
Troubleshooting Common Custard Pie Problems Solved

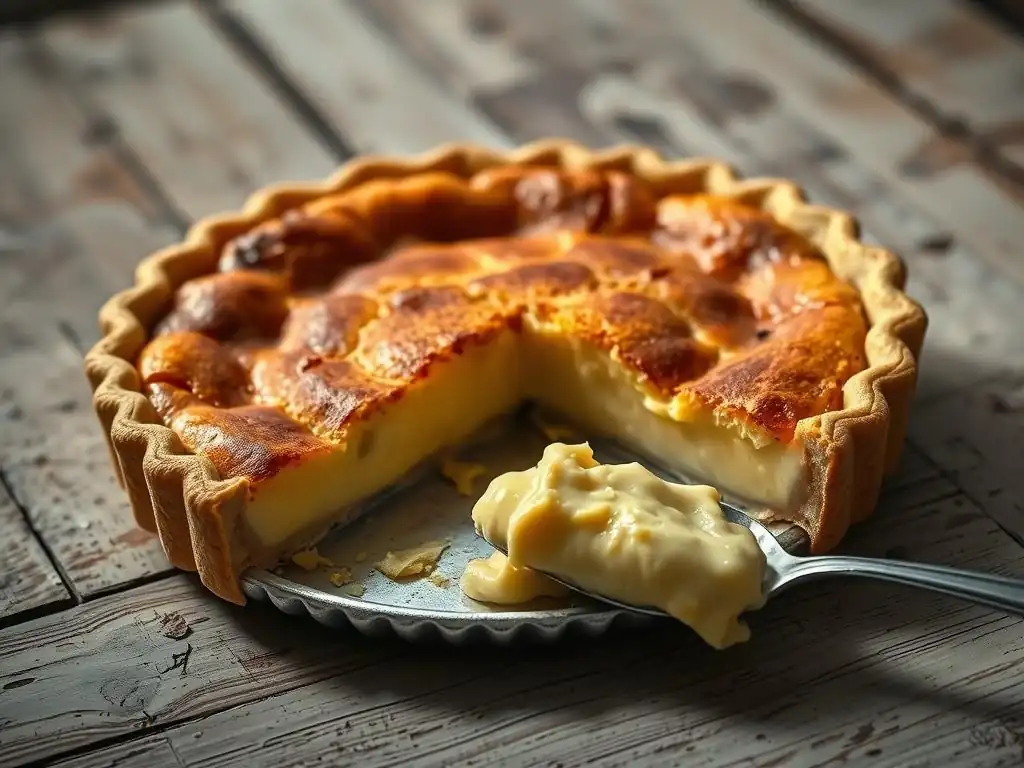
Welcome to BakeWithEase, your trusted guide to baking bliss! Ever dreamt of achieving that perfect, silky-smooth custard pie? We're diving deep into common pitfalls and offering foolproof solutions to custard pie texture problems. Discover the secrets to a flawless custard, avoiding the dreaded soggy bottom or cracked surface. Intrigued? Let's unlock the art of custard perfection together!
- Introduction to Custard Pie Baking: Achieving Perfect Texture
- Identifying Common Custard Pie Texture Problems
- Troubleshooting Runny Custard Pie Filling
- Preventing a Soggy Custard Pie Crust
- Fixing Cracked Custard Pie Surfaces
- Achieving a Smooth, Non-Grainy Custard Pie
- Tips for Perfect Custard Pie Texture Every Time
- Conclusion: Baking the Perfect Custard Pie with Ease
- Frequently Asked Questions
- Final Reflection: The Sweet Science of a Perfect Custard Pie
- Unlock Your Perfect Custard Pie!
Introduction to Custard Pie Baking: Achieving Perfect Texture
Baking a beautiful, perfectly set custard pie can feel like a culinary triumph. That shimmering, smooth filling encased in a crisp crust is the stuff of dessert dreams. However, many home bakers encounter frustrating custard pie texture problems along the way. From fillings that refuse to set to crusts that turn soggy, these challenges can make achieving that ideal slice feel elusive. But fear not! With a little understanding of the science behind custard and some practical techniques, you can conquer these common issues and bake with confidence.
This guide is designed to walk you through the typical pitfalls of custard pie baking and provide clear, actionable solutions. We'll delve into why things go wrong and how to prevent them, helping you understand the nuances of working with egg-based fillings and delicate crusts. By addressing common custard pie texture problems head-on, you'll gain the skills needed to consistently produce pies that are not only delicious but also boast that coveted smooth, set texture.
Why Custard Pie Baking Can Be Tricky
Custard is a delicate balance of milk or cream, eggs, sugar, and often flavorings, thickened primarily by the coagulation of egg proteins when heated. This reliance on precise temperature control and ingredient ratios makes it inherently more challenging than some other fillings. Unlike starch-thickened puddings, which are more forgiving with heat, custard can curdle or become tough if overheated, or remain liquid if not heated enough. The interaction between the wet filling and the dry crust also presents a unique challenge, often leading to the dreaded soggy bottom.
Furthermore, factors like oven calibration, the temperature of your ingredients, and even humidity can subtly impact the outcome. A recipe that works perfectly one day might yield a slightly different result the next. Understanding these variables and learning to adapt is key. It’s this sensitivity to conditions and the precise nature of egg coagulation that makes mastering the art of custard pie baking a skill that takes practice and patience to perfect, helping you navigate the common custard pie texture problems that arise.
The Importance of Proper Custard Pie Texture
The texture of a custard pie is arguably as important as its flavor. A perfect custard filling should be smooth, creamy, and fully set, yet still possess a delicate "jiggle" in the center just after baking. It should slice cleanly without running, holding its shape beautifully. This ideal texture provides a luxurious mouthfeel that complements the richness of the filling and the crispness of the crust. It’s the hallmark of a well-made pie and what elevates a simple dessert into something truly special.
Conversely, poor texture can ruin an otherwise flavorful pie. A runny filling is disappointing to serve and eat, while an overcooked, rubbery custard lacks the desired creaminess. A grainy texture indicates improper cooking or preparation, detracting from the smooth experience. Soggy crusts are perhaps the most common complaint, turning a potentially delightful bite into a mushy mess. Addressing these custard pie texture problems is crucial for achieving baking success and ensuring every slice is a delight.
Identifying Common Custard Pie Texture Problems
Recognizing the signs of common issues is the first step to fixing them. Custard pies can suffer from several distinct texture flaws, each with its own set of causes and solutions. Being able to diagnose whether your pie is suffering from a soggy crust, a runny filling, or a cracked surface helps you pinpoint the necessary adjustments for your next baking attempt. Understanding these problems will build your confidence in tackling them effectively.
We'll explore the most frequent custard pie texture problems encountered by home bakers. Learning to identify these issues by sight and feel will empower you to troubleshoot your recipes and techniques. From the tell-tale pool of liquid at the bottom of the pie plate to the visible cracks across the surface, each problem leaves clues about where things went wrong in the baking process.
Soggy Custard Pie Crust: Causes and Prevention
A soggy bottom crust is one of the most common and frustrating custard pie texture problems. It occurs when moisture from the wet custard filling seeps into the uncooked or partially cooked pie dough during baking, preventing it from becoming crisp and flaky. This is particularly challenging with longer baking times required for custard to set. The steam generated by the filling also contributes to the issue, creating a humid environment around the crust.
Preventing a soggy crust requires creating a barrier between the wet filling and the dough, and ensuring the crust has a head start in crisping up. Techniques like blind baking, where the crust is partially or fully baked before the filling is added, are essential. Protecting the edges of the crust from over-browning while the center bakes is also key, often achieved with pie shields or foil. Choosing a robust pie dough recipe with a good amount of fat can also help create a flakier barrier against moisture absorption.
Runny or Watery Custard Filling: Understanding the Science
A runny or watery custard filling is a clear sign that the egg proteins haven't coagulated sufficiently to set the mixture. This can happen for several reasons, often related to temperature or ingredient ratios. Custard typically needs to reach an internal temperature of around 160-170°F (71-77°C) for the proteins to form a stable gel structure. If the pie is underbaked, or if the oven temperature was too low, this crucial setting point may not be reached throughout the filling.
Another common cause is an incorrect ratio of eggs to liquid. Eggs are the primary thickener; if there aren't enough eggs relative to the amount of milk or cream, the mixture won't have enough protein to set firmly. Using too much liquid or adding extra liquid ingredients without adjusting the eggs can lead to a perpetually runny result. Understanding this protein coagulation process is vital for tackling this specific custard pie texture problem.
Cracked Custard Pie: Avoiding Surface Imperfections
Cracks appearing on the surface of a baked custard pie are usually a symptom of overbaking or rapid cooling. As custard bakes, it expands slightly. If it bakes for too long or at too high a temperature, the outer edges and surface can set and become firm before the center is fully baked. When the pie is removed from the oven and begins to cool, the center continues to set and contract. If the outer layer is already rigid, it can't contract with the center, causing it to pull apart and crack.
Sudden temperature changes can also contribute to cracking. Removing a hot pie directly from a hot oven into a cool kitchen or refrigerator can cause it to cool too quickly, leading to uneven contraction and stress on the set surface. Gentle, gradual cooling is essential. While a crack doesn't necessarily affect the taste, it impacts the visual appeal and is a sign that the delicate balance of baking and cooling wasn't quite right, contributing to custard pie texture problems related to firmness and appearance.
Overcooked Custard: Recognizing and Preventing Toughness
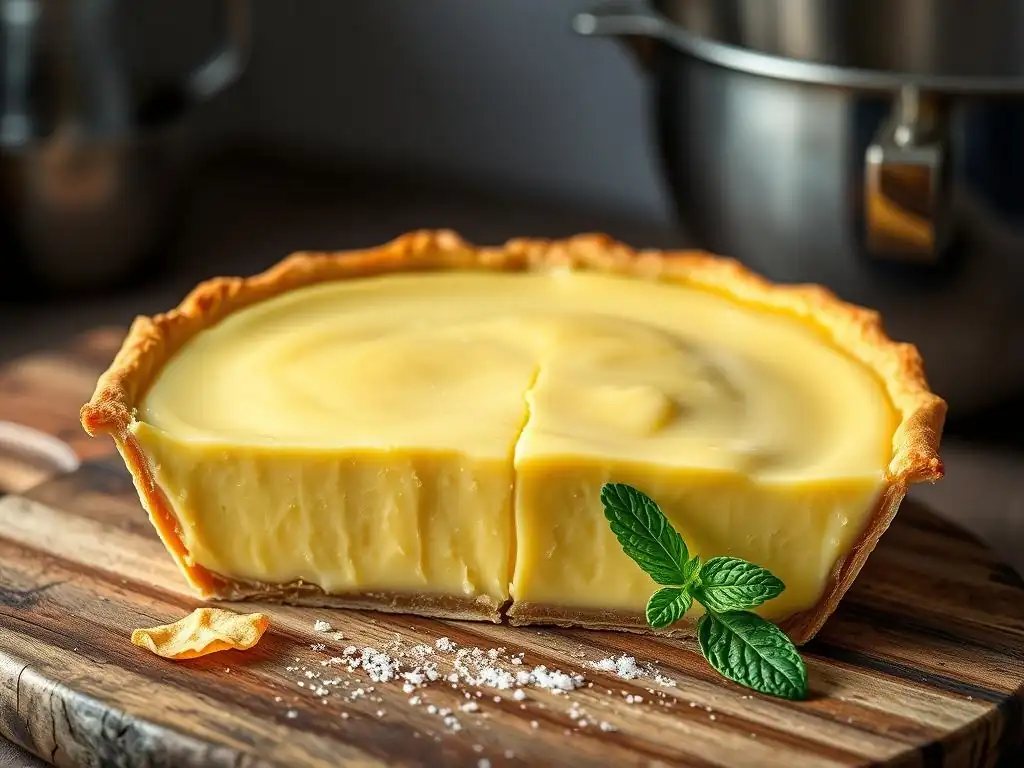
Overcooked custard is another frequent custard pie texture problem, resulting in a filling that is rubbery, tough, or even curdled instead of smooth and creamy. This happens when the egg proteins are heated beyond their optimal coagulation point. Just as underheating leads to runniness, overheating causes the proteins to tighten up too much, squeezing out liquid (syneresis) and creating a firm, unpleasant texture. The edges of the pie are often the first to show signs of overcooking, becoming visibly firmer or even bubbly.
Preventing overcooking requires careful monitoring of the baking process. Relying solely on a timer can be misleading; ovens vary, and the actual setting point depends on the internal temperature of the custard. Learning to recognize the visual cues of a nearly-set custard – the edges are firm, but the center still has a slight jiggle – is crucial. Using a lower oven temperature for a longer time, or baking in a water bath, helps ensure more even, gentle heating, reducing the risk of overheating the delicate proteins.
Grainy Custard Texture: Achieving Smoothness
A grainy or gritty texture in custard is unpleasant and indicates that either the sugar wasn't fully dissolved, or the egg proteins scrambled slightly during the cooking process. When sugar crystals don't dissolve completely in the liquid before heating, they can remain as tiny gritty particles in the finished custard. This is more common when using larger sugar crystals or when the mixture isn't sufficiently mixed or heated gently enough to allow dissolution.
Scrambled eggs in the custard happen when the mixture is heated too quickly or at too high a temperature, causing the egg proteins to seize up unevenly rather than forming a smooth gel. This can also occur if the eggs aren't properly incorporated into the hot liquid (tempering). Ensuring ingredients are well-mixed, dissolving sugar thoroughly, and cooking the custard gently – whether on the stovetop before pouring or in the oven – are key steps to avoiding this particular custard pie texture problem and achieving that desired silky smoothness.
Troubleshooting Runny Custard Pie Filling
Dealing with a runny custard filling is a common frustration, but it's a problem that can often be solved with attention to detail in your technique. The goal is to ensure the egg proteins set just enough to create a stable structure without becoming tough. This involves precise measurements, proper ingredient handling, and careful temperature management during baking. Don't despair if your last pie was too wobbly; these steps can help you achieve a perfectly set filling next time.
Addressing a runny filling involves understanding the fundamental interactions between heat and the ingredients. We'll explore the critical role of eggs, the importance of measuring accurately, and how different baking methods can influence the final set. By implementing these troubleshooting tips, you can significantly reduce the likelihood of encountering this specific custard pie texture problem in your future bakes.
Measuring Ingredients Accurately for Custard Pies
Precision in measuring is absolutely critical for custard pies, perhaps more so than for many other baked goods. The ratio of eggs to liquid is fundamental to achieving the correct set. Too much liquid or too little egg will result in a runny filling, as there simply aren't enough proteins to create a firm structure.
For a standard custard pie, recipes often call for a ratio like 3-4 large eggs per 2-3 cups of milk or cream. Using a kitchen scale for liquid ingredients (like milk or cream, where 1 cup is roughly 240 grams) can sometimes offer more consistency than volume measurements, especially for larger batches.
Beyond the egg-to-liquid ratio, accurately measuring sugar is also important for texture, though less directly related to setting. While sugar primarily affects sweetness, too much can slightly inhibit protein coagulation, and too little might affect the overall structure stability. Ensure you are using the correct measuring tools – liquid measuring cups for liquids and dry measuring cups or a scale for solids like sugar.
Scooping flour or sugar directly from the bag with a measuring cup can compact it, leading to using too much, although flour is less common in pure custard fillings, this principle applies to any dry ingredients used. Consistent measurements are the foundation for avoiding custard pie texture problems like runniness.
The Role of Eggs in Custard Pie Setting
Eggs are the star players in custard, acting as the primary thickener and structure builder. They contain proteins (albumen in the whites, lipoproteins in the yolks) that, when heated to the right temperature (typically starting coagulation around 140-150°F / 60-65°C and setting fully around 160-170°F / 71-77°C), unravel and link together, forming a gel matrix that traps the liquid. Both yolks and whites contribute to setting; yolks add richness and help create a smoother, more stable gel, while whites contribute more strongly to firmness. Many custard pie recipes use a combination, often including extra yolks for a richer texture.
The number and size of eggs used directly impact how firm the custard will be. Using larger eggs than specified or adding an extra egg yolk can result in a firmer set, while using smaller eggs or fewer yolks can lead to a looser, potentially runny custard if not baked perfectly. Understanding that the eggs are doing the heavy lifting in terms of setting is key to troubleshooting runny custard pie texture problems. Ensure your eggs are fresh, as older eggs can sometimes affect coagulation properties.
Tempering Eggs Properly to Prevent Curdling
Tempering is a crucial technique when adding hot liquid to eggs, especially in custard making. It involves gradually raising the temperature of the eggs by whisking a small amount of hot liquid into them first, before adding the warmed egg mixture back into the main batch of hot liquid.
If you simply pour hot milk or cream directly into eggs, the heat will cause the egg proteins to coagulate too quickly and unevenly, resulting in scrambled eggs instead of a smooth base for your custard. This curdled texture cannot be fully corrected and will lead to a grainy or separated filling.
To temper, whisk your eggs (and sugar, if the recipe calls for it to be mixed with eggs) in a bowl. Heat your milk or cream gently until it's steaming but not boiling. While whisking the eggs constantly, slowly pour about a quarter to a third of the hot liquid into the egg mixture in a thin stream. Whisk vigorously until combined.
This warms the eggs gently. Then, slowly pour this warmed egg mixture back into the remaining hot liquid on the stovetop or in the bowl, whisking continuously. This process ensures the eggs are gradually brought up to temperature, allowing them to combine smoothly with the hot liquid and preventing curdling, which is a major cause of poor custard pie texture problems like graininess or separation.
Baking Temperature and Time: Key Factors for a Set Custard
Baking temperature and time are critical for achieving a properly set custard pie. Custard is best baked gently and evenly to allow the egg proteins to coagulate slowly and smoothly without becoming tough or overcooked. A common temperature range is 300-350°F (150-175°C). Baking at a lower temperature for a longer time (e.g., 300-325°F for 50-70 minutes) is generally preferred over a higher temperature for a shorter time, as it promotes more even cooking throughout the filling and reduces the risk of cracking and overcooking the edges before the center is set.
Knowing when the custard is done is key. The pie is typically ready when the edges are set (no longer liquid) and the center still has a slight, gentle jiggle when the pie is lightly shaken. An internal thermometer inserted about an inch from the edge should read around 160-170°F (71-77°C). Over-relying on the jiggle test alone can be tricky; if the entire pie is firm, it's likely overcooked. Underbaking is the primary cause of a runny filling, so ensuring the custard reaches the correct internal temperature is paramount to resolving this common custard pie texture problem.
Solutions for a Runny Custard After Baking
Unfortunately, if a custard pie is significantly underbaked and still very runny after it has cooled completely, there are limited options to "fix" it in the pie shell without compromising quality. Re-baking a very runny pie often leads to an overcooked crust and potentially a tough or cracked filling surface as the edges continue to bake while the center catches up.
However, if the pie is only slightly under-set in the very center, sometimes letting it cool longer in the refrigerator (several hours or even overnight) can help it firm up slightly more as residual heat dissipates and the gel structure continues to strengthen.
For a significantly runny pie, the best approach might be to repurpose the filling. The runny custard can often be gently heated on the stovetop, whisking continuously, until it thickens to a pudding-like consistency (around 170°F / 77°C). Be careful not to boil it. Once thickened, it can be served as a sauce, a pudding, or used as a filling for parfaits or other desserts. While not ideal, this is a way to salvage ingredients and avoid the disappointment of a completely failed pie, offering a practical solution when faced with this particular custard pie texture problem.
Preventing a Soggy Custard Pie Crust
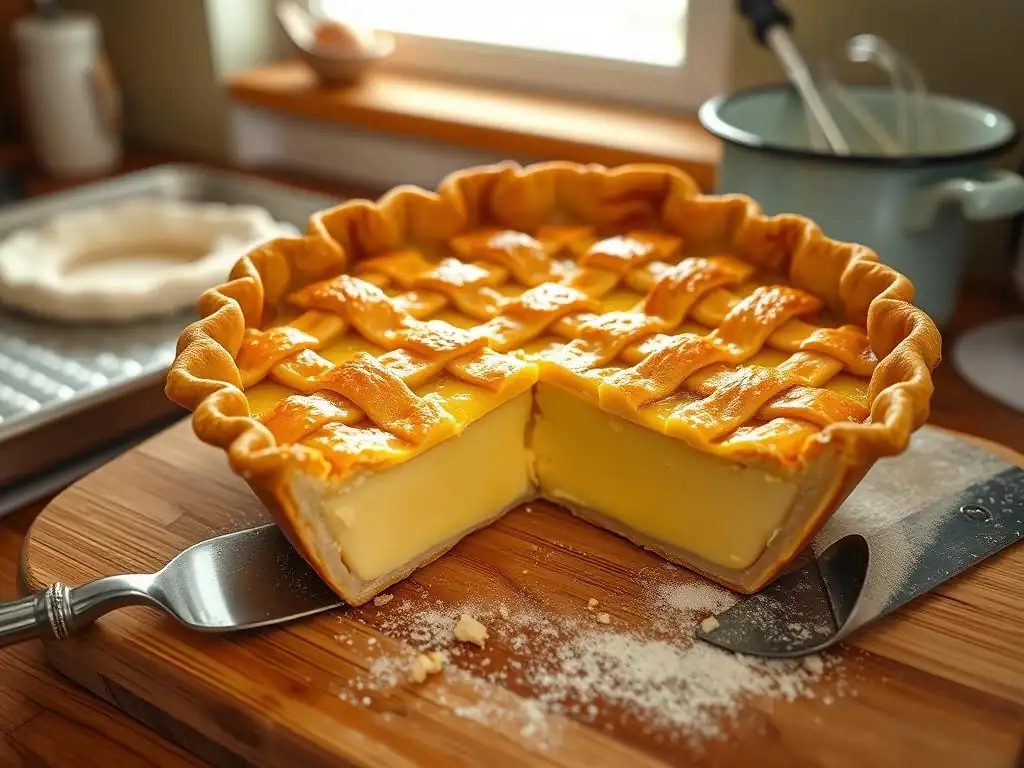
A soggy bottom crust is the bane of many pie bakers. It's particularly challenging with wet fillings like custard, which bake for a long time. The key to a crisp crust is to create a barrier against moisture and give the dough a head start in crisping up before the filling has a chance to make it wet. This requires specific techniques focused on preparing the crust before the custard even goes in.
Implementing preventative measures is far more effective than trying to fix a soggy crust after the fact. By focusing on proper crust preparation and protection during baking, you can significantly improve the texture of your pie base and avoid this common custard pie texture problem. Let's look at some essential techniques.
Blind Baking the Pie Crust: A Crucial Step
Blind baking, also known as pre-baking, is arguably the most critical step in preventing a soggy bottom crust in custard pies. This technique involves partially or fully baking the empty pie shell before adding the wet filling. For custard pies with long baking times (often 45-60 minutes or more), a full blind bake is often recommended. This ensures the bottom crust is fully set and crisp before the moist custard is introduced.
To blind bake, line your pie plate with the rolled-out dough and crimp the edges. Prick the bottom all over with a fork (docking) to prevent bubbling. Line the dough with parchment paper or foil and fill it with pie weights, dried beans, or rice, ensuring the weights go up the sides slightly.
Bake in a preheated oven (often around 375-400°F / 190-200°C) for 15-20 minutes until the edges are set. Remove the weights and liner, and bake for another 10-15 minutes (or longer for a full bake) until the bottom is lightly golden and dry. This head start in crisping creates a barrier against the wet filling, effectively combating this major custard pie texture problem.
Using a Crust Shield or Foil to Protect the Edges
While the bottom crust needs sufficient baking time to prevent sogginess, the delicate edges of the pie crust are prone to browning or even burning before the filling is set. Overcooked edges are brittle and can detract from the overall pie experience. This is where using a crust shield or strips of aluminum foil comes in handy. These tools protect the edges from direct heat, allowing the rest of the pie (especially the center filling and bottom crust) to finish baking evenly.
A crust shield is a reusable silicone or metal ring that fits over the edge of the pie plate. Alternatively, you can create your own shield by tearing off a sheet of aluminum foil, folding it into a ring, and carefully placing it over the crimped edges of the pie.
Apply the shield about halfway or two-thirds of the way through the baking time, once the edges have achieved a desired light golden color but before they start to brown excessively. This simple step helps ensure both a perfectly set filling and beautifully golden, not burnt, crust edges, reducing the likelihood of complex custard pie texture problems involving uneven baking.
Choosing the Right Type of Pie Crust for Custard
Not all pie crusts are created equal, and some are better suited to the challenge of holding a wet custard filling than others. A robust, all-butter or butter-and-shortening crust is generally preferred for custard pies. These types of crusts tend to be flakier and create more distinct layers due to the fat melting and creating steam, which helps form barriers against moisture. A dough with a good amount of fat (around 50-60% fat to flour ratio by weight) will typically yield a flakier, more water-resistant crust compared to leaner doughs.
Avoid using very tender or delicate crust recipes that are better suited for pre-cooked or dry fillings. A sturdy dough that can withstand handling and blind baking is essential. Some bakers also find success with pastry doughs that include a small amount of sugar, which can contribute to browning and crispness. Experimenting with different dough recipes can help you find one that performs well against the moisture of custard, helping you conquer the common custard pie texture problem of a soggy bottom.
Sealing the Pie Crust to Prevent Moisture Absorption
Beyond blind baking, an extra layer of defense can be added to the bottom crust to further prevent moisture from the custard from seeping in. This involves applying a thin coating of something that will seal the surface of the partially baked dough before the filling is poured in. One common method is to brush the warm, blind-baked crust with a thin layer of egg white. The egg white bakes quickly into a thin, impermeable layer when the pie goes back into the oven, creating a barrier against the wet custard.
Another technique is to brush the bottom crust with a thin layer of melted butter or even a sprinkle of finely ground nuts (like almond flour) or dry breadcrumbs before adding the filling. The butter or nuts help to create a slightly more waterproof layer. While blind baking is the primary defense against a soggy bottom, these additional sealing techniques can provide extra insurance, particularly for very wet or long-baking custard fillings, further minimizing the risk of this frustrating custard pie texture problem.
Butter Wash for Sealing
A simple butter wash can act as a helpful sealant for your blind-baked pie crust, adding an extra layer of protection against moisture absorption from the custard filling. After your pie crust has been partially or fully blind-baked and is still warm from the oven, brush the bottom and sides of the crust with a thin, even layer of melted unsalted butter. Use a pastry brush to get into all the corners and up the sides.
The heat from the crust will help the butter soak in slightly and create a subtle barrier. While not as robust as an egg white wash for sealing, it adds flavor and contributes to a slightly crispier texture. Allow the butter to set for a minute or two before pouring in your prepared custard filling. This small step can make a difference in preventing the custard from making direct contact with the dough's pores, offering another tool in your arsenal against the dreaded soggy bottom custard pie texture problem.
Fixing Cracked Custard Pie Surfaces
A cracked surface on a custard pie, while not affecting the taste, is a visual disappointment. It’s a sign that the custard baked or cooled unevenly. The good news is that cracked surfaces are often preventable by controlling temperature and cooling rates. Understanding why cracks occur helps you adjust your baking process for a smooth, beautiful finish every time.
Preventing cracks involves paying close attention during the final stages of baking and the crucial cooling period. These techniques aim to ensure the custard sets evenly and contracts gradually as it cools, avoiding stress on the surface. Let's explore how to prevent this particular custard pie texture problem.
Avoiding Overbaking to Prevent Cracking
Overbaking is the primary culprit behind cracked custard surfaces. As the custard bakes past its ideal setting point (around 160-170°F / 71-77°C internal temperature), the proteins continue to tighten, squeezing out moisture and causing the structure to become more rigid. The edges and top surface, exposed to more direct heat, will overcook and firm up before the center is fully set. When the pie cools, the still-setting center contracts, pulling against the already rigid, overcooked surface, causing it to crack.
To avoid overbaking, monitor the pie closely during the last 10-15 minutes of baking time. Look for the visual cues: the edges should be set and slightly puffed, while the center (about 2-3 inches in diameter) should still have a gentle jiggle. The jiggle shouldn't look liquid or sloshy, but more like firm gelatin.
Using an instant-read thermometer is the most reliable method; aim for the target internal temperature. Pull the pie from the oven when it hits this range, even if the timer isn't up. Learning to recognize the signs of doneness is crucial for preventing this common custard pie texture problem.
Gradual Cooling Techniques for Custard Pies
How a custard pie cools is almost as important as how it bakes. Rapid temperature changes are a major cause of surface cracks. Taking a hot pie directly from a 350°F oven and placing it on a cool counter or in the refrigerator can shock the delicate custard structure. The outside cools and contracts much faster than the hot interior, leading to uneven stress and cracking.
The best way to cool a custard pie is gradually. Once removed from the oven, place the pie on a wire rack at room temperature. Do not move it for at least 2-3 hours, allowing the residual heat to dissipate slowly and the custard to finish setting gently as it cools.
Only transfer it to the refrigerator once it has cooled significantly, feeling just slightly warm or at room temperature to the touch. This slow cooling process allows the entire pie to contract more uniformly, greatly reducing the risk of surface cracks and preserving the smooth texture you worked hard to achieve.
Controlling Oven Temperature for Even Baking
Maintaining a consistent and accurate oven temperature is vital for preventing cracks and achieving an evenly set custard pie. Hot spots or an oven thermostat that runs too high can cause the edges and surface of the custard to bake too quickly and become overcooked before the center has a chance to set properly. This uneven cooking sets the stage for cracking during the cooling process.
Using an oven thermometer is highly recommended to verify that your oven is heating to the temperature you've set. If your oven runs hot, consider lowering the temperature by 15-25°F (8-15°C). Baking custard pies at a slightly lower temperature (like 325°F instead of 350°F) for a longer duration encourages gentler, more even heating throughout the filling. This allows the center to catch up with the edges, resulting in a more uniform set and reducing the differential contraction that causes cracks, thereby mitigating this specific custard pie texture problem.
Water Bath Baking
Baking a custard pie in a water bath (bain-marie) is an excellent technique for ensuring even, gentle heat distribution and preventing cracks. This method involves placing the pie plate inside a larger baking pan and filling the outer pan with hot water halfway up the sides of the pie plate. The water acts as a buffer, regulating the temperature around the custard and preventing the edges and surface from overheating and setting too quickly.
The water bath creates a moist, consistent environment that promotes slow, even coagulation of the egg proteins throughout the filling. This minimizes the temperature difference between the edges and the center, leading to a more uniform set. To use a water bath, prepare your pie in its plate, then place the pie plate carefully into a larger oven-safe pan.
Place the pan on the oven rack, and then carefully pour hot (not boiling) water into the larger pan around the pie plate. Bake as directed, adding more hot water if needed during baking. This technique is highly effective in preventing cracks and achieving a silky-smooth texture, significantly reducing the likelihood of this particular custard pie texture problem.
Achieving a Smooth, Non-Grainy Custard Pie
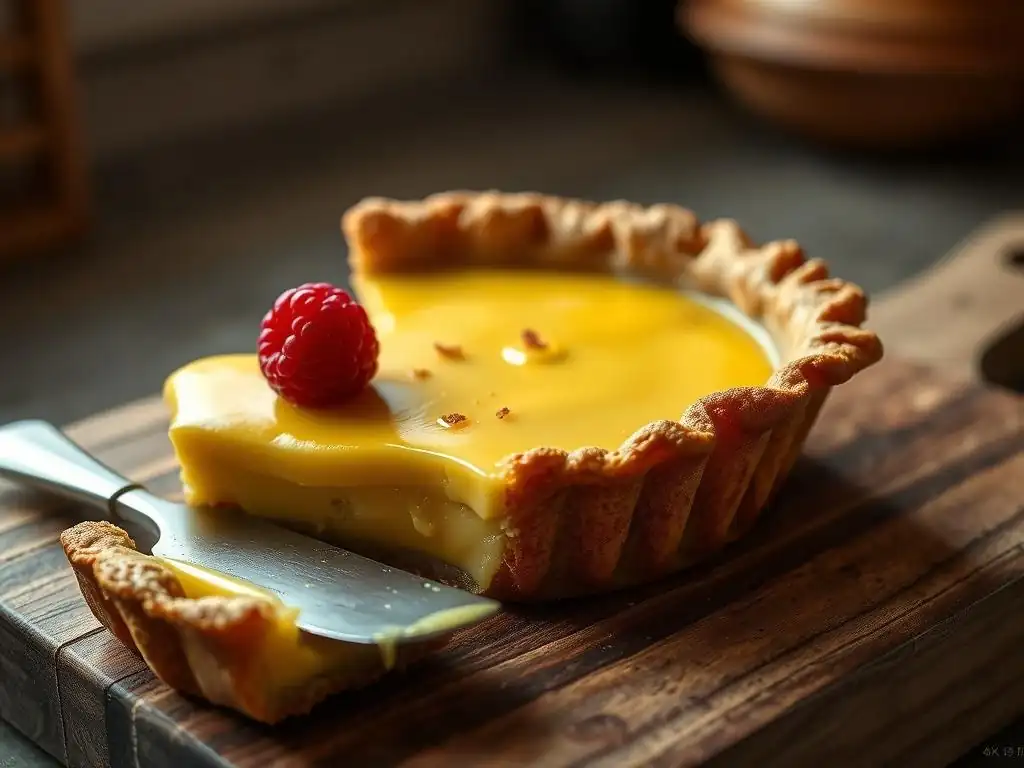
A grainy custard texture is unpleasant and indicates that the egg proteins haven't formed a smooth, continuous gel or that undissolved sugar crystals are present. Achieving that coveted silky-smooth consistency requires careful preparation of the custard mixture before it even goes into the oven.
Focusing on proper mixing, straining, and gentle cooking methods will help ensure your custard is free of graininess. These steps are relatively simple but make a significant difference in the final mouthfeel, helping you avoid this common custard pie texture problem.
Straining the Custard Mixture for a Silky Texture
Straining the custard mixture before pouring it into the pie shell is a simple yet highly effective step in achieving a perfectly smooth texture. Even with careful tempering and gentle heating, small bits of cooked egg protein (from slight overheating or tiny pieces that cooked instantly upon hitting the hot liquid) or undissolved sugar crystals can sometimes remain in the mixture. Straining catches these imperfections.
Simply place a fine-mesh sieve over your prepared pie shell or a clean bowl. Pour the custard mixture through the sieve, using a spoon or spatula to gently press it through if needed. Discard any solids left in the sieve. This process removes any potential lumps, ensuring that only the smoothest liquid goes into the pie shell. It's a quick step that provides great insurance against a grainy texture, helping you proactively address this potential custard pie texture problem.
Using High-Quality Ingredients for Optimal Results
The quality of your ingredients can influence the final texture of your custard pie. Fresh, high-quality dairy (milk and cream) and eggs contribute to a richer flavor and can sometimes contribute to a more stable emulsion and smoother set. While standard ingredients will work, using fresh, good-quality components provides the best foundation for a smooth custard.
Ensure your sugar is fresh and free-flowing. If using granulated sugar, make sure it dissolves completely in the warm liquid; superfine (caster) sugar dissolves more easily. Using high-quality vanilla extract or bean, if called for, not only enhances flavor but indicates attention to detail throughout the recipe. While ingredient quality alone won't solve major custard pie texture problems caused by poor technique, starting with the best possible ingredients sets you up for success and contributes to a superior final product.
Gentle Cooking Methods for a Smooth Custard
Whether you cook the custard mixture on the stovetop before pouring it into the crust (as in some recipes) or rely solely on oven baking, gentle heating is key to preventing a grainy texture. Overheating the mixture at any stage will cause the egg proteins to curdle or scramble unevenly, resulting in a lumpy or grainy consistency that cannot be fixed.
If cooking on the stovetop, heat the mixture over medium-low heat, stirring constantly with a whisk or wooden spoon. Do not allow it to boil. Cook only until it thickens slightly, just enough to coat the back of a spoon (around 170°F / 77°C). For oven-baked custards, using a lower temperature and/or a water bath helps ensure gentle, even cooking. Avoid rushing the process with high heat. Patience and gentle heat are your allies in achieving a smooth texture and avoiding this particular custard pie texture problem.
Immersion Blender for Smoothness
For an extra layer of smoothness, especially if you've encountered graininess before or want an exceptionally silky custard, an immersion blender can be a helpful tool. After straining the custard mixture, you can use an immersion blender directly in the bowl or pan.
Carefully place the immersion blender into the liquid, ensuring the head is fully submerged to avoid splashing. Blend the mixture on low speed for 30-60 seconds. This process helps to emulsify the fats and liquids more thoroughly and breaks down any tiny, remaining protein clumps or sugar crystals that might have made it through the strainer. Be careful not to incorporate too much air, which can cause foaming. This step is optional but can take your custard's smoothness to the next level, providing an extra measure against custard pie texture problems related to graininess.
Tips for Perfect Custard Pie Texture Every Time
Achieving consistently perfect custard pie texture is a skill that develops with practice and attention to key details. Beyond troubleshooting specific issues, incorporating best practices into your routine will elevate your baking results. These final tips focus on critical stages – judging doneness, cooling, and storage – that are often overlooked but are essential for success.
Mastering these final steps can make the difference between a good custard pie and a truly great one. By paying attention to these details, you'll be well on your way to baking custard pies with confidence and ease, consistently avoiding common custard pie texture problems.
Mastering the Custard Pie Jiggle Test
The "jiggle test" is a classic method for determining when a custard pie is properly baked, but it requires careful interpretation. A finished custard pie should have edges that are set and firm, but the center (a circle about 2-3 inches in diameter) should still have a slight, gentle wobble when the pie is lightly shaken. This indicates that the center is just finishing setting from residual heat after being removed from the oven.
If the entire pie is firm and doesn't jiggle at all, it is likely overcooked. If the jiggle is significant or looks liquid like waves, it is underbaked and will likely be runny after cooling. Practicing this test alongside using an internal thermometer (aiming for 160-170°F / 71-77°C in the center, away from the edge) is the best way to judge doneness accurately. Learning to trust the combination of visual cues and temperature readings is key to avoiding custard pie texture problems related to over or underbaking.
Understanding the Importance of Cooling Time
Proper cooling time is absolutely essential for custard pies to achieve their final set texture. Custard continues to cook and firm up from residual heat after it's removed from the oven. Trying to slice into a warm or hot custard pie will result in a runny mess, even if it was perfectly baked. The gel structure formed by the egg proteins needs time to cool and strengthen.
Allow the pie to cool completely on a wire rack at room temperature for at least 2-3 hours. Do not rush this process. Only once it has reached room temperature should you transfer it to the refrigerator. Custard pies are best served chilled, after at least 4-6 hours (or preferably overnight) in the refrigerator. This extended chilling time allows the custard to set fully and firm up to the perfect sliceable consistency. Patience during the cooling phase is paramount to avoiding custard pie texture problems related to the final set.
Storing Custard Pie Properly to Maintain Texture
Proper storage is crucial for maintaining the perfect texture of your baked custard pie and ensuring food safety. Because custard is an egg and dairy-based filling, it is perishable and must be stored in the refrigerator. Leaving a custard pie out at room temperature for more than two hours can lead to bacterial growth and will also negatively impact its set texture, potentially making it softer or even unsafe to eat.
Once the pie has completely cooled at room temperature, cover it loosely with plastic wrap or aluminum foil before refrigerating. This protects the surface from drying out or absorbing odors from the refrigerator. A custard pie stored properly in the refrigerator will typically maintain its quality and texture for 3-4 days. For longer storage, while technically possible to freeze, the texture of custard can become grainy or watery upon thawing due to changes in the gel structure, so it's best enjoyed fresh. Proper storage helps preserve the ideal custard pie texture you worked so hard to achieve.
Adding Vanilla Extract
While primarily a flavor enhancer, the order and timing of adding vanilla extract can subtly impact the custard. Vanilla extract is alcohol-based and its delicate flavor compounds can evaporate when subjected to high heat for extended periods. Adding vanilla at the wrong time won't cause major custard pie texture problems, but it's a detail that contributes to the overall quality and flavor experience.
For the best vanilla flavor, add the extract after the custard mixture has been heated or tempered, just before pouring it into the pie shell. If you're making a baked custard pie where the mixture isn't cooked on the stovetop first, stir the vanilla into the final mixture just before it goes into the oven. This ensures the vibrant vanilla notes aren't lost during the baking process, contributing to a more delicious pie. While this tip is more about flavor than texture directly, attention to such details reflects a mastery of custard making.
Conclusion: Baking the Perfect Custard Pie with Ease
Baking a perfect custard pie might seem intimidating at first, especially when faced with common custard pie texture problems like soggy crusts, runny fillings, or cracked surfaces. However, by understanding the science behind custard and employing the right techniques, you can overcome these challenges and consistently achieve that desirable smooth, creamy filling and crisp crust. Remember that baking is a skill that improves with practice, and each pie, successful or not, offers a learning opportunity.
Don't be discouraged by imperfections. Every baker, even experienced ones, encounters issues occasionally. The key is to identify what went wrong and apply the appropriate troubleshooting steps the next time. With attention to detail in measuring, ingredient handling, baking temperature, and cooling, you'll build confidence and improve your results.
Recap of Key Troubleshooting Steps
To recap, tackling custard pie texture problems involves a few core principles:
- Prevent Soggy Crusts: Always blind bake your crust, use pie weights, and consider sealing the bottom with egg white or butter. Protect edges with a shield.
- Fix Runny Filling: Measure ingredients precisely, ensure sufficient eggs, temper eggs properly, and bake to the correct internal temperature (160-170°F).
- Avoid Cracks: Prevent overbaking by monitoring internal temperature and using the jiggle test. Cool the pie gradually on a wire rack. Consider using a water bath for even heating.
- Achieve Smoothness: Strain the custard mixture before baking. Use gentle heat and avoid boiling. Consider using an immersion blender for extra silkiness.
- Ensure Proper Set: Chill the pie completely for several hours in the refrigerator after cooling at room temperature.
By focusing on these areas, you address the most frequent causes of texture issues.
Enjoying Your Homemade Custard Pie: BakeWithEase Recipe Variations
Once you've mastered the techniques for perfect texture, the possibilities for enjoying homemade custard pie are endless! The classic vanilla custard is a wonderful starting point, but feel free to explore variations. Try adding a sprinkle of nutmeg or cinnamon over the top before baking for a traditional flavor. For a richer twist, use half-and-half or heavy cream instead of just milk. Infuse the milk or cream with citrus zest (like lemon or orange) or spices (like star anise or cardamom) before heating and straining.
At BakeWithEase.com, you can find delicious and reliable custard pie recipes designed to guide you through the process. Look for recipes that include detailed instructions on blind baking and cooling. With practice and patience, you'll soon be confidently baking beautiful, perfectly textured custard pies that will impress your friends and family. Happy Baking!
Frequently Asked Questions
What causes a custard pie to have a watery or runny texture?
A watery custard pie is often caused by undercooking or too much liquid in the recipe. Ensure the internal temperature reaches the recommended level for proper setting and that your ingredient ratios are accurate.
Why does my custard pie crack on the surface after baking?
Cracking typically occurs due to rapid temperature changes or overbaking. Let the pie cool gradually in the oven with the door ajar to prevent drastic temperature shifts.
How can I prevent my custard pie crust from becoming soggy?
A soggy crust can be prevented by pre-baking (blind baking) the crust partially before adding the custard filling. You can also brush the crust with egg wash for a protective layer.
What's the best way to test if my custard pie is done baking?
The ideal custard pie is done when the edges are set, but the center has a slight jiggle. A toothpick inserted near the center should come out with moist crumbs, not wet batter.
My custard pie has a grainy texture. What went wrong?
A grainy texture suggests the custard was overcooked or the eggs were scrambled. Bake at a lower temperature and avoid excessive stirring during the cooking process.
Final Reflection: The Sweet Science of a Perfect Custard Pie
The pursuit of the perfect custard pie is more than just a culinary quest; it's a journey into the fascinating world of emulsion and texture. A seemingly simple dessert, the custard pie reveals the delicate balance between ingredients, temperature, and technique, highlighting the importance of understanding even the smallest details in achieving culinary success. Mastering these elements isn't just about avoiding a cracked crust or a watery filling; it's about unlocking the potential for a truly transcendent dessert experience.
The enduring appeal of custard pie lies not only in its deliciousness but also in its ability to evoke memories and connect us to culinary traditions. It's a dessert that transcends generations, a comforting classic that speaks to our shared human experience of seeking pleasure in simple things. A perfect pie is a love letter to the senses.
This sentiment, though not directly about custard pie, perfectly captures the emotional resonance of creating and sharing a truly exceptional dessert. The challenges encountered in making a perfect custard pie, as explored in this article, only serve to amplify the satisfaction of finally achieving that creamy, smooth, and utterly delightful result.
Now, consider your own culinary adventures. Have you faced the frustration of a curdled custard or a weeping pie? Remember the lessons learned here – the importance of precise measurements, gentle stirring, and a keen eye for detail. Don't let setbacks discourage you. Embrace the challenges, learn from your mistakes, and continue to experiment. The path to mastering the art of custard pie making, like any culinary pursuit, is a journey of continuous learning and refinement. The reward? A slice of pure, unadulterated happiness, shared with those you love.
Unlock Your Perfect Custard Pie!
Thanks for joining us on this custard pie adventure! We hope you've gained valuable tips and tricks to conquer those frustrating baking challenges. Now it's time to put your newfound knowledge into action.
- Bake your dream custard pie today! Grab your ingredients and try out one of the techniques we discussed – you might be surprised by the results.
- Share your custard pie creations with us on social media using #BakeWithEaseCustard – we'd love to see your masterpieces!
- Explore our other baking guides for more delicious recipes and helpful advice.
Ready to create a custard pie that's truly unforgettable? What unique twist will you add to yours?