
Is Your Starter Weak? Sourdough Rise Troubleshooting Guide


Welcome to BakeWithEase, your haven for all things baking!
Ever wondered why your sourdough just isn't rising the way it should? Get ready to unravel the mysteries of a sluggish starter. This article dives deep into weak sourdough starter troubleshooting, offering practical solutions to revive your bubbly friend and get you back to baking beautiful, tangy loaves. Let's unlock the secrets to a thriving starter and perfect sourdough, one step at a time. Curious to know how? Read on!
- Understanding Sourdough Starter Strength: A BakeWithEase Guide
- Identifying the Signs of a Weak Sourdough Starter
-
Weak Sourdough Starter Troubleshooting: Common Causes & Solutions
- 1. Inconsistent Feeding Schedule: How to Fix It
- 2. Incorrect Flour Type: Impact on Starter Vigor
- 3. Temperature Issues: Finding the Sweet Spot for Fermentation
- 4. Hydration Imbalance: Achieving the Right Consistency
- 5. Underfeeding: Not Enough Food for Your Starter
- 6. Overfeeding: Diluting Your Starter's Activity
- 7. Contamination: Preventing Unwanted Bacteria Growth
- Reviving a Weak Sourdough Starter: A Step-by-Step Guide
- Sourdough Rise Troubleshooting: Beyond the Starter
- Maintaining a Strong and Healthy Sourdough Starter: Prevention is Key
- BakeWithEase: Mastering Sourdough, One Step at a Time.
-
Frequently Asked Questions
- What are the most common signs of a weak sourdough starter?
- How often should I be feeding my sourdough starter?
- What type of flour is best for feeding a sourdough starter?
- What is the ideal temperature for sourdough starter fermentation?
- What can I do to revive a sluggish or inactive sourdough starter?
- Final Reflection: The Resilient Rise of Sourdough
- Unleash Your Inner Baker: Perfect Sourdough Every Time!
Understanding Sourdough Starter Strength: A BakeWithEase Guide
What Does a "Weak" Sourdough Starter Mean?
A "weak" sourdough starter is one that lacks the vigorous activity needed to reliably leaven bread. Instead of doubling or tripling in volume within a predictable timeframe after feeding (typically 4-8 hours at standard room temperature around 70-75°F or 21-24°C), a weak starter shows minimal or no significant rise. It might produce some small bubbles but lacks the robust, bubbly structure of a healthy, active starter. This lack of strength means it doesn't produce enough carbon dioxide to make your dough rise properly.
Think of your starter as a living ecosystem of wild yeast and bacteria. A strong starter has a thriving, balanced population that efficiently converts flour and water into organic acids, carbon dioxide, and alcohol. A weak starter indicates that this ecosystem is struggling – perhaps the yeast population is low, the bacteria are out of balance, or they simply aren't getting the optimal conditions to thrive. Identifying a weak sourdough starter is the crucial first step in performing effective weak sourdough starter troubleshooting.
Why Starter Strength Matters for Sourdough Bread
The strength of your sourdough starter is paramount because it is the primary leavening agent in your bread. It's responsible for creating the gas that makes your dough rise, giving your loaf its airy texture and volume. A weak starter will result in a dense, flat loaf with little oven spring – that beautiful expansion that happens in the oven. The starter also contributes significantly to the flavor profile of your sourdough bread, producing the characteristic tang through lactic and acetic acids.
Furthermore, a strong starter helps develop the gluten structure in your dough and contributes to a better crust. If the starter isn't active enough, the fermentation process slows down dramatically, affecting not just the rise but also the development of complex flavors and the dough's overall handling characteristics. Effective weak sourdough starter troubleshooting ensures your starter can perform its essential functions, leading to consistently delicious results.
Identifying the Signs of a Weak Sourdough Starter
Slow or No Rise in Sourdough Starter
One of the most obvious indicators of a weak sourdough starter is its failure to rise significantly after being fed. A healthy starter, given the right conditions and food, should roughly double or even triple in size within a few hours at room temperature (say, 6-8 hours at 72°F). You'll see it climb the sides of its container, often leaving tell-tale lines showing its peak height before it starts to fall.
In contrast, a weak starter might show only a slight increase in volume, perhaps just 25-50%, or sometimes no discernible rise at all, even after 12-24 hours. While timing can vary based on temperature and hydration, a consistently sluggish or non-existent rise is a clear sign that your starter needs some weak sourdough starter troubleshooting attention. It's not producing enough gas to lift itself, let alone a loaf of bread.
Lack of Bubbles and Activity in Sourdough
Beyond just volume, the activity within the starter is key. A strong starter will be visibly bubbly throughout its mass, especially after feeding. You'll see bubbles rising to the surface, and when you stir it, it feels light and airy, almost like a mousse. The surface might be dotted with small craters where bubbles have popped.
A weak sourdough starter, however, will show minimal bubbling. The texture might remain dense and gluey, without that foamy or aerated quality. There might be a few sporadic bubbles, but not the consistent, widespread activity of a robust culture. This lack of internal fizz confirms that the yeast population isn't actively fermenting and producing the necessary carbon dioxide.
Watery or Separated Sourdough Starter
Another common sign of a weak sourdough starter is separation, often manifesting as a layer of liquid on top, sometimes called "hooch." Hooch is a form of alcohol produced by the yeast when they run out of readily available food (simple sugars). While a thin layer of hooch can appear in a healthy starter that hasn't been fed in a while, a thick or rapidly forming layer, especially after a relatively recent feeding, often indicates the starter is consuming its food too quickly relative to its population size or that the population is struggling.
Excessive hooch or a watery consistency throughout the starter can mean it's underfed or the yeast and bacteria aren't efficiently processing the flour. The starter might look thin and less viscous than a healthy starter, which typically has a texture similar to a thick batter or pancake mix. This separation is a distress signal from your starter, pointing towards the need for weak sourdough starter troubleshooting steps.
Unpleasant Odor (Beyond the Tangy Smell)
A healthy sourdough starter typically has a pleasant, tangy aroma, sometimes described as slightly acidic, yogurty, or even a little alcoholic (especially when it's hungry and producing hooch). However, certain unpleasant odors can signal a problem with a weak sourdough starter or even contamination. A strong acetone or nail polish remover smell can indicate that the starter is severely hungry and producing excessive amounts of acetic acid.
Other concerning smells include cheesy, moldy, or frankly rotten odors. A cheesy smell might suggest an imbalance in the bacterial population. Mold, which can appear as fuzzy green, black, orange, or pink spots, is a clear sign of contamination and means the starter should usually be discarded for safety reasons. While a slight tang is normal, any significantly off-putting or chemical smell warrants investigation as part of your weak sourdough starter troubleshooting.
Weak Sourdough Starter Troubleshooting: Common Causes & Solutions
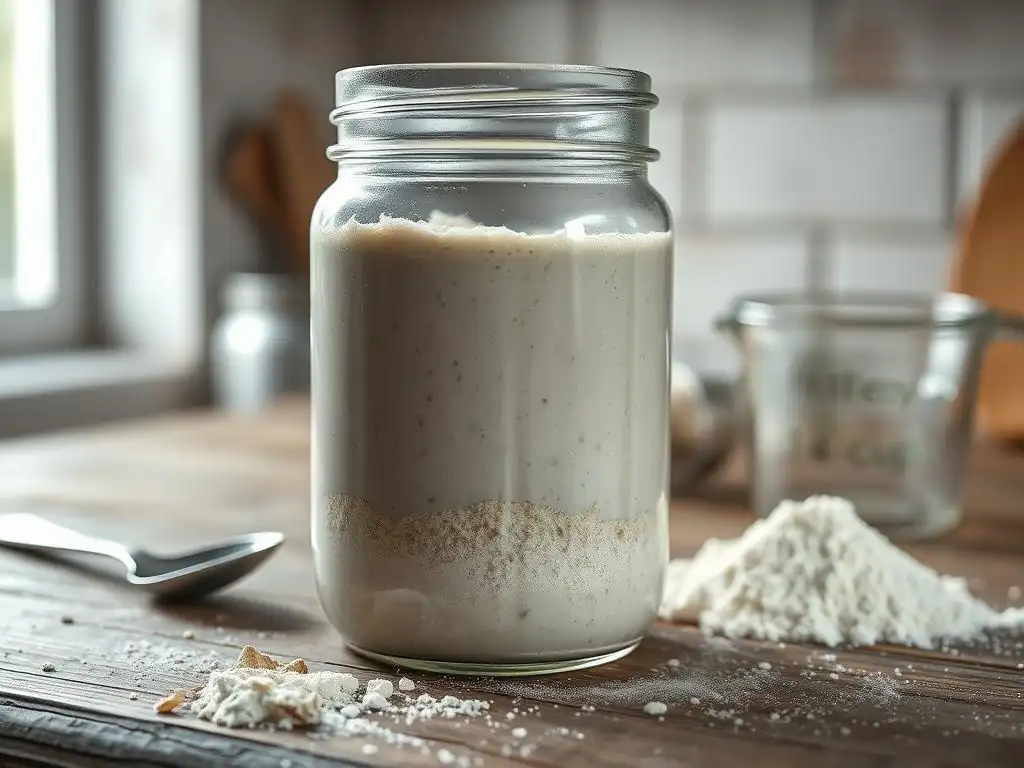
1. Inconsistent Feeding Schedule: How to Fix It
An inconsistent feeding schedule is one of the most frequent culprits behind a weak sourdough starter. Starters are living cultures that need regular nourishment. Skipping feedings, feeding at erratic times, or leaving a starter unfed for too long (especially at warm temperatures) can starve the yeast and bacteria, leading to a decline in their population and activity. They simply don't have the energy or numbers to perform effectively.
When a starter isn't fed consistently, its peak activity window is missed, and the culture weakens as it runs out of food. For instance, if your starter consistently peaks at 6 hours but you only feed it every 24 hours at room temperature, it spends most of its time hungry and inactive. This cycle depletes the starter's energy reserves and reduces its vigor. Addressing this directly is a primary step in weak sourdough starter troubleshooting.
Establishing a Regular Feeding Routine
To fix an inconsistent feeding schedule, establish a routine based on your starter's activity level and the ambient temperature. For a starter kept at room temperature (around 70-75°F), feeding once or twice a day at roughly the same times is often necessary to keep it active and strong. For example, you might feed it first thing in the morning and again before bed.
If you only bake occasionally, you can store your starter in the refrigerator. This dramatically slows down fermentation, meaning you only need to feed it about once a week. However, before baking, you'll need to take it out and perform several consistent feedings at room temperature over 1-3 days to revive its activity. Consistency is key – whether daily or weekly, feeding at predictable intervals helps maintain a stable, healthy culture.
Adjusting Feeding Ratios for Optimal Starter Activity
The ratio of starter, flour, and water you use for feeding also impacts its activity and how quickly it peaks. Common ratios include 1:1:1, 1:2:2, or 1:5:5 (starter:flour:water by weight). A 1:1:1 ratio provides a lot of food relative to the amount of starter, which can make it peak quickly, potentially needing more frequent feedings if kept warm.
Using a higher ratio, such as 1:5:5, provides the starter with food that lasts longer, which can be useful if you can only feed once a day or want to slow things down slightly. For a weak sourdough starter troubleshooting scenario, starting with a consistent 1:1:1 or 1:2:2 ratio fed twice daily can help rebuild strength quickly by ensuring the culture always has access to fresh food before it becomes completely depleted. Experiment to find the ratio that works best with your schedule and environment.
2. Incorrect Flour Type: Impact on Starter Vigor
The type of flour you feed your starter makes a significant difference in its health and activity. Different flours have varying protein content and nutritional profiles, which directly affect the yeast and bacteria. Using the wrong kind of flour, or constantly switching flour types, can stress the starter and lead to weakness.
For instance, using heavily processed all-purpose flour with low protein can sometimes result in a less vigorous starter compared to those fed with stronger flours. Some flours also contain anti-caking agents or bleaching chemicals that can inhibit microbial growth. Ensuring you're using suitable flour is a vital part of weak sourdough starter troubleshooting.
Best Flour for Sourdough Starter: Bread Flour and Whole Wheat
Flours with higher protein content and more nutrients are generally preferred for feeding sourdough starters. Bread flour is an excellent choice because its higher protein (typically 12-14%) provides ample structure and nutrients for the microbes. Whole wheat flour is also fantastic, as it contains the germ and bran, which are rich in vitamins, minerals, and enzymes that the wild yeast and bacteria thrive on.
Many bakers find that a blend of bread flour and whole wheat flour (e.g., 50/50) yields a particularly strong and active starter. The whole wheat gives it a boost of nutrients, while the bread flour provides consistent performance. Using unbleached flour is also recommended, as bleaching agents can potentially harm the microbial population.
Avoiding Flour Additives That Inhibit Starter Growth
When selecting flour for your starter, check the ingredient list. Some flours, particularly certain types of all-purpose or pastry flours, may contain additives like malted barley flour (which is fine in small amounts but can sometimes make the starter too gummy) or anti-caking agents. While many common additives are harmless, some minor ones could potentially impact the delicate balance of your sourdough culture.
Specifically, look out for bleached flours, as the bleaching process can sometimes affect the microbial activity. Opting for unbleached bread flour, whole wheat flour, or a blend is a safe bet for promoting a healthy, active sourdough starter. Consistency in the type of flour you use is also beneficial; frequent, drastic changes can sometimes temporarily slow activity as the culture adjusts.
3. Temperature Issues: Finding the Sweet Spot for Fermentation
Temperature plays a crucial role in the activity level of your sourdough starter. Yeast and bacteria are microorganisms whose metabolic rates are highly dependent on temperature. If the environment is too cold, their activity slows dramatically, leading to a sluggish or weak sourdough starter. If it's too hot, certain bacteria can become dominant, leading to off-flavors or potentially killing off the yeast.
Finding and maintaining a stable temperature within the optimal range is essential for a strong starter. Fluctuations in temperature throughout the day can also impact consistency. For effective weak sourdough starter troubleshooting, assessing and controlling the temperature is key.
Ideal Temperature Range for Sourdough Starter
The ideal temperature range for most sourdough starters is between 75°F and 80°F (approximately 24°C to 27°C). Within this range, the wild yeast and lactic acid bacteria are typically most active and balanced, leading to vigorous fermentation, predictable rise times, and good flavor development.
Temperatures below 70°F (21°C) will significantly slow down activity; while the starter isn't necessarily "weak," it will appear sluggish and take much longer to rise. Temperatures consistently above 85°F (29°C) can favor bacterial growth over yeast, potentially leading to excessive sourness or a less effective leavening culture. Aiming for that 75-80°F sweet spot is the goal for a strong, active starter.
Managing Temperature Fluctuations
Maintaining a consistent temperature can be challenging depending on your home environment. Avoid placing your starter directly in drafty areas or near windows where temperatures fluctuate significantly. Good spots often include inside a microwave (when not in use), inside a turned-off oven with the light on (which often provides gentle warmth), or on top of a refrigerator where heat from the motor rises.
For more precise temperature control, consider using a proofing box, a seedling mat, or placing the starter in a cooler with a bottle of warm water. Monitoring the actual temperature of the starter using an instant-read thermometer is more accurate than just checking the room temperature. Adjusting the starter's location or using external heat sources can help mitigate temperature issues contributing to a weak sourdough starter.
4. Hydration Imbalance: Achieving the Right Consistency
The hydration level – the ratio of water to flour – affects the texture and activity of your sourdough starter. A standard 100% hydration starter (equal weights of flour and water) typically has a thick, batter-like consistency. If the hydration is significantly off, it can impact how the yeast and bacteria function and how you perceive its activity, potentially making it seem like a weak sourdough starter.
A starter that is too dry can be dense and slow to show visible signs of activity, as gas bubbles are trapped in the stiff structure. A starter that is too wet might appear very bubbly, but the bubbles pop quickly, and the starter might separate rapidly, potentially seeming weak due to its inability to hold structure.
Troubleshooting Too Dry or Too Wet Starter
If your starter is too dry, it will be very stiff and difficult to stir. While it might still be active internally, its rise will be less pronounced, and it can be harder to assess its strength visually. To fix this, simply add slightly more water during your next feeding until it reaches the desired consistency (like thick pancake batter or a sticky dough).
If your starter is too wet, it will be very liquid and might separate quickly, forming hooch even shortly after feeding. To correct this, add slightly more flour during your next feeding. Aim for that standard 100% hydration consistency, which is a good balance for ease of feeding, monitoring activity, and achieving robust fermentation. Consistency in hydration is as important as consistency in feeding for weak sourdough starter troubleshooting.
Adjusting Hydration Levels for Optimal Activity
While 100% hydration is standard, some bakers prefer slightly lower (e.g., 70-80%) or higher (e.g., 120-150%) hydration depending on their baking goals or environment. Lower hydration starters are stiffer and ferment slower but can be more resilient if left unfed longer. Higher hydration starters are more liquid and ferment faster but might require more frequent feeding.
For general purposes and especially when troubleshooting a weak sourdough starter, aiming for 100% hydration is recommended. It's the most common standard, and many recipes assume a 100% hydration starter. Achieving and maintaining this consistency helps ensure reliable activity and makes it easier to compare your starter's performance to typical benchmarks. Always measure ingredients by weight for accuracy, as volume measurements for flour and water can be inconsistent.
5. Underfeeding: Not Enough Food for Your Starter
Underfeeding occurs when you don't provide your starter with enough fresh flour and water relative to the amount of starter you keep. This often happens when using very small feeding ratios (like 1:0.5:0.5) or when keeping a large amount of starter but only feeding it a tiny amount of new food. Essentially, the population of yeast and bacteria quickly consumes the limited food supply and then starves, leading to a weak sourdough starter state.
Signs of underfeeding include the starter peaking very quickly (perhaps in just 2-3 hours at room temperature) and then collapsing rapidly, often forming a significant layer of hooch soon after. The starter is essentially telling you it's a ravenous culture with insufficient food to sustain its activity for a reasonable period.
Recognizing the Signs of Underfeeding
The most telling sign of an underfed starter is its rapid ascent to its peak volume followed by an equally rapid collapse, often within just a few hours of feeding, especially when kept warm. You might feed it, see it rise enthusiastically, and then check back a few hours later to find it has completely fallen and developed a layer of hooch on top.
Another sign is consistent hooch formation shortly after feeding, even if the starter does rise a bit. This indicates that the easily accessible food has been consumed, and the culture is already starting to produce alcohol as a byproduct of stress. If your starter seems to burn through its food too quickly, it's likely underfed, requiring weak sourdough starter troubleshooting focused on feeding ratios.
Increasing Feeding Frequency
If your starter is underfed and peaking too quickly, the solution is to increase the amount of food relative to the amount of starter you keep, or increase the frequency of feeding. Instead of a 1:1:1 ratio, try a 1:2:2 or even 1:3:3 ratio (starter:flour:water). This provides a larger food supply for the same amount of starter culture, allowing the activity to last longer.
Alternatively, if using a 1:1:1 ratio, you might need to feed twice a day if keeping it at room temperature, especially if your kitchen is warm. By ensuring the starter doesn't completely run out of food between feedings, you help maintain a strong, active culture. Discarding a larger portion of the old starter before feeding also helps ensure the fresh food isn't immediately overwhelmed by a large, hungry population.
6. Overfeeding: Diluting Your Starter's Activity
Overfeeding, while less common as a cause of a weak appearance than underfeeding, can still make your starter seem sluggish or less active than it should be. This happens when you use a very small amount of starter relative to a large amount of fresh flour and water (e.g., a 1:10:10 ratio or higher), especially if you're only feeding once a day. The small amount of starter culture is essentially diluted in a vast ocean of new food, and it takes a very long time for the population to grow enough to show significant activity or rise.
While this method can be used intentionally to slow down a very vigorous starter, it can make a standard starter appear weak because the visible signs of fermentation (rise, bubbles) are delayed or less pronounced due to the sheer volume of fresh food.
Identifying Overfeeding Issues
An overfed starter might take an unusually long time to show any signs of activity after feeding – perhaps 10-12 hours or more to start rising significantly at room temperature. The rise, when it eventually happens, might seem less robust compared to a starter fed at a standard ratio. The texture might remain dense for a long period before becoming airy.
You might also notice that even after hours, the starter doesn't double or triple, or it does so very slowly. If you're feeding a tiny amount of starter (like 10 grams) with a large amount of flour and water (like 100 grams each), it simply takes a long time for that small culture to colonize and ferment the large volume of new food. This delayed or subdued activity can be misinterpreted as a weak sourdough starter.
Reducing Feeding Amounts
If you suspect overfeeding is making your starter appear weak, the solution is to reduce the feeding ratio – use a larger proportion of starter relative to the fresh flour and water. Switch from a very high ratio (like 1:10:10) to a more standard 1:1:1 or 1:2:2 ratio.
This provides a more concentrated culture relative to the food supply, allowing it to become active and show visible signs of fermentation much faster. By using a ratio like 1:1:1, the yeast and bacteria have a denser food source to work on immediately, leading to a quicker and more apparent rise, which is helpful when performing weak sourdough starter troubleshooting and trying to gauge its strength.
7. Contamination: Preventing Unwanted Bacteria Growth
Sourdough starter is a complex ecosystem, but it's specifically cultivated to favor desirable wild yeast and lactic acid bacteria. However, other unwanted microorganisms, like mold or undesirable bacteria, can sometimes take hold, leading to a weak sourdough starter or one that needs to be discarded. Contamination often results from unclean containers or utensils.
Undesirable growth can outcompete the beneficial microbes, producing off-flavors, inhibiting the starter's leavening ability, or rendering it unsafe to use. Preventing contamination through good hygiene is crucial for maintaining a healthy starter.
Maintaining a Clean Environment
Always use clean jars and utensils when feeding your sourdough starter. Wash your container thoroughly with hot, soapy water and rinse it well to remove any soap residue, which can inhibit microbial activity. Ensure your hands are clean when handling the starter or its ingredients.
Using a dedicated jar for your starter that is only used for this purpose can also help minimize the risk of introducing foreign contaminants. While sourdough is quite resilient due to its acidic environment, which inhibits many pathogens, maintaining cleanliness is a simple yet effective preventative measure against issues that could lead to a weak sourdough starter or spoilage.
Recognizing and Addressing Mold or Unusual Growth
Mold is the most common type of contamination you might encounter. It typically appears as fuzzy patches on the surface of the starter, which can be white, green, black, orange, or pink. Unlike hooch or normal bubbles, mold has a distinct texture and color. If you see mold, it's generally recommended to discard the entire starter, as the mold spores and toxins can spread throughout the culture even if you only see a small patch.
Unusual colors (like bright pink or orange streaks) or significantly off-putting smells (beyond the usual tangy or acetone notes) that persist after feeding can also indicate contamination by undesirable bacteria. While some minor off-colors might just be pigments from the flour, anything that looks or smells truly wrong is a red flag. When in doubt, especially if mold is present, it's safer to discard the starter and start fresh, as you cannot effectively perform weak sourdough starter troubleshooting on a contaminated culture.
Reviving a Weak Sourdough Starter: A Step-by-Step Guide

Step 1: Assess the Starter's Current State
Before you begin the revival process, take a good look at your weak sourdough starter. What are the specific signs you're seeing? Is it just slow to rise, or is there hooch forming rapidly? Does it smell okay (just tangy or a bit hungry), or are there off-putting odors? What's the temperature of the environment where it's kept? How often have you been feeding it, and with what kind of flour?
Gathering this information will help you identify the likely causes of its weakness based on the troubleshooting points discussed earlier. Understanding whether the issue is likely due to temperature, feeding schedule, hydration, or potential contamination guides your next steps. For instance, rampant hooch suggests underfeeding or temperature issues, while a lack of bubbles and no rise at all might point to a fundamental lack of activity needing consistent, warm feeding.
Step 2: Adjust the Feeding Schedule and Ratios
Based on your assessment, the most common and effective step for weak sourdough starter troubleshooting is to adjust your feeding routine. If you've been feeding inconsistently or with low ratios, switch to a consistent schedule, ideally twice a day (every 12 hours) for a few days, using a standard 1:1:1 or 1:2:2 ratio (starter:flour:water by weight).
Discard a significant portion of your starter before each feeding, keeping only a small amount (e.g., 20-30 grams) to feed with fresh flour and water. This ensures the fresh food isn't immediately consumed by a large, hungry culture and gives the yeast and bacteria population a chance to grow and become more concentrated relative to the food supply. Consistent, regular feeding is paramount for rebuilding strength.
Step 3: Monitor Temperature and Consistency
Ensure your weak sourdough starter is kept in a warm, stable environment, ideally between 75-80°F (24-27°C). Use a thermometer to verify the temperature of the starter itself, not just the room. If your environment is too cool, find a warmer spot or use a gentle heat source like a proofing box or an oven with the light on.
Also, check and adjust the hydration. Aim for a 100% hydration starter (equal weights of flour and water). If it's too dry, add a little more water; if it's too wet, add a little more flour during feeding. The consistency should be like thick pancake batter. Maintaining optimal temperature and hydration provides the best conditions for the yeast and bacteria to multiply and become active again.
Step 4: Consider a Flour Change
If you haven't been using high-quality flour, switching to unbleached bread flour or a mix with whole wheat flour can give your weak sourdough starter a significant boost. These flours provide more nutrients and protein that the microbes need to thrive.
Try feeding with 50% unbleached bread flour and 50% whole wheat flour for several consecutive feedings. Sometimes, a change in flour type can awaken a sluggish starter by providing a richer food source. Ensure the flour is fresh and hasn't been sitting on the shelf for too long.
Step 5: Patience and Persistence: Consistent Care is Key
Reviving a weak sourdough starter takes time and consistent effort. Don't expect dramatic results after just one or two adjusted feedings. It might take several days, sometimes even a week or more, of consistent feeding (twice a day), optimal temperature, and correct hydration before you see the starter consistently doubling or tripling in volume within 4-8 hours after feeding.
Be patient, keep up the consistent care routine, and observe the starter's progress. Look for gradual improvements: more bubbles, a slightly higher rise, a more pleasant tangy smell. Once it consistently shows strong activity, you can transition back to a maintenance feeding schedule appropriate for how you store it (room temperature or refrigerator). Persistence is key to successful weak sourdough starter troubleshooting.
Sourdough Rise Troubleshooting: Beyond the Starter

Even with a strong sourdough starter, sometimes your dough still doesn't rise as expected. This indicates that the issue lies not with the starter's viability, but with other factors in the bread-making process. Troubleshooting dough rise involves looking at the entire environment and technique used after the starter has been mixed into the main dough.
Factors like the temperature of your dough during bulk fermentation and proofing, the development of gluten, the amount of salt used, and even the type of flour in the main dough all play a role. Effective sourdough rise troubleshooting requires examining these elements in conjunction with ensuring your starter is performing optimally.
Factors Affecting Dough Rise: Temperature, Gluten Development, and Salt
Several key factors influence how well your sourdough dough rises. Temperature is critical; fermentation (the process by which yeast produces gas) is significantly slower at cooler temperatures and faster at warmer ones. An ideal bulk fermentation temperature is often around 75-80°F (24-27°C), similar to starter temperature, though many bakers use cooler temperatures over a longer time.
Gluten development is equally important. Gluten forms the elastic network that traps the carbon dioxide gas produced by the starter, allowing the dough to rise and hold its shape. Insufficient kneading or folding will result in a weak gluten structure that cannot support the rise, leading to a dense loaf. Finally, salt, while essential for flavor and structure, can inhibit yeast activity if added directly to the starter or in excessive amounts early in the process.
Troubleshooting Dough Rise Issues: Time, Temperature, and Technique
If your dough isn't rising, first check the temperature. Is your kitchen significantly cooler than expected? Try placing the dough in a warmer spot, like a proofing box, oven with the light on, or a warm corner of the kitchen. Remember that dough temperature is key, not just air temperature.
Next, consider the timing. Sourdough fermentation is slower than commercial yeast. Are you giving it enough time for bulk fermentation (the first rise)? This can take anywhere from 4 to 12 hours or more depending on temperature and starter strength. Is the dough showing visible signs of activity (increased volume, bubbles)?
Also, review your technique: did you knead or perform stretch-and-folds adequately to develop gluten? If the dough feels slack and doesn't hold shape, it might need more gluten development. Ensure salt was added correctly and isn't inhibiting the process. Adjusting time, temperature, and refining your technique are crucial steps in sourdough rise troubleshooting.
Maintaining a Strong and Healthy Sourdough Starter: Prevention is Key
Once you've successfully performed weak sourdough starter troubleshooting and revived your culture, the goal is to keep it strong and healthy to avoid future issues. Prevention is always easier than revival. Consistent care and attention to your starter's needs based on its environment and how you use it are the best ways to ensure it's always ready to bake a fantastic loaf.
A consistently strong starter not only reliably leavens your bread but also contributes better flavor and aroma. It means less stress and more successful baking outcomes. By establishing good habits, you can maintain a thriving sourdough culture indefinitely.
Consistent Feeding and Care
The most fundamental aspect of maintaining a strong starter is consistent feeding. Whether you store it at room temperature (requiring daily or twice-daily feeding) or in the refrigerator (requiring weekly feeding), stick to a schedule. Use a standard feeding ratio (like 1:1:1 or 1:2:2) and measure your ingredients by weight for accuracy.
Always discard a portion of the old starter before feeding to maintain a manageable volume and ensure the fresh food isn't immediately diluted among too many microbes. Use clean containers and utensils. Treat your starter as a pet that needs regular meals and a clean home, and it will reward you with consistent activity.
Monitoring Starter Activity and Adjusting as Needed
Regularly observe your starter. Pay attention to how quickly it rises after feeding, how high it peaks, and how long it takes before it starts to fall or produce hooch. This tells you about its activity level. If it's peaking much faster than usual, it might be getting warmer or need a higher feeding ratio to last longer. If it's slower, perhaps the temperature has dropped or it's transitioning after being in the fridge.
Adjust your feeding schedule or ratio based on these observations. For example, if your starter is consistently peaking at 4 hours and you're feeding every 12, consider feeding more often or increasing the flour/water in the feeding ratio. Being responsive to your starter's cues is key to maintaining its strength and is the ongoing practice of weak sourdough starter troubleshooting in miniature.
Experimenting with Flour and Hydration
While consistency is important, don't be afraid to experiment slightly once your starter is strong. You might find that a particular blend of flours (e.g., adding some rye or spelt) boosts its activity or enhances the flavor profile. Similarly, you might slightly adjust hydration based on the flour you're using or the desired starter consistency.
Keep track of what works best in your specific environment. Some flours absorb water differently, and ambient humidity can also play a small role. Finding the optimal flour mix and hydration level for your starter in your kitchen contributes to its long-term health and vigor, ensuring you rarely have to deal with a weak sourdough starter again.
BakeWithEase: Mastering Sourdough, One Step at a Time.
Frequently Asked Questions
What are the most common signs of a weak sourdough starter?
A weak starter often exhibits slow or minimal rising, lack of bubbles, and a thin, watery consistency. It may also have an unpleasant or overly sour smell.
How often should I be feeding my sourdough starter?
For a healthy starter, feeding once or twice a day is generally recommended. This provides the necessary nutrients for the yeast and bacteria to thrive and reproduce.
What type of flour is best for feeding a sourdough starter?
While all-purpose flour can work, using unbleached bread flour or whole wheat flour is often preferable. These flours provide more nutrients and gluten, promoting a stronger rise.
What is the ideal temperature for sourdough starter fermentation?
The ideal temperature range is typically between 70-75°F (21-24°C). This temperature range encourages the optimal activity of the yeast and bacteria in the starter.
What can I do to revive a sluggish or inactive sourdough starter?
Try increasing the feeding frequency to twice a day, using warmer water for mixing, and ensuring your starter is kept in a warm environment. These adjustments can help stimulate activity.
Final Reflection: The Resilient Rise of Sourdough
The quest for a robust sourdough starter is a microcosm of life's challenges: requiring patience, understanding, and a willingness to adapt. A weak starter isn't a failure; it's an opportunity to learn, adjust, and ultimately achieve a satisfying outcome. This journey, fraught with potential pitfalls, ultimately rewards the persistent baker with the unique, tangy flavor only a thriving sourdough can provide.
The process of nurturing a sourdough starter mirrors the cyclical nature of growth and setbacks we encounter in life. It's a reminder that even the smallest of organisms, given the right conditions, can flourish. The seemingly simple act of feeding and caring for a starter becomes a meditative practice, a testament to the power of consistent effort. The greatest glory in living lies not in never falling, but in rising every time we fall.
- Nelson Mandela. This quote perfectly encapsulates the spirit of sourdough baking, and indeed, the spirit of perseverance in the face of adversity.
Now, consider your own "starter." What aspects of your life require the same nurturing attention and patience that your sourdough demands? What seemingly small adjustments can you make to foster growth and overcome challenges? Take the lessons learned from troubleshooting your sourdough starter and apply them to your own personal journey. Embrace the process, learn from the setbacks, and celebrate the successes – the delicious, tangy rewards await.
Unleash Your Inner Baker: Perfect Sourdough Every Time!
Thanks for taking the time to explore the world of sourdough with us! We hope you now have the tools to troubleshoot those pesky rising issues and achieve consistently amazing results. Ready to take your baking to the next level?
- Dive deeper into sourdough: Experiment with different flours, hydration levels, and fermentation times to discover your perfect sourdough recipe. This is where the magic truly happens!
- Share your sourdough journey: Post a picture of your magnificent loaf on social media and tag us @BakeWithEase – we'd love to see your baking success!
- Master the art of the starter: Challenge yourself to maintain a vibrant, active starter for an extended period. It's a rewarding process that builds a foundation for future baking triumphs!
What unique flavor profile are you dreaming of creating with your next sourdough masterpiece?