
Achieve Airy Pizza Crust: Advanced Techniques for Structure and Rise


Welcome to BakeWithEase, your trusted guide to unlocking baking brilliance! Ever wondered how to achieve that perfectly airy pizza crust – the kind that's both crisp and delightfully chewy? We're diving deep into advanced techniques that will transform your pizza game. Get ready to elevate your bread baking skills and discover the secrets to incredible structure and rise. Intrigued? Let's get started!
- Understanding the Foundations of Airy Pizza Crust
- Advanced Techniques for Achieving an Airy Pizza Crust
- Shaping Techniques for Maximum Rise and Airiness
- Troubleshooting Common Issues in Pizza Crust Production
- Advanced Pizza Baking: Beyond the Basics
- Perfecting Your Airy Pizza Crust: A Summary of Key Techniques
-
Frequently Asked Questions
- How can I achieve a truly airy pizza crust at home?
- What role does hydration play in creating an airy pizza crust?
- Are there specific kneading techniques that promote airiness in pizza dough?
- How does fermentation time affect the airiness of my pizza crust?
- What type of flour is best for achieving an airy pizza crust?
- Final Reflection: The Pursuit of the Perfect Airy Crust
- Unlock Your Perfect Pizza Crust: Airy, Light, and Delicious!
Understanding the Foundations of Airy Pizza Crust
The Science Behind Air Pockets in Pizza Dough
Achieving a truly light and airy pizza crust is a delicate dance between biology and physics, primarily driven by yeast activity and gluten development. Yeast, a living organism, feeds on sugars in the flour and produces carbon dioxide gas as a byproduct. This gas is what creates the bubbles within the dough. The magic happens when the dough's structure, built by gluten, is strong enough to trap these gases.
Think of gluten as a network of elastic strands that form a balloon, holding the CO2 inside. A well-developed gluten network is crucial because it allows the dough to expand significantly during fermentation and, even more dramatically, during the intense heat of baking. This rapid expansion, known as "oven spring," is when the trapped gas rapidly expands, pushing the dough upwards and outwards, creating that coveted open, airy crumb structure.
The temperature plays a significant role in yeast activity and gas production. Warmer temperatures (typically 75-80°F or 24-27°C) accelerate fermentation, leading to faster gas production, while colder temperatures (like those used in cold proofing, around 35-40°F or 2-4°C) slow it down, allowing for longer flavor development and more controlled gas production over time.
The dough's hydration level also impacts air pockets; higher hydration makes the dough slacker and easier for gas to expand within, often resulting in larger, more irregular holes in the final crust. Understanding this interplay between yeast, gluten, temperature, and hydration is the first step in mastering airy pizza crust techniques.
Key Ingredients for Optimal Pizza Crust Structure
The journey to a light and airy pizza crust starts with selecting the right ingredients. Flour is arguably the most critical component. For a crust with good structure and rise, you need flour with a sufficient protein content to form a strong gluten network.
Bread flour, with a protein content typically ranging from 12% to 14%, is an excellent choice as it provides the necessary strength and elasticity to trap fermentation gases effectively. Many pizzaiolos also swear by Italian "00" flour, which, despite sometimes having a slightly lower protein percentage (around 10-12.5%), is very finely milled and absorbs water differently, often resulting in a tender yet structured crumb ideal for high-temperature baking. The choice of flour significantly influences the final texture and structure when applying airy pizza crust techniques.
Beyond flour, yeast is the engine of fermentation. Instant dry yeast is convenient and highly active, while active dry yeast needs to be proofed first. Using the correct amount of yeast relative to the fermentation time and temperature is key to controlled gas production. Water quality matters too; chlorine in tap water can inhibit yeast activity, so filtered water is often preferred.
Salt is essential not just for flavor but also for controlling the rate of fermentation and strengthening the gluten structure. While some recipes include a small amount of sugar to kickstart yeast activity, it's not strictly necessary as yeast can feed on the flour's natural sugars. Finally, a touch of olive oil can add flavor and tenderness to the crust, contributing to a pleasant texture alongside the desired airiness.
Advanced Techniques for Achieving an Airy Pizza Crust

Mastering High Hydration Dough for Light Pizza
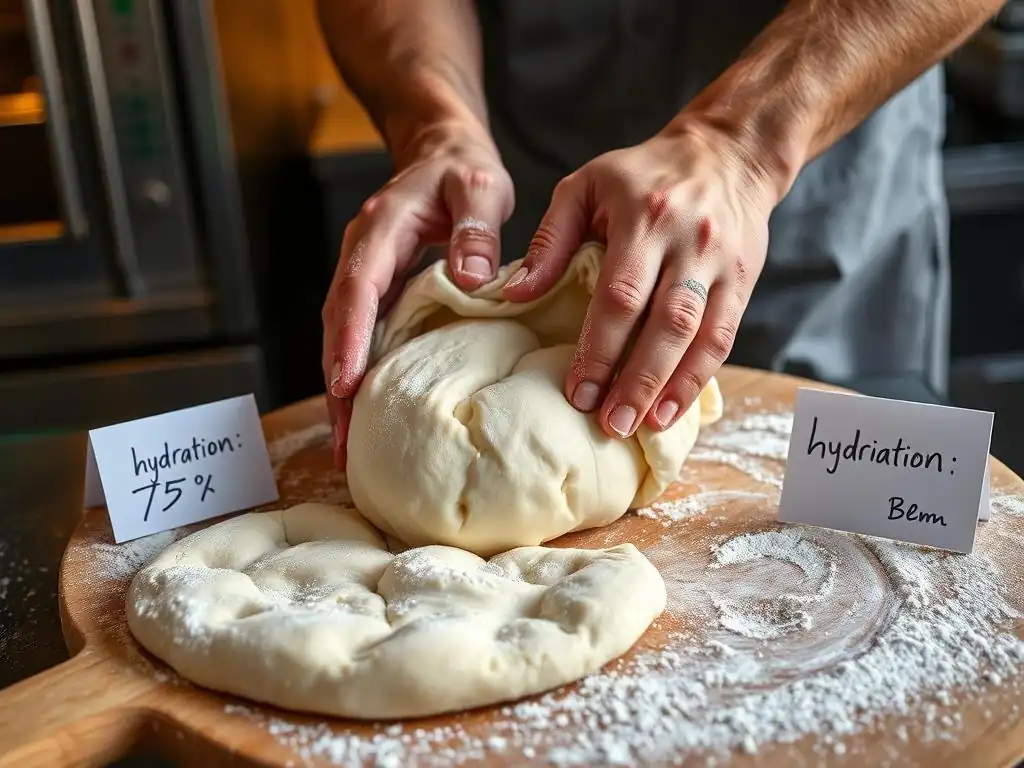
Working with high hydration dough is one of the most effective airy pizza crust techniques for achieving a light and open crumb structure. High hydration simply means using a higher percentage of water relative to the flour weight, often 70% or more (e.g., 700g water for 1000g flour). This increased water content makes the dough slacker and stickier but provides an environment where yeast can thrive and produce ample gas.
The extra water also helps gelatinize the starches during baking, contributing to a softer interior crumb while still allowing for a crisp exterior. Doughs with 75% or even 80% hydration are common in professional settings because they inherently lend themselves to a more open and irregular hole structure, characteristic of artisanal bread and pizza.
Handling such wet dough can be challenging for beginners, as it tends to stick to everything. However, with the right approach, it becomes manageable. Techniques like the "stretch and fold" method, performed wet hands or using a bench scraper, are preferred over traditional kneading.
This gentle manipulation helps build gluten strength without incorporating excessive flour, which would lower the hydration. Allowing the dough to rest between folds (autolyse or simply short rests) also helps make it more extensible and less sticky. Patience is key; high hydration doughs often require longer bulk fermentation and careful handling during shaping to preserve the delicate air pockets developed during proofing, ensuring your airy pizza crust techniques pay off.
Benefits of High Hydration in Pizza Dough
The primary benefit of using high hydration in pizza dough is the resulting texture: a significantly lighter, more open, and often more irregular crumb structure. The increased water content allows the dough to expand more freely during fermentation and baking, leading to larger, more varied air pockets throughout the crust.
This creates a pleasant contrast between a potentially crisp exterior and a soft, airy interior, which is highly desirable for many pizza styles, particularly Neapolitan-style pizza. A higher hydration also contributes to a more tender crust because the extra water delays the setting of the starch and protein structure during baking.
Furthermore, high hydration doughs often brown more readily in a hot oven, contributing to desirable crust color and flavor development through the Maillard reaction and caramelization. The extended mixing or folding required for high hydration doughs also ensures excellent gluten development, which is essential for trapping the gas produced by fermentation. While they require more practice to handle, the textural payoff makes mastering these airy pizza crust techniques well worth the effort for those seeking the ultimate light and airy pizza crust.
Techniques for Handling Sticky, High-Hydration Dough
Working with sticky, high-hydration dough can initially feel frustrating, but specific techniques make it much more manageable. The key is to minimize external friction and use gravity and surface tension to your advantage rather than relying on adding more flour. One of the most effective methods is keeping your hands wet while handling the dough, which prevents it from sticking to your skin. A bowl of water nearby for dipping your hands periodically is essential during stretch and folds or shaping.
Another crucial tool is a plastic or metal bench scraper. This can be used to lift and turn the dough during folding or to portion it without tearing. Performing "stretch and fold" or "coil fold" techniques directly in the mixing bowl or on a lightly wet surface (rather than a floured one) also helps.
These methods involve gently stretching and folding the dough onto itself, using its own weight and stickiness to build strength. Resting the dough between folds (even just 10-15 minutes) allows the gluten to relax, making the dough less resistant and easier to handle. By employing these gentle, hydration-respecting methods, you can successfully manage sticky dough and achieve the desired open structure using advanced airy pizza crust techniques.
Autolyse: Unlocking Dough Potential for Enhanced Airiness
Autolyse is a simple yet powerful technique that can significantly improve the texture and handling of your pizza dough, contributing to a more open and airy crust. It involves mixing just the flour and water from your recipe and letting the mixture rest for a period, typically between 20 minutes and an hour, before adding the salt and yeast and proceeding with mixing or kneading. During this resting period, two key enzymatic processes occur naturally within the dough: proteases begin to break down proteins, and amylases begin to break down starches into simpler sugars.
The autolyse rest allows the flour to fully hydrate and the gluten network to start forming without the interference of salt (which tightens gluten) or yeast (which starts fermentation immediately). This pre-hydration and initial gluten development makes the dough more extensible, less sticky, and easier to handle during subsequent mixing or kneading. It effectively reduces the total kneading time required to reach optimal gluten development. Implementing autolyse is a subtle but effective way to enhance your airy pizza crust techniques, leading to dough that's easier to stretch thinly and results in a lighter, more tender crumb.
The Autolyse Process Explained
The autolyse process is straightforward: weigh out your flour and water according to your recipe, combine them in a mixing bowl, and mix just until there are no dry spots of flour remaining. The mixture will look shaggy and perhaps a bit lumpy – this is perfectly normal. Do not add salt, yeast, or any other ingredients like oil or starter at this stage.
Cover the bowl to prevent the surface from drying out, and let it rest at room temperature. The resting time can vary; even a 20-30 minute autolyse offers benefits, while some bakers extend it to 60 minutes or more, especially for doughs with high percentages of whole wheat flour.
Once the autolyse period is complete, you'll notice a visible change in the dough. It will appear smoother and more cohesive, feeling less resistant when you touch it. At this point, you incorporate the remaining ingredients – yeast (which may be dissolved in a tiny bit of water if using active dry) and salt.
Then, you proceed with your usual mixing or kneading method. The dough will develop gluten much faster and more easily than if you had added all ingredients at once. This ease of handling and accelerated gluten development is a direct benefit of incorporating autolyse into your airy pizza crust techniques.
How Autolyse Impacts Gluten Development and Crust Texture
Autolyse has a profound impact on gluten development and, consequently, the final texture of the pizza crust. By allowing the flour and water to rest together, the gluten proteins (glutenin and gliadin) begin to link up and form the gluten network more readily. The enzymatic activity during autolyse also helps condition the dough, making the gluten more extensible and less elastic. This means the dough is easier to stretch without tearing, which is vital for shaping thin pizza crusts and preserving the internal air structure.
The reduced kneading time required after autolyse minimizes oxidative damage to the dough, which can occur during prolonged mechanical mixing. This can result in dough with better flavor and a more open crumb structure. Ultimately, using autolyse as part of your airy pizza crust techniques leads to dough that is more relaxed, easier to handle, develops gluten efficiently, and bakes up into a crust with improved volume and a lighter, more open crumb.
Bulk Fermentation: Developing Flavor and Structure in Pizza Dough
Bulk fermentation, also known as the first rise, is a critical stage where the dough develops both flavor and structure. This is the period after mixing (and autolyse, if used) and before the dough is divided and shaped. During bulk fermentation, the yeast is actively producing carbon dioxide, causing the dough to rise, and importantly, complex biochemical changes are occurring that develop the dough's flavor profile and strengthen the gluten network further through gentle handling like folding. The duration and temperature of bulk fermentation have a significant impact on the final outcome of your airy pizza crust techniques.
A typical bulk fermentation might last anywhere from 2 to 4 hours at room temperature (around 70-75°F or 21-24°C), during which the dough is often folded periodically. Alternatively, many bakers opt for a long, slow cold fermentation in the refrigerator, which can last from 24 hours up to 72 hours or even longer.
Cold fermentation dramatically slows yeast activity but allows enzymes to break down starches and proteins more slowly, producing a wider range of flavor compounds and resulting in a more complex, nuanced taste in the final crust. It also makes the dough easier to handle and shape because the cold stiffens the fats and slows down the dough's tendency to spring back.
Controlling Fermentation Temperature for Optimal Results
Controlling the temperature during bulk fermentation is paramount for managing the rate of yeast activity and achieving optimal results for airy pizza crust techniques. Warmer temperatures (75-80°F) lead to faster fermentation, often resulting in a larger volume increase in a shorter time. This can be useful when you need a quick turnaround, but it can sometimes compromise flavor development compared to slower methods. A dough fermenting too quickly at high temperatures might also become overly acidic or slack.
Conversely, fermenting at cooler temperatures (like standard room temperature around 68-72°F or 20-22°C) slows down the process, allowing for better flavor development. Cold fermentation in the refrigerator (35-40°F) is the slowest method and is excellent for developing complex flavors and improving dough handleability. It also provides flexibility, allowing you to bake pizza whenever you're ready within a several-day window.
Monitoring the dough's progress visually (how much it has risen) and texturally (how it feels) is essential, regardless of the temperature chosen. Using a proofing box or simply finding a consistently warm or cool spot in your kitchen can help maintain the desired temperature range.
Recognizing the Signs of Properly Fermented Dough
Knowing when your dough is properly fermented is crucial for achieving an airy crust and is a key part of mastering airy pizza crust techniques. Under-fermented dough will be dense, tight, and difficult to stretch, resulting in a flat, heavy crust with a tight crumb. Over-fermented dough, on the other hand, will be overly slack, potentially sticky, and may even start to collapse. It might smell strongly alcoholic or overly acidic and can result in a crust with large, irregular holes but poor overall structure and browning.
Properly fermented dough should have significantly increased in volume, often doubling or even tripling, depending on the recipe and fermentation time/temperature. The surface should appear smooth and slightly domed, and you might see visible gas bubbles just beneath the surface. A common test is the "poke test": gently press a floured finger into the dough about half an inch deep. If the indentation slowly springs back only partially, the dough is likely ready.
If it springs back immediately, it needs more time. If it collapses completely, it's likely over-fermented. The dough should feel light, airy, and easy to work with, indicating that the gluten is developed and the gas is trapped effectively.
The Art of Folding: Strengthening Dough and Creating Layers
Folding is a series of gentle manipulations performed during bulk fermentation that significantly contribute to developing the dough's strength, structure, and ultimately, its airiness. Unlike vigorous kneading, folding respects the developing gluten network and helps align the protein strands, building tension and creating layers within the dough. This added structure helps the dough hold onto the fermentation gases better and provides the framework for a well-defined, open crumb structure in the final pizza crust. Incorporating regular folding is a fundamental technique for advanced airy pizza crust techniques.
The frequency and number of folds depend on the dough's hydration level and the desired outcome. For high-hydration doughs, folding is often the primary method of gluten development after an initial mix or autolyse. Typically, 2-4 sets of folds are performed during the first half or two-thirds of the bulk fermentation period, with rests of 30-60 minutes in between. Each set of folds strengthens the dough incrementally, making it less sticky and more manageable with each pass. This gentle layering process helps create the internal architecture that results in a beautifully airy and irregular crumb.
Different Folding Techniques for Pizza Dough
Several folding techniques can be used for pizza dough, each achieving similar goals of building strength and structure. The most common is the "stretch and fold" method. With wet hands or a bench scraper, gently lift one side of the dough, stretch it upwards without tearing, and fold it back over the rest of the dough. Rotate the bowl a quarter turn and repeat the stretch and fold with the next side. Continue until all four sides (or more, depending on the dough size) have been stretched and folded over the center. This builds tension and layers.
Another popular technique, especially for very high hydration doughs, is the "coil fold." For this method, you lift the dough from the center using both hands underneath, allowing the ends to hang down and fold under the main mass due to gravity. You then place the dough back in the bowl and repeat the lift and fold a few times, rotating the bowl. This method is even gentler and particularly good at preserving existing air bubbles while still building strength. Experimenting with these folding techniques helps refine your airy pizza crust techniques.
When and How Often to Fold Your Pizza Dough
The timing and frequency of folding depend on several factors, including the dough's hydration, the flour used, the fermentation temperature, and the desired level of gluten development. For many standard pizza doughs, performing 2 to 4 sets of folds during the first 1.5 to 2 hours of bulk fermentation is sufficient. If fermenting at room temperature (70-75°F), you might perform folds every 30-45 minutes. For slower, colder fermentations, folds can be spaced further apart, perhaps every 60-90 minutes, or fewer sets might be needed overall.
The goal is to feel the dough gain strength and become smoother and more elastic with each set of folds. You'll notice it becomes less slack and holds its shape better. Once the dough shows good structure and tension, you can stop folding and let it finish its bulk fermentation undisturbed. Over-folding can sometimes lead to a tighter crumb, so it's a balance. Paying attention to how the dough feels and responds is key to determining the optimal folding schedule within your specific airy pizza crust techniques.
Shaping Techniques for Maximum Rise and Airiness
Gentle Handling: Preserving Air Bubbles in the Dough
After bulk fermentation and portioning (if making multiple pizzas), the shaping stage is critical for maintaining the airy structure developed during the previous steps. The dough is now full of fermentation gases trapped within the gluten network. The primary goal during shaping is to form the pizza round while disturbing these precious air bubbles as little as possible. Aggressive handling, punching down the dough forcefully, or degassing it excessively will expel the very gases needed for oven spring and an open crumb. This is where gentle airy pizza crust techniques are paramount.
Instead of treating the dough roughly, approach it with care. If the dough has been cold-proofed, allow it to come to room temperature for 60-90 minutes before shaping; this makes it more relaxed and easier to work with. When transferring the dough from its container, use a bench scraper to help release it and let gravity do some of the work.
Avoid tearing the dough. Your hands should be floured just enough to prevent sticking, but don't incorporate excessive flour into the dough itself, which can make it tough. The aim is to coax the dough into shape, not force it, ensuring the internal structure is preserved for maximum rise.
Stretching vs. Rolling: Choosing the Right Method for Airy Crust
When it comes to shaping pizza dough for an airy crust, stretching is overwhelmingly preferred over rolling. Rolling dough with a pin tends to push out the gases evenly across the entire surface, resulting in a flatter, denser crust with a uniform, tight crumb. While this might be suitable for some thin-crust styles, it's detrimental to achieving the irregular, open structure characteristic of a truly airy crust.
Stretching, on the other hand, allows you to expand the dough using gravity and gentle pressure, primarily from the center outwards. This method preserves the larger air bubbles around the perimeter (forming the cornicione, or edge crust) and throughout the interior. Techniques like lifting the dough and letting it hang, rotating it, or gently pressing and stretching from the center towards the edge allow you to control the thickness while maintaining the dough's inherent structure. Mastering these stretching methods is a fundamental aspect of advanced airy pizza crust techniques.
The Importance of a Hot Baking Surface for Pizza Crust Lift
One of the most significant factors in achieving maximum lift and airiness during baking is ensuring your pizza is cooked on a preheated, extremely hot surface. Whether you use a pizza stone, pizza steel, or bake directly on the floor of a very hot oven (like a wood-fired oven), the principle is the same: rapid heat transfer to the base of the dough is essential for explosive oven spring. A stone or steel preheated in an oven at 500-550°F (260-290°C) or even higher provides this intense heat.
When the dough hits this hot surface, the moisture within the dough is instantly converted to steam, and the trapped CO2 gas expands rapidly. This sudden burst of expansion causes the dough to puff up dramatically, creating the airy structure. Baking on a cold or insufficiently heated surface results in slow heat transfer, which allows the gases to escape before the structure sets, leading to a flat, dense crust. Preheating your baking surface for at least 60 minutes at the highest possible oven temperature is a non-negotiable step for successful airy pizza crust techniques.
Troubleshooting Common Issues in Pizza Crust Production
Dense or Flat Crust: Identifying the Causes and Solutions
A dense or flat pizza crust is a common frustration when aiming for airiness. Several factors can contribute to this issue. One primary cause is under-fermentation. If the dough hasn't had enough time or is too cold to ferment adequately, yeast won't produce enough gas to create significant rise. Solution: Allow more time for bulk fermentation at the appropriate temperature, or consider a longer cold proof.
Another cause can be insufficient hydration; a very low hydration dough inherently produces a tighter crumb. Solution: Try increasing the water percentage in your recipe gradually. Poor gluten development is also a culprit; if the dough isn't kneaded or folded enough, the gluten network isn't strong enough to trap gases. Solution: Ensure proper mixing/folding techniques and sufficient development time.
Aggressive handling during shaping is another major reason for a flat crust. Punching down the dough or rolling it forcefully expels the trapped gases. Solution: Use gentle stretching techniques instead of rolling and handle the dough minimally. Finally, baking on an insufficiently hot surface prevents proper oven spring. Solution: Always preheat your pizza stone or steel at the highest oven temperature for at least an hour. By identifying which of these factors might be at play, you can adjust your airy pizza crust techniques to achieve better results.
Avoiding Tough or Chewy Pizza Dough
While you want a pizza crust with structure and a bit of chew, overly tough or rubbery dough is undesirable. This often stems from issues related to gluten development and handling. One common cause is over-kneading, especially with lower hydration doughs. Developing gluten too much can make the dough very tight and elastic, resulting in a tough crust. Solution: Be mindful of kneading time; stop once the dough passes the windowpane test and feels smooth. Using an autolyse can help reduce the need for prolonged kneading.
Another reason for toughness can be insufficient hydration combined with excessive flour during shaping. A dry dough is inherently tougher, and adding too much extra flour while stretching makes it even drier and harder. Solution: Increase hydration slightly in your recipe and use minimal flour on your hands and surface during shaping, relying more on water or gentle handling.
Baking at too low a temperature or for too long can also dry out the crust and make it tough. Solution: Use a very hot oven and baking surface for a quick bake that cooks the dough through without drying it out. Adjusting these steps within your airy pizza crust techniques will help you avoid a tough crust.
Achieving Consistent Results with Airy Pizza Crust Techniques
Consistency is key to mastering any baking skill, including achieving a consistently airy pizza crust. This requires paying close attention to detail and controlling variables. One crucial element is accurate measurement, especially of flour and water, ideally using a digital scale. Consistency in hydration is fundamental to repeatable results. Controlling fermentation temperature is also vital; a consistent environment (like a proofing box or a specific spot in your kitchen) helps ensure the dough ferments at the expected rate.
Keeping detailed notes on your process can be incredibly helpful. Record things like ambient temperature, dough temperature after mixing, fermentation times, how the dough felt at different stages, and the results after baking. This allows you to identify what worked well and what didn't, making adjustments for your next batch. Using the same ingredients consistently (same brand of flour, yeast) also helps reduce variability. By being methodical and paying attention to these details, you can refine your airy pizza crust techniques and achieve reliably airy and delicious crusts every time.
Advanced Pizza Baking: Beyond the Basics

Experimenting with Different Flours for Unique Crust Textures
Once you've mastered the basic airy pizza crust techniques using standard bread flour or 00 flour, experimenting with different flour types can open up a world of unique crust textures and flavors. Adding a percentage of whole wheat flour (e.g., 10-20%) can introduce nutty flavors and a slightly denser, chewier texture, while still allowing for airiness if mixed and fermented properly. Whole wheat flour requires more water due to the bran and germ, so adjust hydration accordingly.
Using specialty flours like semola rimacinata (durum wheat flour, common in Southern Italian baking) can lend a slightly coarser, more rustic texture and a beautiful golden color to the crust. High-gluten flours (even higher protein than standard bread flour) can provide exceptional strength for very high hydration doughs, resulting in potentially larger, more dramatic air pockets. Conversely, using a small percentage of lower-protein or softer flours (like pastry flour) can contribute tenderness. Blending different flours allows you to fine-tune the crust's structure, flavor, and texture beyond standard recipes.
Adding Flavor Infusions to Your Pizza Dough
Elevating your pizza crust goes beyond texture; infusing flavor directly into the dough can create a more complex and satisfying eating experience. Simple additions like a good quality extra virgin olive oil are standard and contribute richness and aroma. However, you can go further. Finely minced garlic, dried herbs like oregano or basil, or a pinch of red pepper flakes can be incorporated during the initial mixing stage. Be mindful that fresh ingredients like garlic can affect fermentation slightly.
Another popular method is incorporating flavored oils or fats. For instance, using garlic-infused olive oil instead of plain oil adds a subtle but noticeable garlic flavor throughout the crust. Roasted garlic or sun-dried tomatoes (finely chopped) can also be kneaded into the dough towards the end of mixing. While these additions might slightly impact the dough's structure, the flavor reward is often worth it. These simple infusions complement your airy pizza crust techniques by adding an extra dimension of taste.
Pizza Stone vs. Pizza Steel: Choosing the Right Baking Surface
The choice of baking surface significantly impacts the bottom crust's crispness and the overall oven spring, both crucial for an airy crust. The two most popular options for home ovens are pizza stones and pizza steels. Both work by absorbing and radiating heat, providing the intense thermal shock needed for rapid oven spring and a well-browned base. However, they differ in performance.
Pizza stones, typically made from ceramic or cordierite, absorb heat well but transfer it relatively slowly. They are excellent for achieving a crispy bottom and replicating some aspects of brick oven baking. Pizza steels, made from steel or composite metal, heat up faster and retain heat more effectively than stones. Crucially, steel transfers heat much more rapidly to the dough.
This faster heat transfer often results in even better oven spring and a crispier base in a standard home oven, which may not reach the extremely high temperatures of a professional pizza oven. For maximum airiness and bottom crispness, especially in ovens that top out around 500-550°F, a pizza steel is often considered superior. Both require substantial preheating time, typically an hour or more, at the oven's highest setting.
Perfecting Your Airy Pizza Crust: A Summary of Key Techniques
Mastering airy pizza crust techniques involves understanding the science behind the rise and implementing specific methods throughout the process. Key foundations include using high-protein flour for a strong gluten network and controlling fermentation temperature for optimal yeast activity and flavor. Advanced techniques like high hydration (70%+ water) are crucial for an open crumb, requiring gentle handling methods like stretch and fold or coil fold.
Incorporating an autolyse rest improves dough handling and gluten development, leading to a more extensible dough. Bulk fermentation is essential for developing flavor and structure, whether done quickly at room temperature or slowly in the refrigerator. Regular folding during this stage builds strength and creates internal layers.
During shaping, gentleness is paramount to preserve the trapped air bubbles; stretching the dough by hand is preferred over rolling. Finally, baking the pizza on a preheated, very hot surface like a pizza steel provides the necessary thermal shock for maximum oven spring and a light, airy crust. Troubleshooting issues like flatness or toughness involves reviewing fermentation, hydration, handling, and baking temperature. Experimenting with different flours, adding flavor infusions, and choosing the right baking surface can further enhance your results. By consistently applying these techniques, you can reliably achieve a wonderfully light, open, and delicious airy pizza crust.
Frequently Asked Questions
How can I achieve a truly airy pizza crust at home?
To achieve an airy crust, focus on high hydration dough, proper fermentation time (cold fermentation helps!), and using high-protein flour.
What role does hydration play in creating an airy pizza crust?
Higher hydration doughs, typically 70% or more water, create more steam during baking. This steam helps to create large air pockets and a lighter, more open crumb structure.
Are there specific kneading techniques that promote airiness in pizza dough?
Gentle kneading is key. Over-kneading can toughen the dough. Focus on developing gluten strength without excessive force, using methods like stretch and folds during bulk fermentation.
How does fermentation time affect the airiness of my pizza crust?
Long, slow fermentation, especially cold fermentation in the refrigerator, allows for better flavor development and a more relaxed gluten structure. This results in a lighter, more airy crust.
What type of flour is best for achieving an airy pizza crust?
Use a high-protein flour, such as bread flour or a specialized pizza flour. Higher protein content helps to build a stronger gluten network that can trap more air and create a desirable airy texture.
Final Reflection: The Pursuit of the Perfect Airy Crust
The quest for the airy pizza crust transcends mere culinary technique; it's a journey into the heart of texture and flavor, a pursuit relevant to every home cook seeking to elevate their pizza game. The techniques explored in this article – from meticulous dough hydration to precise fermentation control – are not just steps in a recipe, but keys to unlocking a truly transcendent pizza experience. The difference between a dense, leaden crust and one that practically melts in your mouth, light as air, is profound.
The impact of achieving that perfect airy crust extends beyond individual satisfaction. It's a testament to the power of understanding fundamental principles, a reminder that even seemingly simple dishes can be elevated through careful attention to detail. The simplest things are often the most extraordinary.
This quote resonates deeply with the process of crafting an airy pizza crust; the seemingly simple act of mixing flour and water becomes a journey of precision and patience, resulting in something truly remarkable. The pursuit of this ideal has shaped culinary trends, inspiring countless variations and innovations in pizza-making worldwide.
Now, consider your own pizza-making journey. What techniques resonated most with you? What challenges did you encounter, and how did you overcome them? Don't be afraid to experiment, to push the boundaries of your own understanding, and to strive for that perfect airy crust. Each attempt, each slight adjustment, brings you closer to mastering this culinary art. Embrace the process, savor the results, and remember that the journey itself is as rewarding as the destination – a perfectly airy, delicious pizza.
Unlock Your Perfect Pizza Crust: Airy, Light, and Delicious!
Thanks for taking the time to explore the art of crafting the perfect pizza crust! You've now unlocked some advanced techniques to achieve that airy, light texture you've always dreamed of. Ready to put your new skills to the test?
- Bake your masterpiece: Use your newfound knowledge to create your own airy pizza tonight! Experiment with different flours and hydration levels to find your perfect recipe.
- Share your success: Show off your amazing creation on social media! Tag #BakeWithEasePizza and inspire others to achieve their own pizza perfection.
- Join the community: Head over to our forums to share your experiences, ask questions, and connect with fellow baking enthusiasts – let’s elevate our pizza game together!
What unique ingredient or technique will you try next to perfect your airy pizza crust?