
How to Store Dough: From Cookie Dough to Bread Dough, Keep it Fresh

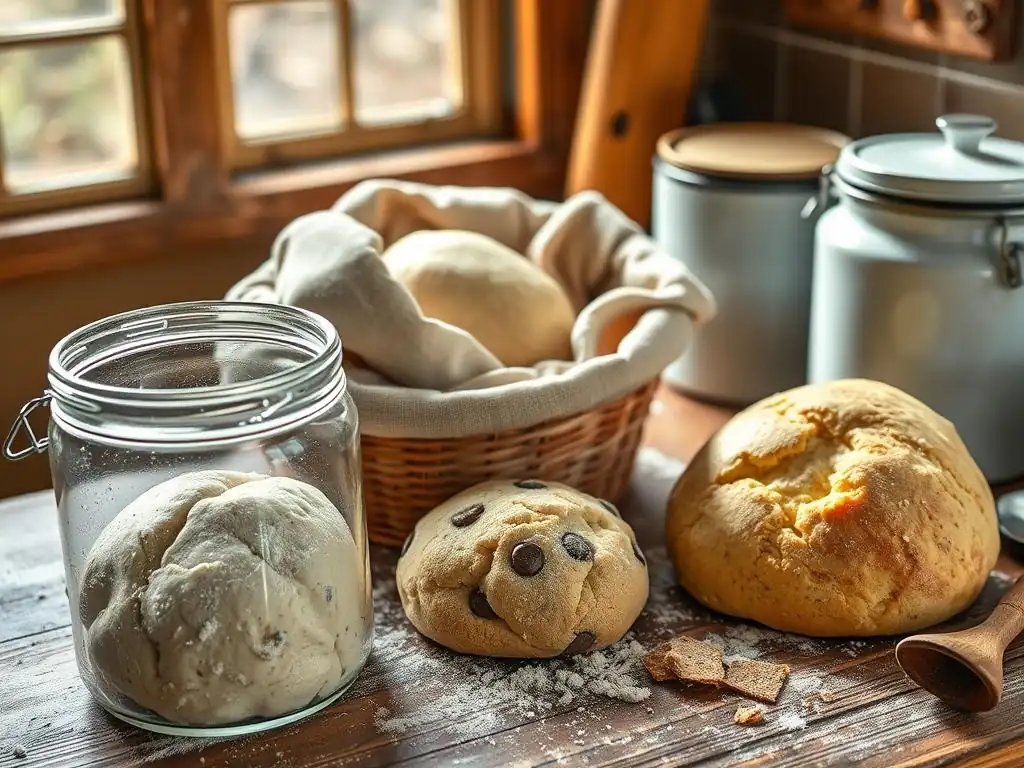
Welcome to BakeWithEase, your trusted companion on your baking journey! Ever wondered if you're truly unlocking the full potential of your precious dough? This week, we delve into a crucial, yet often overlooked, aspect of baking: storing bread dough properly. Discover the secrets to maintaining freshness and flavor, ensuring your next bake is your best yet. Ready to transform your baking game? Let's get started!
- How to Store Dough: From Bread to Cookies, Keep it Fresh
- Introduction: Mastering Dough Storage for Baking Success
- Storing Bread Dough Properly: A Comprehensive Guide
- Storing Cookie Dough Effectively: Preventing Spreading and Texture Changes
- Storing Other Types of Dough: Pie Dough and Pizza Dough
- Troubleshooting Dough Storage Problems
- Tips for Maximizing Dough Freshness and Flavor
- Conclusion: The Guide to Perfect Dough Storage
-
Frequently Asked Questions
- How long can I store bread dough in the refrigerator?
- What's the best way to prevent cookie dough from drying out in the fridge?
- Can I freeze bread dough, and if so, for how long?
- What type of container is best for storing bread dough in the refrigerator?
- What is the best way to thaw frozen bread dough?
- Final Reflection: The Enduring Power of Properly Stored Dough
- Unlock Your Baking Potential: Fresher Dough, Better Results!
Introduction: Mastering Dough Storage for Baking Success
Baking is a journey of transforming simple ingredients into delicious creations. Whether you're crafting a rustic loaf of bread or a batch of classic chocolate chip cookies, the quality of your final product often starts with the dough. Learning how to properly store dough is a fundamental skill that can save you time, reduce waste, and even improve the flavor and texture of your baked goods. It allows for flexibility in your baking schedule, enabling you to prepare components in advance and bake when it's most convenient.
Proper dough storage isn't just about preventing spoilage; it's about controlling the dough's development. For yeast-leavened doughs like bread or pizza dough, refrigeration slows fermentation, allowing flavors to deepen through a process called cold proofing. For doughs like cookie or pie dough, chilling helps solidify fats, which is crucial for achieving the desired texture and preventing excessive spread during baking. Mastering these techniques ensures your dough is in peak condition when it hits the oven, leading to more consistent and satisfying results every time you bake.
Why Proper Dough Storage Matters
Properly storing dough is paramount for several reasons, directly impacting the success of your baking endeavors. Firstly, it controls the activity of leavening agents, whether it's yeast in bread dough or baking soda/powder in cookies. For yeast doughs, refrigeration slows yeast activity significantly, preventing over-proofing, which can lead to a dense, poorly risen loaf. For chemically leavened doughs, chilling solidifies fats, which helps maintain the dough's structure and prevents premature spreading in the oven, resulting in cookies that hold their shape and pies with flaky crusts.
Beyond controlling leavening and structure, correct storage is vital for food safety and flavor development. Leaving doughs at room temperature for too long can encourage the growth of undesirable bacteria. Refrigeration keeps dough at a safe temperature, typically below 4°C (40°F), drastically slowing bacterial growth. Furthermore, especially in bread dough, a slow, cold fermentation in the refrigerator allows enzymes to break down starches into sugars and proteins into amino acids, contributing to a more complex flavor profile and improved crust browning during baking. Storing bread dough properly is thus key to both safety and enhanced taste.
Understanding Different Dough Types and Their Storage Needs
Different types of dough have distinct compositions and reactions to temperature, dictating their specific storage requirements. Yeast doughs, such as those for bread, pizza, and some enriched rolls, rely on live yeast to produce carbon dioxide for leavening. Their storage needs revolve around managing this yeast activity. Refrigeration slows the yeast down for short-term storage (up to a few days) and cold fermentation, while freezing essentially puts the yeast into hibernation for longer-term storage (weeks to months). Proper sealing is crucial to prevent drying and freezer burn.
Cookie dough and pie dough, on the other hand, are typically chemically leavened or rely on steam/fat for lift and texture. Their storage needs focus on keeping fats solid and preventing moisture loss. High butter content means these doughs benefit significantly from chilling, which firms up the fat, contributing to flakiness in pies and preventing excessive spread in cookies.
They can be refrigerated for up to a week or frozen for several months. Unlike yeast doughs, they don't require proofing before storage, but they do need to be well-wrapped to avoid absorbing odors and drying out. Understanding these fundamental differences is the first step to mastering how to store dough of any type effectively.
Storing Bread Dough Properly: A Comprehensive Guide
Storing bread dough properly is a fundamental skill for any home baker looking to bake on their own schedule or develop deeper flavors through cold fermentation. Whether you've mixed a large batch or simply want to bake a loaf later, knowing the best techniques ensures your dough remains viable and produces a delicious loaf. The primary goals are to control yeast activity and prevent the dough from drying out.
The methods for storing bread dough properly vary depending on how long you plan to store it. Short-term storage, typically up to 3-4 days, is best handled in the refrigerator, allowing for beneficial cold proofing. Longer-term storage, extending for several weeks or even a couple of months, requires freezing. Both methods require careful preparation and appropriate containers or wrapping to maintain the dough's quality.
The Importance of Proofing Before Storing Bread Dough
Proofing is the process where yeast ferments sugars, producing carbon dioxide that makes the dough rise. Before storing bread dough, particularly when refrigerating for short periods, it's generally recommended to let it undergo an initial bulk fermentation (the first rise) at room temperature. This allows the yeast to become active and begin developing flavor and structure. A typical bulk fermentation might last anywhere from 1 to 3 hours, depending on the recipe, ambient temperature, and yeast activity, until the dough has increased significantly in size, often doubling.
Once the dough has completed its bulk fermentation and has been shaped (or is ready to be shaped), it can then be placed in the refrigerator for a slower, secondary proofing process. This cold proofing, which occurs while the dough is stored, significantly enhances the flavor and texture of the final baked bread. The slow fermentation breaks down complex carbohydrates, leading to more aromatic compounds and a better crust. Skipping the initial room-temperature bulk fermentation and immediately refrigerating can result in a less flavorful loaf, as the yeast activity is too slow initially to kickstart complex flavor development.
Methods for Storing Bread Dough: Refrigeration vs. Freezing
When considering storing bread dough properly, the two primary methods are refrigeration and freezing, each suited for different durations and purposes. Refrigeration is ideal for short to medium-term storage, typically ranging from overnight up to about 3 or 4 days. This method doesn't halt yeast activity entirely but slows it down considerably, allowing for cold fermentation. This slow process contributes significantly to the depth of flavor and the development of the dough's structure, often resulting in a better-tasting loaf with a more complex crumb structure.
Freezing, on the other hand, is the best option for long-term storage, preserving the dough for several weeks or even up to two months. Freezing essentially pauses yeast activity by dropping the temperature below -18°C (0°F). While freezing is effective for preservation, it can impact the yeast's viability over time, potentially leading to a slightly less vigorous rise after thawing compared to fresh or refrigerated dough. Therefore, proper preparation and packaging are critical when freezing to minimize damage to the yeast cells and prevent freezer burn, ensuring the dough remains usable.
Refrigerating Bread Dough: Slowing Down the Proofing Process
Refrigerating bread dough is a technique widely used by bakers to manage their schedule and enhance flavor. Placing the dough in the refrigerator, typically at temperatures around 4°C (40°F), drastically slows the metabolic rate of the yeast. Instead of completing a rapid proof in an hour or two at room temperature, the dough undergoes a slow, controlled fermentation over many hours. This extended fermentation allows enzymes within the dough to work more effectively, breaking down starches into sugars and proteins into amino acids, which leads to a more nuanced flavor profile and improved crust browning during baking.
This method is perfect for preparing dough the night before a morning bake or for managing multiple baking projects over a few days. Dough refrigerated after its initial bulk fermentation will continue to rise slowly in the cold.
It's essential to use a container large enough to accommodate this slow expansion, as the dough can still double or even triple in size over 24-48 hours in the fridge. While it slows the proofing, it doesn't stop it completely, so dough left too long (beyond 3-4 days for most standard doughs) can still over-proof, potentially resulting in a less effective rise when baked.
Freezing Bread Dough: A Long-Term Storage Solution
Freezing bread dough is an excellent strategy for extending its shelf life significantly, making it possible to bake fresh bread weeks or months after preparing the dough. When dough is frozen at temperatures typically at or below -18°C (0°F), the water within the dough turns to ice crystals, and the yeast activity is essentially halted. This effectively preserves the dough's state at the time of freezing, preventing further fermentation or spoilage. It's a practical solution for busy schedules or for making large batches of dough at once.
However, freezing can cause some damage to the yeast cells and the gluten structure due to ice crystal formation. To minimize this impact, it's best to freeze dough that is relatively young – meaning it has completed its initial bulk fermentation but hasn't fully proofed.
Freezing dough that is slightly under-proofed can help compensate for the potential loss in yeast vigor during the freezing and thawing process. Proper packaging is also paramount to protect the dough from freezer burn, which is moisture loss that results in dry, tough spots on the dough's surface, making it difficult to work with and affecting the final texture of the bread.
Step-by-Step Guide: Refrigerating Bread Dough
Storing bread dough properly in the refrigerator is a straightforward process that offers great flexibility. This method is ideal for cold fermentation, enhancing flavor. Follow these steps for the best results:
Preparing the Dough for Refrigeration
After your bread dough has completed its initial bulk fermentation (first rise) at room temperature, it's ready to be prepped for the fridge. Gently deflate the dough by turning it out onto a lightly floured surface and folding it a few times. This helps redistribute the yeast and gases. If your recipe calls for shaping before the final proof, shape the dough into its intended form (e.g., a loaf, rolls, pizza crust). If you plan to shape it later, you can store the dough as a single mass after deflating it.
Once shaped or deflated, lightly coat the surface of the dough ball or shaped loaf with a neutral oil, such as vegetable or olive oil. A thin layer of oil helps prevent a dry skin from forming on the dough's surface during its time in the cold. Use about a teaspoon or two of oil for a standard loaf-sized batch of dough, ensuring it's evenly distributed over the entire exposed surface. This simple step is crucial for maintaining the dough's moisture and elasticity.
Choosing the Right Container for Refrigerated Dough
Selecting the appropriate container is key when storing bread dough properly in the refrigerator to accommodate its potential expansion. Choose an airtight container that is at least double the volume of your dough. Dough stored in the fridge will continue to rise slowly, and an undersized container can lead to the dough pushing off the lid or overflowing, creating a mess and exposing the dough to air. Plastic or glass food storage containers with tight-fitting lids work well.
Alternatively, you can place the lightly oiled dough into a large bowl and cover it tightly with plastic wrap. Ensure the plastic wrap is pressed directly onto the surface of the dough or create a dome of plastic wrap over the bowl, sealing the edges completely against the rim. Using a dedicated container with a lid is often easier as it provides a more reliable airtight seal and is less prone to accidental puncturing or loosening than plastic wrap.
How Long Can You Refrigerate Bread Dough?
The typical recommended time for storing bread dough properly in the refrigerator is between 12 hours and 3 or 4 days. This range allows for beneficial cold fermentation to develop flavor and structure. Dough refrigerated for just 12 hours will have some enhanced flavor, while dough left for 48-72 hours will often develop a more complex, slightly tangy flavor and a better crumb structure, especially for lean doughs like sourdough or rustic loaves.
While some sources might suggest refrigerating for up to 5-7 days, the yeast activity and gluten structure can begin to degrade after about 4 days for many standard doughs. Beyond this point, the dough may become overly acidic, lose elasticity, and result in a loaf with a poor rise and potentially unpleasant flavor. Always check the dough's condition – if it smells strongly alcoholic or looks deflated and grey, it might be past its prime.
Step-by-Step Guide: Freezing Bread Dough
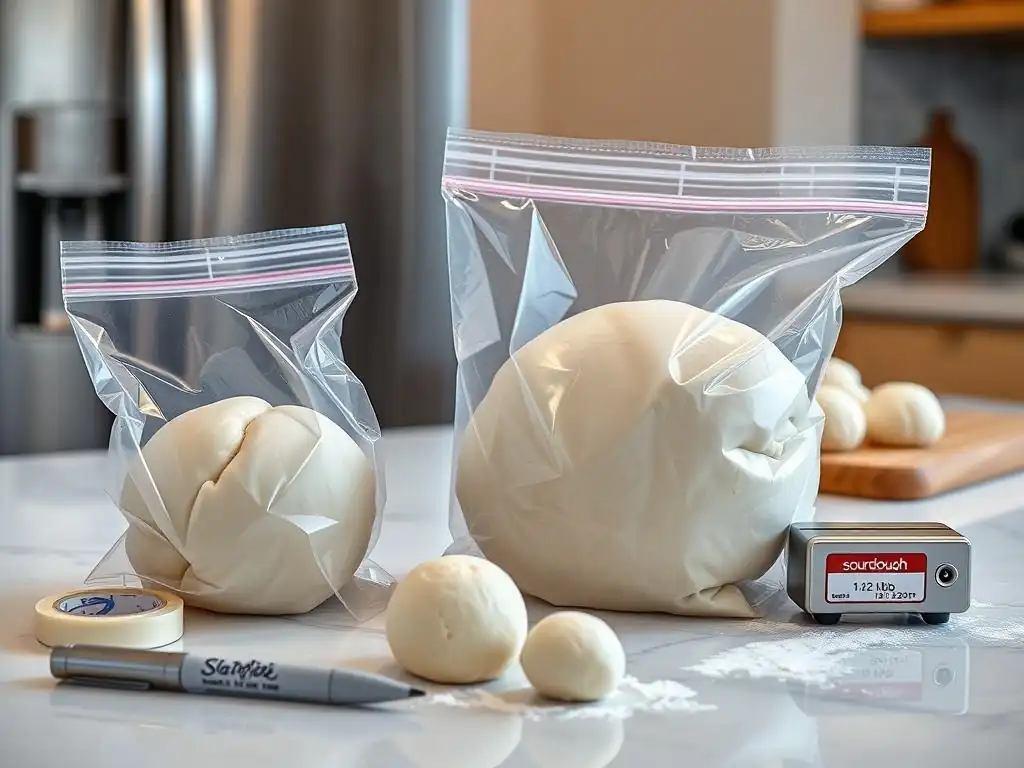
Freezing bread dough allows you to preserve it for much longer periods, offering maximum flexibility. Follow these steps for successfully storing bread dough properly in the freezer:
Preparing the Dough for Freezing
Just like with refrigeration, start with dough that has completed its initial bulk fermentation (first rise). Punch down the dough gently to deflate it. For freezing, it's often best to shape the dough into the form you plan to bake it in – whether it's a loaf, pizza crust, or individual rolls. Shaping before freezing helps maintain the desired structure and makes the dough easier to handle once thawed. Avoid freezing dough that is overly proofed, as the yeast may not have enough vigor left to provide a good rise after thawing.
Once shaped, place the dough on a baking sheet lined with parchment paper. Place the entire baking sheet into the freezer until the dough is solid, typically 2-4 hours depending on the size of the dough pieces and your freezer's temperature. This step is called flash freezing and prevents the dough pieces from sticking together when you package them, making it easy to grab just the amount you need later. Ensure the dough is completely frozen solid before moving to the next step.
Best Practices for Wrapping and Packaging Frozen Dough
Effective wrapping is crucial to protect frozen bread dough from freezer burn and absorption of freezer odors. After flash freezing, remove the solid dough from the baking sheet. Wrap each piece of dough tightly in plastic wrap, pressing out as much air as possible. A double layer of plastic wrap is recommended for extra protection.
Following the plastic wrap, wrap the dough again in a layer of aluminum foil or place it in a heavy-duty freezer bag, again pressing out excess air before sealing. This double layer of protection provides an excellent barrier against moisture loss and air exposure, which are the primary causes of freezer burn. Proper packaging ensures that when you thaw the dough, it is still pliable and hasn't developed dry, tough spots on its surface.
How Long Can You Freeze Bread Dough?
When storing bread dough properly in the freezer using the recommended double-wrapping method, it can maintain good quality for about 1 to 2 months. While it might technically be safe to eat after this period, the viability of the yeast gradually decreases, and the gluten structure can weaken due to ice crystal formation. This can result in a loaf that doesn't rise as well and may have a less desirable texture.
For optimal results – meaning a good rise and texture comparable to fresh dough – aim to use your frozen bread dough within the first month. Beyond two months, you might notice a significant decrease in the dough's ability to rise during proofing and baking. Labeling your frozen dough with the date it was made and frozen is a simple but essential step to help you keep track of its age and ensure you use it within its peak quality window.
Thawing Frozen Bread Dough: Bringing It Back to Life
Thawing frozen bread dough requires patience and the right technique to reactivate the yeast and restore the dough's structure. Improper thawing can lead to dough that is sticky, dense, or unable to rise properly. The goal is to bring the dough back to a workable temperature without shocking the yeast or creating excessive moisture.
The safest and most recommended method for thawing frozen bread dough is in the refrigerator. This slow thawing process minimizes damage to the yeast cells and gluten structure. Once thawed, the dough will need time to proof again before baking, as the freezing process puts the yeast into dormancy.
Safe Thawing Techniques for Bread Dough
The best way to thaw frozen bread dough is slowly in the refrigerator. Remove the dough from the freezer and place it, still in its wrapping or container, in the refrigerator. A standard-sized loaf of dough typically takes about 12-24 hours to thaw completely in the fridge. Smaller items like rolls or pizza dough might take 6-12 hours. This slow, cold environment allows the ice crystals to melt gradually, minimizing damage to the dough's structure.
Once thawed in the refrigerator, unwrap the dough and place it in a lightly oiled bowl or on a baking sheet (depending on its shape), covered loosely with plastic wrap or a clean towel. Let it sit at room temperature for 1-2 hours to warm up slightly and begin its final proofing. Alternatively, if you're in a bit more of a hurry, you can place the frozen dough (unwrapped and in a bowl) in a warm, draft-free place at room temperature.
This will take significantly less time, perhaps 3-5 hours for a loaf, but can sometimes lead to uneven thawing or excessive surface moisture. Avoid using the microwave or warm water baths, as rapid heating can kill the yeast and damage the dough.
Adjusting Baking Time After Freezing
After thawing and proofing frozen bread dough, the baking process itself generally remains the same as baking fresh dough. The required oven temperature and initial baking time should follow your recipe's instructions. However, because frozen dough can sometimes behave slightly differently due to potential minor damage to the yeast or gluten, it's wise to pay closer attention during the bake.
Keep an eye on the dough's browning and internal temperature. Use an instant-read thermometer to check for doneness; most lean bread is done when the internal temperature reaches around 93-99°C (200-210°F). If the crust seems to be browning too quickly before the interior is cooked, you can loosely tent the loaf with aluminum foil. While the time in the oven might be comparable, the rate of rise and browning can occasionally be slightly different, so visual cues and temperature checks are your best guide.
Storing cookie dough properly is a fantastic way to have fresh-baked cookies on demand and can even improve the cookie's texture and flavor. Unlike bread dough, where fermentation is key, the primary goals when storing cookie dough are to keep the fats chilled and firm, prevent the dough from drying out, and allow flavors to meld.
Chilling cookie dough, whether through refrigeration or freezing, is actually a crucial step in many recipes, not just for storage but for achieving the desired cookie texture. Cold dough spreads less in the oven, resulting in thicker cookies. It also allows dry ingredients like flour to fully hydrate and flavors to deepen, leading to a more uniform texture and richer taste.
The science behind storing cookie dough effectively primarily revolves around the behavior of fats and the hydration of ingredients. Most cookie doughs contain a significant amount of butter or other solid fats. At room temperature, these fats are soft, which causes dough to spread rapidly when heated in the oven. Chilling the dough solidifies the fats. When the chilled dough enters a hot oven, the fats melt more slowly, allowing the cookie structure to set before excessive spreading occurs. This results in cookies that are thicker and hold their shape better.
Furthermore, chilling allows the liquid ingredients in the dough (like eggs and vanilla extract) more time to hydrate the dry ingredients (flour, sugar, leavening). This hydration process reduces the amount of free water in the dough, which also contributes to less spread and a more even texture. The flavors in the dough, particularly from ingredients like vanilla, chocolate, and spices, also have time to meld and deepen during chilling, leading to a more complex and satisfying taste.
Refrigerating cookie dough is the standard method for short-term storage and is often a required step in recipes for achieving the best texture. Chilling the dough in the refrigerator, typically at 4°C (40°F), solidifies the fats and allows flavors to develop. This process, often recommended for at least 30 minutes to an hour before baking, can be extended for storage up to a week.
Properly refrigerated cookie dough will result in cookies that spread less during baking, leading to a thicker, chewier texture. The flavors also become more pronounced. For example, chilling chocolate chip cookie dough overnight can significantly enhance the chocolate flavor and result in a cookie with a better balance of chewiness and crispness.
Best Practices for Refrigerating Cookie Dough
When refrigerating cookie dough for storage, proper preparation and packaging are key to maintaining quality. After mixing, gather the dough and shape it into a disc or log, depending on how you plan to use it. Discs are good if you'll be rolling and cutting the dough, while logs are perfect for slice-and-bake cookies. Shaping it before chilling makes it much easier to handle when cold and firm.
Wrap the shaped dough tightly in plastic wrap. Ensure there are no gaps where air can reach the dough, as this will cause drying. For longer refrigeration (more than a couple of days), consider a second layer of plastic wrap or placing the wrapped dough in an airtight container or resealable bag to provide extra protection against drying and absorbing refrigerator odors. Store in the main body of the refrigerator, not the door, where temperatures can fluctuate more.
Preventing Cookie Dough from Drying Out
Preventing cookie dough from drying out during refrigeration is essential for maintaining its texture and workability. Dry dough can become crumbly and difficult to scoop or roll, and can result in dry, tough cookies. The primary culprit for drying is exposure to air.
The best defense against drying is airtight packaging. As mentioned, wrapping the shaped dough tightly in at least one layer of plastic wrap, ensuring no surface is exposed, is the first step. For storage longer than 24-48 hours, adding a second layer of wrapping, such as another layer of plastic wrap, aluminum foil, or placing the wrapped dough inside an airtight container or resealable freezer bag, provides an extra barrier. Always ensure the container or bag is sealed completely. Checking the seal is a simple step that makes a big difference in preserving moisture.
Freezing cookie dough is a fantastic solution for having freshly baked cookies available whenever a craving strikes or for preparing ahead for events. Freezing halts the activity of leavening agents and solidifies fats completely, preserving the dough's state for extended periods. This allows you to bake just one or two cookies at a time directly from frozen.
Properly frozen cookie dough can be stored for up to 3-6 months, depending on the type of dough and packaging. While technically safe beyond this, the quality may decline, potentially leading to changes in texture or flavor. Freezing is particularly convenient for drop cookies, where you can freeze pre-portioned balls of dough.
Freezing Cookie Dough Balls vs. Logs
You have a couple of main options when freezing cookie dough: freezing it as logs or as individual balls. Freezing as logs is ideal for slice-and-bake cookies like shortbread or sugar cookies. Shape the dough into cylinders of your desired diameter, wrap them tightly as described for refrigeration (plastic wrap then foil or bag), and freeze until solid. When ready to bake, simply remove from the freezer, let it sit for 10-15 minutes to soften slightly (enough to slice), slice into rounds, and bake.
Freezing as individual balls is perfect for drop cookies like chocolate chip, oatmeal, or peanut butter cookies. Scoop the dough into uniform balls using a cookie scoop or spoons and place them on a baking sheet lined with parchment paper. Flash freeze the balls until solid (about 1-2 hours). Once frozen, transfer the balls to a heavy-duty resealable freezer bag or airtight container. This method allows you to easily grab and bake just the number of cookies you need without thawing a whole batch.
Baking from Frozen: Tips for Perfect Cookies
Baking cookies directly from frozen dough balls is incredibly convenient and often results in a cookie that is slightly thicker than one baked from thawed dough, as the cold center takes longer to melt and spread. Simply place the frozen cookie dough balls on a baking sheet lined with parchment paper, spacing them according to your recipe.
You will need to increase the baking time compared to baking with room-temperature or chilled dough. The exact increase varies depending on the size of the cookie and your oven, but a general guideline is to add 2-5 minutes to the original baking time. For example, if your recipe calls for baking for 10-12 minutes, try baking frozen dough for 12-17 minutes. The cookies are done when the edges are golden brown and the centers look set. Monitor the first batch closely to determine the correct timing for your oven and cookie size.
Storing Other Types of Dough: Pie Dough and Pizza Dough
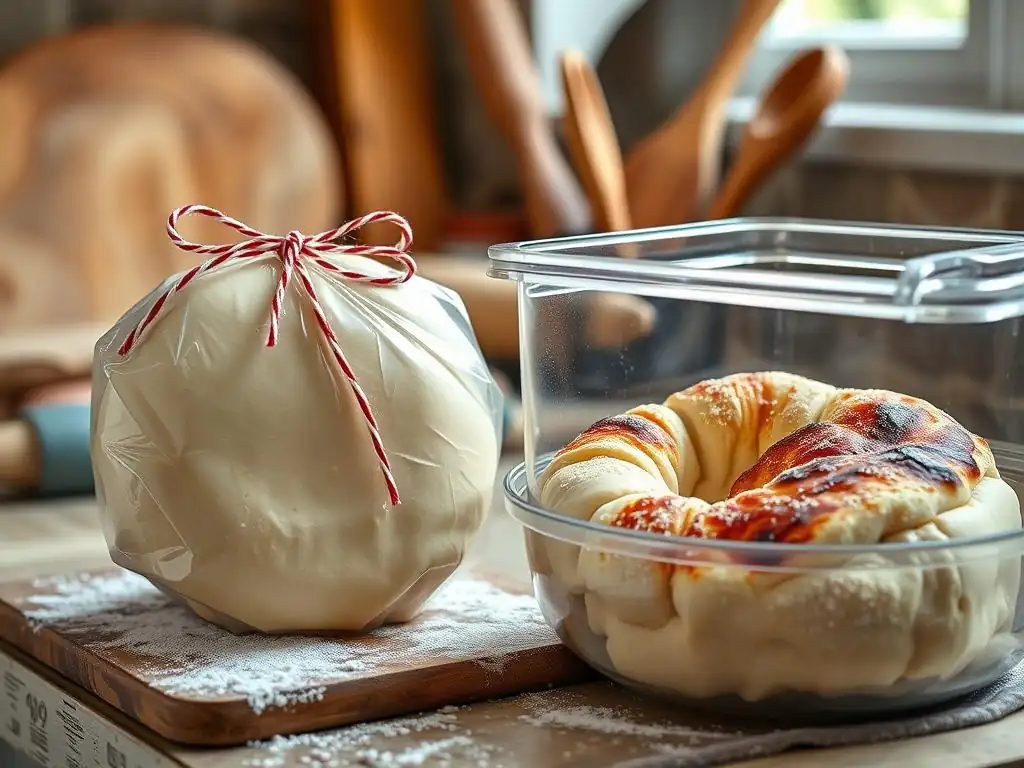
Beyond bread and cookies, other common doughs like pie dough and pizza dough also benefit significantly from proper storage techniques. Each has unique characteristics that influence the best way to store them to maintain their desired texture and performance.
Storing these doughs correctly allows for flexibility in meal preparation and ensures the best possible outcome when baking. Whether you're prepping pie crusts for a holiday or making pizza dough ahead for a weeknight dinner, knowing how to store these doughs is invaluable.
Storing Pie Dough: Keeping it Flaky and Tender
Pie dough relies on layers of fat (usually butter or shortening) separated by flour to create its signature flaky texture. The key to maintaining this flakiness during storage is to keep the fat cold and solid and prevent the dough from drying out. Warm dough or dough that has dried out will result in a tough, less flaky crust.
Chilling pie dough before rolling is typically a required step in recipes to firm up the fat, making it easier to work with and promoting flakiness. Extending this chilling time allows for convenient storage.
Refrigerating Pie Dough Discs
Refrigerating pie dough is the most common storage method for short-term use, typically up to 3-4 days. After preparing your pie dough, gather it into a ball, flatten it into a disc about 1-inch thick, and wrap it tightly in plastic wrap. Shaping it into a disc makes it easier to roll out later when it's cold and firm.
Ensure the plastic wrap is sealed completely around the disc to prevent any air exposure, which can lead to a dry, cracked dough. Store the wrapped disc in the refrigerator. When you're ready to use it, remove the dough from the fridge and let it sit at room temperature for 15-30 minutes until it's pliable enough to roll without cracking, but still cold.
Freezing Pie Dough for Future Use
Freezing pie dough is an excellent option for longer storage, allowing you to have pastry ready whenever inspiration strikes. Properly wrapped pie dough can be frozen for up to 6 months. Freezing doesn't significantly harm the quality or flakiness of pie dough because its structure relies on fat layers, not live yeast.
To freeze, prepare and wrap the dough disc as you would for refrigeration (tightly in plastic wrap), then add an extra layer of protection like a freezer bag or aluminum foil to prevent freezer burn. Label and date the package. To use, thaw the frozen disc overnight in the refrigerator. Once thawed, let it sit at room temperature for 15-30 minutes before rolling, just as you would with refrigerated dough. You can also freeze rolled-out pie crusts carefully folded or placed in pie plates.
Storing Pizza Dough: Achieving Optimal Texture
Pizza dough, like bread dough, is a yeast-leavened dough, but its storage needs often focus on developing a chewy texture and enhanced flavor through cold fermentation. Storing pizza dough properly can significantly improve the quality of your homemade pizza crust.
Refrigeration is particularly beneficial for pizza dough, allowing a slow fermentation that develops complex flavors and a desirable chewy texture. Freezing is also a viable option for longer storage.
Refrigerating Pizza Dough for Enhanced Flavor
Refrigerating pizza dough is a highly recommended technique for developing superior flavor and texture. After the initial mixing and kneading, place the dough ball in a lightly oiled bowl large enough to allow it to double in size. Turn the dough to coat it in oil, then cover the bowl tightly with plastic wrap.
Place the covered dough in the refrigerator. It will undergo a slow cold fermentation. You can refrigerate pizza dough for at least 24 hours for noticeable flavor improvement, and it can be stored this way for up to 3-5 days. The longer it chills, the more complex the flavor will become. When ready to use, remove the dough from the fridge 1-2 hours before shaping to allow it to come to room temperature and become more pliable.
Freezing Pizza Dough Balls
Freezing pizza dough is a convenient way to have dough ready for impromptu pizza nights. After the initial bulk fermentation, divide the dough into individual pizza-sized balls. Lightly oil each ball and place them on a parchment-lined baking sheet. Flash freeze the dough balls until solid (about 2-3 hours).
Once frozen solid, transfer the dough balls to a heavy-duty freezer bag or airtight container. Press out as much air as possible before sealing. Properly packaged, frozen pizza dough can be stored for 1-2 months. To use, thaw the dough ball overnight in the refrigerator, then let it sit at room temperature for 1-2 hours before shaping and baking. You can also thaw at room temperature for 3-5 hours, but watch for excessive rising.
Troubleshooting Dough Storage Problems
Even with the best practices for storing dough properly, you might occasionally encounter issues. Understanding common problems and how to troubleshoot them can save your dough and your bake.
Problems like dough drying out, over-proofing, or failing to rise after thawing are frustrating but often fixable or avoidable with the right knowledge.
Common Dough Storage Mistakes and How to Avoid Them
Several common mistakes can compromise the quality of stored dough. One of the most frequent is inadequate sealing, leading to the dough drying out. Another is storing yeast doughs for too long in the refrigerator, resulting in over-proofing and potential degradation. When storing bread dough properly, ensuring an airtight environment is paramount.
Failing to prepare dough correctly before storage, such as not deflating yeast dough or not shaping cookie/pie dough, can also lead to issues with handling and texture later. Lastly, improper thawing techniques for frozen dough, like using high heat, can kill the yeast or damage the gluten structure.
Dough Drying Out
Dough drying out during storage is usually a result of exposure to air. This is particularly common in refrigerators, which have very dry environments. A dry surface on dough can form a tough skin that inhibits rising and makes the dough difficult to work with.
To prevent this, always use airtight containers or wrap the dough very tightly in plastic wrap, ensuring no surface is exposed. For longer storage, especially in the freezer, use a double layer of wrapping (plastic wrap plus foil or a freezer bag). If you find your dough has developed a slight skin, you might be able to knead a tiny amount of water or oil into it to rehydrate it, but severely dried dough may be unsalvageable.
Dough Over-Proofing
Over-proofing is a risk when storing yeast doughs, particularly in the refrigerator for extended periods. Over-proofed dough will look excessively large, potentially collapse, smell strongly of alcohol, and may feel very fragile or sticky. The yeast has exhausted its food source (sugars) and may have produced too much acid, weakening the gluten structure.
To avoid over-proofing when storing bread dough properly in the fridge, monitor it. While it can last 3-4 days, check it after 48 hours. If it looks significantly expanded and bubbly, it might be reaching its limit. For standard doughs, aim to use them within 72 hours of refrigeration. If you know you won't use the dough within the recommended refrigeration time, it's better to freeze it earlier.
Dough Not Rising After Thawing
A common issue with frozen bread dough is that it doesn't rise well after thawing. This can happen if the dough was over-proofed before freezing, if it was frozen for too long (degrading the yeast), or if it was thawed improperly (killing the yeast).
Ensure you freeze dough that is relatively young (after bulk fermentation but before full proof). Use frozen dough within 1-2 months for best results. Always thaw dough slowly in the refrigerator. If your thawed dough still seems sluggish, try placing it in a slightly warmer spot for a longer period during the final proof to encourage the yeast. If it still doesn't rise, the yeast may be dead, and the dough might only be usable for flatbreads or crackers.
Excessive spreading is a common complaint when baking cookies, often related to dough temperature and composition, but storage plays a role. Warm dough spreads more. Using melted butter instead of softened butter, or having an imbalance in wet-to-dry ingredients can also contribute.
Ensure your cookie dough is properly chilled before baking. Refrigerate dough (shaped into balls or logs) for at least 30 minutes, preferably longer (1-2 hours or even overnight) to ensure the fats are solid. If baking from frozen, the dough is already optimally chilled. If your recipe consistently yields cookies that spread too much despite chilling, you might try adding a tablespoon or two of extra flour per cup of flour in the recipe in future batches, as this can absorb excess moisture and help maintain structure.
Tips for Maximizing Dough Freshness and Flavor
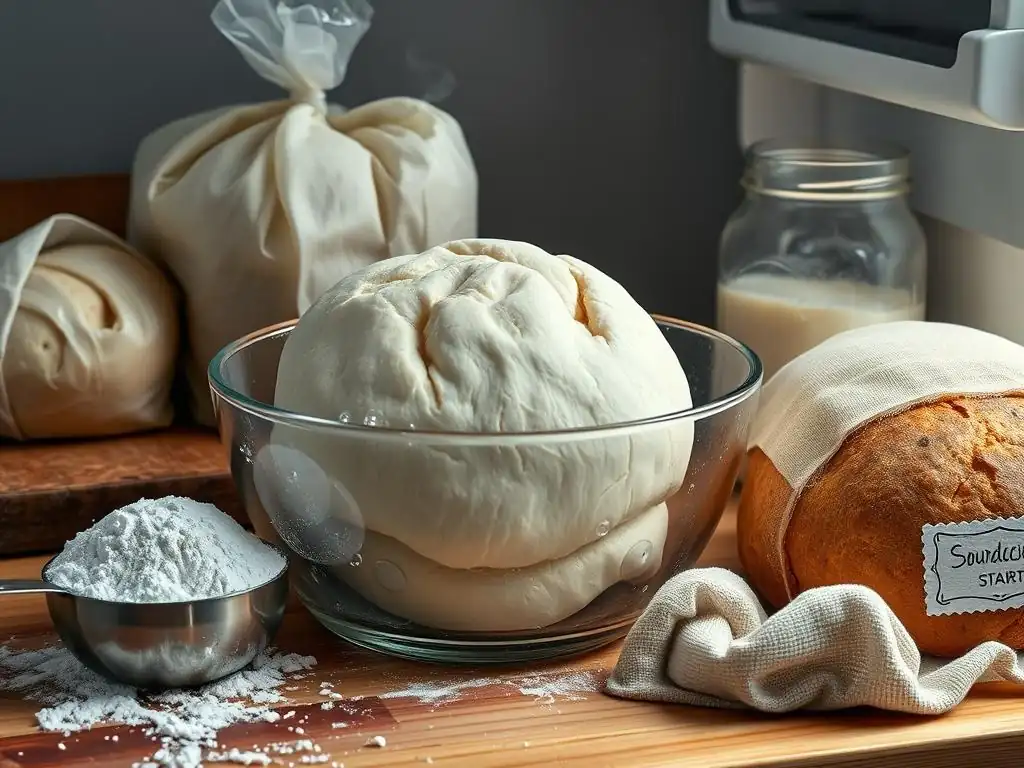
Beyond the basic storage techniques, a few extra tips can help ensure your stored dough remains as fresh and flavorful as possible, leading to better baked goods. These practices apply whether you are storing bread dough properly or keeping cookie dough on hand.
Focusing on ingredient quality, proper sealing, and clear labeling are simple steps that make a significant difference in the outcome of your stored dough.
Using High-Quality Ingredients
The quality of your baked goods starts with the quality of your ingredients, and this is especially true when storing dough. High-quality flour, fresh yeast (if using), and good butter not only contribute to better flavor and texture initially but also hold up better during storage. For instance, fresh yeast is more resilient to the stresses of freezing than old yeast.
Butter with a higher fat content (often labeled European-style) can also contribute to flakier pie crusts and richer cookies, and its structure holds up well to chilling and freezing. Using fresh, unexpired ingredients ensures your dough has the best possible starting point for both initial quality and longevity in storage.
Proper Sealing Techniques
As highlighted throughout this guide, proper sealing is non-negotiable for successful dough storage. Exposure to air is the enemy, leading to drying, oxidation, and absorption of off-flavors from the refrigerator or freezer.
Whether you're wrapping dough in plastic wrap, using airtight containers, or placing it in freezer bags, ensure the seal is complete and tight. For plastic wrap, press out any air bubbles and ensure edges are firmly sealed. For containers and bags, make sure lids are snapped shut or zippers are fully closed, squeezing out excess air before sealing. Investing in good quality storage materials designed for freezing is particularly important for long-term storage.
Labeling and Dating
A simple but crucial step in managing stored dough is proper labeling and dating. It's easy to forget when you made a batch of dough or what type it is, especially if you store multiple kinds.
Use a permanent marker to clearly write the type of dough (e.g., "Sourdough Bread Dough," "Chocolate Chip Cookie Dough"), the date it was made, and the date it was stored (if different). For frozen items, also note the recommended "use by" date (e.g., "Use by [Date + 2 months]"). This prevents guesswork, ensures you use dough within its optimal timeframe, and helps you rotate your stock, reducing waste. This is particularly helpful when you are diligently storing bread dough properly in batches.
Conclusion: The Guide to Perfect Dough Storage
Mastering how to store dough properly is a valuable skill that enhances your baking flexibility and the quality of your baked goods. Whether you're refrigerating bread dough for a richer flavor through cold fermentation, freezing cookie dough for spontaneous baking, or storing pie or pizza dough for future meals, the principles remain consistent: control temperature, prevent moisture loss, and protect from air.
By understanding the specific needs of different dough types, using appropriate storage methods and materials, and following simple best practices like proper sealing and labeling, you can confidently store dough for various durations. This not only reduces stress and saves time in the kitchen but ultimately leads to more delicious and consistent results, allowing you to enjoy fresh, homemade baked goods whenever you desire.
Frequently Asked Questions
How long can I store bread dough in the refrigerator?
Bread dough can typically be stored in the refrigerator for up to 2-3 days. This allows for slower fermentation and a more complex flavor. However, monitor the dough's rise.
To prevent cookie dough from drying out, wrap it tightly in plastic wrap and then place it in an airtight container. This minimizes exposure to air and moisture loss.
Can I freeze bread dough, and if so, for how long?
Yes, you can freeze bread dough for up to 3 months. Ensure it's properly wrapped to prevent freezer burn and maintain its quality.
What type of container is best for storing bread dough in the refrigerator?
A lightly oiled, airtight container is ideal for storing bread dough in the refrigerator. This prevents sticking and maintains the dough's moisture.
What is the best way to thaw frozen bread dough?
The best way to thaw frozen bread dough is to transfer it to the refrigerator and let it thaw slowly overnight. This allows for even thawing and prevents temperature shock.
Final Reflection: The Enduring Power of Properly Stored Dough
The art of storing dough, from the humble cookie to the artisan loaf, is far more than just a culinary technique; it's a testament to our enduring connection with food and the preservation of its potential. Mastering this skill not only ensures delicious results but also minimizes waste and maximizes the enjoyment of homemade goods. In a world increasingly focused on convenience, taking the time to learn proper dough storage methods is a rewarding act of mindful consumption.
The impact of understanding dough storage extends beyond the kitchen table. It speaks to a larger cultural shift towards appreciating the process of food creation, from seed to table. This mindful approach to ingredients and preparation fosters a deeper connection with our food and reduces our reliance on overly processed alternatives. The best things in life are homemade,
a sentiment deeply resonated by the satisfaction of transforming simple ingredients into something delicious and nourishing, all thanks to proper storage techniques.
Now, consider your own baking journey. What new possibilities open up when you know with confidence that your carefully crafted dough will remain fresh and ready to bake, whenever inspiration strikes? I encourage you to experiment with the techniques outlined in this article, to embrace the process, and to experience the joy of perfectly stored dough transforming into delectable creations. The reward? Not just delicious bread or cookies, but a deeper appreciation for the art of baking and the simple pleasure of homemade goodness.
Unlock Your Baking Potential: Fresher Dough, Better Results!
Thanks for taking the time to learn how to keep your dough fresh! We hope you now feel confident tackling any baking project, knowing your dough is in optimal condition. Ready to put your newfound knowledge into action?
- Master the art of dough storage: Experiment with different methods – from freezer techniques for long-term storage to refrigerator tricks for shorter-term needs – and find what works best for your baking style. Note your successes and failures in a baking journal for future reference!
- Share your dough-storage secrets: Tell us (and other bakers!) about your favorite tips and tricks in the comments below. What unexpected methods have worked best for you?
- Challenge yourself with a new recipe: Now that you're a dough-storage pro, why not try a more complex bread or pastry recipe you've been eyeing?
So, what delicious creation will you tackle first, armed with your newly honed dough-preservation skills?