
Dorm Room Baking: Common MicrowavetoOven Time and Temp Conversions


Welcome to BakeWithEase, your kitchen companion for unlocking the secrets of delightful baking! Ever wondered if you could whip up a treat without a traditional oven? You're in the right place. This article dives into the surprisingly simple world of microwave oven baking conversions, offering practical tips and tricks to transform your dorm room (or any microwave-equipped space) into a mini-bakery. Intrigued? Let's discover how to adapt your favorite recipes!
- Dorm Room Baking: Common Microwave to Oven Time and Temp Conversions for Quick Treats
- BakeWithEase: Mastering Baking Even in a Dorm Room
- Understanding Microwave Oven Baking for Dorm Room Treats
- Key Concepts: Microwave vs. Oven Baking Differences
- Common Ingredients and Their Microwave Baking Adaptations
- Microwave to Oven Conversion Chart: Time and Temperature Guidelines
- Converting Popular Oven-Baked Recipes for Microwave Use
- Troubleshooting Microwave Baking: Common Issues and Solutions
- Safety Tips for Microwave Baking in Dorm Rooms
- Beyond Conversions: Simple Microwave Baking Recipes
- Mastering Microwave Baking: Practice and Experimentation
-
Frequently Asked Questions
- Can you really bake in a microwave oven?
- What are some common conversions for baking times from a regular oven to a microwave oven?
- Does the baking temperature change when using a microwave oven instead of a regular oven?
- Are all recipes suitable for microwave oven baking?
- What types of bakeware are safe to use in a microwave oven?
- Final Reflection: The Sweet Science of Microwave to Oven Baking Conversions
- Unleash Your Inner Baker: Take Your Dorm Room Creations to the Next Level!
Dorm Room Baking: Common Microwave to Oven Time and Temp Conversions for Quick Treats
BakeWithEase: Mastering Baking Even in a Dorm Room
Baking doesn't require a full kitchen setup. Even in the confined space of a dorm room, you can whip up delicious treats with just a microwave. BakeWithEase is here to guide you through adapting your favorite recipes for this convenient method. Understanding microwave oven baking conversions is key to successfully transforming traditional oven recipes into quick, single-serving delights perfect for late-night study sessions or sharing with floor-mates. It's all about adjusting expectations and techniques for a different kind of heat.
This guide will walk you through the fundamental differences between microwave and oven baking, explain why simple microwave oven baking conversions are necessary, and provide practical tips for adapting common ingredients and recipes. We'll cover everything from power levels to checking for doneness, empowering you to bake with ease no matter how limited your space might be. Get ready to discover a world of quick, satisfying baked goods right in your dorm room.
Understanding Microwave Oven Baking for Dorm Room Treats
The Appeal of Microwave Baking in Limited Spaces
Dorm rooms are notorious for their lack of traditional kitchen facilities. Often, a microwave is the only appliance available for cooking or reheating. This makes understanding microwave oven baking conversions incredibly valuable for students craving homemade baked goods. The primary appeal lies in speed and convenience; a mug cake might take just 90 seconds to bake, a stark contrast to the 20-30 minutes required in a conventional oven, plus preheating time. This speed is perfect for busy schedules or sudden dessert cravings.
Beyond speed, microwave baking requires minimal equipment – usually just a mug or a small microwave-safe dish, a fork or whisk, and measuring spoons. This means less cleanup, which is a major plus in a shared living environment where sink space might be limited. The ability to bake single-serving portions also reduces waste, ensuring you don't end up with a whole cake that might spoil before you can finish it. Mastering microwave oven baking conversions unlocks a world of quick, easy, and low-mess desserts.
Why Convert Oven Recipes for Microwave Baking?
Simply putting a traditional oven recipe batter into a microwave and hoping for the best usually results in disappointment. Ovens and microwaves heat food in fundamentally different ways, leading to significant differences in how baked goods cook and develop texture and color. Oven recipes are formulated based on dry, radiant, and convective heat circulating around the food, promoting even cooking and browning. Microwaves, however, use electromagnetic waves that excite water molecules within the food, generating heat from the inside out.
Attempting a direct microwave oven baking conversion without adjustments will likely lead to unevenly cooked results – potentially burned on the edges while raw in the middle – and a lack of the desirable golden-brown crust and chewy or crispy textures associated with oven baking. Ingredients need adaptation, quantities need scaling down for single servings, and baking times and "temperatures" (which translate to power levels) must be completely rethought. Effective microwave oven baking conversions require understanding these differences and making deliberate modifications.
Key Concepts: Microwave vs. Oven Baking Differences
How Microwaves Cook Food: A Quick Overview
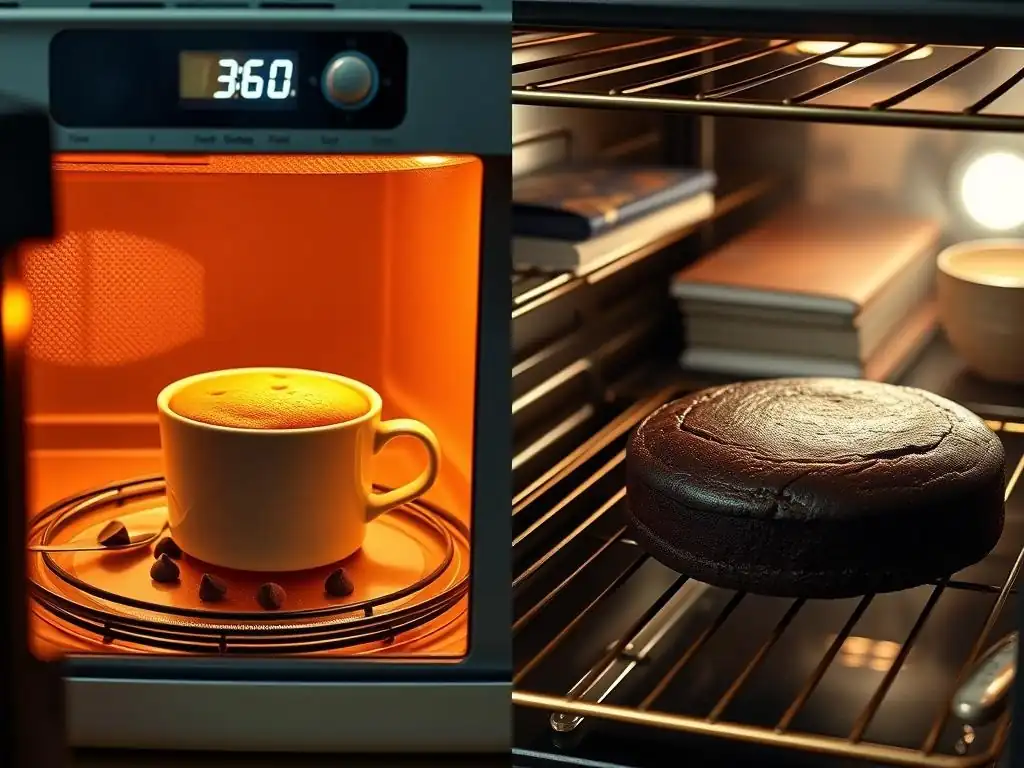
Microwaves work by emitting electromagnetic radiation that penetrates food and causes water, fat, and sugar molecules to vibrate rapidly. This vibration generates heat, cooking the food from within. This process is very fast and efficient, but it has unique effects on food structure and texture. Because the heat is generated internally and primarily targets water molecules, areas with higher moisture content heat up faster, which can lead to hotspots and uneven cooking if not managed.
Unlike oven baking, microwave cooking doesn't typically lead to the Maillard reaction or caramelization on the surface, which are responsible for browning and complex flavors. The absence of dry heat means surfaces remain relatively moist. This fundamental difference is why simple microwave oven baking conversions need to account for texture and color; you often won't get that golden crust or chewy edge without specific recipe modifications or techniques.
Oven Baking: The Traditional Heat Distribution Method
Conventional ovens cook food using external heat sources, typically heating elements or gas flames, which warm the air inside the oven cavity. This hot air transfers heat to the food through radiation and convection. Radiant heat directly warms the surface facing the heat source, while convection (either natural or forced by a fan) circulates the hot air, ensuring more even heat distribution around the food. This method cooks food from the outside in.
The dry, circulating heat of an oven is ideal for creating desirable textures in baked goods. It promotes evaporation on the surface, leading to crust formation. The sustained heat allows for slower, more even cooking throughout the item, giving starches and proteins time to set properly and flavors to develop. Understanding this traditional process highlights why direct microwave oven baking conversions are ineffective; the environment and heat transfer mechanisms are completely different.
Impact on Texture and Browning: Microwave vs. Oven Results
The differing cooking methods have a profound impact on the final texture and appearance of baked goods. Oven-baked goods develop a firm structure, often with a satisfying crust (whether crispy or chewy) and a relatively uniform internal texture. The dry heat and longer cooking times allow moisture to evaporate from the surface, contributing to texture development and enabling browning through the Maillard reaction and caramelization.
Microwave-baked goods, conversely, tend to have a softer, sometimes slightly rubbery or spongy texture due to the high moisture content retained on the surface and the rapid internal heating. They also lack the characteristic browning of oven-baked items unless specific ingredients (like cocoa powder, which provides color) are used or techniques are applied. When performing microwave oven baking conversions, it's crucial to manage moisture levels and adjust expectations regarding texture and color.
Common Ingredients and Their Microwave Baking Adaptations
Adjusting Flour Types for Microwave Baking
The type of flour used can significantly impact microwave baking results. All-purpose flour works well for many microwave recipes, but because microwave cooking is so fast and moist, baked goods can sometimes turn out dense or gummy. Using a blend of all-purpose flour and a small amount of cake flour (known for its lower protein content and finer texture) can sometimes help create a lighter crumb. Alternatively, some microwave recipes specifically call for self-rising flour, as the added leavening helps achieve a quicker rise in the microwave's rapid heating environment.
Experimentation is key when adapting flour for microwave oven baking conversions. You might find that reducing the total amount of flour slightly compared to an oven recipe, or sifting it thoroughly, helps prevent a tough texture. The goal is usually to create a batter that sets quickly without becoming overly dense or rubbery.
Sugar and Sweetener Considerations in Microwave Recipes
Sugar plays multiple roles in baking: providing sweetness, contributing to moisture, aiding in leavening (by creaming with fat), and promoting browning and tenderness in oven baking. In microwave baking, sugar's role in browning is minimal. However, it still contributes sweetness and helps retain moisture, which is particularly important given the microwave's tendency to dry out baked goods if overcooked. Granulated sugar, brown sugar, and liquid sweeteners like honey or maple syrup can all be used.
Brown sugar, with its molasses content, adds moisture and a richer flavor, often desirable in quick microwave treats like brownies or cookies. Liquid sweeteners can also contribute moisture and chewiness. When doing microwave oven baking conversions, you generally don't need to drastically change the type of sugar, but ensuring sufficient moisture from sugar or other wet ingredients is vital to avoid a dry or tough result. The amount might be scaled down for single servings, but the ratio to other wet ingredients is important.
Egg Substitutes for Microwave Baking: Options and Usage
Eggs provide structure, richness, and leavening in traditional baking. In the rapid process of microwave baking, their function can be slightly different, and sometimes using a whole egg in a small, single-serving recipe can lead to a rubbery texture. For microwave oven baking conversions of single-serving recipes, using only the egg yolk (for richness) or egg white (for lightness) can be beneficial, depending on the desired outcome.
Alternatively, various egg substitutes work well. A ripe mashed banana or applesauce can add moisture and binding, though they will impart their own flavor. A 'flax egg' (1 tablespoon ground flaxseed mixed with 3 tablespoons water, let sit for 5-10 minutes) is a popular vegan option that provides binding. Using baking powder in combination with moisture and acidity (like buttermilk or vinegar added to milk) can provide leavening without a whole egg. For single servings, often as little as 1-2 tablespoons of beaten egg or an equivalent substitute is sufficient.
Dairy and Fat Adaptations for Microwave Baking
Dairy (milk, yogurt, sour cream) and fats (butter, oil) are crucial for moisture, richness, and tenderness in baked goods. In microwave baking, maintaining sufficient moisture is paramount to prevent dryness. Whole milk, buttermilk, or yogurt are excellent choices for liquids, contributing richness and a tender crumb. Buttermilk or yogurt, with their acidity, also react with baking soda (if used) to provide lift.
Fats like melted butter or vegetable oil are necessary for tenderness and flavor. Oil tends to distribute more evenly and keeps baked goods moist, which can be advantageous in the quick microwave process. Melted butter offers superior flavor but can sometimes make microwave items slightly denser. When adapting recipes through microwave oven baking conversions, ensure you include enough fat and liquid relative to the dry ingredients to counteract the microwave's drying effect and the lack of external browning/crust formation. For a single mug cake, this might mean 1-2 tablespoons of milk and 1 tablespoon of melted butter or oil.
Microwave to Oven Conversion Chart: Time and Temperature Guidelines
Converting Oven Temperatures to Microwave Power Levels
Directly converting oven temperatures (like 350°F or 175°C) to microwave settings is not possible because microwaves use power levels, not temperatures. Microwave power levels (often expressed as percentages, like 50% or 100%, or settings like Medium or High) relate to the intensity of the microwave radiation emitted. High power (usually 100%) is the most common setting for quick baking like mug cakes, providing rapid heat. However, sometimes lower power levels (like 50% or 70%) are used for more delicate items or to ensure more even cooking by allowing heat to conduct through the food.
Think of power levels as analogous to oven temperature combined with cooking speed. High power cooks very fast, suitable for small volumes. Lower power settings cook slower, which can sometimes mimic the gentler, more even cooking of an oven, albeit without the browning. There is no universal microwave oven baking conversion chart for temperature; it's more about matching the type of cooking needed (fast vs. gentler) to the power level. Most quick microwave baking recipes use High power.
Estimating Microwave Baking Times from Oven Baking Times
Estimating microwave baking times based on oven times is an approximation and requires careful monitoring. A general rule of thumb for small, single-serving items (like a mug cake) adapted from an oven recipe might be that minutes in the oven translate to seconds in the microwave, or that a recipe taking 20-30 minutes in an oven might take 1-5 minutes in a microwave, depending on the item and wattage. This is a very loose guideline for microwave oven baking conversions.
For example, a standard cupcake recipe baked in an oven for 18-22 minutes might yield a single mug cake that is done in 1-2 minutes in a 1000-watt microwave. A small brownie taking 25 minutes in an oven might need 2-4 minutes. The key is to start with a very short time (e.g., 60 seconds) and check for doneness, adding 15-30 second increments until the item is cooked through but not dry or tough. Overcooking happens extremely fast in a microwave.
Important Considerations: Wattage and Adjustments
Microwave wattages vary significantly, typically ranging from 600 to 1200 watts. A higher wattage microwave cooks faster than a lower wattage one. Recipes developed for a specific wattage (often 1000 or 1100 watts) will need time adjustments if you are using a microwave with a different wattage. If your microwave has lower wattage than the recipe specifies, you'll need to increase the cooking time. If it has higher wattage, you'll need to decrease the time.
This wattage difference is a major variable in microwave oven baking conversions. A recipe that takes 90 seconds in an 1100-watt microwave might take 2 minutes or more in a 700-watt unit. Always start with the minimum time suggested in a recipe (or a conservative estimate if converting yourself) and add time as needed. Getting familiar with your specific microwave's power and hot spots through trial and error is the most reliable way to achieve consistent results.
Converting Popular Oven-Baked Recipes for Microwave Use
Microwave Mug Cakes: A Quick Conversion Guide
Mug cakes are perhaps the most popular example of successful microwave oven baking conversions for dorm rooms. They are typically single-serving versions of standard cake recipes. To convert a cake recipe, scale down the ingredients significantly to fit in a mug (usually just a few tablespoons of dry ingredients, a tablespoon or two of wet). A common ratio is about 4 tablespoons flour, 2-4 tablespoons sugar, 1/4 teaspoon baking powder, a pinch of salt, 3-4 tablespoons milk, 1 tablespoon oil or melted butter, and perhaps 1-2 tablespoons of egg (or substitute), plus flavorings.
Mix the batter directly in a microwave-safe mug. Cook on High power. Start with 60-90 seconds for an average mug size and wattage. Check if the top is set and the cake looks cooked through. If still wet, cook for additional 15-30 second intervals. The surface might look slightly wet even when done, but it shouldn't be liquid batter. This simple application of microwave oven baking conversions yields a warm, soft cake in minutes.
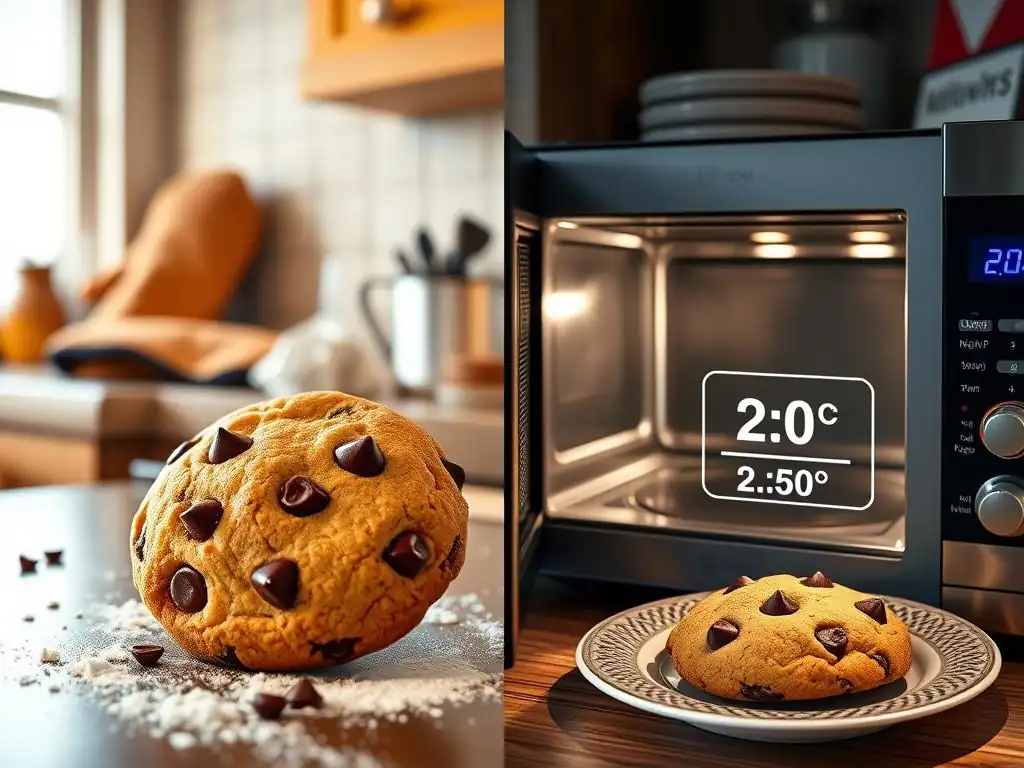
Adapting cookie recipes for the microwave requires focusing on creating a single, soft cookie rather than a batch of crispy ones. Traditional cookie dough often contains ingredients and ratios designed for spreading and browning in an oven. For microwave oven baking conversions, you'll need a small amount of dough (enough for one or two cookies). Place the dough on a small piece of parchment paper or a microwave-safe plate.
Microwave time is very short, usually 30-90 seconds on Medium-High or High power, depending on thickness and desired doneness. The cookie won't spread or brown like an oven cookie. It will likely look slightly underdone in the center when ready, and it will firm up as it cools. Aim for a soft, chewy texture. Overcooking will result in a hard, dry cookie. This application of microwave oven baking conversions is less about perfect texture replication and more about a quick cookie fix.
Brownie Baking in a Microwave: Tips and Tricks
Microwave brownies, like mug cakes, are best made as single servings. A typical microwave brownie recipe involves mixing cocoa powder, sugar, flour, a little baking powder, salt, milk, oil, and vanilla, often with chocolate chips mixed in, directly in a mug or small dish. The key is to get a rich, fudgy texture without drying it out or making it rubbery.
Cook on High power, starting with about 60-90 seconds. Similar to mug cakes, check for doneness. The center might still look slightly moist, but the edges should be set. It will continue to cook slightly from residual heat after you take it out. Overcooking is the most common pitfall, leading to a tough texture. Successful microwave oven baking conversions for brownies prioritize moisture and a shorter cooking time than you might intuitively guess.
Single-Serving Dessert Conversions: From Oven to Microwave
Many other single-serving desserts can be adapted using microwave oven baking conversions. Crumbles or crisps with a fruit base can be microwaved in a ramekin; the topping won't get crispy but will soften into a delicious layer over the warm fruit (cook time might be 2-4 minutes). Mini bread puddings or custards also translate well, relying on the microwave's ability to heat liquids quickly and set egg-based mixtures (cook time varies based on size, perhaps 1-3 minutes).
The general principle for these microwave oven baking conversions is to scale down the recipe to a single portion that fits comfortably in a microwave-safe container. Reduce liquids slightly if aiming for a firmer set, and always start with a short cooking time, adding increments as needed. Focus on getting the interior cooked through without letting the exterior become tough or dry.
Troubleshooting Microwave Baking: Common Issues and Solutions
Uneven Cooking in the Microwave: Addressing Hotspots
Uneven cooking, where parts of the baked good are done while others are raw or overcooked, is a common issue in microwave baking due to the presence of "hotspots" within the microwave cavity. These are areas where the microwave energy is more concentrated. To mitigate this when performing microwave oven baking conversions:
- Use a microwave-safe turntable if your unit has one, as rotating the food helps expose it more evenly to the microwaves.
- If you don't have a turntable, manually rotate the dish halfway through the cooking time.
- Consider using a lower power setting (like 70%) for a slightly longer time, which allows heat to conduct more evenly through the food.
- Stir the batter or dough slightly before cooking if the recipe allows, though this is less common for cake or cookie batters once in the dish.
Avoiding Rubbery Textures in Microwave-Baked Goods
A rubbery texture is a frequent complaint with microwave baking, often resulting from overcooking or too much liquid relative to dry ingredients. To avoid this during microwave oven baking conversions:
- Be precise with measurements, especially liquids and eggs. Too much moisture can contribute to a rubbery result.
- Use oil instead of butter where possible, as oil tends to produce a more tender, moist crumb in microwave items.
- Do not overcook. This is the most critical factor. Stop cooking as soon as the item is just set, even if the very center looks slightly moist. It will continue cooking from residual heat.
- Consider reducing the amount of egg or using only the yolk for richness without the rubbery potential of the white protein when set rapidly.
Preventing Overcooking: Mastering the Microwave Baking Sweet Spot
Overcooking is the nemesis of microwave baking, turning soft, moist treats into hard, dry disappointments in seconds. Mastering microwave oven baking conversions means finding the sweet spot for doneness.
- Always start with the minimum recommended cooking time or a conservative estimate.
- Check frequently. After the initial time, check every 15-30 seconds.
- Look for visual cues: the edges should look set, and the surface should appear mostly cooked, though the center might still look slightly soft.
- Use the "touch test" carefully: gently press the surface; it should spring back slightly.
- Remember that the item will continue to cook for a short period after being removed from the microwave. It's better to err on the side of slightly underdone than clearly overdone.
Safety Tips for Microwave Baking in Dorm Rooms
Choosing Microwave-Safe Containers and Utensils
Safety is paramount when using a microwave in a dorm setting. Always use containers and utensils specifically labeled "microwave-safe." Materials like glass, ceramic, and certain plastics are generally safe. Avoid using metal, as it can cause sparks and potentially damage the microwave or start a fire. Also, be cautious with plastics that are not labeled microwave-safe, as they can melt or leach chemicals into your food when heated.
- Task: Check for "microwave-safe" label on containers.
- Task: Avoid metal bowls, forks, or spoons in the microwave.
- Task: Use glass or ceramic mugs for mug cakes.
Preventing Burns: Safe Handling of Hot Microwave Dishes
Microwave-baked goods and their containers get extremely hot, even if the cooking time was short. Steam trapped inside can also cause burns. Always use oven mitts or a towel to remove hot dishes from the microwave. Be mindful that the dish itself might be hotter than the food inside.
- Task: Always use oven mitts or a thick towel to remove items.
- Task: Be aware of steam when opening containers or piercing cooked items.
- Task: Let the baked item cool slightly before handling or eating.
Microwave Maintenance and Safety Practices
Keeping your microwave clean is not just about hygiene; it's also a safety measure. Splatters can burn onto the interior, causing smoke or odors during subsequent use. Regularly wipe down the inside of the microwave. Ensure the door seals properly to prevent microwave energy leakage. Never operate the microwave if the door is damaged.
- Task: Regularly clean food splatters from the interior.
- Task: Check that the microwave door closes and seals properly.
- Task: Do not operate a damaged microwave.
Beyond Conversions: Simple Microwave Baking Recipes
Here is a simple recipe perfect for trying out microwave oven baking conversions principles.
Ingredients:
- 1 tbsp melted butter
- 1 tbsp granulated sugar
- 1 tbsp brown sugar
- 1/4 tsp vanilla extract
- 1 tbsp milk
- 3 tbsp all-purpose flour
- Pinch of salt
- Pinch of baking soda
- 2 tbsp chocolate chips
Instructions:
- In a small microwave-safe bowl or mug, melt the butter (about 20-30 seconds).
- Stir in both sugars and vanilla until combined.
- Stir in the milk.
- Add the flour, salt, and baking soda. Mix until just combined, do not overmix.
- Stir in the chocolate chips.
- Shape into one cookie or leave as a blob in the dish.
- Microwave on High for 45-90 seconds. The time will vary based on your microwave wattage and desired gooeyness. It should look slightly undercooked in the center.
- Let cool in the dish for a few minutes before enjoying.
Quick Microwave Brownie in a Mug Recipe
Another dorm favorite, showcasing simple microwave oven baking conversions:
Ingredients:
- 2 tbsp all-purpose flour
- 2 tbsp granulated sugar
- 1 tbsp unsweetened cocoa powder
- Pinch of salt
- 1/4 tsp baking powder
- 2 tbsp milk
- 1 tbsp vegetable oil
- 1/4 tsp vanilla extract
- 1 tbsp chocolate chips (optional)
Instructions:
- In a microwave-safe mug, whisk together the flour, sugar, cocoa powder, salt, and baking powder.
- Add the milk, oil, and vanilla extract. Stir until smooth batter forms, scraping the bottom and sides.
- Stir in chocolate chips if using.
- Microwave on High for 60-90 seconds. The brownie is done when the top looks mostly set but might still be slightly wet in the center.
- Let cool for a few minutes before diving in.
Simple Microwave Cake Recipe for Beginners
A basic vanilla mug cake, a staple of microwave oven baking conversions:
Ingredients:
- 4 tbsp all-purpose flour
- 2 tbsp granulated sugar
- 1/4 tsp baking powder
- Pinch of salt
- 3 tbsp milk
- 1 tbsp vegetable oil
- 1/4 tsp vanilla extract
Instructions:
- In a microwave-safe mug, whisk together the flour, sugar, baking powder, and salt.
- Add the milk, oil, and vanilla. Stir until no dry lumps remain.
- Microwave on High for 60-120 seconds. Cooking time depends heavily on your microwave. The cake should rise and the top should look set.
- Let cool for a few minutes. Can be topped with a sprinkle of powdered sugar or a dollop of yogurt.
Mastering Microwave Baking: Practice and Experimentation
Start with Simple Recipes and Gradual Adjustments
The best way to get good at microwave oven baking conversions is to start simple. Recipes specifically designed for the microwave, like the mug cakes and brownies above, are great starting points because the microwave oven baking conversions have already been done for you. Once you're comfortable with how your microwave cooks these items, you can begin experimenting with adapting slightly more complex oven recipes.
When attempting your own microwave oven baking conversions, make small adjustments to liquid and leavening first. Reduce the batch size significantly. Be prepared for variations in texture and appearance compared to the oven-baked original. Use the "start low and check often" rule for cooking time religiously. Patience and observation are key to mastering the unique challenges of microwave baking.
Documenting Your Microwave Baking Conversions for Future Reference
As you experiment with microwave oven baking conversions, keep notes! Jot down the original oven recipe details (if applicable), the modifications you made (ingredient amounts, type of dish), the wattage of your microwave, the power level used, and the exact cooking time that worked best. Also, note the results – texture, doneness, flavor.
This documentation will be invaluable. It saves you from repeating mistakes and allows you to quickly replicate successful microwave oven baking conversions. Over time, you'll develop an intuition for how different types of batters or doughs behave in your specific microwave, making future adaptations easier. A small notebook or a note on your phone can become your personal microwave baking conversion guide.
Embracing the Convenience of Microwave Baking in Small Spaces
While microwave baking may not replicate the exact results of a conventional oven, it offers unparalleled convenience and speed, making it ideal for dorm rooms and other spaces where a full kitchen isn't available. Mastering microwave oven baking conversions allows you to enjoy warm, homemade treats whenever the craving strikes, without needing much space, time, or cleanup.
Embrace the differences! Microwave-baked goods have their own unique charm – they are quick, comforting, and perfectly portioned. With a little practice and an understanding of how microwaves work, you can confidently whip up a wide variety of sweet delights. So go ahead, grab a mug, and start experimenting with microwave oven baking conversions to bring the joy of baking to your dorm room.
Frequently Asked Questions
Can you really bake in a microwave oven?
While not traditional baking, you can create quick desserts and small batches using microwave ovens. It's important to understand that the texture and results will differ from conventional oven baking.
What are some common conversions for baking times from a regular oven to a microwave oven?
Generally, microwave baking requires significantly less time. Start with roughly 1/4 to 1/3 of the original oven baking time, and closely monitor the progress. Adjust according to your microwave's power.
Does the baking temperature change when using a microwave oven instead of a regular oven?
Temperature is not directly convertible as microwaves use radiation to heat food, not air. Recipes are often formulated specifically for microwave cooking, rather than using a temperature conversion.
Are all recipes suitable for microwave oven baking?
No, some recipes, particularly those requiring even heating or specific crust formation, don't translate well to microwave baking. Simple cakes, mug cakes, and some quick breads are more adaptable.
What types of bakeware are safe to use in a microwave oven?
Always use microwave-safe bakeware, typically made of glass, ceramic, or microwave-safe plastic. Avoid metal, as it can cause sparks and damage the microwave.
Final Reflection: The Sweet Science of Microwave to Oven Baking Conversions
Mastering the art of microwave to oven baking conversions is more than just a kitchen hack; it's a gateway to culinary freedom. The ability to seamlessly translate recipes between these two vastly different cooking methods unlocks a world of possibilities for busy students, budget-conscious individuals, and anyone seeking efficient and delicious meal solutions. This newfound flexibility allows for greater creativity and experimentation in the kitchen, regardless of available equipment.
The impact of readily available, accurate conversion information is profound. It democratizes baking, making it accessible to those who might otherwise be limited by their kitchen setup. The best things in life are homemade,
a sentiment often echoed, now becomes more attainable with the knowledge to adapt recipes to suit individual circumstances. This simple act of conversion transcends mere practicality; it empowers individuals to connect with the joy of baking, regardless of their resources.
Now, it's your turn. Consider the recipes you love, the limitations you might have faced in the past, and the potential unlocked by understanding these conversions. Don't be afraid to experiment! Try adapting your favorite microwave mug cake to a traditional oven, or scaling up a simple oven recipe to fit your microwave's capabilities. Embrace the challenge, celebrate the successes, and discover the sweet rewards of mastering the science behind microwave to oven baking conversions. The possibilities are as limitless as your imagination.
Unleash Your Inner Baker: Take Your Dorm Room Creations to the Next Level!
Thanks for diving into the world of dorm room baking! We hope you’ve gained some valuable tips and tricks for converting your favorite recipes. Now it’s time to put your newfound knowledge into practice.
- Master the Microwave-to-Oven Conversion: Try baking your go-to recipe using the conversion methods we discussed. Note the differences and refine your technique for future masterpieces! This is your chance to experiment and improve your baking skills.
- Share Your Success (or Hilarious Fails!): We'd love to see your creations! Share photos of your dorm room baking adventures on social media using #BakeWithEaseDormRoom. Let's build a community of student bakers!
- Explore New Recipes: Challenge yourself to adapt a completely new recipe, applying what you've learned about microwave and oven differences.
Ready to transform your dorm room into a culinary haven? What delicious treat will you bake first?