
Common White Bread Problems Solved: A Baker's Guide

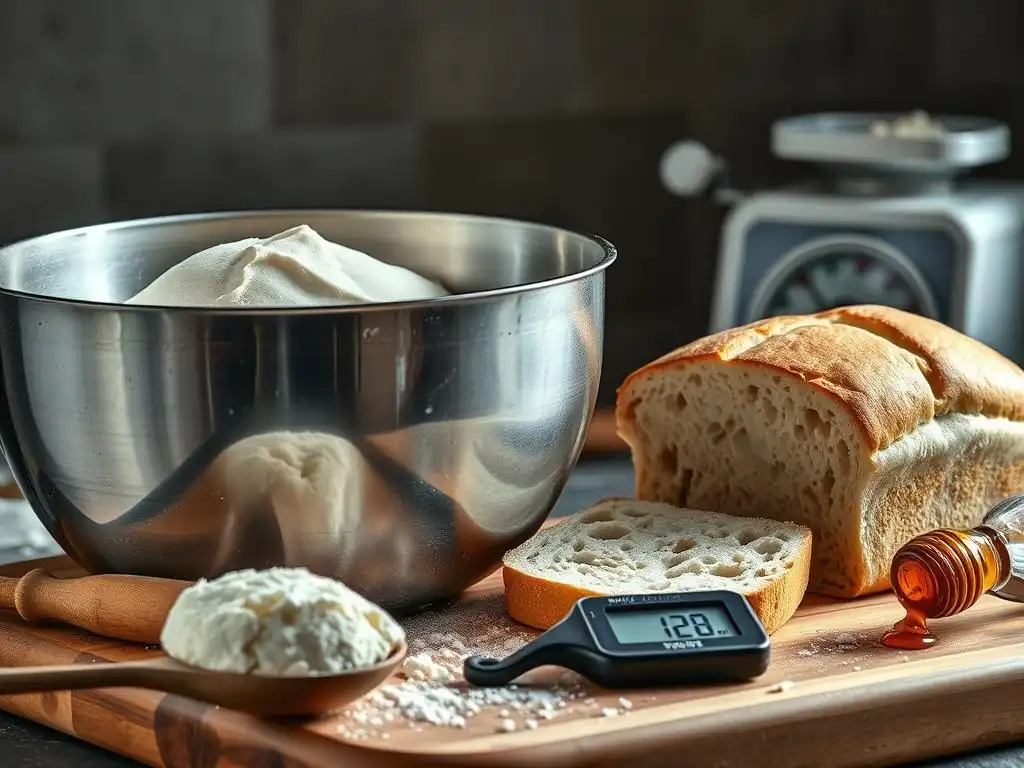
Welcome to BakeWithEase, your haven for all things baking! Ever found yourself staring at a seemingly lifeless bowl of dough, wondering why your white bread dough won't rise? You're not alone! We've compiled a comprehensive guide to help you troubleshoot common bread baking challenges and unlock the secrets to perfectly risen loaves. Dive in and discover the solutions that will transform your baking from frustrating to fantastic!
- Introduction to Troubleshooting White Bread Baking Issues
- Problem 1: Yeast Inactive – Understanding the Causes
- Solution 1: Reviving an Inactive Sourdough Starter
- Problem 2: Dense and Gummy White Bread – Achieving an Open Crumb
- Solution 2: Achieving a Light and Airy White Bread Texture
- Problem 3: White Bread Spreading Out Flat – Preventing a Pancake Loaf
- Solution 3: Preventing White Bread from Spreading
- Problem 4: White Bread Too Yeasty – Balancing the Flavor
- Solution 4: Baking White Bread with Balanced Flavor
- Problem 5: White Bread Crust Too Thick or Too Thin
- Solution 5: Achieving the Perfect White Bread Crust
- Troubleshooting Chart: Quick Reference for Common White Bread Problems
- Conclusion: Mastering White Bread Baking with Ease
-
Frequently Asked Questions
- Why isn't my white bread dough rising?
- How can I tell if my yeast is still active?
- What is the ideal temperature for white bread dough to rise?
- I've kneaded my dough for a long time, but it's still not rising. What could be the problem?
- My white bread dough rose, but it collapsed during baking. What happened?
- Final Reflection: The Humble Loaf and the Triumph of Rising Dough
- Unleash Your Inner Baker: Craft Perfect White Bread!
Introduction to Troubleshooting White Bread Baking Issues
Baking white bread is a foundational skill for many home bakers. The simple combination of flour, water, yeast, salt, and sometimes sugar or fat can yield a wonderfully soft and airy loaf. However, even with seemingly straightforward recipes, problems can arise.
Perhaps the most frustrating issue is when your white bread dough won't rise, leaving you with a dense, disappointing result. This guide delves into common challenges faced when baking white bread and provides practical, friendly solutions to help you achieve consistently excellent loaves. We'll cover everything from inactive yeast to achieving the perfect crust, ensuring your journey to mastering white bread is filled with successful bakes.
Understanding the science behind why white bread dough won't rise or why other issues occur is key to troubleshooting. Yeast activity, gluten development, fermentation times, and oven temperatures all play crucial roles. By identifying the root cause of a problem, you can make targeted adjustments to your process, transforming baking frustrations into learning opportunities. Whether you're dealing with sticky dough, a loaf that collapses, or that persistent problem where your white bread dough won't rise, we're here to guide you through the fixes with straightforward advice and helpful tips.
Problem 1: Yeast Inactive – Understanding the Causes
When your white bread dough won't rise, the most likely culprit is inactive or dead yeast. Yeast are living organisms that consume sugars and produce carbon dioxide gas, which causes the dough to expand. If the yeast isn't working properly, this process, known as fermentation, stalls, and your dough remains flat. Identifying why your yeast isn't active is the first step to solving the problem.
Several factors can render yeast inactive. Using yeast that is past its expiration date is a common issue; older yeast simply loses its potency. Improper storage, such as leaving yeast packets open or storing them in a warm, humid place, can also kill the organisms. Furthermore, the temperature of the liquid used to activate the yeast is critical. Water that is too hot will kill the yeast instantly, while water that is too cold will not activate it effectively, leading to very slow or no rise.
Identifying Factors Affecting Yeast Activity
Identifying whether yeast is the issue when your white bread dough won't rise often starts with a simple test: proofing the yeast. Most recipes call for dissolving active dry yeast in warm water (typically between 105°F and 115°F, or 40°C and 46°C) with a pinch of sugar. Within 5-10 minutes, the mixture should become foamy and bubbly, indicating the yeast is alive and active.
If no foam appears, the yeast is likely dead or inactive, and using it will result in a white bread dough that won't rise. Instant yeast doesn't strictly require proofing first, as it can be mixed directly with the dry ingredients, but its activity still depends on temperature and freshness.
Beyond freshness and temperature, other ingredients can impact yeast. Too much salt added directly to the yeast can inhibit its activity or even kill it. While salt is essential for flavor and controlling fermentation speed, it should ideally be mixed with the flour before adding the liquid and yeast mixture. Similarly, very high concentrations of sugar can also slow down yeast activity by drawing water out of the yeast cells, although this is less common in standard white bread recipes than in enriched doughs.
Inconsistent Feeding Schedule: A Primary Culprit in Starter Problems
Note: This header structure is adapted from a sourdough context. For white bread, this section will focus on the equivalent concept: inconsistent yeast handling or usage.
Unlike sourdough starters which require regular feeding, commercial yeast for white bread is a one-time use ingredient from a packet or jar. However, the handling and storage of this yeast acts as its "feeding schedule" in a metaphorical sense – inconsistent or improper handling leads to inactivity.
If you're using yeast from a jar that's been opened and left in the pantry for months, its activity will significantly decline compared to a fresh packet. The ideal storage is in an airtight container in the refrigerator or freezer, which keeps the yeast dormant and extends its lifespan considerably beyond just pantry storage.
Failure to use the correct amount of yeast specified in a recipe is another form of "inconsistency." Using too little yeast will naturally result in a much slower or insufficient rise, contributing to the problem of white bread dough not rising adequately. While you can sometimes compensate with a longer proofing time, it's best to stick to the recipe's recommended quantity, especially when troubleshooting issues.
Incorrect Temperature: Too Hot or Too Cold?
Temperature is perhaps the most critical factor affecting yeast activity in white bread making. Yeast thrives in a warm, but not hot, environment. As mentioned, using liquid (usually water or milk) that is too hot—above 120°F (49°C) for active dry yeast or 130°F (54°C) for instant yeast—will kill the yeast cells. This is a common reason why white bread dough won't rise; the yeast needed for fermentation is simply dead.
Conversely, temperatures that are too cold significantly slow down yeast activity. If your kitchen is cold, or if you're using cold liquid, the yeast will work very slowly, leading to a prolonged or insufficient first rise (bulk fermentation) and second rise (proofing).
The ideal temperature range for dough to rise is typically between 75°F and 85°F (24°C and 29°C). If your environment is cooler, you'll need to find a warm spot for your dough, such as a slightly warm oven (turned off) or near a sunny window, to ensure proper fermentation and prevent your white bread dough from not rising.
Contamination: Identifying and Preventing Mold Growth
Note: This header structure is adapted from a sourdough context focusing on starter mold. For white bread, this section will briefly address potential contaminants that could affect yeast or dough.
While less common than in sourdough starters, contamination can theoretically affect white bread dough, although it's usually related to external factors rather than mold growing in the yeast itself. Mold typically grows on the surface of dough that has been left to rise for an excessively long time, especially in humid conditions. If you see fuzzy patches of green, blue, or white on your dough, it's a sign of mold growth, and the dough should be discarded as mold spores can be harmful.
Preventing contamination in white bread making primarily involves practicing good kitchen hygiene. Ensure your mixing bowls, utensils, and work surfaces are clean. Use fresh ingredients, especially flour and yeast. While mold isn't a direct cause of inactive yeast from the start, a contaminated environment or ingredients could potentially introduce undesirable microorganisms that compete with or inhibit the yeast, though this is relatively rare compared to issues with yeast freshness or temperature.
Hydration Levels: Maintaining Proper Water-to-Flour Ratio
Hydration, the ratio of water to flour in the dough, primarily affects the dough's texture and the gluten development, but it can also indirectly impact yeast activity and the dough's ability to rise. Yeast needs moisture to become active and move throughout the dough, consuming sugars. A dough that is too dry might slightly impede yeast mobility and gas production.
Conversely, a dough that is too wet (very high hydration) can be difficult to handle and may spread rather than rise upwards. While yeast can still be active in a wet dough, the lack of structure from underdeveloped gluten can make it seem like the dough isn't rising effectively, or that it collapses easily. For typical white bread dough, a hydration level between 60% and 70% is common, providing enough moisture for yeast activity and allowing for good gluten development. Adjusting hydration slightly can help ensure the yeast functions optimally within the dough's structure.
Solution 1: Reviving an Inactive Sourdough Starter
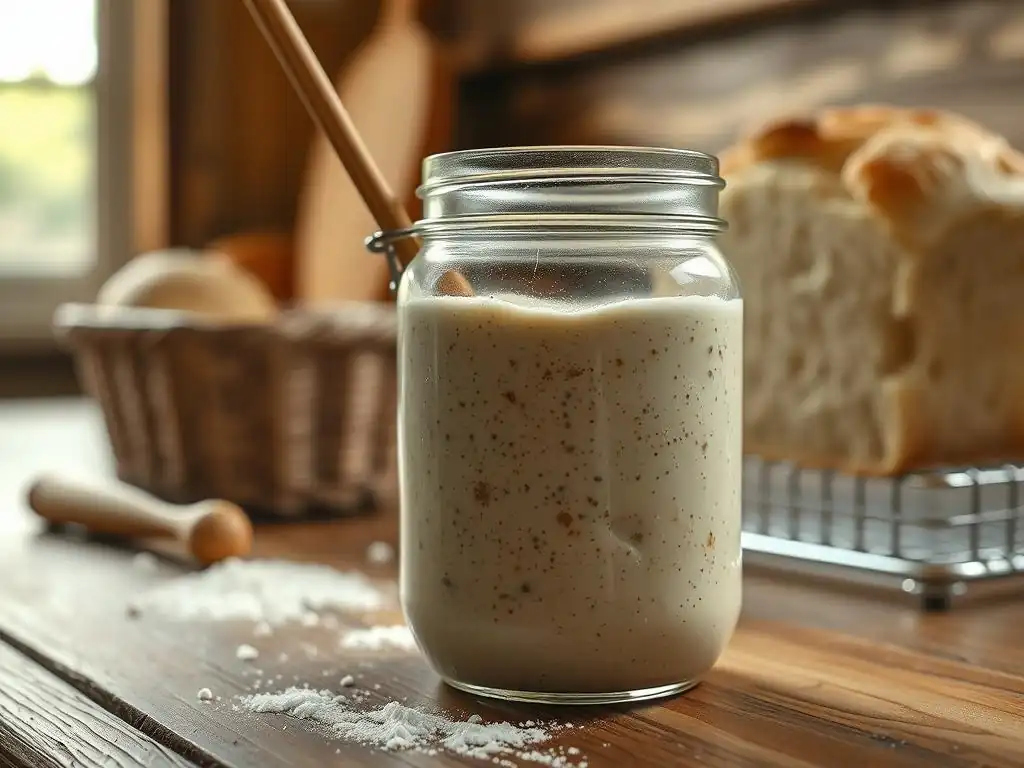
Note: This header structure is adapted from a sourdough context. For white bread, this section will focus on the equivalent concept: reviving or ensuring yeast activity.
If you've determined your yeast is inactive, you cannot "revive" a packet of dead commercial yeast. The solution is straightforward: get new, fresh yeast. Purchase a new packet or jar, check the expiration date, and store it properly (airtight in the fridge or freezer) to maintain its viability for future use. Always proof active dry yeast in warm water with a pinch of sugar before adding it to the rest of your ingredients to confirm it's alive and ready to work, preventing the frustrating outcome where your white bread dough won't rise.
If you're using instant yeast and your dough isn't rising, the issue might still be related to temperature or the amount used. Ensure your liquid is warm (around 120°F-130°F) when mixed with the dry ingredients, and that your proofing environment is warm enough (75°F-85°F). Using the correct measure of yeast from a fresh source is the most reliable way to ensure your dough has the leavening power it needs.
Adjusting Feeding Schedule for Optimal Activity
Note: This header structure is adapted from a sourdough context. For white bread, this section will focus on the equivalent concept: using fresh yeast and proper amounts.
For reliable white bread baking, the "feeding schedule" equivalent is consistently using fresh, properly stored yeast and adhering to the recipe's specified amount. If you're using active dry yeast, proofing it first is a crucial step. Use water within the recommended temperature range (105°F-115°F) and add a little sugar to give the yeast readily available food. This short proofing step (5-10 minutes) confirms the yeast is active and gives it a head start.
If you suspect past issues were due to old yeast, make a habit of checking yeast expiration dates before baking and storing it correctly. An opened jar of instant yeast stored in the freezer can remain potent for several months, while an opened packet in the pantry might lose significant activity within weeks. Consistent use of fresh yeast ensures your white bread dough has the best chance to rise properly.
Maintaining Consistent Temperature for Fermentation
Controlling the temperature during fermentation is vital for successful white bread. After mixing your dough, place it in a warm spot for the first rise. The ideal range is 75°F to 85°F (24°C to 29°C). If your kitchen is cooler, find a warmer location. Options include:
- A turned-off oven with the light on (the light provides just enough warmth).
- Near a sunny window (but avoid direct, hot sun which could overheat the dough).
- On top of the refrigerator.
- In a proofing box or a proofer setting on your oven, if available.
Maintaining this temperature ensures the yeast works efficiently, allowing the dough to double in size within the time specified by the recipe (typically 1-2 hours for the first rise). Inconsistent or cold temperatures are major reasons why white bread dough won't rise on schedule, leading to under-proofed, dense loaves.
Recognizing and Addressing Contamination Issues
Note: This header structure is adapted from a sourdough context focusing on starter mold. For white bread, this section will focus on general hygiene and dough spoilage.
For white bread, preventing contamination is primarily about good hygiene. Always start with clean hands, clean equipment (bowls, spoons, counters), and a clean work area. Store flour and yeast properly in airtight containers to prevent exposure to moisture and potential contaminants.
If you see any signs of mold on your dough (fuzzy spots of any color), discard the entire batch. While rare in the relatively short fermentation time of white bread compared to sourdough, it can happen if dough is left at warm temperatures for too long, especially in very humid environments, or if contaminated ingredients were used. Trust your senses: if the dough smells off or looks questionable beyond normal fermentation bubbles, it's safer to start fresh.
Achieving the Correct Hydration for Starter Health
Note: This header structure is adapted from a sourdough context focusing on starter hydration. For white bread, this section will focus on achieving the correct dough consistency.
Achieving the correct dough consistency is crucial for white bread structure and rise. The hydration level dictates how wet or dry your dough is. While recipes provide ingredient measurements, factors like flour type (different flours absorb water differently) and ambient humidity can affect the final dough feel. A good white bread dough should be slightly sticky but manageable after kneading, pulling away from the sides of the bowl.
If your dough feels too dry and stiff, it might not rise as fully or evenly, potentially contributing to a dense texture. If it's excessively wet and slack, it might spread out rather than rising upwards. Pay attention to the dough's feel as you mix and knead.
You can usually adjust hydration slightly by adding a little more flour if it's too sticky or a tiny bit more water if it's too dry, until you reach a smooth, elastic dough that holds its shape reasonably well. This correct consistency supports optimal yeast activity and gluten development, both essential for a good rise.
Problem 2: Dense and Gummy White Bread – Achieving an Open Crumb
One of the most common complaints about homemade white bread is a dense, heavy, or gummy texture instead of a light, airy crumb. This issue can stem from several factors related to how the dough ferments, develops, and is handled. A dense crumb means the gas produced by the yeast didn't expand sufficiently or wasn't properly trapped within the dough's structure.
Achieving an open, airy crumb in white bread depends on a delicate balance of yeast activity, gluten development, and proper proofing. If any of these steps are rushed or executed incorrectly, the result is often a loaf that feels heavy and lacks the desirable soft texture. Understanding the causes is key to preventing this disappointing outcome.
Under-Proofing: A Common Cause of Dense Bread
Under-proofing is a major contributor to dense white bread. Proofing (the final rise before baking) allows the yeast to produce more gas, expanding the dough and creating the air pockets that form the crumb structure. If the dough is baked before it has fully proofed, it hasn't had enough time to develop sufficient volume and internal structure.
An under-proofed loaf might look okay on the outside, but it will feel heavy for its size. When baked, it will often have a very strong oven spring (a rapid burst of rising in the oven) because the yeast is still very active and the gluten structure is tight. While some oven spring is good, excessive oven spring is a sign the dough needed more time to relax and expand during proofing. The resulting crumb will be tight and dense, with small, irregular holes.
Insufficient Yeast Activity: Weak Fermentation
As discussed earlier, inactive or weak yeast is a primary reason why white bread dough won't rise adequately. If the yeast isn't producing enough carbon dioxide gas during bulk fermentation and proofing, the dough simply won't expand properly. This directly leads to a dense crumb because there isn't enough gas to inflate the gluten network.
Even if your yeast is active initially, factors like cold temperatures, insufficient sugar (the yeast's food), or too much salt can slow down fermentation significantly, resulting in weak yeast activity throughout the process. A dough that takes an excessively long time to rise, or never seems to double in size, is likely suffering from insufficient yeast activity, and will bake into a dense loaf.
Improper Flour Type: Using Low-Protein Flour
The type of flour used greatly impacts the gluten structure in white bread. Gluten is the protein network that develops when flour is mixed with water and kneaded. This network traps the gas produced by the yeast, allowing the dough to rise and hold its shape. White bread typically requires a flour with a relatively high protein content, such as bread flour (around 12-14% protein) or all-purpose flour (around 10-12% protein), to develop a strong gluten structure.
Using a flour with low protein content, like cake flour (around 7-9% protein), will result in a weak gluten network that cannot effectively trap the gas. Even if the yeast is active, the dough won't hold its airy structure, leading to a dense, sometimes crumbly texture. While all-purpose flour works for many recipes, using bread flour can significantly improve the crumb structure and volume of your white bread.
Shaping Techniques: Impacting Crumb Structure
How you shape your dough can also affect the final crumb structure. Gentle handling and proper shaping are important for distributing the gas pockets evenly and creating tension on the dough's surface, which helps it hold its shape during proofing and baking. Rough handling can degas the dough too much, knocking out the precious air bubbles needed for an open crumb.
Over-handling or improper shaping can also lead to a tight crumb. Techniques like folding and gently degassing during shaping help organize the gluten structure and promote an even rise. If the dough is shaped too tightly or too loosely, the internal structure can be compromised, resulting in a less open crumb.
Solution 2: Achieving a Light and Airy White Bread Texture
Achieving that coveted light and airy crumb in white bread is entirely possible by addressing the issues of proofing, yeast activity, flour choice, and shaping. It requires attention to detail throughout the process, but the results are well worth the effort.
Focusing on proper fermentation is key. This means ensuring your yeast is active, providing it with a suitable environment (warm temperature), and allowing the dough sufficient time to rise. Combine this with developing a strong gluten network through effective kneading and using the right flour, and you're well on your way to a beautiful, open crumb.
Optimizing Proofing Time for Open Crumb
Proper proofing is essential for an open crumb. The dough should double in size during the first rise (bulk fermentation) and increase significantly in volume during the second rise (proofing). How do you know when it's ready? The "poke test" is a reliable method. Gently press a floured finger about half an inch into the dough.
- Under-proofed: The indentation springs back immediately.
- Perfectly proofed: The indentation slowly springs back most of the way, leaving a slight indent.
- Over-proofed: The indentation remains completely.
Aim for the "perfectly proofed" stage. This typically takes 45-90 minutes for the second rise in a warm environment, but always go by the dough's appearance and feel, not just the clock. Allowing the dough sufficient time to proof ensures maximum gas production and dough expansion before baking, preventing that dense, gummy texture often seen when white bread dough won't rise enough.
Ensuring Yeast is at Peak Activity
To ensure peak yeast activity, start with fresh yeast and proof active dry yeast in warm water (105°F-115°F) with sugar until foamy. If it doesn't foam, get new yeast. Maintain a warm environment (75°F-85°F) for both the first and second rises. This consistent warmth allows the yeast to work efficiently, producing the necessary carbon dioxide gas to leaven the dough and create an open crumb.
Avoid adding salt directly on top of the yeast when combining ingredients; mix salt with the flour first. While yeast activity slows down over time, ensuring it's vigorous at the start and throughout the fermentation process is crucial for a well-risen, airy loaf. If your white bread dough won't rise, revisiting your yeast handling and proofing environment is often the first step.
Choosing High-Protein Flour for Gluten Development
For the best white bread, opt for bread flour. Its higher protein content (12-14%) allows for the development of a strong, elastic gluten network capable of trapping gas and supporting an open crumb structure. While all-purpose flour can work, especially if it's on the higher end of the protein range (around 11-12%), bread flour provides more reliable results for a light and airy texture.
Effective kneading is also vital for gluten development, regardless of flour type. Kneading develops the gluten strands, making the dough smooth and elastic. Whether by hand (10-15 minutes) or stand mixer (6-8 minutes), knead until the dough passes the "windowpane test": you should be able to stretch a small piece of dough thin enough to see light through it without it tearing. Strong gluten development is key to preventing dense white bread.
Gentle Shaping Techniques for Improved Crumb Structure
When shaping your dough for the final proof and bake, handle it gently to avoid deflating all the gas bubbles. The goal is to create surface tension and a uniform shape without knocking out the air that contributes to the open crumb.
Techniques like folding the dough onto itself and gently sealing seams help organize the gluten and create structure. For a loaf pan, shape the dough into a log by gently patting it into a rectangle, folding one-third over, folding the other third over that, sealing the seam, and then rolling it into a tight cylinder before placing it in the greased pan. This creates layers and tension. Avoid punching down the dough too forcefully after the first rise; a gentle deflate is usually sufficient.
Problem 3: White Bread Spreading Out Flat – Preventing a Pancake Loaf
A common frustration is when your beautifully risen dough collapses or spreads out into a flat disc during proofing or in the oven, resulting in a loaf that looks more like a pancake than a boule or batard. This lack of height and structure can be disheartening, especially after the dough seemed to rise well initially.
Flat white bread is typically a sign that the dough's internal structure isn't strong enough to support its volume, or that it has over-fermented. The gluten network, which is supposed to hold the dough's shape and trap gas, becomes too weak or relaxed, causing the dough to lose its tension and spread outwards under its own weight.
Over-Proofing: A Major Cause of Flat Bread
Over-proofing is arguably the most frequent reason white bread spreads out flat. If the dough proofs for too long, the yeast consumes all the available sugars and becomes less active. More importantly, the enzymes in the dough start to break down the gluten structure.
An over-proofed dough will look puffy and may even start to deflate slightly. When you perform the poke test, the indentation will remain completely without springing back. This indicates the gluten network is overly relaxed and lacks the elasticity needed to hold its shape. When placed in the oven, there's little residual energy for oven spring, and the weakened structure collapses, leading to a flat loaf.
Weak Gluten Structure: Dough Unable to Support Itself
Insufficient gluten development is another primary cause of flat white bread. If the dough wasn't kneaded enough, or if a low-protein flour was used, the gluten network won't be strong or elastic enough to trap the gas produced by the yeast and support the dough's volume during proofing and baking.
A dough with weak gluten will feel slack and possibly sticky even after kneading. It won't hold its shape well during shaping and will tend to spread out quickly. When it tries to rise, the weak structure gives way, causing the dough to flatten instead of rising upwards. This is distinct from over-proofing, though both result in a flat loaf; weak gluten means the structure was never strong to begin with.
High Hydration: Dough Too Wet
While higher hydration doughs can yield a more open crumb, excessively wet dough can be challenging for white bread, especially if the gluten development isn't maximized. A dough with too much water relative to the flour will be very slack and difficult to handle.
Even with good gluten development, a very high hydration dough requires more skill in shaping to create sufficient surface tension to support its structure. If not shaped properly, the sheer weight and lack of internal resistance in a very wet dough will cause it to spread outwards during proofing and potentially collapse in the oven.
Insufficient Oven Spring: Lack of Expansion in the Oven
Insufficient oven spring, while sometimes a symptom of other problems like over-proofing or weak gluten, can also be related to the baking environment itself. If the oven isn't hot enough, or if there isn't adequate steam in the oven, the dough's surface can set too quickly, preventing the rapid expansion (oven spring) that gives the loaf its final height and structure.
Steam in the oven keeps the dough's surface supple for the first 10-15 minutes of baking, allowing the yeast to continue producing gas and the dough to expand before the crust hardens. Without sufficient steam, the crust forms prematurely, restricting the dough's ability to rise.
Solution 3: Preventing White Bread from Spreading
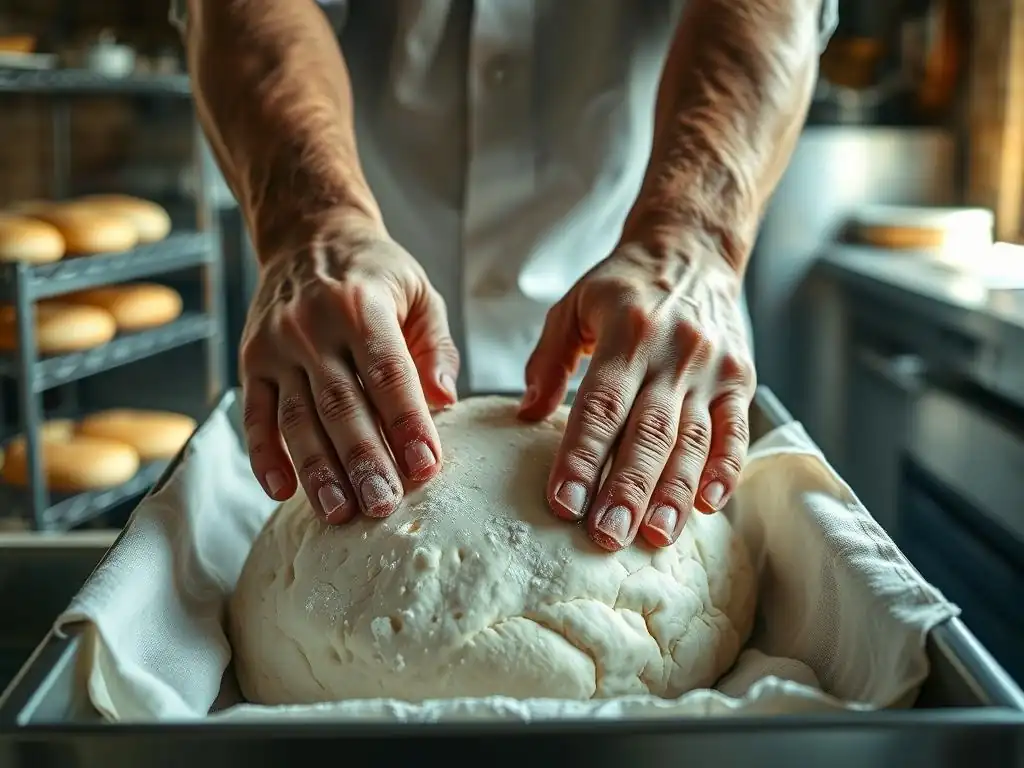
Preventing your white bread from turning into a flat disc involves paying close attention to proofing times, ensuring adequate gluten development, managing hydration, and optimizing your baking environment.
The key is to strike a balance: allow enough proofing time for good volume, but not so much that the structure degrades. Build a strong gluten network through proper kneading and flour choice. Handle wet doughs carefully, and create an environment in the oven that encourages maximum expansion.
Recognizing the Signs of Over-Proofing
Learn to recognize the signs of over-proofing using the poke test. If the indentation remains fully, your dough is likely over-proofed. An over-proofed dough might also appear very puffy and fragile. The surface might look dull or even slightly wrinkly.
If you realize your dough is slightly over-proofed before baking, you can try gently reshaping it and giving it a very short second proof (just 10-20 minutes) or no second proof at all before baking immediately. However, severely over-proofed dough is difficult to salvage and will likely still result in a flatter loaf. It's better to catch it at the perfectly proofed stage.
Strengthening Gluten Structure Through Kneading and Folding
Ensure you are kneading your white bread dough sufficiently to develop a strong, elastic gluten network. Knead until the dough is smooth, supple, and passes the windowpane test. This vigorous kneading is crucial for building the internal structure that will support the dough's rise.
Additionally, incorporating "stretch and folds" during the first rise can further strengthen the gluten. For instance, every 30 minutes during the first hour of bulk fermentation, gently stretch a portion of the dough up and fold it over itself. Repeat this process 3-4 times around the dough. This technique helps build tension and structure, especially beneficial for slightly higher hydration doughs, ensuring the white bread dough rises properly and holds its shape.
Adjusting Hydration Levels for Dough Stability
If you consistently end up with dough that spreads too much, consider slightly reducing the hydration level in your recipe. Use a little less water or a touch more flour. Aim for a dough that is manageable to handle after kneading – it should be slightly sticky but not so wet that it pools or doesn't hold a rough shape.
Alternatively, if you prefer higher hydration, focus intensely on developing the gluten through extended kneading and incorporating stretch and folds during the first rise. Also, ensure your shaping technique creates significant surface tension to help the dough maintain its form during proofing and baking.
Scoring Techniques for Optimal Oven Spring
Proper scoring (cutting the surface of the dough before baking) is vital for controlling oven spring and preventing the crust from tearing randomly. Scoring allows the dough to expand in a controlled manner. Without scores, the crust will set quickly, and the expanding gas will burst through the weakest point, often resulting in a lopsided loaf or restricted rise.
Use a sharp blade (like a razor blade or lame) to make quick, clean cuts about half an inch deep just before placing the dough in the oven. The pattern depends on the shape of your loaf (a single slash down the middle for a baguette or oval loaf, a cross or square pattern for a boule). Proper scoring directs the oven spring upwards, contributing to a taller, better-shaped loaf and preventing it from spreading out flat.
Problem 4: White Bread Too Yeasty – Balancing the Flavor
While sourdough is known for its tang, white bread is typically expected to have a clean, slightly sweet, or neutral flavor with subtle notes from the flour and fermentation. If your white bread has an overpowering, strong "yeasty" or alcoholic flavor, it indicates that the fermentation process wasn't properly controlled, allowing the yeast to produce off-flavors.
An excessively yeasty flavor can make the bread less palatable and is a sign that the yeast either over-fermented or was allowed to ferment at the wrong temperature. This is less about acidity (like in sourdough) and more about the byproducts of fermentation dominating the flavor profile.
Over-Fermentation: Leading to Excessive Byproducts
Over-fermentation in white bread occurs when the dough is allowed to rise for too long or at too warm a temperature. During fermentation, yeast produces alcohol and other compounds in addition to carbon dioxide. While some of these contribute positively to flavor in moderation, excessive fermentation leads to an accumulation of these byproducts, resulting in a strong, sometimes unpleasant, yeasty or alcoholic taste and smell.
If you've had issues where your white bread dough won't rise too much (leading to collapse, as discussed in Problem 3), it's often accompanied by this over-fermented flavor. The yeast has simply run out of readily available sugars and started producing more of the undesirable compounds.
Starter Age: Impacting Sourness
Note: This header structure is adapted from a sourdough context focusing on starter age and sourness. For white bread, this section will focus on Yeast Amount and Fermentation Time.
In white bread, the equivalent concept is the amount of yeast used and the duration of fermentation. Using too much yeast can speed up fermentation excessively, leading to rapid gas production but also potentially stronger off-flavors if not balanced with fermentation time. A standard amount of yeast (e.g., 1-2% of the flour weight for active dry yeast) combined with appropriate rising times is key.
Allowing the dough to ferment for the correct amount of time is more critical than "yeast age" itself (assuming the yeast is fresh and active). Respecting the recipe's recommended rising times and temperatures helps ensure the yeast produces a balanced flavor profile, avoiding that strong, yeasty bite.
Temperature Control: Influencing Fermentation Speed
Temperature has a significant impact on the speed of yeast activity and thus the flavor development. Warmer temperatures (above 85°F / 29°C) accelerate fermentation. While this might seem desirable for a quick rise, it can lead to rapid production of fermentation byproducts before more complex flavors have a chance to develop, resulting in a simpler, often overly yeasty flavor.
Lower temperatures (e.g., proofing in the refrigerator for an extended period) slow down fermentation considerably. This slower process allows enzymes in the flour to break down starches into simpler sugars, providing more food for the yeast over time and contributing to more complex, nuanced flavors, while keeping the production of strong yeasty flavors in check.
Flour Type: Affecting Flavor Development
While not as pronounced as in sourdough, the type of flour used in white bread can subtly influence the flavor. Different flours have varying protein and starch content, which affects how they ferment. Using high-quality bread flour can contribute a pleasant, subtle sweetness and wheaty flavor compared to generic all-purpose flour.
The milling process and origin of the wheat can also play a minor role. While the primary driver of strong "yeasty" flavor is fermentation control, starting with good quality flour provides a better foundation for a well-flavored loaf.
Solution 4: Baking White Bread with Balanced Flavor
Achieving a white bread with a pleasant, balanced flavor involves controlling the fermentation process through yeast amount, time, and temperature. The goal is sufficient fermentation for a good rise without developing overpowering off-flavors.
Think of fermentation as a balance: enough activity for lift, but controlled enough for good flavor. Adjusting temperature and being mindful of fermentation duration are the most effective ways to prevent an overly yeasty taste.
Controlling Fermentation Time to Reduce Sourness
Note: This header structure is adapted from a sourdough context focusing on reducing sourness. For white bread, this section will focus on controlling fermentation time to reduce yeasty flavor.
To avoid an overly yeasty flavor, do not let your white bread dough over-ferment. Follow the recipe's recommended rising times as a guideline, but pay more attention to the dough's appearance and the poke test. If the dough doubles in size much faster than expected (due to a warm kitchen or active yeast), proceed to the next step sooner.
If you need to delay baking (e.g., you're not ready after the first rise), you can slow down fermentation by placing the dough in the refrigerator. Cold fermentation significantly slows yeast activity, preventing over-proofing and the development of strong yeasty flavors. A cold overnight rise can even enhance flavor complexity without making it yeasty.
Managing Starter Age for Flavor Profile
Note: This header structure is adapted from a sourdough context focusing on starter age and flavor. For white bread, this section will focus on Yeast Amount and Temperature.
For white bread, managing "flavor profile" primarily involves using the correct amount of yeast and controlling fermentation temperature. Stick to the yeast quantity specified in your recipe. Using excessive yeast will rush fermentation and likely lead to a stronger, less desirable flavor.
Control the fermentation temperature. Rising the dough at the cooler end of the recommended range (around 75°F / 24°C) or incorporating a period of cold fermentation in the refrigerator can promote a more complex flavor profile by allowing slower enzymatic activity in the dough, resulting in less of that sharp, yeasty taste.
Adjusting Temperature to Slow Down Fermentation
If you find your white bread consistently tastes too yeasty, try proofing your dough at a slightly cooler temperature. Instead of a very warm spot, aim for a consistent 70°F-75°F (21°C-24°C). This will slow down the yeast activity, extending the fermentation time but allowing more complex flavors to develop and reducing the production of strong alcoholic/yeasty notes.
Using cold liquid (water or milk) initially can also slow down the start of fermentation, giving you more control. You can even place the dough in the refrigerator for the first rise (bulk fermentation) for anywhere from 8 to 24 hours. This significantly slows yeast activity, develops more nuanced flavors, and virtually eliminates the risk of an overly yeasty taste, while still resulting in a dough that will rise beautifully (though it may need an hour or two at room temperature before shaping).
Using Different Flours to Adjust Flavor
While standard white bread flavor is relatively neutral, experimenting with different types of flour can offer subtle flavor variations. Using a portion of whole wheat flour (even just 10-20%) can add a nuttier, more complex flavor that balances the yeast notes. Using a high-quality bread flour from a specific region or mill might also offer slightly different flavor characteristics.
However, the most impactful way to control yeasty flavor in white bread remains managing the fermentation time and temperature. Focusing on slower, cooler fermentation is the most effective strategy to achieve a clean, pleasant-tasting white loaf.
Problem 5: White Bread Crust Too Thick or Too Thin
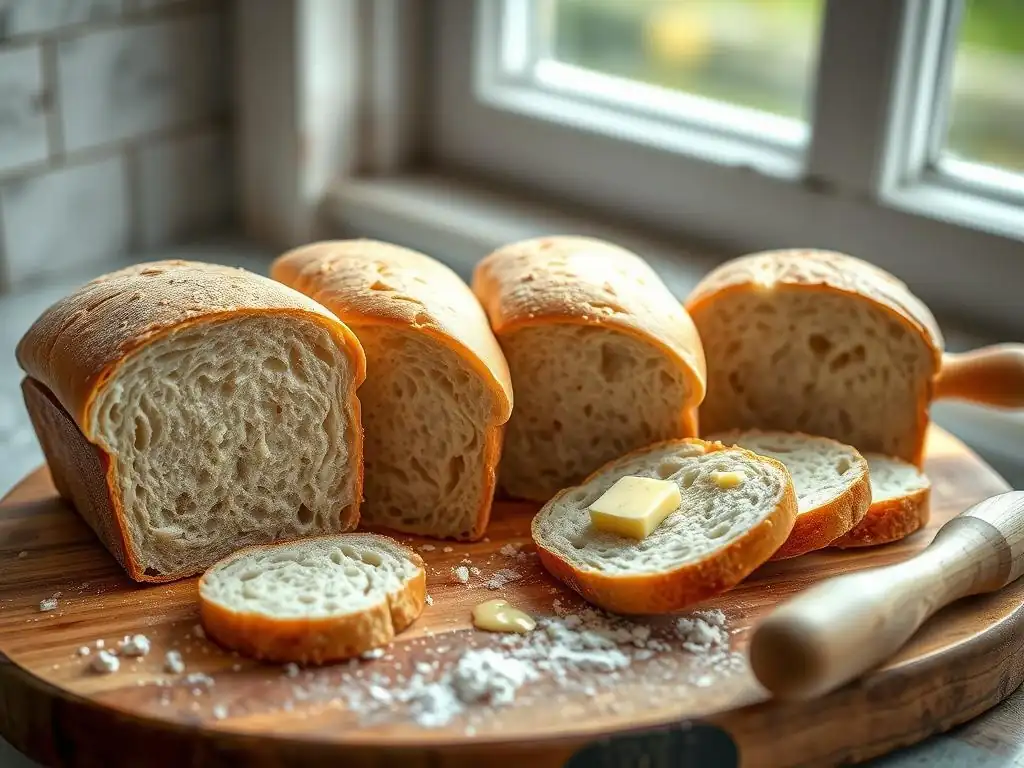
The crust is a crucial part of the white bread experience. A good crust provides texture and contributes to the overall flavor. However, it's common to end up with a crust that's either too thick and hard or too thin and soft, neither of which is ideal.
Achieving the perfect balance – a crust that is golden brown, slightly crisp, yet not overly hard or chewy – depends largely on the baking environment, specifically oven temperature and the presence of steam during the initial phase of baking.
Oven Temperature Issues: Affecting Crust Formation
Oven temperature plays a critical role in crust development. If the oven temperature is too low, the bread will take longer to bake, leading to a thicker, tougher crust as the moisture evaporates slowly over an extended period. The Maillard reaction and caramelization, which give the crust its color and flavor, also proceed differently at lower temperatures.
Conversely, if the oven temperature is too high, the crust can form and brown too quickly before the interior is fully baked. This can result in a loaf that looks done on the outside but is undercooked or gummy inside. The crust might also be excessively hard or even burnt in spots while the crumb is still pale.
Steam in the Oven: Achieving a Crisp Crust
Steam is essential for achieving a thin, crisp crust with good color and oven spring in white bread. During the first 10-15 minutes of baking, steam keeps the surface of the dough moist and elastic. This allows the dough to expand fully during oven spring without the crust hardening prematurely. Once the steam dissipates, the surface dries out and the crust begins to form and brown.
Without adequate steam, the crust forms almost immediately upon entering the hot oven. This restricts oven spring and results in a thicker, often duller crust that might even crack in unpredictable ways. Using a Dutch oven or adding steam to the oven manually are common techniques to address this.
Scoring Depth: Influencing Crust Development
As mentioned earlier, scoring allows controlled expansion. The depth of your scores also influences crust development. Shallow scores may not provide enough release for the expanding dough, potentially leading to blowouts elsewhere on the loaf and uneven crust thickness.
Deeper scores allow the crust to open up more significantly along the cuts, creating prominent "ears" or edges that become particularly crisp during baking. The depth and pattern of scoring directly affect how the crust behaves and looks as the bread bakes and expands.
Cooling Process: Impacting Crust Texture
How you cool your white bread after baking significantly impacts the final crust texture. Allowing the bread to cool completely on a wire rack is crucial. This allows steam from the interior of the loaf to escape, preventing moisture from accumulating under the crust, which would make it soft and potentially rubbery.
Cutting into a hot loaf traps steam inside, leading to a gummy crumb and a softer crust. While it's tempting to slice into warm bread, waiting until it has cooled fully (at least 1-2 hours for a standard loaf) ensures the internal structure sets properly and the crust remains crisp.
Solution 5: Achieving the Perfect White Bread Crust
Attaining the ideal white bread crust involves controlling the baking environment, utilizing steam, mastering scoring, and allowing for proper cooling. These steps work together to create a crust that is visually appealing, flavorful, and texturally satisfying.
Experimenting with different techniques for generating steam and finding the optimal oven temperature for your specific oven are key to consistently achieving great crusts.
Adjusting Oven Temperature for Desired Crust
Preheat your oven thoroughly, typically to a high temperature like 425°F-450°F (220°C-230°C) for white bread. A hot oven ensures a good initial burst of oven spring and promotes proper crust development. Some bakers even start at a higher temperature and then reduce it slightly after the initial expansion phase (e.g., after 10-15 minutes) to ensure the interior bakes through without the crust becoming too dark.
Monitor your bread as it bakes. If the crust is browning too quickly, you can loosely tent the loaf with aluminum foil. If it's not browning enough, you might need to increase the baking time slightly or consider your oven's calibration (many home ovens run slightly hot or cold). An oven thermometer is a useful tool to verify your oven's actual temperature.
Using Steam for a Crisper, Thicker Crust
To create steam in a home oven:
- Dutch Oven/Covered Baker: Bake the loaf in a preheated Dutch oven with the lid on for the first 20-25 minutes. The lid traps the moisture released by the dough, creating a steamy environment. Remove the lid for the remaining baking time to allow the crust to brown and crisp. This is often the most effective method for home bakers.
- Steam Tray: Place a metal tray or cast iron pan on the bottom rack of your oven as it preheats. Carefully pour hot water into the tray just as you load the bread. This creates steam. Be cautious of the hot steam.
- Ice Cubes: Some bakers toss a handful of ice cubes into the hot tray on the bottom rack when loading the bread.
Using one of these methods ensures the dough surface remains pliable, allowing for maximum oven spring and contributing to a thin, crisp, and golden crust.
Adjusting Scoring Depth for Crust Control
Practice your scoring technique with a very sharp blade. For a classic white loaf baked in a pan, a single slash down the center is often sufficient, about 1/2 inch deep. For free-form loaves (boules or batards), experiment with different patterns (like a cross or multiple parallel slashes) and depths.
Deeper scores (around 1/2 inch) tend to open up more dramatically, creating more pronounced crust edges. Shallower scores might result in a smoother surface with less dramatic expansion along the cuts. The key is a clean, swift cut that doesn't drag the dough, allowing it to open cleanly during baking.
Cooling Techniques for Optimal Crust Texture
Always cool your white bread completely on a wire rack after baking. This allows air circulation around the entire loaf, preventing moisture buildup on the bottom crust and ensuring the crust remains crisp. Cooling can take 1-2 hours for a standard-sized loaf.
Resist the urge to slice into the bread while it's still hot. The internal structure is still setting, and slicing too early will compress the crumb, make it gummy, and release steam that would otherwise escape naturally, softening the crust you worked hard to achieve. Patience during the cooling phase is rewarded with the best texture, both inside and out.
Troubleshooting Chart: Quick Reference for Common White Bread Problems
A Quick Guide to Common Problems and Solutions
Here's a quick checklist to help diagnose and fix common issues when your white bread dough won't rise or other problems occur:
- Problem: White bread dough won't rise / Dough is flat and dense.
- Possible Causes: Inactive yeast, cold proofing environment, under-proofing, weak gluten.
- Solutions: Use fresh yeast & proof it, ensure warm proofing temps (75-85°F), check poke test for proofing, knead dough sufficiently, use bread flour.
- Problem: Dense/Gummy crumb.
- Possible Causes: Under-proofing, insufficient yeast activity, weak gluten development, too little liquid.
- Solutions: Allow full proofing time (poke test), ensure yeast is active, knead until windowpane, check hydration.
- Problem: Loaf spreads flat.
- Possible Causes: Over-proofing, weak gluten, high hydration (without proper technique), insufficient oven spring.
- Solutions: Don't over-proof (poke test), strengthen gluten (knead/folds), reduce hydration slightly or improve shaping, use steam in oven, score properly.
- Problem: Bread tastes too yeasty.
- Possible Causes: Over-fermentation (too warm/too long), too much yeast.
- Solutions: Control fermentation temperature (aim cooler), reduce fermentation time, use correct amount of yeast, try cold fermentation.
- Problem: Crust too thick/hard.
- Possible Causes: Oven temp too low, not enough steam, baking too long.
- Solutions: Increase oven temp, use steam (Dutch oven/tray), check baking time.
- Problem: Crust too thin/soft.
- Possible Causes: Oven temp too low, too much steam for too long, improper cooling.
- Solutions: Ensure oven is hot enough, remove steam source partway through, cool completely on wire rack.
Conclusion: Mastering White Bread Baking with Ease
Baking white bread is a rewarding process, and encountering problems like your white bread dough won't rise or ending up with a dense loaf are common learning experiences. By understanding the fundamental role of yeast, gluten development, fermentation time and temperature, and the baking environment, you gain the power to troubleshoot effectively.
Remember, baking is a blend of science and art. Paying attention to the feel of your dough, the signs of proper proofing, and making small adjustments based on your observations will lead to consistent success. Don't be discouraged by imperfect loaves; each bake teaches you something new. With practice and the tips outlined in this guide, you'll be well on your way to baking beautiful, light, and delicious white bread loaves with ease. Happy baking!
Frequently Asked Questions
Why isn't my white bread dough rising?
Several factors can affect rising. Common culprits include expired yeast, dough temperature being too cold, or using too much salt which inhibits yeast activity.
How can I tell if my yeast is still active?
Test your yeast by mixing it with warm water and sugar. If it doesn't foam within 5-10 minutes, your yeast is likely dead and needs replacing.
What is the ideal temperature for white bread dough to rise?
Aim for a warm environment, ideally between 75-80°F (24-27°C). Too cold and the yeast will be sluggish; too hot and it could die.
I've kneaded my dough for a long time, but it's still not rising. What could be the problem?
Over-kneading can damage the gluten structure, preventing proper rise. Under-kneading can also be a problem. Try ensuring you've used the correct kneading technique.
My white bread dough rose, but it collapsed during baking. What happened?
This is likely due to over-proofing, meaning the dough rose for too long. It could also be caused by the oven being too hot or the loaf being under-baked.
Final Reflection: The Humble Loaf and the Triumph of Rising Dough
The persistent struggle with a dough that refuses to rise is far more common than many bakers admit, a silent frustration shared across kitchens worldwide. This seemingly simple act of leavening, the transformation from a dense mass to a light and airy loaf, speaks volumes about the delicate balance of ingredients, technique, and patience required in baking. Mastering this process unlocks not just a perfectly risen loaf, but a deeper understanding of the alchemy of baking itself.
The journey from a stubbornly flat dough to a beautifully browned crust is a microcosm of the larger challenges we face in life – the need for careful preparation, the importance of attention to detail, and the acceptance that sometimes, despite our best efforts, things don't always go as planned. The best bread is made with love and patience,
a wise baker once told me, and those words resonate far beyond the confines of the kitchen. This article, while focused on the practicalities of white bread baking, ultimately touches upon a deeper appreciation for the process, the reward, and the resilience required to overcome setbacks.
So, the next time your white bread dough seems reluctant to rise, remember the lessons learned here. Don't be discouraged; instead, view it as an opportunity for growth, a chance to refine your technique, and a reminder that even the simplest of tasks can hold profound lessons. Take the time to diagnose the problem, adjust your approach, and embrace the journey. The perfectly risen loaf, a testament to your perseverance and understanding, will be all the more rewarding for the effort. Now, go forth and bake!
Unleash Your Inner Baker: Craft Perfect White Bread!
Thanks for taking the time to explore the world of white bread baking with us! We hope you’ve gained valuable insights and newfound confidence in your baking abilities. Now it's time to put your knowledge into action.
- Bake your best loaf yet! Try out one of the techniques we discussed – maybe that no-knead method or the trick for a perfectly crisp crust? We'd love to see your results!
- Share your baking journey! Post a picture of your creation on social media and tag us – let’s inspire each other!
- Explore other BakeWithEase recipes: Discover more delicious bread recipes and baking tips on our website. You might even find your new favorite!
What innovative white bread recipe will you create next? Let's discuss in the comments below!