
Beyond Melting: The Transformative Power of Tempering Chocolate.

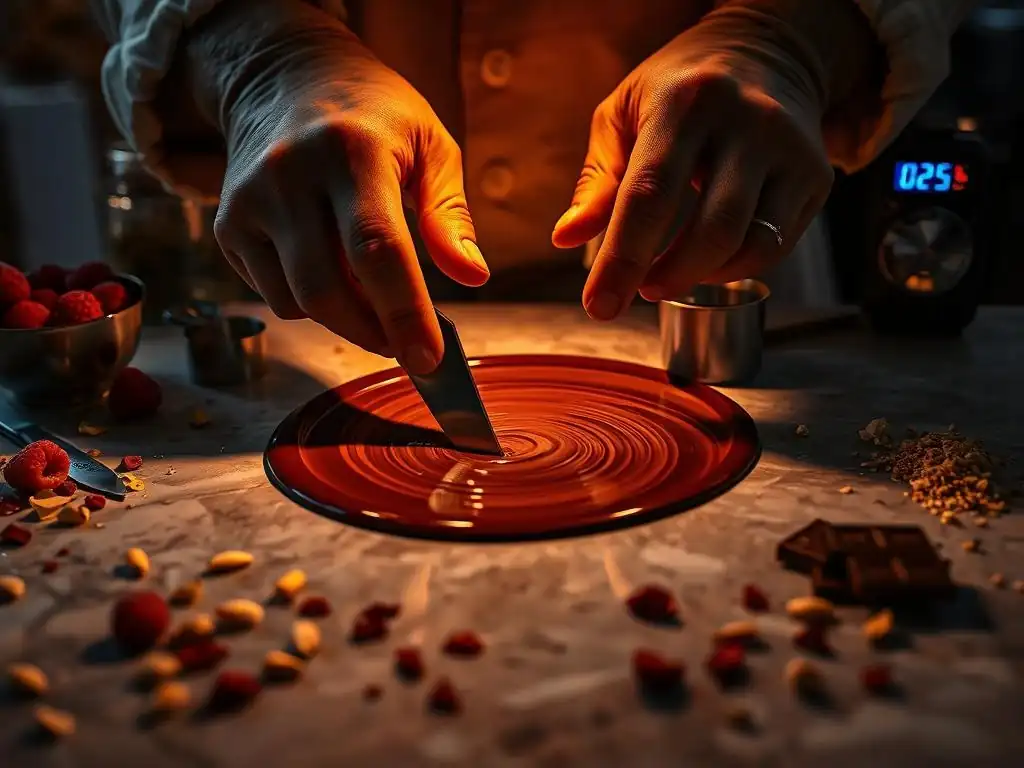
Welcome to BakeWithEase, your companion on a delicious journey into the world of baking! Ever wondered why your homemade chocolates lack that professional shine and satisfying snap? This article unveils the secrets behind achieving chocolate perfection. We delve into the transformative power of tempering chocolate for desserts, demystifying the process and providing you with the knowledge to elevate your creations. Prepare to unlock a new level of baking expertise – discover how mastering this advanced technique can revolutionize your desserts!
- Understanding Tempering Chocolate for Desserts: The Foundation of Chocolate Crafting
- Step-by-Step Guide to Tempering Chocolate for Desserts at Home
- The Transformative Effects of Tempering Chocolate on Dessert Quality
- Advanced Chocolate Tempering Techniques for Professional-Looking Desserts
- Tools and Ingredients Essential for Mastering Chocolate Tempering in Desserts
- Elevating Your Baking with Expert Tips on Tempering Chocolate for Desserts
- Conclusion: Unlocking the Full Potential of Tempering Chocolate in Advanced Baking
-
Frequently Asked Questions
- What exactly is tempering chocolate, and why is it so important?
- What happens if I don't temper my chocolate before using it in desserts?
- What are the different methods for tempering chocolate, and which is the easiest for beginners?
- What temperature ranges are crucial to monitor when tempering chocolate, and why are they important?
- Can I temper chocolate in the microwave, and if so, how?
- Final Reflection: The Enduring Sweetness of Mastery
- Unlock Your Chocolate Mastery: Tempering Made Easy!
Understanding Tempering Chocolate for Desserts: The Foundation of Chocolate Crafting
Tempering chocolate for desserts is a fundamental skill that separates amateur bakers from those who achieve professional results. It's not just about melting chocolate; it's a precise process that ensures your chocolate sets correctly, delivering that coveted snap, shine, and smooth texture in all your baked goods and confections. Mastering this technique unlocks a new level of quality and presentation for everything from simple chocolate-covered treats to intricate molded bonbons.
What Is Tempering Chocolate and Why It Matters in Baking
Tempering chocolate is a heat treatment process involving carefully controlling the temperature of chocolate to stabilize the cocoa butter crystals within it. When chocolate is melted and allowed to cool naturally, the cocoa butter crystals form in an unstable structure, resulting in a dull, streaky appearance, a crumbly texture, and a tendency to melt easily at room temperature. Tempering encourages the formation of stable, uniform cocoa butter crystals, specifically the 'Beta V' crystal form, which is responsible for desirable characteristics.
The importance of tempering chocolate for desserts cannot be overstated. Whether you're making chocolate bark, dipping strawberries, creating decorative elements, or coating truffles, using properly tempered chocolate guarantees a beautiful finish and a satisfying mouthfeel. Untempered chocolate, while still edible, lacks the visual appeal and structural integrity needed for many professional-looking desserts. It can bloom (develop greyish streaks) over time, becoming less appealing both visually and texturally. Achieving the correct temper is crucial for durability and aesthetic quality.
The Science Behind Chocolate Crystallization and Texture
At its core, tempering is a controlled crystallization process. Cocoa butter, the fat component in chocolate, contains different types of fatty acids that crystallize at different temperatures, forming various crystal structures, often referred to as Polymorphs I through VI. When chocolate is melted, these crystal structures are destroyed. As it cools, these crystals begin to reform. Without tempering, a mix of unstable crystals (like Forms I, II, III, and IV) and the desired stable crystals (Form V) will develop.
The goal of tempering chocolate for desserts is to melt out the unstable crystal forms and encourage the formation of only the stable Form V crystals. This is achieved by heating the chocolate to melt all crystals, cooling it down to a specific temperature range where Form V crystals begin to form, and then gently reheating it slightly to melt any remaining unstable crystals while leaving the stable ones intact. This precise dance of temperature ensures that when the chocolate sets, it does so with a uniform, stable crystal structure, yielding the desired snap, gloss, and smooth melt.
Key Differences Between Tempered and Untempered Chocolate
The differences between tempered and untempered chocolate are immediately apparent in finished desserts. Tempered chocolate boasts a beautiful, glossy surface free from streaks or bloom. When you break a piece of tempered chocolate, it produces a clean, sharp snap. It also melts smoothly in your mouth without feeling waxy or grainy.
In stark contrast, untempered chocolate typically looks dull or streaky, often developing greyish-white patches known as "bloom" as it cools and ages. It breaks with a soft crumble rather than a crisp snap and can feel soft or sticky at room temperature. Untempered chocolate also melts very easily, making it unsuitable for applications like dipping or molding where a stable structure is required. Understanding these differences highlights why mastering tempering chocolate for desserts is a vital skill for elevating your baking.
Step-by-Step Guide to Tempering Chocolate for Desserts at Home
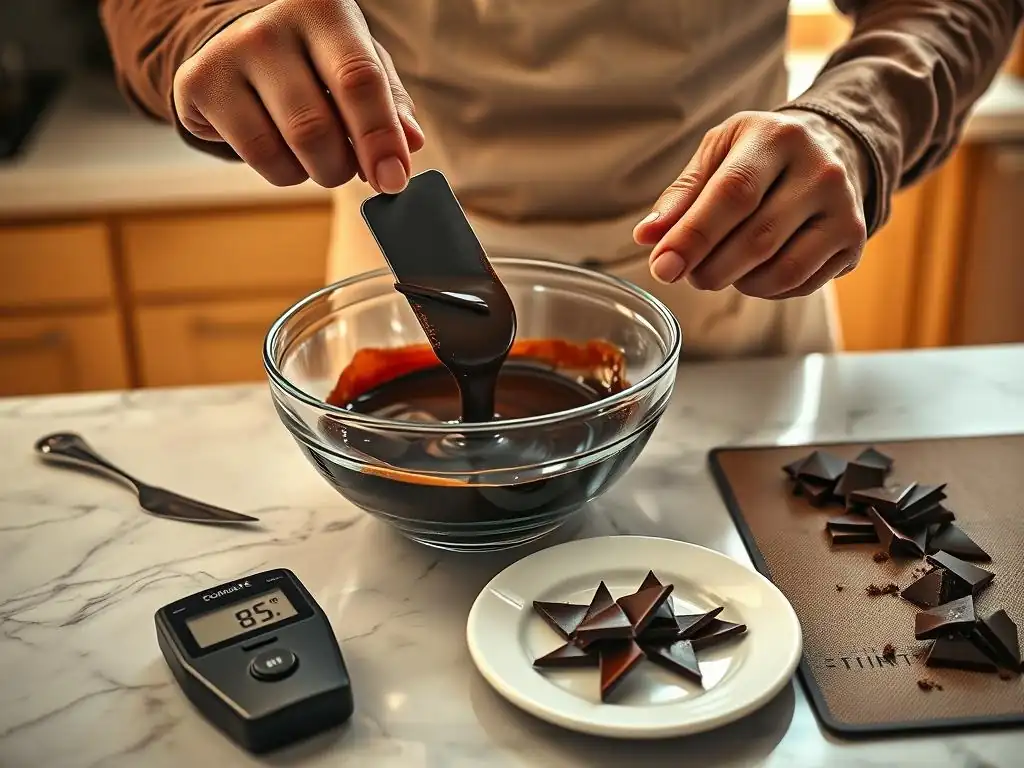
Embarking on the journey of tempering chocolate for desserts at home might seem daunting, but with the right approach and a little practice, it's a skill well within reach. This section breaks down the essential steps and common techniques to help you achieve perfectly tempered chocolate every time.
Preparing Your Workspace and Ingredients for Successful Chocolate Tempering
Before you even start melting chocolate, setting up a clean, dry workspace is crucial. Water is the enemy of melting chocolate; even a tiny drop can cause it to seize and become unusable. Ensure all your bowls, spatulas, and surfaces are completely dry. Gather all your ingredients and tools before you begin. You'll need the chocolate itself, a heat-safe bowl, a double boiler setup or microwave, a reliable thermometer (digital or infrared is best), and a spatula.
Measure out the chocolate you plan to temper. It's generally recommended to work with at least 8-12 ounces of chocolate at a time, as smaller quantities can be difficult to monitor accurately. Chop the chocolate into small, uniform pieces or use pistoles (callets) for easier melting. Having everything ready prevents rushing and potential errors once the process begins, ensuring a smoother experience when tempering chocolate for desserts.
Methods of Tempering: Tabling, Seeding, and Microwave Techniques Explained
There are several popular methods for tempering chocolate for desserts, each with its own advantages.
- Tabling Method: This classic technique involves melting the chocolate, pouring about two-thirds of it onto a clean, cool surface (like marble or granite), and working it back and forth with a spatula and scraper until it cools and thickens slightly, indicating crystal formation. This cooled, thickened chocolate is then scraped back into the remaining melted chocolate, and the mixture is stirred until it reaches the correct working temperature. This method offers precise control but requires practice and a suitable surface.
- Seeding Method: This is often the most approachable method for home bakers. You melt about two-thirds to three-quarters of your chopped chocolate gently until it reaches its initial melting temperature (e.g., around 45-50°C for dark chocolate). Remove from heat and add the remaining un-melted, finely chopped chocolate (the "seed"). Stir constantly. The seed chocolate helps cool the melted chocolate while introducing stable cocoa butter crystals. Continue stirring until all the seed chocolate is melted and the mixture cools to the working temperature (e.g., 31-32°C for dark, 29-30°C for milk/white).
- Microwave Method: This is a quick method, but requires careful attention. Heat chopped chocolate in a microwave-safe bowl on 50% power, stirring every 30 seconds. Continue until the chocolate is mostly melted, with a few small lumps remaining. Remove and stir vigorously. The residual heat should melt the remaining lumps, bringing the chocolate to the correct working temperature. This method relies heavily on stirring and can be tricky to get right consistently when tempering chocolate for desserts.
Monitoring Temperature: Tools and Tips for Perfect Chocolate Tempering
Accurate temperature monitoring is absolutely critical for successful tempering chocolate for desserts. Without knowing the precise temperature at each stage, you're essentially guessing, and the likelihood of achieving the desired temper is low. A reliable thermometer is your best friend here. Digital probe thermometers offer fast readings and can be easily inserted into the chocolate. Infrared thermometers are also excellent, providing surface temperature readings without needing to touch the chocolate, which can be more hygienic and convenient.
Each type of chocolate (dark, milk, white) has slightly different temperature ranges for melting, cooling, and working. For example, dark chocolate is typically heated to 45-50°C, cooled to 28-29°C to encourage crystallization, and then gently reheated to a working temperature of 31-32°C. Milk and white chocolate have lower temperature ranges, often heating to 40-45°C, cooling to 26-27°C, and reheating to 29-30°C. Always refer to the specific recommendations for the type of chocolate you are using and keep a close eye on your thermometer throughout the process.
Common Mistakes When Tempering Chocolate and How to Avoid Them
Several common pitfalls can derail your efforts when tempering chocolate for desserts. One of the most frequent is introducing water, which causes the chocolate to seize into a thick, clumpy mass. Ensure all equipment is bone dry and avoid condensation if using a double boiler (don't let the water boil vigorously or touch the bottom of the chocolate bowl).
Another common error is overheating the chocolate during the initial melting phase or the final reheating step. Exceeding the target temperatures can destroy the stable crystals you're trying to cultivate. Use gentle heat (low setting on a microwave, simmering water in a double boiler) and remove the chocolate from the heat source before it reaches the target temperature, relying on residual heat and stirring to finish the job.
Not stirring enough during the cooling phase (especially with the seeding method) can also lead to uneven crystallization. Finally, working in a cold or drafty environment can cause the chocolate to set too quickly or unevenly; a stable room temperature is ideal for successful tempering chocolate for desserts.
The Transformative Effects of Tempering Chocolate on Dessert Quality
Beyond merely melting, the act of tempering chocolate for desserts fundamentally changes its physical properties, leading to significant improvements in the quality and appeal of your finished baked goods and confections. These transformations are what make the effort of tempering worthwhile.
Enhancing Gloss and Snap: Visual and Textural Benefits of Proper Tempering
One of the most striking benefits of properly tempering chocolate is the resulting high-gloss finish. Tempered chocolate sets with a smooth, reflective surface that looks incredibly professional and inviting. This visual appeal is due to the uniform alignment of the stable cocoa butter crystals. Untempered chocolate, in contrast, often sets with a dull, matte appearance and may show streaks or patches.
Equally important is the textural transformation. Tempered chocolate hardens into a brittle structure that breaks with a distinct, clean snap – a hallmark of high-quality chocolate. This satisfying snap is a direct result of the stable crystalline structure of the cocoa butter. Untempered chocolate remains softer and more pliable at room temperature, breaking with a soft bend or crumble rather than a sharp snap. Achieving this perfect gloss and snap is a key outcome of successful tempering chocolate for desserts.
Impact of Tempered Chocolate on Flavor Release and Mouthfeel in Desserts
Properly tempered chocolate also significantly impacts how flavor is perceived and the overall mouthfeel of a dessert. The stable Form V cocoa butter crystals melt precisely at body temperature (around 30-32°C), creating a smooth, luxurious melting sensation on the tongue. This controlled melting releases the chocolate's complex flavors efficiently, allowing you to fully appreciate its nuances.
Untempered chocolate, containing a mix of crystal types, melts less uniformly and often feels waxy or fatty in the mouth. The flavor can be muted or released unevenly. By mastering tempering chocolate for desserts, you ensure that the chocolate component of your creation melts perfectly, contributing to a superior taste experience and a delightful mouthfeel that elevates the entire dessert.
How Tempering Improves Shelf Life and Stability of Chocolate-Based Treats
Tempering chocolate for desserts doesn't just enhance immediate appeal; it also significantly improves the shelf life and stability of chocolate-based confections. The stable crystal structure is less prone to fat bloom (where cocoa butter separates and rises to the surface, causing grey streaks) or sugar bloom (where sugar crystals appear on the surface due to moisture).
Tempered chocolate is also more resistant to melting at room temperature compared to untempered chocolate. This increased stability makes tempered chocolate ideal for confections that need to hold their shape, like molded candies, chocolate-covered nuts, or decorative elements, and allows them to be stored at slightly warmer temperatures without becoming soft or sticky.
A box of properly tempered chocolate bonbons can maintain its quality and appearance for several weeks when stored correctly, whereas untempered chocolate items would likely deteriorate much faster. This longevity is a crucial benefit of tempering chocolate for desserts, especially for gifts or items meant for sale.
Advanced Chocolate Tempering Techniques for Professional-Looking Desserts
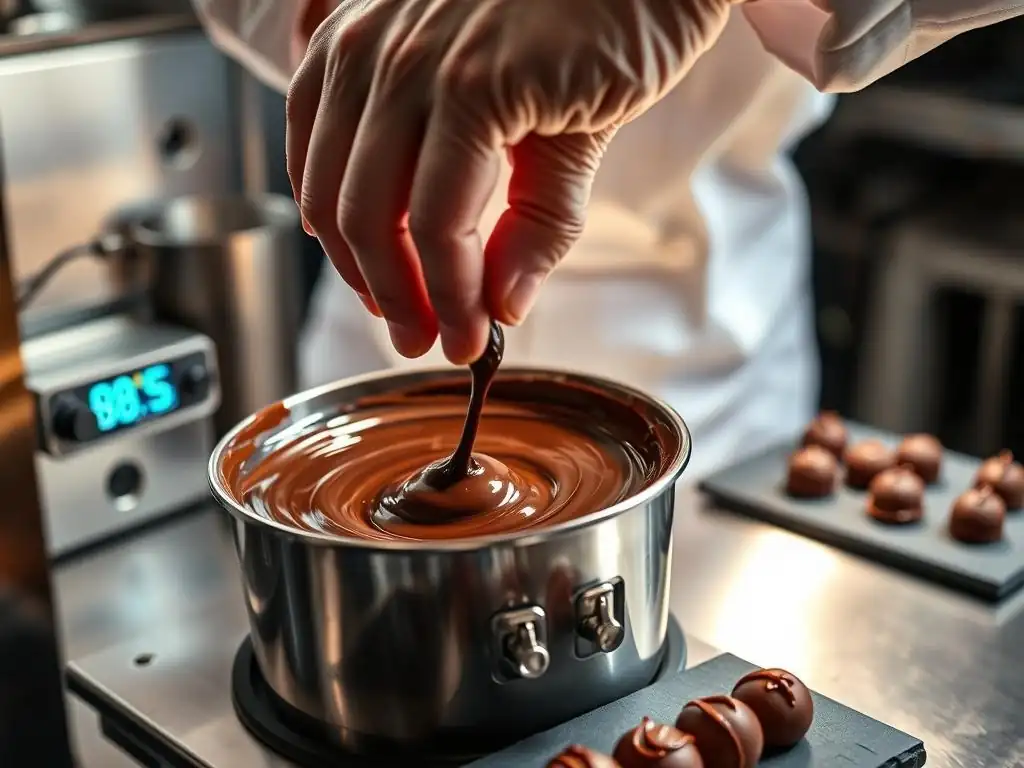
Once you've mastered the basics of tempering chocolate for desserts using standard methods, you can explore more advanced techniques to create truly stunning and professional-looking creations. These methods leverage the unique properties of tempered chocolate to form intricate shapes, smooth coatings, and stable inclusions.
Using Tempered Chocolate for Molding, Dipping, and Decorating
Tempering is absolutely essential for successful chocolate molding. Pouring properly tempered chocolate into clean, dry molds ensures that the chocolate contracts slightly as it cools, making it easy to release from the mold with a perfect shape and a glossy finish. Untempered chocolate would stick to the mold or release with a dull, imperfect surface. Whether you're making solid chocolate figures, filled bonbons, or chocolate bars, using tempered chocolate is non-negotiable for clean lines and a professional look.
Dipping fruits, nuts, cookies, or confections in tempered chocolate results in a thin, even, and crisp coating that sets quickly and hardens with a beautiful shine. Unlike untempered chocolate, which would set slowly and potentially bloom, tempered chocolate adheres smoothly and sets with that desirable snap. Tempered chocolate is also the medium of choice for creating delicate chocolate decorations, such as chocolate curls, fans, or piped designs, as it holds its shape and sets firmly at room temperature. Mastering tempering chocolate for desserts opens up a world of decorative possibilities.
Incorporating Tempered Chocolate into Ganaches, Truffles, and Glazes
While pure tempering is often used for solid chocolate applications, tempered chocolate can also be incorporated into other components like ganaches, truffles, and glazes to improve their texture and stability. For instance, adding a small amount of properly tempered chocolate to a ganache after it's made can help stabilize it, giving it a firmer set and a smoother texture when it cools.
When making hand-rolled truffles, dipping them in tempered chocolate provides that classic crisp shell that contrasts beautifully with the creamy interior. Similarly, tempered chocolate can be used to create mirror glazes that set with a flawless, reflective surface over cakes and pastries. While not always a strict requirement for all ganaches or glazes, using tempered chocolate for desserts in these applications can significantly enhance their structural integrity, appearance, and mouthfeel, pushing your creations towards professional standards.
Troubleshooting Tempering Issues in Complex Dessert Recipes
Even experienced bakers encounter issues when tempering chocolate for desserts, especially in complex recipes involving multiple components or environmental factors. Common problems include the chocolate losing its temper while working (becoming thick or setting too quickly), blooming after setting, or not setting properly at all. If your chocolate starts to thicken too much while dipping or molding, it likely needs to be gently reheated slightly (just a degree or two) to maintain its working temperature.
If your finished chocolate shows bloom, it indicates incorrect crystallization during tempering or improper storage conditions (like temperature fluctuations). If it doesn't set firmly, it likely never achieved the correct temper in the first place, meaning the stable crystals didn't form. Troubleshooting involves re-evaluating your process: check your temperatures meticulously, ensure no water contamination occurred, and verify you used the correct method for the type of chocolate. Sometimes, the easiest solution is to re-melt the chocolate and attempt the tempering process again from the beginning. Patience and practice are key to overcoming these challenges when tempering chocolate for desserts.
Tools and Ingredients Essential for Mastering Chocolate Tempering in Desserts
Having the right tools and selecting the appropriate ingredients are fundamental to successfully tempering chocolate for desserts. While it's possible to start with minimal equipment, investing in a few key items can significantly improve your consistency and results.
Selecting the Right Chocolate Types and Cocoa Content for Tempering
Not all chocolate is created equal when it comes to tempering. For best results, use high-quality chocolate that contains real cocoa butter, not vegetable oil substitutes (often found in "melting wafers" or "compound chocolate"). Look for chocolate labeled couverture, which has a higher percentage of cocoa butter (typically 30-35% or more), making it ideal for tempering and yielding a superior texture and shine.
The cocoa content also plays a role. Dark chocolate (with 50% cocoa content or higher) is generally the easiest to temper due to its higher proportion of cocoa solids and cocoa butter. Milk chocolate and white chocolate contain less cocoa solids and more milk solids and sugar, which affects their melting and crystallization points, making them slightly trickier to temper and requiring lower temperature ranges. Starting with good quality dark couverture chocolate is often recommended when learning tempering chocolate for desserts.
Recommended Thermometers, Spatulas, and Tempering Machines for Precision
A reliable thermometer is arguably the most essential tool for tempering chocolate for desserts. As mentioned earlier, both digital probe thermometers and infrared thermometers work well. Ensure your thermometer is accurate within a degree or two. You'll also need sturdy spatulas for stirring and, if using the tabling method, a metal scraper. Silicone spatulas are excellent for stirring in bowls as they are non-reactive and easy to clean.
For those who plan to temper chocolate frequently or in larger quantities, investing in a chocolate tempering machine might be worthwhile. These machines automate the process by gently melting, cooling, and holding the chocolate at the correct working temperature, taking much of the guesswork out of tempering chocolate for desserts. While not strictly necessary for home bakers, they offer convenience and consistency for serious enthusiasts or small-batch producers.
Storage Tips for Tempered Chocolate to Preserve Quality
Once you've successfully tempered chocolate for desserts and used it in your creations, proper storage is key to maintaining its quality and preventing bloom. Store finished chocolate items in a cool, dry place, ideally between 15°C and 20°C (59°F and 68°F). Significant temperature fluctuations are a primary cause of bloom, so avoid storing chocolate near heat sources or in the refrigerator if possible, as condensation can also cause sugar bloom.
Airtight containers can help protect chocolate from moisture and odors, which it can easily absorb. If refrigeration is necessary due to a warm climate, place the chocolate in an airtight container before refrigerating, and allow it to come to room temperature slowly within the container before opening it to prevent condensation. Following these storage tips will help ensure that the beautiful gloss and snap you achieved by tempering chocolate for desserts last as long as possible.
Elevating Your Baking with Expert Tips on Tempering Chocolate for Desserts
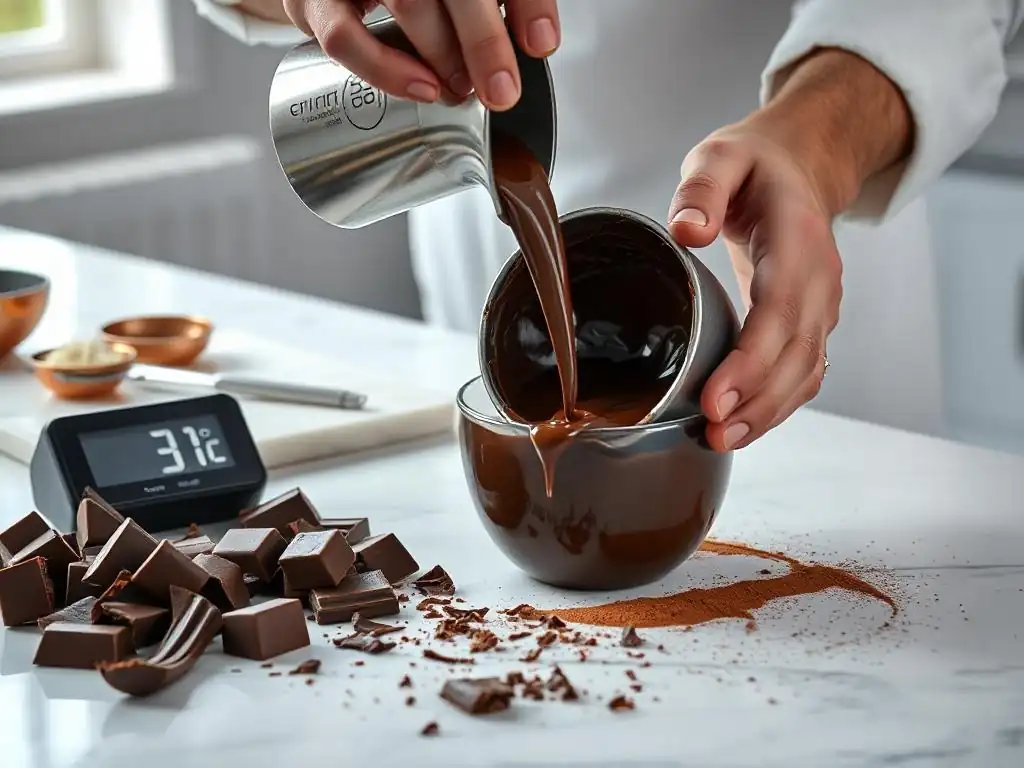
Moving beyond basic applications, tempered chocolate can become a versatile ingredient and decorative element that truly elevates your baking repertoire. These expert tips focus on integrating tempered chocolate creatively into your desserts for enhanced flavor and visual impact.
Combining Tempered Chocolate with Flavor Infusions and Inclusions
Tempered chocolate serves as an excellent base for incorporating various flavors and textures. Before the chocolate sets completely after tempering, you can stir in finely chopped nuts, dried fruit, crushed cookies, or even flaky sea salt to create custom chocolate bark or inclusion bars. Ensure any inclusions are completely dry to avoid seizing the chocolate.
You can also infuse tempered chocolate with flavors. While the chocolate is melted during the initial phase of tempering, you can steep ingredients like coffee beans, tea leaves, or citrus zest in the warm chocolate for a short period before straining them out and proceeding with the cooling and reheating steps. Alternatively, add fat-soluble flavorings or extracts (like peppermint oil or orange oil) to the tempered chocolate just before using it. Experimenting with these combinations allows you to create unique and personalized treats using tempered chocolate for desserts.
Pairing Tempered Chocolate Elements with Complementary Dessert Components
Think about how the texture and flavor of tempered chocolate can complement other elements in a dessert. The crisp snap of a tempered chocolate coating provides a wonderful textural contrast to soft interiors like ganache truffles, mousse cakes, or creamy tarts. A delicate tempered chocolate garnish can add elegance and a satisfying crunch to a smooth panna cotta or crème brûlée.
Consider the flavor profile of the chocolate itself and pair it with complementary tastes. Dark tempered chocolate pairs beautifully with red fruits, coffee, or caramel. Milk tempered chocolate works well with nuts, toffee, or peanut butter. White tempered chocolate complements berries, citrus, or vanilla. Strategically incorporating tempered chocolate for desserts, either as a coating, inclusion, or decoration, enhances the overall sensory experience by adding layers of texture and flavor.
Creative Presentation Ideas Using Tempered Chocolate Techniques
Tempered chocolate is a fantastic medium for creative dessert presentation. Use tempered chocolate to make intricate edible decorations like chocolate cages, ribbons, or delicate filigree work by piping or spreading it onto parchment paper and shaping it before it sets. Create chocolate shards or "sails" by spreading tempered chocolate thinly and breaking it into pieces once set.
You can also use tempered chocolate to create elegant drizzles or swirls over cakes and pastries. For a modern look, paint the inside of molds with colored cocoa butter before pouring in tempered chocolate, creating vibrant, patterned bonbons. The possibilities for using tempered chocolate for desserts in decorative ways are vast, limited only by your imagination and steady hand. Practice with simple techniques first, and gradually move towards more complex designs to impress with your baking skills.
Conclusion: Unlocking the Full Potential of Tempering Chocolate in Advanced Baking
Mastering the art of tempering chocolate for desserts is a significant step in elevating your baking skills. It transforms chocolate from a simple ingredient into a powerful tool for achieving professional-level results with stunning visual appeal, delightful textures, and enhanced flavor. The process, while requiring precision and practice, is incredibly rewarding.
How Mastering Tempering Chocolate Transforms Dessert-Making Skills
Successfully tempering chocolate for desserts builds confidence and opens doors to creating a wider array of sophisticated confections that were previously out of reach. You gain the ability to produce glossy, snappy chocolate coatings, perfectly molded figures, and stable decorative elements. This skill allows you to replicate techniques used by professional chocolatiers and patissiers, significantly improving the quality and presentation of your homemade treats.
Beyond specific applications, the discipline required for tempering – the attention to temperature, the care in handling – translates into greater precision in other areas of baking. It instills an understanding of ingredient science and process control, which are valuable assets for any baker looking to advance their craft. Mastering tempering chocolate for desserts truly transforms your capabilities in the kitchen.
Encouragement to Experiment and Innovate with Tempered Chocolate Recipes
Don't be discouraged if your first attempts at tempering chocolate aren't perfect. It's a skill that improves with practice. Use the techniques and tips outlined here as a foundation, and then feel encouraged to experiment. Try different types of chocolate, explore various flavoring infusions, and get creative with molding and decorating.
The world of tempered chocolate is vast and offers endless opportunities for innovation. Combine tempered chocolate elements with new recipes, develop unique flavor pairings, or design original chocolate decorations. Embrace the process, learn from any mishaps, and enjoy the journey of unlocking the full potential of tempering chocolate for desserts in your advanced baking adventures. The beautiful, delicious results are well worth the effort.
Frequently Asked Questions
What exactly is tempering chocolate, and why is it so important?
Tempering chocolate is the process of stabilizing the cocoa butter crystals within the chocolate. This results in a smooth, glossy finish and a satisfying snap when you break it. Without tempering, chocolate can be dull, streaky, and melt easily.
What happens if I don't temper my chocolate before using it in desserts?
Untempered chocolate will likely bloom, meaning a white or grayish coating appears on the surface. It will also be soft and melty at room temperature, making it unsuitable for many dessert applications requiring a firm set.
What are the different methods for tempering chocolate, and which is the easiest for beginners?
There are several methods, including the seeding method, the tabliering method (on a marble slab), and using a double boiler. The seeding method is often considered the easiest for beginners, as it involves adding tempered chocolate to melted chocolate to stabilize it.
What temperature ranges are crucial to monitor when tempering chocolate, and why are they important?
Specific temperature ranges are crucial for different types of chocolate (dark, milk, white). Monitoring these temperatures is essential because it ensures the correct cocoa butter crystals form. The goal is to melt the chocolate enough to break down unstable crystals, then cool it to encourage the formation of stable ones.
Can I temper chocolate in the microwave, and if so, how?
Yes, you can temper chocolate in the microwave, but it requires careful attention. Microwave in short bursts, stirring frequently to prevent overheating. Use a thermometer to monitor the temperature closely and follow a specific tempering method, such as the seeding method, to ensure proper crystallization.
Final Reflection: The Enduring Sweetness of Mastery
The art of tempering chocolate, far from being a mere technical skill, represents a profound journey of precision, patience, and ultimately, transformation. Mastering this process unlocks not only the creation of flawlessly smooth, glossy desserts but also a deeper understanding of the delicate balance between science and artistry in culinary creation. This balance is more relevant today than ever, as consumers increasingly demand high-quality, ethically sourced ingredients and expertly crafted experiences.
The impact of properly tempered chocolate extends far beyond the visual appeal of a perfectly finished dessert. It speaks to a dedication to quality, a respect for the ingredients, and a commitment to excellence that resonates deeply with both the creator and the consumer. The difference between something good and something great is attention to detail.
This quote, though not specifically about chocolate tempering, perfectly encapsulates the spirit of this process and its broader implications within the culinary world. The meticulous attention required fosters a sense of mindfulness and appreciation for the craft, qualities that are increasingly valued in our fast-paced society.
Now, consider your own approach to your culinary endeavors. Are you willing to embrace the challenges of tempering chocolate, to invest the time and effort required to achieve that perfect sheen and snap? I invite you to experiment, to learn from your mistakes, and to savor the satisfaction of mastering this transformative process.
The journey itself, with its moments of frustration and ultimate triumph, is as rewarding as the beautifully tempered chocolate that results. The skills you gain will not only elevate your desserts but also cultivate a deeper appreciation for the artistry and precision inherent in all forms of culinary creation.
Unlock Your Chocolate Mastery: Tempering Made Easy!
Thanks for diving into the world of chocolate tempering! You've now gained the knowledge to create flawlessly smooth and shiny chocolate creations. Ready to put your newfound skills to the test?
- Master the art: Try tempering a small batch of chocolate using the method you found most effective in the article. It's the best way to solidify your learning!
- Share your success: Post a picture of your perfectly tempered chocolate on social media and tag #BakeWithEaseTempering – let's see those gorgeous results!
- Explore new recipes: Browse our website for delicious recipes that showcase the beauty of tempered chocolate. Challenge yourself with something new!
What exciting chocolate project will you tackle first? Let us know in the comments below!