
Decode the Mystery of Lustrous Chocolate for Your Baking.

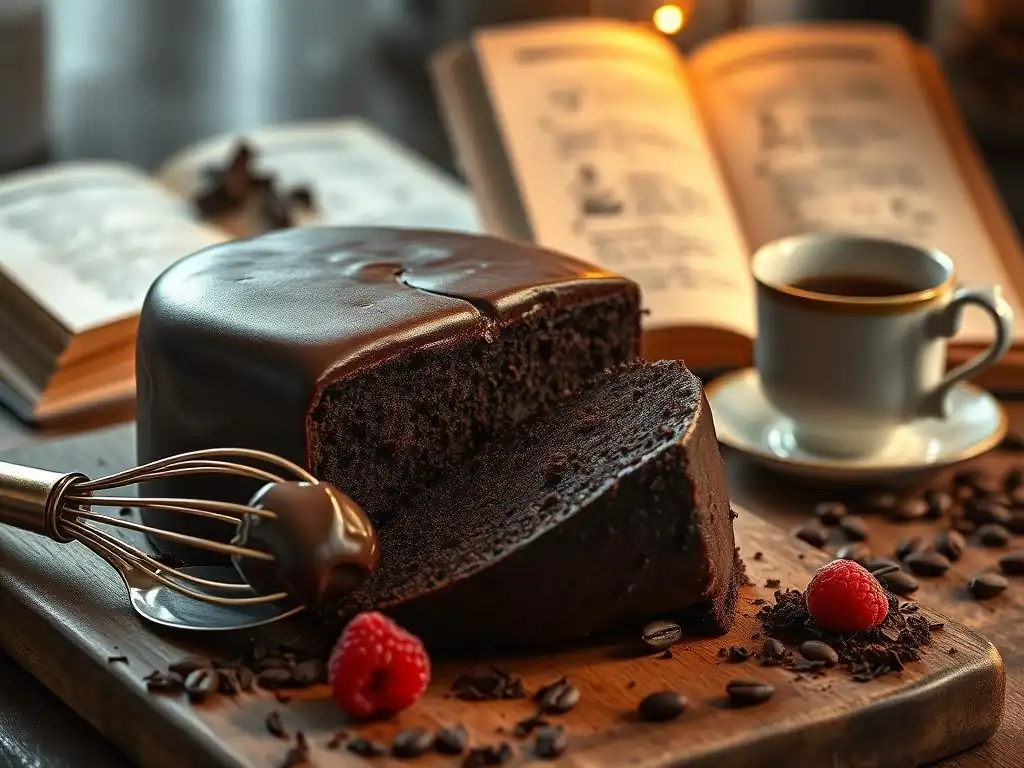
Welcome to BakeWithEase!
Unlock the secrets to achieving that perfectly lustrous chocolate finish in your baking creations. Whether you're dreaming of decadent ganaches or dazzling chocolate decorations, we'll guide you through expert techniques that elevate your desserts from ordinary to extraordinary. Ready to decode the mystery and add a touch of brilliance to your chocolate baking? Let's get started!
- Decode the Mystery of Lustrous Chocolate for Your Baking: BakeWithEase's Guide
- Achieving Lustrous Chocolate: An Introduction for Bakers
- Mastering Chocolate Tempering: The Key to Lustrous Results
- Lustrous Chocolate Baking Tips: A Step-by-Step Guide
- Troubleshooting Common Chocolate Tempering Problems for Baking
- Recipes That Showcase Lustrous Chocolate
- Maintaining Lustrous Chocolate: Storage and Handling
- Advanced Techniques for Enhanced Chocolate Luster in Baking
- Conclusion: Elevate Your Baking with Lustrous Chocolate
-
Frequently Asked Questions
- What makes chocolate look dull after baking?
- How can I achieve a glossy chocolate finish in my baked goods?
- What are some common mistakes that lead to lackluster chocolate in baking?
- What types of chocolate are best for achieving a lustrous sheen in finished baked goods?
- How does tempering chocolate contribute to its shine after baking?
- Final Reflection: The Enduring Allure of Lustrous Chocolate
- Unlock Your Inner Chocolate Master!
Decode the Mystery of Lustrous Chocolate for Your Baking: BakeWithEase's Guide
Achieving Lustrous Chocolate: An Introduction for Bakers
Baking with chocolate is a true pleasure, but achieving that perfect, glossy finish can sometimes feel like a mystery. You've seen those professional confections – bonbons shimmering under the light, cakes draped in a mirror-like glaze, biscotti with a perfect snap and shine. This isn't magic; it's the result of understanding chocolate's unique properties and applying specific techniques, primarily tempering. Mastering the art of creating lustrous chocolate elevates your baked goods from homemade treats to stunning showpieces, impressing everyone who sees and tastes them.
Unlocking the secret to truly lustrous chocolate involves delving into its crystalline structure. When chocolate is simply melted and cooled, its fat molecules (cocoa butter) solidify in a chaotic, unstable way, resulting in a dull, streaky appearance and a soft texture. Tempering, however, is the process of carefully melting, cooling, and then slightly reheating chocolate to encourage the cocoa butter crystals to form a stable, uniform structure. This stable structure is what gives chocolate its desirable properties: a glossy finish, a firm texture, and that satisfying snap when broken.
Why Lustrous Chocolate Matters in Baking
The visual appeal of a baked good is often the first thing that captures attention, and a lustrous chocolate finish makes an immediate statement of quality and care. Imagine a rich chocolate truffle or a perfectly enrobed pastry; the shine communicates sophistication and expertise. This isn't just about aesthetics; the process that creates shine – tempering – also ensures the chocolate is firm, doesn't melt easily at room temperature, and has a pleasant mouthfeel. A dull, bloomy chocolate coating, on the other hand, can signal improper handling, leading to a less appealing texture and taste experience.
Beyond the immediate visual impact, achieving lustrous chocolate is a hallmark of advanced baking techniques and attention to detail. It shows a baker's understanding of ingredients and processes. Whether you're making decorative elements like chocolate shards, coating candies, or creating a flawless ganache glaze, the difference between a dull finish and a brilliant sheen is significant. It transforms simple ingredients into edible art, making your baked creations not just delicious, but truly unforgettable in their presentation.
Understanding the Science Behind Shiny Chocolate
The key to shiny chocolate lies in the crystallization of cocoa butter, the fat component of chocolate. Cocoa butter is polymorphic, meaning it can solidify into several different crystal forms, each with distinct melting points and structures. There are six known forms, typically labeled Forms I through VI. Only one of these forms, Form V, is stable and desirable for confectionery purposes. This Form V crystal structure melts at just above body temperature (around 32-34°C or 90-93°F), giving chocolate that smooth, melt-in-your-mouth quality, along with a firm texture and a beautiful gloss.
When chocolate is melted and allowed to cool without specific temperature control, the cocoa butter forms a mix of unstable crystals (Forms I-IV) and potentially some Form V, but not enough stable ones to dominate. These unstable crystals melt at lower temperatures and can rearrange over time, leading to fat bloom (a grayish, dull surface).
Tempering is the process designed to melt out the unstable crystal forms while promoting the formation and growth of the stable Form V crystals. By carefully controlling the temperature through melting, cooling, and reheating cycles, you guide the cocoa butter into forming this desired structure, resulting in that sought-after lustrous finish.
Mastering Chocolate Tempering: The Key to Lustrous Results
Achieving truly lustrous chocolate is synonymous with mastering the technique of tempering. This process is fundamental for any baker or chocolatier looking to work with chocolate beyond simply melting it into a batter. Without proper tempering, chocolate used for coating, molding, or decorative work will lack shine, be soft and prone to melting, and can develop bloom over time. It might seem intimidating at first, but with practice and attention to detail, tempering becomes a manageable and rewarding skill in your baking repertoire.
Tempering essentially involves a precise dance of temperature changes to manipulate the cocoa butter crystals. The goal is to break down all existing crystal structures by heating the chocolate sufficiently, then cool it down to a specific temperature range where Form V crystals can form and stabilize, and finally, warm it slightly to eliminate any remaining unstable crystals, leaving only the desired Form V structure. This state of tempered chocolate is then ready to be used for dipping, molding, or decorating, ensuring a beautiful, durable, and shiny finish on all your chocolate baked goods.
What is Chocolate Tempering and Why is it Essential?
Chocolate tempering is a critical process for anyone working with chocolate intended to solidify into a stable, glossy, and firm structure. It involves heating, cooling, and re-heating chocolate to specific temperatures to control the crystallization of cocoa butter. When chocolate is melted casually, the cocoa butter molecules solidify into various unstable crystal forms. These forms lead to a dull, streaky appearance, a crumbly or soft texture, and susceptibility to fat bloom (a grayish, unappetizing film on the surface) and melting at room temperature.
The essence of tempering is to encourage the formation of stable Form V crystals, which are the most desirable for confectionery. These crystals solidify into a tight, uniform structure that gives tempered chocolate its signature properties: a brilliant shine, a clean snap when broken, a smooth texture that melts beautifully in the mouth, and resistance to melting at room temperature. For bakers creating chocolate decorations, dipping candies, enrobing pastries, or making molded chocolates, tempering is not optional; it's the fundamental technique required to achieve professional-quality results and that coveted lustrous chocolate finish.
Different Tempering Methods for Baking Chocolate
There are several reliable methods for tempering chocolate, each suitable for different quantities of chocolate and levels of experience. The core principle remains the same across methods: melt, cool while encouraging stable crystal formation, and gently reheat to working temperature. Choosing the right method often depends on the tools you have available and the amount of chocolate you need to temper. Experimenting with different techniques can help you find the one that works best for your specific baking needs and setup.
Understanding the temperature ranges for each type of chocolate (dark, milk, white) is crucial, as their compositions differ, particularly in cocoa butter and milk solids content. Generally, dark chocolate requires the highest temperatures, followed by milk, and then white chocolate. Using a reliable thermometer is non-negotiable for success in any tempering method. While the process requires precision, mastering a method like seeding or tablier tempering can significantly enhance the quality and appearance of your chocolate work in baking.
Seed Tempering Technique for Baking
The seed tempering method is widely considered one of the easiest and most reliable for home bakers. It involves melting the chocolate completely, then adding finely chopped, untempered chocolate (the "seed") to the melted chocolate while stirring. The seed chocolate contains stable Form V crystals, which act as templates, encouraging the melted chocolate to crystallize into the desired structure as it cools. This method is effective because you are introducing stable crystals directly into the mix.
To perform seed tempering, first melt about two-thirds of your chocolate gently, either over a double boiler or in the microwave on low power, until it reaches the upper end of its melting temperature range (e.g., around 45-50°C or 113-122°F for dark chocolate). Remove from heat and immediately stir in the remaining one-third of finely chopped chocolate. Stir constantly until the seed chocolate is fully melted and the mixture cools down to the working temperature range (e.g., 31-32°C or 88-90°F for dark chocolate).
The constant stirring helps distribute the crystals and promotes even cooling. Once it reaches the correct temperature and is smooth, it's tempered and ready to use for your lustrous chocolate baking applications.
Tablier Tempering (Working on Marble) for Baking
Tablier tempering, also known as the marble slab method, is a classic technique favored by professional chocolatiers for achieving highly lustrous chocolate. It requires a clean, cool, non-porous surface, traditionally marble or granite, and a metal scraper or spatula. This method relies on rapid cooling and constant movement to create stable Form V crystals. It allows for precise control over temperature and crystal formation, often resulting in a superior shine.
To execute tablier tempering, melt all of your chocolate completely, just as you would for seed tempering, reaching the same initial melting temperature. Pour about two-thirds of the melted chocolate onto your clean, cool marble surface. Using a metal scraper and spatula, spread the chocolate thinly and then scrape it back together, continuously working it across the surface. This process cools the chocolate rapidly while the movement encourages the formation of stable crystals.
Continue working the chocolate until it thickens and reaches a specific cooling temperature (e.g., 27-28°C or 81-82°F for dark chocolate). Scrape the cooled chocolate back into the bowl with the remaining one-third of warm melted chocolate. Stir thoroughly. The warmer chocolate will gently reheat the cooled chocolate, bringing the mixture up to the final working temperature (e.g., 31-32°C or 88-90°F for dark chocolate), leaving only the stable Form V crystals.
Microwave Tempering Technique for Baking
Microwave tempering is arguably the simplest and fastest method, making it ideal for small quantities of chocolate needed for specific lustrous chocolate baking tips or small projects. It's a variation of the seed tempering method, using the microwave to carefully control the melting and cooling process. While quick, it requires careful attention to avoid overheating the chocolate, which can ruin the temper. This method is particularly convenient for dipping small items or creating quick chocolate decorations.
To temper chocolate in the microwave, place finely chopped chocolate (or callets) in a microwave-safe bowl. Heat on a low power setting (e.g., 50%) for short intervals (30-60 seconds), stirring thoroughly after each interval. Reduce the time between intervals as the chocolate begins to melt. Continue until the chocolate is mostly melted, with just a few small unmelted pieces remaining.
Remove from the microwave and stir vigorously. The residual heat will melt the remaining pieces, and the stirring will help cool the chocolate down to its working temperature while encouraging stable crystal formation. Check the temperature with a thermometer; once it reaches the correct working temperature range (e.g., 31-32°C for dark chocolate), it is tempered and ready to use.
Lustrous Chocolate Baking Tips: A Step-by-Step Guide
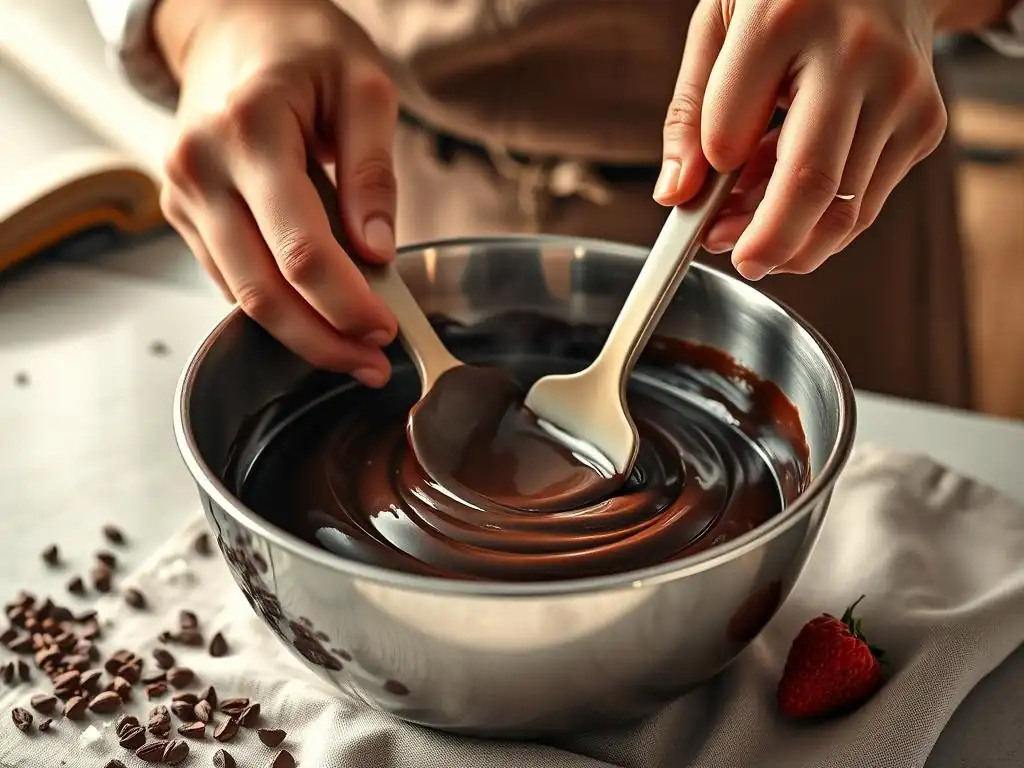
Achieving truly lustrous chocolate in your baking projects involves more than just tempering; it's also about meticulous preparation, careful temperature monitoring, and proper handling of the tempered chocolate itself. Think of tempering as laying the foundation, and these additional steps as refining the structure to ensure maximum shine and stability. Following a systematic approach will significantly increase your success rate and help you consistently produce beautifully glossy chocolate finishes.
Implementing these lustrous chocolate baking tips requires patience and attention to detail. From the initial melting stage to the final solidification, every step plays a role in the final appearance. Using the right tools, understanding temperature cues, and working efficiently once the chocolate is tempered are all key factors. This guide breaks down the essential stages to help you navigate the process effectively and achieve that professional-looking shine on your baked goods.
Preparing Your Chocolate for Tempering: A Baker's First Step
Proper preparation of your chocolate before tempering is fundamental to a successful outcome and achieving lustrous chocolate. Start with high-quality chocolate. Compound chocolate (candy melts) does not contain cocoa butter and therefore cannot be tempered; it melts and solidifies differently and will not give you a true glossy finish. Use couverture chocolate or high-quality baking chocolate that lists cocoa butter as an ingredient. The form of the chocolate matters too; callets (small drops or buttons) or finely chopped bar chocolate melt more evenly and quickly than large chunks.
Ensure your workspace and all equipment are completely dry and free of any water droplets. Even a tiny amount of water can cause chocolate to seize, instantly turning it into a thick, unworkable paste and ruining your tempering efforts. Use clean, dry bowls and spatulas. If using a double boiler, make sure the bottom of the bowl does not touch the simmering water, and that no steam escapes into the chocolate. Melting the chocolate gently and evenly is the goal of this preparatory step before you begin the actual tempering process.
Monitoring Chocolate Temperature: Crucial for Lustrous Finish
Accurate temperature monitoring is perhaps the single most critical factor in successful chocolate tempering and achieving a lustrous finish. Each step of the tempering process – melting, cooling, and re-warming – requires the chocolate to be within specific temperature ranges, which vary depending on the type of chocolate (dark, milk, or white). Guessing temperatures will almost certainly lead to failure. A reliable digital thermometer is an indispensable tool for any serious baker working with chocolate.
For dark chocolate, you typically melt it to 45-50°C (113-122°F), cool it to 27-28°C (81-82°F) to crystallize, and then gently warm it to a working temperature of 31-32°C (88-90°F). Milk chocolate ranges are slightly lower: melt to 40-45°C (104-113°F), cool to 26-27°C (79-81°F), and work at 29-30°C (84-86°F). White chocolate has the lowest ranges: melt to 35-40°C (95-104°F), cool to 25-26°C (77-79°F), and work at 28-29°C (82-84°F). Staying within these narrow windows is essential for encouraging the formation of stable Form V crystals and ensuring your lustrous chocolate baking tips yield shiny results.
Working with Tempered Chocolate: Best Practices for Baking
Once your chocolate is perfectly tempered and at the correct working temperature, handling it properly is key to maintaining its temper and achieving a flawless, lustrous finish on your baked goods. Tempered chocolate will begin to set relatively quickly compared to untempered chocolate, so it's important to work efficiently. Keep your workspace relatively cool (ideally around 20-22°C or 68-72°F) and avoid drafts, which can cause uneven cooling and affect the shine.
When using tempered chocolate for dipping or molding, ensure the items you are coating or the molds are clean and dry. The surface of the item being dipped or the mold needs to be cooler than the chocolate to encourage rapid crystallization on contact, which helps set the shine. Avoid touching the setting chocolate as much as possible, as fingerprints will mar the surface and compromise the lustrous finish. Allow the chocolate to solidify fully at room temperature or in a cool, dry place (not the refrigerator, as condensation can cause bloom) for the best results.
Moulding with Tempered Chocolate for Baking
Moulding chocolate is a fantastic way to create professional-looking decorations or confections with a brilliant, lustrous finish, provided you use properly tempered chocolate. High-quality polycarbonate molds are ideal because they are rigid, smooth, and allow the chocolate to contract as it cools, making release easier and enhancing the shine. Silicone molds are more flexible but can sometimes result in a slightly less sharp or shiny finish compared to polycarbonate.
To mold with tempered chocolate, ensure your molds are spotlessly clean and completely dry. Warm the molds slightly (just to room temperature, not hot) if they are cold, as this prevents shocking the chocolate. Pour the tempered chocolate into the cavities, tapping the mold gently on the counter to release air bubbles. Pour out any excess chocolate (for hollow shapes) or fill completely (for solid shapes).
Scrape the top edge clean with a spatula. Allow the chocolate to set fully at room temperature. Properly tempered chocolate will contract as it cools and should release easily from the mold, revealing a smooth, highly lustrous surface.
Enrobing with Tempered Chocolate for Baking
Enrobing, or dipping, items like cookies, truffles, or pastries in tempered chocolate is a common baking technique for applying a flawless, lustrous coating. Using tempered chocolate ensures the coating sets quickly, is firm, doesn't melt easily in your hands, and has that desirable snap and shine. The viscosity of the tempered chocolate is important; it should be fluid enough to coat evenly but not so thin that it runs off excessively.
To enrobe effectively, keep your tempered chocolate at its working temperature, ideally using a warming bath or a gently heated container. Use dipping tools (like forks or skewers) to immerse the items. Lift the item out, allowing excess chocolate to drip back into the bowl, and gently scrape the bottom against the edge of the bowl or a wire rack to remove drips.
Place the enrobed item onto parchment paper or a non-stick mat to set. Work quickly before the chocolate starts to set in the bowl. The quick setting time of tempered chocolate means you get a smooth, even coating with excellent shine and durability.
Troubleshooting Common Chocolate Tempering Problems for Baking
Even with careful attention to temperature and method, you might occasionally encounter issues when tempering chocolate for baking. Understanding these common problems – seizing, bloom, and lack of snap – and knowing how to prevent or fix them is part of mastering the art of achieving lustrous chocolate. Don't be discouraged by setbacks; they are learning opportunities that will improve your technique over time.
Identifying the cause of a tempering issue is the first step toward resolving it. Most problems stem from incorrect temperatures, the presence of moisture, or improper cooling. By being aware of these pitfalls and having strategies to address them, you can save your chocolate and get back on track to creating those beautiful, lustrous chocolate finishes for your baked goods.
Chocolate Seizing: Prevention and Solutions for Baking
Chocolate seizing is one of the most frustrating problems in baking, occurring when chocolate suddenly transforms from a smooth, fluid state into a thick, lumpy, unworkable paste. This happens when even a tiny amount of water or steam comes into contact with melted chocolate. The sugar in the chocolate attracts the water, forming a syrup, and the cocoa solids clump together, causing the seizing reaction. Once seized, the chocolate cannot be used for dipping, molding, or achieving a lustrous finish.
Prevention is the best approach to avoid chocolate seizing. Ensure all your equipment – bowls, spatulas, spoons – are absolutely dry. If using a double boiler, make sure the water is simmering gently, not boiling vigorously, and that the bowl fits snugly over the pot to prevent steam from escaping and condensing into the chocolate.
If your chocolate does seize, sometimes you can rescue it by stirring in a tablespoon or two of hot, melted fat, such as melted butter, vegetable oil, or cocoa butter. This can help loosen the clumps, but the resulting mixture will not be tempered and cannot be used for applications requiring a lustrous chocolate finish or proper set. It might be usable in a ganache or baked into a cake batter.
Bloom in Chocolate: Understanding and Avoiding It in Baking
Chocolate bloom appears as a grayish or whitish film or streaks on the surface of chocolate. There are two types: sugar bloom and fat bloom. Sugar bloom occurs when condensation forms on the surface of chocolate (often from moving cold chocolate into a warm, humid environment), dissolving sugar crystals which recrystallize on the surface as fuzzy white spots.
Fat bloom is more common and related to improper tempering or storage; it happens when unstable cocoa butter crystals melt and migrate to the surface, recrystallizing in a dull, powdery layer. Both types ruin the aesthetic appeal and the desired lustrous finish.
Avoiding bloom is primarily achieved through proper tempering and storage. Tempering ensures the cocoa butter forms stable Form V crystals, which are less likely to migrate. Store chocolate in a cool, dry place with stable temperatures (ideally 15-18°C or 59-64°F) and low humidity (below 50%).
Avoid storing chocolate in the refrigerator unless it's sealed airtight and brought to room temperature very gradually to prevent condensation. If chocolate has bloomed, it is still safe to eat, but its texture and appearance are compromised. You can often remelt bloomed chocolate and temper it correctly to restore its shine and texture, making it suitable again for lustrous chocolate baking tips.
Achieving the Perfect Snap: A Sign of Well-Tempered Chocolate for Baking
The "snap" is a defining characteristic of properly tempered chocolate. When you break a piece of well-tempered chocolate, it should break cleanly with a distinct, crisp sound. This snap is a direct result of the stable Form V crystal structure of the cocoa butter. These crystals are tightly packed in a uniform lattice, giving the chocolate its firmness and brittleness at room temperature. A dull, soft, or bendable piece of chocolate indicates that it was not properly tempered, lacking the necessary stable crystal structure for that desirable snap and accompanying lustrous finish.
Testing for temper involves letting a small amount of the tempered chocolate set. Dip the tip of a knife or a piece of parchment paper into the chocolate. Allow it to set at room temperature for a few minutes.
If it sets quickly (within 3-5 minutes), is glossy, and snaps cleanly when broken, your chocolate is tempered and ready to use for all your lustrous chocolate baking projects. If it remains soft, sets slowly, or is dull, it is not tempered correctly and needs to be re-tempered. The snap test is a simple yet effective way to confirm your tempering success before you begin working with larger quantities.
Recipes That Showcase Lustrous Chocolate
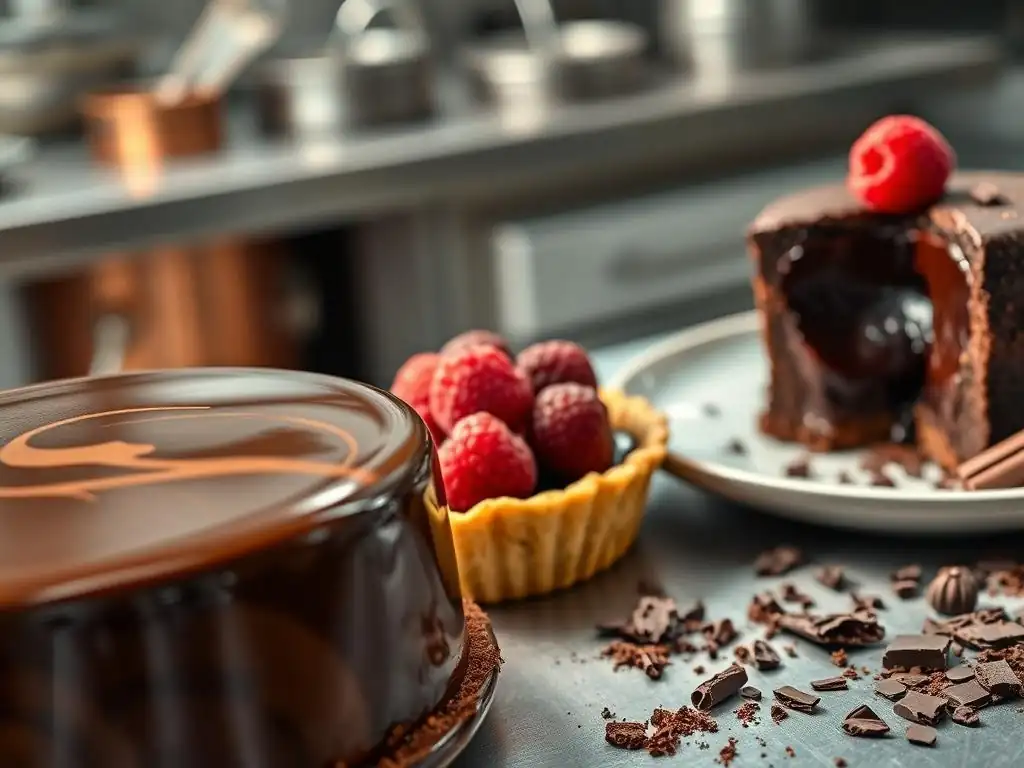
Putting your chocolate tempering skills to the test with recipes designed to highlight that brilliant shine is incredibly rewarding. While tempered chocolate can be used in countless ways, some applications truly showcase the lustrous finish better than others. Think about recipes where chocolate forms a prominent outer layer or decorative element. These recipes provide excellent opportunities to practice your tempering techniques and demonstrate the beautiful results of well-executed lustrous chocolate baking tips.
From elegant bonbons to simple dipped treats, incorporating tempered chocolate elevates the presentation and texture of your baked goods. These examples provide a starting point for exploring the possibilities. Remember that the quality of the chocolate and the precision of your tempering will directly impact the final shine and snap, making each of these recipes a perfect canvas for showcasing your mastery of lustrous chocolate.
Chocolate Bonbons with Pistachio Filling and Lustrous Shells
Creating chocolate bonbons is a classic application for tempered chocolate and a fantastic way to showcase a truly lustrous finish. The goal is a thin, crisp, shiny chocolate shell encasing a delicious filling. Using high-quality tempered chocolate is essential for achieving shells that are easy to unmold, have a brilliant shine, and offer a satisfying snap when bitten into. A vibrant green pistachio filling provides a beautiful contrast against the dark, glossy chocolate exterior.
To make bonbons with lustrous shells, you'll need polycarbonate molds and perfectly tempered chocolate (dark, milk, or white, depending on preference). Fill the mold cavities completely with tempered chocolate, then immediately invert the mold and tap out the excess, leaving a thin layer of chocolate coating the inside of the mold. Scrape the top clean. Allow the shells to set fully at room temperature.
Once set, pipe your cooled pistachio filling into the shells, leaving a small space at the top. Cap the bonbons by pouring more tempered chocolate over the mold, scraping off the excess to seal the bottoms. Let them set completely before unmolding to reveal your beautiful, lustrous chocolate bonbons.
Chocolate-Dipped Biscotti with Perfect Shine
Dipping biscotti in chocolate adds an extra layer of indulgence and provides a wonderful opportunity to achieve a perfect, lustrous chocolate coating. The crisp texture of the biscotti contrasts beautifully with the smooth, snappy chocolate. Using tempered chocolate ensures that the chocolate coating sets quickly and firmly, doesn't melt in your hands, and has a beautiful shine that elevates this simple cookie to something special.
After baking and cooling your biscotti, prepare your tempered chocolate using your preferred method. Hold a biscotti piece by one end and dip the desired portion into the tempered chocolate, allowing excess to drip off. For an extra neat finish, scrape the bottom of the dipped biscotti against the edge of the chocolate bowl or a wire rack.
Place the dipped biscotti onto parchment paper or a non-stick mat to set completely at room temperature. The tempered chocolate will solidify quickly, leaving a smooth, hard, and very shiny coating that perfectly complements the crunchy biscotti. This is a straightforward way to practice your lustrous chocolate baking tips.
Flourless Chocolate Cake with Mirror Glaze
While not a solid chocolate piece, a mirror glaze made with tempered chocolate or incorporating cocoa butter and gelatin offers an incredibly smooth, reflective, and lustrous finish for cakes. This type of glaze is often used on mousse cakes or dense flourless cakes to create a stunning, professional appearance. Achieving the perfect mirror-like shine requires precise temperatures and a well-executed technique.
A classic mirror glaze recipe often involves heating glucose syrup, sugar, water, and condensed milk, then pouring this mixture over bloomed gelatin and tempered white chocolate (or a mixture of cocoa powder, water, sugar, and gelatin for a dark glaze). The mixture is then emulsified, often with an immersion blender, being careful not to incorporate air bubbles.
The key to a mirror glaze's luster and perfect pourable consistency is bringing it to the correct temperature (typically around 30-35°C or 86-95°F) before pouring it over a perfectly smooth, well-chilled (often frozen) cake. The specific composition and temperature control are what give this glaze its signature reflective, lustrous finish.
Maintaining Lustrous Chocolate: Storage and Handling
Once you've successfully tempered chocolate and created beautiful, lustrous chocolate baked goods or confections, proper storage and handling are crucial to preserve that hard-earned shine and texture. Incorrect storage conditions can lead to bloom, melting, or loss of snap, undoing all your careful work. Protecting your tempered chocolate creations from environmental factors is just as important as the tempering process itself.
Understanding how temperature, humidity, and even physical contact can affect tempered chocolate will help you keep your creations looking their best. Simple practices like choosing the right storage location and handling items minimally can make a significant difference in maintaining their lustrous finish and structural integrity over time. Treat your tempered chocolate pieces with care to ensure they remain perfect until they are enjoyed.
Proper Storage Techniques to Preserve Shine
Storing tempered chocolate correctly is essential to prevent bloom and maintain its glossy finish. The ideal storage environment is cool, dry, and has a stable temperature, away from direct sunlight or strong odors. A temperature range of 15-18°C (59-64°F) and humidity below 50% is generally recommended. Avoid storing chocolate in areas with fluctuating temperatures, such as near ovens or windows, or in humid environments.
The refrigerator is generally not recommended for storing tempered chocolate due to the high humidity and potential for condensation, which can cause sugar bloom. If you must refrigerate chocolate (e.g., due to a very warm climate), seal it tightly in an airtight container or multiple layers of plastic wrap and foil to protect it from moisture and odors. When removing refrigerated chocolate, allow it to come to room temperature very slowly while still wrapped before unwrapping. This prevents condensation from forming on the surface, helping to preserve that lustrous chocolate shine.
Handling Tempered Chocolate to Avoid Fingerprints and Smudges
The beautiful, smooth, lustrous surface of tempered chocolate is easily marred by fingerprints and smudges. The warmth of your skin is enough to slightly melt the delicate Form V crystals on the surface, leaving a dull mark. Therefore, minimizing direct contact with finished tempered chocolate pieces is vital for maintaining their pristine appearance.
When handling tempered chocolate bonbons, decorations, or dipped items, use gloves, preferably clean cotton gloves, or handle them using tools like tweezers or confectioner's forks. Lift items carefully from the setting surface onto serving plates or into packaging. If packaging items individually, consider using small paper cups or dividers to prevent them from touching each other and causing marks. By handling tempered chocolate minimally and with care, you ensure that the lustrous finish you worked hard to achieve remains perfect until the moment of indulgence. These small lustrous chocolate baking tips for handling make a big difference in presentation.
Advanced Techniques for Enhanced Chocolate Luster in Baking
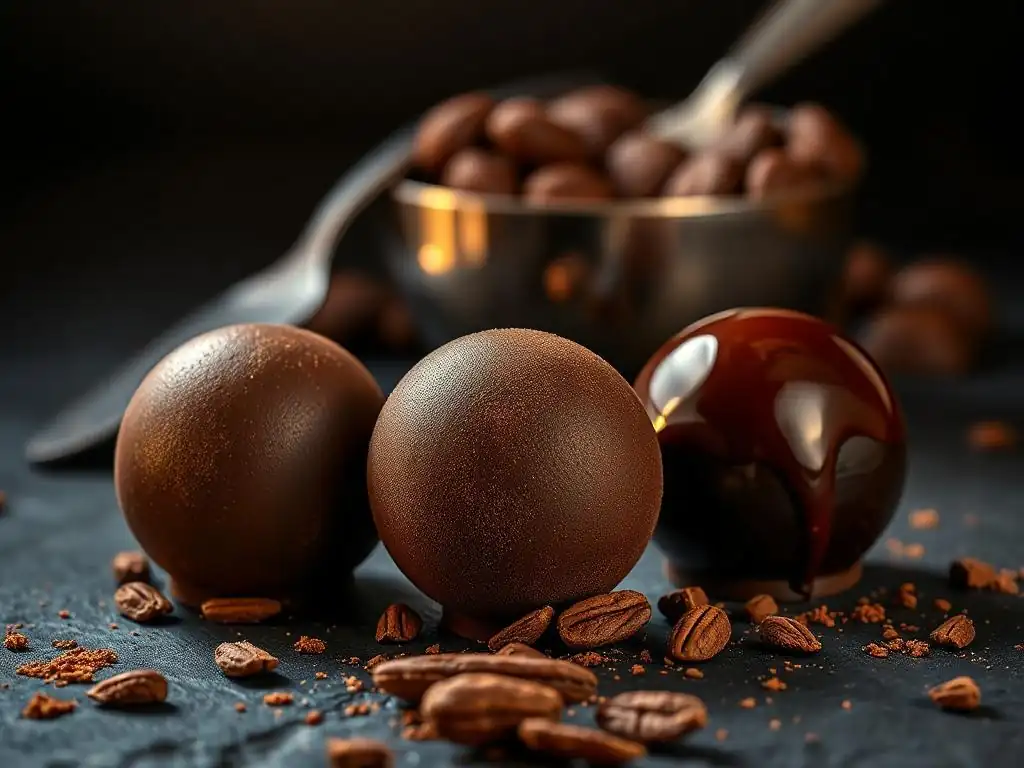
While traditional tempering methods yield excellent results, there are some more advanced techniques and ingredients that can help achieve an even more superior and consistent lustrous finish on your chocolate creations. These methods build upon the fundamental principles of tempering but offer additional layers of control and polish, particularly for professional-level work or when seeking the absolute best possible shine.
Exploring these advanced options can take your lustrous chocolate baking tips to the next level. They might involve using specific cocoa butter preparations or applying finishing touches after the chocolate has set. While not strictly necessary for home bakers, understanding these techniques provides insight into how top chocolatiers achieve their signature brilliant finishes.
Using Cocoa Butter Silk for Superior Tempering
Cocoa Butter Silk, also known as Mycryo powder, is a relatively modern and advanced method for tempering chocolate that is gaining popularity among professional and serious home bakers. It is made from 100% pure cocoa butter that has been pre-crystallized into stable Form V crystals. Adding a small percentage of this powder to melted chocolate provides a high concentration of stable seed crystals, making the tempering process very precise and reliable, often resulting in a beautiful, consistent lustrous chocolate finish.
To use Cocoa Butter Silk, melt your chocolate completely to its initial melting temperature (e.g., 45-50°C for dark). Allow the chocolate to cool naturally, with occasional stirring, down to its working temperature (e.g., 31-32°C for dark). Once the chocolate reaches this temperature, stir in 1% of its weight in Cocoa Butter Silk powder (e.g., 5g of powder for 500g of chocolate).
Stir gently but thoroughly for a few minutes to distribute the crystals. The chocolate is now tempered and ready to use. This method is often considered more foolproof than traditional seeding or tablier methods, consistently producing chocolate with excellent shine and snap.
Polishing Techniques for Extra Shine
For certain applications, particularly molded chocolate figures or bonbon shells, a final polishing step can enhance the natural luster achieved through tempering, adding an extra level of brilliance. This technique is usually applied after the chocolate has fully set and been unmolded. It's a subtle refinement that can make a significant visual impact on the final product, making your lustrous chocolate creations truly stand out.
One common polishing technique involves gently buffing the surface of the chocolate with a soft material. This could be a piece of cotton wool, a soft microfiber cloth, or even a dedicated chocolate polishing brush. The gentle friction helps to smooth out any microscopic imperfections on the surface and bring out the maximum shine from the tempered cocoa butter crystals. This step is typically used for showpieces or high-end confections where presentation is paramount, adding that final touch to your lustrous chocolate baking artistry.
Conclusion: Elevate Your Baking with Lustrous Chocolate
Mastering the art of achieving lustrous chocolate is a skill that significantly elevates your baking. It transforms simple ingredients into visually stunning creations, adding a layer of professionalism and sophistication to everything from dipped cookies to intricate bonbons. The process of tempering, while requiring precision and practice, is the fundamental technique that unlocks this beautiful shine and ensures your chocolate sets correctly with a satisfying snap.
By understanding the science of cocoa butter crystallization and diligently applying the techniques of tempering, temperature monitoring, and proper handling, you can consistently achieve that coveted glossy finish. Don't be afraid to experiment with different methods and troubleshoot issues as they arise. Each attempt builds your skill and confidence.
The Art and Science of Beautifully Tempered Chocolate
Achieving beautifully tempered chocolate is a perfect blend of art and science. The science lies in understanding the specific temperature ranges and the behavior of cocoa butter crystals. It requires precision, accurate tools like thermometers, and attention to detail. The art comes in the practice – developing a feel for the chocolate's consistency at different temperatures, working efficiently, and applying the tempered chocolate smoothly and evenly to your baked goods.
When executed correctly, the result is a piece of chocolate that is not only delicious but also a feast for the eyes. The brilliant, lustrous finish is a testament to the baker's skill and patience, showcasing the transformative power of proper technique. Embrace the challenge and reward of working with tempered chocolate; it's a skill that will open up a world of possibilities in your baking.
Further Resources for Chocolate Tempering Mastery on BakeWithEase
To continue your journey towards mastering lustrous chocolate baking tips and techniques, explore the wealth of resources available right here on BakeWithEase. We offer detailed guides on selecting the best chocolate for tempering, in-depth tutorials on each tempering method with visual aids, and recipes specifically designed to help you practice and showcase your skills.
Dive deeper into the nuances of working with dark, milk, and white chocolate, troubleshoot specific issues you might encounter, and find inspiration for your next chocolate project. Our goal is to provide you with the knowledge and confidence needed to tackle chocolate tempering successfully and consistently achieve beautiful, lustrous results in all your baking endeavors. Keep practicing, keep learning, and enjoy the shine!
Frequently Asked Questions
What makes chocolate look dull after baking?
Dull chocolate is often caused by chocolate bloom, where cocoa butter separates and rises to the surface. This can occur due to temperature fluctuations or improper tempering.
How can I achieve a glossy chocolate finish in my baked goods?
To get that shiny finish, ensure your chocolate is properly tempered before use. Also, avoid overbaking and use high-quality chocolate with a good cocoa butter content.
What are some common mistakes that lead to lackluster chocolate in baking?
Common mistakes include overheating the chocolate during melting, allowing water to contaminate it, and using old or low-quality chocolate.
What types of chocolate are best for achieving a lustrous sheen in finished baked goods?
Chocolate with a higher cocoa butter content, such as couverture chocolate, tends to produce a more lustrous finish. Using good-quality dark chocolate also helps.
How does tempering chocolate contribute to its shine after baking?
Tempering properly aligns the cocoa butter crystals, creating a stable and smooth structure that reflects light. This results in a glossy and appealing finish after baking.
Final Reflection: The Enduring Allure of Lustrous Chocolate
The pursuit of perfectly lustrous chocolate isn't merely an aesthetic endeavor; it's a testament to the power of precision and understanding in baking. A flawlessly glossy finish elevates a simple dessert into a masterpiece, transforming a treat into an experience. This article explored the science behind achieving that coveted shine, from the careful selection of chocolate to the precise techniques of tempering and finishing. But the impact extends far beyond the visual; it speaks to a dedication to craft and the joy of creating something truly beautiful.
The quest for lustrous chocolate reflects a broader cultural fascination with the sensory experience of food. We are drawn to its visual appeal, its rich aroma, and its decadent texture. This pursuit isn't just about following a recipe; it's about connecting with a tradition of culinary artistry passed down through generations. The best things in life are simple, but not easy.
This quote perfectly encapsulates the journey to achieving lustrous chocolate—simple in its goal, yet demanding in its execution. The reward, however, is immeasurable.
Now, consider your own baking journey. What have you learned about precision and patience from this exploration of chocolate? I invite you to embrace the challenge of achieving that perfect sheen, not just for the visual impact, but for the deeper satisfaction of mastering a craft. Experiment with different techniques, refine your methods, and most importantly, savor the process. The journey to lustrous chocolate is a journey of self-discovery, a testament to your dedication, and a celebration of the artistry within you.
Unlock Your Inner Chocolate Master!
Thanks for taking the time to explore the delicious world of lustrous chocolate! We hope you now feel confident in creating truly stunning baked goods. Ready to put your new knowledge to the test?
- Craft your dream chocolate creation: Use your newfound understanding to bake something amazing – a rich, decadent cake, perhaps, or perfectly glossy bonbons. Let your imagination run wild!
- Share your chocolate masterpiece: Snap a photo of your baking triumph and show it off on social media using #BakeWithEaseChocolate. Let's inspire each other!
- Discover more chocolate secrets: Explore our other articles on BakeWithEase.com for even more baking tips and techniques.
What incredible chocolate treat will you create next? Let us know in the comments!