
Mastering the Airbrush for Stunning Gradient & Stencil Effects

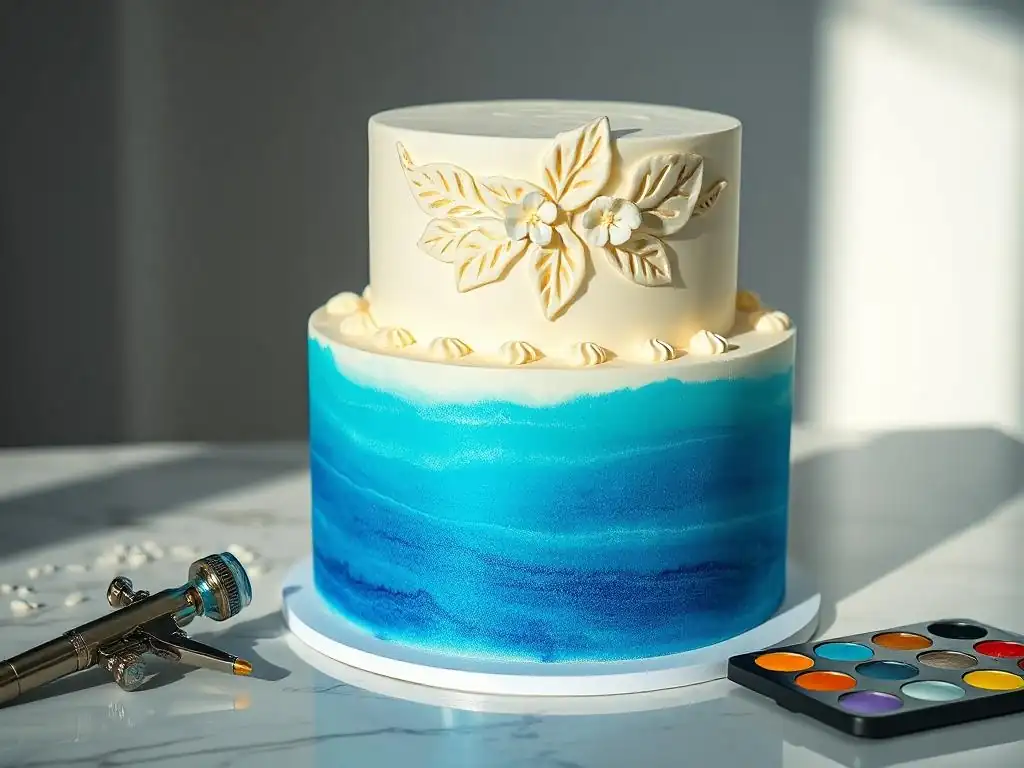
Welcome to BakeWithEase, your ultimate guide to baking brilliance! Ever dreamt of creating cakes that look like edible masterpieces? This week, we're diving deep into the mesmerizing world of airbrushing cakes for beginners. Unlock the secrets to achieving flawless gradients, intricate stencil designs, and vibrant colors that will elevate your baking to a whole new level. Ready to transform ordinary cakes into extraordinary works of art? Let's get started!
- Mastering Airbrushing for Cake Decorating: Gradients, Stencils, and More
- Introduction to Airbrushing Cakes
- Preparing Your Cake for Airbrushing
- Creating Gradient Effects
- Mastering Stencil Airbrushing
- Airbrushing with Edible Paints
- Advanced Airbrushing Techniques
- Cleaning and Maintaining Equipment
- Inspiration and Ideas
- Conclusion: Elevating Cake Decorating
- Frequently Asked Questions
- Final Reflection: The Enduring Allure of Airbrushed Cakes
- Unleash Your Inner Airbrush Artist!
Mastering Airbrushing for Cake Decorating: Gradients, Stencils, and More
Introduction to Airbrushing Cakes
The Impact of Airbrushing on Cake Decorating
Airbrushing has revolutionized cake decorating, transforming the process from painstaking hand-painting or coloring large areas with traditional methods to a fast, efficient, and incredibly versatile technique. Before airbrushing became widely accessible, achieving smooth, even color coverage on a cake, especially on large surfaces or with vibrant hues, often required significant amounts of food coloring mixed into icing, which could sometimes affect texture or taste.
Intricate designs or gradients demanded advanced brush skills and considerable time. The introduction of edible airbrush systems changed this landscape dramatically, allowing decorators, including those just starting with airbrushing cakes for beginners, to apply color with unprecedented speed and create effects previously difficult or impossible to achieve.
This powerful tool empowers decorators to create stunning visual effects like seamless color transitions, photorealistic shading, and crisp stencil patterns with relative ease. For anyone exploring airbrushing cakes for beginners, the learning curve for basic techniques like solid coverage and simple gradients is surprisingly gentle, offering quick gratification and a professional-looking finish.
It opens up a world of creative possibilities, from subtle washes of color that enhance buttercream swirls to bold, graphic designs applied via stencils on fondant. The ability to apply thin layers of highly concentrated color means cakes can achieve intense vibrancy without altering the texture or flavor profile of the icing underneath, making it a favorite technique for both hobbyists and professional bakers aiming for that flawless look.
Essential Airbrush Equipment
Diving into airbrushing cakes for beginners requires a few key pieces of equipment to get started. At the heart of the system is the airbrush gun itself, a precision tool that mixes air and edible liquid color to create a fine mist. This mist is what allows for smooth, even application and detailed work.
Coupled with the airbrush gun is the air compressor, the power source that provides the compressed air needed to propel the color. A reliable compressor is crucial for consistent results. Beyond these two main components, you'll need edible airbrush colors designed specifically for this purpose, which are much thinner than gel pastes or liquid food coloring.
| Essential Item | Purpose | Notes for Beginners |
|---|---|---|
| Airbrush Gun | Applies color as a fine mist | Look for a gravity-feed model initially. |
| Air Compressor | Provides compressed air | Aim for adjustable PSI, preferably with a tank. |
| Edible Airbrush Colors | Specially formulated liquid colors | Start with a basic set of primary colors and black/white. |
| Cleaning Supplies | For maintaining the airbrush gun | Essential for preventing clogs and ensuring longevity. |
| Protective Gear | Gloves, optional mask | Keeps hands clean, mask helps with fine mist control. |
Airbrush Types: Gravity Feed vs. Siphon Feed
Airbrush guns primarily come in two types: gravity feed and siphon feed. The gravity feed airbrush has a color cup mounted on top of the gun. Color is drawn down into the air stream by gravity. These are generally preferred for airbrushing cakes for beginners because they require lower air pressure to operate, are easier to clean, and are ideal for smaller amounts of color and detailed work. They allow for greater control over the amount of paint being sprayed, which is excellent for fine lines, shading, and smaller cakes or details.
Siphon feed airbrushes, on the other hand, have the color reservoir (usually a bottle) attached underneath the gun. Air passing over a tube draws the color up into the air stream. These typically require higher air pressure and are better suited for spraying larger areas or using larger volumes of color.
While useful for covering very large cakes quickly, the higher pressure and larger volume of color might be less intuitive for beginners learning precise control. For most detailed cake decorating and general use when starting out with airbrushing cakes for beginners, a gravity feed airbrush is the recommended choice due to its ease of use and control.
Choosing an Air Compressor: PSI and Tank Size
The air compressor is the engine of your airbrush system, providing the necessary air pressure (measured in PSI - Pounds per Square Inch) to atomize and spray the color. For airbrushing cakes for beginners, an adjustable compressor is highly beneficial, allowing you to experiment with different pressures for various effects. A common working pressure for cake decorating ranges from about 20 to 30 PSI, depending on the color viscosity and desired spray pattern. Some compressors are tankless, meaning they run continuously while you're spraying. These are often more compact and less expensive initially.
However, a compressor with a tank offers significant advantages, especially as you progress. A tank stores compressed air, providing a consistent flow of air without the compressor motor running constantly. This results in a smoother spray, less pulsing, and a quieter operation overall, as the motor only cycles on to refill the tank.
While a tanked compressor might have a higher upfront cost and be larger, the improved performance and reduced noise make them a worthwhile investment for anyone serious about mastering airbrushing cakes for beginners and beyond. Even a small tank, perhaps 0.5 to 1 gallon, can make a noticeable difference in the consistency of your airflow.
Essential Cleaning Supplies: Cleaner, Brushes, and Lubricant
Proper cleaning and maintenance are non-negotiable for keeping your airbrush system functioning correctly, especially when learning airbrushing cakes for beginners. Edible colors, particularly those with shimmer or thicker pigments, can quickly clog the fine nozzle of an airbrush gun if not cleaned immediately after use. The most crucial supply is a dedicated airbrush cleaner designed for edible colors. This cleaner helps dissolve pigment residue. It's often recommended to flush the airbrush with water first, then cleaner, and finally water again.
Beyond the cleaner, a set of small cleaning brushes and needles is essential for physically removing stubborn clogs from the cup, body, and nozzle. These tiny tools are designed to reach into the narrow passages of the airbrush.
Finally, a food-grade airbrush lubricant (often silicone-based) can be used sparingly on the needle and trigger mechanism after cleaning to ensure smooth operation and prevent parts from seizing. Investing in these simple supplies and using them diligently after each coloring session will save you a lot of frustration and extend the life of your equipment significantly, making the process of airbrushing cakes for beginners much smoother.
Preparing Your Cake for Airbrushing
Icing for Airbrushing: Buttercream, Fondant, and Ganache
The type of icing you use significantly impacts the final look of your airbrushed cake. For the best results, you need a surface that is smooth and firm enough to withstand the gentle air pressure without developing imperfections. Fondant is often considered the ideal surface for airbrushing, especially when aiming for crisp details or vibrant, even coverage.
Its smooth, non-porous nature allows the color to sit on the surface and dry quickly without being absorbed unevenly. A well-chilled, fondant-covered cake provides a perfect canvas for intricate designs, gradients, and stencil work, making it a popular choice when learning airbrushing cakes for beginners.
Buttercream can also be airbrushed, but it requires a specific preparation. A crusting buttercream that forms a dry surface when exposed to air is best. Once crusted, the surface is less likely to be disturbed by the air pressure. However, achieving a perfectly smooth finish on buttercream can be more challenging than with fondant.
American buttercream, which tends to crust well due to its high sugar content, is a good candidate. Smooth the buttercream meticulously, chill the cake thoroughly to firm up the surface, and then airbrush with light, even coats. Ganache, particularly a firm chocolate ganache that has set, can also be airbrushed, offering a rich, dark base that works well with metallic or pearl colors. The key across all icing types is a smooth, firm, and clean surface.
Achieving a Smooth Surface: Techniques and Tools
A flawless airbrushed finish starts with a perfectly smooth canvas. For fondant, this means rolling it evenly and covering the cake without wrinkles or bubbles. After covering, use fondant smoothers (like a set of two plastic smoothers) to gently but firmly polish the surface and sides, removing any imperfections and ensuring sharp edges if desired.
Work methodically around the cake, applying even pressure. Any bumps or marks on the fondant will be highlighted by the airbrush color, so take your time during this smoothing process. Chilling the fondant-covered cake in the refrigerator for 15-30 minutes before airbrushing can also help firm up the surface, making it less susceptible to accidental marks.
When working with buttercream, achieving a smooth surface requires different techniques. For a crusted buttercream, apply the buttercream generously, then use a bench scraper or a large palette knife held at a 45-degree angle against the cake to scrape away excess and create a smooth finish. Dip your tool in hot water and dry it between passes for an extra smooth result.
Once the buttercream has crusted (test by lightly touching it – it shouldn't stick to your finger), you can gently buff the surface with a Viva paper towel (one without deep texture) or a clean, dry fondant smoother. This final step can help eliminate subtle lines or imperfections before you begin airbrushing cakes for beginners.
Protecting Your Workspace: Ventilation and Covering
Airbrushing creates a fine mist of edible color that can travel further than you might expect. Protecting your workspace is crucial for easy cleanup and maintaining a clean environment, especially when you're getting comfortable with airbrushing cakes for beginners. Set up your airbrushing area in a well-ventilated space, ideally near an open window or under an extractor fan if available. While edible colors are food-safe, inhaling the fine mist over prolonged periods is not recommended. Consider wearing a simple dust mask, especially when working with large volumes of color or frequently.
Cover all surrounding surfaces – countertops, walls, floors – with disposable plastic sheeting, newspaper, or old tablecloths. A dedicated spray booth, even a homemade one from a cardboard box, can significantly contain the overspray. Place your cake on a turntable within the protected area.
Wear old clothes or an apron, and consider wearing disposable gloves to keep your hands clean. Cleaning up liquid airbrush color is much easier than dried color, so having covered surfaces prevents it from drying onto your permanent fixtures. Taking these protective steps makes the entire process of airbrushing cakes for beginners much cleaner and less stressful.
Creating Gradient Effects
Color Theory for Cake Decorating
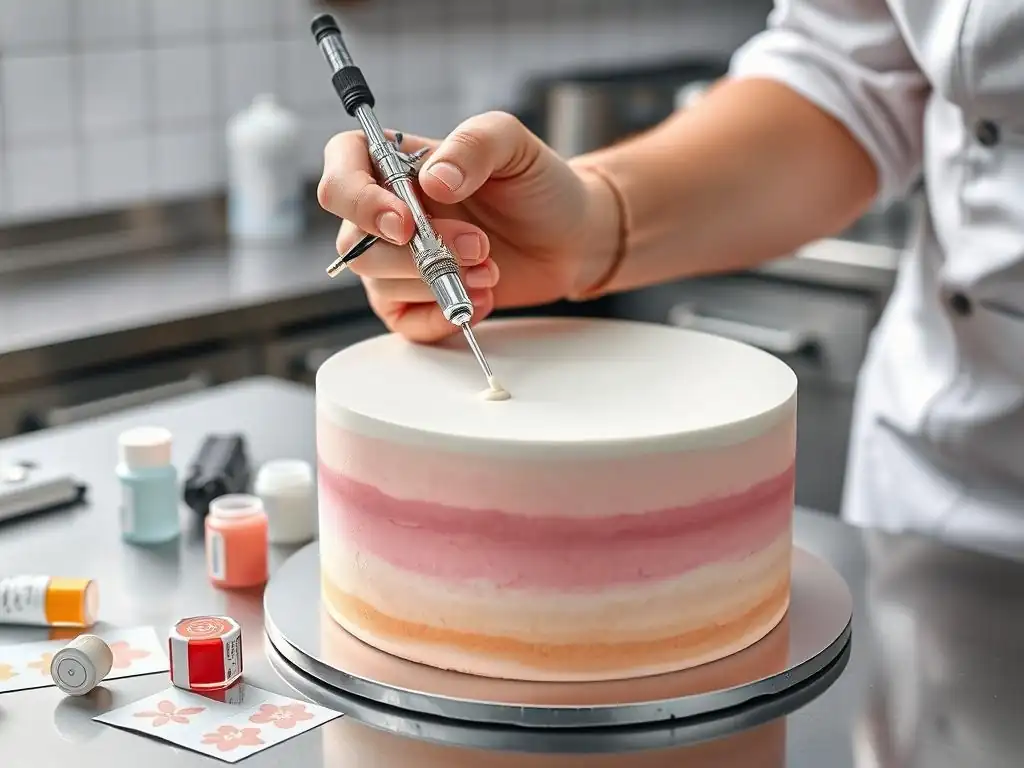
Understanding basic color theory is incredibly helpful when creating stunning gradient effects with an airbrush. Gradients involve the smooth transition from one color to another, or from a color to white/clear. The most visually appealing gradients often use analogous colors – colors that are next to each other on the color wheel, like blue, teal, and green, or yellow, orange, and red.
Using analogous colors ensures a harmonious and seamless blend. For example, transitioning from a light yellow at the bottom of a cake to a vibrant orange in the middle and a deep red at the top creates a warm, fiery sunset effect.
You can also create striking gradients using complementary colors (colors opposite each other on the color wheel, like blue and orange). While you wouldn't typically blend directly between two complementary colors (as they create muddy browns when mixed), you can use them in a gradient by transitioning through a neutral color or white. For instance, a gradient might go from blue, to white, then to orange.
Understanding value (lightness or darkness of a color) and saturation (intensity or purity of a color) is also key for airbrushing cakes for beginners. A gradient often involves changing the value of a single color (e.g., light blue to dark blue) or transitioning smoothly between hues of similar value. Experimenting with a color wheel and practicing on paper towels will help you visualize and plan your gradients before applying them to the cake.
Mixing Airbrush Colors: Achieving Desired Hues
Edible airbrush colors are highly concentrated and usually come ready to use. However, you might need to mix colors to achieve a specific shade or dilute them for a lighter application. Most airbrush colors are water-based, but some metallics or specialty colors might be alcohol-based. Always use the appropriate diluent recommended by the manufacturer – typically airbrush cleaner, distilled water, or a specific thinning medium. When mixing colors, start with small amounts in a separate clean container. You can use small plastic cups or the cups that come with some airbrush cleaning stations.
Begin by adding the lighter color first, then gradually add small drops of the darker or more intense color until you reach the desired hue. Remember that colors often appear slightly darker or more intense when wet than when dry on the cake surface.
It's always better to mix a little more color than you think you'll need for a project, as it can be challenging to replicate the exact shade if you run out mid-spray. Test the mixed color on a paper towel or a scrap piece of fondant before applying it to the cake to check the color and ensure it sprays smoothly without clogging, a crucial step when you're learning airbrushing cakes for beginners.
Airbrushing Techniques: Smooth Gradient Application
Creating a smooth gradient is a signature effect achievable with airbrushing, perfect for adding depth and visual interest. The key is to apply color in thin, even layers, gradually building intensity and transitioning between hues. Start with the lightest color at the area where you want the gradient to begin.
Hold the airbrush gun about 6-8 inches away from the cake surface, perpendicular to the surface. Move the airbrush in smooth, overlapping passes, releasing the trigger at the end of each pass to avoid paint buildup at the edges. For a vertical gradient, move the gun up and down; for a horizontal gradient, move side to side.
Once you have a light, even layer of your first color, switch to your next color. Begin spraying the second color slightly overlapping the first color's area, but focus more passes on the area where you want the second color to be most intense. By applying more passes of the second color further away from the first color's main area, you create a natural blend where the two colors meet.
For a seamless transition when airbrushing cakes for beginners, maintain a consistent distance and speed of movement. Practice on paper towels is invaluable for mastering the feel of applying thin, even coats and controlling the blend point.
Layering Colors for Depth
Layering colors is fundamental to creating rich, deep gradients and realistic shading effects. Instead of trying to achieve the final color intensity in a single heavy pass, apply multiple thin layers. This technique allows each layer to dry slightly, preventing pooling and drips, and gives you greater control over the color buildup. For a gradient transitioning from white to blue, for example, you would start with just air (or clear medium) over the white area, then begin applying a very light mist of blue at the transition point, extending into the area you want blue.
Allow the first blue layer to flash dry for a few seconds. Then, apply another thin layer, focusing the spray slightly further into the blue area. Repeat this process, applying progressively more color and concentrating it where you want the deepest blue. This gradual layering allows the colors to blend softly on the surface of the cake, creating a smooth transition without harsh lines. This approach is essential for airbrushing cakes for beginners as it is much more forgiving than trying to lay down heavy color all at once.
Controlling Air Pressure and Distance
Controlling air pressure and the distance between the airbrush gun and the cake surface are critical variables in achieving different effects, especially smooth gradients. Higher PSI (pounds per square inch) generally results in a wider spray pattern and a coarser mist, which can be useful for covering large areas quickly but less ideal for fine details or soft blends. Lower PSI produces a finer mist and a narrower spray pattern, offering more control and allowing for smoother transitions and detailed work. For gradients, a moderate PSI (around 20-25 PSI for most edible colors) is often a good starting point.
The distance you hold the gun from the surface also dramatically affects the outcome. Holding the gun closer (say, 2-4 inches) results in a smaller, more concentrated spray pattern, allowing for more precise application and sharper lines (useful for stencils, but tricky for gradients). Holding the gun further away (6-10 inches) disperses the mist over a wider area, creating a softer, more diffused effect.
This is perfect for blending colors smoothly in a gradient. Experimenting with these two variables on practice surfaces will quickly show you how they interact and how to adjust them to achieve the desired gradient effect when airbrushing cakes for beginners.
Troubleshooting Gradient Issues: Splattering and Unevenness
Even with careful preparation, you might encounter issues like splattering or unevenness when creating gradients. Splattering, where larger drops of color appear instead of a fine mist, is often caused by color that is too thick, insufficient air pressure, or a partially clogged nozzle. Ensure your airbrush color is properly diluted (if necessary) and free of any clumps. Check your compressor's PSI setting; it might be too low. If the issue persists, your nozzle is likely clogged. Stop immediately, disassemble the airbrush gun, and clean it thoroughly using cleaner and small brushes.
Unevenness in a gradient can result from inconsistent air pressure, inconsistent movement, or applying color in patches rather than smooth, overlapping passes. A compressor without a tank can sometimes cause pulsing, leading to unevenness. If possible, use a tanked compressor or hold the trigger down for a few seconds to build pressure before starting your pass. Practice maintaining a consistent speed and distance as you move the airbrush gun.
Applying color in thin layers, allowing each to dry slightly, also helps prevent blotchiness and allows you to build the color evenly. If you get an uneven patch, you can often blend it out by applying more thin layers around the area, feathering the edges. Patience and practice are key to overcoming these common hurdles when airbrushing cakes for beginners.
Mastering Stencil Airbrushing
Choosing Stencils: Material and Design
Stencils are fantastic tools for adding intricate patterns, logos, or text to cakes using airbrushing. They come in various materials, primarily food-grade plastic or mylar. Mylar stencils are generally more durable and flexible, conforming better to curved surfaces. Plastic stencils are often rigid and work best on flat sides or tops of cakes. When choosing a design for airbrushing cakes for beginners, start with simpler patterns like polka dots, stripes, or basic geometric shapes. These are easier to align and secure without causing bleeding.
Consider the size of the stencil relative to your cake. A design that's too large or too small can look awkward. Also, think about the complexity. While intricate lace patterns are beautiful, they can be challenging for beginners due to the high risk of color bleeding under the fine details. Look for stencils with clear, well-cut lines. Stencils designed specifically for airbrushing often have slightly thicker material or a design that minimizes fine points where color is likely to seep.
Securing Stencils: Adhesives and Hand Placement
Properly securing the stencil to the cake surface is critical for achieving crisp, clean lines and preventing color from bleeding underneath. The method depends on the stencil material and the cake surface (fondant is ideal). For flat surfaces, a common technique is to use a very light mist of edible stencil adhesive spray on the back of the stencil.
Wait a few seconds for it to become tacky, then carefully position it on the cake, pressing down gently to ensure full contact, especially around the edges of the design. Use minimal adhesive; too much can damage the cake surface or leave residue.
Alternatively, especially for curved surfaces or if you prefer not to use adhesive, you can manually hold the stencil firmly against the cake. Use one hand (or both for larger stencils) to press the stencil flat against the surface, ensuring there are no gaps, particularly around the edges of the cut-out areas you plan to spray. This requires a steady hand and careful coordination with your spraying hand. For airbrushing cakes for beginners, practicing holding the stencil firmly while spraying on a flat surface like a board covered in paper towels is a good way to build muscle memory.
Airbrushing Techniques: Crisp Stencil Application
Achieving crisp lines with stencil airbrushing requires a light touch and careful technique. The goal is to apply just enough color to fill the stencil cut-outs without forcing paint underneath the edges. Hold the airbrush gun perpendicular to the stencil surface, about 2-4 inches away. Use low air pressure (around 15-20 PSI is often sufficient for stencils) and apply color in very light, quick passes. Think of it as dusting the color onto the cake.
Start spraying off the stencil and move across the cut-out area, releasing the trigger off the stencil as well. This feathering technique prevents a heavy burst of color at the start or end of your pass. Apply several thin coats rather than one heavy one. Allow each coat to dry for a few seconds before applying the next. Once the desired color intensity is reached, carefully peel the stencil straight up and away from the cake surface. Peeling it slowly and straight up minimizes the chance of smudging or lifting the color.
Preventing Bleeding: Light Coats and Proper Angle
Bleeding is the most common issue when stencil airbrushing, resulting in fuzzy or smudged edges instead of crisp lines. The primary cause is applying too much paint at once or holding the airbrush at an angle that sprays color under the stencil edges. To prevent bleeding, always use light coats. It is far better to apply four thin layers of color than one thick, wet layer. This allows the paint to dry quickly within the stencil cut-out rather than pooling and seeping.
Maintain a perpendicular angle (90 degrees) between the airbrush gun and the stencil surface. Avoid tilting the gun, especially towards the edges of the cut-out. Tilting directs the air and paint sideways, pushing it under the stencil. Using low air pressure also helps prevent the paint from being forced under the edges. If you are holding the stencil by hand, ensure firm, even pressure around the entire design area you are spraying. These simple precautions are vital steps when learning airbrushing cakes for beginners to achieve those sought-after sharp stencil designs.
Using Multiple Stencils: Layered Design Creation
You can create complex and visually rich designs by using multiple stencils or applying the same stencil multiple times. This technique allows for layered patterns, multi-colored designs, or covering a large cake with a repeating motif. When using multiple stencils, plan your design beforehand. Decide which stencil goes where and in what order you will apply them, especially if they overlap or interact.
If layering different stencil designs, ensure the first stenciled area is completely dry before placing the next stencil over or near it. Applying a new stencil over wet airbrush color can cause smudging or lifting. If using the same stencil repeatedly (e.g., for a damask pattern), carefully align each application to create a seamless overall design.
Measure or use registration marks on the stencil if they are provided. Clean the stencil thoroughly between uses, especially if switching colors or if there's any build-up, as residual paint can transfer or cause misalignment. Practicing alignment on a flat surface is recommended before attempting a large, repeating pattern on a cake when airbrushing cakes for beginners.
Airbrushing with Edible Paints
Understanding Edible Airbrush Colors: Water-Based vs. Alcohol-Based
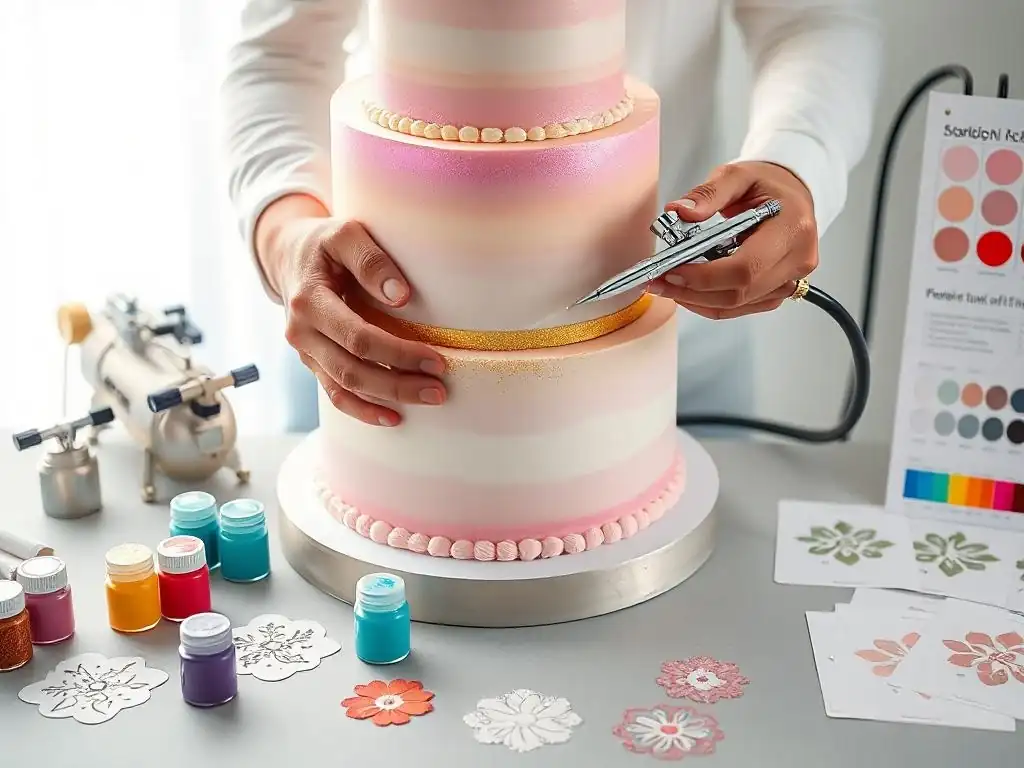
Edible airbrush colors are specially formulated liquid food colorings designed to be thin enough to pass through the fine nozzle of an airbrush gun without clogging. They typically come in small bottles with dropper tops for easy filling of the airbrush cup. The most common type is water-based. These colors are vibrant, easy to clean with water and airbrush cleaner, and work well on most cake surfaces, especially fondant and crusted buttercream. They dry relatively quickly depending on humidity.
Alcohol-based edible colors are less common but serve specific purposes. Because alcohol evaporates faster than water, these colors dry almost instantly. This makes them ideal for airbrushing on surfaces that might react negatively to moisture, such as delicate chocolate work, isomalt, or very thin layers of fondant that could become gummy with water-based colors. Alcohol-based colors require a different cleaning solution (often alcohol-based cleaner or pure alcohol) and should be used in a very well-ventilated area due to fumes. Understanding which base your color uses is important for both application and cleanup when airbrushing cakes for beginners.
Working with Metallic and Pearl Colors: Achieving Shimmer
Metallic and pearl edible airbrush colors contain tiny particles (like mica-based pigments) that create a shimmery or reflective effect. These colors can add a touch of glamour and sophistication to your cakes, perfect for accents or full coverage on celebration cakes. However, the particles that create the shimmer can also pose a challenge for airbrushing: they are more prone to clogging the airbrush nozzle than standard liquid colors.
To mitigate clogging when using metallic or pearl colors, ensure the color is well-shaken before pouring it into the airbrush cup, as the particles tend to settle. You might also need to use slightly higher air pressure (but still within a moderate range, perhaps 25-30 PSI) to help push the particles through. Apply these colors in thin layers, allowing each to dry, to build up the desired shimmer.
Clean your airbrush immediately and thoroughly after using metallic or pearl colors, paying extra attention to flushing out all residual particles. Some decorators even dedicate a separate, slightly less fine-nozzle airbrush gun specifically for metallic colors if they use them frequently, which is something to consider as you advance beyond airbrushing cakes for beginners.
Creating Custom Colors: Mixing and Diluting
While edible airbrush colors come in a wide spectrum, you'll often need to mix them to achieve a very specific shade that's not available ready-made or to match a client's request. As mentioned earlier, use a separate clean container for mixing. Start with your base color and add small amounts of other colors until you reach the desired hue. Remember that a little color goes a long way in an airbrush.
Diluting colors is also a common practice. You might want to dilute a color to create a lighter shade, to make a dark color more transparent for subtle shading, or if the color seems too thick for your airbrush (though most reputable brands are formulated correctly). Use the appropriate diluent for your color's base (water, alcohol-based cleaner, or manufacturer's thinning medium).
Add the diluent gradually, testing the consistency and color intensity on a paper towel. The color should flow smoothly through the airbrush without sputtering or clogging. Getting comfortable with mixing and diluting expands your creative palette significantly when airbrushing cakes for beginners.
Advanced Airbrushing Techniques
Creating 3D Effects: Shading and Highlighting
Airbrushing is an excellent tool for adding dimension and realism to cake decorations by creating 3D effects through shading and highlighting. This involves strategically applying darker colors in areas that would naturally be in shadow and lighter colors or just air in areas that would catch the light. Think about a light source – where is it coming from? Apply darker shades (often a diluted black, grey, or a darker tone of the base color) on the opposite side of the light source and in recessed areas.
Use a lighter color or simply air (with no color) to create highlights on the side facing the light source and on raised areas. Control is key here; use low pressure and hold the airbrush closer for more defined shadows, or further away for softer, diffused shading. This technique is particularly effective on sculpted cakes or fondant details like pleats, ruffles, or molded figures, making them appear more lifelike. It's a step up from basic airbrushing cakes for beginners but achievable with practice on flat surfaces first.
Airbrushing Textures: Splatter Effects and Sponging
Beyond smooth coverage and stencils, airbrushing can be used to create interesting textures. A simple and fun technique is the splatter effect, which creates a speckled or distressed look. To do this, load your airbrush with color, hold it further away from the cake (perhaps 10-12 inches or more), and quickly pull and release the trigger, or even just use air pressure to push out droplets of color. The distance and pressure will affect the size and distribution of the splatters. This works well for galaxy themes, distressed finishes, or adding a playful element.
Another texture technique involves using a sponge. Lightly dampen a clean piece of food-safe sponge and dab it onto the cake surface while airbrushing over it. The sponge creates a mottled, textured appearance. You can also spray color onto the sponge itself and then dab the sponge onto the cake. This technique is useful for creating stone effects, clouds, or other organic textures. While splatter is easy for airbrushing cakes for beginners, the sponging technique requires a bit more control.
Enhancing Cake Sculptures: Detailing and Realism
For complex cake sculptures, airbrushing is almost indispensable for adding fine details, depth, and realism. Once the sculpture is covered in fondant or ganache, airbrushing allows you to add subtle skin tones, fur textures, shadows under features (like eyes or noses), highlights on muscles or folds of fabric, and intricate patterns or markings that would be difficult or time-consuming to hand-paint.
Using low pressure and holding the airbrush very close (sometimes less than an inch away with the air cap removed for fine lines), you can create sharp details like veins on leaves, wrinkles on skin, or individual strands of fur. Layering different shades of color builds depth and form, bringing the sculpture to life. While sculpting itself is an advanced technique, airbrushing provides the finishing touches that elevate a cake sculpture from good to truly exceptional, showcasing the full potential beyond simple airbrushing cakes for beginners.
Cleaning and Maintaining Equipment
Proper Cleaning Techniques: Disassembly and Cleaning
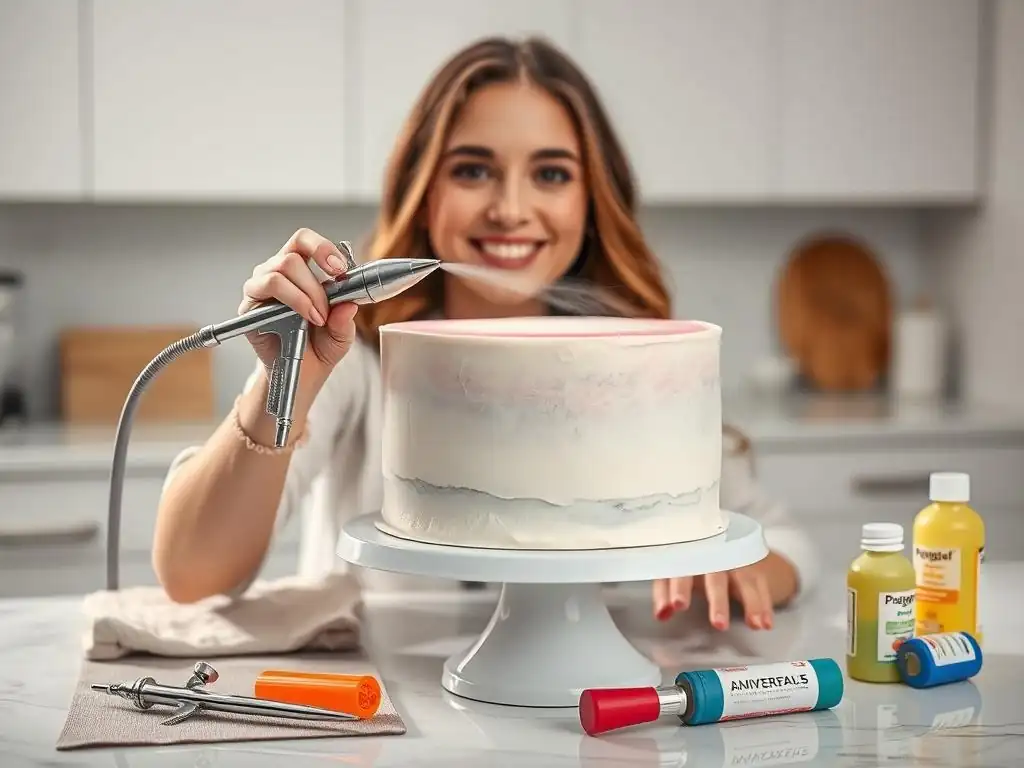
Cleaning your airbrush gun immediately after each use is the single most important step in maintaining your equipment and preventing frustrating clogs. Start by emptying any remaining color from the cup. Add a few drops of airbrush cleaner (or the appropriate diluent for your color) to the cup and back-flush: cover the nozzle tip with your finger or a cap and pull the trigger back to allow air to bubble back into the cup.
This helps dislodge pigment from inside the nozzle. Spray the cleaner out onto a paper towel or into a waste container. Repeat this flush-and-spray process several times until the liquid sprays clear.
For a more thorough clean, especially after using metallic or pearl colors, or if you notice sputtering, you'll need to disassemble the airbrush gun. Carefully unscrew the handle, pull out the needle (be gentle, the tip is sharp! ), unscrew the nozzle cap, and then unscrew the nozzle itself. Soak the parts in airbrush cleaner.
Use small cleaning brushes and needles to gently clean the inside of the cup, the body of the airbrush, the nozzle, and the needle groove in the nozzle cap. Rinse all parts with water, dry them thoroughly, and reassemble. This deep cleaning prevents build-up that can ruin your airbrush over time, a crucial habit to develop when airbrushing cakes for beginners.
Troubleshooting Clogs and Issues: Identifying and Resolving
Despite best efforts, clogs and other spraying issues can occur. A common problem is the airbrush sputtering or spraying inconsistently. This is often a sign of a partial clog in the nozzle or tip. The first step is usually to try back-flushing with cleaner as described above. If that doesn't work, the clog is more significant and requires disassembly and physical cleaning with brushes and needles. Ensure you use the correct size cleaning needle for your nozzle to avoid damage.
Another issue is the airbrush not spraying color at all, but air is coming out. This could be a complete clog or an issue with the needle not being pulled back far enough to allow color flow. Check that the needle chuck nut is tightened correctly, allowing the trigger to pull the needle back.
If air isn't coming out, check your compressor connection, hose, and compressor settings (PSI). Sometimes, color drying on the needle tip while you work can cause issues; periodically wipe the needle tip clean with a damp cloth or cotton swab during long spraying sessions. Learning to quickly identify and resolve these issues is part of mastering airbrushing cakes for beginners.
Extending Lifespan: Regular Maintenance and Storage
Beyond cleaning after each use, regular maintenance and proper storage significantly extend the lifespan of your airbrush equipment. After a thorough cleaning and drying, apply a tiny drop of food-grade airbrush lubricant to the needle before reinserting it. Also, apply a small amount to the trigger mechanism where it connects to the needle guide. This keeps the moving parts smooth and prevents wear. Be very sparing with lubricant; excess can get into the air path.
When storing your airbrush gun, it's best to keep it disassembled if you plan on not using it for an extended period, or at least ensure it is completely empty and clean. Store the airbrush gun and compressor in a dry, dust-free environment. Avoid storing the gun with color left in the cup or body, as it will dry and create a difficult clog.
Protect the delicate needle tip; many airbrushes come with a crown cap or needle protector for storage. Following these simple maintenance and storage tips will keep your equipment in top condition, ensuring reliable performance for countless projects after you've learned airbrushing cakes for beginners.
Inspiration and Ideas
Airbrushing Cake Design Ideas: Themes and Occasions
Airbrushing opens up a vast world of design possibilities for cakes, limited only by your imagination. For those starting with airbrushing cakes for beginners, simple designs are a great way to build confidence. Consider creating a smooth, even base color on a fondant cake – this is a fundamental skill and looks polished. Gradients are also relatively beginner-friendly and can be adapted for many themes: a sunset gradient for a tropical or romantic cake, a blue-to-white gradient for a winter or sky theme, or transitioning shades of green for a nature-inspired design.
Stencils offer another avenue for accessible designs. Simple stencil patterns like dots, stripes, chevrons, or even a single large motif (like a star or heart) can add visual interest quickly. Think about occasions: airbrushing a soft pink or blue gradient for a baby shower, using a simple stencil pattern around the side of a birthday cake, or airbrushing a metallic sheen for an anniversary cake. Even just airbrushing a subtle pearl finish over white fondant can elevate a simple design for a wedding or elegant event.
Advanced Airbrushing Cake Design Inspiration: Complex Designs
As you gain confidence and skill, you can explore more complex airbrushing techniques. Layering multiple stencil patterns allows for intricate designs like damask, lace, or geometric overlays. Combining airbrushing with other techniques, like hand-painting details over an airbrushed base or using airbrushing to enhance fondant appliqués, creates multi-dimensional effects.
Advanced airbrushing can achieve photorealistic effects, shading sculpted elements to look like real objects, animals, or people. Creating detailed scenes, like landscapes, galaxies, or underwater worlds, using layered gradients, freehand spraying, and masking techniques is another advanced application. Hyperrealism, where cakes are airbrushed to look exactly like everyday objects (like a stack of pancakes or a handbag), showcases the pinnacle of airbrushing skill. While these examples are far beyond airbrushing cakes for beginners, they illustrate the incredible potential of the tool.
Airbrushed Cake Showcase
Imagine a stunning three-tier wedding cake covered in pristine white fondant. The bottom tier features a soft, horizontal gradient transitioning from a delicate blush pink at the base to pure white at the top, achieved with careful layering of color. The middle tier is adorned with a subtle pearl sheen airbrushed over the fondant, catching the light beautifully. The top tier uses a fine lace stencil airbrushed in edible gold metallic color, creating an intricate band around the circumference. This combination of techniques elevates a classic design.
Consider a child's birthday cake shaped like a rocket ship. The base is covered in grey fondant, then airbrushed with varying shades of grey and black to create realistic panel lines and shadows, giving it a metallic, industrial look. Flames are airbrushed in vibrant reds, oranges, and yellows at the base using freehand technique with controlled air pressure and distance to create a wispy effect.
Small details like windows are masked off and airbrushed black, then highlighted with white airbrush paint for a glass effect. Even simple shapes are transformed into dynamic creations through airbrushing, inspiring those exploring airbrushing cakes for beginners.
Conclusion: Elevating Cake Decorating
The Evolution of Airbrushing in Cake Decorating
Airbrushing has evolved from a specialized technique used primarily by professional cake artists for complex designs into a widely accessible skill enjoyed by hobbyists and beginners alike. Early airbrush systems were often expensive and required significant technical knowledge. However, advancements in compressor technology, the development of food-safe, ready-to-use edible colors, and the availability of user-friendly airbrush guns have made airbrushing cakes for beginners more practical and affordable than ever before. Online tutorials, classes, and readily available equipment have demystified the process, empowering more home bakers to explore this creative avenue.
This evolution means that achieving professional-looking results like smooth gradients, crisp stencils, and vibrant colors is no longer confined to high-end bakeries. With a modest investment in basic equipment and a willingness to practice, anyone can learn the fundamentals of airbrushing. It adds a new dimension to cake decorating, offering speed, versatility, and the ability to create effects that are difficult or impossible with traditional methods. As equipment continues to improve and new edible colors and tools are developed, the possibilities for airbrushing cakes for beginners and seasoned decorators will only continue to expand.
Frequently Asked Questions
What is airbrushing and why use it on cakes?
Airbrushing is a technique that uses an airbrush gun to apply food-safe coloring to cakes. It allows for creating smooth gradients, intricate stencil designs, and an overall polished, professional look that is difficult to achieve with other methods.
What kind of airbrush and compressor do I need as a beginner?
For beginners, a single-action airbrush paired with a small, portable compressor is recommended. These are generally more affordable and easier to learn than dual-action models, providing a good starting point for cake decorating.
What type of food coloring is best for airbrushing cakes?
Use airbrush-specific food coloring. These are formulated with a thinner consistency to prevent clogging the airbrush and ensure even application. Avoid using gel or paste food colorings unless they are specifically designed for airbrushing.
How do I clean my airbrush after using it?
Thorough cleaning is crucial to prevent clogging. Disassemble the airbrush, rinse all parts with warm water and airbrush cleaner, and use small brushes to remove any remaining color. Then reassemble and test the spray pattern.
What are some simple airbrushing techniques I can try as a beginner?
Start with basic gradients on a frosted cake, practicing applying color from light to dark. Stencil designs are also a great option, using pre-made or custom stencils to create detailed patterns with your airbrush.
Final Reflection: The Enduring Allure of Airbrushed Cakes
The art of airbrushing cakes, once a niche skill, is experiencing a vibrant resurgence, driven by the accessibility of tools and the ever-growing demand for visually stunning desserts. This isn't just about pretty pictures; it's about elevating the entire baking experience, transforming a simple cake into a breathtaking centerpiece. The techniques explored in this article – mastering gradients and stencils – represent just the beginning of a journey into a world of creative possibilities.
The impact of airbrushing on the culinary landscape is undeniable. It's moved beyond simple decorations, becoming a powerful tool for expressing artistic vision and personal style. The beauty of a cake is in the details, and airbrushing allows you to achieve a level of precision and artistry that's simply unmatched.
This quote, though not directly from a famous baker, encapsulates the sentiment I've encountered repeatedly: airbrushing isn't just a technique; it's a way to infuse personality and passion into every creation. The ability to customize designs, create unique textures, and achieve flawless color transitions empowers bakers to truly express themselves.
Now, it's your turn. Don't let the initial steps intimidate you. Pick up an airbrush, experiment with different techniques, and let your creativity flow. Embrace the learning process, celebrate your successes, and learn from your mistakes. The journey of mastering airbrushing is as rewarding as the stunning results themselves. Remember the techniques you've learned here, and use them as a springboard to explore your own unique style. The world of airbrushed cakes awaits – go create something beautiful!
Unleash Your Inner Airbrush Artist!
Thanks for diving into the world of airbrushing! You've now got the skills to create amazing gradients and stencils – imagine the possibilities! Ready to put your newfound knowledge into action?
- Craft your masterpiece: Try a new airbrushing technique on your next baking project – think beautifully shaded cakes or intricately designed cookies!
- Share your creations: Show off your stunning airbrushed designs on social media using #BakeWithEaseAirbrush – let’s inspire each other!
- Explore advanced techniques: Dive deeper into the art of airbrushing by checking out our other tutorials on the BakeWithEase website (you'll find them easily in the navigation! ).
What unique design will you airbrush next? Let's see your amazing creations in the comments below!