
Achieving the Perfect Caramel Color: Visual Cues & IPA Test Explained

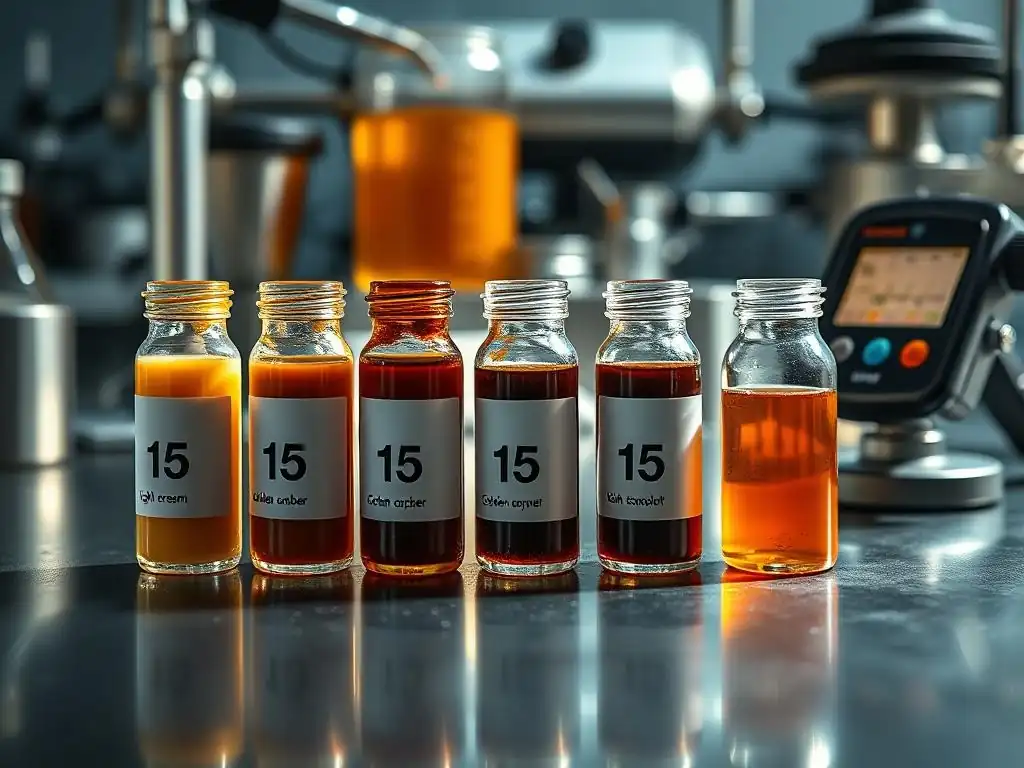
Welcome to BakeWithEase, your trusted companion on your baking journey! Ever wondered how to achieve that perfect amber hue in your caramel creations? This guide delves into the fascinating world of caramelization, offering a visual Caramel Sugar Color Guide to help you master the art of achieving the ideal shade. Discover the secrets behind consistent results and learn about the invaluable IPA test. Are you ready to unlock the full potential of caramel?
- Achieving the Perfect Caramel Color: Visual Cues & Temperature Guide Explained
- Introduction to Caramel Color: Your Ultimate Guide for Baking Success
- Understanding the Caramelization Process: Chemistry and Stages
- Visual Cues for Perfect Caramel Color: A Baker's Guide
- Temperature Guide for Caramel: A Baker's Key
- Caramel Sugar Color Guide: Matching Color to Your Recipe
- Troubleshooting Caramel Color Issues: Common Problems and Solutions
- Mastering Caramel Color: Advanced Techniques and Tips
- Conclusion: Achieving Caramel Perfection with Confidence
-
Frequently Asked Questions
- How can I tell when my caramel is the perfect color without burning it?
- What is the IPA test mentioned in the article, and how does it help with caramel color?
- What are some common mistakes that bakers make when trying to achieve the right caramel color?
- How does the color of the caramel affect the final flavor of the baked good?
- Can I use a candy thermometer to help me achieve the perfect caramel color, or is visual assessment more reliable?
- Final Reflection: Mastering the Art of Caramel Color
- Unlock Your Caramel Mastery: Take the Next Step!
Achieving the Perfect Caramel Color: Visual Cues & Temperature Guide Explained
Introduction to Caramel Color: Your Ultimate Guide for Baking Success
Making caramel might seem simple – just sugar and heat – but achieving that perfect balance of rich flavor and beautiful color is an art. The journey from clear sugar crystals to a luscious, golden-brown liquid is one of transformation, and mastering this process is key to countless delicious desserts. Whether you're drizzling caramel sauce over ice cream, incorporating it into a cake, or making chewy candies, the color of your caramel is your primary indicator of its flavor profile and structural integrity.
This article serves as your comprehensive caramel sugar color guide, breaking down the science, the visual cues, and the temperature milestones you need to know. We'll explore how to confidently navigate the different stages of caramelization, ensuring you hit that sweet spot between undercooked blandness and dreaded bitterness. Get ready to elevate your baking game by understanding the secrets behind perfect caramel color every time.
Why Caramel Color Matters in Baking: Flavor and Visual Appeal
The color of your caramel is far more than just aesthetically pleasing; it's a direct reflection of the chemical reactions happening and, consequently, the flavor that develops. A pale caramel, light golden in hue, will taste primarily sweet with subtle nutty undertones. As the color deepens to a rich amber, the sweetness becomes more complex, and notes of toasted sugar and slight bitterness emerge, adding depth and sophistication.
Visually, the right caramel color can make a dessert irresistible. Think of a glossy, deep amber caramel sauce cascading down a cake, or perfectly golden caramel coating a batch of nuts for brittle. The visual appeal sets expectations for the taste, and a beautiful color signals that the flavor will be just right – not too sweet, not burnt, but perfectly balanced. Understanding this connection is fundamental to using any caramel sugar color guide effectively in your kitchen.
A Baker's Guide to Mastering Caramelization
Mastering caramelization involves developing both your visual intuition and your understanding of temperature. Relying solely on one without the other can lead to inconsistent results. While a visual caramel sugar color guide is invaluable, especially for quick checks, using a thermometer provides precision that removes guesswork.
Think of it as learning to drive: initially, you might focus on the speedometer (temperature), but over time, you develop a feel for speed based on your surroundings (visual cues). A skilled baker uses both in tandem. This guide will equip you with the knowledge to interpret both the subtle shifts in color and the critical temperature points, making you confident in producing perfect caramel for any recipe.
Understanding the Caramelization Process: Chemistry and Stages
Caramelization is a complex non-enzymatic browning reaction that occurs when sugars are heated to high temperatures. Unlike the Maillard reaction, which involves amino acids and sugars and typically happens at lower temperatures (like browning meat), caramelization is purely about the breakdown and transformation of sugar molecules themselves.
As sugar heats, it first melts into a clear liquid. As the temperature continues to rise, the sugar molecules begin to decompose. Water is released, and the sugar molecules break down into smaller compounds and polymerize into larger ones. These new compounds are responsible for the characteristic color, aroma, and flavor of caramel. This process is continuous and temperature-dependent, moving through distinct stages that correspond directly to the color and flavor development – the very essence of a caramel sugar color guide.
The Science Behind Caramel Color Development
At temperatures starting around 320°F ( 160°C) for sucrose (common table sugar), the caramelization process begins. The initial stages involve the inversion of sucrose into glucose and fructose, followed by dehydration. As heating continues, further dehydration and isomerization occur, leading to the formation of various compounds like caramelan ( C24H36O18), which contributes to the lighter brown color.
As the temperature increases towards 340-350°F ( 170-175°C), more complex reactions take place, producing compounds like caramelen ( C36H50O25) and caramelin ( C125H188O80). These larger molecules are responsible for the deeper amber to dark brown hues and the more intense, sometimes slightly bitter, caramel flavors. The precise mix of these compounds dictates the final color and taste, highlighting why temperature is a crucial factor in any reliable caramel sugar color guide.
From Pale Yellow to Deep Amber: Stages of Caramelization
Caramelization progresses through several recognizable stages, each marked by a distinct color and corresponding flavor profile. Understanding these stages is fundamental to using a visual caramel sugar color guide effectively:
- Stage 1: Melting (Clear): Sugar crystals melt into a clear, syrupy liquid. Temperature is typically below
300°F(150°C). No caramel flavor yet. - Stage 2: Initial Browning (Pale Yellow to Light Gold): The edges might start to tint, and the liquid turns a very pale yellow. Subtle nutty aroma might begin. Temperature is usually around
300-315°F(150-157°C). Flavor is mildly sweet with hints of toasted sugar. - Stage 3: Medium Gold to Amber: The color deepens noticeably to a rich golden or light amber. The aroma becomes distinctly caramel-like. Temperature is typically between
320-340°F(160-170°C). This stage offers a balanced sweet and complex caramel flavor, often desired for sauces. - Stage 4: Deep Amber to Mahogany: The color becomes a dark, reddish-brown amber. The aroma is intense and borders on pungent. Temperature is usually around
345-355°F(174-179°C). The flavor is rich, bittersweet, and intense, suitable for applications like toffee or darker caramels. - Stage 5: Dark Brown to Black: The sugar is burnt. Smoke is visible, and the smell is acrid. Temperature is typically above
360°F(182°C). The flavor is very bitter and unpleasant.
Monitoring these stages visually, ideally alongside a thermometer, is the core practice of using a caramel sugar color guide.
Visual Cues for Perfect Caramel Color: A Baker's Guide
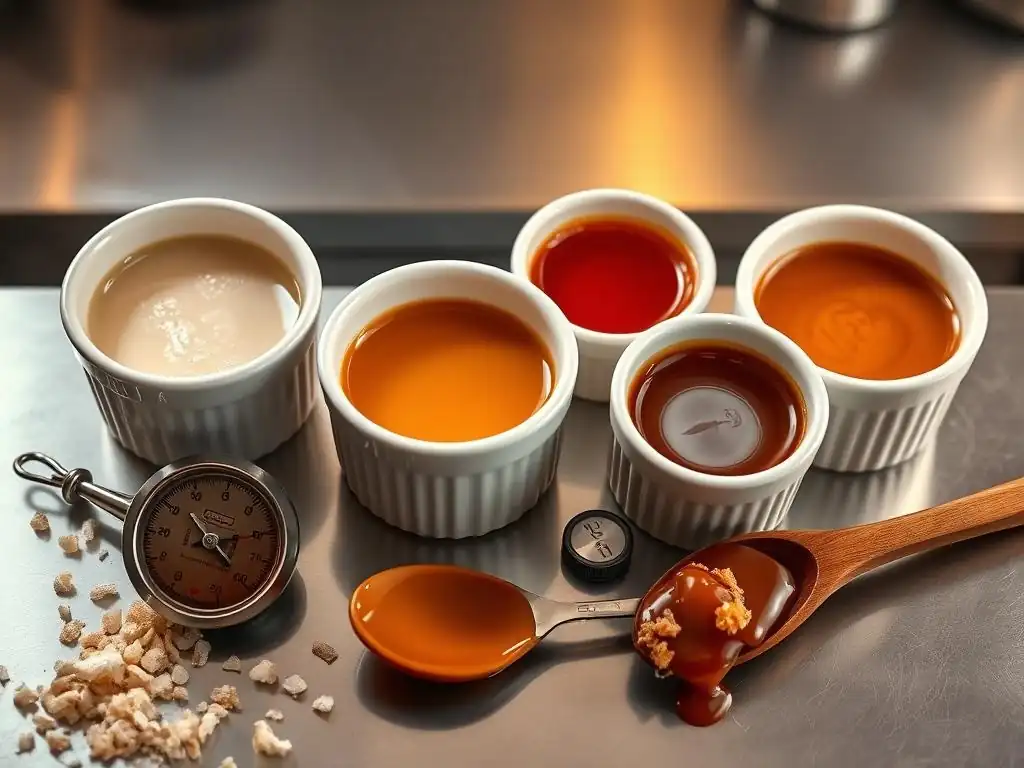
Learning to read the color of your caramel is perhaps the most intuitive part of the process. While temperature provides precision, your eyes are your first line of defense against under- or over-caramelization. The key is to observe the color change against the background of your pan and ideally against a white surface if you're carefully spooning out small amounts to check.
Lighting is crucial; natural light is best, but consistent artificial light works too. Avoid shadows or reflections that can distort the color perception. As the sugar melts and begins to brown, the color change will be gradual at first, then accelerate rapidly in the later stages. This acceleration is why vigilant observation is necessary when following a visual caramel sugar color guide.
Recognizing the Ideal Caramel Shade: A Step-by-Step Visual Guide
Here’s how to train your eye using a visual caramel sugar color guide:
- Start with Patience: Heat sugar and water (or just sugar) over medium heat. Resist stirring initially if using the dry method; let the edges start to melt and color naturally.
- Observe the Edges: The first sign of color usually appears around the edges of the pan. It will be a very pale yellow.
- Watch the Spread: As heating continues, the pale yellow will spread towards the center. Swirl the pan gently if needed (especially with dry caramel) to ensure even heating.
- Look for Gold: The yellow will deepen to a light golden color, similar to honey. This is the beginning of true caramel flavor development.
- Target Amber: Continue watching as the color turns a rich, reddish-gold or amber, like dark maple syrup or brewed black tea. This is the stage most commonly desired for balanced caramel flavor – the heart of a useful caramel sugar color guide.
- Deepen for Intensity: For a more intense, bittersweet flavor, allow the color to deepen further to a dark amber, almost mahogany. This requires careful attention as it's close to burning.
- Tip: If unsure, carefully spoon a small amount onto a white plate to get a true read of the color without the reflection of the pan.
Avoiding Burnt Caramel: Identifying Warning Signs
The line between perfectly deep amber and burnt is incredibly thin, often a matter of seconds. Recognizing the warning signs is critical to prevent a bitter, acrid outcome. A key sign is the smell; burnt sugar emits a sharp, acrid, unpleasant odor, distinct from the rich, sweet aroma of good caramel.
Visually, the color will rapidly darken past deep amber towards dark brown and eventually black. Smoke may begin to rise from the pan. If you see dark brown patches forming unevenly, or the entire mass is darkening too quickly, it's likely heading towards burnt. React immediately by removing it from the heat and, if possible, plunging the bottom of the pan into an ice bath for a second or two to halt the cooking process. Trust your senses; your nose is often the first warning sign before the color becomes irrecoverable according to any caramel sugar color guide.
Temperature Guide for Caramel: A Baker's Key
While visual cues are intuitive, temperature provides objective data. Using a candy thermometer is highly recommended, especially when you're new to making caramel or working on a recipe that requires a specific consistency or color stage. Different temperatures correspond reliably to different stages of caramelization and sugar concentration, making a temperature-based caramel sugar color guide extremely precise.
Temperature is particularly useful when incorporating other ingredients like cream or butter (as in wet caramel or caramel sauce), which can obscure the visual color initially. A thermometer tells you exactly where you are in the process, regardless of what else is in the pot. This precision is invaluable for consistent results, batch after batch.
Why Use Temperature?
Using temperature provides consistency and control. Sugar cooked to 320°F ( 160°C) will always be at the same caramelization stage, regardless of minor variations in heat intensity or batch size (within reason). This consistency is difficult to achieve relying solely on visual cues, as lighting and individual perception can vary.
Furthermore, many recipes specify target temperatures for specific results – for example, caramel sauce might stop cooking around 330°F ( 165°C) for a lovely amber, while a firm caramel candy might be cooked closer to 345°F ( 174°C). A reliable caramel sugar color guide often pairs visual descriptions with these crucial temperature points. Using a good quality candy thermometer is an investment in your baking success.
Temperature Ranges: A Step-by-Step Tutorial
Here are typical temperature ranges associated with different caramel stages, vital for a temperature-based caramel sugar color guide. Remember these are approximate and can be slightly affected by factors like altitude and the type of sugar used:
- Melting Sugar: Below
300°F(150°C) - Sugar dissolves and melts. - Pale Yellow/Light Gold:
300°Fto315°F(150°Cto157°C) - Initial caramelization begins. - Medium Gold/Amber:
320°Fto340°F(160°Cto170°C) - Most common range for balanced caramel flavor and color.- Example: A classic caramel sauce often reaches
330°F(165°C) before adding cream.
- Example: A classic caramel sauce often reaches
- Deep Amber/Mahogany:
345°Fto355°F(174°Cto179°C) - Intense, bittersweet caramel, suitable for toffee or harder candies.- Example: Toffee is typically cooked to
350°F(177°C) or slightly higher.
- Example: Toffee is typically cooked to
- Burnt: Above
360°F(182°C) - Sugar is breaking down too much, resulting in bitterness.
- Note: Always use a thermometer specifically designed for candy making, which can withstand high temperatures and provides accurate readings.
Interpreting Temperature Results: Determining Caramel Color Accuracy
Interpreting temperature readings in the context of a caramel sugar color guide means understanding that temperature drives the color and flavor development. If your thermometer reads 335°F ( 168°C), you should expect to see a medium to deep amber color and taste a rich, balanced caramel flavor. If the color is still pale yellow at this temperature, double-check your thermometer's accuracy.
Conversely, if your caramel visually looks like a deep amber but the thermometer reads only 310°F ( 154°C), something is likely off – perhaps uneven heating, or the thermometer isn't fully immersed. Trusting the thermometer for critical stages, especially in wet caramel where visuals can be misleading due to steam or added liquids, provides a reliable benchmark for achieving the desired caramel sugar color guide stage. Use temperature as your objective confirmation of the visual cues you are observing.
Caramel Sugar Color Guide: Matching Color to Your Recipe
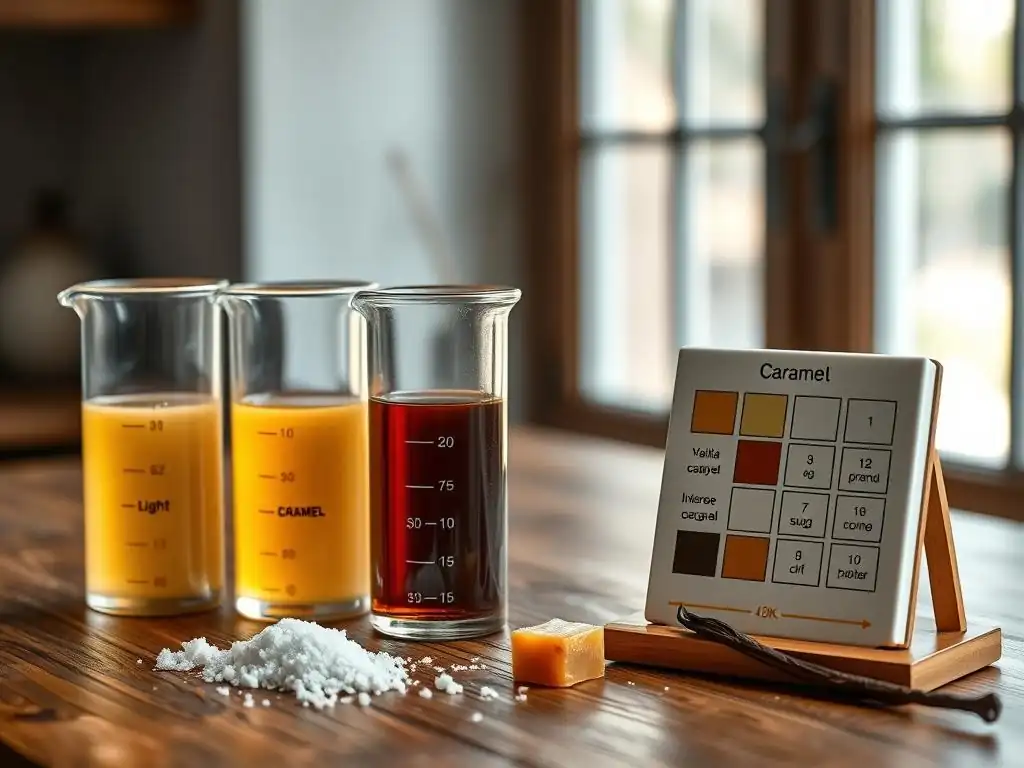
The ideal caramel color isn't a single fixed point; it depends entirely on what you plan to do with it. A light caramel is perfect when you want sweetness with just a hint of toasted sugar, while a deeper color is necessary for intense flavor that can stand up to other ingredients. Understanding this relationship is key to effectively using any caramel sugar color guide.
Matching the color to your recipe ensures that the caramel contributes the intended flavor profile and consistency to the final dish. Using a light caramel in a recipe calling for deep, bittersweet notes will result in a flat flavor, just as using a dark, intense caramel in a delicate pastry cream could overpower it. This flexibility is why a good caramel sugar color guide isn't just about identifying colors, but about applying them correctly.
Adjusting Caramel Color for Different Baking Applications
Here’s how to think about matching your caramel's color to common baking uses, referencing a practical caramel sugar color guide:
- Light Gold/Pale Amber: Ideal for delicate sauces, glazes, or when folding into light mousses or creams where you want sweetness and a subtle toasted note without bitterness. Approximate Temp:
315-325°F(157-163°C). - Medium Amber: The most versatile stage, perfect for classic caramel sauces, fillings for tarts, or binding agents in bars. It offers a balanced sweet and rich flavor. Approximate Temp:
325-340°F(163-170°C). - Deep Amber/Mahogany: Best for applications where you need an intense, slightly bittersweet caramel flavor, such as toffee, brittle, or as a strong flavor component in dense cakes or brownies. Approximate Temp:
340-355°F(170-179°C).
Always consider the other ingredients in your recipe. Adding cream, butter, or salt will affect the final flavor and perceived sweetness, so you might push the caramelization slightly further if those additions will mellow it out.
Caramel Color Chart: A Visual Reference for Bakers
While a physical chart is most useful, mentally referencing or even sketching out a simple caramel sugar color guide chart can be helpful. Imagine a gradient:
Clear Sugar -> Pale Yellow -> Light Gold -> Medium Amber -> Deep Amber -> Mahogany -> Dark Brown (Burnt)
- Flavor Progression: Increases in intensity and bitterness from left to right.
- Temperature Progression: Increases from left to right (roughly
300°Fto355°F).
Think of specific examples:
- Light Gold: Like a very light maple syrup or apple juice.
- Medium Amber: Like classic cola or medium-roast coffee.
- Deep Amber: Like dark maple syrup or strong black tea.
Using this mental or physical caramel sugar color guide chart helps you quickly assess the stage your caramel is in and determine if it matches your recipe's requirements. Practice making caramel and comparing the color to these descriptions to hone your visual recognition.
Troubleshooting Caramel Color Issues: Common Problems and Solutions
Even with a reliable caramel sugar color guide and a thermometer, things can occasionally go wrong. Caramel is notoriously sensitive to heat fluctuations and external factors like humidity. Knowing how to identify common issues and having rescue techniques at your disposal can save a batch and prevent frustration.
Common problems include caramel that's too light, caramel that's too dark (or burnt), and crystallization. Each requires a different approach to fix or prevent, reinforcing the importance of understanding the process stages outlined in a comprehensive caramel sugar color guide. Don't despair if your first few attempts aren't perfect; troubleshooting is part of mastering any baking technique.
My Caramel is Too Light: How to Fix It
If you've stopped cooking your sugar and realize the color is too pale for your intended use (e.g., you aimed for medium amber but have light gold), the fix is usually straightforward: return it to the heat.
- If you haven't added other ingredients (like cream or butter): Simply place the pan back over medium heat. Continue to heat, swirling gently if needed, and monitor the color closely using your visual caramel sugar color guide and thermometer until it reaches the desired shade. Be aware that it will brown faster the second time around.
- If you've added other ingredients (making sauce): This is trickier, as you're now cooking a mixture, not just sugar. Gently reheat the sauce over low to medium heat. While the color might not deepen significantly once other ingredients are incorporated, the flavor can still develop a little more complexity. Watch carefully to ensure the sauce doesn't scorch on the bottom. It might be better to accept a slightly lighter sauce than risk burning it.
My Caramel is Too Dark: Rescue Techniques
If your caramel has gone too dark, bordering on burnt, the options are limited but worth trying before you dump it.
- If it's just slightly too dark amber: Immediately remove the pan from the heat. You can try plunging the bottom of the pan into a shallow ice bath for just a second or two to rapidly cool the bottom layer and halt the cooking. If making sauce, have your warm cream or liquid ready and add it immediately (carefully, as it will steam violently) to stop the caramelization. The added liquid will dilute the flavor and color slightly.
- If it's visibly burnt, smoking, or smells acrid: Unfortunately, burnt caramel cannot be salvaged. The bitter compounds are irreversible. Trying to use it will ruin your entire dish. Cut your losses and start over. Clean the pan by soaking it with hot water and a little baking soda; the burnt sugar will dissolve.
Preventing Crystallization in Caramel: Tips and Tricks
Crystallization, where the smooth liquid sugar turns into a grainy, solid mass, is a common caramel woe. It happens when stray sugar crystals act as seeds, causing the dissolved sugar to recrystallize. Preventing it is key to a smooth caramel sugar color guide journey:
- Start with a Clean Pan: Ensure your saucepan is spotless before you begin.
- Dissolve Sugar Fully: If using the wet method (sugar and water), heat gently and stir only until the sugar is completely dissolved and the liquid is clear before boiling.
- Wash Down the Sides: Use a pastry brush dipped in water to wash down any sugar crystals clinging to the sides of the pan above the liquid line while the sugar is dissolving and boiling. These are common culprits for seeding crystallization.
- Avoid Stirring (Dry Method): If using the dry method (sugar only), resist the urge to stir until the sugar is mostly melted. Swirl the pan instead to encourage even melting.
- Add Acid: A small amount of acid, like lemon juice or cream of tartar (
1/4 teaspoonper cup of sugar is a general guideline), can help prevent crystallization by breaking down sucrose into glucose and fructose.
Following these steps dramatically increases your chances of achieving a smooth, crystalline-free caramel worthy of any caramel sugar color guide illustration.
Mastering Caramel Color: Advanced Techniques and Tips
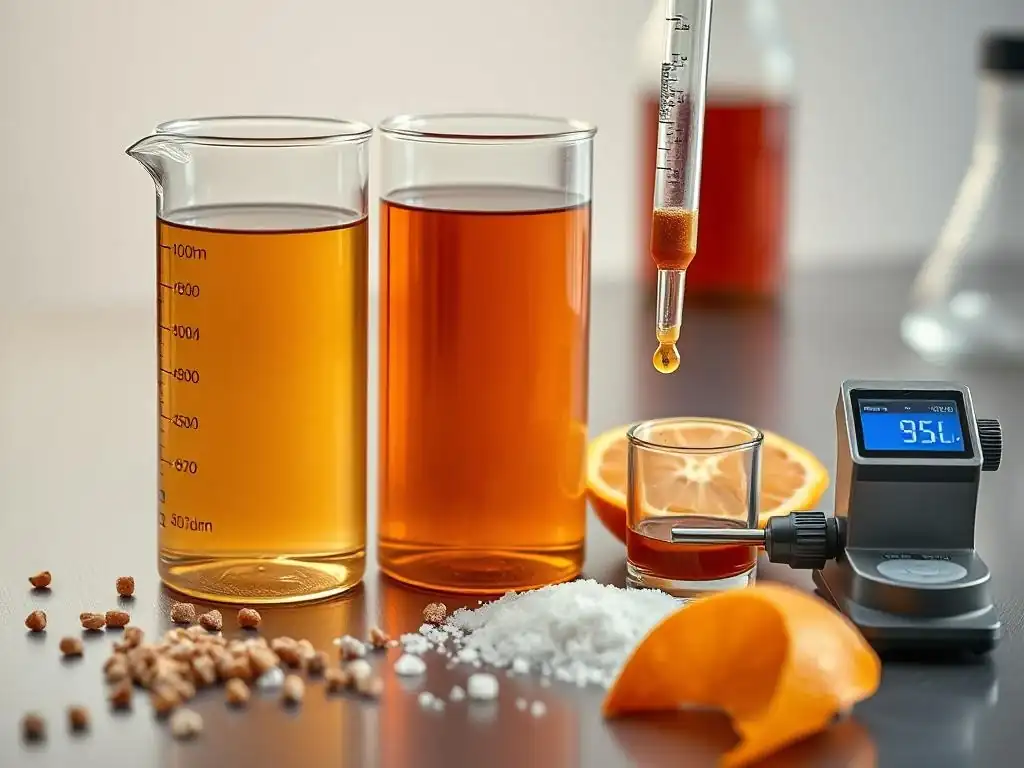
Once you're comfortable with the basics of using a caramel sugar color guide – recognizing visual cues and hitting temperature points – you can explore more advanced techniques. This includes infusing your caramel with flavors and adapting the base caramel recipe for different applications.
Mastering caramel color means not just reaching a specific shade, but understanding how that shade contributes to the overall flavor profile and texture of your final dessert. It's about intentionality – choosing the right level of caramelization to complement other ingredients and achieve your desired result.
Infusing Caramel with Flavor: Salted Caramel
One popular variation is salted caramel, which beautifully balances the sweetness and slight bitterness of caramel with the sharp contrast of salt. The salt is typically added after the caramel has reached its desired color and temperature, often along with butter and cream.
- Process: Make your caramel to the target color (usually medium to deep amber, around
330-340°For165-170°C). Remove from heat, carefully whisk in warm cream (it will bubble vigorously), then whisk in softened butter and finally the salt. - Salt Type: Use a good quality sea salt or kosher salt. Flaky sea salt added at the end can provide bursts of salinity and a pleasant texture. The amount of salt can be adjusted to taste, but a common starting point is
1/2 to 1 teaspoonof fine salt per cup of sugar used.
The color of the base caramel is still crucial here. A lighter caramel will yield a sweeter salted caramel, while a darker one will produce a more complex, bittersweet version. Your caramel sugar color guide principles still apply!
Using Caramel in Different Baking Recipes: Caramel Sauce, Caramel Apples
The base caramel (just sugar, or sugar and water) is a building block. Its final form depends on what you add after reaching the desired caramel sugar color guide stage and temperature.
- Caramel Sauce: After achieving the desired amber color (typically
330-340°F/165-170°C), hot cream and butter are whisked in. The temperature drops significantly, halting further caramelization. The amount of liquid determines the sauce's thickness. - Caramel Candies (Chewy Caramels): Sugar, corn syrup, water, butter, and cream are cooked together. The mixture is heated to a higher temperature than sauce, often
240-245°F(115-118°C), which corresponds to the "firm ball" stage in candy making. While the final temperature is lower than pure caramelization temps, the initial heating of the sugar component often involves caramelization before other ingredients are added, contributing color and flavor. Sometimes, the sugar is caramelized separately to a deep amber (340-350°F/170-175°C) before the dairy is added to create a darker, more intense candy. - Toffee: Sugar and butter (and sometimes water or corn syrup) are cooked to a high temperature, usually
290-305°F(143-151°C), the "hard crack" stage. The sugar caramelizes during this process, typically reaching a medium to deep amber color depending on the desired flavor intensity. A caramel sugar color guide is essential for judging the color at these high temperatures before the mixture turns brittle. - Caramel Apples/Pecans: Often uses a sauce base cooked to a firm consistency or a specific type of caramel candy cooked to a firm ball stage. The color of the caramel determines the flavor of the coating.
Understanding how the base caramel color translates into these different applications is a sign of a truly skilled baker.
Conclusion: Achieving Caramel Perfection with Confidence
Mastering the art of caramel color is a rewarding skill that significantly impacts the flavor and appearance of countless baked goods. By understanding the science behind caramelization, learning to interpret both visual cues and temperature readings, and using a reliable caramel sugar color guide, you can move from guesswork to consistent success.
Remember that practice makes perfect. Don't be discouraged by a batch that goes wrong. Each attempt is a learning opportunity, helping you fine-tune your senses and techniques. Whether you're aiming for a delicate golden sauce or a rich, deep amber brittle, you now have the knowledge to confidently navigate the stages of caramelization. So grab your pan and thermometer, and start creating beautiful, delicious caramel with ease!
Frequently Asked Questions
How can I tell when my caramel is the perfect color without burning it?
Rely on visual cues like a rich amber color rather than solely on timing. The darker the color, the stronger the flavor, but be careful to avoid the burnt stage. Constant monitoring is key!
What is the IPA test mentioned in the article, and how does it help with caramel color?
The IPA test, or isopropyl alcohol test, involves placing a drop of your caramel into IPA. This helps you see the true color of the caramel without interference from the heat and bubbles. It's crucial for precise color control.
What are some common mistakes that bakers make when trying to achieve the right caramel color?
Overcrowding the pan with sugar, using too high heat, and not stirring properly are common errors. These lead to uneven cooking and can cause the caramel to burn before it reaches the desired color.
How does the color of the caramel affect the final flavor of the baked good?
The caramel color directly impacts the flavor. A light amber color will have a delicate sweetness, while a darker amber will provide a more intense, almost bitter-sweet flavor. Experiment to find your preference!
Can I use a candy thermometer to help me achieve the perfect caramel color, or is visual assessment more reliable?
While a candy thermometer is helpful for sugar stages, visual assessment is more reliable for caramel color. The temperature can be a guide, but color is the ultimate indicator of readiness and flavor development.
Final Reflection: Mastering the Art of Caramel Color
The quest for the perfect caramel color is more than just a culinary pursuit; it's a journey into precision, understanding, and the transformative power of heat. Achieving that ideal hue, whether for a rich sauce, a stunning candy, or a perfectly balanced beer, requires a keen eye and a grasp of the underlying chemical processes. This guide, focusing on visual cues and the invaluable IPA test, aims to empower you to confidently navigate this fascinating process.
The impact of color on our perception of food is undeniable. From the inviting amber glow of a well-crafted beer to the deep mahogany richness of a perfectly caramelized onion, color speaks volumes about flavor and quality. Color is a power which directly influences the soul.
- Wassily Kandinsky. This quote, while referring to art, perfectly encapsulates the emotional and sensory connection we have with color, particularly in the context of food and drink. Understanding how to control this aspect elevates our culinary creations beyond mere sustenance, transforming them into works of art.
Now, it's your turn. Take what you've learned here – the visual cues, the IPA test, the understanding of the Maillard reaction – and experiment! Don't be afraid to push boundaries, to explore the spectrum of caramel colors, and to discover your own personal "perfect" shade. Each batch, each experiment, is a step closer to mastering this beautiful and rewarding craft. The journey of achieving the perfect caramel color is ongoing, and your own unique discoveries await.
Unlock Your Caramel Mastery: Take the Next Step!
Thanks for diving into the world of perfect caramel with us! We hope you now feel confident in identifying the ideal color and using the IPA test for consistent results. Ready to put your new skills to the test?
- Whip up a batch of your favorite caramel recipe: Use your newfound knowledge of color and the IPA test to achieve that perfect shade every time.
- Share your caramel creations on social media using #BakeWithEaseCaramel and tag us—we'd love to see your stunning results!
- Experiment with different sugars and techniques: Try substituting different types of sugar or exploring alternative heating methods to discover your preferred approach.
What unique caramel flavor combination will you create next? Let's hear your ideas in the comments below!