
The Ultimate Guide to Flour for Effortless Baking Success

Welcome to BakeWithEase, your kitchen companion for all things baking! Are you ready to unlock the secrets to effortless baking success? Choosing the right flour can be the key. Dive into our ultimate guide to flour types and discover how mastering this fundamental ingredient can transform your baked goods from "meh" to magnificent. What if the secret to that perfect cake or irresistible bread was simpler than you thought? Let's explore!
- BakeWithEase: Mastering Flour Types for Baking Perfection
- Understanding Flour Types: Your Key to Effortless Baking
- Wheat Flour: The Baking Staple
- Beyond Wheat: Exploring Alternative Flours for Baking
- Flour Storage: Maintaining Freshness and Quality
- Troubleshooting: Flour-Related Baking Issues
- Flour Conversion Chart: Baking Made Easy
- Mastering Flour for Baking Success: Final Thoughts
- Frequently Asked Questions
- Final Reflection: Mastering the Flour Power for Baking Bliss
- Unlock Your Baking Potential: Flour Power Unleashed!
BakeWithEase: Mastering Flour Types for Baking Perfection
Understanding the different flour types baking success is fundamental for anyone looking to improve their baking skills, from novice home bakers to those aiming for professional-level results. Flour isn't just a single ingredient; it's a diverse category with varieties offering unique properties that dramatically influence the texture, structure, and taste of baked goods. Each type of flour behaves differently when mixed with liquids, fats, and leavening agents, primarily due to its protein content and how it's processed.
At BakeWithEase, we believe that mastering flour types is a cornerstone of effortless baking success. Whether you're aiming for a light and airy cake, a chewy loaf of bread, or a flaky pie crust, selecting the correct flour is the first critical step. This guide will walk you through the most common flour types, explain their unique characteristics, and provide practical tips for using them effectively to achieve predictable and delicious outcomes in your baking endeavors. Let's unlock the secrets to perfect baking by understanding your flour.
Understanding Flour Types: Your Key to Effortless Baking
To truly achieve flour types baking success, it's essential to grasp what makes different flours distinct. The primary factor is protein content, which directly relates to gluten development. Gluten is a protein network that forms when wheat flour is mixed with water and kneaded. This network provides structure and elasticity, allowing dough to rise and hold its shape. Flours with higher protein content develop stronger gluten, ideal for chewy bread, while lower protein flours develop weaker gluten, perfect for tender cakes and pastries.
Beyond protein, other factors like milling process, starch content, and whether the flour is bleached or unbleached also play significant roles. For instance, finely milled flours tend to produce lighter textures. Bleaching flour whitens it and alters its protein structure slightly, which can improve its ability to absorb liquid and create a finer crumb in cakes. Understanding these nuances is crucial for selecting the right flour for your specific baking project and ensuring consistent, high-quality results every time you bake.
Choosing the Right Flour: A BakeWithEase Guide
Selecting the appropriate flour is perhaps the most impactful decision you make before even preheating your oven. The wrong choice can lead to tough cakes, flat bread, or crumbly cookies. Consider the desired outcome: Do you want a light, delicate crumb or a robust, chewy texture? This will immediately point you towards flours with lower or higher protein content, respectively. For example, a typical all-purpose flour contains around 10-12% protein, making it versatile but not necessarily optimal for highly specific results like a super-tender biscuit or an extremely chewy baguette.
Furthermore, think about the recipe's hydration level and mixing method. Recipes requiring extensive kneading, like artisan bread, thrive on high-protein bread flour that can withstand the manipulation and develop strong gluten. Conversely, recipes that are minimally mixed, such as muffins or quick breads, benefit from lower-protein flours that prevent toughness. Always check recipe recommendations, but understanding the underlying principles of flour composition will empower you to make informed substitutions and adjustments, truly mastering flour types baking success in any situation.
Wheat Flour: The Baking Staple
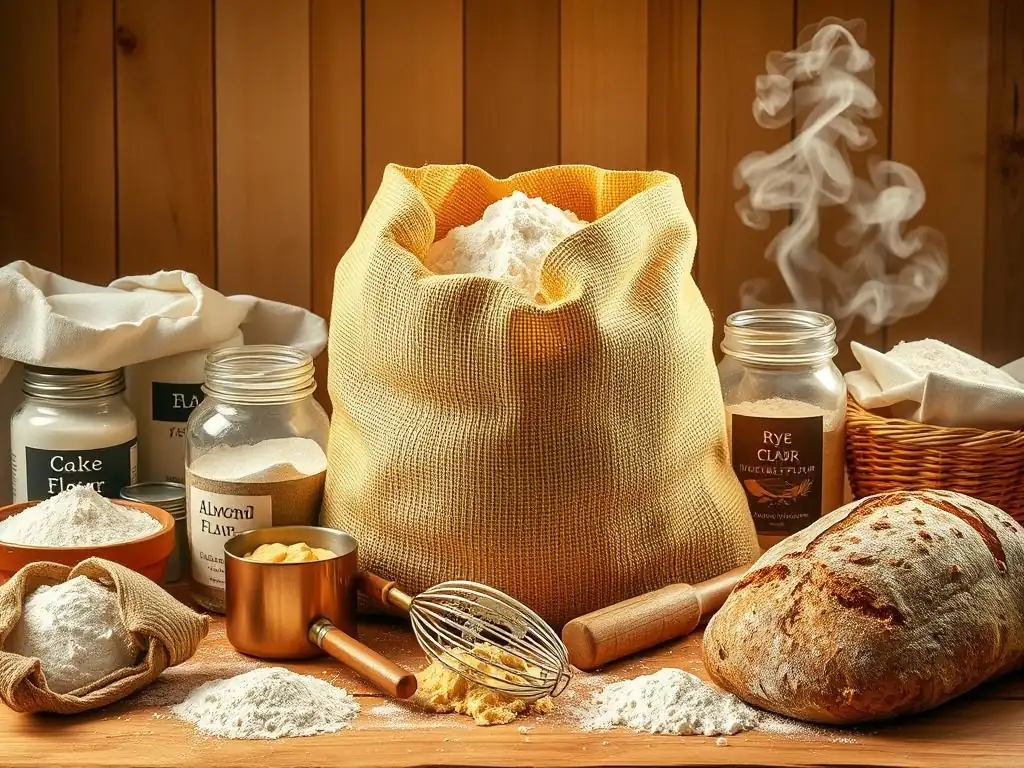
Wheat flour is the most commonly used flour in baking worldwide, forming the base of countless breads, cakes, cookies, and pastries. It is derived from grinding wheat kernels, which consist of three main parts: the endosperm, germ, and bran. Different types of wheat flour are produced by varying the type of wheat used (hard or soft, red or white) and how much of the kernel is included in the milling process.
The versatility of wheat flour stems from its ability to form gluten, providing structure to baked goods. Hard wheat varieties, higher in protein, yield flours like bread flour, excellent for yeast-leavened goods. Soft wheat varieties, lower in protein, produce flours like cake and pastry flour, ideal for tender baked goods. All-purpose flour, a blend of hard and soft wheat, strikes a balance, making it suitable for a wide range of applications, though it may not be the best for highly specialized recipes.
All-Purpose Flour: The Versatile Baking Flour
All-purpose flour, often simply labeled "AP flour," is a pantry workhorse for a reason. It's milled from a blend of hard and soft wheat, resulting in a moderate protein content, typically ranging from 10% to 12%. This balance makes it suitable for a vast array of baked goods, from cookies and muffins to pie crusts and some types of bread. Its ubiquity makes it the go-to choice for many home bakers and recipes.
While AP flour is incredibly versatile, it's important to recognize its limitations. For instance, while you can make bread with AP flour, it won't develop the same strong, chewy crust and open crumb structure as bread flour. Similarly, using it for delicate cakes might result in a slightly tougher texture compared to using cake flour. Think of AP flour as the reliable generalist – it performs reasonably well in many roles, contributing to overall flour types baking success in a home kitchen, but specialized flours often yield superior results for specific items.
Baking with All-Purpose Flour: Tips and Tricks
When baking with all-purpose flour, accurate measurement is key. Scooping flour directly from the bag can compact it, leading to using too much and potentially resulting in dry or tough baked goods. A standard method is to gently spoon the flour into your measuring cup and then level it off with a straight edge. This method helps ensure you're using the intended amount, typically yielding about 120-130 grams per cup, depending on the flour brand and how it's handled.
For recipes like cookies, cakes, or muffins where a tender crumb is desired, avoid overmixing the batter once the flour is added. Mixing develops gluten, and too much gluten development in these recipes can lead to toughness. Mix just until the dry ingredients are incorporated. For simple quick breads or batters, AP flour is forgiving, but for more delicate items, consider sifting the flour to aerate it and remove any lumps, contributing to a lighter texture. Mastering these simple techniques with AP flour is a great step towards broader flour types baking success.
Bread Flour: Achieving Optimal Gluten Development
Bread flour is specifically milled from hard wheat varieties and boasts a higher protein content than all-purpose flour, typically between 12% and 14%. This elevated protein level is crucial for developing strong, elastic gluten networks when mixed with water and kneaded. This strong gluten is what allows bread dough to trap the gases produced by yeast, enabling the dough to rise significantly and creating the characteristic chewy texture and robust structure found in many types of bread.
Using bread flour is essential for achieving the desired structure and texture in yeast-leavened breads. The higher protein makes the dough more elastic and less likely to tear during kneading and rising. This results in loaves with excellent volume, a well-formed crumb structure (often with desirable large holes), and a satisfyingly chewy crust. For anyone serious about making artisanal loaves, bagels, or pizzas from scratch, bread flour is a non-negotiable ingredient for flour types baking success in these applications.
Best Uses for Bread Flour in Baking
Bread flour shines in recipes where strong gluten development is desired. Its primary application is, of course, bread making, including rustic loaves, sandwich bread, rolls, and enriched doughs like brioche or challah. The high protein content provides the necessary structure to support the weight of added fats and eggs in enriched doughs without collapsing.
Beyond traditional bread, bread flour is also the preferred choice for achieving the ideal chewiness in bagels and pizza crusts. A classic New York-style pizza crust, for example, relies heavily on the strong gluten network formed by bread flour to create that signature structure and chew. Even some pasta recipes call for bread flour or a blend with durum flour to achieve a desirable al dente texture. If your goal is a chewy, structured bake, reach for bread flour.
Pastry Flour: For Tender and Flaky Results
Pastry flour is milled from soft wheat and has a lower protein content than all-purpose flour, typically ranging from 8% to 9%. This lower protein level results in less gluten development when mixed with liquids, which is precisely what you want for baked goods that require tenderness and flakiness rather than chewiness or structure.
The fine texture and low protein of pastry flour make it ideal for creating delicate pastries where a tender crumb and minimal toughness are paramount. Think of buttery pie crusts that shatter when you cut them, flaky biscuits that pull apart in layers, or tender scones. Using pastry flour helps prevent the formation of too much gluten, ensuring these items remain light and delicate rather than tough or dense. It's a key player in flour types baking success for the pastry chef or home baker aiming for delicate results.
Baking Delicate Pastries with Pastry Flour
When working with pastry flour, the goal is often to minimize gluten development as much as possible. This means using cold ingredients (especially fat like butter) and handling the dough gently and minimally. For pie crusts, for instance, incorporating cold butter into the flour creates pockets that steam and expand during baking, contributing to flakiness. Overworking the dough with pastry flour will still develop some gluten and make the crust tough, albeit less so than with higher protein flours.
Pastry flour is perfect for recipes like:
- Flaky pie crusts
- Tender biscuits
- Scones
- Some cookie recipes where a delicate, crumbly texture is desired
- Certain types of muffins or quick breads where extreme tenderness is the aim
Using pastry flour in these applications helps guarantee the desired texture, contributing significantly to flour types baking success in the realm of delicate baked goods.
Cake Flour: Creating Light and Airy Cakes
Cake flour is another low-protein flour, even lower than pastry flour, typically containing just 6% to 8% protein. It is milled from soft wheat and is usually bleached. The bleaching process not only whitens the flour but also slightly alters the starch and protein structure, allowing it to absorb more liquid and fat than unbleached flours. This increased absorption capacity, combined with the low protein, results in a very fine texture and minimal gluten development, making it perfect for creating cakes with a supremely tender, soft, and fine crumb structure.
The fine milling and low protein of cake flour are essential for achieving the characteristic light and airy texture of many classic cakes. It produces a delicate structure that melts in your mouth, unlike the more robust crumb you get from all-purpose flour. For bakers striving for the perfect sponge cake, chiffon cake, or delicate cupcakes, cake flour is the ingredient that makes all the difference in achieving that desired ethereal texture and is crucial for flour types baking success in the cake department.
Using Cake Flour for Superior Cake Texture
Using cake flour is straightforward, but its properties require mindful handling. Because it absorbs more liquid, some recipes specifically designed for cake flour may have slightly different liquid ratios than those written for all-purpose flour. When substituting cake flour for AP flour in a recipe, you might need to adjust liquid slightly, though often a direct substitution by weight (using about 7/8 cup cake flour per 1 cup AP flour, or simply weighing) works well, resulting in a more tender cake.
Cake flour is the secret weapon for:
- Sponge cakes
- Chiffon cakes
- Angel food cakes
- Delicate butter cakes
- Cupcakes where a light, fluffy crumb is desired
Sifting cake flour is particularly important due to its fine texture; it helps aerate the flour and ensures smooth incorporation into the batter, preventing lumps and contributing to an even, fine crumb. Embracing cake flour for these specific baked goods is a key step towards mastering flour types baking success for delicate desserts.
Self-Rising Flour: Convenience and Considerations
Self-rising flour is a pre-mixed convenience product that contains all-purpose flour, a leavening agent (typically baking powder), and salt. The standard ratio is approximately 1 ½ teaspoons of baking powder and ¼ teaspoon of salt per cup of all-purpose flour. This blend is designed for quick and easy baking, particularly for recipes like biscuits, scones, and some quick breads, where the leavening is already incorporated evenly throughout the flour.
The main advantage of self-rising flour is its simplicity – it saves you the step of measuring and mixing in baking powder and salt. This can be helpful for beginner bakers or when you're in a hurry. However, its fixed composition can also be a limitation. The leavening agent's potency can diminish over time, and you have no control over the amount of leavening or salt, which can restrict its use in recipes that require different ratios or no chemical leavening at all.
When to Use and When to Avoid Self-Rising Flour
Self-rising flour is best suited for simple recipes specifically developed for it, such as classic Southern-style biscuits, certain quick bread recipes, or simple muffins. It provides a reliable lift and seasoning for these items without needing separate leavening agents. For instance, a basic biscuit recipe might simply call for self-rising flour, butter, and buttermilk.
However, you should generally avoid using self-rising flour in recipes that:
- Use yeast as the primary leavening agent (e.g., most breads).
- Require a precise amount of baking powder or baking soda that differs significantly from the amount in the flour.
- Call for no salt or a specific amount of salt added separately.
- Are complex cakes or pastries where precise control over ingredients is crucial for texture.
Using self-rising flour inappropriately can lead to over- or under-leavened results, or an incorrect salt balance. While convenient, understanding when to use it and when to stick to separate ingredients is vital for consistent flour types baking success.
Beyond Wheat: Exploring Alternative Flours for Baking
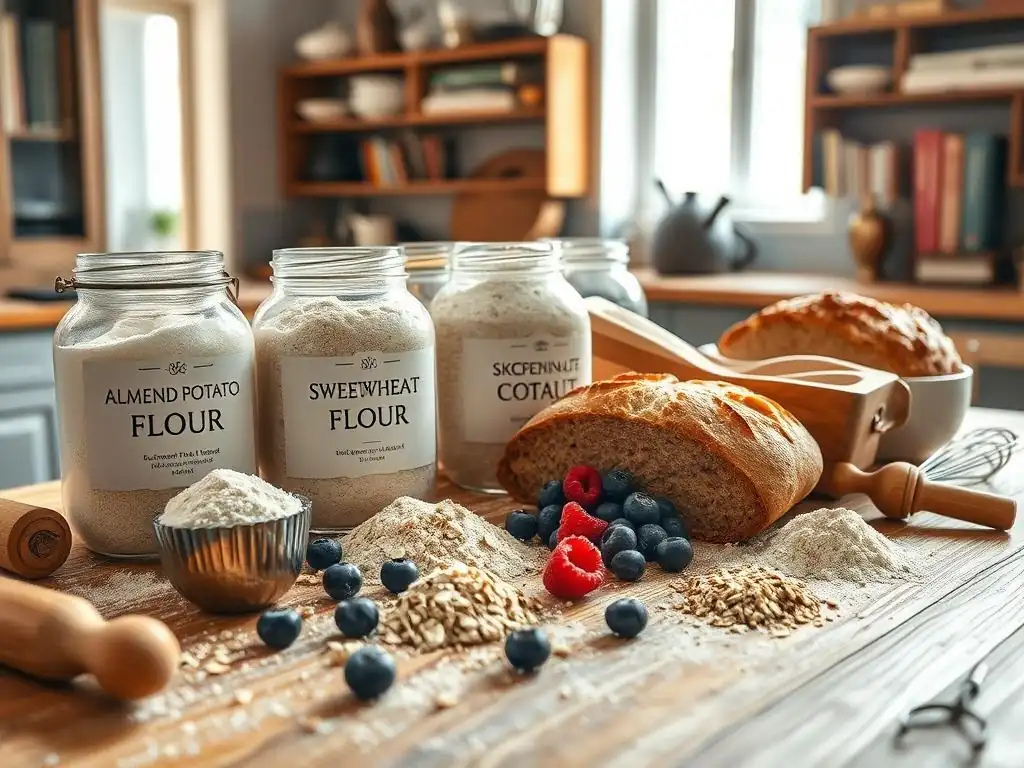
While wheat flour is the standard, the world of baking has expanded significantly to include a wide variety of alternative flours. These are made from grains other than wheat, nuts, seeds, or roots and offer diverse flavors, textures, and nutritional profiles. Alternative flours are particularly popular for gluten-free baking but are also used to add unique characteristics to traditional recipes.
Working with alternative flours often requires a different approach than wheat flour, as they behave differently, particularly in terms of structure and liquid absorption. They typically lack the gluten-forming proteins found in wheat, meaning they won't provide the same elasticity and structure on their own. Bakers often use binders like xanthan gum or psyllium husk, or blend multiple alternative flours, to mimic the properties of wheat flour and achieve successful results. Exploring these options expands the possibilities for flour types baking success beyond traditional boundaries.
Gluten-Free Flour Blends: A Comprehensive Overview
Gluten-free flour blends are designed to replace wheat flour in recipes for individuals with celiac disease or gluten sensitivity. These blends are typically a mix of several different flours, starches, and sometimes binders to approximate the texture and structure provided by wheat gluten. Common components include rice flour (brown and white), sorghum flour, millet flour, tapioca starch, potato starch, cornstarch, and binders like xanthan gum or guar gum.
The composition of gluten-free blends varies significantly between brands, and this variation can impact baking results. Some blends are formulated specifically for cakes and pastries, while others are better suited for bread. A good all-purpose gluten-free blend aims for versatility but may still require recipe adjustments compared to using wheat flour. For example, a blend might contain 20-30% starch, 60-70% flours, and a small percentage of binder. Understanding the typical components helps in selecting the right blend for your specific needs and contributes to achieving flour types baking success in gluten-free baking.
Baking Gluten-Free: Tips for Flour Substitutions
Substituting gluten-free flour for wheat flour isn't always a simple 1:1 swap, although some blends are designed to be used that way, especially by weight. Because gluten-free flours don't develop gluten, baked goods can sometimes be crumbly or dense. Adding a binder like xanthan gum (typically ¼ to 1 teaspoon per cup of flour blend, depending on the recipe type) can help provide structure and elasticity.
- Tip 1: Use a reputable, all-purpose gluten-free blend specifically formulated for baking.
- Tip 2: Measure gluten-free flour by weight (grams) rather than volume (cups) for greater accuracy, as density can vary.
- Tip 3: Many gluten-free doughs benefit from a slightly longer resting period before baking to allow the flours to hydrate fully.
- Tip 4: Consider adding an extra egg or a bit more fat to improve moisture and binding in some recipes.
Experimentation is key in gluten-free baking, as different blends and recipes will react differently. Patience and practice using the right flour types baking success techniques for gluten-free blends will yield delicious results.
Almond Flour: Nutty Flavor and Moist Texture
Almond flour is made from finely ground blanched almonds (with the skins removed). It's a popular gluten-free alternative, offering a rich, slightly sweet, nutty flavor and contributing moisture and tenderness to baked goods. Almond flour is relatively high in fat and protein compared to wheat flour, and low in carbohydrates.
Due to its high fat content and lack of gluten, almond flour behaves quite differently from wheat flour. It doesn't absorb liquid in the same way and won't create an elastic dough. This makes it unsuitable for recipes requiring significant structure or rise, like yeast bread. However, its unique properties make it excellent for specific applications where moisture, tenderness, and flavor are desired. For example, it's a key ingredient in French macarons.
Almond Flour Recipes for Baking
Almond flour is fantastic in recipes where its moistness and flavor can shine. It's widely used in:
- Macarons: Provides the essential structure and delicate chewiness.
- Cakes and Muffins: Adds moisture and a tender crumb, often resulting in denser but very moist baked goods.
- Cookies: Creates chewy or tender cookies depending on the recipe.
- Quick Breads: Adds flavor and moisture.
- Pie Crusts: Can be used alone or blended with other flours for a tender, nutty crust.
When substituting almond flour for wheat flour, it's rarely a 1:1 volume swap due to differences in weight and absorption. Recipes specifically developed for almond flour will provide the correct ratios. A common approximation is that almond flour is denser than wheat flour; roughly 1 cup of almond flour weighs about 90-100 grams, compared to 120-130 grams for AP wheat flour. Understanding these differences is vital for flour types baking success when using almond flour.
Coconut Flour: High Fiber and Unique Properties
Coconut flour is a fine, powdery flour made from dried, defatted coconut meat. It is extremely high in fiber and highly absorbent, often requiring significantly more liquid than other flours in recipes. It has a distinct coconut flavor, which can be a benefit or a challenge depending on the desired outcome. Coconut flour is also gluten-free and relatively low in carbohydrates.
Working with coconut flour requires a fundamental shift in approach compared to wheat or even almond flour. Its incredible absorbency means you typically use much less of it in a recipe, and you need to increase the liquid content considerably. For example, substituting coconut flour for wheat flour often involves using only about ¼ to ⅓ cup of coconut flour for every cup of wheat flour, while also adding extra eggs and liquid to compensate for the absorption and lack of gluten structure.
Baking with Coconut Flour: Hydration is Key
The most critical aspect of baking with coconut flour is managing its high absorption. Without sufficient liquid, baked goods will be dry and dense. Eggs are often used generously in coconut flour recipes, as they provide both liquid and binding. A typical recipe might use 4-6 eggs per ½ cup of coconut flour.
- Key Tip: Always follow recipes specifically designed for coconut flour, as the liquid ratios are drastically different.
- Absorption: Allow batters or doughs made with coconut flour to sit for a few minutes before baking to allow the flour to fully absorb the liquid.
- Texture: Baked goods with coconut flour often have a unique, somewhat crumbly but moist texture.
- Flavor: Be mindful of the coconut flavor and how it will interact with other ingredients.
Mastering the hydration needs of coconut flour is essential for flour types baking success when incorporating this unique ingredient into your baking repertoire.
Oat Flour: Wholesome and Slightly Sweet
Oat flour is made by grinding rolled oats or steel-cut oats into a fine powder. It's a whole grain flour, meaning it contains the bran, germ, and endosperm of the oat groat, providing more fiber and nutrients than refined wheat flour. Oat flour has a slightly sweet, nutty flavor and creates tender, moist baked goods. While oats themselves are naturally gluten-free, oat flour can be cross-contaminated during processing, so look for certified gluten-free oat flour if baking for someone with celiac disease.
Oat flour contains some protein (around 11-17%, similar to or higher than AP flour), but it does not form gluten like wheat protein. It absorbs liquids well but can result in a denser crumb compared to wheat flour. It's often used in muffins, cookies, pancakes, and quick breads, sometimes blended with other flours.
Incorporating Oat Flour into Your Baking
Oat flour can often be substituted for a portion of wheat flour in recipes (e.g., replacing 25-50% of the wheat flour) to add whole-grain goodness and tenderness. For full substitution in gluten-free recipes, it usually needs to be combined with other flours and a binder for structure.
- Substitution: When substituting oat flour for wheat flour, you might need slightly less liquid, as it absorbs differently. Start with a 1:1 volume substitution and adjust consistency as needed, or ideally, use weight (1 cup oat flour is roughly 90-100 grams).
- Texture: Expect a slightly more rustic or dense texture compared to baked goods made purely with refined wheat flour.
- Flavor: The subtle sweet, nutty flavor pairs well with fruits, spices like cinnamon, and chocolate.
Oat flour is a versatile and nutritious alternative that can enhance the flavor and texture of many baked goods, contributing to a different dimension of flour types baking success.
Flour Storage: Maintaining Freshness and Quality
Proper storage is crucial for keeping your flour fresh and preventing spoilage, which can ruin your baking efforts. Flour, especially whole grain and alternative flours, contains natural oils that can go rancid if not stored correctly. Rancid flour will impart an unpleasant, bitter flavor to your baked goods, rendering them inedible.
Beyond rancidity, improper storage can also lead to pest infestations or absorption of odors from the surrounding environment. Storing flour correctly ensures it retains its intended flavor, texture, and leavening capabilities, guaranteeing that your efforts to achieve flour types baking success aren't undermined by stale ingredients.
Proper Flour Storage Techniques for Baking
The best way to store flour is in an airtight container in a cool, dark, dry place. Exposure to air, light, moisture, and heat are the main culprits behind spoilage.
- Container: Transfer flour from its original paper bag into a rigid, airtight container made of plastic, glass, or metal. This protects it from moisture, pests, and odors.
- Location: A pantry or cupboard away from the stove, oven, or direct sunlight is ideal. Consistent, cool temperatures (below 70°F or 21°C) are best.
- Refrigeration/Freezing: For longer storage, especially for whole wheat, alternative, or rarely used flours, the refrigerator or freezer is recommended. Cold temperatures significantly slow down the oxidation of fats that causes rancidity. Ensure the container is truly airtight to prevent moisture absorption and freezer burn.
Storing flour in the refrigerator or freezer can extend its shelf life considerably. While white all-purpose flour might last 6-12 months in the pantry, whole wheat or nut flours might only last 1-3 months in the pantry but up to a year or more in the freezer.
Preventing Flour Spoilage: Tips from BakeWithEase
To actively prevent flour spoilage and ensure maximum freshness for flour types baking success:
- Buy Fresh: Purchase flour from stores with high turnover to ensure you're getting the freshest possible product. Check expiration or best-by dates if available.
- Inspect Before Use: Before using flour, especially if it's been stored for a while, give it a quick sniff. It should have a neutral or slightly sweet, fresh aroma, not musty, bitter, or oily. Look for any signs of clumping that aren't easily broken up (which could indicate moisture) or pests.
- Label and Date: When transferring flour to storage containers, label them with the type of flour and the date you purchased it or the date you stored it. This helps you keep track of freshness.
- Small Batches: If you don't bake frequently or use specialized flours, consider buying smaller quantities to ensure you use them up while they are still fresh.
Following these simple storage tips will help you protect your investment in quality ingredients and ensure that your flour is always ready to contribute to delicious, successful baking projects.
Even experienced bakers sometimes encounter issues, and often, the culprit can be related to the flour used. Recognizing common problems linked to flour and knowing how to address them is a key part of achieving consistent flour types baking success. Issues like tough texture, lack of rise, excessive crumbling, or dryness can often be traced back to using the wrong type of flour or measuring it incorrectly.
For example, a cake that turns out tough instead of tender might be the result of using high-protein bread flour instead of low-protein cake flour, or overmixing the batter with all-purpose flour, leading to excessive gluten development. Conversely, a loaf of bread that doesn't rise well or lacks structure might have been made with a low-protein flour not suitable for yeast baking.
Here are some common baking issues and their potential links to flour:
- Tough or Chewy Texture (in cakes, muffins, cookies): Often caused by using too high a protein flour (like bread flour instead of AP, cake, or pastry flour) or overmixing, which develops too much gluten.
- Dense or Flat Baked Goods (especially cakes, muffins, quick breads): Can happen if using flour that is too low in protein for the recipe's needs (though less common than toughness from high protein), or more likely, if the flour was measured incorrectly (too much flour) or if self-rising flour with inactive leavening was used.
- Crumbly Texture (in cookies, scones, gluten-free items): Can be caused by using too little liquid for the type of flour, or by using a flour that lacks sufficient binding properties (common with some single-source gluten-free flours without binders).
- Dry Baked Goods: Often a result of using too much flour, which absorbs excess moisture. This is frequently due to inaccurate volume measuring (scooping and compacting flour).
- Lack of Structure/Spread Too Much (in cookies, flatbreads): Can occur if using a flour too low in protein for the desired structure, or if the recipe was designed for a flour with higher absorption properties.
Being able to diagnose these issues based on the final texture is crucial for learning from your baking experiences and refining your approach to flour types baking success.
Solutions for Baking Issues Caused by Flour Type
Once you've identified a flour-related problem, implementing the correct solution is key to improving your next bake.
- For Toughness:
- Solution: Ensure you are using the flour type specified in the recipe (e.g., cake flour for a delicate cake). If using AP flour, measure accurately and mix just until the flour is incorporated. Consider sifting the flour.
- For Density/Lack of Rise:
- Solution: Verify you measured the flour correctly, ideally by weight (grams). If using self-rising flour, check its freshness or switch to using separate AP flour, baking powder, and salt. Ensure other leavening agents (baking soda, yeast) are active.
- For Crumbly Texture:
- Solution: Double-check the liquid amounts. If using gluten-free flours, ensure you are using a blend with appropriate binders or adding a binder like xanthan gum as needed (e.g., ¼ tsp xanthan gum per cup of gluten-free flour blend for cookies/muffins, ½-¾ tsp for cakes, 1 tsp for bread).
- For Dryness:
- Solution: Always measure flour by spooning it into the cup and leveling, or preferably, use a kitchen scale to weigh the flour according to the recipe's weight measurement.
- For Lack of Structure/Excessive Spread:
- Solution: Ensure you are using a flour with sufficient protein for the recipe's needs. For cookies that spread too much, chilling the dough before baking can also help.
By understanding how different flour types baking success is influenced by their properties and applying these troubleshooting tips, you can confidently tackle baking challenges and achieve better results.
Flour Conversion Chart: Baking Made Easy
Recipes from different sources might call for different types of flour than you have on hand, or you might want to experiment with substitutions. While a perfect conversion or substitution isn't always possible due to the unique properties of each flour type, understanding general guidelines can make baking easier and open up possibilities. Converting flour types, especially between wheat and alternative flours, often requires more than just a volume adjustment; it may also necessitate changes in liquid, fat, or leavening.
Using a flour conversion chart or guide can provide a starting point for making substitutions. However, it's important to remember that these are often approximations, and results may vary. The most reliable approach is to use recipes specifically developed for the flour you intend to use, but a conversion chart offers flexibility for adapting existing recipes and working towards flour types baking success with what you have available.
Converting Flour Types for Different Recipes
Direct volume (cup-for-cup) conversions between different flour types are often inaccurate because flours vary significantly in weight per volume and how they absorb liquid. For example, 1 cup of sifted cake flour weighs less than 1 cup of all-purpose flour, which weighs less than 1 cup of bread flour. Gluten-free flours, like almond or coconut flour, have even more significant differences in weight and absorption.
- Best Practice: Whenever possible, measure flour by weight using a kitchen scale. This is the most accurate way to ensure consistency.
- Approximate Weights per Cup (Level, Spooned):
- Cake Flour: ~110-120 grams
- All-Purpose Flour: ~120-130 grams
- Bread Flour: ~130-145 grams
- Pastry Flour: ~115-125 grams
- Almond Flour: ~90-100 grams
- Coconut Flour: ~110-120 grams (but used in much smaller quantities by volume)
- Oat Flour: ~90-100 grams
- Volume Substitutions (Use with Caution):
- Replacing 1 cup AP Flour with Cake Flour: Use ~7/8 cup cake flour.
- Replacing 1 cup AP Flour with Bread Flour: Use ~1 cup plus 1-2 tablespoons bread flour (for structure, but texture will differ).
- Replacing 1 cup AP Flour with Pastry Flour: Use ~1 cup plus 1-2 tablespoons pastry flour (for tenderness, but structure will differ).
- Replacing Wheat Flour with Gluten-Free Blend: Start with a 1:1 substitution by weight for a reputable blend, but be prepared to adjust liquid or add binder.
- Replacing Wheat Flour with Almond Flour: Typically requires less almond flour by volume and adjusting other ingredients. Follow specific almond flour recipes.
- Replacing Wheat Flour with Coconut Flour: Requires significantly less coconut flour (e.g., ¼ to ⅓ cup per cup of wheat flour) and much more liquid/eggs. Follow specific coconut flour recipes.
These are general guidelines; always observe your batter or dough consistency and make small adjustments as needed.
BakeWithEase's Guide to Flour Substitutions
Substituting flours successfully requires understanding the goal of the original recipe and the properties of the flour you want to use.
- [ ] **Identify the original flour type:** What properties (protein, texture, absorption) does it bring?
- [ ] **Identify the substitute flour type:** What properties does it have? How does it differ in protein, absorption, and flavor?
- [ ] **Consider the recipe type:** Is it a delicate cake, a chewy bread, or a quick bread? What texture is desired?
- [ ] **Use weight measurements:** This is the most reliable method for substitution.
- [ ] **Adjust liquid as needed:** Alternative flours, especially coconut, require significant liquid adjustments. Even between wheat flours, slight tweaks might be beneficial.
- [ ] **Consider binders for gluten-free swaps:** Xanthan gum or other binders are often necessary when replacing wheat flour with gluten-free options.
- [ ] **Be prepared for texture differences:** Even successful substitutions may result in a slightly different texture or flavor than the original recipe.
- [ ] **Start with recipes designed for the specific flour:** This is the easiest path to **flour types baking success** with less common flours.
Substituting flours is a skill that improves with practice. Don't be afraid to experiment, but perhaps start with simpler recipes when trying new substitutions.
Mastering Flour for Baking Success: Final Thoughts
Embarking on the journey to master flour types baking success is a rewarding endeavor that will elevate your baking from good to great. We've explored the fundamental differences between common wheat flours – from the versatile all-purpose to the specialized bread, pastry, and cake flours – and delved into the unique characteristics of popular alternative flours like gluten-free blends, almond, coconut, and oat flour. Each type offers distinct possibilities and challenges, primarily dictated by protein content and absorption capabilities.
Remember that accurate measurement, proper storage, and understanding the role each flour plays in a recipe are just as crucial as selecting the right type. Don't be discouraged by initial challenges; baking is a process of continuous learning and refinement. With practice, patience, and the knowledge gained from understanding these diverse flour types baking success will become effortless, allowing you to create a wider range of delicious baked goods with confidence and joy. Happy Baking from all of us at BakeWithEase!
Frequently Asked Questions
What is the best type of flour for achieving baking success?
The "best" flour depends on what you're baking. For general baking, all-purpose flour is a good start. However, for specific items like bread or cakes, bread flour or cake flour will yield better results.
How does flour type affect the texture of baked goods?
Different flours contain varying amounts of gluten, which affects texture. Higher gluten content, like in bread flour, creates chewier textures. Lower gluten, like in cake flour, results in tender, delicate textures.
Can I substitute different types of flour in a recipe?
Generally, yes, but with caution. Substituting flour can significantly alter the final product's texture and structure. It's best to research the impact before substituting, and adjust other ingredients if necessary.
What's the difference between bleached and unbleached flour?
Bleached flour is treated with chemicals to whiten it and weaken the gluten, while unbleached flour whitens naturally with age. Bleached flour is better for tender items, while unbleached is suitable for heartier bakes.
Where can I learn more about flour types and baking techniques?
BakeWithEase.com is your go-to resource. We offer simple recipes, techniques, and tips for bakers of all levels, focusing on achieving baking success with different flour types.
Final Reflection: Mastering the Flour Power for Baking Bliss
Understanding the nuances of flour is not merely a technical skill; it's the cornerstone of effortless baking success. The journey through different flour types, from the familiar all-purpose to the specialized options like bread flour and cake flour, reveals a world of possibilities, directly impacting the texture, rise, and overall flavor of your baked goods. This guide aimed to demystify this crucial ingredient, empowering you to confidently choose the perfect flour for any recipe.
The impact of flour choice extends far beyond the kitchen; it's a reflection of our evolving relationship with food and the increasing demand for quality ingredients. We've moved beyond simply using "flour" – we're now seeking specific characteristics to achieve desired results. This reflects a growing appreciation for the craft of baking and a desire for more control over the final product. The best flour is the one that best suits your needs and your recipe.
This simple statement underscores the importance of understanding the unique properties of each flour type, allowing for a more conscious and satisfying baking experience.
Now, consider your own baking journey. What have you learned about the power of flour selection? Are you ready to experiment with new types, pushing your baking skills to new heights? I encourage you to embrace the knowledge gained here, to explore the diverse world of flours, and to confidently create baked goods that are not only delicious but also a testament to your newfound expertise. The journey to baking bliss begins with understanding the flour – and now, you have the ultimate guide to help you along the way.
Unlock Your Baking Potential: Flour Power Unleashed!
Thanks for joining us on this flour-powered journey! We hope you've discovered new ways to elevate your baking game and feel more confident in the kitchen. Now it's time to put your newfound knowledge into practice!
- Master your next bake: Try out one of the flour types discussed, experimenting with a recipe you already love. Note the differences in texture and flavor! This is where the real magic happens.
- Share your flour-filled creations: Show us your baking triumphs (and even your flour-based mishaps!) on social media using #BakeWithEaseFlourPower. We'd love to see what you create!
- Dive deeper into baking science: Explore our other articles on BakeWithEase.com for more tips and tricks to unlock your baking potential.
Ready to transform your baking from good to great? What flour will you conquer next?