
Fixing a Loaf That Looks Great But Is Heavy Inside

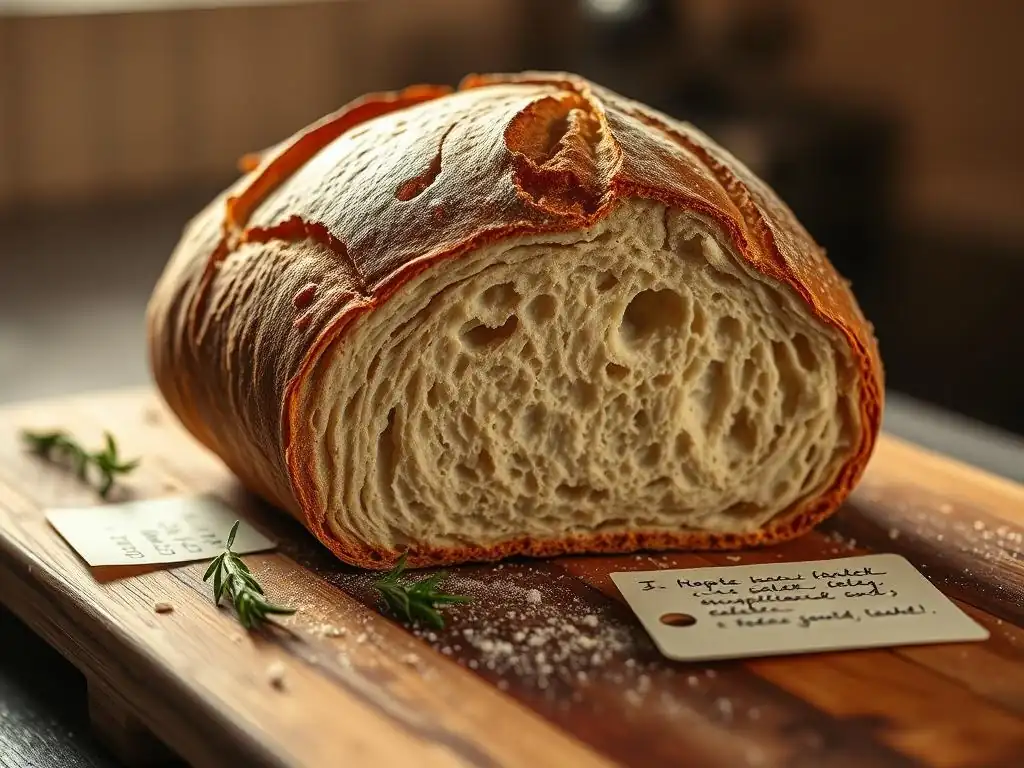
Welcome to BakeWithEase, your ultimate guide to conquering the world of baking! Ever pulled a beautiful loaf from the oven, only to be met with a disappointingly dense interior? You're not alone! This article dives deep into the common culprits behind dense bread and, more importantly, offers easy fixes that will transform your baking game. Ready to unlock the secrets to light, airy, and perfectly textured bread? Let's get started!
- Fixing a Loaf That Looks Great But Is Heavy Inside: Dense Bread, Easy Fix
- BakeWithEase: Troubleshooting Dense Bread
-
Why Is My Bread So Dense? Common Causes of Heavy Bread
- Insufficient Gluten Development: The Foundation of Light Bread
- Inactive or Insufficient Yeast: Powering the Rise
- Incorrect Flour Measurement: Accuracy Matters in Baking
- Too Much Flour: A Common Culprit for Dense Loaves
- Not Enough Hydration: Water's Role in Bread Texture
- Over-Proofing or Under-Proofing: The Timing Tightrope
- Dense Bread Fixes: Step-by-Step Solutions for a Lighter Loaf
- Preventative Measures: Baking Habits for Consistently Light Bread
- BakeWithEase: Enjoying Perfectly Baked, Light Bread
-
Frequently Asked Questions
- What are the most common causes of dense bread?
- How can I ensure proper gluten development in my dough?
- What does "proofing" mean, and how do I know if my dough is properly proofed?
- Can using the wrong type of yeast cause dense bread?
- What are some quick fixes I can try if my bread is consistently dense?
- Final Reflection: The Unexpected Journey of a Dense Loaf
- Unleash Your Inner Baking Genius!
Fixing a Loaf That Looks Great But Is Heavy Inside: Dense Bread, Easy Fix
BakeWithEase: Troubleshooting Dense Bread
Identifying the Problem: Beautiful Crust, Heavy Crumb
It's a common baking heartbreak: you pull a gorgeous loaf from the oven, perfectly golden crust, lovely shape, maybe even some nice oven spring. You tap the bottom, it sounds hollow – all the signs point to success. But then you slice into it, and instead of a light, airy crumb with beautiful holes, you find a dense, heavy interior. This isn't the fluffy texture you dreamed of; it's a solid, almost cake-like dough. The external beauty hides an internal issue, resulting in that disappointing dense bread.
This phenomenon often leaves bakers scratching their heads. How can something look so good on the outside and be so heavy within? The appearance suggests everything went right – the shaping was good, the bake was correct – but the texture tells a different story. Understanding the root causes of this dense bread problem is the first step towards an easy fix. It's not about a flaw in your oven temperature or baking time, but typically relates to how the dough was handled before it even went into the heat.
Why Is My Bread So Dense? Common Causes of Heavy Bread
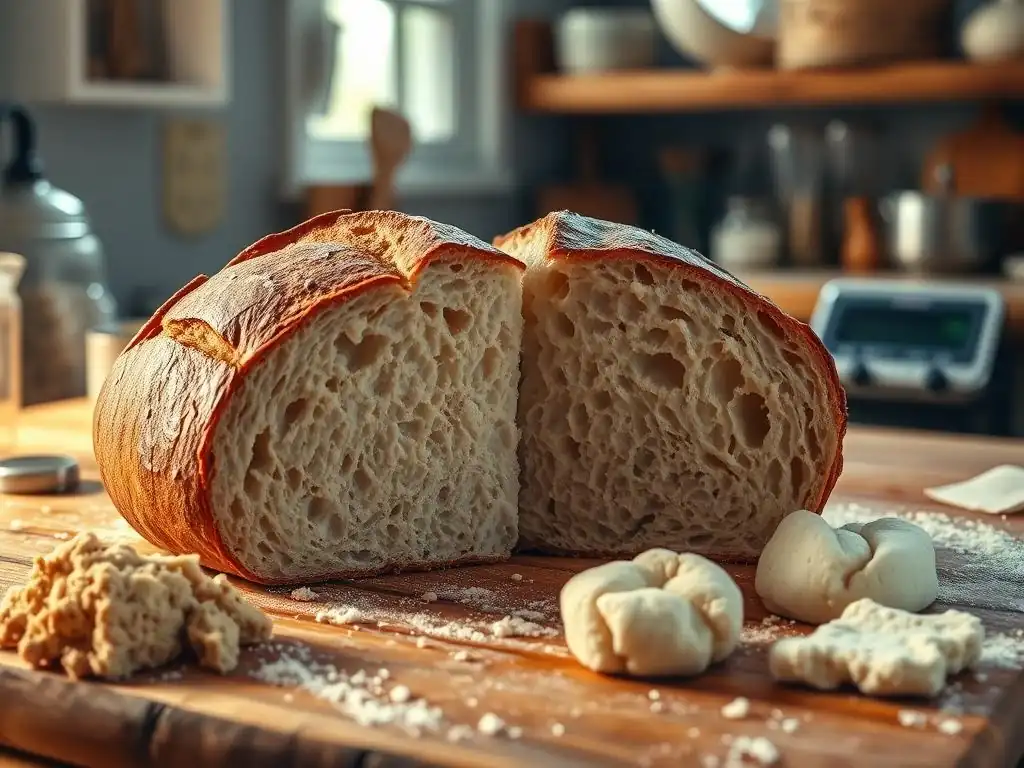
Insufficient Gluten Development: The Foundation of Light Bread
Gluten is the protein structure in flour that provides the elasticity and strength needed for dough to rise and hold its shape. When you knead dough, you are developing this gluten network. If the dough isn't kneaded enough, or if the gluten is weak, it won't be able to trap the gases produced by the yeast effectively. This results in a dough that doesn't expand properly during proofing or baking, leading to a compact, dense bread texture.
Think of gluten development as building a microscopic, stretchy scaffolding within your dough. This scaffolding needs to be strong enough to stretch as the yeast produces carbon dioxide bubbles. If the scaffolding is weak or incomplete, the bubbles escape, and the dough collapses on itself or doesn't rise much in the first place. A well-developed gluten network is absolutely critical for achieving that desirable light and airy crumb structure, preventing that heavy, dense bread outcome.
Inactive or Insufficient Yeast: Powering the Rise
Yeast is the primary leavening agent in most bread recipes; it eats sugars in the dough and produces carbon dioxide gas, which makes the bread rise. If your yeast is old, expired, or not properly activated, it won't produce enough gas. This lack of leavening power means the dough won't rise adequately, leading directly to a dense bread texture because there aren't enough air pockets formed within the dough structure.
Using the wrong amount of yeast, whether too little or too much for the recipe's hydration and flour type, can also cause problems. Too little yeast, obviously, means less gas production. Too much yeast can cause the dough to rise too quickly, potentially exhausting the available food source (sugars) before the gluten structure is fully ready to support the rise, or leading to issues during baking. Ensuring your yeast is vigorous and used in the correct proportion is vital for avoiding dense bread.
Incorrect Flour Measurement: Accuracy Matters in Baking
Baking is often described as a science, and accurate measurement is paramount. Flour is the main structural ingredient, and its quantity significantly impacts the dough's hydration and consistency. Measuring flour by volume (cups) can be notoriously inaccurate because flour settles in the bag and can be packed tightly or scooped loosely. Just one cup of flour can vary in weight by as much as 20-30 grams depending on how it's measured.
Adding too much flour, even slightly, without adjusting the liquid can dramatically change the dough's hydration level, making it stiff and difficult for gluten to develop properly or for yeast to work efficiently. This leads to a dough that resists expansion and inevitably bakes into dense bread. Conversely, too little flour (relative to liquid) can result in a dough that's too slack to hold its structure, potentially collapsing during proofing or baking, also resulting in a dense texture, albeit for a different reason. Precision in flour measurement is a simple yet effective easy fix for many baking woes.
Too Much Flour: A Common Culprit for Dense Loaves
As highlighted above, excess flour is a frequent cause of dense bread. When a recipe calls for a certain amount of flour, say 500 grams, adding even 50-100 grams more can significantly alter the dough's characteristics. The dough becomes stiffer, less pliable, and harder to work with. This stiffness inhibits the natural stretching and expansion that should occur during kneading and rising.
A dough with too much flour requires more effort to knead, and even then, the gluten development can be hampered because there isn't enough liquid for the proteins to hydrate and form strong bonds easily. The yeast also struggles to produce gas and inflate the stiff dough. This leads to insufficient rise during proofing and baking, resulting in a loaf that feels heavy and compact – the classic dense bread.
Not Enough Hydration: Water's Role in Bread Texture
Hydration refers to the ratio of water (or other liquids) to flour in a recipe, typically expressed as a percentage of the flour weight. For example, 600 grams of flour with 360 grams of water has 60% hydration (360/600 = 0.6). Water plays a critical role in activating the yeast, hydrating the flour proteins to form gluten, and allowing the dough to become extensible and elastic.
If a dough has insufficient hydration (too little water relative to flour), it will be stiff and dry. A dry dough is difficult to knead effectively, limiting gluten development. It also makes it harder for the yeast to move and produce gas bubbles throughout the dough. The resulting lack of elasticity and poor gas production leads to a dough that doesn't expand well, yielding dense bread. Ensuring adequate hydration is key to a workable dough and a lighter crumb.
Over-Proofing or Under-Proofing: The Timing Tightrope
Proofing is the final rise of the dough before baking. It's a critical step where the yeast produces the last burst of gas to expand the dough. Getting the timing right is crucial; both over-proofing and under-proofing can lead to dense bread. Under-proofing means the dough hasn't had enough time to rise and develop sufficient gas volume before baking. When it hits the oven, it may expand slightly (oven spring), but not enough to create an open, airy structure.
Over-proofing occurs when the dough rises for too long. The yeast consumes all the available sugars, and the gluten structure, stretched to its limit, begins to collapse. The dough may look large and puffy initially, but it lacks the structural integrity to hold its shape and gas during baking. It often deflates slightly when handled or placed in the oven, resulting in a loaf with poor oven spring and a heavy, dense bread crumb. Finding that "just right" proofing window is essential.
Dense Bread Fixes: Step-by-Step Solutions for a Lighter Loaf
1. Mastering Gluten Development for Lighter Bread
Achieving proper gluten development is fundamental to preventing dense bread. Gluten provides the framework that holds the air bubbles produced by yeast, resulting in a light texture. Without sufficient gluten, your dough won't have the elasticity to expand properly. This step is arguably one of the most important dense bread fixes.
Focusing on kneading technique and duration is key. Whether kneading by hand or machine, the goal is to transform a shaggy, often sticky dough into a smooth, elastic one. This process aligns the gluten proteins and builds strength. Don't rush this step; it might take 8-10 minutes by machine or 10-15 minutes by hand for many doughs.
Kneading Techniques for Strong Gluten
When kneading by hand, use a push-and-fold motion: push the dough away from you with the heels of your hands, fold it back over itself, rotate, and repeat. This action stretches and aligns the gluten strands. Keep your movements rhythmic and consistent. Avoid adding too much extra flour during kneading, as this lowers hydration and can hinder gluten development. A slightly sticky dough is often better for gluten development than a dry one.
Using a stand mixer with a dough hook simplifies the process. Start on a low speed to bring the ingredients together, then increase to medium speed (usually speed 2 or 3 on most mixers). Let the mixer work the dough until it pulls away from the sides of the bowl and is smooth and elastic. Periodically scrape down the sides to ensure all the dough is being kneaded. Over-kneading is possible but less common for home bakers than under-kneading.
The Windowpane Test: Knowing When to Stop Kneading
The windowpane test is a classic method to check for sufficient gluten development. Carefully take a small piece of dough (about the size of a golf ball). Gently stretch it between your fingers. If the dough can be stretched into a thin, translucent membrane (like a windowpane) without tearing easily, the gluten is well-developed. You should be able to see light through it.
If the dough tears quickly when you try to stretch it, it needs more kneading. This test provides a visual confirmation that the gluten network is strong enough to trap gases and support a good rise, helping you avoid dense bread. Practice this test to recognize the feel and appearance of properly kneaded dough.
Using Bread Flour for Improved Gluten Strength
Bread flour is specifically milled to have a higher protein content (typically 12-14%) compared to all-purpose flour (around 10-12%). This higher protein level means there are more gluten-forming proteins available in the flour. Using bread flour can significantly contribute to a stronger gluten network in your dough.
While you can certainly make delicious bread with all-purpose flour, especially enriched doughs like challah or brioche, for lean loaves where structure is paramount, bread flour often gives you an edge in achieving a lighter, airier crumb. If you've been struggling with dense bread, simply switching to bread flour could be part of your easy fix.
2. Ensuring Active Yeast for a Proper Rise
Vigorous yeast is non-negotiable for a well-risen loaf. If your yeast is sluggish or dead, no amount of kneading or perfect proofing time will save your bread from being dense bread. Making sure your yeast is active is a simple but crucial step in preventing this issue.
Yeast is a living organism, and like any living thing, it has a shelf life and specific conditions it thrives in. Storing yeast properly (usually in the refrigerator or freezer once opened) and checking its viability before use can save you from baking disappointment.
Testing Yeast Activity: Is Your Yeast Alive?
Before committing your yeast to a whole batch of dough, perform a simple test. In a small bowl, combine about 1/4 cup of warm water (around 105-115°F or 40-46°C, which feels warm but not hot to the touch), a teaspoon of sugar (yeast food! ), and the amount of yeast specified in your recipe (or about 2 1/4 teaspoons for a standard packet). Stir gently and let it sit for 5-10 minutes.
If the mixture becomes foamy and bubbly, with a noticeable yeasty aroma, your yeast is active and ready to go. If nothing happens, or you see only a few weak bubbles, your yeast is likely dead or inactive, and you should discard it and get fresh yeast. This quick test is a reliable easy fix to rule out inactive yeast as the cause of dense bread.
Understanding Yeast Types: Active Dry vs. Instant
There are two common types of dry yeast for home bakers: active dry and instant. Active dry yeast typically requires being dissolved in warm water before being added to the dry ingredients (the test above is for active dry). It has a slightly larger granule size.
Instant yeast has finer granules and can usually be mixed directly into the dry ingredients without prior hydration. It often rises a bit faster than active dry yeast. While recipes usually specify which type to use, you can often substitute them (usually at a 1:1 ratio by weight, or slightly more active dry than instant by volume), but be aware that proofing times might differ. Using the type specified, or understanding how to substitute, ensures your yeast is working correctly.
Proper Yeast Hydration: Activating the Power
For active dry yeast, using water within the correct temperature range (105-115°F / 40-46°C) is vital for activation. Water that is too cold won't wake the yeast up, while water that is too hot can kill it. Using the specified temperature ensures the yeast starts its work effectively.
For instant yeast, while it can be mixed directly with flour, some bakers still prefer to hydrate it in warm water first, especially in drier climates or with certain recipes, as this gives an extra boost to its activity. Whether you hydrate first or mix directly, ensuring the liquid temperature is appropriate for the yeast type is essential for initiating fermentation and avoiding dense bread.
3. Accurate Flour Measurement: Baking Precision
Precision in measuring ingredients, especially flour, is a crucial dense bread fix. As mentioned earlier, volume measurement can lead to significant variations. Adopting more accurate methods will lead to more consistent baking results.
Even if you're using a recipe that gives measurements in cups, understanding the potential for error and how to minimize it is important. Small deviations in flour quantity can throw off the entire hydration balance of the dough.
Weighing Flour vs. Measuring by Volume: The Difference
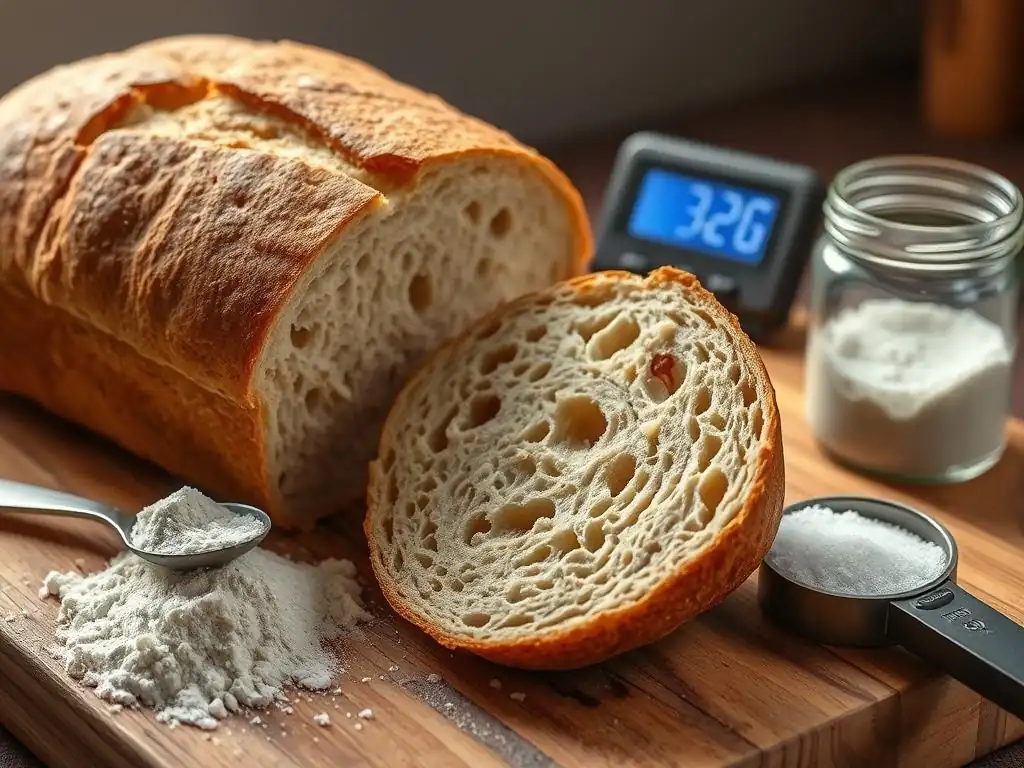
The most accurate way to measure flour is by weight using a digital scale. A cup of all-purpose flour is typically considered to weigh around 120-130 grams, while bread flour is slightly heavier, around 130-140 grams. Recipes written by weight (grams or ounces) eliminate the variability of volume measurement. If your recipe provides weights, use them!
Measuring by weight ensures you are using the exact amount of flour intended by the recipe developer, regardless of how packed or sifted your flour is. This consistency is key to replicating results and avoiding the common pitfall of adding too much flour, which often leads to dense bread. Investing in a simple kitchen scale is one of the best easy fix investments you can make for baking.
Spooning and Leveling: A More Accurate Volume Method
If you must measure flour by volume, use the spoon-and-level method to minimize errors. Do not scoop flour directly from the bag with your measuring cup; this packs the flour down and results in significantly more flour than intended.
Instead, gently spoon the flour into your measuring cup until it is overflowing. Then, use a straight edge (like the back of a knife or a ruler) to level off the excess flour without tapping or shaking the cup. This method provides a more consistent volume measurement than scooping, although it's still not as accurate as weighing. While not a perfect easy fix compared to weighing, it's far better than the scoop-and-pack method for preventing dense bread.
4. Achieving the Right Hydration Level: The Water Balance
The hydration level of your dough is critical for its texture and workability, directly impacting whether you end up with light bread or dense bread. Hydration affects gluten development and how easily gas bubbles can expand within the dough.
Recipes provide a starting point for hydration, but factors like the type of flour used, humidity levels, and even how you measure can mean you need to make slight adjustments. Learning to recognize what properly hydrated dough looks and feels like is a valuable skill.
Adjusting Water Content Based on Flour Type
Different flours absorb water differently. Whole wheat flour, for example, requires significantly more water than white all-purpose or bread flour because the bran and germ also absorb liquid. High-protein bread flour generally absorbs more water than lower-protein all-purpose flour.
If you substitute flour types in a recipe, you may need to adjust the water slightly. If using whole wheat instead of white, you'll likely need more water. If using a lower-protein flour, you might need slightly less. Starting with the recipe amount and adding a little more water, a tablespoon at a time, until the dough feels right is often the best approach for an easy fix when adapting recipes.
Recognizing Signs of Proper Dough Hydration
Properly hydrated dough should be soft, pliable, and slightly sticky but manageable after kneading. It shouldn't feel stiff, dry, or crumbly. As you knead, it should become smoother and more elastic. If the dough feels very stiff early in the kneading process, it likely needs a little more water.
A dough that is too dry will resist stretching and tear easily during kneading and proofing, resulting in poor volume and dense bread. Conversely, dough that is too wet will be very sticky and difficult to handle, potentially spreading too much and lacking structure, also leading to a dense outcome. Aim for a dough that is lively and responsive, stretching rather than tearing.
5. Perfecting the Proofing Process: Finding the Sweet Spot
Proofing is arguably the stage where many loaves destined for dense bread take a wrong turn. It's the dough's final opportunity to build volume before baking. Both too little and too much proofing time can ruin the texture.
Understanding the difference between the first rise (bulk fermentation) and the second rise (proofing) and how to judge when each is complete is vital for achieving a light crumb. Temperature plays a significant role in proofing speed, so being aware of your environment helps.
First Proof vs. Second Proof: Understanding the Difference
The first proof, or bulk fermentation, happens after kneading. The dough rests in a bowl and roughly doubles in size. This stage develops flavor and builds initial volume. It can take anywhere from 1 to 4 hours or even longer if done in the refrigerator (cold fermentation, which further enhances flavor). The dough should look significantly larger and feel airy.
The second proof happens after the dough is shaped into its final form (loaf, rolls, etc.). This is the final rise before baking. It typically takes less time than the first proof (often 30-60 minutes). The dough should increase in size again, becoming puffy and ready for the oven. Getting the timing right for this final rise is crucial to avoid dense bread.
Recognizing Signs of Over-Proofing and Under-Proofing
An under-proofed loaf hasn't built enough gas volume. It will look smaller than expected before baking and might have significant, uncontrolled oven spring, potentially tearing along the sides or top. The crumb will be dense and tight, lacking those desirable air pockets.
An over-proofed loaf will look very large and puffy before baking. It might even start to sag or spread. When gently poked, an over-proofed dough will retain the indentation and may even deflate slightly. In the oven, it will have little to no oven spring and result in a heavy, dense bread with an uneven, sometimes gummy crumb.
Temperature's Impact on Proofing Time: Controlling the Environment
Yeast activity is highly dependent on temperature. Warmer temperatures speed up proofing, while cooler temperatures slow it down. A dough might double in size in an hour in a warm kitchen (around 75-80°F / 24-27°C), but take 2-3 hours in a cooler one (68-70°F / 20-21°C).
Understanding your kitchen temperature and adjusting proofing times accordingly is key. If your kitchen is cold, find a warmer spot or create a warm environment (like a turned-off oven with the light on). If it's hot, proofing will be much faster, so keep a close eye on the dough. Don't rely solely on recipe timings; instead, learn to judge proofing readiness by the dough's appearance and feel. This adaptability is an essential easy fix for consistent results.
Preventative Measures: Baking Habits for Consistently Light Bread
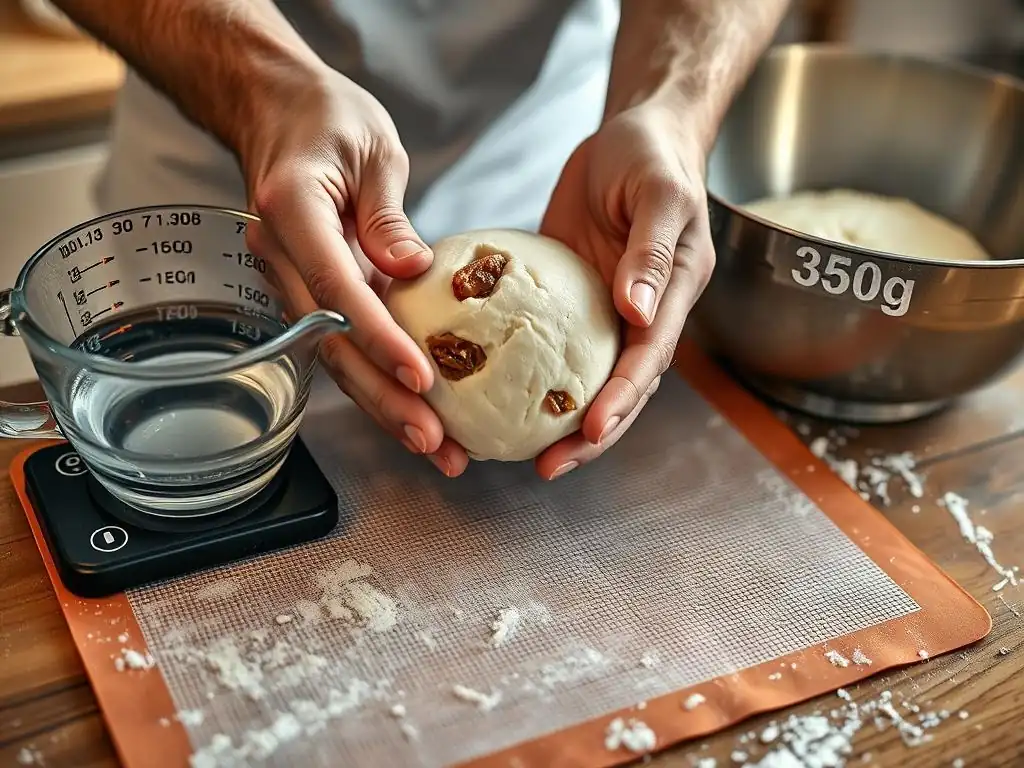
Beyond troubleshooting a specific loaf, adopting good baking habits is the best way to consistently achieve light, airy bread and avoid the frustration of dense bread. These practices help you learn from each bake and improve over time.
Baking is a skill that improves with practice and attention to detail. Establishing a routine and using reliable tools can make a significant difference in your results.
Keeping a Baking Journal: Tracking Your Successes (and Failures)
A baking journal is an invaluable tool. For each loaf, note the date, the recipe used, ingredients (including brand of flour, type of yeast), hydration level, kitchen temperature, proofing times and observations (how the dough looked and felt), baking time and temperature, and the final result (crust, crumb texture, flavor).
When you bake a loaf that turns out perfectly, you have detailed notes on exactly what you did. When you end up with dense bread, you can look back at your notes for potential culprits – maybe the proofing was too short, or the kitchen was colder than usual. This systematic approach helps you identify patterns and make informed adjustments for future bakes, acting as a long-term easy fix.
Investing in a Digital Scale: Precision is Key
As discussed earlier, measuring ingredients by weight is far more accurate than by volume. A simple digital kitchen scale is relatively inexpensive but makes a huge difference in baking consistency. This is perhaps the single most impactful easy fix you can implement.
Weighing flour, water, salt, and yeast ensures you are using the precise ratios intended by the recipe developer. This eliminates a major variable that can lead to unpredictable results, including dense bread. Most modern bread recipes provide measurements by weight, making a scale an essential tool for serious home bakers.
Understanding Your Oven: Adjusting for Hot Spots and Temperature Variations
Even with a perfectly prepared dough, your oven can impact the final outcome. Ovens often have temperature variations and hot spots. An inaccurate oven temperature can affect oven spring and the final crust development.
Consider using an inexpensive oven thermometer to check your oven's actual temperature against the setting. You might find it runs hotter or cooler than indicated. Knowing this allows you to adjust the temperature setting accordingly. Rotating your loaf halfway through baking can also help ensure even browning and heat distribution, contributing to a better overall bake and potentially preventing some issues that contribute to dense bread.
BakeWithEase: Enjoying Perfectly Baked, Light Bread
Frequently Asked Questions
What are the most common causes of dense bread?
Dense bread is often caused by insufficient gluten development, incorrect proofing, or using too much flour. These issues prevent the bread from rising properly, leading to a heavy texture.
How can I ensure proper gluten development in my dough?
Kneading the dough for the recommended time (usually 8-10 minutes) is crucial. Also, ensure you're using bread flour, which has a higher protein content than all-purpose flour.
What does "proofing" mean, and how do I know if my dough is properly proofed?
Proofing is allowing the dough to rise before baking. A properly proofed dough should double in size and leave a slight indentation when gently poked.
Can using the wrong type of yeast cause dense bread?
Yes, using expired or improperly stored yeast can result in a loaf that doesn't rise sufficiently. Always check the expiration date and activate the yeast according to package instructions.
What are some quick fixes I can try if my bread is consistently dense?
Try slightly increasing the amount of yeast in your recipe. Also, ensure your oven temperature is accurate, as underbaking can contribute to a dense texture.
Final Reflection: The Unexpected Journey of a Dense Loaf
The quest for the perfect loaf, light and airy, is a journey many home bakers undertake, often encountering the frustrating reality of a beautifully browned exterior hiding a dense, heavy interior. This isn't just a culinary conundrum; it's a metaphor for the challenges we face when striving for perfection, where appearances can be deceiving. The seemingly simple act of baking bread reveals deeper truths about process, patience, and the importance of understanding the underlying mechanics.
The struggle with dense bread resonates far beyond the kitchen. It mirrors our own lives, where external pressures and expectations can mask internal struggles or unmet potential. We often present a flawless exterior, while internally grappling with imperfections and setbacks. The greatest glory in living lies not in never falling, but in rising every time we fall.
- Nelson Mandela. This quote perfectly encapsulates the spirit of baking, and indeed, life itself. Each failed loaf, each dense crumb, offers a valuable lesson, pushing us to refine our techniques and approach with renewed understanding.
So, the next time you encounter a dense loaf – whether it's bread or a metaphor for a life challenge – remember the lessons learned. Don't be discouraged by the initial disappointment. Instead, analyze the process, identify the potential causes, and adjust your approach. Embrace the imperfections, learn from the mistakes, and rise again, creating a lighter, more fulfilling outcome, both in your baking and in your life.
Unleash Your Inner Baking Genius!
Thanks for taking the time to explore the mysteries of dense loaves! We hope you gained valuable insights into rescuing your otherwise perfect-looking bake. Now, let's put that knowledge to work:
- Experiment with your next loaf: Try adjusting the hydration level (as discussed) or experimenting with a different flour blend to see if you can achieve that light, airy crumb you've been dreaming of. This is your chance to truly master the art!
- Share your baking triumphs (or even your "oops" moments!): Let's build a supportive baking community! Tell us about your experiences in the comments below. We love hearing your stories.
- Consider the small details: Take notes during your next baking session. What were the conditions like? Did you notice anything different from usual? Tracking this can improve future results drastically!
Ready to transform your next loaf from dense to delightful? What small adjustments will you make first?