
How to Achieve a Soft & Chewy Bread Crumb Texture

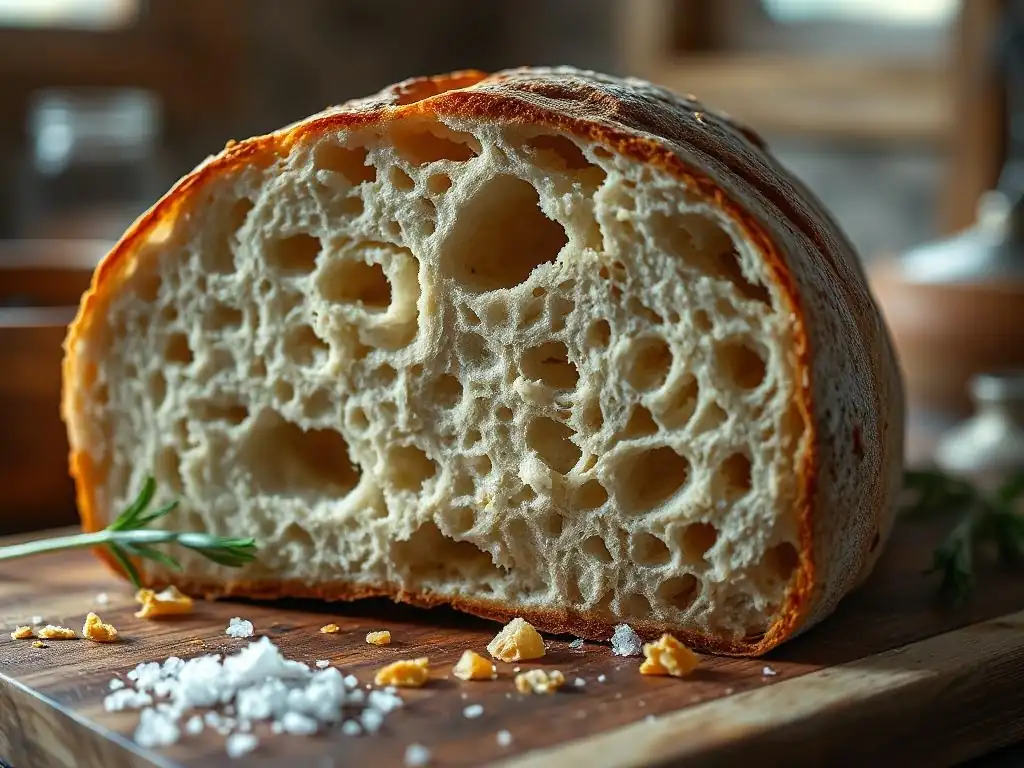
Welcome to BakeWithEase, your guide to unlocking baking brilliance! Ever wondered how to achieve that perfectly soft and chewy interior in your bread? Our latest article, "How to Achieve a Soft & Chewy Bread Crumb Texture," dives deep into the secrets of creating a soft chewy bread crumb recipe that will elevate your baking. Discover the techniques, ingredients, and simple hacks that transform ordinary bread into something truly extraordinary. Are you ready to bake bread with unparalleled texture and flavor? Let's get started!
- How to Achieve a Soft & Chewy Bread Crumb Texture: BakeWithEase's Guide
- Understanding the Importance of Bread Crumb Texture
- The Secret to a Soft Chewy Bread Crumb: Key Ingredients & Their Roles
- Mastering the Technique: Achieving the Perfect Crumb
- Troubleshooting Your Soft & Chewy Bread Crumb Recipe
- Soft & Chewy Bread Crumb Recipe: A Step-by-Step Guide
- Advanced Tips for a Superior Crumb Texture
- Enjoying Your Perfect Soft & Chewy Bread
-
Frequently Asked Questions
- What is the key ingredient for achieving a soft and chewy bread crumb?
- How does kneading impact the texture of the bread crumb?
- What baking temperature is ideal for a soft and chewy bread crumb?
- Can using a specific type of flour affect the bread crumb texture?
- Are there any post-baking techniques to maintain the bread's soft and chewy texture?
- Final Reflection: The Enduring Quest for the Perfect Crumb
- Unlock the Secret to Perfectly Soft & Chewy Bread!
How to Achieve a Soft & Chewy Bread Crumb Texture: BakeWithEase's Guide
Understanding the Importance of Bread Crumb Texture
Why a Soft and Chewy Crumb Matters in Bread Baking
The texture of a bread crumb is absolutely crucial, defining much of the eating experience. A soft and chewy crumb offers a delightful mouthfeel, providing a satisfying bite that isn't too dense or too airy. This texture is often desired in sandwich loaves, rolls, and many artisanal breads, as it holds up well to fillings and spreads without collapsing or becoming soggy. It's the difference between a truly memorable slice of bread and one that is merely functional.
Achieving this specific texture is a hallmark of skilled baking and is a key goal for many home bakers. A soft crumb indicates proper hydration and gentle handling, while the chewiness comes from well-developed gluten. Together, they create a balanced structure that is both tender and resilient. Mastering the techniques for a soft chewy bread crumb recipe allows you to produce bakery-quality loaves right in your own kitchen, enhancing everything from a simple piece of toast to a complex sandwich creation.
Common Bread Crumb Texture Problems & How to Identify Them
Bakers often encounter challenges with bread crumb texture, leading to results that are either too dense, too dry, too tough, or too open. A dense crumb lacks sufficient air pockets and can feel heavy or gummy, often resulting from under-proofing or insufficient kneading. Conversely, a crumb that is too open might have large, irregular holes and can feel fragile or tear easily, sometimes caused by over-proofing or improper shaping.
A dry crumb feels stale quickly and lacks moisture, indicating issues with hydration levels or baking time. A tough crumb, distinct from chewy, is hard to bite through and can be a sign of over-kneading or using flour with too high a protein content without proper hydration. Identifying these problems requires examining a sliced cross-section of your loaf.
Look at the size and distribution of the air cells (alveoli) and feel the texture between your fingers. Comparing your results to examples of desired textures, like those found in a classic Soft chewy bread crumb recipe, helps pinpoint where adjustments are needed in your process.
The Secret to a Soft Chewy Bread Crumb: Key Ingredients & Their Roles
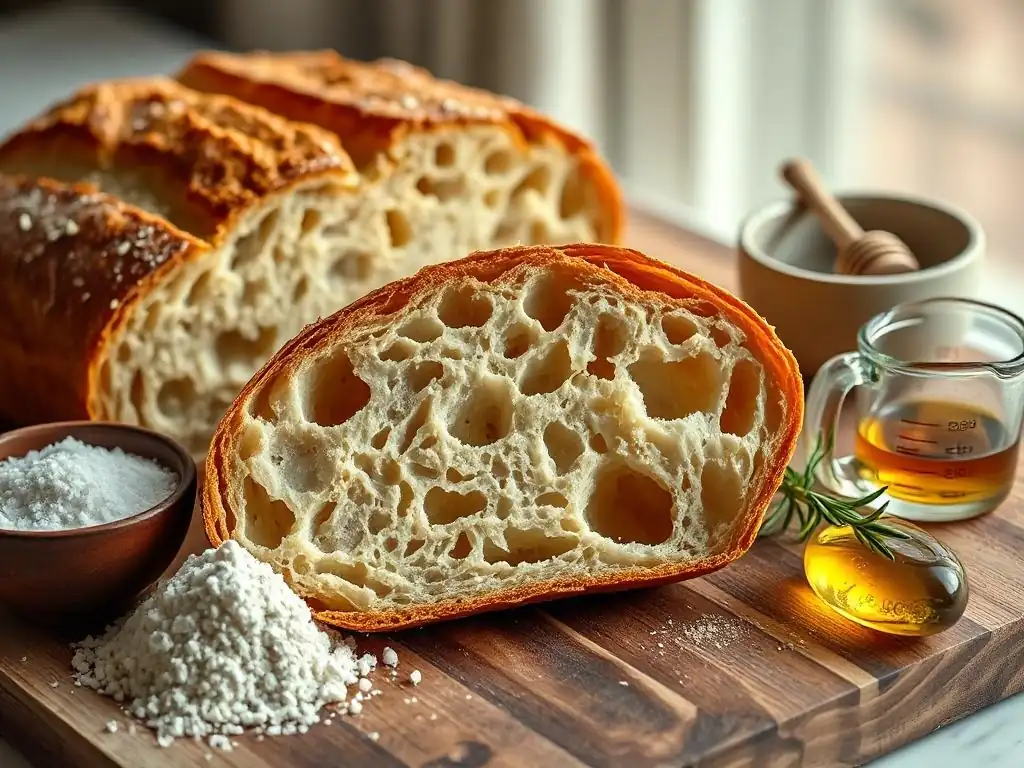
High-Protein Flour: The Foundation of Chewy Bread
High-protein flour, typically bread flour with a protein content ranging from 12% to 14%, is fundamental to achieving a chewy bread crumb texture. The higher protein level means more gluten-forming proteins (glutenin and gliadin). When these proteins are hydrated and kneaded, they develop into a strong, elastic network – the gluten structure. This network traps the gases produced by yeast during fermentation, allowing the dough to rise and creating the characteristic air pockets in the crumb.
The strength and elasticity provided by the gluten network are directly responsible for the chewiness of the bread. Without sufficient protein and proper gluten development, the crumb will be weak, potentially dense, and lack that desirable resilient chew. While all-purpose flour (around 10-12% protein) can work for some recipes, opting for bread flour is often the first step in perfecting a Soft chewy bread crumb recipe, providing the necessary scaffolding for the desired structure.
Water Content: Hydration for a Soft Crumb
Hydration, referring to the ratio of water to flour in a dough, is a critical factor influencing crumb softness. A higher hydration level generally leads to a softer, more open crumb. Doughs with hydration levels of 70% or higher (meaning the weight of water is 70% or more of the weight of the flour) are often preferred for achieving a tender, moist interior. The water allows the gluten proteins to hydrate fully and develop properly, and it also contributes directly to the perceived moisture in the final baked loaf.
Managing high hydration doughs can be challenging as they are stickier and harder to handle than lower hydration doughs (like those around 60-65%). However, the effort pays off in terms of crumb quality. Using precise measurements, often by weight, is essential when working with hydration percentages. Even a slight variation can significantly impact the dough's consistency and the final crumb texture, making careful measurement a key part of any Soft chewy bread crumb recipe.
The Importance of Autolyse for Water Absorption
The autolyse technique, introduced by Professor Raymond Calvel, is a simple yet powerful method involving mixing only the flour and water and letting it rest for 20 minutes up to several hours before adding yeast, salt, or other ingredients. This resting period allows the flour to fully hydrate and enables enzymes naturally present in the flour (protease and amylase) to begin breaking down proteins and starches.
This initial hydration and enzymatic activity kickstart gluten development without any mechanical kneading, making the subsequent kneading process easier and more efficient. It results in a dough that is more extensible (stretchy) and less sticky, which is particularly beneficial when working with high hydration doughs aimed at a soft chewy bread crumb. The autolyse process ensures that water is thoroughly absorbed by the flour particles, leading to a more uniform and tender crumb structure.
Sweeteners: Adding Moisture and Tenderness
Sweeteners like sugar, honey, or maple syrup play a role beyond just taste in a Soft chewy bread crumb recipe. They are hygroscopic, meaning they attract and retain moisture. Adding a small amount of sweetener to your dough can help keep the bread soft and moist for longer, improving its keeping quality.
Furthermore, sweeteners contribute to the browning of the crust during baking through the Maillard reaction and caramelization. While not directly impacting chewiness, the added moisture retention from sweeteners contributes significantly to the overall softness of the crumb, creating a pleasant contrast with the developed chewiness from the gluten structure.
Fats: Enhancing Softness and Mouthfeel
Fats, such as butter, oil, or even milk (which contains fat), are excellent tenderizers in bread dough. They work by coating the gluten strands, interfering with their full development. While this might seem counterintuitive for a chewy crumb (which requires good gluten development), a moderate amount of fat can strike a balance, preventing the crumb from becoming tough or dry.
Adding fat results in a softer, more tender crumb with a richer mouthfeel. Recipes like brioche or Challah, known for their incredibly soft texture, often incorporate significant amounts of butter or oil. For a standard Soft chewy bread crumb recipe, a smaller addition, perhaps 2-5% of the flour weight in butter or oil, can provide noticeable improvements in crumb softness without compromising the desired chewiness.
Mastering the Technique: Achieving the Perfect Crumb
Kneading for Gluten Development: The Key to Chewiness
Kneading is the process that develops the gluten network in bread dough. As you knead, the hydrated gluten proteins align and link together, forming a strong, elastic structure capable of trapping gas and giving the bread its chewiness. Insufficient kneading leads to a weak gluten structure, resulting in a dense, heavy crumb that lacks chew. Over-kneading, while less common with home methods, can make the dough tough and difficult to work with, although it rarely results in a tough baked crumb in the way under-kneading does.
The goal of kneading for a Soft chewy bread crumb recipe is to develop the gluten just enough to create elasticity and strength, but not so much that the dough becomes resistant or the resulting crumb becomes tough. Different methods, like manual kneading, stand mixer kneading, or stretch-and-folds for high hydration doughs, all aim to achieve this gluten development. The time required varies based on the flour, hydration, and method used, typically ranging from 5-15 minutes of active kneading or several sets of stretch-and-folds over an hour or two.
Understanding the Windowpane Test
The windowpane test is a classic method used to assess whether gluten development is sufficient. To perform the test, take a small piece of dough, about the size of a golf ball. Gently stretch and pull it between your fingers, trying to create a thin membrane. If the dough can be stretched thin enough to see light through it without tearing, like a translucent windowpane, then the gluten is well-developed and the dough is ready for the next step.
If the dough tears easily before becoming thin, it needs more kneading. This test is particularly useful when working on a Soft chewy bread crumb recipe, as it gives a clear visual indicator of the gluten network's strength. It helps prevent both under-kneading and potential over-development, ensuring the dough has the optimal structure for a soft and chewy texture after baking.
Proofing: Creating Air Pockets for a Light Crumb
Proofing, or fermentation, is the process where yeast consumes sugars in the dough and produces carbon dioxide gas. This gas is trapped by the gluten network, causing the dough to rise and creating the air pockets that will form the crumb structure. Proper proofing is essential for a light, airy, yet still chewy crumb. Under-proofing results in a dense loaf with a tight crumb, while over-proofing can cause the structure to collapse, leading to a gummy texture or large, irregular holes.
The temperature and time for proofing vary significantly depending on the recipe, yeast amount, and ambient temperature. A standard bulk fermentation might take 1-3 hours at room temperature (around 70-75°F or 21-24°C), while a cold proof in the refrigerator can extend for 12-48 hours, developing more flavor. Learning to judge when your dough is perfectly proofed is key to a successful Soft chewy bread crumb recipe.
Bulk Fermentation: Developing Flavor and Texture
Bulk fermentation is the first rise of the dough after kneading and before shaping. This stage is crucial not only for developing gas and volume but also for developing flavor and improving the dough's texture. During this period, the gluten network relaxes and becomes more extensible, making the dough easier to shape. Enzymes continue to work, breaking down complex carbohydrates into simpler sugars that the yeast can consume.
Often, a bulk fermentation involves one or more "stretch-and-fold" sessions. These gentle manipulations strengthen the gluten network further without the need for aggressive kneading and help distribute the yeast and gas evenly throughout the dough. For a Soft chewy bread crumb, allowing sufficient time during bulk fermentation ensures a well-developed structure and a more complex flavor profile.
Final Proofing: Achieving the Right Rise
The final proof, also known as the second rise or 'proofing' in the basket/pan, occurs after the dough has been shaped and placed in its final baking vessel. This is the last chance for the dough to build volume before hitting the oven. The dough should increase significantly in size, becoming light and airy.
The poke test is commonly used to determine if the final proof is complete: gently poke the dough with a floured finger; if the indentation springs back slowly and only partially, it's ready. If it springs back immediately, it needs more time. If it doesn't spring back at all and the dough deflates slightly, it's likely over-proofed.
Over-proofing during the final rise is a common issue that can lead to a crumb that is too open or even collapses during baking. Under-proofing will result in a dense crumb. Mastering the timing of the final proof is vital for achieving the desired soft and chewy texture in your Soft chewy bread crumb recipe.
Baking Temperature & Time: Controlling Crumb Structure
The temperature and duration of baking play a significant role in setting the internal crumb structure. High initial oven temperatures (often 450-500°F or 230-260°C) provide a strong oven spring, causing the dough to expand rapidly before the crust sets. This rapid expansion helps create a more open and airy crumb. After the initial spring, the temperature is often reduced (to around 400-425°F or 200-220°C) to ensure the interior cooks through without the crust burning.
Baking time depends on the size and shape of the loaf. An internal temperature of 200-210°F (93-99°C) typically indicates that the bread is fully cooked. Under-baking can result in a gummy, dense interior, while over-baking will dry out the crumb, making it less soft and chewy. Monitoring both external appearance (golden-brown crust) and internal temperature is key for a perfectly baked Soft chewy bread crumb recipe.
The Role of Steam in Oven Spring and Crumb Development
Introducing steam into the oven at the beginning of the bake is one of the most effective ways to improve both crust and crumb. Steam keeps the surface of the dough moist and pliable during the initial phase of baking, allowing the loaf to expand fully (oven spring) before the crust hardens. Without steam, the crust forms too quickly, restricting expansion and resulting in a denser crumb.
The presence of steam facilitates better oven spring, which in turn allows for a more open and tender crumb structure. It also contributes to a thinner, crispier crust, providing a lovely contrast to a soft, chewy interior. Home bakers can create steam using various methods, such as placing a tray of hot water on the bottom rack of the oven or using a Dutch oven. This technique is a cornerstone for achieving professional-quality results with your Soft chewy bread crumb recipe.
Troubleshooting Your Soft & Chewy Bread Crumb Recipe
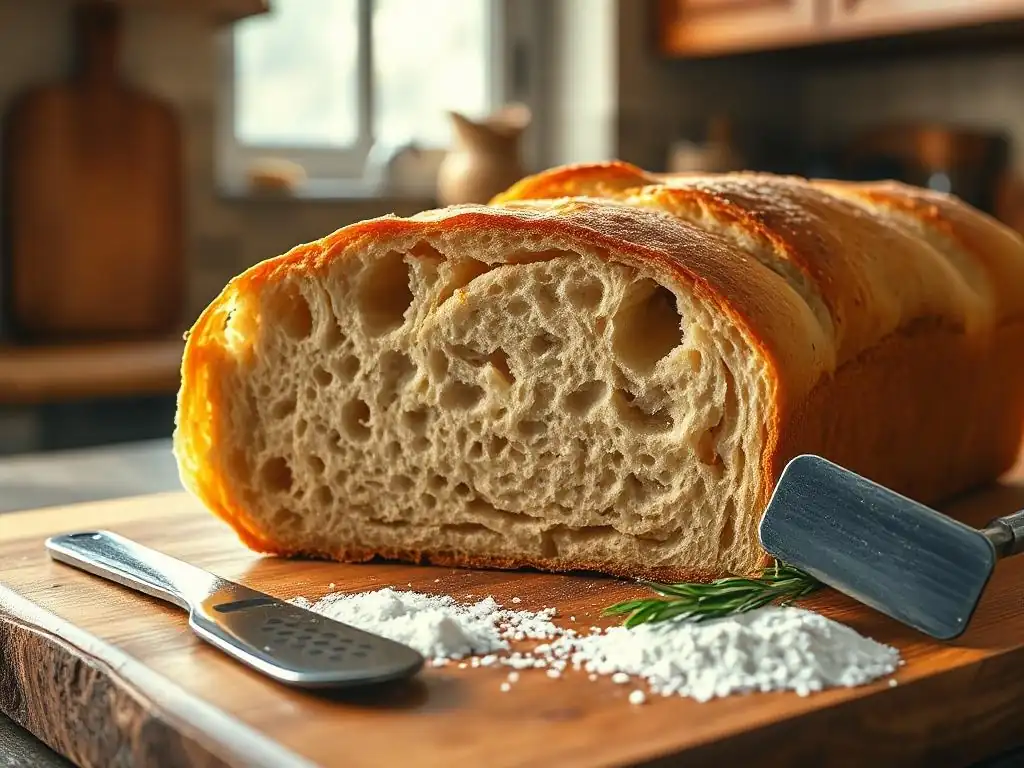
My Bread Crumb is Too Dense: Possible Causes and Solutions
A dense bread crumb is a common issue and usually indicates that the dough didn't rise enough. Several factors can contribute to this.
- Under-kneading: Insufficient gluten development means the network isn't strong enough to trap gas. Solution: Knead longer or perform additional stretch-and-folds until the dough passes the windowpane test.
- Under-proofing: The yeast didn't produce enough gas, or the dough didn't have enough time to expand. Solution: Allow more time for both bulk fermentation and final proofing, checking the dough's readiness with the poke test. Ensure your yeast is active.
- Too Low Hydration: Not enough water can inhibit yeast activity and gluten development. Solution: Increase the water content slightly in your recipe, aiming for at least 65-70% hydration for a Soft chewy bread crumb recipe.
Another potential cause for density is using flour with too low a protein content that cannot form a strong enough gluten network. If using all-purpose flour, the resulting crumb will inherently be less chewy than one made with bread flour. Baking at too low a temperature can also hinder oven spring, contributing to a denser loaf. Ensure your oven is accurately calibrated and preheated sufficiently, and consider using steam for better initial expansion.
My Bread Crumb is Too Dry: Hydration Adjustments
A dry crumb lacks moisture and can make the bread feel stale quickly. This is almost always related to insufficient hydration or over-baking.
- Low Hydration: The most direct cause. The initial water content wasn't high enough. Solution: Increase the water in your recipe. Start with adding just 2-3% more water (by flour weight) in your next bake and see if it improves. For a Soft chewy bread crumb recipe, aiming for 70-75% hydration is often a good target, though this varies by flour type.
- Over-baking: Baking for too long or at too high a temperature can evaporate too much moisture from the loaf. Solution: Check the internal temperature of the bread with a thermometer (200-210°F or 93-99°C is typically done) rather than relying solely on visual cues. Adjust baking time or temperature if needed.
Humidity can also play a role; on very dry days, flour might absorb more moisture. You might need to slightly increase hydration in such conditions. Storing the bread improperly, allowing it to be exposed to air, will also dry it out quickly. Proper cooling and storage techniques are essential for maintaining moisture after baking.
My Bread Crumb is Too Open: Controlling Gluten Development
An overly open crumb, characterized by very large, sometimes irregular holes and potentially a fragile structure, can happen for a few reasons, often related to handling and proofing.
- Over-proofing: Allowing the dough to rise for too long, especially in the final proof, can cause the gluten network to weaken and collapse slightly, leading to large, uncontrolled pockets of air. Solution: Reduce proofing time, especially the final proof. Use the poke test to judge readiness.
- Insufficient Shaping: If the dough isn't shaped properly to create tension on the surface, the expanding gases can escape unevenly, creating large voids. Solution: Focus on developing surface tension during shaping. Watch tutorials specific to the type of loaf you are making (e.g., batard, boule).
- Aggressive Handling: Punching down dough too harshly or degassing too much during shaping can expel too much gas, leading to large, uneven holes. Solution: Be gentle when handling dough after bulk fermentation. The goal is to gently redistribute gas, not eliminate it.
While an open crumb is desired in some breads (like ciabatta), for a consistent, even, Soft chewy bread crumb, controlled gluten development and careful handling during proofing and shaping are key. Ensure your kneading develops a strong, but not overly tight, gluten network.
Soft & Chewy Bread Crumb Recipe: A Step-by-Step Guide
Ingredients List for a Perfect Crumb
To make a delicious loaf with a soft chewy bread crumb texture, start with quality ingredients. This recipe aims for a hydration of approximately 72% and uses bread flour for robust gluten development.
- 500g Strong Bread Flour (12-14% protein)
- 360g Lukewarm Water (around 90-100°F or 32-38°C)
- 1.5 tsp Instant Dry Yeast (about 5g)
- 1.5 tsp Fine Sea Salt (about 8g)
- 1 tbsp Honey or Sugar (about 20g) - for tenderness and moisture retention
- 1 tbsp Unsalted Butter, softened (about 14g) - for softness and mouthfeel
Ensure your ingredients are fresh, especially the yeast, as expired yeast will lead to poor or no rise and a dense crumb. Using weight measurements, particularly for flour and water, is highly recommended for accuracy in a Soft chewy bread crumb recipe, as volume measurements can vary significantly.
Detailed Baking Instructions: From Mixing to Baking
Follow these steps carefully to achieve that coveted soft chewy bread crumb texture:
- Autolyse (Optional but Recommended): In a large bowl, mix the flour and water until just combined and no dry bits remain. Cover and let rest for 20-30 minutes. This step helps hydrate the flour and begins gluten development.
- Mix Ingredients: Add the yeast, salt, honey (or sugar), and softened butter to the dough. If you skipped the autolyse, add flour, water, yeast, honey, and butter first, adding salt after a few minutes of mixing.
- Knead: Knead the dough until it is smooth, elastic, and passes the windowpane test. This can take 8-12 minutes in a stand mixer on medium speed or 10-15 minutes by hand. The dough should be slightly sticky but manageable.
- Bulk Fermentation: Place the dough in a lightly oiled bowl, cover, and let rise in a warm place (75-80°F or 24-27°C) for 1.5 to 2 hours, or until doubled in size. Perform 2-3 sets of stretch-and-folds during the first hour of fermentation, spaced 20-30 minutes apart. This strengthens the gluten.
- Shape: Gently turn the dough onto a lightly floured surface. Degas gently (don't punch it down aggressively). Shape the dough into your desired form (loaf, rolls, etc. ), creating good surface tension.
- Final Proofing: Place the shaped dough into a proofing basket or loaf pan. Cover loosely and let rise at room temperature for 45-75 minutes, or until significantly increased in size and the poke test indicates readiness (slow, partial spring back). Alternatively, cold proof in the refrigerator for 8-16 hours for deeper flavor.
- Preheat Oven & Prepare for Steam: Preheat your oven to 475°F (245°C) with a baking stone or steel inside if using. Place a cast iron pan or oven-safe tray on the bottom rack.
- Bake: Just before baking, score the top of the loaf with a sharp knife or lame. Carefully transfer the dough to the hot baking stone/steel. Pour about 1 cup of hot water into the steam pan on the bottom rack (be careful of the steam!). Quickly close the oven door.
- Reduce Temperature: Bake for 15 minutes with steam. Then, carefully remove the steam pan, reduce the oven temperature to 425°F (220°C), and continue baking for another 20-30 minutes, or until the crust is golden brown and the internal temperature reaches 200-210°F (93-99°C).
- Cool: Transfer the baked loaf to a wire rack and let it cool completely before slicing. This is crucial for the crumb structure to set properly and to retain moisture, contributing to a soft chewy bread crumb.
Cooling and Storing Your Bread for Optimal Softness
Once your beautiful loaf is out of the oven, resisting the urge to slice into it immediately is perhaps the hardest part! However, allowing the bread to cool completely on a wire rack is absolutely essential for achieving the best Soft chewy bread crumb texture. As the bread cools, residual heat continues to cook the interior slightly, and moisture redistributes throughout the loaf. Slicing too early can result in a gummy, dense crumb. Allow at least 1-2 hours for a standard loaf to cool fully.
For storage, once completely cool, store the bread at room temperature. Avoid refrigerating bread made for soft texture, as the cold temperature accelerates starch retrogradation, making it stale faster. Store in a bread box, a paper bag inside a plastic bag, or a sealed plastic bag to maintain softness. A loaf with a well-developed soft chewy bread crumb can stay fresh and soft for 2-3 days when stored properly.
Advanced Tips for a Superior Crumb Texture
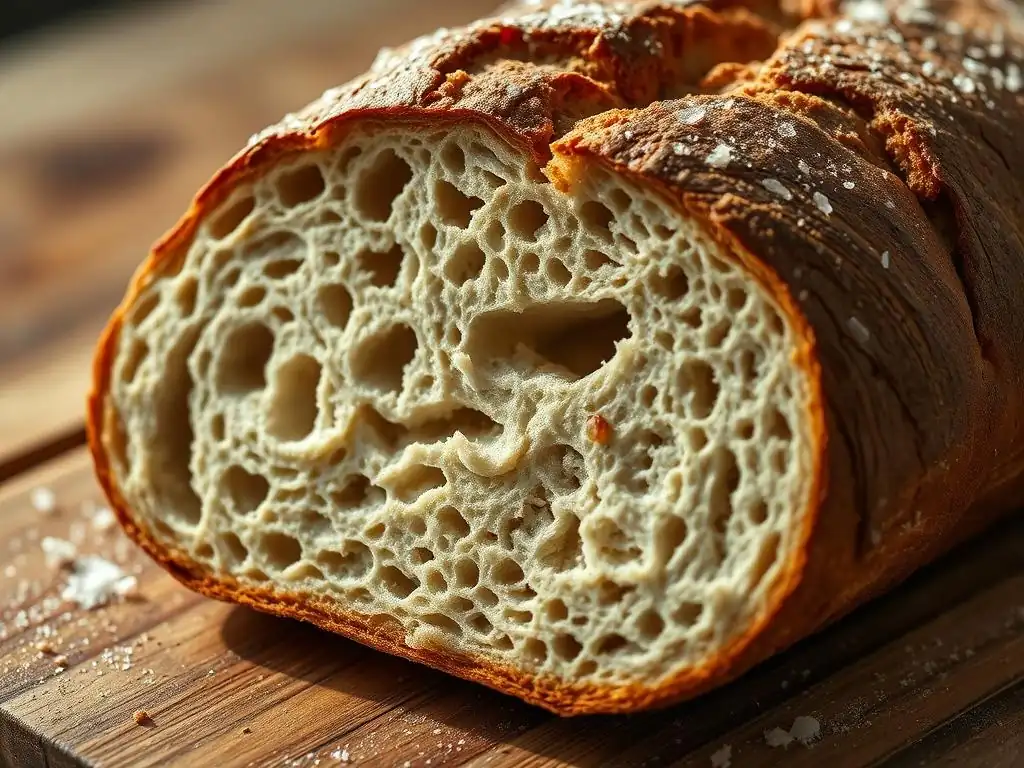
Using a Sponge or Poolish for Enhanced Flavor and Texture
Incorporating a pre-ferment like a sponge or poolish can significantly improve the flavor, aroma, and texture of your Soft chewy bread crumb. A sponge is typically a stiff mixture of flour, water, and yeast, while a poolish is a liquid pre-ferment with equal parts flour and water by weight, plus a small amount of yeast. Both are allowed to ferment for several hours (often 8-16 hours or more, sometimes in the refrigerator) before being added to the final dough mix.
These pre-ferments contribute to a more complex flavor profile through longer fermentation. They also help develop gluten and acidity, which can improve dough handling and result in a more open and tender crumb structure. While adding an extra step, using a sponge or poolish is a technique often employed by professional bakers to elevate a standard Soft chewy bread crumb recipe.
Incorporating Tangzhong for Extra Softness
The Tangzhong method, originating from Asian baking, is a technique used to create exceptionally soft and fluffy bread, perfect for enhancing a Soft chewy bread crumb. It involves cooking a small portion of the flour and liquid (usually milk or water) into a thick paste or roux before adding it to the main dough. Typically, 5-10% of the total flour is used in the Tangzhong, cooked with 5 times its weight in liquid to about 150°F (65°C).
This cooked paste gelatinizes the starches in the flour, allowing them to absorb and retain significantly more liquid than raw flour. When added to the main dough, this extra moisture is locked within the starches, resulting in a dough that can handle higher hydration without being excessively sticky and yields a bread with an incredibly soft, moist, and tender crumb that stays fresh for longer. It's a highly effective method for achieving a superior soft texture.
Adjusting Recipes for Different Types of Flour
The type of flour used is paramount when aiming for a Soft chewy bread crumb, and recipes often need adjustments when substituting flours. As discussed, bread flour is ideal due to its high protein content (12-14%), which allows for strong gluten development necessary for chewiness. If using all-purpose flour (10-12% protein), you may need to adjust hydration downwards slightly, as it absorbs less water, and you might achieve less chewiness.
Whole wheat flour contains bran and germ, which can cut the gluten strands, resulting in a denser crumb. If using whole wheat, consider replacing only a portion of the white bread flour (e.g., 20-30%) and potentially increasing hydration slightly, as whole wheat absorbs more water initially but can still feel dry. Gluten development will be slower and potentially less robust. Experimentation is key when adapting a Soft chewy bread crumb recipe for different flour types, starting with small adjustments and observing the results.
Enjoying Your Perfect Soft & Chewy Bread
Serving Suggestions and Recipe Pairings
Once you've mastered the Soft chewy bread crumb texture, the possibilities for enjoyment are endless! This type of bread is wonderfully versatile. Its soft, resilient crumb makes it perfect for sandwiches, holding up well to moist fillings without becoming soggy. Try it with classic pairings like ham and cheese, a BLT, or even a simple spread of butter and jam.
Beyond sandwiches, slices can be toasted to a golden crisp, providing a delightful textural contrast with the soft interior. Use it for French toast, bread pudding, or as the base for bruschetta or garlic bread. A loaf with a beautiful Soft chewy bread crumb is also excellent served alongside soups, stews, or pasta dishes, perfect for soaking up sauces. The subtle sweetness often present in recipes designed for softness also makes it a great accompaniment to breakfast or brunch.
Exploring Different Bread Varieties with a Soft Crumb
The techniques and principles used to create a Soft chewy bread crumb can be applied to numerous bread varieties. While our guide focused on a basic recipe, consider exploring others known for this desirable texture.
- Japanese Milk Bread (Shokupan): Often uses the Tangzhong method for supreme softness and a fine, cottony crumb.
- Challah: A rich, braided bread often made with eggs and oil or butter, contributing to its tender, slightly chewy texture.
- Brioche: Another enriched bread high in butter and eggs, resulting in a very soft, rich crumb.
- Potato Bread: Incorporates mashed potatoes or potato flour, which helps retain moisture and creates a soft texture.
- Some Sandwich Loaves: Many commercial and homemade sandwich bread recipes are specifically designed for a soft, tight crumb ideal for slicing.
Experimenting with these different types of bread using the principles outlined in this guide will further hone your skills in achieving the perfect Soft chewy bread crumb texture, allowing you to bake a wide variety of delicious and satisfying loaves.
Frequently Asked Questions
What is the key ingredient for achieving a soft and chewy bread crumb?
The secret often lies in using a higher proportion of hydration in your dough. This creates more steam during baking, leading to a softer and chewier interior.
How does kneading impact the texture of the bread crumb?
Proper kneading develops gluten strands, which are crucial for that desirable chewy texture. Insufficient kneading can result in a dense and less elastic crumb.
What baking temperature is ideal for a soft and chewy bread crumb?
Baking at a slightly lower temperature allows the bread to cook more evenly, preventing the crust from hardening too quickly and resulting in a softer crumb. Monitor for internal temperature rather than relying on cook time alone.
Can using a specific type of flour affect the bread crumb texture?
Yes, using bread flour, which has a higher protein content than all-purpose flour, will create more gluten and a chewier texture. All-purpose flour can still work, but may require adjustments to hydration and kneading time.
Are there any post-baking techniques to maintain the bread's soft and chewy texture?
Allowing the bread to cool completely on a wire rack prevents the bottom from becoming soggy. Storing it in an airtight container or bread bag will help retain moisture and maintain its softness.
Final Reflection: The Enduring Quest for the Perfect Crumb
The pursuit of the perfect soft and chewy bread crumb transcends mere culinary technique; it's a journey into the heart of baking itself. This article explored the science behind achieving that elusive texture, delving into the intricacies of hydration, fermentation, and baking techniques. But more than just a recipe guide, it's a testament to the power of understanding the fundamental principles that transform simple ingredients into something truly magical.
The quest for the perfect crumb is a reflection of our desire for comfort and connection. Bread, after all, is a staple across cultures, a symbol of nourishment and shared experience. The satisfying chew, the delicate softness – these are sensory details that evoke memories and forge bonds. As we strive for mastery in the kitchen, we're also engaging in a deeper exploration of our relationship with food and its cultural significance. Bread is the staff of life.
This simple saying speaks volumes about the profound impact this seemingly humble food has on our lives.
Now, consider your own baking journey. What have you learned about the delicate balance of ingredients and techniques? Don't be afraid to experiment, to adjust hydration levels, to play with fermentation times. Each loaf you bake, each crumb you analyze, is a step closer to understanding the art and science of bread making. Embrace the process, savor the results, and share the joy of perfectly soft and chewy bread with those you love. The journey, as much as the destination, is what truly matters.
Unlock the Secret to Perfectly Soft & Chewy Bread!
Thanks for diving into the world of perfectly textured bread! We hope you learned valuable techniques to achieve that dreamy soft and chewy crumb you've always wanted. Ready to put your newfound knowledge into practice?
- Bake your dream loaf: Try the recipe variations we discussed, focusing on the one that excites you most – perhaps experimenting with different flours or hydration levels. Don't be afraid to get creative!
- Share your baking journey: Snap a picture of your masterpiece and share it on social media using #BakeWithEaseSoftCrumb – let's inspire each other!
- Join our baking community: Head over to our forum to discuss your baking experiences and ask questions – our community is full of passionate bakers eager to share tips and tricks.
So, what delicious bread will you bake next, and what small adjustments will you make to achieve your ideal texture?