
Fast and Accurate: Best Practices for Measuring in a Busy Home Kitchen

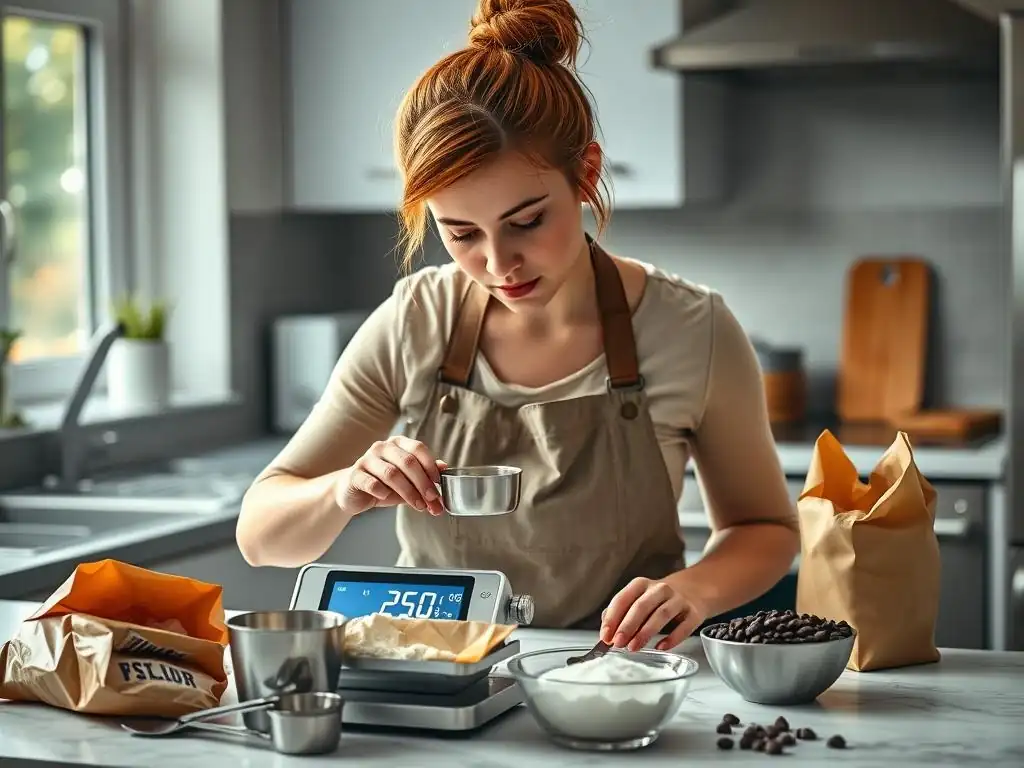
Welcome to BakeWithEase, your kitchen companion for conquering the world of baking! Ever wondered how to achieve consistent results in less time? This week, we dive deep into the secrets of efficient baking with our guide to measuring ingredients accurately quickly. Unlock the key to perfect cakes, breads, and pastries, even when life gets hectic. Ready to streamline your baking process and eliminate guesswork? Let's get started!
- Precision Baking: Mastering Measurement for Consistent Results
- Introduction: The Foundation of Successful Baking
- Essential Measuring Tools for the Home Baker
- Streamlining Measurement: Time-Saving Techniques
- Measuring Dry Ingredients: Achieving Consistent Results
- Measuring Liquid Ingredients: Avoiding Common Pitfalls
- Avoiding Measurement Errors: Common Mistakes and Solutions
- Maintaining Tool Accuracy: Care and Calibration
- Recipe Adaptation: Adjusting Measurements for Different Yields
- Conclusion: Mastering Measurement for Baking Confidence
-
Frequently Asked Questions
- How can I quickly and accurately measure dry ingredients like flour?
- What's the best way to measure liquids for baking, especially when I'm short on time?
- Is it really that important to measure ingredients accurately when baking?
- What are some quick tips for ensuring accurate measurements without spending too much time?
- Can I substitute volume measurements for weight measurements in baking recipes?
- Final Reflection: The Art of the Quick, Precise Measure
- Unleash Your Inner Baking Maestro: Master Measurement!
Precision Baking: Mastering Measurement for Consistent Results
Introduction: The Foundation of Successful Baking
The Impact of Accurate Ingredient Measurement on Baking Outcomes
Baking is often described as a science, and for good reason. Unlike cooking, where a pinch more salt or a splash more liquid can often be adjusted on the fly, baking relies on precise ratios. Even slight inaccuracies in measuring ingredients accurately quickly can drastically alter the final product.
Too much flour, for instance, can result in a dry, dense cake, while too little leavening agent might lead to flat cookies. Consider a simple chocolate chip cookie recipe: if you accidentally add 20% more flour than specified (say, 240g instead of 200g), the dough will be stiffer, the cookies won't spread properly during baking, and the texture will be significantly different – likely drier and less tender than intended. Achieving consistent, delicious results every time hinges directly on the accuracy of your measurements.
Furthermore, accurate measurement impacts not just texture but also flavor and appearance. The balance of sugar, fat, and leavening agents determines how a cake rises, how a pie crust browns, and how a cookie spreads and crisps. A discrepancy of just a few grams of baking soda or baking powder in a loaf of bread can mean the difference between a beautifully risen crumb and a collapsed, heavy interior. Mastering the techniques for measuring ingredients accurately quickly is the fundamental step towards becoming a confident and successful baker, ensuring your efforts consistently yield the delightful treats you envision.
Efficiency and Precision: Balancing Speed and Accuracy in the Kitchen
In a bustling home kitchen, finding the balance between speed and accuracy when measuring ingredients is crucial. While rushing through measurements can lead to errors that compromise your bake, spending excessive time on each ingredient can make the baking process feel tedious and overwhelming, especially when you're trying to get dinner on the table or bake a batch of cookies before guests arrive. The goal is not to sacrifice one for the other, but to implement smart practices that allow you to measure accurately without unnecessary delay.
Developing efficient habits, like having your tools ready and understanding the best method for each type of ingredient, significantly speeds up the process without compromising precision. For example, using a digital scale is often faster and more accurate for many ingredients than using volume cups, particularly for flour or sugar. Learning these techniques for measuring ingredients accurately quickly allows you to move confidently through your recipe, reducing the chances of mistakes that require starting over or result in a disappointing outcome, ultimately saving you time and frustration in the long run.
Essential Measuring Tools for the Home Baker
Digital Kitchen Scales: Ensuring Accuracy in Grams and Ounces
A digital kitchen scale is arguably the most valuable tool for achieving precise measurements in baking. It allows you to measure ingredients by weight (grams or ounces) rather than volume (cups or tablespoons), which is inherently more accurate. A cup of flour, for instance, can vary significantly in weight depending on how it's scooped or sifted – potentially by as much as 30 grams (over an ounce) between a lightly spooned cup and a densely packed one.
Measuring 120 grams of flour on a scale, however, provides a consistent amount every single time, regardless of how you handle it. This consistency is vital for reproducible baking results, making it easier to troubleshoot recipes and replicate successes.
Using a scale also simplifies the process of measuring ingredients accurately quickly. Instead of leveling cups repeatedly, you simply place a bowl on the scale, hit the "tare" button to zero it out, and add your ingredient until the desired weight is reached.
This method is particularly efficient when measuring multiple ingredients into the same bowl, as you can tare the scale after adding each one. While a good quality scale might cost between $20 and $50, the improvement in your baking consistency and the ease of measuring make it a worthwhile investment for any serious home baker looking to enhance their precision and speed.
Nested Measuring Cups and Spoons: Selecting the Right Size for Each Ingredient
While digital scales are superior for accuracy by weight, nested dry measuring cups and measuring spoons remain essential for ingredients where volume measurement is standard or easier, such as liquids (though liquid measuring cups are preferred for larger volumes), small amounts of spices, extracts, or sticky ingredients like peanut butter. Dry measuring cups typically come in sets (1/4, 1/3, 1/2, and 1 cup), and it's crucial to use the correct size for the amount specified in the recipe rather than approximating with a larger cup.
Using a 1/2 cup measure twice for 1 cup is less precise than using a dedicated 1-cup measure, as each scoop introduces potential for variation.
Measuring spoons, usually in sets from 1/4 teaspoon up to 1 tablespoon, are indispensable for small quantities of leavening agents, salt, spices, and flavorings. Accuracy here is paramount, as even a small error in baking soda or salt can significantly impact taste and texture. Ensure your sets are clearly marked and made from sturdy material like stainless steel or durable plastic. For measuring ingredients accurately quickly with cups and spoons, proper technique (like the spoon and sweep method for dry ingredients) is just as important as having the right tools themselves.
Streamlining Measurement: Time-Saving Techniques
Mise en Place: Preparing Ingredients Before You Begin
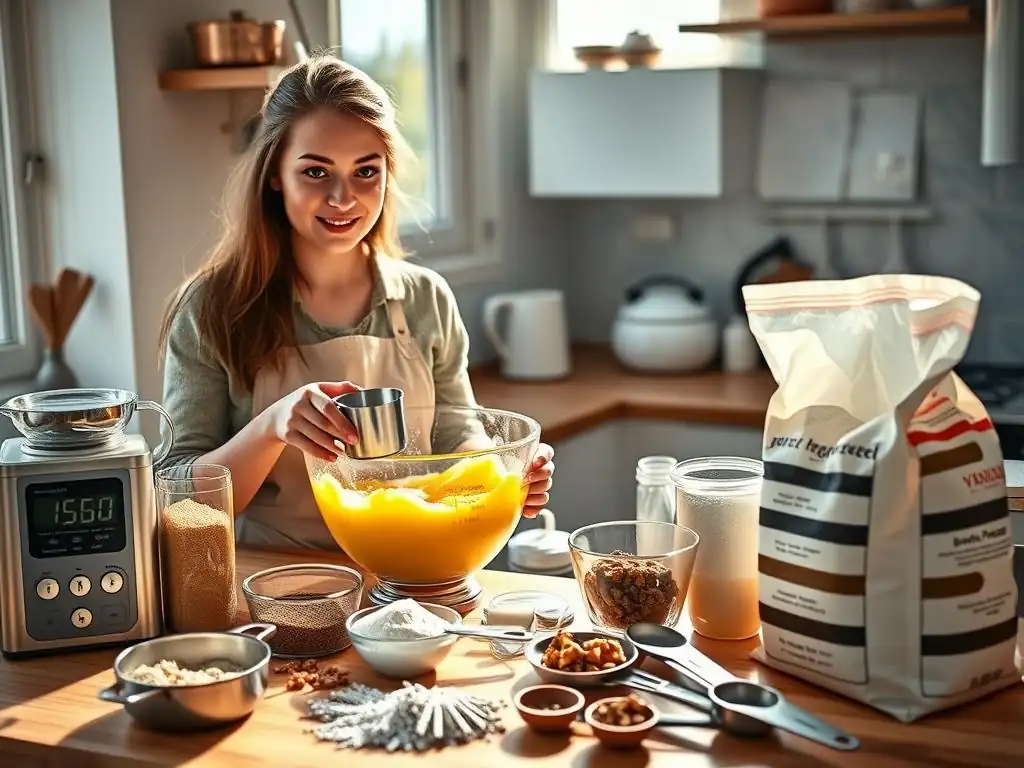
"Mise en place" is a French culinary term meaning "everything in its place," and it's a game-changer for efficient and accurate baking. This technique involves reading the entire recipe before you start, gathering all your tools, and measuring out all your ingredients before you even turn on the oven or mixer. You place each measured ingredient into separate small bowls or containers. This prevents frantic searching for ingredients mid-recipe, reduces the chance of forgetting something, and ensures you have the correct amounts ready to go when needed.
Implementing mise en place might seem like an extra step, but it dramatically streamlines the actual mixing and assembly process, allowing you to move quickly and confidently. Imagine you need 1 cup of flour, 1/2 cup of sugar, and 2 teaspoons of baking powder. With mise en place, these are already measured and waiting. When the recipe calls for them, you simply add them, rather than stopping to measure each one individually while other ingredients are mixing or melting. This preparation is key to measuring ingredients accurately quickly and maintaining flow in a busy kitchen environment.
The Spoon and Sweep Method: Consistent Dry Ingredient Measurement
For recipes that still call for volume measurement of dry ingredients like flour (though weighing is preferred), the spoon and sweep method is the standard for achieving consistent results. Instead of scooping the measuring cup directly into the flour bag, which can compact the flour and lead to over-measurement (sometimes by 20% or more), you gently spoon the flour from the bag into the measuring cup. Overfill the cup slightly. Then, use a straight edge, like the back of a knife or a bench scraper, to level off the excess flour across the top of the cup.
This method ensures that the flour is not packed down, giving you a more accurate representation of the intended volume. While not as precise as weighing, consistently using the spoon and sweep method minimizes variability compared to simply scooping. For instance, a correctly spooned and swept cup of all-purpose flour should weigh approximately 120-130 grams, whereas a scooped and packed cup could weigh 150-160 grams or more. Practicing this technique is vital for anyone looking to improve their speed and accuracy when measuring ingredients accurately quickly using volume methods.
Utilizing the Tare Function: Efficient Multi-Ingredient Weighing
The tare function on a digital scale is incredibly useful for speeding up the process of measuring multiple ingredients that go into the same bowl, such as dry ingredients for a cake or cookies. Instead of using separate containers for each ingredient, you place your mixing bowl directly on the scale. Add the first ingredient (e.g., flour) and note the weight. Then, press the "tare" button. The scale will reset to zero, effectively subtracting the weight of the bowl and the first ingredient. You can then add the second ingredient (e.g., sugar) until the desired weight is displayed.
This process can be repeated for all subsequent dry ingredients, adding them one after another into the same bowl, taring the scale each time. This not only saves on washing multiple bowls but also allows for rapid, sequential measurement. For example, measuring 200g flour, then taring, then adding 150g sugar, then taring, then adding 5g baking powder takes mere moments once you get the hang of it, making it a highly efficient method for measuring ingredients accurately quickly and reducing clutter.
Measuring Dry Ingredients: Achieving Consistent Results
Flour: Weighing for Accuracy vs. Spooning and Leveling
Flour is perhaps the most common culprit for inaccurate volume measurements in baking. Its compressibility means that a cup measure can hold vastly different amounts depending on how it's filled. As mentioned, scooping directly from the bag can compact the flour significantly, leading to over-measurement by as much as 30 grams per cup compared to the standard weight of approximately 120-130 grams for a lightly spooned and leveled cup of all-purpose flour. This excess flour absorbs more liquid, resulting in dry, tough baked goods.
For truly consistent results, weighing flour is the gold standard. Most professional recipes and many modern home baking recipes provide weight measurements (grams or ounces) for flour for this very reason. If a recipe only provides volume measurements, it's helpful to know the approximate weight equivalents (e.g., 1 cup AP flour ≈ 120-130g, 1 cup cake flour ≈ 100-110g). If you must use volume, strictly adhere to the spoon and sweep method to minimize variability and improve your ability to measure ingredients accurately quickly, aiming for that lighter, less compacted cup.
Sugar: Measuring Granulated, Brown, and Powdered Varieties
Different types of sugar require slightly different measurement techniques, especially when using volume measures. Granulated sugar is relatively free-flowing, so it can be measured by scooping and leveling, similar to flour, although it doesn't compact as much. A standard cup of granulated sugar weighs approximately 200-210 grams. Brown sugar, however, contains molasses and is naturally moist and clumpy.
Recipes calling for brown sugar by volume typically specify "packed" brown sugar. To measure packed brown sugar, firmly press the sugar into the measuring cup with your fingers or the back of a spoon until it's compacted and level with the rim. When inverted, it should hold the shape of the cup.
Powdered sugar (confectioners' sugar) is very fine and can clump easily. It should ideally be sifted before measuring, especially if the recipe calls for sifted powdered sugar, as sifting removes lumps and aerates it. Whether sifted or not, powdered sugar should also be measured using the spoon and sweep method or lightly scooped and leveled to avoid compacting it, which can lead to over-measurement.
A cup of unsifted powdered sugar weighs roughly 120-130 grams, while a cup of sifted powdered sugar weighs significantly less, around 100-110 grams. Paying attention to these nuances when measuring ingredients accurately quickly ensures the correct sugar balance in your recipes.
Leavening Agents and Spices: Accurate Measurement for Optimal Results
Leavening agents like baking powder and baking soda, as well as potent spices and extracts, are used in small quantities, but their precise measurement is critical. Errors here can lead to major issues – too much baking soda can cause a metallic taste and excessive spreading, while too little baking powder can result in a flat, dense bake. For these ingredients, using appropriately sized measuring spoons is essential.
To measure baking powder, baking soda, salt, or spices using a measuring spoon, scoop the ingredient into the spoon until it's overflowing slightly. Then, use a straight edge (like the back of a knife) to sweep off the excess, creating a level surface. Do not tap the spoon on the counter, as this can cause the ingredient to settle and compact, leading to over-measurement.
For liquid extracts, fill the measuring spoon carefully to the rim, ensuring it doesn't spill. Accurate measurement of these small but powerful ingredients is non-negotiable for successful baking and is part of measuring ingredients accurately quickly in the overall process.
Measuring Liquid Ingredients: Avoiding Common Pitfalls
Water, Milk, and Extracts: Using Liquid Measuring Cups Effectively
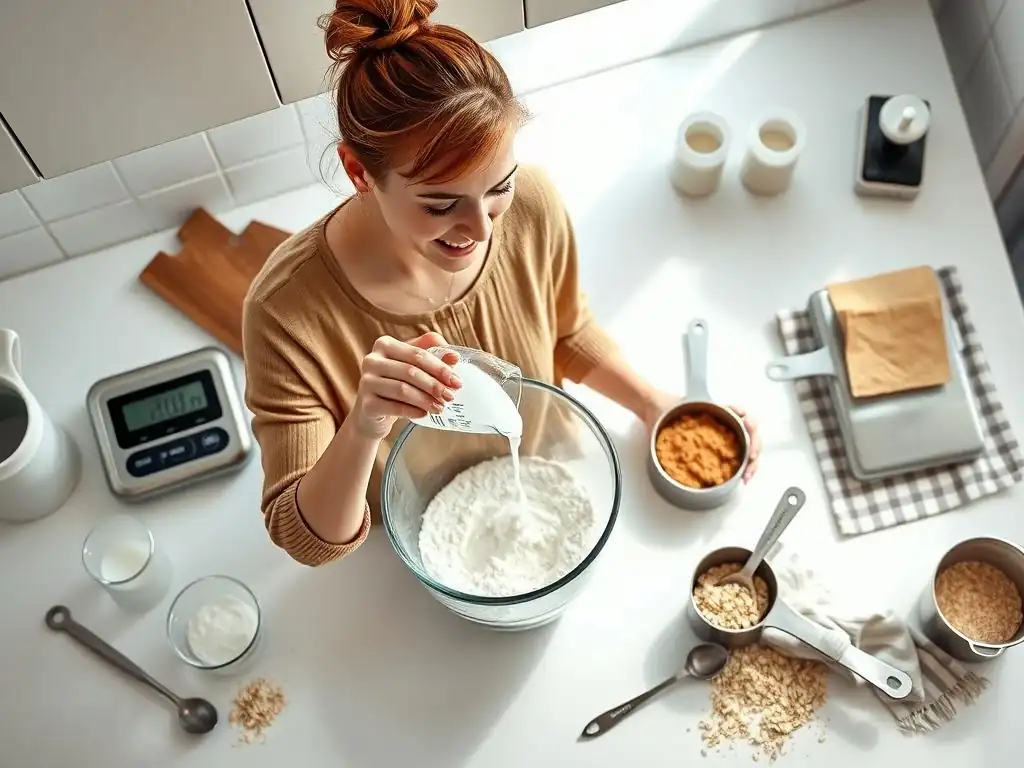
Liquid ingredients like water, milk, cream, and larger quantities of extracts are best measured using clear liquid measuring cups, which are designed with a spout for easy pouring and marked with measurements on the side. Unlike dry measuring cups, which should be filled to the rim and leveled, liquid measuring cups have headspace above the highest measurement mark. To measure liquids accurately, place the cup on a flat, level surface and pour the liquid until it reaches the desired measurement line when viewed at eye level.
Viewing the measurement at eye level is crucial because looking down from above can lead to inaccurate readings due to parallax error – the apparent shift in position of an object when viewed from different angles. For example, if you need 1 cup of milk, pour it into the liquid measuring cup, set the cup on the counter, and bend down so your eyes are level with the 1-cup line to ensure the bottom of the meniscus (the slight curve of the liquid surface) aligns with the mark. This simple step significantly improves accuracy when measuring ingredients accurately quickly.
Viscous Liquids: Measuring Honey, Molasses, and Syrups Accurately
Measuring viscous liquids like honey, molasses, corn syrup, or maple syrup can be tricky because they are thick and sticky, making them difficult to pour and leaving residue in the measuring cup. While liquid measuring cups can be used, some tricks can make the process easier and more accurate. One effective technique is to lightly grease the measuring cup or spoon with a neutral oil or non-stick cooking spray before adding the sticky liquid. This helps the liquid slide out much more easily, ensuring you get the full amount into your mix.
Another approach, especially for larger amounts, is to measure by weight using a digital scale, which is often the most accurate method for these dense liquids. For instance, 1 cup of honey weighs approximately 340 grams, while 1 cup of molasses weighs about 290 grams. If a recipe provides weight, use your scale. If not, greasing the volume cup or spoon is the best way to ensure you're measuring ingredients accurately quickly and getting all of that precious, sticky goodness into your bowl without waste.
Fats and Oils: Measuring Melted Butter, Oil, and Solid Shortening
Fats come in various forms and require different measurement approaches. Liquid oils (like vegetable, canola, or olive oil) are measured using liquid measuring cups, following the same eye-level technique as water or milk. Melted butter is also measured this way. However, solid fats like butter, shortening, or coconut oil (when solid) are often measured by volume using dry measuring cups or by weight.
When measuring solid fats by volume, press the fat firmly into the dry measuring cup using a spatula or spoon to eliminate any air pockets. Level off the top with a straight edge. For butter, which is typically sold in sticks with measurements marked on the wrapper (e.g., tablespoons or fractions of a cup), you can often simply cut off the required amount using these markings.
A standard stick of butter (1/2 cup) weighs approximately 113 grams. Weighing is the most accurate method for solid fats; for instance, if a recipe calls for 226 grams of butter, you know that's exactly two sticks. Choosing the appropriate method based on the fat's state and the recipe's format is key to measuring ingredients accurately quickly.
Avoiding Measurement Errors: Common Mistakes and Solutions
Compacting Ingredients: Avoiding Over-Measurement in Cups
One of the most frequent mistakes in home baking is over-measuring dry ingredients, particularly flour, by compacting them into the measuring cup. As discussed, scooping flour directly from the container with the measuring cup shoves the flour down, packing it tightly.
This results in significantly more ingredient by weight than intended by the recipe author, assuming they developed the recipe using a standard method like spooning and leveling or weighing. For example, if a recipe calls for 1 cup of flour (intended to be about 125g) and you pack it, you might end up with 150g or more, leading to a dry, heavy product.
The solution is simple but critical: either weigh your dry ingredients using a digital scale (the most reliable method) or commit to the spoon and sweep method when using volume measurements. Gently spoon the flour into the cup until it overflows, then level it off with a straight edge without tapping or shaking the cup. Being mindful of how you handle ingredients is essential for measuring ingredients accurately quickly and consistently achieving the desired texture and structure in your baked goods.
Inconsistent Leveling: Achieving Accurate Spoon Measurements
Just like with dry measuring cups, inconsistent leveling of measuring spoons can lead to small but significant errors, especially with powerful ingredients like leavening agents, salt, or potent spices. Simply tapping the spoon handle or eyeballing the level can result in slightly too much or too little of these critical components. Too much baking powder can cause a cake to rise too quickly and then fall, while too little salt can leave a recipe tasting bland.
Always use a straight edge, such as the back of a knife or a small spatula, to level off dry ingredients in measuring spoons. After scooping or spooning the ingredient into the spoon until it's overflowing, draw the straight edge across the top of the spoon, pushing the excess back into the container. This ensures a precise, level measure every time. For liquid extracts in spoons, fill carefully to the brim without letting it spill. This attention to detail, even on small measurements, is part of mastering measuring ingredients accurately quickly and consistently.
Neglecting the Tare Function: Ensuring Accurate Net Weight
When using a digital scale, failing to use the tare function properly can lead to cumulative errors, especially when adding multiple ingredients to the same bowl. If you add flour, then add sugar without taring, the sugar weight displayed will be the combined weight of the flour and sugar, not just the sugar. This forces you to do mental math or rely on external calculations, which increases the chance of mistakes and slows down the process.
The tare function is designed specifically to zero out the weight of the container or the previous ingredient, allowing you to measure the net weight of each subsequent ingredient accurately. Get into the habit of pressing the "tare" button every time you add a new ingredient to the bowl on your scale. This ensures that the number displayed reflects only the weight of the ingredient you are currently adding. Utilizing the tare function is a fundamental technique for measuring ingredients accurately quickly and efficiently with a digital scale.
Maintaining Tool Accuracy: Care and Calibration
Checking and Calibrating Your Digital Scale
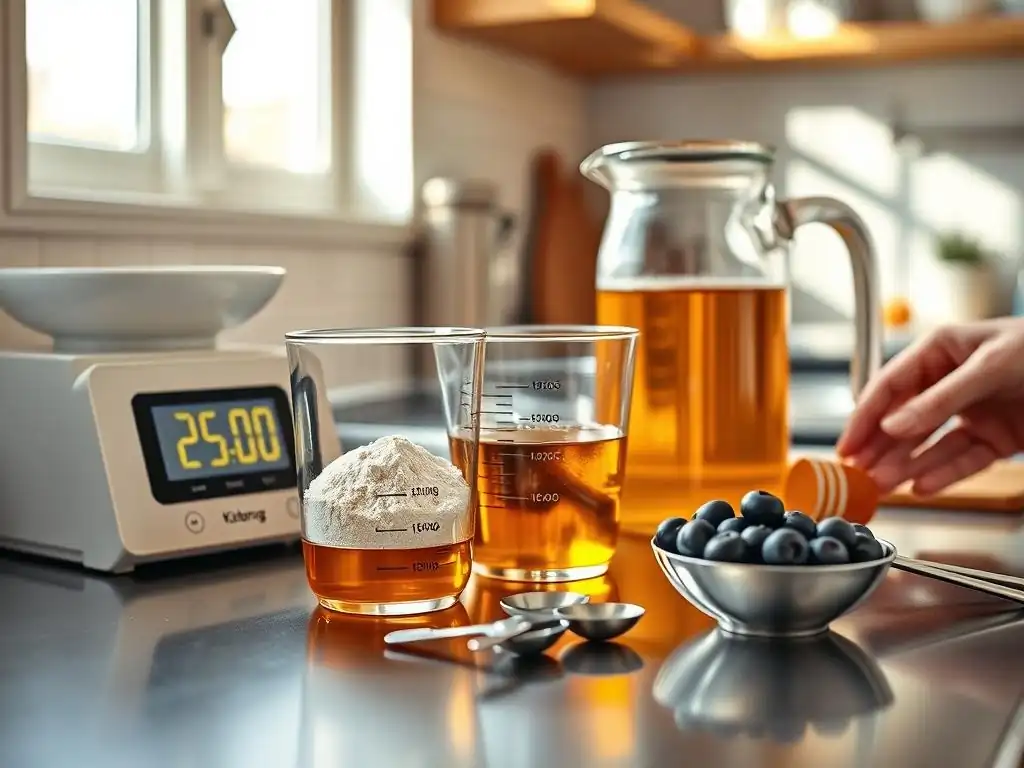
Even the best digital scales can lose their accuracy over time due to wear and tear or environmental factors. A scale that is off by even a few grams can impact your baking results, especially with sensitive recipes. Most digital scales come with instructions on how to calibrate them, often requiring a specific calibration weight (commonly 500g or 1kg) or a known standard weight like a set of coin weights. If your scale doesn't have a calibration function or you don't have a calibration weight, you can perform a simple accuracy check using items with known, precise weights.
For example, new U.S. pennies minted after 1982 weigh exactly 2.5 grams. A stack of 10 pennies should weigh 25 grams. Four U.S. quarters weigh approximately 5.67 grams each, so four should weigh about 22.68 grams. Check your scale against several known weights across its range. If your scale consistently reads significantly higher or lower than the known weights, it may need calibration or replacement. Regularly checking your scale's accuracy ensures your efforts in measuring ingredients accurately quickly are not undermined by faulty equipment.
Cleaning and Storing Measuring Tools for Longevity
Proper care and storage of your measuring tools not only extend their lifespan but also maintain their accuracy. Residue from previous measurements can build up on spoons and cups, potentially affecting the volume they hold. Sticky ingredients can be particularly stubborn. Wash all measuring cups and spoons thoroughly after each use. For sticky substances, a quick rinse with hot water might help before washing with soap. Ensure they are completely dry before storing to prevent rust (on metal tools) or residue buildup.
Digital scales should be kept clean and dry. Avoid getting the electronic components wet. Wipe down the surface with a damp cloth and dry immediately.
Store measuring cups and spoons neatly, ideally nested or hung, to prevent them from getting bent or scratched, which could affect their shape and therefore their accuracy. Store your digital scale in a safe place where it won't be dropped or have heavy objects placed on it, as this can damage the sensors and impair its function. Taking these simple steps ensures your tools remain reliable aids for measuring ingredients accurately quickly for years to come.
Recipe Adaptation: Adjusting Measurements for Different Yields
Scaling Recipes: Maintaining Ratios for Consistent Flavor
Sometimes you need to bake a larger or smaller batch of a recipe than originally written. Scaling a recipe means adjusting all ingredient quantities proportionally. If you want to double a recipe, you multiply every ingredient amount by two. If you want to halve it, you divide by two.
This seems straightforward, but maintaining accurate ratios is critical. For example, if a recipe calls for 1.5 cups of flour and you're doubling it, you need 3 cups. If it calls for 3/4 teaspoon of baking powder and you're halving it, you need 3/8 teaspoon (which can be tricky to measure exactly, sometimes requiring conversion to a slightly easier fraction or approximation).
This is where measuring by weight shines, especially when scaling. Doubling 125 grams of flour is simply 250 grams – much easier and more accurate than doubling 1 cup using volume.
When scaling, pay extra attention to potent ingredients like salt, leavening agents, and strong flavorings (like extracts or spices). While most ingredients scale linearly, sometimes these powerful components might need slight adjustments based on taste preference or how they behave in different batch sizes, though starting with a direct scaling is the best practice for maintaining the intended flavor profile while measuring ingredients accurately quickly for a different yield.
Converting Units: Understanding and Applying Conversion Factors
Recipes can be written using different units – some in volume (cups, tablespoons, teaspoons) and others in weight (grams, ounces, pounds). Being able to convert between units is essential for using recipes from various sources or when scaling. While exact conversions between volume and weight for dry ingredients vary depending on the ingredient (as discussed with flour and sugar), there are standard conversion factors for liquid volumes and weights where density is consistent (like water).
For example, 1 cup = 16 tablespoons = 48 teaspoons = 8 fluid ounces ≈ 237 milliliters. For water, 1 cup ≈ 237 grams. Knowing these standard conversions and having access to reliable conversion charts for common baking ingredients (like flour, sugar, butter weights per cup) is invaluable.
When converting, prioritize using a digital scale whenever possible after converting volume to weight, as this provides the most accurate result. For instance, if a recipe calls for 2 cups of flour and you know 1 cup is roughly 125g, convert to 250g and weigh it for better accuracy than simply doubling the volume measurement technique. Mastering unit conversion enhances your flexibility and ability to measure ingredients accurately quickly across different recipes.
Conclusion: Mastering Measurement for Baking Confidence
Key Takeaways for Accurate and Efficient Baking
Mastering ingredient measurement is the cornerstone of successful baking. To consistently achieve delicious results and improve your efficiency in the kitchen, prioritize accuracy above all else. Invest in a digital kitchen scale and use it for dry ingredients whenever possible – it's the single best step you can take to improve precision. Supplement with accurate nested dry measuring cups and liquid measuring cups, understanding the proper techniques for each (spoon and sweep for dry, eye level for liquid).
Embrace mise en place to prepare all ingredients before you start mixing, streamlining the process and reducing errors. Practice techniques like the spoon and sweep method and utilizing the tare function on your scale to improve speed without sacrificing accuracy. Understand the nuances of measuring different ingredients, from compacting flour to handling sticky syrups. Regularly check your tools, especially your digital scale, for accuracy and maintain them properly. By focusing on these key practices, you'll build confidence in your ability to measure ingredients accurately quickly and consistently produce fantastic baked goods.
Continuous Practice: Refining Your Measuring Skills
Like any skill, mastering measurement in baking requires practice. Don't be discouraged if your first attempts aren't perfect. Pay attention to how your baked goods turn out and consider if measurement errors might have played a role. If a cake is dry, perhaps too much flour was measured. If cookies spread too much, maybe the butter measurement was off or the sugar wasn't packed correctly.
As you bake more frequently and consciously apply accurate measuring techniques, you'll become faster and more intuitive. You'll develop a feel for the correct amount of flour when spooning and leveling, and using your digital scale will become second nature. Continue to consult reliable sources for ingredient weights and conversion charts. The more you practice measuring ingredients accurately quickly, the more reliable and enjoyable your baking experience will become, leading to consistent success and the joy of sharing perfectly baked treats.
Frequently Asked Questions
How can I quickly and accurately measure dry ingredients like flour?
Using a kitchen scale is the most accurate method. Otherwise, spoon the flour into the measuring cup and level it off with a straight edge.
What's the best way to measure liquids for baking, especially when I'm short on time?
Use liquid measuring cups with clear markings and pour until the liquid reaches the desired line. Check at eye level for accurate volume.
Is it really that important to measure ingredients accurately when baking?
Yes! Accuracy is crucial for consistent results, especially in baking. Even small discrepancies can affect the final texture and taste.
What are some quick tips for ensuring accurate measurements without spending too much time?
Use pre-cut parchment paper to avoid greasing pans, and keep your measuring tools clean. This saves time and reduces errors.
Can I substitute volume measurements for weight measurements in baking recipes?
While possible, it's not recommended for best results. Weight measurements are more precise and lead to more consistent outcomes.
Final Reflection: The Art of the Quick, Precise Measure
The quest for speed and accuracy in the kitchen isn't just about efficiency; it's about unlocking culinary potential. A perfectly measured recipe, achieved swiftly, transforms a potentially stressful cooking experience into a joyful, creative endeavor. This is especially true in today's busy world, where time is a precious commodity.
The impact of precise measurement extends far beyond the immediate outcome of a single dish. It fosters a deeper understanding of cooking as a science, where ratios and proportions dictate success. Cooking is at its heart a form of chemistry,
a renowned chef once said, and this rings truer than ever when considering the importance of accurate ingredient measurement. This understanding allows for greater experimentation and improvisation, empowering home cooks to confidently adapt recipes and develop their own unique culinary styles.
Consider the impact of even a small inaccuracy. A slightly off measurement can lead to a cake that's too dense, a sauce that's too thin, or a bread that fails to rise. But mastering the techniques outlined in this article—from utilizing the right tools to understanding the nuances of different measuring methods—empowers you to avoid these pitfalls. Take the time to practice these methods, to find what works best for your kitchen and your style. Embrace the precision, and watch your culinary creations flourish.
Unleash Your Inner Baking Maestro: Master Measurement!
Thanks for taking the time to explore the world of precise baking measurements! You've now got the tools to confidently tackle any recipe. Ready to put your new skills to the test?
- Bake your dream cake (or cookies, or bread!) today: Choose a recipe you've always wanted to try and put your newfound measurement expertise to work. See the difference precision makes!
- Share your baking triumphs (or challenges!): Let's build a community of bakers! Tell us about your experience using these tips in the comments below.
- Explore our other articles on baking techniques – we have tons of tips to help you level up your skills!
What delicious creation will you be measuring out first?