
Why Your Whole Wheat Bread is Dense (Common Mistakes Revealed)


Welcome to BakeWithEase, your guide to confident baking! Ever wondered why your whole wheat bread refuses to rise to its full, fluffy potential? You're not alone! This article dives deep into the common pitfalls that lead to dense whole wheat bread problems, revealing the secrets to achieving bakery-worthy loaves at home. Discover these crucial mistakes and unlock the secrets to a perfect, airy loaf. Ready to bake better? Let's get started!
- Troubleshooting Dense Whole Wheat Bread: Common Causes & Solutions
-
Common Baking Errors Resulting in Dense Whole Wheat Bread
- 1. Measurement Inaccuracies: Ensuring Precision
- 2. Insufficient Gluten Development: Achieving Structure
- 3. Inactive or Expired Yeast: Impact on Leavening
- 4. Incorrect Dough Temperature: Influencing Yeast Performance
- 5. Improper Proofing: Striking the Right Balance
- 6. Inaccurate Baking Temperature: Affecting Bread Structure
- 7. Excessive Whole Wheat Flour: Balancing Flavor and Texture
- Troubleshooting Dense Whole Wheat Bread: Practical Solutions
- Achieving Light and Airy Whole Wheat Bread: Key Principles
-
Frequently Asked Questions
- Why is my whole wheat bread turning out so dense?
- What kind of flour is best for avoiding dense whole wheat bread?
- How can I improve the rise of my whole wheat bread dough?
- What role does hydration play in the texture of whole wheat bread?
- Are there any additives that can help lighten the texture of whole wheat bread?
- Final Reflection: Unlocking the Secrets of Light and Fluffy Whole Wheat
- Unlock the Secret to Light & Fluffy Whole Wheat Bread!
Troubleshooting Dense Whole Wheat Bread: Common Causes & Solutions
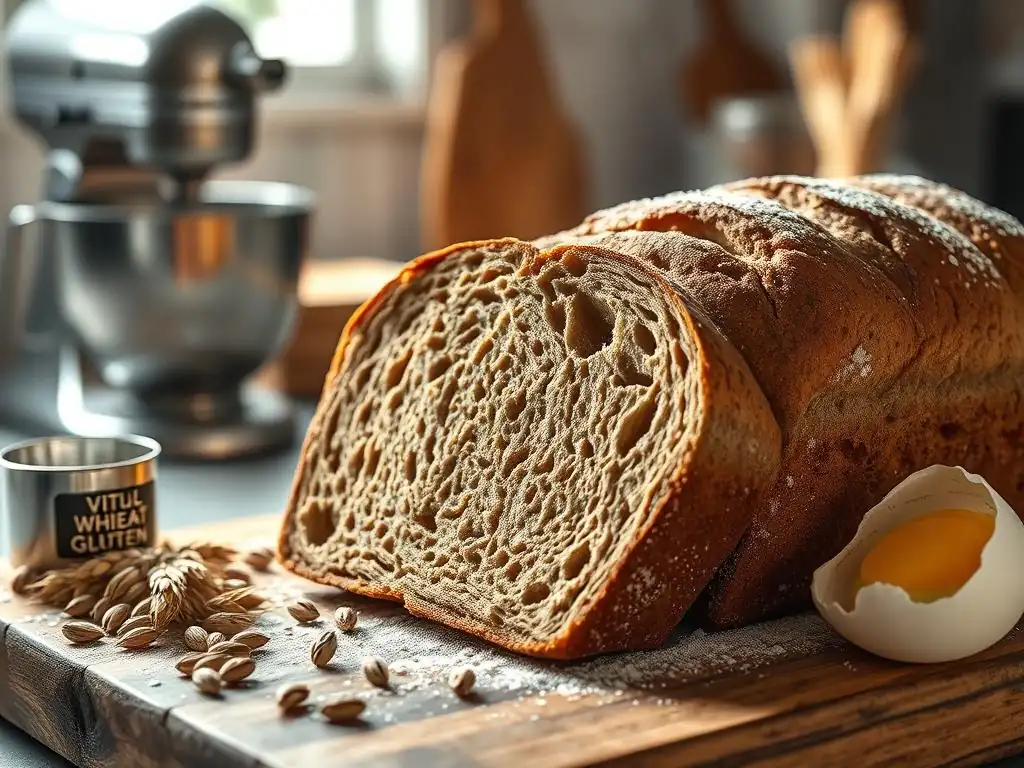
Factors Contributing to Dense Bread
Achieving a light and airy crumb in bread is a baker's goal, but several factors can conspire to create dense whole wheat bread. At its core, bread density is often a result of insufficient gas production or retention within the dough structure. Yeast activity, which produces carbon dioxide gas, is paramount; if the yeast is sluggish or inactive, there won't be enough gas to inflate the dough.
Furthermore, the dough's ability to trap this gas relies heavily on a well-developed gluten network. Think of gluten as the elastic balloon that holds the air inside; if it's weak or underdeveloped, the gas escapes, leading to a heavy, dense loaf.
Beyond yeast and gluten, hydration levels play a significant role. Too little water results in a stiff dough that's difficult for yeast to expand and for gluten to develop properly. Conversely, while high hydration can lead to a more open crumb, it also requires more careful handling and stronger gluten development to prevent collapse. Other factors like dough temperature, proofing time, and even baking temperature can impact how well the bread rises and sets, all contributing to the potential for dense whole wheat bread problems.
Whole Wheat Flour Characteristics: Impact on Texture
Whole wheat flour differs significantly from refined white flour, and these differences directly contribute to why achieving a light texture can be more challenging, often leading to dense whole wheat bread problems. Unlike white flour, which is made solely from the endosperm, whole wheat flour includes the bran and germ of the wheat kernel. The bran, the outer layer, consists of sharp particles that can act like tiny knives, cutting through the developing gluten strands during mixing and kneading. This disruption weakens the gluten network, making it less effective at trapping the carbon dioxide gas produced by the yeast.
The germ, the nutrient-rich embryo, contains fats and enzymes that can also interfere with gluten development and structure over time. Furthermore, both the bran and germ are highly absorbent and soak up more water than the endosperm alone. This means whole wheat dough often requires higher hydration than white dough, sometimes needing 75-85% hydration relative to flour weight compared to 60-70% for white flour. If the hydration isn't adjusted correctly, the dough can be too dry, hindering gluten development and resulting in dense whole wheat bread.
Common Baking Errors Resulting in Dense Whole Wheat Bread
1. Measurement Inaccuracies: Ensuring Precision
Precision in measuring ingredients is fundamental to successful baking, especially when working with whole wheat flour which is prone to dense whole wheat bread problems if hydration and ratios are off. Using volumetric cups for flour is notoriously inaccurate because the amount of flour packed into a cup can vary significantly.
A cup of flour might weigh anywhere from 120 grams if lightly spooned and leveled to 150 grams or more if scooped directly from the bag. This variation of up to 25% in the most crucial ingredient can drastically alter the dough's hydration and the final outcome, leading to inconsistency and often a denser loaf than intended.
Equally important is the accurate measurement of liquids. While less prone to variation than flour, ensuring you have the precise amount of water or milk specified in the recipe is key. Too little liquid will result in a dry, stiff dough that inhibits yeast activity and gluten development, directly contributing to dense whole wheat bread.
Too much liquid can make the dough difficult to handle and potentially lead to a loaf that collapses or has a gummy texture inside if not properly supported or baked. Using clear measuring cups on a level surface and reading at eye level helps ensure accuracy for liquids.
Using a Kitchen Scale for Accurate Flour Measurement
The most reliable way to measure flour for consistent baking results and to avoid common dense whole wheat bread problems related to hydration is to use a kitchen scale and weigh your ingredients in grams or ounces. Recipes written by professionals or serious home bakers often provide weights alongside volume measurements.
Weighing ensures you use the exact amount of flour intended by the recipe developer, regardless of how it's scooped or stored. For instance, if a recipe calls for 400 grams of whole wheat flour, weighing guarantees you have precisely that amount every time, eliminating the variability inherent in cup measurements.
Liquid Measurement Techniques for Consistent Results
Measuring liquids accurately is simpler than measuring flour by volume but still requires attention. Use a clear liquid measuring cup and place it on a flat, level surface. Pour the liquid to the desired mark, bending down to read the measurement at eye level to avoid parallax error.
This ensures you are adding the exact volume of liquid specified in the recipe. For recipes providing liquid measurements by weight (e.g., grams), use your kitchen scale, placing the container on the scale and taring it before adding the liquid. This is the most precise method, particularly for high-hydration doughs where small differences matter significantly in preventing dense whole wheat bread.
2. Insufficient Gluten Development: Achieving Structure
Gluten is the protein network formed when water is added to flour and kneaded. This network is essential for trapping the carbon dioxide gas produced by yeast, allowing the bread to rise and creating its open, airy structure. In whole wheat bread, the presence of bran and germ makes gluten development more challenging compared to white flour.
If the gluten isn't sufficiently developed through mixing and kneading, the dough won't be strong enough to hold the gas, resulting in a loaf that doesn't rise properly and suffers from dense whole wheat bread problems. The dough might feel slack, tear easily, and lack the elasticity needed for a good rise.
Proper gluten development is achieved through mechanical action (kneading or mixing) and time (autolyse or bulk fermentation). For whole wheat dough, finding the right balance is crucial. Over-kneading can damage the weakened gluten structure due to the bran, while under-kneading leaves the gluten undeveloped. Recognizing the signs of proper development – the dough becomes smooth, elastic, and passes the windowpane test (stretching a small piece thin enough to see light through without tearing) – is key to avoiding a dense crumb.
Kneading's Role in Whole Wheat Bread Dough
Kneading is the process of working the dough to align and strengthen the gluten proteins. For whole wheat dough, the process is similar to white dough but may require slight adjustments. The bran can make the dough feel less smooth initially and prone to tearing.
Kneading helps develop the gluten network by stretching and folding the dough, allowing the proteins to link together. Adequate kneading, whether by hand or machine, is vital for building the structure necessary to support the rise and prevent dense whole wheat bread. A typical kneading time might range from 8-15 minutes depending on the method and hydration.
Autolyse Method: Enhancing Gluten Formation
The autolyse technique, introduced by Professor Raymond Calvel, involves mixing just the flour and water from a recipe and letting it rest for 20-60 minutes before adding the salt and yeast. This resting period allows the flour to fully hydrate and gives enzymes naturally present in the flour time to start developing the gluten network without the stress of kneading.
For whole wheat flour, autolyse is particularly beneficial as it helps soften the bran particles, reducing their tendency to cut gluten strands during subsequent mixing. This can lead to a more extensible dough, better gluten development with less effort, and ultimately a lighter texture, helping to mitigate dense whole wheat bread problems.
3. Inactive or Expired Yeast: Impact on Leavening
Yeast is the primary leavening agent in most bread recipes; it consumes sugars in the dough and produces carbon dioxide gas and alcohol. This gas is what causes the dough to rise. If your yeast is inactive or expired, it won't produce enough gas (or any gas at all), leading to a dough that doesn't rise and results in a heavy, dense loaf. Using old yeast is a common culprit behind dense whole wheat bread problems, as even slightly weakened yeast may not have the power needed to lift the heavier whole wheat dough.
Yeast is a living organism, and its viability decreases over time, especially if not stored correctly. Active dry yeast typically has a shelf life of 1-2 years when unopened, but once the package is opened, its lifespan shortens significantly. Instant yeast is often more robust but still benefits from proper storage. Relying on yeast that has lost its potency is a sure way to end up with flat, dense whole wheat bread instead of a beautifully risen loaf.
Verifying Yeast Activity Before Baking
Before committing your ingredients to a batch of dough, it's wise to test your active dry yeast to ensure it's still alive and active. This is often called "proofing" the yeast. To do this, dissolve the required amount of yeast for your recipe (or about 1 teaspoon if just testing) in a small amount of warm water (around 105-115°F or 40-46°C) specified in the recipe, along with a pinch of sugar (yeast's food). Stir gently and let it sit for 5-10 minutes.
If the mixture becomes foamy and bubbly, the yeast is active and ready to use. If nothing happens, your yeast is likely dead or inactive and should be discarded to avoid dense whole wheat bread problems. Instant yeast usually doesn't require proofing but can be tested the same way if you're unsure of its viability.
Proper Storage for Maintaining Yeast Viability
To maximize the shelf life and activity of your yeast, proper storage is essential. Unopened packages of active dry or instant yeast should be stored in a cool, dry place, away from heat and direct sunlight. Once opened, yeast is best stored in an airtight container in the refrigerator or freezer. Storing yeast in the freezer can extend its life considerably, often for several months or even up to a year after opening.
Freezing doesn't kill the yeast; it just makes it dormant. When ready to use, simply take it out of the freezer a few minutes before measuring. Always ensure the container is tightly sealed to prevent moisture and air exposure, which can degrade the yeast and contribute to dense whole wheat bread outcomes.
4. Incorrect Dough Temperature: Influencing Yeast Performance
Yeast activity is highly sensitive to temperature. There's an optimal temperature range where yeast thrives and produces gas efficiently. If the dough temperature is too cold, the yeast becomes sluggish, and the dough will rise very slowly, if at all, leading to dense whole wheat bread problems. Conversely, if the dough temperature is too warm, the yeast can become overly active initially, exhaust itself prematurely, or produce off-flavors. Extremely high temperatures can even kill the yeast.
For most bread yeasts (Saccharomyces cerevisiae), the ideal dough temperature for bulk fermentation and proofing is typically between 75°F and 80°F (24°C and 27°C). Maintaining a consistent temperature throughout the rising process is crucial for predictable results and a well-risen loaf. Factors like the temperature of your ingredients, the ambient room temperature, and even the friction from kneading can affect the dough's temperature.
Optimal Dough Temperature for Whole Wheat Bread
Aiming for a dough temperature within the 75-80°F (24-27°C) range is generally considered optimal for whole wheat bread. This temperature allows yeast to ferment at a steady, predictable rate, producing enough gas to lift the heavier whole wheat dough and contribute to good flavor development during fermentation.
Temperatures below 70°F (21°C) will significantly slow down the rise, requiring much longer proofing times, while temperatures consistently above 85°F (29°C) can accelerate fermentation too much, potentially leading to over-proofing or less complex flavors. Monitoring dough temperature with an instant-read thermometer is a good practice for consistent results and avoiding dense whole wheat bread issues.
Adjusting Liquid Temperature to Achieve Desired Dough Temperature
The temperature of the liquid (usually water or milk) is the most controllable factor influencing the final dough temperature. A common rule of thumb to estimate the required water temperature is the "desired dough temperature" formula. While there are variations, a simple version is: (Desired Dough Temp x 3) - (Flour Temp + Room Temp) = Water Temp.
For example, if your desired dough temperature is 78°F, your flour is 70°F, and your room is 70°F, you'd aim for water around (78 x 3) - (70 + 70) = 234 - 140 = 94°F. This formula is an approximation, but it highlights how adjusting the water temperature is key to hitting your target dough temperature and promoting healthy yeast activity to prevent dense whole wheat bread.
5. Improper Proofing: Striking the Right Balance

Proofing (or proving) is the final rise of the shaped dough before baking. This stage allows the yeast to produce more gas, giving the loaf its final volume and airy texture. However, proofing is a delicate balance: under-proofing and over-proofing can both lead to dense whole wheat bread problems. Under-proofed dough hasn't had enough time for the yeast to produce sufficient gas; it will be dense, heavy, and may crack on the surface during baking as it attempts a final, rapid expansion (oven spring) without adequate structure.
Over-proofed dough, on the other hand, has risen too much. The gluten structure becomes stretched too thin and weak to support the volume. It may even start to collapse. During baking, over-proofed dough has little to no oven spring because the yeast has exhausted its food supply and the structure is compromised, resulting in a flat, dense loaf with a coarse crumb. Identifying the sweet spot for proofing is crucial for a well-risen, light loaf.
Visual Cues for Identifying Properly Proofed Dough
Determining when your whole wheat dough is perfectly proofed requires observation. Visually, the dough should have increased significantly in size, typically doubled or nearly doubled, depending on the recipe and desired outcome. The surface should appear well-inflated and smooth, though whole wheat dough might show more texture due to the bran. A reliable test is the "poke test": gently press a floured finger about half an inch into the dough.
If the indentation springs back slowly and only partially (leaving a small indent), the dough is likely properly proofed. If it springs back immediately, it's under-proofed. If the indentation remains completely, it's over-proofed.
Understanding the Impact of Temperature on Proofing Time
Proofing time is highly dependent on temperature. Warmer temperatures accelerate yeast activity, meaning the dough will rise faster. For example, dough proofing at 75°F (24°C) might double in 1-1.5 hours, while the same dough at 65°F (18°C) could take 2-3 hours or even longer. This is why recipes often provide time ranges and emphasize visual cues or the poke test rather than strict timings.
Understanding this relationship allows you to adjust proofing time based on your environment. If your kitchen is cool, be patient and allow more time; if it's warm, keep a closer eye on the dough to prevent over-proofing and subsequent dense whole wheat bread issues. Using a proofing box or your oven with just the light on can help maintain a consistent temperature.
6. Inaccurate Baking Temperature: Affecting Bread Structure
The temperature of your oven plays a critical role in the final structure and rise of your bread. When dough is placed in a hot oven, it experiences a final burst of rising called "oven spring." This happens because the yeast gets one last surge of activity before dying, and the water in the dough turns to steam, expanding the air cells. If the oven temperature is too low, the crust sets too slowly, and the dough doesn't get sufficient oven spring, leading to a flatter, denser loaf.
Conversely, if the oven is too hot, the crust can set too quickly before the dough has had a chance to fully expand, also restricting the final rise and potentially resulting in dense whole wheat bread inside a thick, hard crust. Using an oven thermometer is highly recommended, as oven thermostats can be inaccurate, sometimes by as much as 50°F (10°C) or more. Preheating your oven adequately is also essential to ensure the temperature is stable when the bread goes in.
Recommended Baking Temperature for Whole Wheat Bread
Whole wheat bread is often baked at temperatures ranging from 375°F to 425°F (190°C to 220°C). Starting at a higher temperature for the first 10-15 minutes (e.g., 425°F) can help maximize oven spring by rapidly setting the crust and promoting steam expansion.
After this initial phase, the temperature is often reduced (e.g., to 375-400°F) to allow the inside of the loaf to cook through without the crust burning. The specific temperature and timing will depend on the loaf size and your oven, but ensuring your oven reaches and maintains the set temperature is key to avoiding dense whole wheat bread problems related to baking.
Using a Baking Stone for Even Heat Distribution
A preheated baking stone or steel is an excellent tool for achieving better results with whole wheat bread, contributing to improved oven spring and even baking. Placing the dough directly on a hot surface provides a strong, consistent heat source from the bottom, which helps the dough rise quickly and evenly during the initial phase of baking.
This bottom heat promotes a better-developed crust and contributes to a lighter crumb structure. For best results, place the stone or steel in the oven before preheating and allow it to heat up for at least 30-60 minutes at the target baking temperature to ensure it's fully saturated with heat.
7. Excessive Whole Wheat Flour: Balancing Flavor and Texture
While the goal might be a loaf packed with whole grain goodness, using 100% whole wheat flour can be challenging and is a common reason for dense whole wheat bread problems, especially for less experienced bakers. The bran and germ content, as discussed earlier, significantly interferes with gluten development, making it harder to achieve a light, open crumb compared to bread made with a portion of white flour.
Many successful whole wheat bread recipes actually use a blend of whole wheat and bread flour (a high-protein white flour) to balance the nutritional benefits and flavor of whole wheat with the superior gluten-forming capabilities of white flour.
Recipes using 50-75% whole wheat flour are common and often produce a loaf that is both flavorful and has a reasonably open texture. Pushing towards 100% whole wheat requires specific techniques, higher hydration, and often the use of vital wheat gluten to compensate for the disruptive effects of the bran and germ. Simply substituting whole wheat flour cup-for-cup in a recipe designed for white flour will almost certainly result in a dense, heavy loaf.
Optimal Whole Wheat Flour Percentage in Bread Recipes
For many home bakers, starting with recipes that use a blend of whole wheat and bread flour is the easiest way to avoid dense whole wheat bread problems while still incorporating whole grains. Using 50-75% whole wheat flour provides significant nutritional benefits and a pronounced whole grain flavor without making gluten development excessively difficult. The bread flour contributes stronger gluten-forming proteins, helping to build a robust structure capable of trapping more gas. As you gain experience, you can gradually increase the percentage of whole wheat flour, adjusting hydration and technique as needed.
100% Whole Wheat Bread Recipe: Flour Ratio and Hydration Levels
Creating a light and airy 100% whole wheat loaf is possible but requires careful attention to hydration and technique. Because the bran and germ absorb more water, 100% whole wheat dough needs significantly higher hydration than white dough, typically ranging from 75% to 85% hydration relative to the flour weight. This means for every 100 grams of whole wheat flour, you might need 75-85 grams (or ml) of water.
Techniques like autolyse (mixing flour and water and resting for 30-60 minutes) are particularly helpful as they give the bran time to soften and absorb water before kneading begins, reducing the disruption to gluten development. Some recipes also benefit from adding vital wheat gluten (e.g., 1-2 tablespoons per cup of whole wheat flour) to boost the protein content and improve the dough's structure and ability to rise, directly addressing dense whole wheat bread tendencies.
Troubleshooting Dense Whole Wheat Bread: Practical Solutions
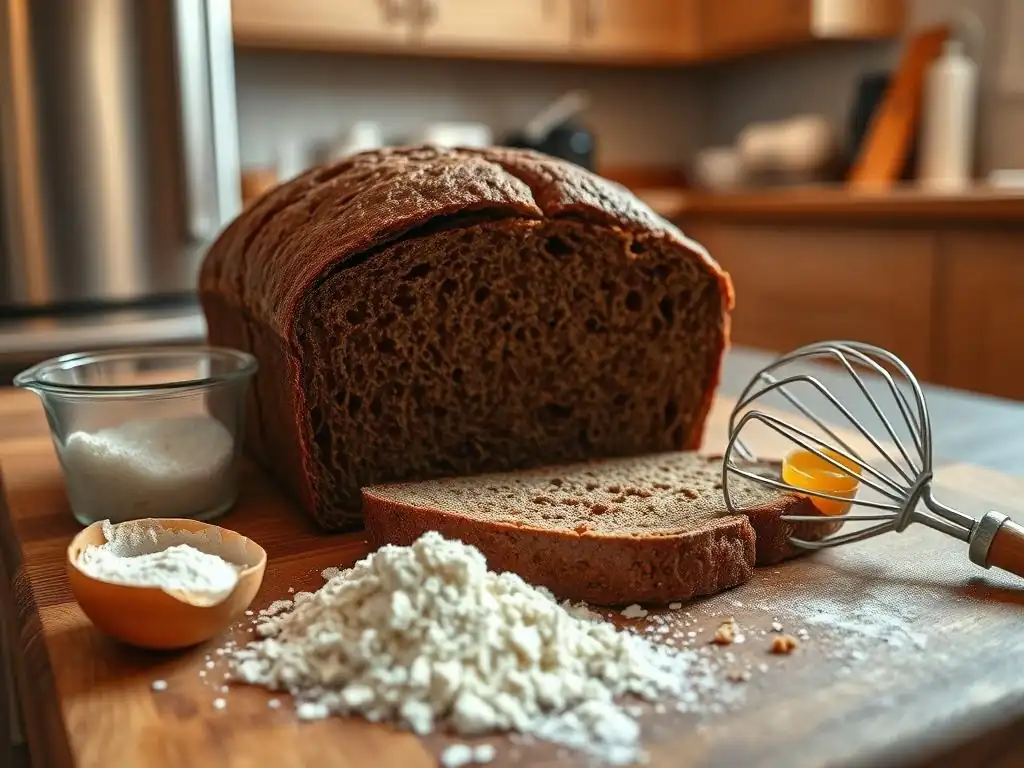
Enhancing Gluten Development in Whole Wheat Dough
To combat dense whole wheat bread issues stemming from weak gluten, focus on techniques that promote strong, elastic gluten formation. Start by weighing your flour for accurate hydration – whole wheat often needs more water, perhaps 75-85% hydration relative to flour weight, compared to 60-70% for white flour. Incorporating an autolyse phase (mixing flour and water and resting for 30-60 minutes) is highly effective; it allows the bran to soften and gluten development to begin with less mechanical effort.
During kneading, aim for a dough that is smooth and elastic. Whole wheat dough might feel less smooth than white dough initially, but it should still become pliable and pass a modified windowpane test (it might tear slightly due to bran, but you should be able to stretch it thin enough to see light). If your recipe uses 100% whole wheat and you consistently get dense results, consider adding vital wheat gluten, typically 1-2 tablespoons per cup of flour, to boost the protein content and strengthen the gluten network.
Optimizing Yeast Activity for Improved Rise
Ensuring your yeast is active and happy is paramount for a good rise and avoiding dense whole wheat bread. Always check the expiration date on your yeast package. If using active dry yeast, proof it in warm water (105-115°F / 40-46°C) with a pinch of sugar for 5-10 minutes to verify it's alive and foamy before adding it to the rest of your ingredients.
Pay close attention to dough temperature throughout mixing and fermentation. Aim for a dough temperature of 75-80°F (24-27°C) for optimal yeast performance. Adjust the temperature of your liquid to achieve this target temperature. During proofing, provide a warm, draft-free environment. Using a proofing box, your oven with the light on, or simply covering the bowl and placing it in a slightly warm spot can help maintain a consistent temperature and ensure the yeast works efficiently to produce the necessary gas for a light loaf.
Adjusting Recipe for High Altitude Baking
Baking at high altitudes presents unique challenges that can contribute to dense whole wheat bread problems. Lower atmospheric pressure means dough rises faster and can over-proof easily. The air is also drier, which can affect dough hydration. To compensate:
- Reduce Yeast: Use slightly less yeast (e.g., reduce by 1/4 teaspoon per cup of flour) to slow down the rapid rise.
- Reduce Sugar: Sugar feeds the yeast; slightly reducing it can also slow fermentation.
- Increase Liquid: Add a little more liquid (e.g., 1-2 tablespoons per cup of flour) to account for drier air and faster evaporation.
- Shorter Proofing Time: Watch the dough closely and expect proofing to take less time. Rely on the poke test rather than the clock.
- Higher Baking Temperature: Some bakers increase oven temperature by 15-25°F (8-14°C) to set the structure more quickly before the gas expands too much.
These adjustments help balance the effects of altitude on yeast activity and moisture loss, improving your chances of baking a well-risen whole wheat loaf instead of struggling with dense whole wheat bread problems.
Achieving Light and Airy Whole Wheat Bread: Key Principles
Essential Takeaways for Baking Success
Overcoming dense whole wheat bread problems hinges on understanding the unique properties of whole wheat flour and applying careful technique. The most critical principles include precise measurement, ideally by weight, to control hydration accurately. Developing sufficient gluten strength, which might involve techniques like autolyse or adding vital wheat gluten, is paramount for the dough's ability to trap gas. Ensuring your yeast is active and maintaining optimal dough temperature throughout fermentation are non-negotiable for a powerful rise.
Furthermore, mastering the art of proofing – knowing how to identify properly proofed dough using visual cues and the poke test – is vital to avoid both under- and over-rising. Finally, baking at the correct, consistent oven temperature ensures good oven spring and allows the structure to set correctly. Addressing these core areas systematically will significantly improve your success rate in baking light and airy whole wheat bread.
Baker's Tips for Consistently Perfect Whole Wheat Bread
Here are some practical tips to help you consistently bake whole wheat bread that is light and delicious, minimizing dense whole wheat bread problems:
- [x] Weigh your ingredients: Always use a scale for flour and ideally for liquids too. This is the single best way to ensure consistent hydration.
- [x] Consider an autolyse: Mix just flour and water, rest for 30-60 minutes before adding other ingredients. This helps hydrate bran and starts gluten development gently.
- [x] Don't under-knead: Develop the gluten until the dough is reasonably smooth and elastic, even if it's not as smooth as white dough due to the bran.
- [x] Check your yeast: Always proof active dry yeast or test instant yeast if unsure of its freshness.
- [x] Monitor dough temperature: Use a thermometer and aim for 75-80°F (24-27°C) during fermentation. Adjust water temperature accordingly.
- [x] Learn the poke test: Practice identifying properly proofed dough to avoid under- or over-proofing.
- [x] Preheat your oven fully: Use an oven thermometer to confirm the temperature is accurate and stable before baking.
- [x] Use a baking stone/steel: This provides consistent bottom heat for better oven spring.
- [x] Start with a blend: If new to whole wheat, use recipes with 50-75% whole wheat and white bread flour for easier success.
- [x] Be patient: Whole wheat dough can sometimes be slower or require slightly different handling than white dough. Observe the dough, not just the clock.
By implementing these tips and understanding the common causes of dense whole wheat bread problems, you'll be well on your way to baking consistently wonderful loaves.
Frequently Asked Questions
Why is my whole wheat bread turning out so dense?
Dense whole wheat bread is often due to insufficient gluten development. Other common causes include not using enough liquid or yeast.
What kind of flour is best for avoiding dense whole wheat bread?
While 100% whole wheat can be challenging, using a combination of whole wheat and bread flour can improve texture. Look for high-protein whole wheat flour too.
How can I improve the rise of my whole wheat bread dough?
Proper kneading to develop gluten strength is crucial. Ensure your yeast is active and that you provide a warm environment for proofing the dough.
What role does hydration play in the texture of whole wheat bread?
Whole wheat flour absorbs more liquid than white flour. Insufficient hydration leads to a dry, dense crumb. Adjust the recipe to achieve a tacky dough.
Are there any additives that can help lighten the texture of whole wheat bread?
Adding a small amount of vital wheat gluten can improve elasticity and rise. Some bakers also use dough enhancers or acidic ingredients like lemon juice or vinegar.
Final Reflection: Unlocking the Secrets of Light and Fluffy Whole Wheat
The quest for perfectly textured whole wheat bread is a journey many home bakers undertake, often encountering frustratingly dense results. This journey, however, is far from fruitless; understanding the science behind a good loaf unlocks a world of culinary possibilities and empowers us to create truly satisfying bread. The common mistakes outlined in this article – from improper hydration to rushed fermentation – are not insurmountable obstacles, but rather valuable lessons in the art of baking.
The impact of readily available, mass-produced bread on our palates and expectations is undeniable. We've become accustomed to a certain lightness and softness, often forgetting the inherent density of whole wheat flour. The best bread is the bread you bake yourself,
a sentiment often repeated, speaks to the deeper connection we forge with food when we understand its creation. This understanding extends beyond mere technique; it fosters appreciation for the ingredients, the process, and the satisfaction of a perfectly risen loaf. It's a journey of discovery, one that continues to evolve with each bake.
Now, armed with this knowledge, I invite you to experiment. Don't be discouraged by a less-than-perfect loaf; embrace the learning process. Try adjusting hydration levels, experimenting with different yeast strains, and paying close attention to fermentation times. Each attempt, each observation, brings you closer to mastering the art of crafting light and fluffy whole wheat bread. The reward? Not just a delicious loaf, but a deeper connection to the craft and the satisfaction of creating something truly special with your own hands.
Unlock the Secret to Light & Fluffy Whole Wheat Bread!
Thanks for taking the time to explore the world of whole wheat baking with us! We hope you gained valuable insights into avoiding those common density pitfalls. Now it's time to put your newfound knowledge into action.
- Bake your perfect loaf: Try our recipe for light and airy whole wheat bread, designed to avoid the common mistakes we discussed! We've included tips and tricks for achieving that perfect texture. It’s time to experience the joy of fluffy whole wheat!
- Share your baking triumphs (or challenges!): Join our vibrant online community and share your baking experiences – both successes and setbacks! We’d love to see your results and hear your stories.
- Experiment with different flours: Don't be afraid to try other whole grains and explore unique flour blends. What exciting flavour combinations will you create?
Ready to transform your whole wheat baking? What's your next baking adventure?