
Master SliceandBake Cookies: Simple Steps for Perfect Results

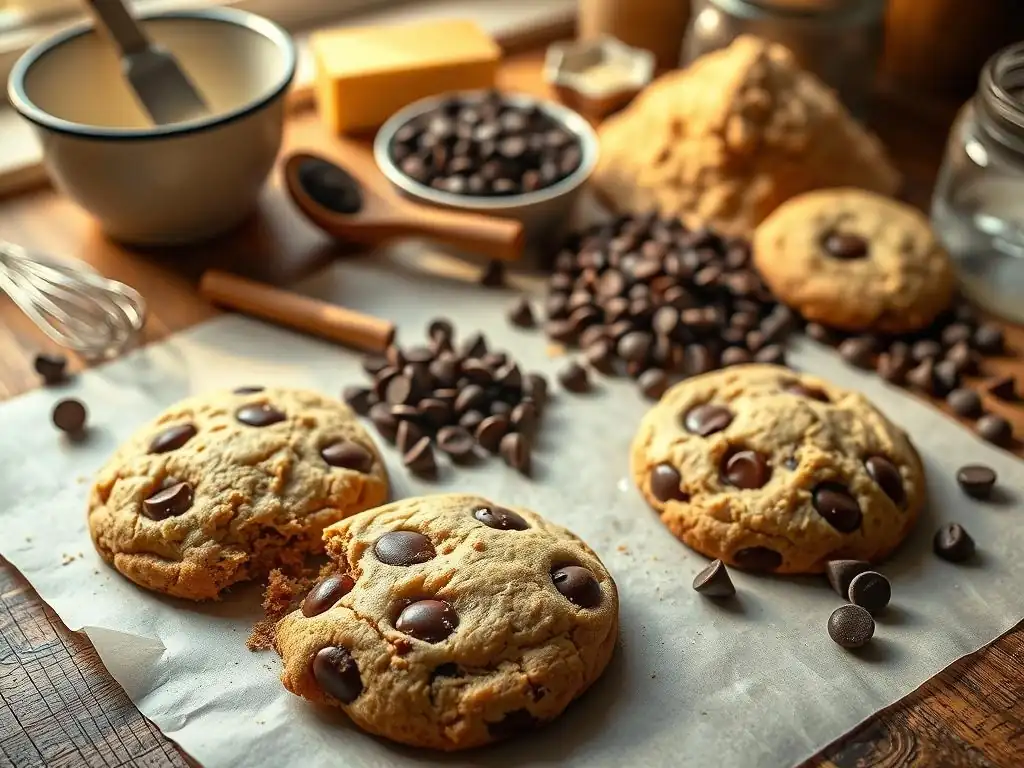
Welcome to BakeWithEase, your guide to unlocking baking brilliance!
Ever dreamt of pulling perfectly golden, melt-in-your-mouth cookies from the oven? Then you're in the right place. Discover the secrets to baking success, starting with our foolproof guide to the perfect chocolate chip cookies recipe. Intrigued? Let's dive in and transform your kitchen into a haven of delicious aromas and satisfying treats! Prepare to be amazed at how easy achieving baking perfection can be.
- Perfect Peanut Butter Slice and Bake Cookies: Simple Steps for Delicious Results
- Introduction to Slice and Bake Cookies: Your Path to Easy Baking at BakeWithEase.com
- Why Choose Slice and Bake for Perfect Peanut Butter Cookies?
- Essential Ingredients for Your Slice and Bake Peanut Butter Cookies
- Step-by-Step Guide to Making the Best Slice and Bake Peanut Butter Cookies
- Tips and Tricks for Slice and Bake Cookie Perfection
-
Troubleshooting Common Slice and Bake Cookie Problems
- Dough Too Dry: Add a tablespoon of milk or water at a time until dough comes together.
- Dough Too Sticky: Add a tablespoon of flour at a time until dough is manageable.
- Cookies Spreading Too Thin: Ensure dough is properly chilled and oven temperature is accurate.
- Uneven Baking: Ensure oven is preheated properly and baking sheet is placed in the center rack.
- Serving and Enjoying Your Homemade Slice and Bake Peanut Butter Cookies
- Conclusion: Mastering the Art of Slice and Bake with BakeWithEase.com
-
Frequently Asked Questions
- What makes the BakeWithEase chocolate chip cookie recipe "perfect"?
- Is this a good BakeWithEase recipe for beginner bakers?
- Can I customize the BakeWithEase chocolate chip cookie recipe?
- Why does the BakeWithEase recipe emphasize chilling the dough?
- What kind of chocolate chips are recommended for this BakeWithEase recipe?
- Final Reflection: The Enduring Allure of the Perfect Chocolate Chip Cookie
- Unleash Your Inner Baker: Perfect Slice-and-Bake Cookies Await!
Baking cookies from scratch often feels like a daunting task, especially for beginners. The traditional process can involve multiple steps, significant cleanup, and the need for precise timing and technique. This is where the slice and bake method shines, offering a remarkably simple and accessible entry point into the world of homemade treats. It fundamentally streamlines the baking workflow, transforming a potentially complex undertaking into a straightforward, manageable process perfect for busy schedules or those new to the kitchen.
The beauty of slice and bake lies in its preparation-ahead capability. You make the dough, shape it, chill it, and then simply slice off portions and bake as needed. This eliminates the rush of baking an entire batch at once, allowing for fresh cookies whenever the craving strikes, whether it's just a few for an afternoon snack or a whole tray for an unexpected guest. It significantly reduces mess by consolidating the dough-making process into one session, leaving you with minimal cleanup when it's time to bake.
At BakeWithEase.com, our mission is to demystify baking and make it enjoyable for everyone, regardless of experience level. We believe that achieving perfect cookies shouldn't require expert skills or hours of labor. Our approach focuses on clear instructions, simple techniques, and reliable recipes that deliver consistent, delicious results every time. The slice and bake method perfectly embodies this philosophy, making it a cornerstone of our beginner-friendly content.
This guide specifically tackles perfect peanut butter cookies using the slice and bake technique. We break down each step, from selecting ingredients to troubleshooting common issues, ensuring that you feel confident and capable throughout the process. Our aim is to empower you to create bakery-quality cookies right in your own kitchen, proving that even complex-sounding treats like perfect cookies can be easily mastered with the right guidance and a simple method like slice and bake.
The Simplicity and Speed of Slice and Bake Method
The slice and bake method is unparalleled in its simplicity and speed when it comes to producing freshly baked cookies on demand. Once the initial dough preparation is complete – a process that typically takes less than 20 minutes of active work – the rest is merely slicing and baking. Compare this to traditional drop cookies, which require scooping each individual portion, or rolled cookies, which demand chilling, rolling, and cutting. The slice and bake approach eliminates these labor-intensive steps during the baking phase.
Imagine needing warm cookies in just 15 minutes. With slice and bake dough ready in your refrigerator, this is entirely possible. You simply preheat your oven, slice the desired number of cookies from the log, and place them on a baking sheet. There's no waiting for butter to soften mid-session, no flour dust from rolling, just quick, efficient baking. This makes it an ideal method for impromptu treats, busy weeknights, or when you only want a small batch without committing to baking dozens at once.
Achieving Consistent Results with Slice and Bake Recipes
Consistency is often a challenge in baking, particularly for beginners. Achieving uniform size, shape, and texture across an entire batch can be tricky with methods like dropping dough by spoonfuls, which can lead to variations. The slice and bake method inherently promotes consistency. By shaping the dough into a uniform log and then slicing it into equally thick discs, you ensure that each cookie starts with the same amount of dough and a similar shape.
This uniformity in size and thickness is crucial for even baking. Cookies that are all the same size will bake at the same rate, preventing some from being overdone while others are undercooked. This leads to a batch of perfect cookies, each with the desired texture and doneness. Furthermore, the chilling step firming the dough also contributes to less spreading during baking, helping the cookies maintain their shape and thickness for that classic, consistent look and feel.
Creating a perfect peanut butter cookies recipe doesn't have to be complicated. The slice and bake method naturally simplifies the process, making it highly accessible for those new to baking. Unlike recipes that might require creaming butter and sugar for specific durations or mastering complex shaping techniques, this method focuses on straightforward dough mixing and simple log formation.
The inherent structure of a slice and bake recipe means that many of the variables that can trip up beginners are minimized. The chilling step allows flavors to meld and makes the dough easy to handle. The slicing provides portion control. The controlled baking time based on uniform slices ensures success. It's a method designed for reliability, making that dream of baking perfect cookies a realistic and enjoyable goal for anyone starting their baking journey.
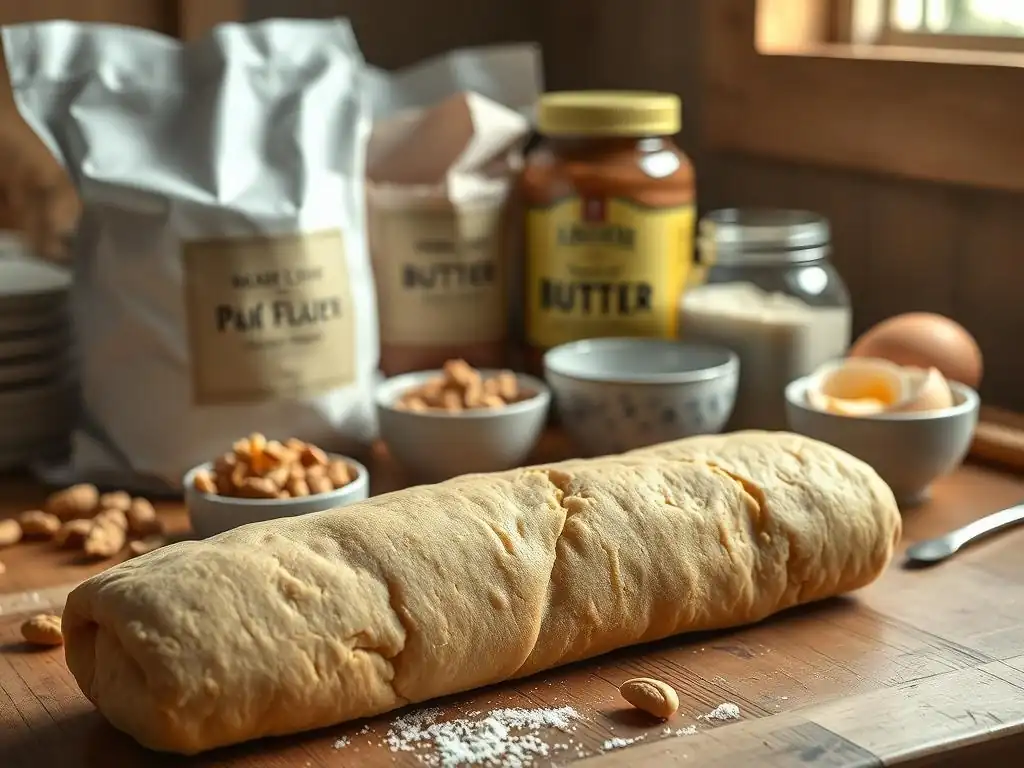
The star ingredient in perfect peanut butter cookies is, naturally, the peanut butter itself. For consistent results in baking, especially with slice and bake, it's generally recommended to use commercial, no-stir creamy peanut butter. These varieties, like Jif or Skippy, contain stabilizers that prevent oil separation and provide a uniform texture throughout the jar. This consistency translates directly into more predictable dough behavior and cookie texture.
While natural peanut butter (the kind that separates) can be used, it often requires thorough stirring to reincorporate the oil, and even then, the fat content can vary slightly from batch to batch or even within the same jar. This variability can affect how the cookies spread and their final texture. Using a creamy, stabilized peanut butter ensures you start with a consistent base, which is fundamental for achieving that desired tender, chewy, yet slightly crisp perfect cookies texture.
Flour Power: Choosing the Right Flour for Slice and Bake
All-purpose flour is the standard choice for most cookie recipes, including slice and bake peanut butter cookies, and for good reason. Its moderate protein content (typically 10-12%) provides enough structure to hold the cookies together without making them tough. Using bleached or unbleached all-purpose flour will work well; the difference is primarily in how they are processed.
When measuring flour, accuracy is key. Too much flour is a common mistake that can lead to dry, crumbly cookies. The best method is the "spoon and level" technique: gently spoon the flour into your measuring cup until it overflows, then level off the excess with a straight edge like a knife. Avoid scooping directly from the bag with your measuring cup, as this compacts the flour and results in using too much. For a standard batch yielding about 24 cookies, you might use around 1 ½ to 2 cups of all-purpose flour, depending on the specific recipe ratio.
Butter and Sugar: Achieving the Perfect Texture and Sweetness
Butter plays a critical role in cookie texture, contributing to richness, spread, and tenderness. For most cookie recipes, including slice and bake, unsalted butter is preferred because it gives you control over the saltiness. Ensure your butter is softened but not melted – it should yield slightly when pressed but still hold its shape. Softened butter creams better with sugar, creating air pockets that contribute to the cookie's structure and lightness.
The combination of granulated sugar and brown sugar is often used in peanut butter cookies to achieve a balance of texture and moisture. Granulated sugar helps with spread and crispness, while brown sugar (which contains molasses) adds moisture, chewiness, and a deeper flavor. A typical ratio might involve equal parts granulated and brown sugar, or slightly more brown sugar for a chewier cookie. The amount used, often around 1 cup total for a batch, directly impacts the sweetness and how the cookies spread.
Other Key Ingredients: Eggs, Vanilla, and Salt
Eggs act as a binder in cookie dough, helping to hold the ingredients together and contributing to the structure and richness. A large egg is standard in most recipes. It also adds moisture and helps the cookies brown nicely in the oven. Ensure your egg is at room temperature if possible, as it will incorporate more evenly into the dough.
Vanilla extract enhances the overall flavor profile, adding warmth and complexity that complements the peanut butter. Pure vanilla extract offers the best flavor, but imitation vanilla is also acceptable. Just a teaspoon or two can make a significant difference.
Salt is crucial for balancing the sweetness and enhancing the flavors of the other ingredients, particularly the peanut butter. A half teaspoon to a full teaspoon of salt is typical for a batch, but adjust slightly depending on whether you used salted or unsalted peanut butter and your personal preference. These seemingly minor ingredients are essential for developing truly perfect cookies.
Creating the dough is the first critical step in your journey to perfect peanut butter cookies. Begin by creaming together the softened butter, creamy peanut butter, and sugars (both granulated and brown) in a large bowl using an electric mixer or a sturdy whisk. Beat these ingredients together until the mixture is light and fluffy, which usually takes about 2-3 minutes. This process incorporates air into the dough, contributing to the cookie's texture.
Next, beat in the egg and vanilla extract until just combined. In a separate medium bowl, whisk together your dry ingredients: the all-purpose flour, salt, and any leavening agents like baking soda or baking powder specified in your recipe. Gradually add the dry ingredients to the wet ingredients, mixing on low speed until just combined. The dough will be thick and might look a bit crumbly at this stage, but it should hold together when pressed.
Combining Wet and Dry Ingredients for Optimal Texture
The process of combining wet and dry ingredients is where the dough truly forms. Adding the dry mix gradually to the wet ensures that the flour is evenly dispersed without overworking the gluten. Start by adding about half of the dry ingredients, mixing briefly until no dry streaks remain, then add the rest and mix until the flour is almost fully incorporated.
The goal is to mix until the dough just comes together. It should be moist enough to clump but not overly wet or sticky. If it seems too dry, ensure all ingredients were measured accurately. Sometimes, especially in dry climates, adding a tiny splash of milk (a teaspoon at a time) can help bring the dough together, but be cautious not to add too much liquid, as this will change the texture.
Avoiding Overmixing: A Crucial Tip for Tender Cookies
Overmixing cookie dough is a common pitfall that can result in tough, dense cookies rather than the desired tender, perfect cookies. Once the flour is added, gluten begins to develop. The more you mix, the more gluten develops, leading to a tougher texture. For tender cookies, stop mixing as soon as you no longer see streaks of dry flour.
It's perfectly acceptable for the dough to still look a little shaggy or crumbly in the bowl. You will bring it fully together when you shape the log. Using a low speed on your mixer or mixing by hand with a wooden spoon or spatula can help prevent overmixing. Err on the side of slightly undermixed in the bowl, as it will finish combining when you form the log.
Step 2: Shaping the Dough into a Log – Preparing for Slicing
Once the dough is mixed, it's time to shape it into a log. This is the defining step of the slice and bake method. Turn the dough out onto a piece of plastic wrap or parchment paper. Gather the dough together and gently press it into a rough log shape. Don't knead the dough; just consolidate it.
Using the plastic wrap or parchment paper, begin to shape the dough into a uniform cylinder. Aim for a log that is evenly thick from end to end, typically 1 ½ to 2 inches in diameter. Roll the dough back and forth, using the wrap to help compress and smooth the log. Try to eliminate any large air pockets within the log. A consistent diameter ensures that all your slices will be the same size, leading to even baking and a batch of perfect cookies.
Techniques for Forming a Uniform Cookie Dough Log
Achieving a perfectly uniform log requires a bit of technique, but it's not difficult. Start by forming the dough into a rough rectangle shape on the plastic wrap. Then, starting from one long edge, roll the dough tightly into a log, using the plastic wrap to help you. As you roll, gently press inwards from the ends to keep the log compact and prevent it from spreading too wide.
If you find the log isn't perfectly round, you can gently shape it with your hands or by rolling it back and forth on a flat surface while still wrapped in plastic. For a very uniform log, you can even use a ruler or the edge of a counter to help shape it into a straight cylinder. The goal is a log that is dense, smooth, and consistent in diameter along its entire length, ready for slicing into perfect cookies.
Wrapping and Chilling the Dough: The Importance of Cold Dough
Properly wrapping and chilling the dough log is absolutely essential for successful slice and bake cookies. Once shaped, wrap the log tightly in plastic wrap, ensuring there are no gaps where air can reach the dough. You can even double-wrap it for extra protection against drying out or absorbing refrigerator odors.
Place the wrapped dough log in the refrigerator for at least 2 hours, or until it is very firm. Chilling the dough serves multiple purposes: it solidifies the fats (butter and peanut butter), which helps the cookies hold their shape and prevents excessive spreading during baking. It also allows the flavors to meld and the gluten to relax, resulting in a more tender cookie. Chilled dough is also much easier to slice cleanly, ensuring uniform cookies. For best results and truly perfect cookies, chilling for 24 hours is even better, allowing flavors to deepen.
Once your dough log is thoroughly chilled and firm, it's ready to be transformed into individual cookies. Unwrap the log and place it on a cutting board. Use a sharp knife to slice the dough into discs of uniform thickness. Aim for slices about ¼ to ½ inch thick. Consistency in thickness is key to ensuring all cookies bake at the same rate.
Place the sliced dough rounds onto a baking sheet lined with parchment paper or a silicone baking mat. Leave about 2 inches of space between cookies to allow for slight spreading. You can bake them immediately from chilled. Preheat your oven to the correct temperature specified in your recipe, typically around 350°F (175°C).
Achieving Even Slices for Consistent Baking
Achieving even slices is crucial for batch consistency. A sharp knife is your best tool here; a dull knife can squash the dough and distort the cookie shape. Make clean, decisive cuts straight down through the log. Avoid sawing back and forth.
If you are having trouble getting perfectly even slices, you can lightly mark the log at intervals (e.g., every half inch) before cutting. Some bakers find it helpful to slightly twist the log as they slice to prevent sticking. If the dough is very cold, let it sit at room temperature for just 5 minutes before slicing to make it slightly easier to cut without crumbling, but don't let it get too soft.
Baking Time and Temperature: The Secrets to Golden Brown Cookies
Baking time and temperature are variables that significantly impact the final texture and appearance of your perfect cookies. Most slice and bake peanut butter cookies bake at 350°F (175°C). This moderate temperature allows the cookies to bake through and become golden brown without burning the edges.
The baking time will vary depending on the thickness of your slices and your oven, but it typically ranges from 8 to 12 minutes. For cookies sliced about ½ inch thick, it might be closer to 10-12 minutes. Thinner slices will bake faster, potentially in 8-10 minutes. Pay close attention during the last few minutes of baking.
Monitoring Doneness: When Are Your Cookies Ready?
Knowing when your slice and bake peanut butter cookies are perfectly done is a matter of observation. Look for the edges of the cookies to be lightly golden brown. The centers should still look slightly soft or puffy but not wet or raw. They will firm up as they cool.
If you prefer a softer, chewier cookie, take them out when the edges are just barely set and the centers look slightly underbaked. For a crispier cookie, bake until the golden brown color extends further towards the center. Once removed from the oven, let the cookies cool on the baking sheet for 5-10 minutes before transferring them to a wire rack to cool completely. This allows them to finish setting without breaking apart.

- Ensuring Even Baking: Rotate baking sheet halfway through baking time. Ovens often have hot spots. By rotating your baking sheet 180 degrees about halfway through the recommended baking time (e.g., after 5 minutes if baking for 10), you expose all cookies to the same amount of heat, promoting uniform browning and texture across the entire batch. This simple step helps guarantee that every cookie is a perfect cookie.
- Preventing Spreading: Chill dough for at least 2 hours before slicing. Adequate chilling is the single most important factor in preventing excessive cookie spread. The colder and firmer the dough, the less the fat will melt rapidly in the oven, allowing the cookie to set before it spreads too much. For minimal spread and thicker cookies, chill for 24 hours or even freeze the log briefly before slicing.
- Adding Variations: Add chopped peanuts, chocolate chips, or a sprinkle of sea salt. While classic peanut butter slice and bake cookies are delicious on their own, you can easily customize them. Before shaping the log, fold in about ½ cup of chopped peanuts for added crunch, ½ cup of mini chocolate chips for a sweet twist, or roll the finished log in coarse sugar or finely chopped peanuts before chilling. A sprinkle of flaky sea salt on top just before baking enhances the peanut flavor beautifully.
- Storage Solutions: Keep dough wrapped tightly in the refrigerator for up to 5 days or freeze for up to 2 months. The make-ahead nature of slice and bake is a major benefit. Store the wrapped log in the fridge for quick access throughout the week. For longer storage, place the tightly wrapped log (perhaps wrapped again in foil or in a freezer bag) in the freezer. When ready to bake from frozen, you can often slice the log while still frozen and bake immediately, though they might require an extra minute or two in the oven.
Dough Too Dry: Add a tablespoon of milk or water at a time until dough comes together.
If your dough seems excessively dry and crumbly after mixing, struggling to even form a log, it's likely due to too much flour or too little liquid/fat. This can happen if flour was compacted when measured or if ingredients weren't at the right temperature. To remedy this, add a very small amount of liquid – a tablespoon of milk or water – and mix it in. Assess the dough's consistency; if it still doesn't hold together when squeezed, add another tablespoon. Be cautious, as too much liquid will make the dough sticky and affect the final texture.
Often, simply working the dough together with your hands during the log-shaping phase is enough to bring a slightly dry dough together, as the warmth of your hands helps soften the butter and peanut butter. If the dough is only slightly dry, skip adding liquid and just focus on compressing it firmly into a log.
Dough Too Sticky: Add a tablespoon of flour at a time until dough is manageable.
Conversely, if your dough is too soft, sticky, and difficult to shape into a firm log, it might be due to too little flour, too much liquid/fat, or ingredients that were too warm. This is particularly common if butter or peanut butter were melted instead of just softened, or if the measurements were off. To correct sticky dough, gradually add a tablespoon of all-purpose flour at a time, mixing until it's just incorporated.
Continue adding flour, one tablespoon at a time, until the dough is firm enough to be shaped into a log without sticking excessively to your hands or the work surface. Don't add too much flour at once, as this can quickly make the dough dry and tough. Once the dough is manageable, proceed with shaping and chilling as usual. The chilling step is even more crucial for slightly sticky doughs to firm them up properly.
Cookies spreading too much during baking is a common issue, often resulting in flat, crispy discs instead of thick, perfect cookies. The primary culprit is usually insufficient chilling of the dough log. If the dough isn't cold and firm when it enters the oven, the fat melts too quickly, causing the cookies to spread rapidly before the structure sets. Ensure your dough log has been chilled for at least the minimum recommended time, preferably longer, until it is very firm throughout.
Another significant factor is oven temperature. If your oven isn't preheated properly or runs cooler than indicated, the cookies will take longer to set, giving them more time to spread. Conversely, if the oven is too hot, the outside might set too quickly while the inside remains soft, leading to uneven results. Using an oven thermometer is highly recommended to verify your oven's accuracy. Also, ensure your baking sheet isn't hot from a previous batch, as placing cold dough on a warm sheet will cause immediate spreading.
Uneven Baking: Ensure oven is preheated properly and baking sheet is placed in the center rack.
Uneven baking, where some cookies are perfectly golden while others are pale or burnt, can be frustrating. This is frequently caused by an oven that isn't fully preheated or has significant hot spots. Always allow your oven ample time to preheat to the specified temperature, usually 15-20 minutes after it indicates it's ready. An oven thermometer can confirm the temperature is stable and accurate.
The position of your baking sheet in the oven also matters. For most cookies, the center rack provides the most even heat distribution. Avoid placing sheets too close to the top or bottom heating elements. If you are baking multiple sheets at once, rotate their positions (top to bottom, front to back) halfway through the baking time to ensure all cookies bake evenly. Using light-colored, heavy-gauge baking sheets also promotes more even heat transfer compared to dark or thin sheets.
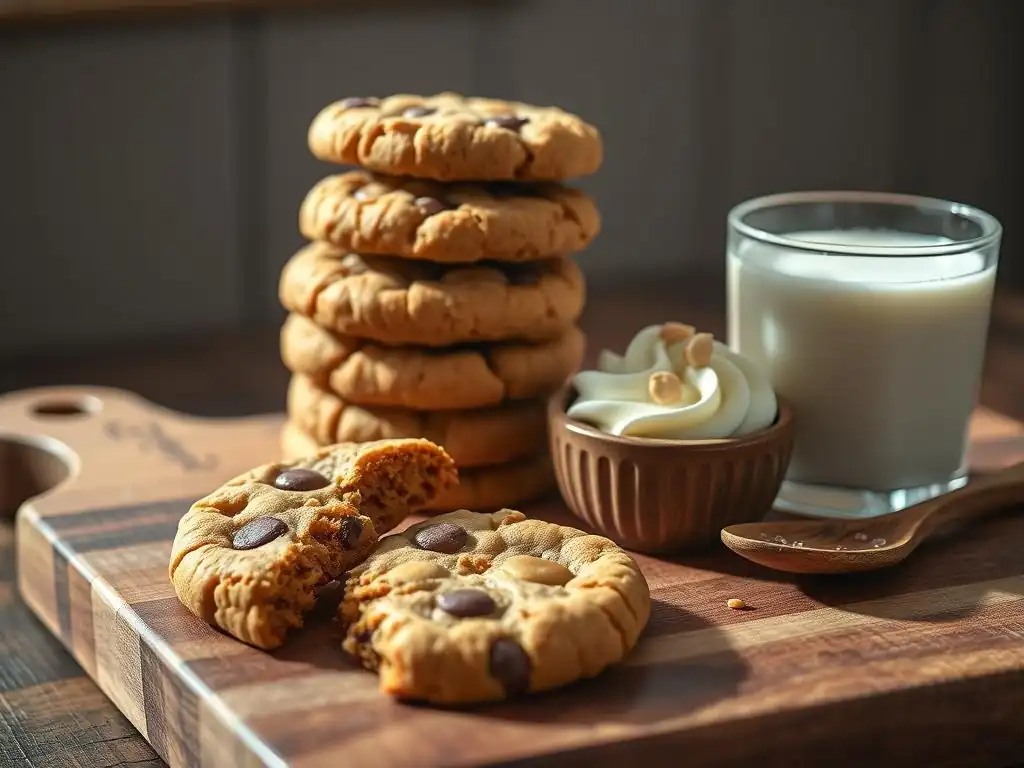
Pairing Suggestions: Serve with a glass of cold milk or a scoop of vanilla ice cream.
Perfect peanut butter cookies, especially warm from the oven, are a simple pleasure that pairs beautifully with classic accompaniments. A tall, cold glass of milk is perhaps the most iconic pairing. The creaminess of the milk complements the rich, slightly salty flavor of the peanut butter cookie perfectly and provides a refreshing contrast to the sweetness.
For a more indulgent treat, serve your warm cookies with a scoop of vanilla ice cream. The combination of warm cookie and cold, melting ice cream is heavenly. You can even make ice cream sandwiches by pressing softened ice cream between two cookies. Other delightful pairings include hot coffee or tea, or even dipping them in melted chocolate for an extra layer of decadence.
Even simple slice and bake cookies can be presented beautifully. For a special occasion or gathering, arrange the cookies on a tiered dessert stand. This elevates their appearance and makes them look like they came from a professional bakery. Using different sized cookies (by varying slicing thickness slightly) can add visual interest.
For gifting or sharing, package the cooled cookies in a decorative tin or box lined with parchment paper. Stacking them neatly or arranging them in a single layer makes for an appealing presentation. A simple ribbon or tag can add a personal touch. Even just arranging them neatly on a nice plate for your family makes enjoying your perfect cookies a little more special.
Conclusion: Mastering the Art of Slice and Bake with BakeWithEase.com
Congratulations! By following these simple steps, you've successfully mastered the art of making perfect peanut butter slice and bake cookies. You've transformed basic ingredients into delicious, consistent treats using a remarkably easy method. This achievement is a testament to the fact that stress-free baking is not only possible but incredibly rewarding. Each uniform, golden-brown cookie is proof of your newfound skill and patience.
Take a moment to appreciate your accomplishment. Whether you baked a full batch or just a few slices, you created something wonderful from scratch. This experience with the slice and bake method has hopefully shown you that baking perfect cookies doesn't require complex techniques or hours in the kitchen. It's about understanding the fundamentals and using smart methods that fit your lifestyle.
Further Baking Adventures with BakeWithEase.com
Your journey into easy, perfect cookies doesn't have to end here. The slice and bake method is incredibly versatile and can be adapted for many other cookie types. Imagine applying these simple steps to create perfect chocolate chip cookies recipe variations, shortbread, or even festive holiday cookies.
BakeWithEase.com is filled with more simple recipes, helpful tips, and easy-to-follow guides designed to help you explore various baking techniques and expand your repertoire. We encourage you to try other slice and bake recipes or venture into other beginner-friendly categories on our site. Keep baking, keep experimenting, and most importantly, keep enjoying the process and the delicious results.
Frequently Asked Questions
Our perfect chocolate chip cookies recipe focuses on simple steps and readily available ingredients to ensure consistently delicious results. We emphasize proper techniques, like chilling the dough, for optimal texture and flavor.
Is this a good BakeWithEase recipe for beginner bakers?
Yes! This recipe is designed with beginners in mind. It features a clear, step-by-step guide and uses simple instructions to help anyone create delicious chocolate chip cookies with ease.
Absolutely! While the recipe is great as-is, you can easily customize it. Consider adding different types of chocolate chips, nuts, or even a sprinkle of sea salt for a unique flavor profile.
Why does the BakeWithEase recipe emphasize chilling the dough?
Chilling the dough is crucial because it allows the flavors to meld together and prevents the cookies from spreading too thin while baking. This results in a chewier, more flavorful cookie with a perfect texture.
What kind of chocolate chips are recommended for this BakeWithEase recipe?
The recipe is flexible! You can use semi-sweet, milk chocolate, or even dark chocolate chips depending on your preference. Experiment to find your favorite chocolate chip flavor for the perfect cookie.
The pursuit of the perfect chocolate chip cookie is more than just a culinary quest; it's a reflection of our desire for simple pleasures and comforting traditions. This article explored the seemingly straightforward process of creating these beloved treats, highlighting the often-overlooked nuances that elevate a good cookie to a truly exceptional one. From the precise chilling of the dough to the careful attention paid to baking time and temperature, we uncovered the secrets to achieving consistently perfect results, even for novice bakers.
The impact of a perfectly baked chocolate chip cookie transcends mere taste; it's a powerful symbol of comfort, nostalgia, and shared experiences. These cookies are woven into the fabric of our memories, connecting us to childhoods, family gatherings, and moments of simple joy. As the writer M.F.K. Fisher eloquently stated, First we eat, then we do everything else.
And what better way to begin than with a cookie that embodies both skill and satisfaction? The enduring popularity of this recipe, passed down through generations and constantly reinterpreted, speaks to its fundamental role in our collective culinary heritage.
Now, I invite you to take what you've learned and embark on your own journey to cookie perfection. Don't be afraid to experiment, to tweak the recipe to your liking, and to share your creations with loved ones. The true magic of baking lies not just in the precise measurements, but in the love and care you put into the process. So, gather your ingredients, preheat your oven, and let the aroma of warm, freshly baked chocolate chip cookies fill your home – a testament to your own mastery of this timeless treat.
Thanks for taking the time to explore the world of effortlessly delicious slice-and-bake cookies! You've now got the knowledge to create perfectly crisp edges and chewy centers every time. Ready to put your newfound skills to the test?
- Bake a batch today! Use your favorite cookie dough recipe (or one of our many favorites on BakeWithEase.com!) and experience the joy of perfectly portioned, ready-to-bake goodness.
- Share your creations! Post a picture of your masterpiece on social media and tag us – we’d love to see your baking success!
- Experiment with flavors! Try adding different extracts, spices, or mix-ins to create your signature slice-and-bake cookie. What unique flavor combination will you invent?
What delicious adventure will your baking skills take you on next?