
Achieving an Open Crumb Structure: Advanced Techniques for Airy Dough

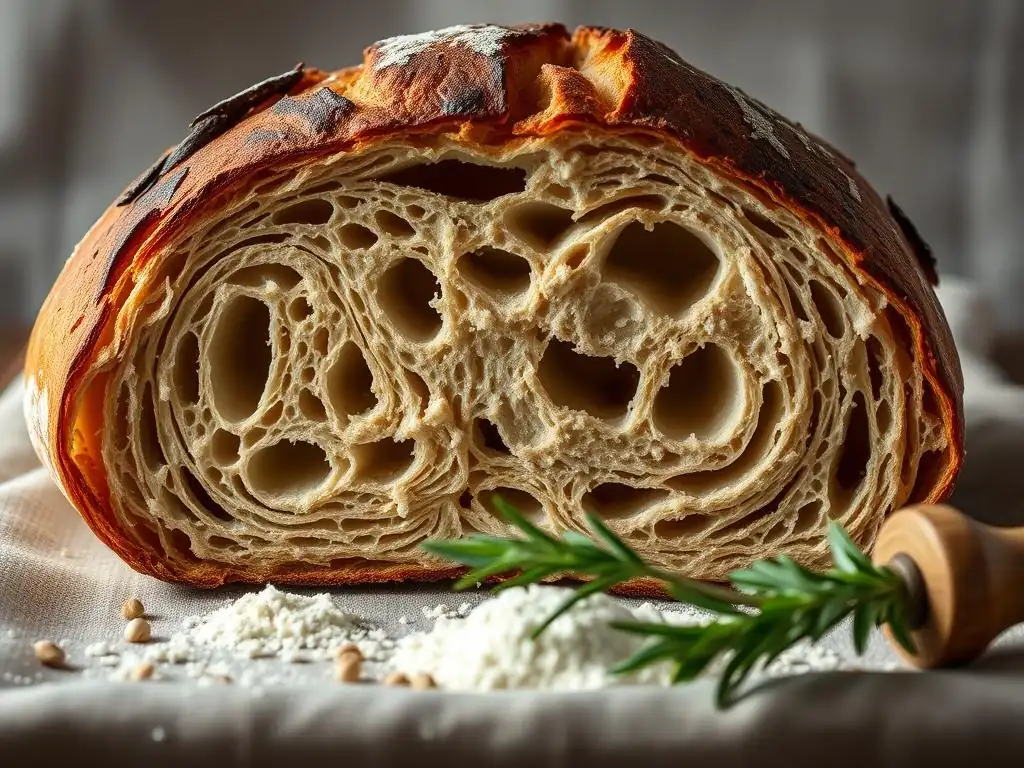
Welcome to BakeWithEase, where baking dreams come to life! Ever wondered how professional bakers achieve that perfectly airy, open texture in their sourdough? Get ready to unlock the secrets! This guide dives deep into open crumb sourdough techniques, revealing the advanced methods and subtle adjustments that will transform your loaves from dense to delightfully light. Intrigued? Let's explore the science and artistry behind that coveted open crumb structure.
- Introduction to Open Crumb Sourdough Techniques
- Key Factors Influencing Open Crumb Structure
- Advanced Techniques for Open Crumb Sourdough
- Troubleshooting Common Open Crumb Challenges
- Open Crumb Sourdough Recipe: A Step-by-Step Guide
- Conclusion: Mastering the Art of Airy Sourdough
-
Frequently Asked Questions
- What exactly is an "open crumb" in sourdough, and why is it desirable?
- What are some key factors that contribute to achieving an open crumb in sourdough?
- How does hydration level affect the crumb structure in sourdough?
- What role does gluten development play in achieving an open crumb?
- What are some common mistakes that prevent an open crumb in sourdough?
- Final Reflection: The Enduring Allure of the Open Crumb
- Unleash Your Inner Baking Maestro: Master the Airy Crumb
Introduction to Open Crumb Sourdough Techniques
Understanding the Allure of Open Crumb in Sourdough
The coveted open crumb structure in sourdough bread is more than just visually appealing; it signifies a mastery of fermentation and dough handling. This characteristic porous texture, with its large, irregular air pockets, is the hallmark of a well-developed dough and a successful bake. Achieving this level of openness requires understanding the interplay of several factors, from the initial mixing to the final bake. It's a journey that pushes bakers beyond basic techniques, delving into the nuances of gluten development, hydration management, and precise fermentation control.
For many sourdough enthusiasts, the open crumb is the ultimate goal, a tangible representation of their skill and patience. It requires attention to detail at every stage, from nurturing a vibrant starter to executing gentle yet effective dough manipulation techniques. While a tight, even crumb is perfectly acceptable and desirable for certain breads, the open crumb speaks to a different kind of texture – one that is light, airy, and perfect for soaking up olive oil or butter. Mastering the advanced techniques for airy dough unlocks a new level of baking satisfaction.
Why Achieve an Open Crumb? The Benefits for Bread, Pizza, and More
Achieving an open crumb offers significant benefits that extend beyond aesthetics. In bread, the structure contributes to a lighter texture and a more enjoyable chew. The large air pockets allow the complex flavors developed during sourdough fermentation to fully express themselves, creating a more nuanced taste experience. For artisanal loaves, this airy texture is often preferred for its rustic appeal and its ability to slice beautifully.
Beyond traditional loaves, the principles of open crumb sourdough techniques are invaluable for other applications. For instance, achieving an open, airy pizza dough results in a lighter crust with satisfyingly chewy bubbles around the edge – the hallmark of Neapolitan-style pizza. Similarly, techniques used for open crumb can translate to lighter, airier enriched doughs. The goal isn't just large holes, but a matrix of well-developed gluten supporting a light, non-dense structure throughout the baked good.
BakeWithEase's Guide to Mastering Airy Dough
Welcome to BakeWithEase's comprehensive guide to mastering the art of achieving an open crumb structure in your sourdough baking. We understand the fascination and occasional frustration that comes with pursuing this goal. This guide is designed to break down the advanced techniques required, providing clear explanations and practical steps to help you elevate your baking skills. We'll explore everything from selecting the right flour to advanced dough handling methods like lamination and coil folds.
Our aim is to demystify the process, providing you with the knowledge and confidence to consistently produce loaves with that desirable airy texture. Whether you're refining your sourdough open crumb techniques for your weekly bake or aiming for that perfect pizza crust, the principles covered here will serve as your foundation. Get ready to experiment, observe, and learn as we delve into the fascinating world of creating beautiful, open-crumbed sourdough.
Key Factors Influencing Open Crumb Structure
Flour Selection: Choosing the Right Flour for Open Crumb Bread
High-Protein Flour: The Foundation for Elasticity
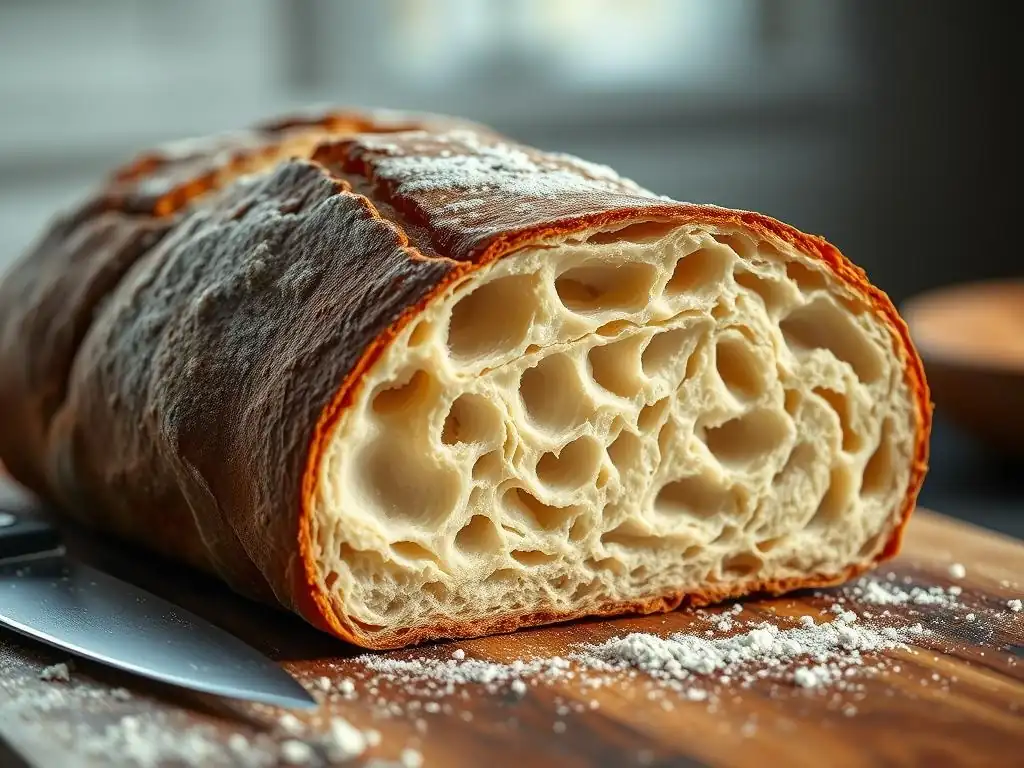
Choosing the correct flour is a fundamental step in achieving an open crumb structure. High-protein flours, typically those labeled as bread flour with protein content ranging from 12% to 14%, are essential. This higher protein level translates directly to a greater potential for gluten development. Gluten, formed when flour proteins (glutenin and gliadin) interact with water, creates the elastic network that traps gases produced by fermentation. A strong, extensible gluten network is crucial for allowing the dough to expand significantly during fermentation and oven spring, leading to those large, airy pockets characteristic of an open crumb.
Using a lower protein all-purpose flour (often 10-11.5% protein) can make achieving a very open crumb more challenging, especially with high hydration doughs. While it's not impossible, the dough will generally lack the structural integrity to support such large air pockets.
Investing in a quality bread flour, sometimes even a blend of different bread flours or a small percentage of high-gluten flour (14%+ protein), can make a noticeable difference in your pursuit of an open crumb. For example, a popular strong bread flour in the US might have 12.7% protein, while certain European flours like Italian "Type 0" or "Type 00" designed for long fermentation and high hydration might have similar protein levels but different gluten characteristics, often favoring extensibility.
Understanding Gluten Development in Open Crumb Dough
Gluten development is not just about the flour's potential; it's also about how you treat the dough. Proper gluten development is critical for creating a strong, elastic network capable of holding the gas produced by the sourdough starter. This network needs to be both strong enough to maintain structure and extensible enough to stretch without tearing as the dough expands.
Underdeveloped gluten results in a weak dough that collapses rather than expanding, leading to a dense crumb. Overdeveloped gluten, often from excessive mechanical kneading without sufficient rest, can make the dough too tight and difficult to expand, also hindering open crumb formation.
Techniques like autolyse, stretch and folds, and coil folds are specifically designed to develop gluten gently and effectively in high hydration doughs without the need for intense kneading. These methods encourage the gluten strands to align and strengthen over time, building the necessary structure for an airy crumb. The goal is a dough that is strong, smooth, and elastic, capable of passing the "windowpane test" – where a small piece of dough can be gently stretched thin enough to see light through it without tearing.
Hydration Levels: The Art of High Hydration Dough
The Role of Water in Open Crumb Formation
Water plays a critical role in achieving an open crumb, particularly in sourdough. Higher hydration levels (the ratio of water to flour by weight, typically 75% and above for open crumb goals) contribute significantly to dough extensibility and the potential for larger air pockets. More water allows the flour to hydrate more fully, facilitating better gluten development and creating a slacker dough that is easier to expand. As the yeast and bacteria in the sourdough starter produce gas, this gas can inflate the more pliable, well-hydrated dough into larger bubbles compared to a stiffer, lower-hydration dough.
However, working with high hydration dough presents challenges. The dough is stickier and more difficult to handle. It requires specific techniques to build tension and structure, as it won't hold its shape easily on its own. Mastering high hydration sourdough techniques is key; simply adding more water without adjusting your handling methods will likely result in a flat, unmanageable dough rather than an airy loaf. The extra water provides the potential for openness, but it's the baker's skill in handling and fermenting that unlocks this potential.
Calculating Optimal Hydration for Your Sourdough Starter
Calculating hydration in sourdough can be slightly nuanced because the starter itself contains flour and water. To determine the true overall hydration of your dough, you need to account for the water and flour contributed by the starter. A typical sourdough starter is fed at a 1:1:1 ratio of starter:water:flour, meaning it's 100% hydration relative to the flour content within the starter. If you use 100g of a 100% hydration starter, you are adding 50g of flour and 50g of water to your dough mix.
Let's consider an example: A recipe calls for 500g flour, 350g water, and 100g of 100% hydration starter. Total flour: 500g (recipe flour) + 50g (starter flour) = 550g
Total water: 350g (recipe water) + 50g (starter water) = 400g
Overall Hydration = (Total Water / Total Flour) * 100 = (400g / 550g) * 100 ≈ 72.7%
This calculation is crucial for understanding the dough's consistency and adjusting water levels based on your flour's absorption capabilities and environmental factors like humidity.
While many open crumb recipes target 75% hydration or higher, finding your optimal hydration involves testing how your specific flour behaves and what level you can comfortably handle while still building adequate tension.
Sourdough Starter Activity: The Heart of the Process
Ensuring a Vigorous and Active Sourdough Starter
A vigorous and active sourdough starter is non-negotiable for achieving a good open crumb. The starter is the primary source of leavening (gas production) and also contributes enzymes that help break down flour, improving dough extensibility.
An inactive or weak starter will produce gas too slowly or not at all, leading to a dense, flat loaf regardless of other techniques. A healthy starter, often referred to as being "ripe" or "peak," should double or triple in volume within 4-8 hours after feeding (depending on temperature and feeding ratio), have numerous bubbles throughout, and smell pleasantly tangy, not strongly alcoholic or like acetone.
To maintain a vigorous starter, consistent feeding is key. For regular baking, keeping a small amount (e.g., 50-100g) and feeding it daily or every other day at room temperature is effective. If you bake less frequently, storing your starter in the refrigerator and feeding it 1-2 times before use is necessary to revive its activity.
A simple test for vigor is observing its rise after feeding; if it consistently doubles or triples, it's likely strong enough. Using a starter at its peak activity, typically when it has just about doubled and is full of bubbles, provides the most leavening power for your dough.
The Float Test: Determining Starter Readiness
A popular method to gauge if your sourdough starter is ready to be used for baking is the float test. While not foolproof (as different starters and flours can behave differently), it's a quick indicator of sufficient gas production and activity. To perform the float test, gently take a small spoonful of your ripe, bubbly starter and drop it into a glass of water at room temperature.
If the starter floats on the surface of the water, it indicates that it contains enough trapped gas to make it less dense than the water, suggesting it is active and ready to leaven your dough. If it sinks, it may not have developed enough gas yet, or it might be past its peak and starting to collapse. For the best results with open crumb sourdough techniques, aim to use your starter when it reliably passes the float test and is visibly active and bubbly.
Fermentation Techniques: Unlocking Flavor and Structure
Bulk Fermentation: Developing Complexity and Air Pockets
Bulk fermentation (or the first rise) is perhaps the most critical phase for developing both flavor and structure necessary for an open crumb. During this period, the sourdough starter's yeast produces carbon dioxide gas, creating air pockets, while bacteria produce organic acids that contribute to flavor and help condition the gluten. The dough should typically increase significantly in volume, often by 50% to 100%, depending on the desired outcome and fermentation temperature. This phase usually lasts several hours at room temperature (e.g., 4-6 hours at 75-80°F / 24-27°C) or much longer at cooler temperatures.
Monitoring the dough's progress rather than strictly following a clock is key. Look for visual cues: the dough should appear visibly larger, puffier, and have bubbles on the surface and along the sides of the container. It should feel lighter and more aerated.
Proper bulk fermentation ensures that a strong gluten network is developed and filled with a sufficient amount of evenly distributed gas bubbles, which will expand further during the final proof and baking. Under-fermentation leads to a dense crumb, while over-fermentation can cause the gluten structure to degrade, resulting in a dough that collapses and may have large, irregular tunnels rather than a uniform open crumb.
Cold Fermentation: Slowing Down the Process for Enhanced Flavor
Cold fermentation, typically performed in the refrigerator (around 35-40°F / 2-4°C) after shaping, is an advanced technique that significantly enhances flavor and can contribute to a better open crumb. The cold temperature dramatically slows down yeast activity but allows the bacteria to continue producing flavorful acids. This extended fermentation period (often 12-48 hours or even longer) deepens the characteristic sourdough tang and improves the dough's handling properties.
The slow fermentation also helps to condition the gluten further, making the dough more extensible and easier to score. While gas production is slow in the cold, the structure developed during bulk fermentation is preserved. When the cold dough hits the hot oven, the trapped gases expand rapidly, contributing to excellent oven spring and the formation of a beautiful open crumb. Cold fermentation also offers scheduling flexibility, allowing bakers to bake loaves directly from the fridge.
Advanced Techniques for Open Crumb Sourdough
Autolyse: Preparing the Flour for Optimal Hydration
The Science Behind Autolyse: Enhancing Dough Extensibility
Autolyse is a simple yet powerful technique where you mix only the flour and water from your recipe and let it rest for a period, typically 20 minutes to a few hours, before adding the starter and salt. The science behind autolyse involves two key processes: hydration and enzymatic activity.
Allowing the flour to fully hydrate without the presence of salt (which tightens gluten) or starter (which begins fermentation) gives the gluten-forming proteins time to bond and begin developing passively. Simultaneously, naturally occurring enzymes in the flour, proteases, begin to break down some of the protein bonds, making the dough more extensible and less resistant to stretching.
This initial rest period significantly improves the dough's handling qualities. After autolyse, the dough is noticeably smoother, more pliable, and less sticky. This enhanced extensibility means the dough can be stretched thinner without tearing during subsequent handling, which is crucial for incorporating air and developing a strong yet flexible gluten network capable of supporting an open crumb. It effectively gives the gluten a head start before the more rigorous work of mixing and folding begins.
Implementing Autolyse for Improved Dough Strength
Implementing autolyse is straightforward. Weigh out your flour and water according to your recipe. Combine them in your mixing bowl and mix just until no dry flour remains. The mixture will look shaggy and perhaps a bit lumpy – this is normal. Cover the bowl to prevent the surface from drying out. Let it rest at room temperature. A short autolyse of 20-30 minutes is beneficial for most doughs, while longer periods (up to 2-3 hours, especially for whole grain flours) can further improve extensibility.
After the autolyse period, add your ripe sourdough starter and salt to the bowl. Incorporate them into the dough, which will initially feel stiff where the new ingredients are added. This is where your mixing or initial stretch and folds begin to fully integrate everything and continue the gluten development process actively. The difference in dough texture after autolyse compared to mixing all ingredients at once is often quite striking, showcasing its effectiveness in preparing the dough for optimal strength and structure.
Stretch and Folds: Building Strength and Structure
Mastering the Stretch and Fold Technique: Gradual Strength Development
Stretch and folds are a cornerstone technique for developing gluten and building structure in high hydration sourdough without intensive kneading. This gentle method involves wetting your hands, grabbing one side of the dough in the bowl, stretching it upwards without tearing, and folding it back over the rest of the dough. You then rotate the bowl and repeat the process with the other sides (typically 3-4 sides per round). This action aligns the gluten strands and incorporates air into the dough.
Performing several rounds of stretch and folds during the initial part of bulk fermentation gradually builds tension and strength in the dough. Unlike mechanical kneading which can be harsh, stretch and folds are gentle, allowing the gluten network to develop incrementally while the dough rests between rounds. This results in a dough that is strong, elastic, and holds its shape better, creating the necessary scaffolding for the large air pockets characteristic of an open crumb.
Frequency and Timing of Stretch and Folds
The frequency and timing of stretch and folds depend on the dough's hydration, the flour used, and the ambient temperature. For high hydration doughs (75%+), multiple rounds are usually necessary. A common schedule involves performing 4-6 rounds of stretch and folds during the first 2-3 hours of bulk fermentation, spaced 20-45 minutes apart. For example, if your bulk fermentation is scheduled for 5 hours at room temperature, you might perform rounds at 0, 20, 40, 60, 90, and 120 minutes.
The goal is to continue until the dough develops significant strength, feels smooth, and can hold tension. You'll notice the dough becoming less shaggy and more cohesive with each round. As the bulk fermentation progresses, the dough will become more aerated and may require gentler handling. Pay attention to the dough's feel; stop performing aggressive stretch and folds once it feels strong and puffy to avoid degassing it excessively.
Coil Folds: A Gentle Approach to Dough Strengthening
Understanding the Benefits of Coil Folds
Coil folds are another gentle dough strengthening technique, particularly useful for very high hydration or delicate doughs where traditional stretch and folds might be too aggressive or difficult. Instead of stretching the dough upwards from the edge, coil folds involve lifting the center of the dough from underneath, allowing the ends to fold under themselves due to gravity and the dough's own weight. This technique is excellent for building structure and tension in the dough without degassing it as much as forceful stretching.
Coil folds help to create layers and build internal structure, promoting a more even distribution of air pockets throughout the dough. They are often used after the initial, more frequent stretch and folds are complete, during the later stages of bulk fermentation when the dough is gassier and more fragile. This method provides support and strength while handling the delicate, airy dough with care.
Performing Coil Folds: Gentle Strengthening for Delicate Dough
To perform a coil fold, first, wet your hands slightly. Gently slide your hands under the center of the dough in the container. Lift the dough straight up, allowing the ends to naturally fold under the center due to gravity. The dough will look like a coiled rope. Gently lower the dough back into the container. Rotate the container 180 degrees and repeat the lift and fold. Typically, 2-3 coil folds are performed per round.
These rounds are usually spaced 30-60 minutes apart, often after the initial stretch and fold period is finished. For example, after 4-5 rounds of stretch and folds in the first 2 hours, you might perform 2-3 rounds of coil folds during the next 2-3 hours of bulk fermentation. The key is to be gentle; the aim is to support and structure the dough, not to degas it. Stop performing folds when the dough feels airy, puffy, and holds its shape well in the container.
Lamination: Creating Distinct Layers for Air Pockets
What is Lamination and How Does It Work?
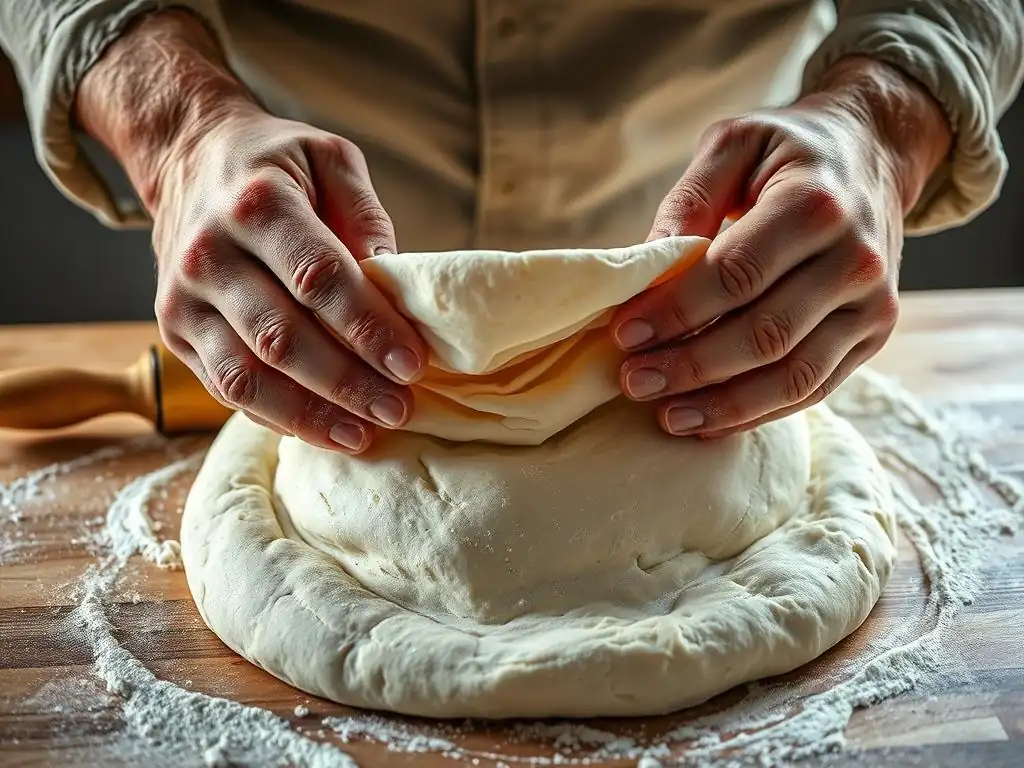
Lamination is an advanced sourdough open crumb technique borrowed from pastry making, involving stretching the dough out into a large, thin rectangle and then folding it back onto itself. This process creates multiple distinct layers within the dough. While it might seem counterintuitive for creating large air pockets, lamination, when done correctly, helps distribute tension evenly throughout the dough and incorporates oxygen, strengthening the gluten network further.
More importantly for open crumb, lamination allows for the even distribution of inclusions (like seeds or herbs, though not required for basic lamination) and creates potential fault lines within the dough structure. As the dough ferments and bakes, the gas gets trapped between these layers and within the strengthened gluten network, leading to larger, more defined air pockets compared to dough that hasn't been laminated. It's a technique particularly favored for achieving spectacular, irregular open crumb structures.
Step-by-Step Guide to Laminating Sourdough Dough
Lamination is typically performed early in the bulk fermentation, often after the first couple of stretch and fold rounds, when the dough has developed some initial strength but is still extensible.
- Prepare your surface: Lightly mist a clean countertop with water, then spread a very thin layer of water or neutral oil. This prevents the dough from sticking.
- Transfer the dough: Gently pour or scrape the dough onto the prepared surface.
- Stretch the dough: Using the backs of your hands or your fingertips, gently begin stretching the dough outwards from the center towards the edges. Work carefully and patiently, aiming for a large, thin rectangle or square. Try to make it as thin as possible without tearing large holes, perhaps down to a thickness of 1/4 to 1/2 inch (approx. 0.6 - 1.2 cm). If the dough resists, let it rest for 5-10 minutes before continuing.
- Fold the dough: Once stretched, fold one side (e.g., the bottom third) up towards the center. Then fold the opposite side (the top third) down over the folded section, like folding a letter.
- Optional Second Fold: For added layers, you can then fold the dough in half again, either left over right or right over left. This creates even more layers.
- Return to container: Gently gather the folded dough into a neat package and carefully transfer it back to your bulk fermentation container.
- Rest: Allow the dough to rest and recover for 30-60 minutes before performing your next set of stretch or coil folds.
Lamination requires a dough with sufficient initial strength, which is why it's often done after some initial gluten development. It's a technique that dramatically impacts the internal structure and can be a game-changer for achieving that sought-after open crumb.
Scoring Techniques: Guiding the Oven Spring
The Importance of Proper Scoring: Controlling Expansion
Scoring, the act of cutting the surface of the shaped dough just before baking, is not merely for decoration; it's a critical step that directly impacts the oven spring and the resulting crumb structure. As the dough enters the hot oven, the rapid expansion (oven spring) occurs as trapped gases expand and water turns to steam. If the dough is not scored, it will burst unpredictably along the weakest points, potentially tearing the gluten structure and leading to a less controlled, sometimes denser, crumb.
Proper scoring provides designated weak points or "vents" in the surface of the dough. These cuts guide the expansion, allowing the dough to rise significantly and predictably. This controlled expansion ensures that the internal structure develops optimally, contributing to a better overall shape and promoting the formation of a more open and airy crumb. The depth, angle, and pattern of your scores all influence how the dough expands.
Scoring Patterns for Maximum Open Crumb: Blade Angle and Depth
For maximizing open crumb and achieving a dramatic "ear" (the flap of crust that lifts along a score), the angle and depth of your score are crucial. Using a sharp blade (like a razor blade or lame) is essential for clean cuts that don't drag the dough.
- Angle: For a single, bold score often used on oval loaves ( batards), hold the blade at a shallow angle, almost parallel to the dough's surface (around 15-30 degrees). This angle allows the top flap of dough to lift and create the ear as the loaf expands beneath it. For round loaves ( boules), multiple perpendicular scores held straight (90 degrees) can encourage even expansion across the surface.
- Depth: The depth of the score matters. For a bold ear and significant oven spring, the primary score should be relatively deep, perhaps 1/2 to 1 inch (approx. 1-2.5 cm) into the dough. This allows ample room for the dough to expand through the cut. Shallower decorative cuts will open slightly but won't guide major expansion.
Experimenting with different scoring patterns – a single long score on an oval loaf, a square or criss-cross pattern on a round loaf, or more intricate designs – can influence the shape and how the crumb develops beneath the surface. However, for maximizing a specific open crumb focus, mastering the angled, deep score to encourage a strong ear is a key technique.
Troubleshooting Common Open Crumb Challenges
Dense Crumb: Identifying and Addressing the Causes
Under-fermentation: Recognizing and Correcting Inadequate Proofing
One of the most common culprits behind a dense crumb is under-fermentation. This occurs when the dough hasn't had enough time or warmth for the sourdough starter to produce sufficient gas to properly leaven the dough. Signs of under-fermentation include a dough that hasn't increased significantly in volume during bulk fermentation (perhaps less than 50% increase), feels heavy or tight, and doesn't show many bubbles on the surface or sides. When baked, the loaf will be smaller than expected, feel heavy for its size, and have a uniform, tight crumb structure with very few or no large air pockets.
To correct under-fermentation, you need to extend the bulk fermentation time or increase the dough temperature. Monitor the dough's volume increase and feel rather than strictly relying on a timer. If your kitchen is cool (below 70°F / 21°C), consider placing the dough in a warmer spot, like inside a turned-off oven with the light on, which can raise the temperature to around 75-80°F (24-27°C). Next time, allocate more time for the bulk ferment or ensure your starter is at peak activity when you mix the dough.
Over-fermentation: Recognizing and Correcting Excessive Proofing
Conversely, over-fermentation can also lead to a poor crumb, sometimes dense, sometimes with large, irregular tunnels and a lack of overall structure. Over-fermentation happens when the dough ferments for too long or at too high a temperature, causing the gluten network to break down and the trapped gases to escape. An over-fermented dough will often appear very large and puffy, may start to collapse in the container, feel fragile or soupy, and have a vinegary or strongly alcoholic smell. When shaped, it might lose its tension quickly.
Correcting over-fermentation mid-process is difficult. Prevention is key. Pay close attention to the signs of readiness during bulk fermentation (volume increase, bubbles, texture). If you suspect slight over-fermentation, handle the dough very gently during shaping to preserve any remaining gas. For future bakes, reduce the fermentation time, use a cooler spot for bulk fermentation, or decrease the amount of starter used, especially in warm environments. A significant collapse during baking is a strong indicator of over-fermentation.
Insufficient Gluten Development: Improving Strength Through Technique
Insufficient gluten development results in a weak dough unable to hold its structure and support an open crumb. This can happen if you use a low-protein flour, don't hydrate the flour adequately, or don't perform enough effective dough strengthening techniques like stretch and folds or coil folds. A dough with poor gluten development will feel slack and lifeless, tear easily when stretched, and fail the windowpane test. The resulting loaf will be dense and flat.
To improve gluten development, start with appropriate flour and ensure full hydration (consider an autolyse). Incorporate multiple rounds of stretch and folds and/or coil folds during the initial hours of bulk fermentation. These techniques build strength gradually. Pay attention to the dough's feel – it should become smoother, more elastic, and hold tension better with each round. If your dough consistently lacks strength, you may need to increase the number of folds or the duration of the bulk fermentation slightly to allow more time for the gluten network to form and strengthen.
Tight Crumb: Avoiding a Compact Texture
Over-kneading: Understanding the Impact of Overworked Dough
While insufficient gluten development causes a dense crumb, over-kneading (particularly with mechanical mixers) can lead to a tight, compact crumb, albeit with a strong gluten structure. Overworking the dough can make the gluten network too tight and resistant to expansion. It can also overheat the dough and potentially damage the protein structure. While manual stretch and folds are less likely to overwork dough in this manner, continuous, aggressive handling without rest can have a similar effect.
An over-kneaded dough feels very stiff and resistant, may tear rather than stretch smoothly, and lacks extensibility. To avoid this, especially when using a mixer, monitor the dough closely and stop mixing once the dough is smooth, elastic, and passes the windowpane test. When using manual techniques for open crumb sourdough, focus on gentle handling and allowing the dough to rest between sets of folds. The goal is developed strength and extensibility, not just maximum tightness.
Incorrect Hydration Levels: Adjusting Hydration for Better Results
Using too low a hydration level for your flour can result in a tighter crumb because the dough is simply not extensible enough to form large air pockets. While a lower hydration dough (e.g., 65-70%) is easier to handle and still produces good bread, achieving a very open crumb with large, irregular holes is challenging at these levels. The stiffer dough resists expansion during fermentation and oven spring.
If you consistently get a tight crumb despite good fermentation and handling, consider gradually increasing your hydration percentage in future bakes. Start by adding just 5-10% more water (relative to the flour weight) in your next recipe and observe the difference. Remember that different flours absorb water differently, so finding the optimal hydration for your specific flour and desired crumb requires experimentation. Higher hydration requires mastering the handling techniques discussed earlier.
Uneven Crumb: Achieving Consistent Air Pockets
Inconsistent Fermentation Temperatures: Maintaining a Stable Environment
Inconsistent temperatures during bulk fermentation or proofing can lead to an uneven crumb structure, where some areas are dense while others have large, irregular holes or tunnels. Sourdough fermentation is highly sensitive to temperature. Fluctuations can cause parts of the dough to ferment faster or slower than others. For example, if one side of the dough is significantly warmer than the other, gas production will be uneven.
Maintaining a stable fermentation temperature is crucial for a consistent crumb. Aim for a consistent temperature throughout the bulk fermentation, ideally in the 75-80°F (24-27°C) range for many open crumb recipes, though lower temperatures for longer periods also work if stable. Use a proofing box, a warm spot in your kitchen, or your oven with the light on to create a stable environment. Monitor the dough's temperature if possible. Consistent temperature ensures even gas production and gluten development throughout the entire dough mass.
Improper Dough Handling: Gentle Shaping for Optimal Results
Rough or inconsistent dough handling during shaping can easily degas parts of the dough or create areas of uneven tension, leading to an uneven crumb. Punching down the dough aggressively after bulk fermentation, folding it too tightly or unevenly during shaping, or rough handling during the final proof can expel trapped gases and damage the delicate gluten structure you've worked hard to build.
For an open crumb, gentle handling is paramount, especially after bulk fermentation is complete and the dough is airy. Instead of punching down, gently ease the dough out of the container. Use techniques that preserve the gas, such as gentle folding and shaping that creates surface tension without deflating the interior.
Avoid excessive flour on your work surface, as this can create dry spots in the dough. Practice shaping techniques that build a taut surface skin while maintaining the airy interior. A well-shaped loaf will hold its tension during proofing and bake, promoting even expansion and a consistent open crumb.
Open Crumb Sourdough Recipe: A Step-by-Step Guide
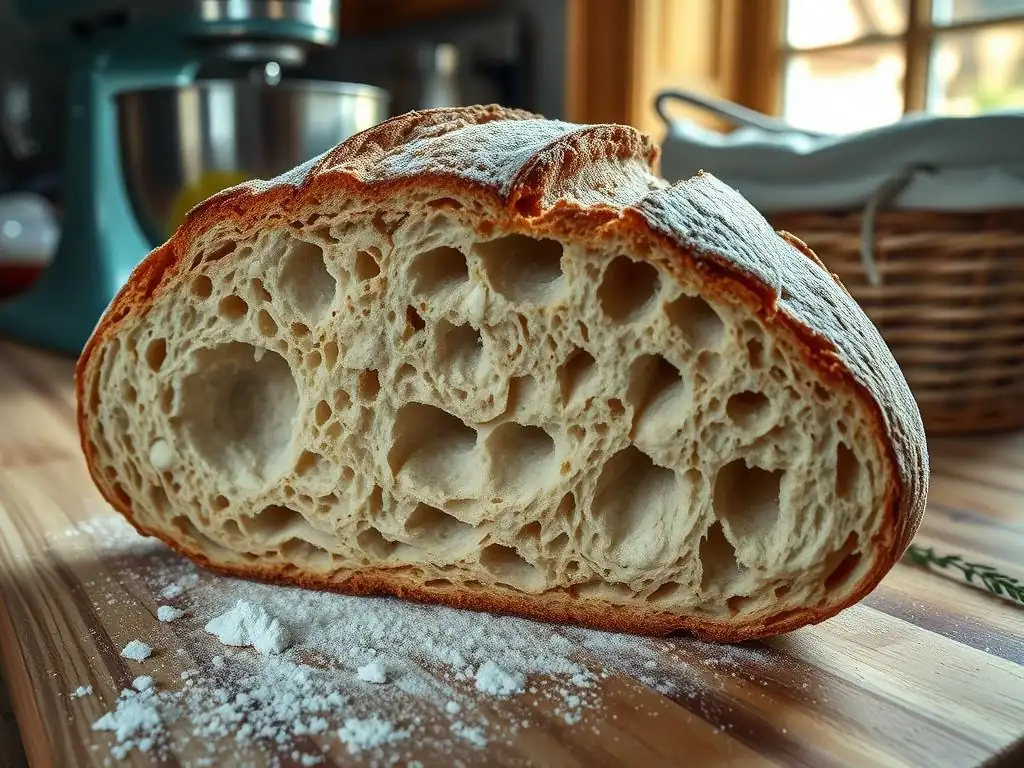
Here is a sample recipe designed to help you practice the open crumb sourdough techniques discussed. This uses a relatively high hydration (around 80% overall, excluding starter) and incorporates several advanced steps.
Ingredients for Open Crumb Sourdough Bread
- Strong Bread Flour (12.5% protein or higher): 500g
- Water (filtered, room temperature): 400g (80% hydration relative to main flour)
- Active Sourdough Starter (100% hydration, peak activity): 100g
- Fine Sea Salt: 10g (2% relative to total flour)
Note: Overall hydration including starter flour/water is approx. (400+50)/(500+50) = 450/550 ≈ 81.8%
Detailed Instructions for the Open Crumb Dough Process
Here’s a step-by-step process incorporating key open crumb techniques:
- [ ] Autolyse (30 minutes - 2 hours):
- In a large bowl, combine the 500g flour and 400g water.
- Mix with your hands or a spatula until no dry flour remains. It will be shaggy.
- Cover the bowl and let rest at room temperature for 30 minutes up to 2 hours.
- [ ] Mix in Starter and Salt (10-15 minutes):
- Add the 100g active starter and 10g salt to the autolysed dough.
- Dimple the ingredients into the dough with wet fingers.
- Gently mix and squeeze the dough with your hands to fully incorporate the starter and salt. The dough will feel wet and sticky. Mix until the ingredients are integrated.
- Rest for 15 minutes.
- [ ] Lamination (Approx. 45-60 minutes after mixing):
- Lightly wet your clean counter surface.
- Gently pour or scrape the dough onto the wet surface.
- Using wet hands, carefully stretch the dough into a large, thin rectangle (as thin as possible without tearing significantly, approx. 1/4-1/2 inch thick).
- Fold one side (e.g., bottom third) up, then the opposite side (top third) down, like a letter.
- Fold in half again (left over right or right over left).
- Gently transfer the folded dough back to your clean bulk fermentation container.
- [ ] Bulk Fermentation & Folds (4-6 hours at 75-80°F / 24-27°C):
- Cover the container.
- Perform 3-4 sets of Stretch and Folds during the first 2 hours, spaced 30-45 minutes apart. Wet your hand before each set.
- Example Schedule: Sets at 0, 30, 75, 120 minutes from start of Bulk Fermentation.
- Perform 2-3 sets of Coil Folds during the next 2-3 hours, spaced 45-60 minutes apart. Be gentle as the dough gets gassier.
- Example Schedule: Sets at 180, 240 minutes from start of Bulk Fermentation.
- Monitor the dough's progress. It should increase in volume by 70-100%, look visibly aerated, and feel lighter. Total bulk fermentation time will vary based on temperature and starter activity.
- [ ] Pre-Shaping (20-30 minutes rest):
- Gently ease the dough out of the container onto a lightly floured surface.
- Divide if making multiple loaves.
- Gently shape into a rough boule (round) or batard (oval) shape, creating light surface tension. Avoid degassing.
- Let the dough rest, uncovered, for 20-30 minutes. This allows the gluten to relax before final shaping.
- [ ] Final Shaping:
- Lightly flour your banneton or proofing basket.
- Using minimal flour on your hands and surface, gently shape the dough into its final desired form (boule or batard), building significant surface tension this time.
- Place the shaped dough seam-side up (if baking in a Dutch oven) or seam-side down (if baking on a baking stone) into the floured banneton.
- [ ] Cold Proofing (12-24 hours):
- Cover the banneton (e.g., with a plastic bag or shower cap) and place it in the refrigerator (35-40°F / 2-4°C) for 12-24 hours. This develops flavor and makes the dough easier to score. A longer cold proof (up to 48 hours) can deepen flavor further.
Baking Instructions for Bread with Open Crumb
Baking in a preheated Dutch oven is highly recommended for achieving excellent oven spring and crust development, which supports an open crumb.
- [ ] Preheat Oven & Dutch Oven (1 hour):
- Place your Dutch oven (with lid) in your oven.
- Preheat the oven to 500°F (260°C) for at least 1 hour. This ensures the Dutch oven is screaming hot.
- [ ] Score the Dough:
- Carefully remove the hot Dutch oven from the oven (use heavy-duty oven mitts! ).
- Gently invert the cold dough from the banneton onto a piece of parchment paper.
- Using a sharp lame or razor blade, score the dough quickly and confidently. For an open crumb focus, use a shallow angle (15-30 degrees) and a depth of 1/2 to 1 inch (1-2.5 cm) for your primary score.
- [ ] Bake with Lid On (20 minutes):
- Carefully lift the dough using the parchment paper and lower it into the hot Dutch oven.
- Place the lid on the Dutch oven.
- Carefully place the Dutch oven back into the preheated oven.
- Reduce the oven temperature to 450°F (230°C).
- Bake for 20 minutes with the lid on. The steam trapped inside the Dutch oven allows for maximum oven spring before the crust hardens.
- [ ] Bake with Lid Off (20-25 minutes):
- Carefully remove the lid from the Dutch oven.
- Continue baking for another 20-25 minutes, or until the crust is deep golden brown and the internal temperature of the bread reaches 205-210°F (96-99°C).
- [ ] Cooling:
- Carefully remove the bread from the Dutch oven and transfer it to a wire rack.
- Let the bread cool completely for at least 2-3 hours before slicing. Slicing too early can damage the crumb structure and result in a gummy texture. Patience is key!
Conclusion: Mastering the Art of Airy Sourdough
The Journey to Perfect Open Crumb: Patience and Practice
Achieving that stunning open crumb in your sourdough is undeniably a rewarding goal, but it's a journey that requires patience, observation, and consistent practice. There's no single magic bullet; it's the harmonious interplay of numerous factors – a vigorous starter, appropriate hydration, correct flour selection, effective gluten development through techniques like stretch and folds and lamination, precise fermentation control, and proper baking. Each loaf baked is a learning opportunity. Don't be discouraged by less-than-perfect results; analyze what might have happened based on the troubleshooting tips provided, and adjust your process for the next bake.
Mastering open crumb sourdough techniques means learning to read your dough, understanding its feel, its rise, and how it reacts to different conditions. It involves trusting your senses more than just a timer. With each attempt, you'll refine your intuition and gain a deeper understanding of the sourdough process. Embrace the learning curve, celebrate your successes, and keep baking!
Further Exploration: Resources for Advanced Sourdough Baking
For those dedicated to refining their sourdough skills and exploring even more advanced techniques for achieving airy dough and open crumb structures, there are many avenues for further learning. Consider delving deeper into the science of fermentation, exploring the impact of different types of flour (like heritage grains or specific regional flours), or experimenting with varying starter hydration and feeding schedules.
Many experienced bakers share detailed insights online, through books, and in workshops. Look for resources that provide detailed explanations of the 'why' behind the techniques, not just the 'how'. Understanding the underlying principles of gluten development, enzymatic activity, and microbial behavior in your sourdough starter will empower you to troubleshoot effectively and adapt recipes to your specific environment and desired outcome. Continue to read, watch, and most importantly, bake!
BakeWithEase: Your Partner in Baking Excellence
At BakeWithEase, we are passionate about empowering bakers of all levels to achieve their goals, from mastering basic recipes to tackling advanced techniques like open crumb sourdough. We strive to provide clear, reliable information and guidance to help you navigate the complexities of baking with confidence. Our aim is to be your trusted resource as you explore new challenges and expand your skills in the kitchen.
Whether you're perfecting your sourdough open crumb techniques or exploring other areas of baking, BakeWithEase is here to support your journey. We believe that with the right knowledge and practice, anyone can bake delicious, beautiful bread. Keep exploring our site for more tips, techniques, and inspiration to continue your path towards baking excellence. Happy Baking!
Frequently Asked Questions
What exactly is an "open crumb" in sourdough, and why is it desirable?
An open crumb refers to a large, irregular hole structure within the interior of a sourdough loaf. It's often desirable because it indicates a well-fermented dough and contributes to a lighter, airier texture.
What are some key factors that contribute to achieving an open crumb in sourdough?
Several factors are crucial, including high hydration dough, proper gluten development through techniques like folds, and allowing for a long, slow fermentation. The strength of your starter is also paramount.
How does hydration level affect the crumb structure in sourdough?
Higher hydration levels, typically above 75%, create a wetter dough, which allows for greater gas expansion during baking, resulting in a more open and airy crumb. This also makes it more difficult to handle.
What role does gluten development play in achieving an open crumb?
Proper gluten development, achieved through kneading or stretch and fold techniques, creates a strong network that can trap the gases produced during fermentation, leading to a more open crumb structure.
What are some common mistakes that prevent an open crumb in sourdough?
Common mistakes include under-proofing or over-proofing the dough, not developing the gluten sufficiently, and using a weak or inactive starter. Also, improper shaping can deflate the dough.
Final Reflection: The Enduring Allure of the Open Crumb
The pursuit of the perfect open crumb in sourdough baking remains a captivating challenge, a testament to the delicate balance between science and artistry in the kitchen. This quest, far from being a mere aesthetic preference, reflects a deeper desire to understand the intricate processes that transform simple flour and water into something truly extraordinary. The techniques explored in this article – from meticulous sourdough starter management to precise hydration control and mindful shaping – are not just recipes, but pathways to unlocking the full potential of this ancient craft.
The journey towards mastering the open crumb is a continuous one, a reflection of our own growth and understanding. Each loaf baked, each experiment conducted, brings us closer to appreciating the subtle nuances of fermentation and the profound impact it has on the final product. The satisfaction derived from achieving that airy, open structure is unparalleled, a tangible reward for patience and dedication. The best bread is made with love and time; it's a labor of love, and the results are worth the effort.
This sentiment, though simple, encapsulates the essence of this pursuit.
Now, consider your own baking journey. What techniques resonated most with you? What challenges did you encounter, and how did you overcome them? Don't be afraid to experiment, to push your boundaries, and to embrace the inevitable imperfections along the way. The path to achieving an open crumb, like life itself, is a process of continuous learning and refinement. Each loaf is a step forward, a testament to your dedication, and a delicious reward for your efforts. Embrace the journey, and may your next loaf be your best yet.
Unleash Your Inner Baking Maestro: Master the Airy Crumb
Thanks for taking the time to explore the art of achieving that perfect open crumb! We hope you gained valuable insights into creating airy, light dough. Ready to put your new knowledge into practice?
- Bake your masterpiece: Try a new recipe today, focusing on the techniques we discussed – gentle handling, proper fermentation, and precise shaping. This is your chance to experiment and truly master the airy crumb.
- Share your success: Snap a photo of your gorgeous, open-crumb loaf and share it on social media! Use #BakeWithEaseOpenCrumb to connect with our community of baking enthusiasts.
- Deep Dive into Dough: Explore our other articles on sourdough techniques, hydration levels, and advanced baking methods to further refine your skills.
What unique ingredient or technique will you experiment with to achieve your dream open crumb?