
Mastering the Slap and Fold Method for Ciabatta Dough

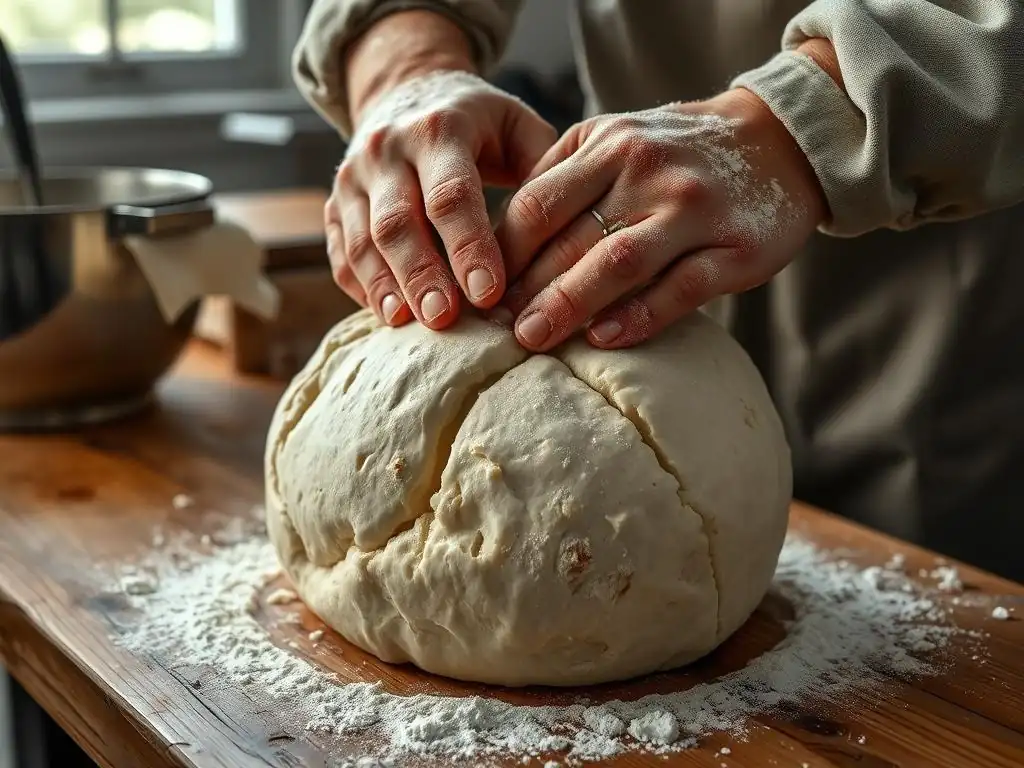
Welcome to BakeWithEase, your haven for all things baking! Ever wondered how to achieve that perfect, airy crumb in your ciabatta? This isn't just another bread recipe; it's a journey into the Slap and Fold technique, a revolutionary method that'll transform your dough and your baking experience. Discover the secrets to this simple yet effective method and unlock the potential for artisan-quality bread in your own kitchen. Intrigued? Let's get started and unfold the possibilities!
- Introduction to Slap and Fold for Ciabatta: BakeWithEase Guide
- Understanding the Slap and Fold Technique: A Beginner's Guide
- Preparing to Slap and Fold Your Ciabatta Dough
- Step-by-Step Guide to Slap and Fold Ciabatta Dough
- Tips and Tricks for Perfect Slap and Fold Ciabatta
- Shaping and Baking Your Slap and Fold Ciabatta
- Advanced Slap and Fold Techniques for Ciabatta Bakers
- Enjoying Your Homemade Slap and Fold Ciabatta Bread
- Conclusion: Embrace the Slap and Fold for Exceptional Ciabatta
-
Frequently Asked Questions
- What exactly is the slap and fold method, and why is it used for ciabatta dough?
- How often should I slap and fold my ciabatta dough during the bulk fermentation?
- What consistency should my ciabatta dough have after the slap and fold sessions?
- What if my ciabatta dough remains too sticky even after several slap and fold sessions?
- Can I use the slap and fold method for other types of bread besides ciabatta?
- Final Reflection: The Transformative Power of a Simple Fold
- Unleash Your Inner Ciabatta Artisan!
Introduction to Slap and Fold for Ciabatta: BakeWithEase Guide
Welcome to the world of high-hydration doughs! If you've ever admired the airy, open crumb and rustic crust of authentic ciabatta bread, you've likely encountered the challenge of working with very wet dough. Traditional kneading methods can quickly turn into a sticky, frustrating mess.
This is where the slap and fold technique comes into its own, particularly when mastering slap and fold ciabatta dough. It's a method that might look a little chaotic at first, involving lifting, slapping, and folding the dough onto a surface, but it is remarkably effective for developing the gluten structure needed for those signature large holes in ciabatta.
At BakeWithEase, we believe baking should be enjoyable, not intimidating. The slap and fold method, while requiring a bit of practice, simplifies the process of handling wet doughs like those used for ciabatta. It leverages the dough's own weight and gravity to stretch and align the gluten strands, building strength without adding excessive flour, which would make the final bread dense. Learning this technique is a game-changer for anyone wanting to bake authentic, light, and airy ciabatta bread right in their own kitchen.
Understanding the Slap and Fold Technique: A Beginner's Guide
What is the Slap and Fold Dough Technique?
The slap and fold technique, also known as fraisage in French baking, is a method specifically designed for developing gluten in high-hydration doughs (typically those with 70% hydration or higher). Instead of pushing and pressing the dough as in traditional kneading, you pick up the dough, lift it, and literally slap it down onto a clean, unfloured surface.
As it lands, you stretch it out slightly, then fold it back onto itself. This process is repeated rhythmically, often for 10-15 minutes or until the dough transforms from a shaggy, sticky mass into a smooth, elastic ball that holds its shape better.
This seemingly rough treatment is surprisingly gentle on the dough, allowing the gluten network to form without tearing it. The repeated stretching and folding action elongates and aligns the protein chains (glutenin and gliadin) present in the flour, creating a strong, elastic structure capable of trapping the gases produced by yeast fermentation. This developed structure is absolutely crucial for achieving the characteristic open, irregular crumb structure desired in a perfect slap and fold ciabatta dough.
Why Use the Slap and Fold Method for Ciabatta?
Ciabatta dough is known for its very high hydration level, often ranging from 75% to even 85% or higher water-to-flour ratio. Attempting to knead such a wet dough traditionally on a floured surface quickly incorporates too much extra flour, changing the hydration and resulting in a denser loaf. Alternatively, it can become an unmanageable, sticky mess that adheres stubbornly to hands and surfaces, making proper gluten development nearly impossible.
The slap and fold method circumvents these issues. By working the wet slap and fold ciabatta dough on a clean, unfloured surface (or very lightly oiled), you minimize the addition of extra flour. The technique allows you to handle the sticky dough by leveraging its weight and momentum.
The stretching action is efficient at developing gluten rapidly, leading to a strong network that can support the large air pockets characteristic of ciabatta's open crumb. Without sufficient gluten strength, the dough would collapse during proofing or baking, resulting in a flat, dense loaf instead of the light, airy "slipper" bread ciabatta is named after.
Slap and Fold vs. Traditional Kneading for Ciabatta Bread
Comparing the slap and fold method to traditional kneading for ciabatta highlights the unique advantages of the former for high-hydration doughs. Traditional kneading, involving pushing, pulling, and pressing, is very effective for lower hydration doughs (like sandwich bread, typically 60-65% hydration). The dough is firm enough to handle easily, and the friction helps develop gluten. However, apply this to an 80% hydration ciabatta dough, and you'll find the dough resisting the action, sticking everywhere, and potentially tearing the weak gluten structure before it has a chance to develop properly.
Slap and fold, on the other hand, embraces the dough's wetness. It focuses on stretching and aligning rather than compressing. While traditional kneading might take 15-20 minutes or longer to reach the desired gluten development for lower hydration doughs, a comparable level of strength in a high-hydration slap and fold ciabatta dough can often be achieved in just 10-15 minutes of active slapping and folding. This efficiency, coupled with the ability to handle the wetness without excessive flour, makes slap and fold the superior technique for achieving the signature open crumb of authentic ciabatta bread.
Preparing to Slap and Fold Your Ciabatta Dough
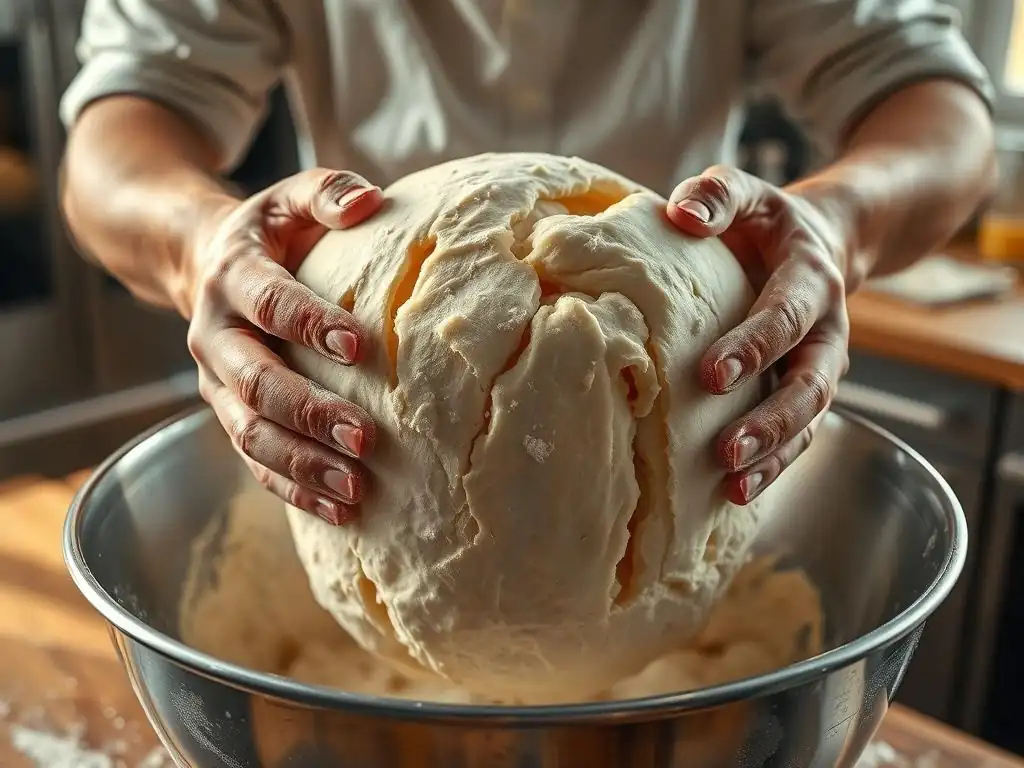
Essential Ingredients for Ciabatta Dough (Slap and Fold Recipe)
Crafting the perfect slap and fold ciabatta dough starts with quality ingredients. While recipes vary, the core components are simple, allowing the flavor of the flour and the technique to shine. You'll typically need:
- Strong Bread Flour: High-protein flour (around 12-14% protein) is crucial. The higher protein content means more gluten can be developed, which is essential for the open crumb and structure of ciabatta. All-purpose flour (typically 10-12% protein) might work, but will result in a less airy crumb. King Arthur Bread Flour is a popular choice among home bakers for its consistent performance.
- Water: This is the key to ciabatta's high hydration. Use lukewarm water, ideally around 25-30°C (77-86°F), as it helps activate the yeast and gets the dough temperature into an optimal range for fermentation. The hydration level will significantly impact the texture and handling of your slap and fold ciabatta dough.
- Yeast: Instant dry yeast is convenient as it can be mixed directly with the flour. Active dry yeast needs to be proofed in a small amount of the warm water first. The amount of yeast used can vary depending on the desired fermentation time, but a common starting point is about 0.5% to 1% of the flour weight for a longer, slower fermentation, or slightly more for a quicker rise.
- Salt: Essential for flavor and also plays a role in controlling yeast activity and strengthening the gluten network. Typically, salt is added at about 1.8% to 2% of the flour weight. It's often added after the initial mixing or autolyse phase, as it can sometimes interfere with initial gluten development if mixed directly with flour and water from the start.
These simple ingredients, when combined and worked using the slap and fold method, transform into the foundation for delicious ciabatta. The high hydration provided by the water is what makes the slap and fold necessary and ultimately contributes to the bread's unique texture.
Required Equipment for Slap and Fold Dough Preparation
While the slap and fold technique is hands-on, a few pieces of equipment will make the process smoother and more successful. You don't need fancy gadgets, just the basics:
- Large Mixing Bowl: You'll need a bowl large enough to initially mix the dough and then for bulk fermentation. A bowl that can comfortably hold at least 2-3 times the volume of your dough is ideal, as ciabatta dough expands considerably during fermentation.
- Kitchen Scale: Accurate measurement by weight is crucial for baking, especially with high-hydration doughs where small variations in water or flour can drastically affect the outcome. Measuring ingredients by volume (cups) is less precise. Weighing your ingredients ensures consistency when working on your slap and fold ciabatta dough.
- Dough Scraper: A bench scraper (metal or plastic) is invaluable for handling sticky dough. It helps you gather the dough from the surface during the slap and fold process and is also useful for dividing the dough later. A plastic bowl scraper is also helpful for getting every last bit of dough out of the mixing bowl.
- Clean, Unfloured Surface: A countertop (granite, laminate, or wood) is perfect. Avoid using too much flour on your surface when performing the slap and fold; a clean surface allows the dough to stick just enough to get the necessary stretch before you release it. If the dough sticks excessively, a very light mist of water or a tiny amount of oil can sometimes help, but the goal is to work on an unfloured surface.
Having these tools ready before you start mixing ensures you can move seamlessly into the slap and fold process once your initial dough is hydrated. Preparation is key to managing the wetness of the slap and fold ciabatta dough effectively.
Step-by-Step Guide to Slap and Fold Ciabatta Dough
Step 1: Mixing the Initial Ciabatta Dough
Begin by accurately weighing your flour into your large mixing bowl. If using instant dry yeast, add it directly to the flour and stir briefly to combine. If using active dry yeast, proof it first in a small portion of your lukewarm water (around 30-35°C or 85-95°F) with a pinch of sugar for 5-10 minutes until foamy, then add this mixture to the flour. Next, pour in the rest of the lukewarm water.
At this stage, do not add the salt yet. Use a spoon, spatula, or your hand to mix everything together until there are no dry bits of flour left. The mixture will be very wet, shaggy, and sticky – this is exactly how a high-hydration ciabatta dough should look at this point.
Once the ingredients are just combined into a rough mass, cover the bowl and let it rest for 20-30 minutes. This initial rest is often called an "autolyse" (or a partial autolyse if the yeast is included). During this time, the flour absorbs the water fully, and enzymatic activity begins to break down proteins, starting the gluten development process without any mechanical work. This hydration step makes the dough easier to handle during the subsequent slap and fold sessions and leads to a smoother, more extensible dough later.
Step 2: The First Slap and Fold Session (Initial Gluten Development)
After the autolyse period, your dough will look slightly smoother but will still be very sticky. This is the moment to introduce the salt, which you held back in Step 1. Sprinkle the salt over the dough. Now, turn the dough out onto your clean, unfloured countertop. Don't be intimidated by the stickiness; resist the urge to add flour. Wet your hands slightly if needed, but avoid excessive water.
Begin the slap and fold technique: pick up the dough from one side, lift it, and slap the far end down onto the counter, letting the near end stick to your hand. With the hand still holding the dough, stretch the dough slightly towards you as you bring it back up, then fold the stretched portion over the part that's on the counter. Rotate the dough mass slightly (about a quarter turn) and repeat: slap, stretch, fold, rotate. Continue this rhythmic action for about 5-8 minutes.
Initially, the dough will be very loose and sticky, tearing easily. As you work it, you'll notice it becoming slightly smoother, less sticky, and starting to show some elasticity. It won't be perfectly smooth yet, but you'll feel the gluten beginning to develop in your slap and fold ciabatta dough.
Step 3: Rest and Relaxation: Autolyse for Improved Dough Hydration
(Note: Step 3 as labeled in the structure seems to refer to a rest period, which was already covered in Step 1 as the initial autolyse. Assuming this step intends to refer to rest periods between slap and fold sessions or a specific longer autolyse variation, we will describe a rest period here. If the intention was a different kind of rest, this section can be adjusted.)
Following the initial slap and fold session (Step 2), gather the dough into a rough ball using your bench scraper and transfer it back into the lightly oiled mixing bowl. Cover the bowl again and let the dough rest for another 20-30 minutes at room temperature. This rest period is crucial for allowing the gluten network, which you just started to develop, to relax and realign. The dough will become less resistant and easier to work in the next session.
This intermediate rest also allows the water to continue hydrating the flour more completely. This process is sometimes referred to as a continuation of the autolyse principles, even though salt and yeast are present. The dough will spread out in the bowl during this rest, but don't worry – this is normal for high-hydration doughs and shows that the gluten is relaxing. These rest periods between active working sessions are just as important as the slap and fold itself in developing a strong yet extensible slap and fold ciabatta dough.
Step 4: Subsequent Slap and Fold Sessions for Stronger Gluten
After the 20-30 minute rest, turn the dough out onto your clean, unfloured surface again. It should feel a bit smoother and more elastic than after the first session. Perform another slap and fold session, similar to Step 2. Again, wet your hands slightly if needed, but avoid adding flour. Continue the slap, stretch, fold, and rotate motion. This session will likely be easier than the first as the gluten is more developed. Work the dough for another 5-8 minutes.
You will observe significant changes during this second session. The dough will become noticeably smoother, more cohesive, and less sticky. It will resist tearing more than before and will start to hold its shape better when gathered. The surface will become taut and glossy. Depending on the flour and hydration, you might perform a third slap and fold session after another 20-30 minute rest. The goal is to continue building gluten strength until the dough passes the "windowpane test" (described in the next section), indicating sufficient development for your slap and fold ciabatta dough.
Step 5: Determining When Your Ciabatta Dough is Ready
Knowing when to stop working your slap and fold ciabatta dough is key to avoiding over-development. You're aiming for a dough that is smooth, elastic, and passes the "windowpane test." To perform this test, gently pull a small piece of dough from the main mass. Slowly and carefully stretch it between your fingers. If the dough can be stretched thinly enough to see light through it without tearing easily – forming a translucent "windowpane" – then the gluten is well-developed and the dough is ready for bulk fermentation.
If the dough tears before you can stretch it thin, it needs more gluten development. Perform another short slap and fold session (3-5 minutes) followed by a rest, then test again. Overworking the dough can make it tough and difficult to handle later, so stop once the windowpane test is passed. The total active slap and fold time is often between 10 and 15 minutes across multiple sessions, but the dough's feel and the windowpane test are the best indicators of readiness for your slap and fold ciabatta dough.
Tips and Tricks for Perfect Slap and Fold Ciabatta
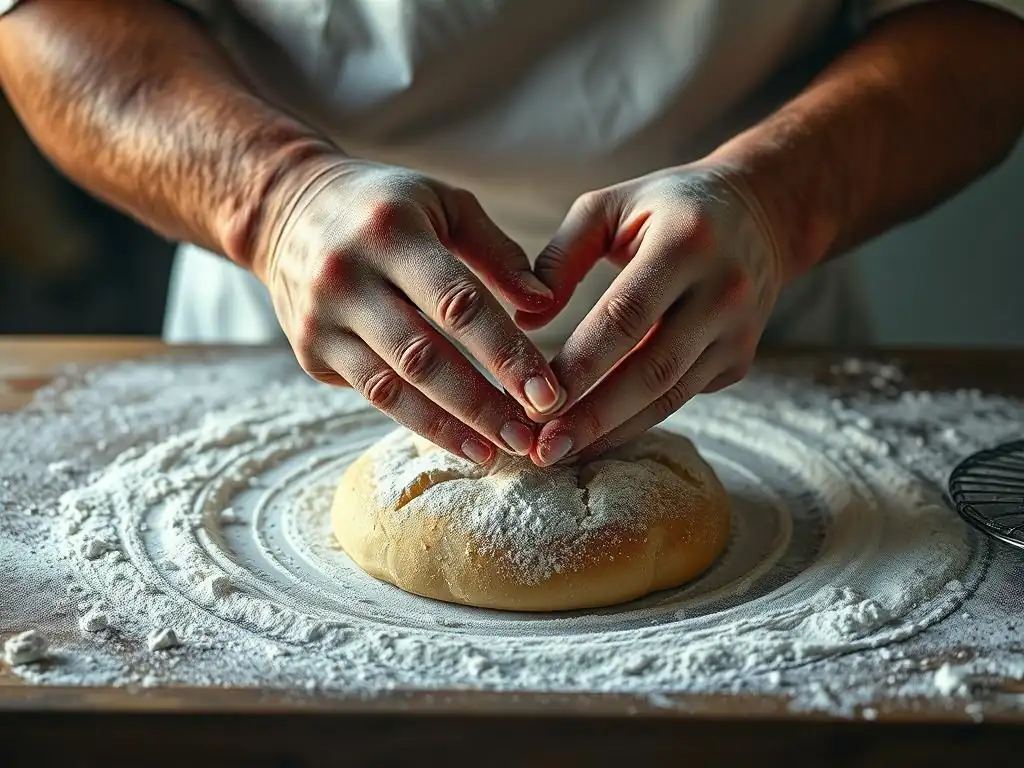
Mastering the Slap Technique: Avoiding Common Mistakes
The slap and fold method can feel awkward initially, but mastering the action is key to successful slap and fold ciabatta dough. A common mistake is trying to use too much force or speed. The process should be rhythmic and controlled, not violent. Focus on the stretch and fold after the slap, allowing the dough's own weight to assist. Another error is adding too much flour to the surface; this defeats the purpose of the technique, which is to work a high-hydration dough without changing its consistency.
If the dough is sticking excessively to your hands, try wetting them slightly with water, but avoid soaking them. A bench scraper is your best friend for gathering the dough from the surface between slaps. Don't worry if small pieces break off initially; just incorporate them back into the main mass. Practice makes perfect; after a few sessions, you'll find a rhythm that works for you, making the slap and fold ciabatta dough process much smoother. Remember, the goal is to build gluten gently through repetition, not to force the dough into submission.
Achieving the Right Dough Consistency for Slap and Fold
The correct consistency for slap and fold ciabatta dough is counter-intuitively wet and sticky. If your dough feels too firm or dry, it likely has too little water for true ciabatta hydration (aiming for 75-85% hydration relative to flour weight). A dough that is too dry will be difficult to slap and fold effectively, as it won't stretch properly, and the resulting bread will be dense. Conversely, a dough that is excessively wet (say, above 90% hydration for a beginner) can be extremely challenging to handle, even with slap and fold, requiring more advanced technique.
The ideal consistency after the initial mix and autolyse should be a shaggy, cohesive mass that spreads out readily when left to rest but can still be gathered with a scraper. As you slap and fold, it will become smoother and more manageable, but it should remain quite soft and tacky.
If you accidentally add too much water, you can carefully add a tiny bit more flour (a tablespoon at a time) during the initial mixing, but it's better to measure precisely from the start. The stickiness is normal and a sign you're on the right track for classic slap and fold ciabatta dough.
Troubleshooting Sticky Ciabatta Dough During Slap and Fold
Working with sticky slap and fold ciabatta dough is part of the process, but excessive stickiness can be frustrating. If the dough is sticking stubbornly to your hands and the surface, first, ensure your surface is truly clean and unfloured. A tiny amount of oil rubbed on the surface can sometimes help, but use it very sparingly. Wetting your hands slightly is also a common trick.
Avoid the temptation to add significant amounts of flour to the surface or into the dough itself during the slap and fold process. This lowers the hydration and will negatively impact the final crumb. If the dough is persistently difficult, try working it for 2-3 minutes, then give it a short rest (5-10 minutes) covered on the counter, and return to the slap and fold.
The rest allows the gluten to relax and the flour to hydrate further, often making it easier to handle. Patience and a good bench scraper are your best tools when troubleshooting sticky slap and fold ciabatta dough.
Adjusting Hydration Levels for Optimal Slap and Fold Results
Hydration is perhaps the most critical factor influencing the texture of your slap and fold ciabatta dough and the final bread. Ciabatta is typically made with high hydration, usually between 75% and 85% water relative to flour weight. A higher hydration (e.g., 80-85%) will result in a more open, airy crumb with larger holes, but the dough will be stickier and harder to handle, demanding more confident slap and fold technique. A lower hydration (e.g., 75%) will be easier to work but may yield a slightly less open crumb.
Beginners might start with a slightly lower hydration, perhaps 75-78%, to get comfortable with the slap and fold method before attempting wetter doughs. As you gain experience, you can gradually increase the water percentage to achieve a more open structure. Factors like flour type (different flours absorb water differently) and ambient humidity can also affect how the dough feels, so be prepared to make slight adjustments. The key is to find a hydration level that challenges you slightly but remains manageable with the slap and fold technique to produce the desired slap and fold ciabatta dough consistency.
Shaping and Baking Your Slap and Fold Ciabatta
Gently Shaping the Ciabatta Loaves: Maintaining Air Pockets
After the bulk fermentation period, your slap and fold ciabatta dough will be significantly increased in volume and filled with air bubbles. The shaping process for ciabatta is unique because the goal is to handle the dough as gently as possible to preserve these precious air pockets that contribute to the open crumb. Avoid traditional kneading or degassing.
Turn the dough out onto a lightly floured surface. Use your bench scraper to divide the dough into the desired number of portions (typically 2-4 loaves depending on the batch size). For each portion, gently stretch or coax it into a rough rectangle or square shape. Avoid pressing out the air.
Simply fold the dough in half lengthwise or into thirds like a letter, then gently seal the seam. You can slightly elongate it if desired. The key is minimal handling. Place the shaped loaves seam-side down onto a well-floured couche or parchment paper for the final proof, ensuring generous flouring to prevent sticking, especially with high-hydration slap and fold ciabatta dough.
The Importance of Proofing for Light and Airy Ciabatta
Proofing, or the final rise, is a critical stage after shaping your slap and fold ciabatta dough. During proofing, the yeast continues to ferment, producing more gas and causing the shaped loaves to increase in volume and become lighter. Proper proofing is essential for achieving a light and airy texture and the signature open crumb. Over-proofing can lead to the dough collapsing in the oven, while under-proofing results in a dense loaf.
Ciabatta is often proofed for a relatively short time compared to its bulk fermentation, typically 45-90 minutes at room temperature, or longer if proofing in a cooler environment. The dough should look visibly puffed up but should not be doubled in size. A good test is the poke test: gently press your finger into the dough; if the indentation springs back slowly and not completely, it is properly proofed.
If it springs back immediately, it needs more time. If it stays indented completely, it might be slightly over-proofed, which is a risk with the delicate structure of slap and fold ciabatta dough.
Baking Techniques for Achieving a Crispy Crust and Open Crumb
Baking ciabatta requires a hot oven and steam to achieve its characteristic crispy crust and maximize oven spring, which helps create that open crumb structure developed by the slap and fold method. Preheat your oven with a baking stone or steel inside to a high temperature, typically 230-250°C (450-475°F), for at least 30-60 minutes to ensure the stone is fully heated.
Just before loading the loaves, create steam in the oven. This can be done by placing a pan of hot water on the bottom rack or by using lava rocks/chains in a tray that you pour hot water over just as you close the oven door. Quickly transfer the proofed ciabatta loaves onto the hot stone using a peel or by sliding the parchment paper.
Bake with steam for the first 15-20 minutes, then remove the steam source and continue baking for another 15-25 minutes, or until the crust is deep golden brown and the internal temperature reaches around 98-100°C (208-212°F). The steam keeps the crust soft initially, allowing the dough to expand fully before the crust hardens, resulting in better oven spring and a more open crumb in your slap and fold ciabatta bread.
Advanced Slap and Fold Techniques for Ciabatta Bakers
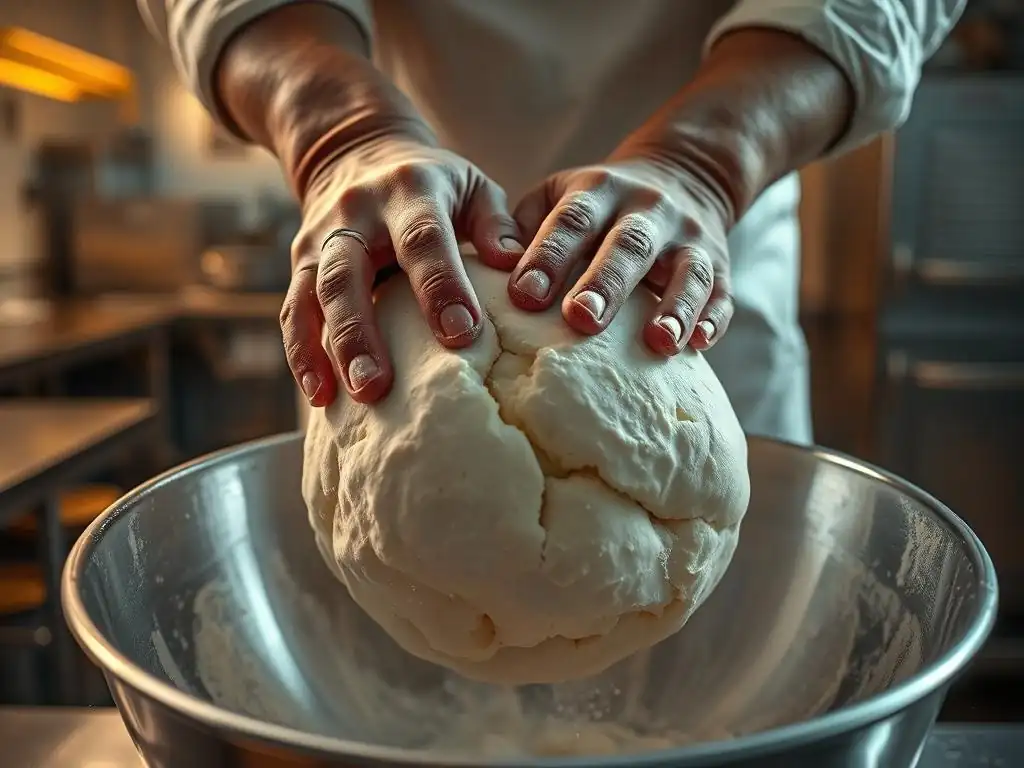
Incorporating Pre-Ferments (Poolish or Biga) for Enhanced Flavor
Taking your slap and fold ciabatta dough to the next level often involves incorporating a pre-ferment, such as a poolish or a biga. A pre-ferment is a portion of the flour and water from the main recipe that is mixed with a small amount of yeast and allowed to ferment for several hours (or overnight) before being added to the final dough. This long, slow fermentation develops complex flavors and aromas that are not achievable with a direct dough method.
A poolish is a liquid pre-ferment, typically made with equal parts flour and water by weight (100% hydration) and a tiny amount of yeast, fermented at room temperature for 12-16 hours or in the refrigerator for 24 hours. A biga is a stiffer pre-ferment, usually 50-60% hydration, also fermented over a similar timeframe. Both add depth of flavor and contribute to a more open crumb structure.
When using a pre-ferment for your slap and fold ciabatta dough, you'll subtract the flour and water used in the pre-ferment from the main dough's ingredients. The slap and fold technique is still applied to the final dough mixture, which will now include the mature pre-ferment.
Experimenting with Different Flour Types for Unique Ciabatta Textures
While strong bread flour is the standard for slap and fold ciabatta dough due to its high gluten content, experimenting with different flour types can introduce unique flavors and textures. For example, incorporating a percentage of whole wheat flour (say, 10-20% of the total flour weight) will add a nutty flavor and increase the nutritional value, though it may result in a slightly denser crumb as whole wheat bran can interfere with gluten development.
Using a portion of high-extraction flour or even a small amount of rye flour (5-10%) can also impact flavor and crumb. Italian Tipo 00 flour, while lower in protein than many bread flours, is very finely milled and can contribute to a soft, tender crumb when blended with stronger flour for slap and fold ciabatta dough. Be aware that different flours absorb water differently, so you may need to adjust the total hydration slightly when substituting flours. The slap and fold method remains effective for developing gluten even with these blends, though the dough's handling characteristics might change.
Slap and Fold Variations: Exploring Alternative Techniques
While the standard slap, stretch, and fold on an unfloured surface is the core technique, there are variations and complementary methods that bakers use, especially for extremely wet doughs. One variation involves performing the slap and fold on a slightly wet surface rather than an unfloured dry one. This can help prevent sticking without adding flour, though it requires careful control to avoid the dough becoming too wet.
Another common approach, particularly with very high hydration slap and fold ciabatta dough (85%+), is to alternate slap and fold sessions with "stretch and fold" sessions done in the bowl. For a bowl stretch and fold, you simply wet your hand, grab one edge of the dough in the bowl, stretch it upwards, and fold it over the center. Rotate the bowl and repeat 3-4 times.
This is less intensive than slap and fold and is often done between slap and fold sessions or as the primary method for doughs too wet to manage on a surface. Combining techniques can be effective for developing strength and handling very wet doughs.
Enjoying Your Homemade Slap and Fold Ciabatta Bread
Serving Suggestions for Freshly Baked Ciabatta
There's nothing quite like the aroma and taste of freshly baked slap and fold ciabatta bread, still warm from the oven. Its airy crumb and crispy crust make it incredibly versatile. It's perfect served simply with a drizzle of good quality olive oil and a sprinkle of flaky sea salt – a classic Italian way to enjoy its pure flavor.
Ciabatta is also the ideal bread for making paninis or other sandwiches; its sturdy crust holds up well to fillings, while the soft, open interior is perfect for absorbing juices. Serve it alongside soups, stews, or pasta dishes to sop up delicious sauces. Cut into chunks, it makes an excellent base for bruschetta or crostini, topped with tomatoes, garlic, or other savory ingredients. Don't forget it's fantastic for dipping into balsamic vinegar and olive oil. The open texture achieved by the slap and fold ciabatta dough makes it particularly good for these uses.
Storing Your Ciabatta Bread to Maintain Freshness
Ciabatta is best enjoyed on the day it is baked when its crust is at its crispiest and the crumb is most airy. However, if you need to store it, proper technique can help maintain its quality for a day or two. The enemy of a crispy crust is moisture, so avoid airtight containers or plastic bags on the first day, as they will trap moisture and soften the crust.
For short-term storage (a few hours), simply leave the loaf cut-side down on a cutting board. For overnight storage, wrap the cooled loaf loosely in a paper bag or a clean linen towel. This allows some air circulation while protecting it slightly from drying out too much. If you need to store it longer, or wish to preserve it for later, ciabatta freezes exceptionally well.
Allow the loaf to cool completely, then wrap it tightly in plastic wrap followed by aluminum foil or place it in a freezer bag. To reheat, remove from the freezer, unwrap, and bake in a preheated oven at 180-200°C (350-400°F) for 10-15 minutes until the crust is crisp again. This method helps revive the texture of your slap and fold ciabatta bread.
Conclusion: Embrace the Slap and Fold for Exceptional Ciabatta
Mastering the slap and fold method is a rewarding step in your bread baking journey, especially when tackling the challenges of high-hydration doughs like those used for ciabatta. While it might feel intimidating or messy initially, the technique's ability to efficiently develop gluten in a wet environment without adding excess flour is unparalleled. It allows you to handle doughs that would be unmanageable with traditional kneading, opening the door to baking truly authentic, light, and airy ciabatta bread with that sought-after open crumb.
By understanding the "why" behind the slap and fold technique, practicing the rhythmic motion, respecting the rest periods, and paying attention to the dough's feel and the windowpane test, you will gain confidence. Don't be discouraged by sticky hands or imperfect results on your first try. Each attempt at working your slap and fold ciabatta dough builds skill and intuition. Embrace the process, enjoy the transformation from a shaggy mass to an elastic dough, and savor the incredible flavor and texture of homemade ciabatta bread that this method helps you achieve. Happy baking!
Frequently Asked Questions
What exactly is the slap and fold method, and why is it used for ciabatta dough?
The slap and fold method is a no-knead technique used to develop gluten in dough. It's particularly useful for high-hydration doughs like ciabatta, as it's less messy than traditional kneading.
How often should I slap and fold my ciabatta dough during the bulk fermentation?
Typically, you'll perform the slap and fold technique 3-4 times during the first 1-2 hours of bulk fermentation. This helps to build dough strength and structure.
What consistency should my ciabatta dough have after the slap and fold sessions?
After the slap and fold sessions, the dough should feel stronger and more elastic, but still quite wet and sticky. It won't be as smooth as a traditionally kneaded dough.
What if my ciabatta dough remains too sticky even after several slap and fold sessions?
If your dough is excessively sticky, try using slightly less water in your next batch. Also, ensure your surface is well-floured to prevent sticking during the technique.
Can I use the slap and fold method for other types of bread besides ciabatta?
Yes, the slap and fold method can be used for other high-hydration breads like focaccia and some types of sourdough. It's a versatile technique for developing gluten in wet doughs.
Final Reflection: The Transformative Power of a Simple Fold
Mastering the slap and fold technique isn't just about crafting perfect ciabatta; it's about understanding the fundamental principles of bread making and embracing the meditative process of dough manipulation. The seemingly simple act of slapping and folding unlocks a world of texture and flavor, transforming ordinary flour and water into something truly extraordinary. This seemingly small skill is a gateway to a deeper understanding of gluten development and the artistry of baking.
The impact of this simple technique extends far beyond the kitchen. The rhythmic repetition of the slap and fold mirrors a kind of mindful practice, a meditative connection to the process of creation. It's a reminder that even the most complex results can stem from simple, repeated actions. The best things in life are simple,
a common adage rings true here, highlighting the beauty found in mastering fundamental techniques. The satisfaction derived from perfectly formed air pockets and a beautifully risen loaf is a testament to the power of patience and precision.
Now, consider your own journey. What seemingly simple techniques or practices have yielded unexpected results in your life? Perhaps it's a daily habit, a consistent effort, or a simple act of kindness. I encourage you to reflect on the power of repetition and mindful engagement in your own pursuits. Embrace the slap and fold, not just for ciabatta, but as a metaphor for achieving mastery in any endeavor. The journey may be simple, but the rewards are truly transformative.
Unleash Your Inner Ciabatta Artisan!
Thanks for taking the time to explore the magic of the slap and fold method! We hope you now feel confident in tackling this seemingly complex dough. Ready to put your newfound knowledge into practice?
- Master the Slap & Fold: Try making your own ciabatta loaf today using the techniques we've outlined. You'll be amazed at the results!
- Share Your Success: Post a picture of your ciabatta creation on social media and tag us – we'd love to see your beautiful loaves!
- Explore Other Breads: Feeling ambitious? Dive into our other bread-making tutorials for even more baking adventures!
Now, tell us: What unique ingredient are you most excited to try in your next ciabatta masterpiece?