
Applying Buttercream to Tiered Cakes: A StepbyStep

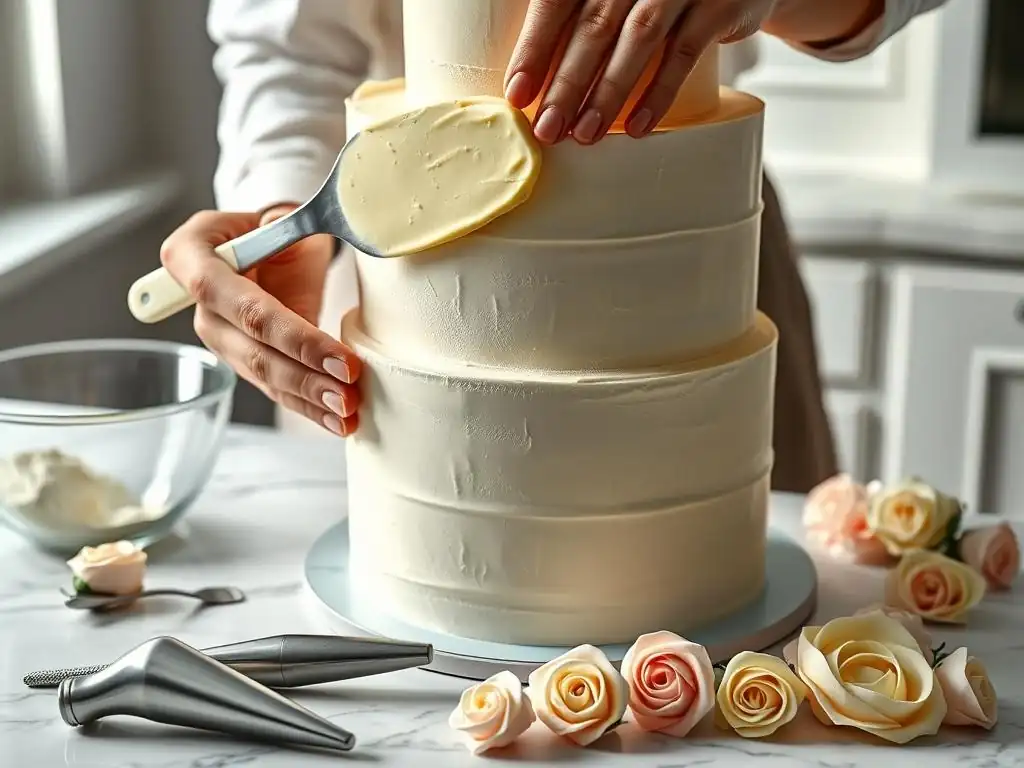
Welcome to BakeWithEase, your trusted guide to creating delicious baked goods! Ever dreamed of mastering the art of tiered cakes with flawlessly smooth buttercream? You're in the right place! Our guide breaks down the secrets of achieving professional-looking results, starting with our Buttercream frosting tiered cake tutorial. Read on to discover the techniques and tips that will elevate your baking from simple to spectacular... and leave your guests wondering how you did it!
- Buttercream Frosting Tiered Cake Tutorial: A Step-by-Step Guide for BakeWithEase
- Introduction to Buttercream Frosting Tiered Cakes
- Preparing for Your Buttercream Tiered Cake Project
- Baking and Preparing Your Cake Layers for Buttercream
- Creating a Stable Base for Your Tiered Cake
- Applying Buttercream Frosting to the First Tier
- Stacking and Securing the Second Tier
- Buttercream Frosting the Second Tier: Matching the First
- Decorating Your Buttercream Tiered Cake
- Troubleshooting Common Buttercream Tiered Cake Issues
- Serving and Storing Your Buttercream Tiered Cake
- Conclusion: Mastering the Art of Buttercream Tiered Cakes with BakeWithEase
-
Frequently Asked Questions
- How do I ensure my tiered cake layers are level before applying buttercream?
- What type of buttercream is best for tiered cakes?
- How much buttercream do I need for a tiered cake?
- What's the best way to apply a smooth buttercream finish to a tiered cake?
- How do I transport a tiered cake without damaging the buttercream?
- Final Reflection: The Sweet Art of Tiered Cake Perfection
- Unleash Your Inner Cake Artist: Take the Next Step!
Buttercream Frosting Tiered Cake Tutorial: A Step-by-Step Guide for BakeWithEase
Introduction to Buttercream Frosting Tiered Cakes
Why Tiered Cakes and Buttercream are a Perfect Match
Tiered cakes stand as impressive centerpieces, perfect for celebrations like weddings, birthdays, and anniversaries. While fondant is often associated with their smooth, sculptural finish, buttercream offers a delicious, versatile, and often more approachable alternative. A well-executed buttercream frosting tiered cake tutorial reveals that buttercream provides a rich flavor and creamy texture that many people prefer, making your beautiful creation not just a feast for the eyes but also for the palate.
Beyond taste, buttercream is incredibly adaptable. It can be easily colored, flavored, and piped into intricate designs, allowing for endless creative possibilities. Learning to apply buttercream to tiered cakes opens up a world of decorating techniques, from rustic swirls to smooth, modern finishes. This guide will walk you through the essential steps, ensuring your stacked cake is both stable and stunningly frosted.
Level Up Your Baking Skills: Mastering Tiered Cakes
Moving from single-layer cakes to tiered structures is a significant step in any baker's journey. It requires precision, planning, and an understanding of basic engineering principles to ensure stability. Mastering this particular buttercream frosting tiered cake tutorial involves learning how to bake sturdy layers, create internal support systems, and apply frosting smoothly across multiple levels.
Successfully completing a tiered cake frosted with buttercream builds confidence and expands your baking repertoire. It demonstrates proficiency in managing different cake sizes, understanding weight distribution, and achieving a professional finish. Think of it as the next level after perfecting your layer cakes – a rewarding challenge that yields spectacular results.
Preparing for Your Buttercream Tiered Cake Project
Gathering Your Baking Essentials for a Tiered Cake
Embarking on a tiered cake project requires more than just ingredients; specific tools are essential for success. You'll need cake pans in various sizes (e.g., 6-inch, 8-inch, 10-inch for a standard three-tier), parchment paper for lining, and cooling racks. Accurate measuring cups and spoons are crucial, as consistency is key when baking multiple layers that need to stack neatly.
Having a kitchen scale is also highly recommended for precise ingredient measurements, especially for flour and sugar, which can vary significantly when measured by volume. Don't forget basic tools like mixing bowls, whisks, spatulas, and a good oven thermometer to ensure your oven maintains the correct temperature for even baking.
Essential Buttercream Frosting Tools and Equipment
Achieving a smooth and professional buttercream finish on a tiered cake depends heavily on your tools. You'll need an offset spatula (or two, in different sizes), a bench scraper or cake comb for smoothing the sides, and a turntable or lazy Susan to rotate the cake easily while frosting. Piping bags and various tips will be useful for applying the buttercream initially and for decoration.
Consider investing in a sturdy cake board for each tier (cut to size or slightly larger) and a larger, thicker cake drum for the base. Dowels (plastic or wood) are non-negotiable for providing internal support between tiers. Having these specific tools on hand will make the process of applying buttercream to tiered cakes much smoother and more efficient.
Choosing the Right Cake Recipes for Tiering
Not all cake recipes are suitable for stacking. Light, airy cakes like chiffon or angel food are generally too delicate. You need recipes that yield sturdy, dense crumbs that can support the weight of the tiers above. Pound cake, dense vanilla or chocolate butter cakes, or even some sturdier sponge cakes work well.
Look for recipes that are known for their structure and stability. A good rule of thumb is that the cake should be firm enough to handle without crumbling, even when chilled. Testing a recipe beforehand with a single layer can save disappointment later when attempting your tiered cake buttercream guide.
Selecting the Perfect Buttercream Recipe for Tiered Cakes: Stability Matters
The type of buttercream you choose is critical for a tiered cake's stability and finish. American buttercream (butter and powdered sugar) is easy to make but can be very sweet and may soften quickly in warm environments. Swiss meringue, Italian meringue, or French buttercream are more stable, less sweet, and provide a silky-smooth finish perfect for sharp edges.
For a tiered cake buttercream guide, a stable buttercream recipe is paramount. Consider using a recipe that incorporates shortening alongside butter for extra firmness, or one of the meringue-based buttercreams which are known for holding their shape well, especially when chilled. Ensure you make enough buttercream to generously cover all your layers; it's better to have too much than too little.
Baking and Preparing Your Cake Layers for Buttercream
Baking Even Cake Layers: Tips and Tricks
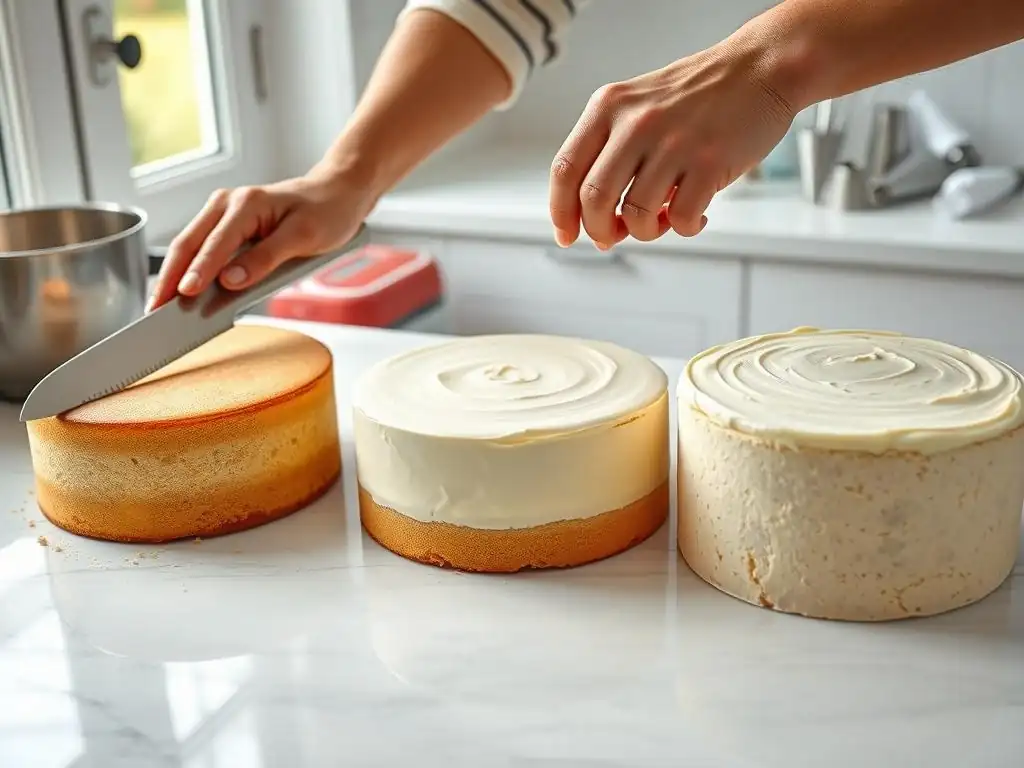
Even cake layers are the foundation of a stable tiered cake. To achieve this, start by properly preparing your pans: grease and flour them, or line the bottoms with parchment paper cut to size. Distribute the batter evenly between pans, using a kitchen scale to ensure each pan contains the exact same weight of batter.
Baking at a consistent temperature is also vital. Avoid opening the oven door frequently. If your oven tends to bake unevenly, rotate the pans halfway through the baking time. Using cake strips (wet fabric strips wrapped around the outside of the pan) can help the cakes bake more evenly, preventing doming in the center and crusting on the sides.
Leveling and Torting Your Cakes for a Professional Finish
Once your cakes are baked and cooled, leveling is necessary to create flat surfaces for stacking. A serrated knife or a specialized cake leveler works well for this. Carefully slice off any dome from the top of the cake until it's perfectly flat. This excess cake can be saved for cake pops or other treats.
Torting, or slicing a single cake layer horizontally into two or more thinner layers, allows for more filling and helps create a more impressive height. Use a serrated knife, a cake leveler, or even dental floss for a clean cut. Ensuring your layers are level and uniform is a fundamental step in this buttercream frosting tiered cake tutorial.
Chilling Cake Layers: A Crucial Step for Easy Buttercream Application
Chilling your cake layers is a non-negotiable step before frosting, especially when making a tiered cake buttercream guide. Once layers are cooled to room temperature and leveled/torted, wrap them tightly in plastic wrap. Place them in the refrigerator for at least 30-60 minutes, or in the freezer for 15-20 minutes.
Chilling makes the cake layers firm and easier to handle, significantly reducing crumbs during the frosting process. This results in a cleaner crumb coat and a smoother final finish. Cold cake layers also help the buttercream set faster as you apply it, which is particularly helpful when working on the sides and edges.
Creating a Stable Base for Your Tiered Cake
Assembling the First Tier: Securing Your Cake to the Board
The base tier needs a sturdy foundation. Place a non-slip mat or a dab of buttercream on your cake drum or presentation board to prevent the cake from sliding. Then, place the first cake layer onto the board. If your cake board is larger than the cake, center it carefully.
Apply a layer of filling (if using) and stack the subsequent layers for the first tier, ensuring they are aligned. Once all layers for the first tier are stacked and filled, secure the entire tier to its individual cake board (which should be the same size as the cake) using a small amount of buttercream as "glue" between the bottom cake layer and the board. This individual board is vital for support when stacking.
Using Cake Boards and Dowels for Support
Cake boards and dowels are the unsung heroes of tiered cake stability. Each upper tier must rest on its own cake board, and dowels inserted into the tier below support the weight of the tiers above. For example, dowels go into the bottom tier to support the second tier.
Measure the height of the bottom tier accurately and cut dowels (typically 4-5 for an 8 or 10-inch cake) slightly shorter than the tier's height. Insert them vertically into the bottom tier, arranging them in a circle slightly smaller than the diameter of the tier that will sit on top. This structure prevents the upper tiers from sinking into the lower ones, a critical step in any buttercream frosting tiered cake tutorial.
Applying a Crumb Coat: The Foundation for Flawless Buttercream
The crumb coat is a thin layer of buttercream applied to the entire cake before the final layer. Its purpose is to trap any loose crumbs, creating a clean surface for your final frosting application. Apply a thin layer of buttercream with an offset spatula, working from the top down the sides.
Don't worry about perfection at this stage; the goal is simply to cover the cake entirely. Once coated, chill the cake for at least 15-30 minutes until the crumb coat is firm to the touch. This step is essential for achieving a smooth, crumb-free finish on your final buttercream layer when applying buttercream to tiered cakes.
Applying Buttercream Frosting to the First Tier
Achieving a Smooth Buttercream Finish on Round Cakes
Applying the final layer of buttercream smoothly requires practice and patience. Start by applying a generous amount of buttercream to the top of the chilled, crumb-coated cake. Use an offset spatula to spread it evenly, working from the center outwards.
Next, apply buttercream to the sides. You can do this by applying large dollops and spreading, or by using a piping bag to apply a more even layer around the circumference. The goal is to apply enough buttercream so that it's slightly thicker than your desired final layer, allowing room for smoothing.
Techniques for Applying Buttercream to the Sides of the Cake
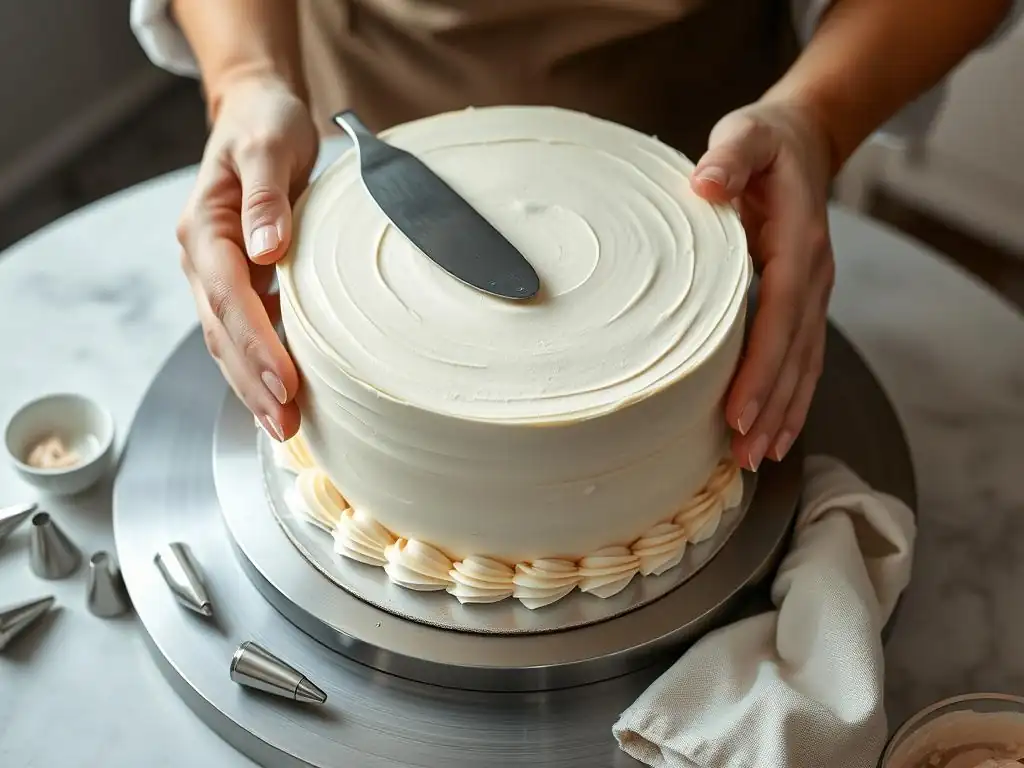
Once buttercream is on the sides, use a bench scraper or a long offset spatula held perpendicular to the cake and parallel to the turntable. With one hand gently guiding the scraper against the cake, slowly rotate the turntable with the other hand. This action will smooth the buttercream and remove excess.
Work your way around the cake, cleaning your scraper frequently. For very smooth sides, you might need to go over the cake multiple times, potentially chilling briefly between passes if the buttercream becomes too soft. This smoothing process is key to a professional-looking tiered cake buttercream guide.
Achieving Sharp Edges with Buttercream Frosting
Sharp edges elevate the look of a buttercream tiered cake. After smoothing the sides, there will likely be a small lip of buttercream extending above the top edge. Use a clean offset spatula, held flat against the top of the cake, and draw it inwards from the edge towards the center.
Repeat this action around the entire circumference of the top edge, cleaning your spatula after each swipe. For truly sharp edges, some bakers apply an extra thick layer of buttercream, smooth the sides, and then use the spatula technique on the top edge. Chilling the cake briefly can also help set the edges before the final smoothing pass.
Stacking and Securing the Second Tier
Placing the Second Tier: Ensuring Proper Alignment
Before placing the second tier, ensure the dowels are correctly inserted into the bottom tier as described earlier. Lift the second tier (which is already assembled on its own cake board) carefully. It helps to use cake lifters or have a second person assist, especially for larger tiers.
Center the second tier over the dowels on the bottom tier. Gently lower it into place, ensuring it sits flat on the dowel supports. Use a ruler or simply eye it from different angles to check that it is centered and straight relative to the tier below.
Adding Dowels to the Bottom Tier for Stability
As mentioned, dowels are crucial for preventing the upper tiers from collapsing the lower ones. For a standard 8-inch base tier supporting a 6-inch tier, you would typically use 4-5 dowels. Measure the height of the frosted 8-inch tier accurately. Cut the dowels slightly shorter (about 1/8 inch) than this height.
Insert the cut dowels into the 8-inch tier, positioning them in a circle just inside where the edge of the 6-inch tier will sit. Push them down until they are flush with the top surface of the buttercream. These dowels bear the weight of the 6-inch cake and its board, maintaining the structural integrity of the stacked cake.
Applying the Second Layer of Crumb Coat to the Second Tier
Just like the first tier, the second tier needs a crumb coat before its final buttercream layer. Once the second tier is stacked on the dowels of the first tier, apply a thin layer of buttercream to the top and sides of the second tier. This layer serves the same purpose: trapping crumbs.
Carefully cover the entire surface of the second tier with this thin layer. Use an offset spatula to spread it evenly. Don't worry about achieving a perfectly smooth finish yet. After applying the crumb coat, chill the entire stacked cake (both tiers) in the refrigerator for at least 30 minutes to allow the crumb coat to firm up.
Buttercream Frosting the Second Tier: Matching the First
Replicating Your Buttercream Design on the Upper Tier
With the crumb coat chilled, it's time to apply the final layer of buttercream to the second tier. The goal is to achieve a finish that matches the first tier, whether it's perfectly smooth, textured, or swirled. Apply a generous amount of buttercream to the top and sides of the second tier.
Use your offset spatula and bench scraper (for smooth finishes) or other tools as needed to apply the buttercream. Work carefully around the stacked structure, ensuring you don't bump or damage the lower tier. Consistency in technique is key to making the two tiers look cohesive in this buttercream frosting tiered cake tutorial.
Smoothing the Buttercream for a Uniform Look
Using your bench scraper or spatula, smooth the buttercream on the sides of the second tier, just as you did with the first. Hold the scraper perpendicular to the cake and rotate the turntable. Clean the scraper often. For the top, use an offset spatula to draw in the edges.
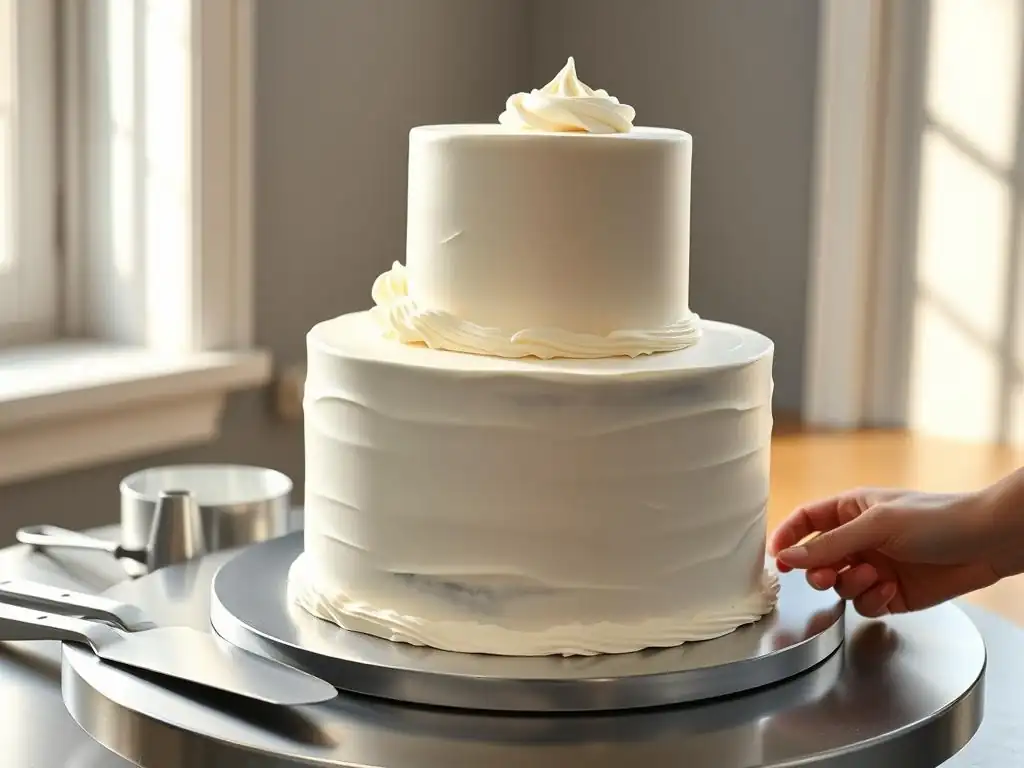
Pay close attention to the transition area where the second tier meets the first. While you won't apply frosting to the seam itself (as the second tier sits on its board), ensure the buttercream on the side of the second tier is smooth and consistent down to its base board.
Refining Edges and Addressing Imperfections
After smoothing, examine the second tier for any bumps, air pockets, or uneven areas. Use a small offset spatula to add or remove buttercream as needed. For sharp edges on the top, repeat the technique of drawing the spatula inwards.
If you notice any minor imperfections, you can often fix them by warming your bench scraper slightly under hot water, drying it completely, and doing a final gentle pass over the surface. Chilling the cake again briefly can also help set the buttercream before final refinements or decorations.
Decorating Your Buttercream Tiered Cake
Simple Buttercream Decoration Ideas for Tiered Cakes
Once your buttercream is smooth and set, the fun of decoration begins! Simple techniques can have a big impact on a tiered cake. Consider a rustic look by using an offset spatula to create textured swirls or peaks all over the cake. This is forgiving and hides minor imperfections.
Another simple yet elegant option is a horizontal or vertical striped texture using a cake comb. Drip effects, created by allowing ganache or thinned buttercream to drip down the sides, also add visual interest without complex piping. Remember, even a simple smooth finish is a beautiful decoration in itself.
Using Piping Tips for Elegant Buttercream Designs
Piping tips offer a wide range of decorative possibilities. A simple round tip can create dots, beads, or smooth lines. Star tips are perfect for shells, rosettes, or borders. A leaf tip can add greenery if you're using floral elements.
Consider piping borders around the base of each tier to cover the cake board and create a clean transition. You can also pipe decorative elements directly onto the sides of the cake, such as swirls, scrolls, or rosettes. Experiment with different tips on a practice board first to get a feel for the technique.
Adding Finishing Touches: Sprinkles, Edible Flowers, and More
Finishing touches can transform your buttercream tiered cake. Sprinkles are an easy way to add color and texture – apply them to the sides, top, or create sprinkle borders. Edible flowers, fresh or sugar, add natural beauty and elegance.
Consider adding edible glitter, dragees, or even small sugar paste figurines that complement your theme. These final details complete your buttercream frosting tiered cake tutorial masterpiece and add that extra touch of personality and flair.
Troubleshooting Common Buttercream Tiered Cake Issues
Preventing Cake Sagging and Instability
Cake sagging is usually a result of insufficient or improperly placed internal support. Ensure you are using enough dowels for the size and weight of your upper tiers. For instance, a 10-inch tier supporting an 8-inch tier might need 5-6 dowels, while an 8-inch supporting a 6-inch might need 4-5.
Measure and cut your dowels accurately so they are just slightly shorter than the height of the frosted lower tier. Insert them vertically, not at an angle, and position them within the footprint of the tier they are supporting. Using sturdy cake boards under each upper tier is also critical for distributing weight evenly onto the dowels.
Fixing Buttercream Bumps and Imperfections
Bumps and imperfections in the final buttercream layer often stem from crumbs in the final coat, air bubbles in the buttercream, or uneven application. Ensure your crumb coat is thoroughly chilled and firm before applying the final layer.
If you spot an air bubble while smoothing, pop it with a pin or the tip of your spatula and then re-smooth the area. For unevenness, add a little more buttercream to the low spots and re-smooth with a warm bench scraper. Patience and multiple passes with a clean scraper are often the key to a smooth finish.
Addressing Issues with Buttercream Consistency
Buttercream consistency is paramount for easy application and a beautiful finish. If your buttercream is too stiff, it will be difficult to spread smoothly and may tear the cake. Add a tiny amount of milk, cream, or even water (a teaspoon at a time) and mix until it reaches the desired consistency.
If your buttercream is too soft or appears greasy, it might be too warm or overworked. Chill it in the refrigerator for 10-15 minutes, then re-whip it briefly. For American buttercream, adding a little more powdered sugar can also stiffen it. For meringue buttercreams, chilling is usually the best solution.
Serving and Storing Your Buttercream Tiered Cake
How to Transport a Tiered Cake Safely
Transporting a tiered cake is perhaps the most nerve-wracking step! For shorter distances, a sturdy box slightly larger than your cake drum is essential. Place a non-slip mat inside the box. Chill the cake thoroughly before transport so the buttercream is firm.
For larger cakes or longer distances, consider assembling the tiers at the final destination if possible. If not, place the boxed cake on a flat surface in your vehicle (the floorboard or trunk, not a slanted seat). Drive carefully, avoiding sudden stops or turns. Some professional bakers use support systems within the box or even transport tiers separately for assembly on-site.
Proper Storage to Maintain Buttercream Freshness
Store your buttercream tiered cake in the refrigerator until a few hours before serving. A cake box provides protection from odors and drying out. Most buttercream-frosted cakes can be stored in the refrigerator for 3-4 days.
If you need to store it longer, or if you have leftover cake, individual slices or even whole tiers can be frozen. Wrap tightly in plastic wrap, then in a layer of aluminum foil. Frozen cake can last for 1-2 months. Thaw in the refrigerator overnight before bringing to room temperature.
Slicing and Serving Your Beautifully Frosted Tiered Cake
Serving a tiered cake can seem daunting, but it's straightforward. Start with the top tier. Remove any decorations. Use a sharp, long serrated knife. Cut slices as you would a round cake. Once the top tier is served, remove the second tier by carefully sliding an offset spatula or cake lifter between the tier and its supporting board, lifting it off the dowels below.
Place the removed tier onto a cutting surface and remove its internal board. Cut and serve this tier. Repeat for any remaining tiers. Remember to remove the dowels from the lower tiers before cutting them! For large round cakes, a common method is to cut concentric circles, then slice the rings into pieces. This maximizes portions and makes cutting easier.
Conclusion: Mastering the Art of Buttercream Tiered Cakes with BakeWithEase
Celebrate Your Baking Success: You Made a Tiered Cake!
Congratulations! You've navigated the complexities of baking, preparing, stacking, and frosting a beautiful tiered cake with buttercream. This buttercream frosting tiered cake tutorial has guided you through each critical step, from selecting the right recipes and tools to ensuring structural integrity and achieving a smooth finish.
Creating a multi-tiered cake is a significant accomplishment in baking. Take a moment to admire your work and celebrate your newfound skills. Each cake you make will build upon this experience, leading to even more impressive creations in the future. You've successfully applied buttercream to tiered cakes!
Further Resources for Advanced Buttercream Techniques
While this guide covers the essentials for a basic buttercream tiered cake, there are always more techniques to explore. Consider delving into advanced piping skills with different tips, learning how to create realistic sugar flowers, or experimenting with airbrushing or stenciling on buttercream.
BakeWithEase offers many resources, including tutorials on various buttercream types, advanced smoothing techniques, and intricate piping designs. Keep practicing, keep experimenting, and continue your baking journey. The world of cake decorating with buttercream is vast and full of delicious possibilities!
Frequently Asked Questions
How do I ensure my tiered cake layers are level before applying buttercream?
Level cake layers are crucial for a stable and visually appealing tiered cake. Use a cake leveler or a serrated knife to trim any unevenness. A small amount of buttercream underneath each cake will help to cement it to the cake board and make it level.
What type of buttercream is best for tiered cakes?
A stiff and stable buttercream, such as American buttercream or Swiss meringue buttercream, is ideal. These types hold their shape well and can support the weight of the tiers without melting or sagging.
How much buttercream do I need for a tiered cake?
The amount of buttercream depends on the size of your cake, the number of tiers, and the desired thickness of the frosting. It's always better to make slightly more than you think you'll need to avoid running out mid-project.
What's the best way to apply a smooth buttercream finish to a tiered cake?
The "crumb coat" is an essential step. Apply a thin layer of buttercream to seal in crumbs, then chill the cake. Follow this with a thicker layer, using a bench scraper for a smooth finish and a hot spatula to smooth the top.
How do I transport a tiered cake without damaging the buttercream?
Chill the cake thoroughly before transporting it. Use a sturdy cake box and consider using dowels or supports inside the cake to prevent shifting. Drive carefully and avoid sudden stops or bumps.
Final Reflection: The Sweet Art of Tiered Cake Perfection
Mastering the art of buttercream frosting on tiered cakes isn't just about achieving a visually stunning dessert; it's about embracing a process that demands precision, patience, and a touch of artistry. The techniques outlined in this tutorial, from creating the perfect consistency to achieving smooth, flawless finishes, are crucial for bakers of all skill levels looking to elevate their cake decorating game. This isn't just about following steps; it's about understanding the why behind each action, leading to consistently beautiful results.
The enduring appeal of tiered cakes lies in their inherent elegance and celebratory nature. They represent a commitment to detail and a desire to create something truly special. These cakes aren't just desserts; they're centerpieces, memories waiting to be made, and testaments to the power of culinary creativity. As the saying goes, The best things in life are sweet,
and a perfectly frosted tiered cake embodies that sentiment perfectly. The journey of learning this skill, with its challenges and triumphs, is a rewarding one that connects us to a rich history of baking and artistry.
Now, it's your turn. Don't be intimidated by the seemingly complex nature of tiered cakes. Take what you've learned here, practice the techniques, and experiment with your own creative flourishes. The next time you face a blank canvas – or rather, a naked cake – remember the steps, the tips, and the joy of transforming simple ingredients into a masterpiece. Embrace the process, celebrate your successes, and most importantly, have fun creating something truly delicious and unforgettable. The world awaits your perfectly frosted tiered cake.
Unleash Your Inner Cake Artist: Take the Next Step!
Thanks for joining us on this buttercream journey! We hope you now feel confident and inspired to create stunning tiered cakes. Ready to put your new skills to the test?
- Master the art of smooth buttercream: Practice your techniques on a smaller cake first. Challenge yourself to achieve that perfectly flawless finish!
- Share your creations: Show off your beautiful cakes on social media using #BakeWithEaseButtercream – we'd love to see your masterpieces!
- Explore advanced techniques: Discover our upcoming workshop on advanced cake decorating, featuring innovative frosting techniques and stunning design ideas.
What incredible cake design will you create next?