
The Art of the Turn: Mastering Lamination Folds for Success

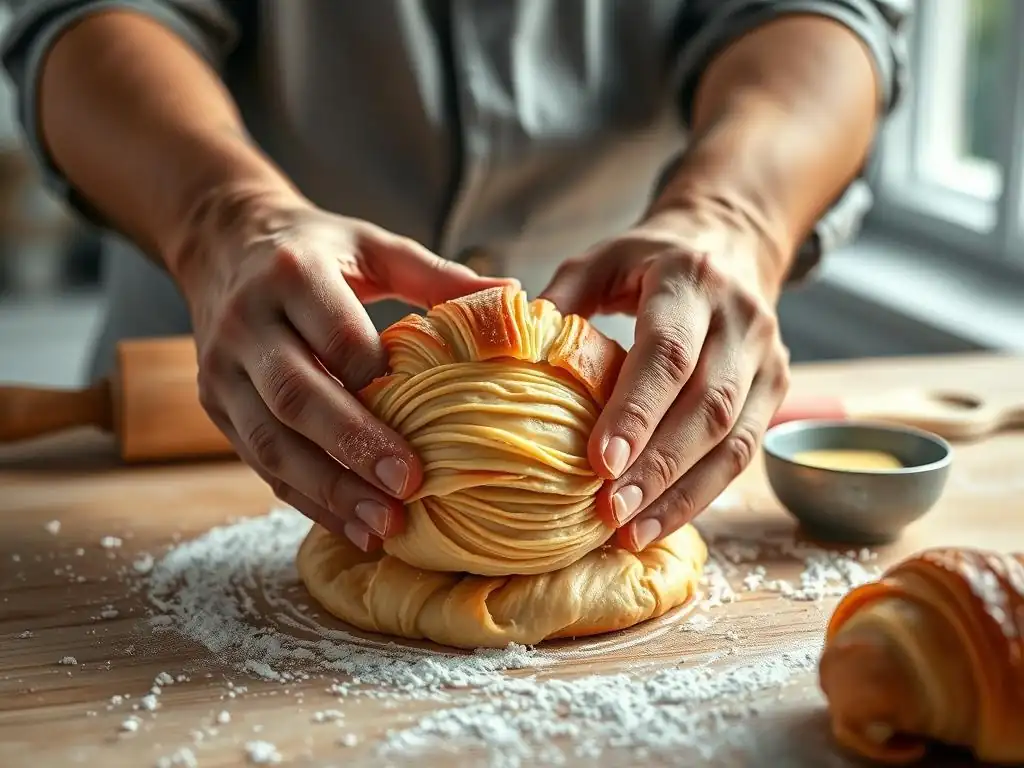
Welcome to BakeWithEase, your passport to pastry perfection! Ever wondered how croissants achieve that impossibly flaky, melt-in-your-mouth texture? It all starts with lamination folds. Unlock the secrets to this crucial technique and transform your baking from good to extraordinary. This guide demystifies the process, even for beginner bakers eager to master lamination folds, so get ready to create layers of deliciousness!
- Introduction to Lamination Folds for Beginner Bakers at BakeWithEase
- Understanding the Fundamentals of Lamination Folds
- Step-by-Step Guide to Basic Lamination Folds: Perfecting the Single Fold
- Mastering the Double Fold Lamination Technique
- Advanced Lamination Folds: The Art of the Book Fold (or Letter Fold)
- Troubleshooting Common Lamination Problems for Pain au Chocolat & Viennoiseries
- The Importance of Resting and Temperature Control in Lamination
- Applying Lamination Folds to Viennoiseries: Pain au Chocolat and Beyond
- Best Practices for Lamination Success: A Checklist for Beginner Bakers
-
Frequently Asked Questions
- What exactly are lamination folds, and why are they important in baking?
- Are lamination folds really necessary for beginner bakers? Can't I skip them?
- What type of fat is best to use for lamination folds, and why?
- How many lamination folds are typically required for a good croissant or puff pastry?
- What are some common mistakes beginner bakers make when attempting lamination folds, and how can I avoid them?
- Final Reflection: The Enduring Power of the Fold
- Unleash Your Inner Baker: Master the Perfect Laminated Dough!
Introduction to Lamination Folds for Beginner Bakers at BakeWithEase
What is Lamination in Baking and Why is it Important?
Lamination in baking is the fundamental technique of creating very thin, alternating layers of dough and a fat, typically butter. This process is achieved through a series of rolling and folding steps, often referred to as "turns." The importance of lamination cannot be overstated when it comes to achieving the signature flaky, airy texture found in classic pastries like croissants, pain au chocolat, and puff pastry. Without proper lamination, these baked goods would be dense and bread-like, lacking the delicate structure that makes them so beloved.
The magic happens in the oven. As the pastry bakes, the cold butter melts and releases steam. This steam is trapped between the layers of dough, forcing them apart and creating numerous distinct pockets of air. The dough layers themselves crisp up, resulting in a pastry that is both tender and shatteringly flaky. Mastering these 'lamination folds' is the secret weapon of pastry chefs and a key skill for any beginner baker aspiring to make authentic viennoiseries.
The Role of Lamination in Achieving Flaky Pastries
The primary goal of performing 'lamination folds' is to build up a significant number of thin, separate layers. The more distinct, even layers you create, the flakier your final pastry will be. Think of it like a stack of paper; the more sheets you have, the thicker the stack, and when baked, each "sheet" of dough contributes to that desirable crispness. A well-laminated croissant can easily have dozens of layers, each contributing to its light, airy structure.
For instance, a classic croissant typically undergoes a series of folds resulting in around 54 distinct layers of dough and butter. This specific layer count, achieved through careful 'lamination technique', is what provides that characteristic honeycomb interior and the incredibly flaky exterior that shatters when you take a bite. Learning to perform these folds accurately is a key step for 'lamination folds beginner bakers'.
Understanding the Fundamentals of Lamination Folds
Key Ingredients for Successful Lamination: Butter and Dough
The success of lamination hinges on the quality and handling of just two main components: butter and dough. The butter must be of high quality, ideally with a high fat content (around 82% is often recommended for professional results). This higher fat percentage means less water, which helps the butter remain more stable and less likely to melt into the dough prematurely.
The butter needs to be pliable but cold – think the consistency of cold playdough – so it can be rolled thinly without breaking or melting. This carefully prepared butter is often shaped into a flat block, called a beurrage.
The dough, on the other hand, needs to be strong yet elastic. It's typically a lean dough made from flour, water, yeast, salt, and sometimes a little sugar or milk. Proper gluten development through initial kneading is essential to give the dough the structure needed to withstand repeated rolling and folding without tearing. However, it shouldn't be too strong or tight; adequate resting periods are needed to relax the gluten, making the dough amenable to rolling and ready for the 'lamination folds beginner bakers' are learning.
The Science Behind Flaky Layers: Gluten Development and Butter Incorporation
The interplay between gluten development in the dough and the strategic incorporation of butter is the scientific basis for flaky layers. As the dough is mixed and kneaded, the proteins gliadin and glutenin combine with water to form gluten. This forms an elastic network that provides the structure to contain the steam during baking. During lamination, this gluten network is stretched and aligned into thin sheets.
The cold butter is then encased within these dough sheets. During baking, as the oven temperature rises, the butter melts. The small amount of water in the butter (even high-fat butter contains some) turns into steam. This steam expands rapidly, pushing the thin layers of dough apart. The gluten structure in the dough layers sets around these steam pockets, creating the airy, open crumb structure characteristic of well-laminated pastries. The melted fat also contributes to the tenderness and richness of the final product. Mastering the 'lamination technique' is all about controlling this delicate balance.
Step-by-Step Guide to Basic Lamination Folds: Perfecting the Single Fold
Preparing Your Dough and Butter for the Single Fold
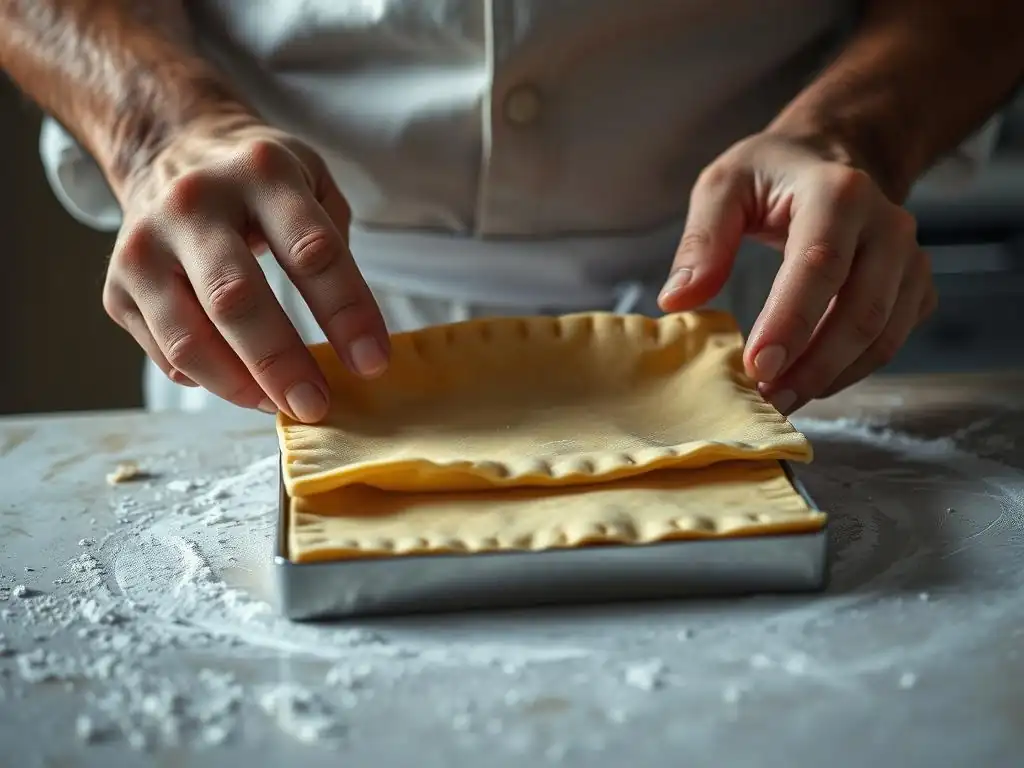
Before you begin the actual 'lamination folds', proper preparation of your dough and butter is crucial. Your dough should be well-chilled and rested after its initial mixing and perhaps a first proof. Roll the dough out on a lightly floured surface into a rectangle. Aim for a thickness of about 1 to 1.5 centimeters (approx. 0.4-0.6 inches) and make the rectangle roughly three times as long as it is wide. Ensure the edges are as straight as possible for even layering.
Your butter block ( beurrage) also needs to be ready. It should be pliable but cold. You can achieve this by gently pounding a cold block of butter with a rolling pin or rolling it out between two sheets of parchment paper. Shape it into a rectangle that is approximately two-thirds the size of your dough rectangle. For example, if your dough is 30 cm long and 10 cm wide, your butter block should be about 20 cm long and 10 cm wide.
Executing the Single Fold: A Visual Guide
The single fold is the simplest of the 'lamination folds' and forms the basis for building layers. Imagine your rolled-out dough rectangle lying horizontally in front of you. Place the prepared butter block onto the central two-thirds of the dough rectangle. Ensure the butter covers the middle section neatly, leaving the top and bottom thirds of the dough exposed.
Now, take the bottom third of the dough and fold it up and over the butter block. Brush off any excess flour from the surface before folding to prevent dry spots. Next, take the top third of the dough and fold it down over the previously folded section.
This creates a neat package with three layers of dough separated by two layers of butter. Turn the dough 90 degrees (either clockwise or counterclockwise) so the seam is facing to your right, like the spine of a book. This standardized orientation is important for consistent rolling in subsequent steps of your 'lamination technique'.
Resting and Chilling the Dough: Why It's Crucial
After executing a single fold, resting and chilling the dough is not optional – it's absolutely essential for successful lamination. Rolling and folding stretches the gluten network in the dough, making it tense and elastic. If you try to roll it out immediately for the next fold, it will spring back, resist rolling, and likely tear. Resting allows the gluten to relax, making the dough pliable and easy to work with again.
Equally important is chilling. The repeated handling and rolling warm up both the dough and the butter. The butter must be cold and firm (but not brittle) for the next fold to maintain distinct layers. Chilling the dough in the refrigerator for a minimum of 30-60 minutes between folds allows the butter to firm up and the dough to relax. Aim for a dough temperature between 4°C and 10°C (40°F and 50°F) during chilling. This crucial step prevents butter leakage and ensures even layers, vital for 'lamination folds beginner bakers'.
Mastering the Double Fold Lamination Technique
When to Use a Double Fold Instead of a Single Fold
The double fold, sometimes called a "book fold" or "letter fold," is another fundamental 'lamination technique'. While a single fold adds three layers (relative to the starting point), a double fold adds four layers. This fold is often used in recipes that require fewer total "turns" but still need a significant number of layers quickly. For example, some puff pastry recipes might use two double folds to achieve 16 layers (4 x 4 = 16), whereas a similar layer count (27 layers, 3 x 3 x 3) would require three single folds.
Choosing between a single and double fold depends on the specific recipe and the desired final texture. A recipe might call for a combination, like one double fold followed by one or two single folds. Using a double fold can sometimes be slightly trickier to execute perfectly for beginners, as it requires more precise alignment, but it's an important fold to master for building layers efficiently in your 'lamination folds'.
Performing the Double Fold: A Detailed Walkthrough
To perform a double fold, start with your chilled and rested dough, rolled out into a rectangle. This time, roll it out to be roughly four times as long as it is wide, maintaining an even thickness (again, around 1-1.5 cm). Imagine dividing the length of the rectangle into four equal sections.
Take one end of the dough and fold it towards the center line, covering approximately one-quarter of the total length. Now, take the opposite end of the dough and fold it also towards the center line, so that its edge meets the edge of the first fold neatly in the middle. You now have the dough folded into thirds, with the two outer sections meeting in the center.
Finally, fold the dough in half along the center line where the two edges meet, like closing a book. This results in four layers. Turn the dough 90 degrees so the seam is on your right, ready for the next rolling step or rest.
Tips for Avoiding Common Double Fold Mistakes
Precision is key when performing the double fold to ensure even layers. A common mistake is failing to roll the dough into a perfect rectangle of the correct proportions (four times as long as wide). If the rectangle is uneven, your subsequent folds will be uneven, leading to thicker and thinner spots in the final pastry.
Another pitfall is not aligning the two edges precisely in the center before folding in half. Any overlap or gap here will create an area with too many or too few layers. Also, be mindful of excess flour; brush it off before folding to prevent dry streaks. As always, proper chilling before and after the double fold is non-negotiable. If the butter is too soft, it will squeeze out during the folding process, ruining your layers. Patience and attention to detail are vital for 'mastering lamination folds', especially the double fold.
Advanced Lamination Folds: The Art of the Book Fold (or Letter Fold)
Understanding the Book Fold and its Benefits
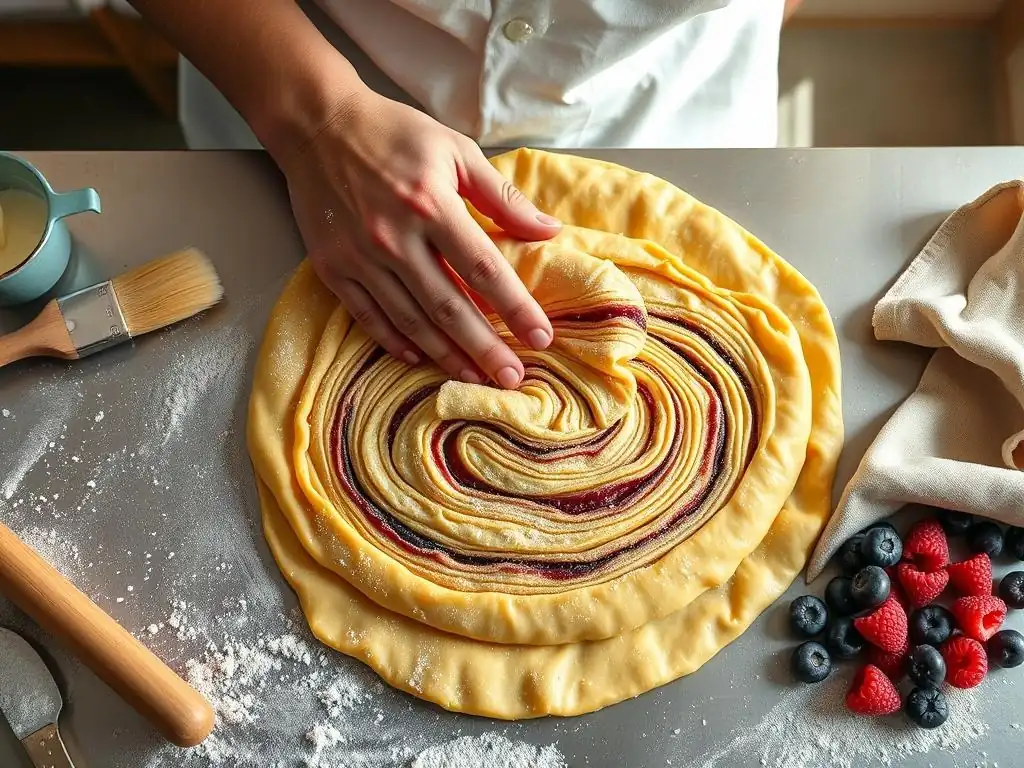
As discussed, the Book Fold is often synonymous with the Double Fold, where both ends of the dough are folded towards the center before the whole thing is folded in half. This technique is considered highly effective for building layers efficiently. In a single "turn" using this method, you increase the number of layers by a factor of four (compared to three with a single fold).
The main benefit of the Book Fold is its speed in layer development. Recipes requiring a higher number of layers but fewer total folding steps often utilize this method. It's commonly used in puff pastry preparations which might call for two or three double folds, quickly generating a large number of layers (16 or 64 respectively). While perhaps slightly more challenging initially than a single fold due to the precision required in meeting the edges, mastering the Book Fold significantly enhances your 'lamination technique' repertoire.
How to Execute the Book Fold for Optimal Lamination
Executing the Book Fold for optimal lamination requires careful attention to detail at each step. Begin with your chilled, rested dough rolled into a precise rectangle, aiming for it to be four times as long as it is wide. Use a ruler if necessary to ensure accuracy. Mentally, or even lightly marked with your finger, divide the length into four equal sections.
Gently fold one end of the dough inwards so the edge reaches the imaginary line that marks the center of the rectangle. Brush away any excess flour. Then, take the opposite end and fold it inwards so its edge meets the first folded edge exactly in the center. Now, you have a shape that resembles a wider, shorter rectangle. Finally, fold this rectangle in half along the center seam where the two edges meet. Turn the dough 90 degrees. This careful execution ensures layers are built uniformly, crucial for 'lamination folds beginner bakers'.
Achieving Even Layers with the Book Fold Technique
Achieving beautifully even layers with the Book Fold is a hallmark of skilled lamination. The evenness starts with the initial rolling – the dough rectangle must have consistent thickness throughout. If one part is thicker than another, the layers in that section will be compressed or stretched unevenly during subsequent rolling.
The precise alignment of the two folded edges in the center is paramount. If they overlap, you'll create a section with too many layers, leading to a dense band in the final pastry. If they don't meet, you'll have a gap, potentially resulting in hollow spots. Practice makes perfect with this fold; focusing on creating sharp corners and straight edges during the initial roll-out and precise alignment during the fold itself will lead to superior results in your 'lamination folds'.
Troubleshooting Common Lamination Problems for Pain au Chocolat & Viennoiseries
Dealing with Torn Dough During Lamination
Torn dough is a frustrating but common issue when learning 'lamination folds beginner bakers'. It often happens when the dough hasn't rested long enough and the gluten is too tight, or if the dough is too cold and stiff, or simply from rolling too forcefully. If you encounter a small tear, especially one that doesn't expose the butter, you can often gently pinch the dough back together to seal it.
For larger tears, particularly if the butter is visible or oozing, the best course of action is to stop rolling immediately. Gently patch the tear by pressing the dough together. Then, wrap the dough tightly in plastic wrap and return it to the refrigerator for an extended rest, perhaps 1 to 2 hours, or even overnight. This allows the gluten to fully relax and the butter to firm up. When you resume, roll very gently and try to avoid putting pressure on the previously torn area. Patience is key; rushing will only make it worse.
Preventing Butter Leakage: Temperature Control is Key
Butter leakage, or "butter blow-out," is perhaps the most frequent and detrimental problem encountered during lamination. It occurs when the butter block gets too warm and soft, causing it to squeeze out from between the dough layers as you roll or fold. This destroys the distinct layers necessary for flakiness, effectively turning your dough into enriched bread dough.
The absolute best way to prevent butter leakage is rigorous temperature control. Your dough and butter must remain cold throughout the entire process. The ideal temperature range for working with laminated dough is typically between 4°C and 10°C (40°F and 50°F). If at any point the dough feels warm, oily, or the butter seems soft, stop immediately. Wrap the dough and put it back in the refrigerator for a minimum of 30 minutes to re-chill before attempting to continue your 'lamination technique'. Working in a cool environment and quickly also helps.
Handling Sticky Dough: Flouring Techniques
Sticky dough makes rolling and folding a messy and difficult process, increasing the likelihood of tears and uneven layers. Stickiness can result from a dough that is too hydrated, not sufficiently chilled, or working in a warm, humid environment. While some flour is necessary on your work surface and rolling pin to prevent sticking, using too much can dry out the dough's surface and edges, leading to streaks in the final product.
The key is to use flour sparingly and judiciously. Lightly flour your work surface and rolling pin, just enough to prevent the dough from adhering. Lift and move the dough frequently as you roll to ensure it's not stuck down. If the dough is excessively sticky, it's a strong indication that it needs more time to chill and firm up in the refrigerator before you proceed with your 'lamination folds'. A properly chilled dough should be relatively easy to handle with minimal flour.
The Importance of Resting and Temperature Control in Lamination
The Impact of Temperature on Butter and Dough Consistency
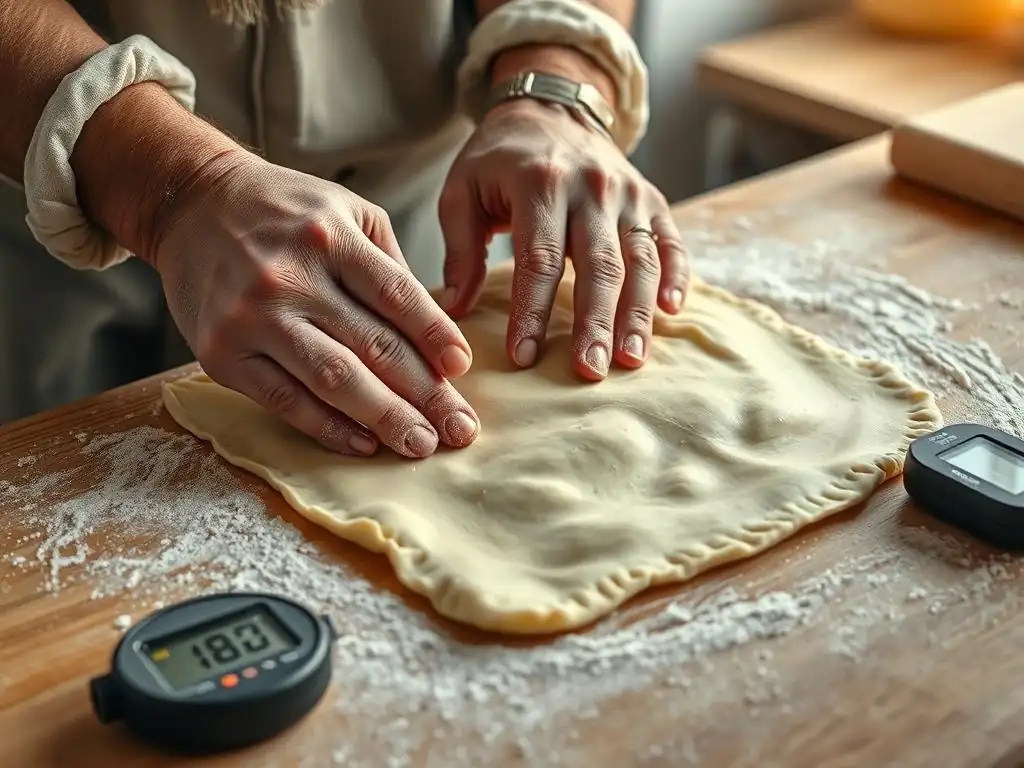
Temperature is the single most critical factor in successful 'lamination technique'. The temperature directly dictates the consistency of both your butter and your dough, which in turn determines how well they can be rolled and folded into distinct layers. Cold temperatures (ideally 4-10°C / 40-50°F) are necessary to keep the butter solid and pliable, allowing it to form a continuous sheet between the dough layers. If the butter is too cold, it will shatter; if too warm, it will melt into the dough.
Similarly, the dough's consistency is temperature-dependent. Cold dough is firm enough to handle and roll without excessive stickiness or tearing. It also allows the gluten network to relax after being stretched during rolling. Warm dough becomes slack, sticky, and difficult to manage, increasing the risk of tearing and butter leakage. Maintaining a consistent, cool temperature throughout the entire lamination process is paramount for achieving those beautiful, flaky layers in your 'lamination folds beginner bakers'.
Optimal Resting Times for Different Lamination Folds
Resting the dough in the refrigerator between each series of 'lamination folds' is non-negotiable. The optimal resting time is typically between 30 and 60 minutes after each single or double fold. This period serves two vital purposes: it allows the gluten network in the dough to relax after the stress of rolling, making the dough extensible and easy to roll out again without shrinking back; and it allows the butter to firm up sufficiently, preventing it from melting or squeezing out during the next rolling step.
Longer rests, such as 1.5 to 2 hours or even overnight (8-12 hours), can be beneficial, particularly after the final fold before shaping. An overnight rest deepens the flavor of the dough and ensures it is completely relaxed and chilled, making the final rolling and shaping much easier. Never skip or shorten the resting periods; they are as important as the folds themselves for successful 'lamination folds'.
Techniques for Maintaining Consistent Temperature During Lamination
Keeping your dough and butter cold throughout the lamination process can be challenging, especially in a warm kitchen. Several techniques can help maintain that crucial consistent temperature. Work as quickly and efficiently as possible when rolling and folding to minimize the time the dough is at room temperature. If your kitchen is warm, consider turning on the air conditioning or working early in the morning.
You can also chill your tools: place your rolling pin in the freezer for 10-15 minutes before you start rolling. If you have a marble or granite work surface, these naturally stay cooler. Alternatively, you can place a baking sheet with ice water underneath your regular work surface to help keep it cold. If you feel the dough or butter warming up or softening at any point, stop, wrap the dough tightly, and return it to the refrigerator for a mandatory chill period before proceeding with your 'lamination technique'.
Applying Lamination Folds to Viennoiseries: Pain au Chocolat and Beyond
Lamination Techniques for Pain au Chocolat Perfection
Creating perfect Pain au Chocolat relies entirely on mastering the fundamental 'lamination folds'. The dough used is essentially croissant dough, which requires a specific series of turns to develop the characteristic layers.
A common sequence involves an initial single fold, followed by a rest, then a double fold, followed by another rest, and finally a third single fold, followed by a final rest. This sequence yields a high number of layers (3 x 4 x 3 = 36 layers using this calculation, or 3 x 3 x 3 = 27 if using three single folds, plus the initial butter layer, leading to counts around 54 layers in total depending on method).
After the final lamination and rest, the dough is rolled out to a specific thickness, typically around 3-4mm (approx. 0.12-0.16 inches). It is then cut into rectangles (traditionally about 8-10 cm wide by 18-20 cm long), a piece or two of chocolate baton is placed at one end, and the dough is rolled up. The quality of the 'lamination folds' you performed dictates the structure of the dough that encases the chocolate, resulting in that delightful combination of crisp, flaky pastry and melted chocolate.
Using Lamination for Other Viennoiseries: Croissants, Kouign Amann, and More
The 'lamination technique' is the cornerstone of a wide variety of viennoiseries beyond Pain au Chocolat. Classic croissants use the exact same dough and lamination process; the difference lies solely in the final shaping, where the laminated dough is cut into triangles and rolled up from the base. Kouign Amann, a specialty from Brittany, also uses a laminated dough, but sugar is incorporated between the layers during the final folds and sometimes on the exterior. This sugar caramelizes during baking, creating a wonderfully crisp, sweet crust alongside the flaky interior provided by the 'lamination folds'.
Other laminated pastries include Danish pastries (often filled with fruit, cheese, or nuts), puff pastry (used for everything from savory tarts to sweet turnovers and vol-au-vents), and even some regional specialties. While the specific dough formula or the number and type of folds might vary slightly depending on the desired outcome, the core principles of cold butter, strong yet elastic dough, precise folding, and adequate resting remain constant. Mastering 'lamination folds beginner bakers' will unlock the ability to create this diverse range of pastries.
Best Practices for Lamination Success: A Checklist for Beginner Bakers
Summary of Key Steps for Successful Lamination Folds
To recap, achieving successful 'lamination folds' involves a series of deliberate steps that require patience and precision. Start with a well-developed, rested dough and a pliable, cold butter block. Ensure your workspace and tools are cool. Roll the dough into a neat rectangle before each fold. Execute your single or double folds carefully, ensuring edges are aligned.
Here's a quick checklist to keep in mind:
- [ ] Ensure dough and butter are properly chilled before starting.
- [ ] Roll dough into a neat, even rectangle before each fold.
- [ ] Brush off excess flour before folding.
- [ ] Execute folds (single or double) precisely.
- [ ] Turn dough 90 degrees after each fold.
- [ ] Rest and chill the dough for 30-60 minutes (or longer) after each fold.
- [ ] Maintain a cool working environment.
- [ ] Handle the dough gently during rolling and folding.
Consistently following these steps is the path to mastering 'lamination technique'.
Essential Tools for Lamination: Rolling Pins, Work Surfaces, and More
Having the right tools can significantly simplify the process of 'lamination folds beginner bakers'. A heavy, sturdy rolling pin is essential. Materials like marble or solid wood are excellent as their weight helps with rolling and they stay cooler than lighter materials. A large work surface is also beneficial, giving you ample space to roll out your dough. A cold surface like marble or granite is ideal, but any clean, flat surface can work, especially if kept cool.
Other helpful tools include a ruler or measuring tape to help you roll your dough to the correct dimensions and ensure precise folds. A bench scraper is invaluable for lifting and moving the dough without stretching or tearing it, and for portioning after the final roll-out. Parchment paper or plastic wrap is necessary for wrapping the dough tightly during its crucial resting periods in the refrigerator, preventing it from drying out. While not strictly essential, a pastry brush is useful for brushing off excess flour. Equipping yourself with these tools sets you up for success in your 'lamination folds'.
Final Thoughts: Elevating Your Baking with Lamination Skills
Embarking on the journey of mastering 'lamination folds' is one of the most rewarding steps a beginner baker can take. While it requires patience, practice, and attention to detail, the ability to create your own flaky, buttery pastries like pain au chocolat and croissants is incredibly satisfying. Don't be discouraged by initial challenges; uneven layers, small tears, or slight butter leakage are common learning experiences. Each attempt will teach you more about the dough, the butter, and the crucial role of temperature.
Focus on the fundamentals: starting with the right dough and butter consistency, executing the folds carefully, and, most importantly, respecting the resting and chilling times. With persistence and a friendly attitude towards the learning curve, you will gradually refine your 'lamination technique'. Soon, you'll be pulling beautifully puffed, golden, and shatteringly flaky viennoiseries from your oven, a testament to your growing skills as a baker. Happy folding and happy baking!
Frequently Asked Questions
What exactly are lamination folds, and why are they important in baking?
Lamination folds are a technique of folding dough to create thin, alternating layers of dough and fat. This is crucial for achieving flaky and airy textures in pastries like croissants and puff pastry.
Are lamination folds really necessary for beginner bakers? Can't I skip them?
While they might seem intimidating, lamination folds are essential for many classic pastries. Starting with simpler recipes using fewer folds can help beginners learn. Understanding the basics is key to successful baking!
What type of fat is best to use for lamination folds, and why?
Traditionally, butter is the preferred choice due to its flavor and fat content. However, some recipes might use shortening or margarine. The most important factor is keeping the fat cold to prevent it from melting into the dough.
How many lamination folds are typically required for a good croissant or puff pastry?
The number of folds can vary depending on the recipe, but generally, 3-4 single or double folds are recommended. Proper execution of each fold is more important than the quantity.
What are some common mistakes beginner bakers make when attempting lamination folds, and how can I avoid them?
Common mistakes include overworking the dough, letting the butter melt, and not allowing the dough to rest sufficiently. Keeping everything cold, being gentle, and following the recipe closely will help prevent these issues.
Final Reflection: The Enduring Power of the Fold
The art of the perfect lamination fold, as explored in this article, isn't just a technique for achieving flaky pastries; it's a metaphor for meticulous planning and the rewarding payoff of patience. Mastering this seemingly simple fold unlocks a world of culinary possibilities, transforming ordinary dough into extraordinary creations. This isn't just about baking; it's about achieving excellence through careful attention to detail.
The impact of understanding lamination extends beyond the kitchen. The precision required mirrors the dedication needed in any craft, from coding to carpentry. It's a process that teaches us the importance of incremental progress and the beauty of a well-executed plan. The difference between ordinary and extraordinary is that little extra.
– Jimmy Johnson. This quote perfectly encapsulates the essence of mastering lamination folds – that extra effort, that extra fold, yields extraordinary results.
Now, it's your turn. Don't be intimidated by the seemingly complex process. Take the time to understand the principles outlined in this article, practice the techniques, and embrace the journey. The satisfaction of creating perfectly layered, melt-in-your-mouth pastries is a reward in itself, a testament to your dedication and a delicious taste of success. So, gather your ingredients, embrace the fold, and discover the joy of mastering the art of lamination.
Unleash Your Inner Baker: Master the Perfect Laminated Dough!
Thanks for taking the time to explore the world of laminated dough! We hope you now feel confident in tackling this seemingly complex technique. Ready to put your newfound skills to the test?
- Bake your masterpiece! Try out one of the recipes mentioned in the article (or create your own!) and experience the flaky, buttery perfection of laminated dough firsthand.
- Share your baking journey! Snap a picture of your creation and post it on social media using #BakeWithEaseLaminatedDough – let's inspire each other!
- Dive deeper into the world of baking! Explore our other articles on BakeWithEase.com for more tips and tricks to elevate your baking game.
What incredible laminated creation will you bake next?