
Butter Incorporation: The Key to Tender Brioche Crumb

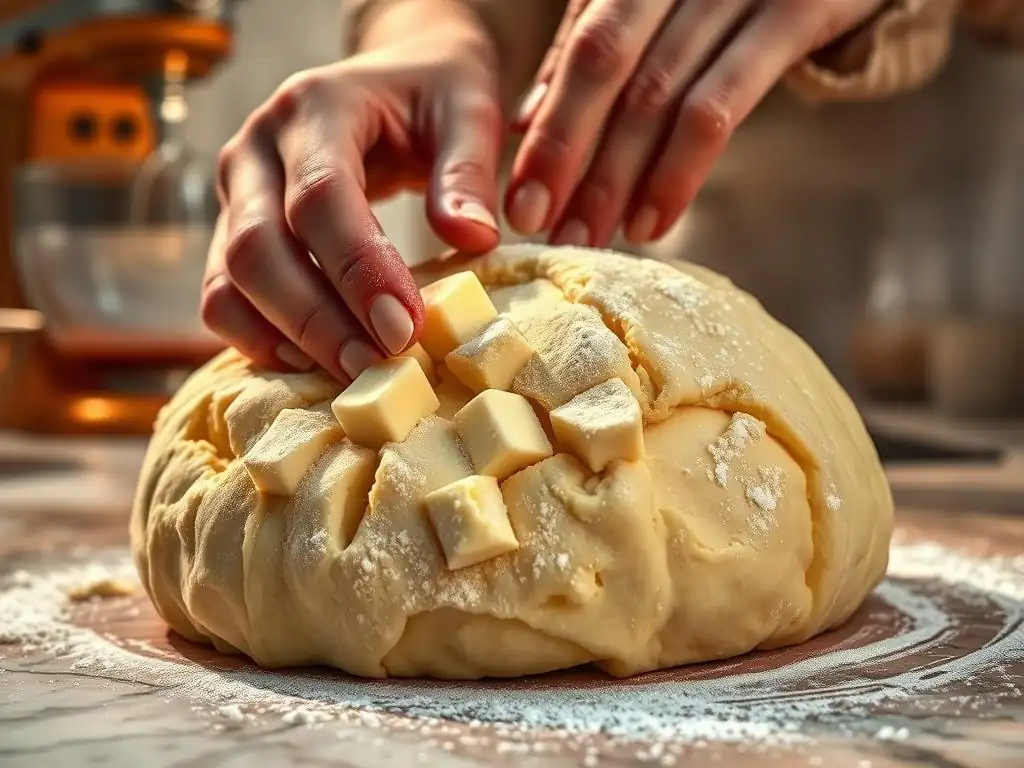
Welcome to BakeWithEase, your partner in creating delicious baked goods! Ever wondered how to achieve that irresistibly tender and airy crumb in your brioche? This guide delves into the secrets, focusing on the crucial technique of butter incorporation. Unlock the secrets to a perfect brioche – you might be surprised by how simple it can be! Read on to discover the method that will transform your baking.
- Understanding the Importance of Butter in Brioche
- The Science Behind Butter Incorporation in Brioche Dough
- How to Incorporate Butter into Brioche Dough: A Step-by-Step Guide
- Troubleshooting Butter Incorporation Issues in Brioche
- Different Techniques for Incorporating Butter into Brioche
- Tips and Tricks for Perfect Butter Incorporation
- Advanced Brioche Techniques: Exploring Butter Variations
- Recipes to Practice Your Butter Incorporation Skills
- Mastering Butter Incorporation: Elevate Your Brioche Baking
-
Frequently Asked Questions
- How crucial is temperature control when incorporating butter into brioche dough?
- What happens if I add the butter all at once instead of gradually?
- Can I use a stand mixer to incorporate the butter into my brioche dough?
- What are some signs that I've successfully incorporated the butter?
- What if my brioche dough seems too wet or greasy after incorporating the butter?
- Final Reflection: The Enduring Allure of the Perfect Brioche Crumb
- Unlock Your Best Brioche Yet!
Understanding the Importance of Butter in Brioche
Brioche isn't just any bread; it's a rich, tender, and often slightly sweet dough that stands apart from lean doughs like baguettes or ciabatta. This distinct character comes largely from its high fat content, typically derived from generous amounts of butter. Understanding the fundamental role butter plays is the first step in mastering this delightful bread. Without proper butter incorporation, the desired texture and flavor simply won't develop.
The high proportion of butter, along with eggs and sometimes milk or cream, is what defines enriched doughs like brioche. While lean doughs rely on flour, water, yeast, and salt to build structure through gluten development, enriched doughs have these added ingredients that significantly alter the dough's behavior and final outcome. Butter, in particular, impacts everything from handling the dough to the crust color and, most importantly, the interior crumb.
What Makes Brioche Brioche? The Role of Butter
Brioche is characterized by its rich flavor, golden color, and exceptionally soft, tender crumb. These qualities are primarily attributed to the significant amount of butter and eggs used in the dough. A typical brioche recipe might include butter at a ratio of 50% to 70% of the flour weight, sometimes even higher in very rich versions like pain au lait. This high fat content is far greater than in a standard loaf of bread, which might have little to no added fat.
The butter contributes several key elements. Firstly, it provides richness and a distinct dairy flavor that permeates the bread. Secondly, it tenderizes the crumb by coating gluten strands, preventing them from forming a tight, rigid network. Thirdly, the moisture from the butter (which is typically around 15-18% water) contributes to the overall hydration of the dough, while the fat helps keep the bread moist and extends its shelf life compared to lean breads.
Achieving a Tender Crumb: The Butter's Contribution
The hallmark of a great brioche is its incredibly tender crumb, which is soft, airy, and almost cake-like. This texture is a direct result of the butter's interaction with the gluten structure. Gluten is a protein network that develops when flour and liquid are mixed and kneaded. In lean doughs, this network provides strength and structure, allowing the bread to rise and hold its shape.
In enriched doughs like brioche, the fat molecules from the butter coat the gluten strands. This coating acts as a lubricant, interfering with the formation of a strong, tight gluten network. Instead, the gluten develops into a more relaxed, less elastic structure. When the brioche bakes, the air pockets created during proofing are surrounded by this tenderized network, resulting in a soft, delicate crumb that melts in your mouth. The proper process of incorporating butter for brioche is therefore critical to achieving this desired tenderness.
The Science Behind Butter Incorporation in Brioche Dough
Incorporating butter into brioche dough is not just about mixing ingredients; it's a process rooted in understanding how fats interact with flour, liquid, and gluten development. The timing and method of adding butter significantly impact the final dough structure and, consequently, the bread's texture. Mastering how to incorporate butter brioche involves appreciating the scientific principles at play.
The dough undergoes several transformations during mixing and kneading. Initially, gluten begins to form as flour hydrates. Adding butter too early can hinder this initial gluten development. Adding it too late, or improperly, can result in a greasy dough where the butter doesn't fully integrate, leading to an uneven texture in the finished loaf. The goal is to add the butter at the right stage and in a way that allows it to emulsify and distribute evenly throughout the dough.
Gluten Development and Butter's Impact
Gluten development is crucial for providing the dough with the elasticity and extensibility needed to trap gases produced by yeast, allowing the bread to rise. In lean doughs, kneading encourages gluten strands to align and strengthen, forming a robust network. However, when learning how to incorporate butter brioche, you learn that butter's presence changes this dynamic.
Butter is primarily fat (typically 80-82% fat in European-style butter, 80% in American). Fat is hydrophobic, meaning it repels water. Gluten requires water to form. When fat is present, it coats the flour particles and the developing gluten strands, preventing them from fully hydrating and bonding as effectively as they would in a lean dough. This interference leads to a weaker, more tender gluten network. The challenge is to develop enough gluten for structure while simultaneously tenderizing it with fat, which is why the method and timing of adding butter are so important.
Emulsification: Butter, Flour, and Liquid Working Together
Emulsification is the process of combining ingredients that don't naturally mix, like oil and water, into a stable mixture. In brioche dough, we are essentially creating an emulsion of water (from eggs, milk, and butter), fat (from butter and egg yolks), and solids (flour, sugar, salt). Proper butter incorporation is about achieving a stable, even distribution of the fat throughout the dough's watery phase.
When butter is added gradually to a partially developed dough and kneaded, the mechanical action breaks the butter into tiny droplets. These droplets become suspended within the dough's matrix of hydrated flour and gluten. The lecithin in egg yolks also acts as a natural emulsifier, helping to bind the fat and water components together. This stable emulsion prevents the butter from separating and ensures that the fat is uniformly distributed, leading to a consistently tender crumb and preventing greasiness in the final product. Understanding this process is key to mastering how to incorporate butter brioche successfully.
How to Incorporate Butter into Brioche Dough: A Step-by-Step Guide
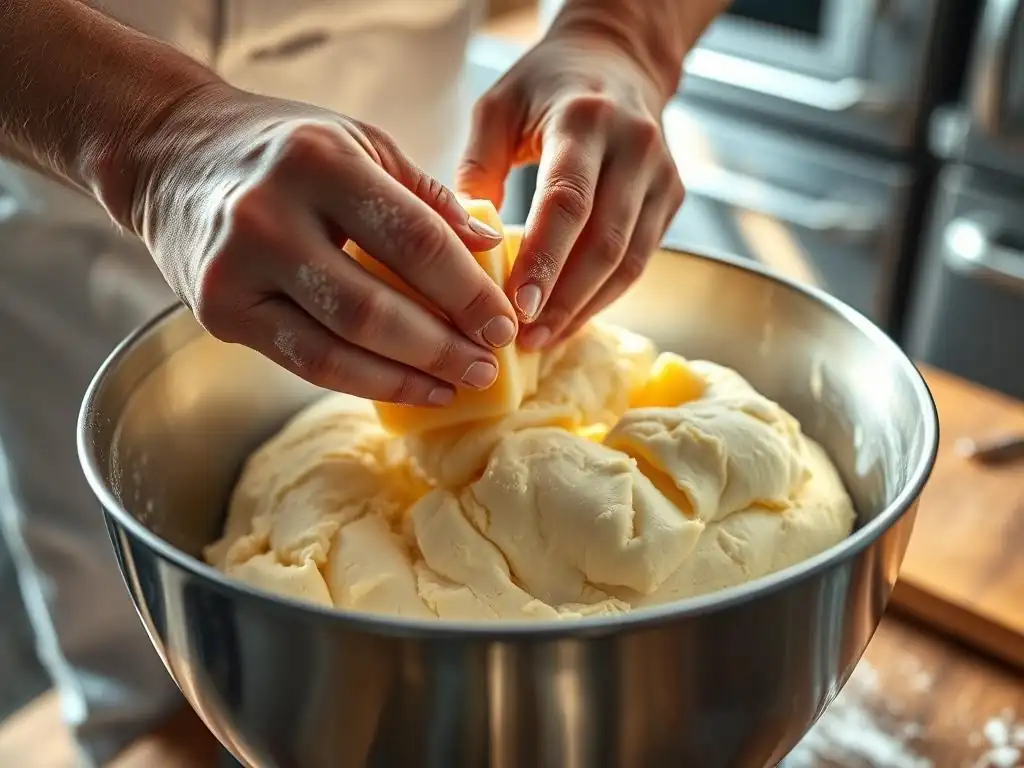
Mastering the technique of adding butter to brioche dough is perhaps the most critical step in the entire process. Unlike many other doughs where ingredients are simply mixed together at the start, brioche requires a specific approach to ensure the butter is fully integrated without inhibiting initial gluten development too much or resulting in a greasy mess. This guide outlines the common and effective method for incorporating butter for brioche.
This method typically involves developing the initial dough base with flour, liquid, yeast, sugar, salt, and eggs first, and then adding the butter gradually. This allows some gluten structure to form before the tenderizing fat is introduced. The process requires patience and careful observation of the dough's consistency.
Step 1: Preparing the Brioche Dough Base
Begin by combining the initial ingredients: flour, yeast, sugar, salt, and liquids (eggs, milk, or water). Mix these until a shaggy dough forms. At this stage, the dough will likely be quite sticky and not very elastic.
Knead this base dough until it starts to come together and develop some initial elasticity. This can take anywhere from 5 to 15 minutes in a stand mixer on low speed, or longer by hand. The goal is to hydrate the flour and begin forming the gluten network before the fat is introduced. You might notice the dough starting to pull away from the sides of the bowl slightly, though it will still be soft.
Step 2: The Crucial Stage: Adding the Butter Gradually
This is where the magic happens when learning how to incorporate butter brioche. The butter should typically be cold but pliable, or softened but not melted. Cut it into small cubes (about 1-2 cm). With the mixer running on a low speed, add the butter cubes one or two at a time.
Wait until each piece of butter is almost fully absorbed into the dough before adding the next. This process is slow and requires patience. Initially, the dough may look like it's breaking apart or becoming very wet and sticky. This is normal. Keep the mixer running, scraping down the sides of the bowl as needed. As more butter is added and kneading continues, the dough will eventually start to come back together, becoming smoother and more cohesive.
Why Gradual Incorporation is Essential
Adding butter gradually allows the dough's gluten structure to absorb the fat incrementally. If you add all the butter at once, especially a large quantity typical for brioche (e.g., 250g butter for 500g flour), it overwhelms the dough. The large amount of fat coats the flour particles and gluten strands too quickly, preventing them from bonding and hydrating properly.
Gradual addition, combined with continuous kneading, breaks the butter into smaller and smaller particles, distributing them evenly throughout the dough matrix. This slow process facilitates the formation of a stable emulsion, where the fat is suspended within the dough's structure. It allows the dough to maintain some structural integrity while incorporating a high percentage of fat, ultimately leading to that signature tender crumb and preventing a greasy texture.
When to Add the Butter: Timing is Everything
The ideal time to start incorporating butter for brioche is after the initial ingredients have been mixed and the dough base has developed some preliminary gluten structure. This means the dough should no longer be just a shaggy mass but should have started to become somewhat smooth and elastic.
A good indicator is when the dough begins to pull away from the sides of the mixing bowl, even if it's still sticking to the bottom. If kneading by hand, the dough will feel less like wet cement and more like a cohesive, albeit still sticky, mass. Adding the butter too early, before this initial structure forms, will make it very difficult to incorporate the fat and develop sufficient strength. Adding it too late, after excessive gluten development, can make it harder for the fat to tenderize the network effectively.
Step 3: Kneading the Dough After Butter Incorporation
Once all the butter has been added, continue kneading the dough. This stage is crucial for fully incorporating the butter and developing the final gluten structure. The dough will likely go through a phase where it looks very wet, greasy, and may even seem "broken." Don't panic!
Keep kneading. With continued mechanical action, the dough will transform. It will start to absorb the butter, become less sticky, and eventually pull cleanly away from the sides and bottom of the mixing bowl. This final kneading phase can take a significant amount of time, often 15-25 minutes or even longer in a stand mixer on medium speed, depending on the recipe and mixer power. The dough should become very smooth, elastic, and shiny.
Signs of Properly Incorporated Butter
You'll know the butter is properly incorporated and the dough is sufficiently kneaded when it exhibits several key characteristics. Firstly, the dough should be smooth, shiny, and elastic. It should no longer feel greasy or sticky to the touch, though it will be soft.
Secondly, the dough should pass the "windowpane test." To perform this, gently pull a small piece of dough (about the size of a golf ball) and stretch it carefully between your fingers. If the dough is properly developed, you should be able to stretch it into a thin membrane that you can see light through, without it tearing easily. This indicates a strong yet pliable gluten network that has successfully integrated the fat. This is the desired outcome when mastering how to incorporate butter brioche.
Step 4: First Proofing: Achieving Optimal Rise and Flavor Development
After the butter is fully incorporated and the dough is properly kneaded, it's time for the first proofing (also known as bulk fermentation). Because brioche is a rich dough with a high fat content, it typically proofs more slowly than lean doughs. The cold temperature of the butter also chills the dough, further slowing fermentation.
Place the dough in a clean, lightly oiled bowl, cover it, and allow it to proof in a relatively cool environment. Many recipes recommend an initial proof at room temperature for an hour or two, followed by a long, slow proof in the refrigerator for at least 8-12 hours, or even up to 24 hours. This cold fermentation develops complex flavors and makes the dough easier to handle for shaping. The dough should significantly increase in volume, though perhaps not quite double, especially during the cold proof.
Troubleshooting Butter Incorporation Issues in Brioche
Working with enriched doughs like brioche, especially when learning how to incorporate butter brioche, can sometimes present challenges. The high fat content and specific mixing method can lead to issues if not handled correctly. Recognizing common problems and knowing how to address them will save your dough and lead to better results.
Common issues include a dough that remains stubbornly greasy, one that refuses to come together, or butter separating during baking. These are often related to butter temperature, mixing time, or the order of ingredients. Don's get discouraged; troubleshooting is part of the learning process in baking.
Dough Too Greasy: Causes and Solutions
A greasy dough after adding butter is a common issue, often indicating that the butter hasn't been fully incorporated or emulsified. This can happen if:
- The butter was too soft or melted when added.
- The butter was added too quickly.
- The dough wasn't kneaded long enough after adding the butter.
- The dough or ingredients were too warm.
To fix a greasy dough, continue kneading. The mechanical action will help the butter break down and emulsify into the dough. If using a stand mixer, increase the speed slightly (but not too high) and keep mixing, scraping down the bowl periodically.
If the dough feels very warm, you can stop mixing for a few minutes to let it cool down slightly before resuming. Adding a tiny pinch of flour (no more than a tablespoon for a standard recipe) might help absorb excess surface grease, but avoid adding too much, as it can dry out the dough. Patience and continued kneading are usually the best solutions.
Dough Not Coming Together: What Went Wrong?
If your dough remains a shaggy, wet mess after adding butter and kneading for some time, it could be due to several factors:
- Butter too cold: If the butter is too hard, it won't break down and incorporate easily.
- Not enough initial kneading: The base dough didn't develop enough structure before the butter was added.
- Insufficient kneading time: You simply haven't kneaded long enough after adding the butter. Brioche kneading is a marathon, not a sprint.
- Ratio issues: While less common in following a recipe, incorrect ingredient ratios can cause problems.
Ensure your butter is pliable (cold but bendable) when adding it. If the dough seems to be stuck in the "broken" phase, continue kneading. Trust the process!
For a typical 500g flour recipe, the total kneading time after adding butter can easily exceed 20-30 minutes in a stand mixer. Keep the mixer running, and eventually, the dough should start to come together, becoming smooth and pulling away from the bowl. If after a very long time (e.g., 30-40 mins in a mixer) it still hasn't come together and feels overly wet, there might be a hydration issue, but typically, it just needs more kneading time to fully incorporate the fat.
Butter Separating During Baking: Prevention Tips
If you notice pockets of melted butter pooling around your brioche during baking, it means the butter was not properly emulsified into the dough during the mixing stage. This is a direct consequence of insufficient kneading after butter incorporation. The fat wasn't dispersed finely enough throughout the gluten matrix, and as it melts in the oven, it separates out.
The primary prevention is proper technique during dough preparation. Ensure you add the butter gradually, allow each addition to incorporate before adding more, and, most importantly, knead the dough thoroughly until it passes the windowpane test and is smooth and elastic. This ensures the fat is locked within the dough's structure. Baking the brioche cold, directly from the refrigerator after the final proof, can also help. The cold dough goes into the hot oven, giving the structure time to set before the butter fully melts, reducing the likelihood of separation.
Different Techniques for Incorporating Butter into Brioche
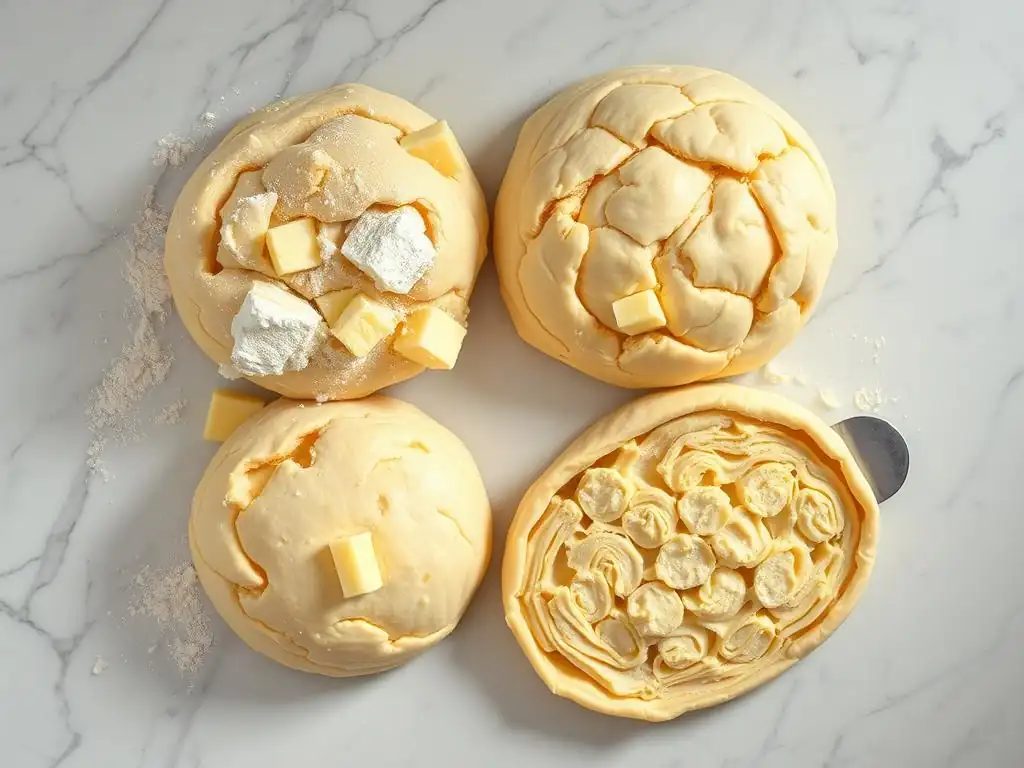
While the gradual addition of cold or softened butter to a partially developed dough is the most common method when learning how to incorporate butter brioche, variations exist. These techniques can slightly alter the dough's handling and the final crumb structure. Understanding these methods provides flexibility and allows bakers to choose the approach that best suits their equipment and desired outcome.
Each technique has its pros and cons, influencing the time required, the effort involved, and the texture achieved. Experimenting with these methods can deepen your understanding of how butter interacts with dough.
The Traditional Method: Cold Butter Cubes
This is the widely recommended method, particularly for stand mixers. Cold butter (cut into small cubes) is added gradually to the partially developed dough. The cold temperature helps the butter pieces remain somewhat distinct initially, allowing them to be gradually worked into the dough without turning it into a greasy soup immediately.
- Pros: Excellent control over incorporation, leads to a very smooth, elastic dough, results in a classic tender brioche crumb. Works very well with stand mixers.
- Cons: Requires significant kneading time after all butter is added (often 20+ minutes in a mixer). Can be challenging by hand as the cold butter is harder to work in.
This method ensures the gluten has a chance to develop before the fat significantly interferes, and the slow, mechanical action of kneading breaks down and emulsifies the cold butter effectively. It's the gold standard for achieving that perfect brioche texture.
The Beurre Manié Method: A Faster Approach
While beurre manié is technically a mix of flour and butter used to thicken sauces, some brioche methods adapt a similar principle by creaming together the butter, sugar, and sometimes eggs before adding the flour and liquids. Think of it like making a cookie dough base before adding the wet ingredients.
- Pros: Can potentially reduce overall kneading time as the fat is already incorporated with some dry ingredients. Might be slightly easier for hand mixing initially.
- Cons: Can sometimes inhibit initial gluten development more significantly, potentially leading to a slightly different crumb structure. Less control over the emulsification process compared to gradual addition.
This method is less traditional for classic brioche doughs but is sometimes used in faster or simpler recipes. It's a different way of approaching how to incorporate butter brioche, merging the fat with dry or semi-dry ingredients early on.
Using Softened Butter: When and How to Use It
Adding softened butter (butter that is pliable but not melted, around 65-70°F or 18-21°C) is another variation of the gradual incorporation method. Instead of cold cubes, softened cubes or even dollops are added to the partially developed dough.
- Pros: Can be slightly easier to incorporate initially than cold butter, potentially reducing the initial "broken" phase of the dough. Works well for hand kneading as the butter is more pliable.
- Cons: If the butter is too soft, or the dough gets too warm, it can become greasy more quickly and be harder to emulsify properly. Requires careful temperature control.
When using softened butter, it's even more crucial to add it slowly, letting each piece disappear into the dough before adding the next. Ensure your kitchen isn't too warm and that your dough doesn't overheat during mixing. This method is a valid approach when learning how to incorporate butter brioche, especially if you struggle with incorporating cold butter by hand.
Tips and Tricks for Perfect Butter Incorporation
Achieving that perfect, silky-smooth brioche dough with fully incorporated butter is a skill that improves with practice. Beyond the basic steps of how to incorporate butter brioche, there are several tips and tricks that can make the process smoother and more successful, whether you're using a stand mixer or kneading by hand.
Paying attention to details like ingredient temperature and using the right technique for your equipment can make a significant difference in the final dough quality. These small adjustments can help you avoid common pitfalls and ensure your butter integrates beautifully.
Temperature Matters: Keeping Ingredients Cool
Temperature is perhaps the most critical factor when incorporating a large amount of butter into dough. Both the butter and the dough itself should be relatively cool.
- Butter: Should be cold but pliable (like a stick of butter that's been out of the fridge for 10-15 minutes) or straight from the fridge and cut into small cubes (for the traditional method). Avoid using butter that is warm or melted.
- Dough: The initial dough base should not be warm. If your kitchen is hot or your mixer works aggressively and warms the dough quickly, consider chilling the dough for 20-30 minutes in the refrigerator after the initial mixing but before adding the butter.
Keeping things cool slows down gluten development initially (which is fine, as you'll knead more later) and, more importantly, prevents the butter from melting too quickly during the intensive kneading process. This allows the mechanical action to break down the butter into tiny droplets and emulsify it properly into the dough.
Using a Stand Mixer: Best Practices
A stand mixer with a dough hook is the most common tool for making brioche due to the long kneading time required for butter incorporation.
- Start Slow: Begin mixing the initial dough ingredients on a low speed (like KitchenAid speed 1 or 2).
- Gradual Butter Addition: Add butter cubes one or two at a time on low speed. Don't rush this process. Wait until each addition is mostly absorbed before adding the next.
- Increase Speed for Final Kneading: Once all the butter is incorporated and the dough looks greasy and messy, increase the mixer speed to medium (like KitchenAid speed 3 or 4). This higher speed provides the necessary mechanical action to develop the gluten and emulsify the butter.
- Scrape Down: Stop the mixer occasionally to scrape down the sides and bottom of the bowl, ensuring all the dough is being worked by the hook.
- Monitor Dough Temperature: If the mixer motor feels hot or the dough seems very warm, stop mixing periodically to let the dough cool down for a few minutes.
Following these practices will help you efficiently incorporate butter for brioche dough using a stand mixer.
Hand Kneading: Techniques for Success
While more physically demanding, it is absolutely possible to incorporate butter into brioche dough by hand. The principle remains the same: develop some initial structure, then add butter gradually and keep kneading.
- Initial Kneading: Knead the base dough until it's smoother and less shaggy, about 10-15 minutes.
- Butter Addition: Work the butter in small pieces. Flatten a piece of dough, place a small cube of butter in the center, fold the dough over, and knead until the butter is mostly absorbed. Repeat with the remaining butter, one small piece at a time. This will be messy!
- The "Slap and Fold" Method: Once all the butter is in and the dough is a sticky, greasy mess, the slap and fold technique is very effective. Pick up the dough, slap it onto a clean, un-floured surface, stretch it out, and fold it back onto itself. Repeat this rhythmically. This technique develops gluten efficiently without sticking excessively to your hands or the surface, as the dough is too wet and buttery to stick firmly.
- Patience: Hand kneading brioche after butter incorporation takes considerable time and effort, often 20-40 minutes or more of active kneading. Keep going until the dough is smooth, elastic, and passes the windowpane test.
Hand kneading is a great way to truly understand the dough's texture at each stage of how to incorporate butter brioche.
Advanced Brioche Techniques: Exploring Butter Variations
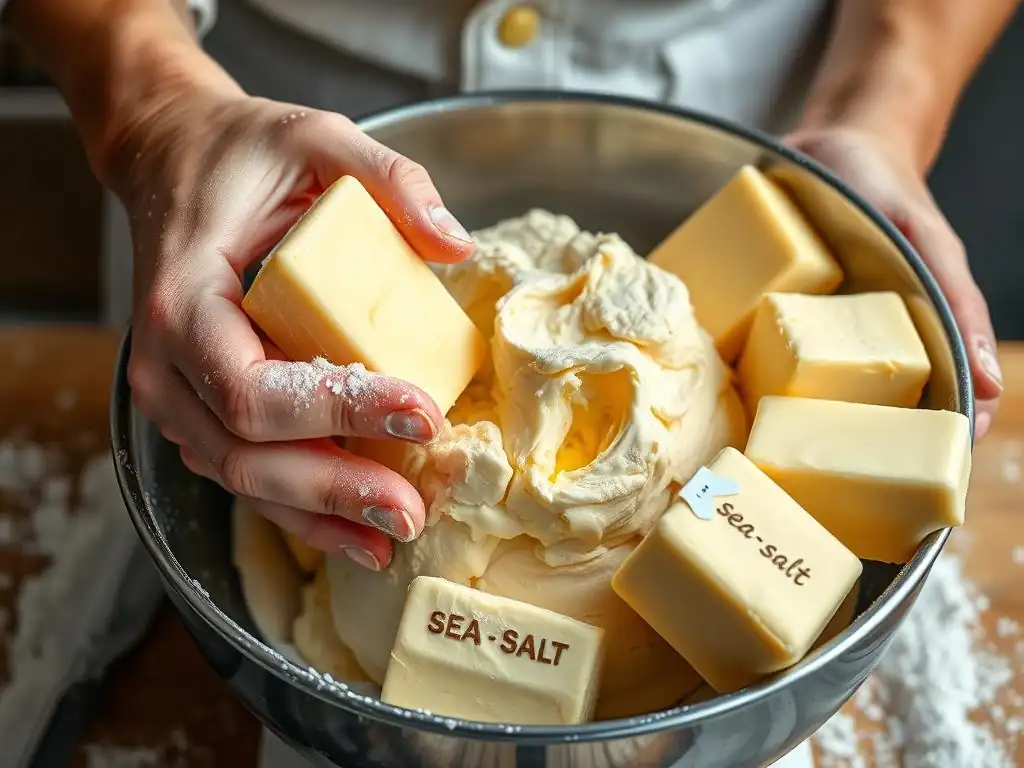
Once you've mastered the basic technique of how to incorporate butter brioche, you can start exploring variations that add new dimensions of flavor. Butter itself can be modified before incorporation to infuse the brioche with different aromatic profiles. These techniques build upon the fundamental principles of butter incorporation but introduce exciting new possibilities.
These variations showcase how the fat component, already central to brioche's character, can become a carrier for additional flavors, elevating the bread beyond its classic form.
Brown Butter Brioche: Adding Nutty Flavors
Browning butter (also known as beurre noisette) involves gently heating butter until the milk solids toast and turn a nutty brown color, creating a rich, complex flavor profile. Using brown butter instead of regular butter in brioche adds wonderful nutty, caramel notes to the finished bread.
To make brown butter brioche, first brown the required amount of butter on the stovetop. Let it cool slightly until it solidifies but is still pliable (or chill it and cut into cubes). Then, incorporate it into the dough using the standard gradual addition method, treating it just like regular butter. Be aware that browning butter evaporates some water, so the dough hydration might be slightly different depending on how much you brown it. The resulting brioche will have a deeper color and a more sophisticated flavor.
Herb-Infused Butter Brioche: Enhancing Flavor with Aromatic Herbs
Infusing butter with herbs before incorporating it into the dough is a fantastic way to create savory brioche variations, perfect for serving with meals or as flavorful buns. Herbs like rosemary, thyme, chives, or even roasted garlic can be used.
One way to do this is to gently heat the butter with fresh herbs until the butter is melted and infused, then strain out the herbs and chill the butter until solid again. Alternatively, very finely minced fresh herbs can be kneaded directly into the butter before it's added to the dough, or added along with the butter during the incorporation phase.
When learning how to incorporate butter brioche with added flavors like herbs, ensure the herbs are minced very finely to distribute evenly and not tear the dough. The process of incorporating the herb-infused butter is the same gradual method, resulting in a fragrant and flavorful dough.
Recipes to Practice Your Butter Incorporation Skills
The best way to truly understand how to incorporate butter brioche is through practice. The following recipes provide a framework for applying the techniques discussed. Start with a classic recipe to build your foundation, then move on to variations like buns or flavored versions.
Each recipe requires diligent attention during the butter incorporation phase. Pay close attention to the dough's texture as you add the butter and during the subsequent kneading.
Classic Brioche Loaf Recipe
A standard brioche loaf recipe typically uses around 500g of flour, 6-8 large eggs, 50-100g sugar, 10g salt, 10-15g instant yeast, a splash of milk, and a significant amount of butter, often 250-350g.
- Mix flour, yeast, sugar, and salt.
- Add eggs and milk; mix to form a shaggy dough.
- Knead until some gluten develops (dough pulls from sides).
- Gradually add cold, cubed butter, 1-2 cubes at a time, kneading until each addition is absorbed.
- Continue kneading after all butter is added until dough is smooth, elastic, and passes the windowpane test (20-30+ mins total kneading after butter starts).
- First proof (bulk fermentation), often with a cold overnight chill.
- Shape into a loaf, place in a greased loaf pan.
- Second proof until doubled.
- Egg wash and bake until golden brown and internal temperature reaches 190-200°F (88-93°C).
Brioche Buns Recipe
Brioche buns use the same dough as a loaf but are shaped into individual rolls. This recipe is excellent for practicing shaping after mastering the butter incorporation for brioche dough.
Follow steps 1-6 from the Classic Brioche Loaf Recipe. After the cold proof:
7. Divide the dough into equal portions (e.g., 60-100g each). 8. Gently shape each portion into a tight ball by pulling the dough surface taut. 9. Place buns on a baking sheet lined with parchment paper. 10. Second proof until significantly increased in size. 11. Egg wash and bake at a slightly higher temperature than a loaf (e.g., 375°F/190°C) for 15-20 minutes, until golden brown.
Chocolate Chip Brioche Recipe
Adding inclusions like chocolate chips is done after the main dough development and butter incorporation are complete.
Follow steps 1-5 from the Classic Brioche Loaf Recipe. After the dough is smooth, elastic, and passes the windowpane test:
6. Gently fold in chocolate chips (e.g., 150-200g for a 500g flour recipe) by hand or on the lowest mixer speed until evenly distributed. Be careful not to overmix, which can break the chocolate chips or toughen the dough.
7. Proceed with first proof (bulk fermentation), cold proof, shaping, second proof, and baking as per the classic loaf or bun instructions. The chocolate chips will melt slightly during baking, creating pockets of deliciousness within the tender crumb developed by proper butter incorporation for brioche.
Mastering Butter Incorporation: Elevate Your Brioche Baking
Learning how to incorporate butter brioche effectively is a transformative skill in baking. It's the technique that unlocks the signature richness, tenderness, and flavor that makes brioche such a beloved bread. While it might seem challenging at first, especially the phase where the dough looks like a greasy mess, understanding the 'why' behind the steps and trusting the process will lead to success.
The journey to mastering brioche involves patience, observation, and hands-on experience. Each time you make brioche, you'll gain a better feel for the dough's texture at different stages and become more adept at knowing when the butter is fully incorporated and the dough is properly kneaded.
Practice Makes Perfect: Keep Baking!
Like any baking skill, mastering how to incorporate butter brioche requires repetition. Don't be discouraged if your first attempt isn't perfect. Perhaps the dough was a little greasy, or the crumb wasn't as tender as you hoped. Analyze what might have happened – was the butter too soft? Did you knead long enough?
Keep practicing with classic recipes. As you bake more brioche, you'll develop muscle memory and a better intuition for the dough's consistency. Soon, you'll be able to tell just by touch if the butter is incorporated and the dough is ready for proofing. Aim to bake brioche regularly to solidify your understanding of this crucial technique.
Experimenting with Flavors and Techniques: Unleash Your Creativity
Once you are confident in your ability to incorporate butter for brioche dough, feel free to experiment! Try using different types of butter (e.g., cultured butter for extra flavor), adjust the sugar level, or incorporate various additions like fruits, nuts, or spices.
Explore different shaping techniques beyond loaves and buns, such as braiding, making individual rolls with a tête (topknot), or creating festive shapes. You can also try the slight variations in butter incorporation techniques discussed earlier to see how they impact the final result. Brioche is a versatile dough, and your mastery of butter incorporation is the foundation upon which you can build countless delicious creations. Enjoy the process and the delicious rewards!
Frequently Asked Questions
How crucial is temperature control when incorporating butter into brioche dough?
Temperature is absolutely critical. The butter needs to be cold enough to remain solid and distribute evenly, but not so cold that it prevents proper dough development. Aim for cold, but pliable butter.
What happens if I add the butter all at once instead of gradually?
Adding all the butter at once can overwhelm the gluten structure. It makes it much harder for the dough to properly emulsify and can result in a greasy, poorly developed dough.
Can I use a stand mixer to incorporate the butter into my brioche dough?
Yes, a stand mixer is highly recommended! Use the dough hook attachment and follow the recipe's instructions carefully. It helps ensure even distribution and prevents overworking the dough.
What are some signs that I've successfully incorporated the butter?
The dough should become smooth, elastic, and slightly tacky. It will also pull away from the sides of the bowl and have a glossy appearance. Avoid overmixing.
What if my brioche dough seems too wet or greasy after incorporating the butter?
Continue kneading the dough. Sometimes, it just needs more time to fully absorb the butter. If it remains too wet, carefully add a tiny amount of flour (1 teaspoon at a time) until the dough reaches the desired consistency.
Final Reflection: The Enduring Allure of the Perfect Brioche Crumb
The meticulous incorporation of butter, as detailed throughout this article, isn't merely a technical baking step; it's the very heart of achieving that ethereal, melt-in-your-mouth brioche crumb we all crave. Mastering this technique unlocks a world of buttery, airy perfection, a testament to the power of precision and patience in the culinary arts. This isn't just about following a recipe; it's about understanding the fundamental interplay of ingredients and technique.
The journey of perfecting my own brioche technique has been a deeply rewarding one, a testament to the enduring power of tradition and the joy of culinary exploration. The subtle nuances of butter incorporation—the temperature, the folding method, the feel of the dough—have taught me the importance of attentiveness and the beauty found in the seemingly simple act of baking. Baking is at once child's play and adult joy. And love, of course.
– This quote perfectly encapsulates the emotional connection I've found in mastering this seemingly simple process.
Now, I invite you to embark on your own brioche journey. Don't be afraid to experiment, to adjust the techniques to your own style, and to savor the process as much as the final product. The perfect brioche crumb awaits, a reward for your dedication and a testament to the transformative power of culinary passion. Remember the lessons learned here, and let the aroma of freshly baked brioche fill your kitchen with warmth and the promise of deliciousness.
Unlock Your Best Brioche Yet!
Thanks for taking the time to explore the secrets of perfectly tender brioche! We hope you now feel confident in mastering the art of butter incorporation. Ready to put your new knowledge into practice?
- Bake your own brioche masterpiece today! Use the techniques you learned to create a loaf (or several!) of stunning, melt-in-your-mouth brioche. Don't forget to experiment with different flavors!
- Share your baking journey with us and other fellow bread enthusiasts on social media – tag us in your delicious creations!
- Challenge yourself: Try adapting these techniques to another enriched dough recipe – what will you create?
Ready to transform your baking game? What unique twist will you add to your next brioche creation?