
Conquer Croissants: An Intermediate Baker's Guide to Flakiness

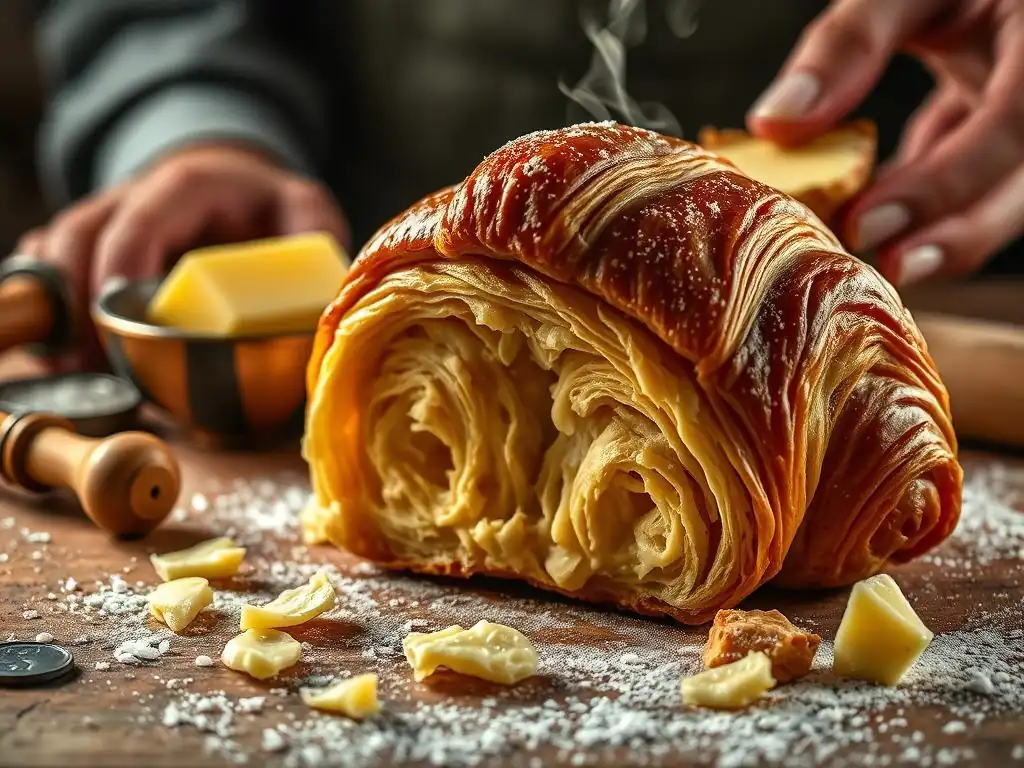
Welcome to BakeWithEase, your trusted companion on your baking journey! Ever dreamt of creating that perfectly flaky croissant at home? This guide dives deep into a flaky croissant recipe beginner can master, bridging the gap between novice and confident baker. Prepare to unlock the secrets of laminated dough and elevate your baking skills – the aroma of freshly baked croissants awaits! Let's get started!
- Introduction to Croissant Mastery: Achieving the Perfect Flake
- Essential Ingredients for a Flaky Croissant Recipe
-
Step-by-Step Guide to Making Flaky Croissants at Home
- Preparing the Détrempe: Mixing the Dough Base
- Creating the Beurre Manié: Preparing the Butter Block
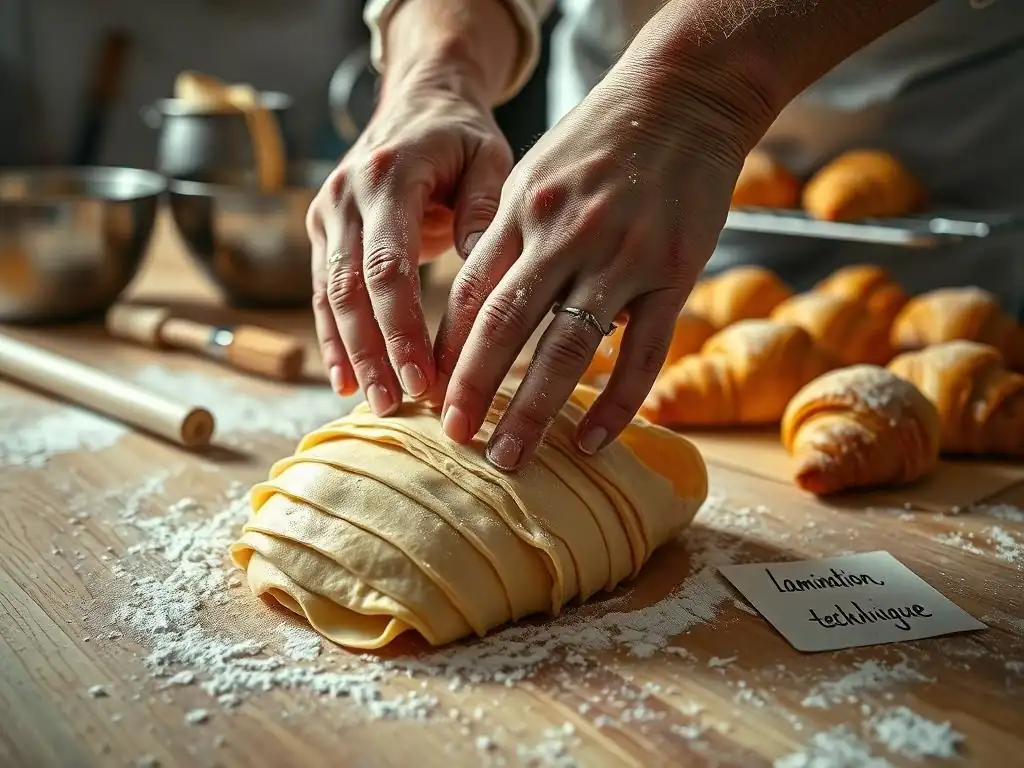
- The Lamination Process: Folding for Flakiness (Detailed Instructions)
- Resting and Proofing the Dough: Developing Flavor and Volume
- Shaping the Croissants: The Classic Crescent Shape
- Egg Wash and Baking: Achieving Golden Perfection
- Troubleshooting Common Croissant Baking Problems
- Advanced Croissant Techniques for the Aspiring Pro
- Tips for Perfecting Your Flaky Croissant Recipe
- Storing and Enjoying Your Homemade Croissants
-
Frequently Asked Questions
- How much experience do I need to attempt this croissant recipe?
- What makes this croissant recipe different from a beginner's recipe?
- What are the most common mistakes people make when baking croissants?
- What kind of butter is best for making flaky croissants?
- Can I freeze the croissant dough at any stage?
- Final Reflection: The Enduring Allure of the Flaky Croissant
- Unleash Your Inner Croissant Master!
Introduction to Croissant Mastery: Achieving the Perfect Flake
Beyond Beginner: Why This Croissant Recipe is for Intermediate Bakers
Stepping into the world of croissants means moving beyond simple doughs and exploring the intricate dance of butter and flour. While a basic bread or cookie recipe might be perfect for beginners, a truly flaky croissant recipe introduces complexities like lamination, precise temperature control, and careful shaping. This guide assumes you have a foundational understanding of yeast doughs and are comfortable working with slightly more demanding techniques, ready to tackle the challenge of achieving those coveted airy layers.
This journey isn't just about following steps; it's about understanding the science behind the bake. We'll delve into why certain temperatures are critical, how ingredients interact, and the physics of creating hundreds of delicate layers. Mastering a flaky croissant recipe requires patience and attention to detail, making it a rewarding project for bakers looking to elevate their skills beyond the fundamentals and achieve professional-level results in their home kitchen.
The Secret to Flaky Croissants: Understanding the Lamination Process
The hallmark of a great croissant is its incredible flakiness, and this is almost entirely due to the lamination process. Lamination involves repeatedly folding and rolling a dough with a block of butter encased within it. As the dough is folded, the butter is spread into thin sheets between layers of dough. During baking, the water in the butter turns to steam, puffing up the dough layers and creating separation, resulting in that signature airy structure.
Think of lamination as building a delicate pastry skyscraper, layer by layer. A typical flaky croissant recipe involves at least three folds (often called "turns"), which can multiply the layers significantly. For example, three single folds can create over 200 distinct layers of dough and butter! This meticulous process is what differentiates a croissant from other pastries and is the absolute core technique you'll master on your way to conquering this classic bake.
Essential Ingredients for a Flaky Croissant Recipe
High-Quality Flour: The Foundation of a Great Croissant
The type of flour you use plays a critical role in the structure and texture of your croissants. A medium-protein bread flour, typically containing around 11-13% protein, is often recommended. This protein develops gluten, which provides the necessary structure and elasticity to the dough, allowing it to be rolled thinly without tearing during lamination. Too low in protein, and the dough might be weak; too high, and it could become tough.
Using a quality unbleached flour is also beneficial. Bleached flours can sometimes weaken the gluten structure. The goal is a dough that is strong enough to hold its shape and layers but pliable enough to stretch without excessive resistance. Experimenting with flours within the recommended protein range can help you find the one that yields the best results for your specific flaky croissant recipe technique.
European-Style Butter: The Key to Flavor and Flakiness
Butter is not just an ingredient in croissants; it's a co-star alongside the dough. European-style butter, with its higher fat content (typically 82-84% butterfat compared to 80% in many American butters), is highly preferred for a truly flaky croissant recipe. This higher fat percentage means less water, which is crucial for creating distinct, separate layers during baking without making the dough soggy.
The plasticity of European butter is also key. It needs to be firm but pliable enough to roll out into an even sheet without cracking or melting too quickly. Cold, high-quality butter is essential for the lamination process, ensuring the butter remains in distinct layers rather than mixing into the dough. The flavor of good butter also significantly contributes to the rich taste of the finished flaky croissants.
Yeast and Hydration: Achieving the Right Dough Consistency
Yeast is the leavening agent that makes the croissant light and airy, providing lift during proofing and baking. Instant or active dry yeast can be used, typically around 1-2% of the flour weight, depending on proofing time and temperature. The yeast activity needs to be controlled, often by using cold liquids, to allow for sufficient flavor development during the long, cold fermentation periods that are common in flaky croissant recipes.
Hydration refers to the ratio of liquid (usually milk or water) to flour. For croissant dough, hydration is typically moderate, often ranging from 50% to 60%. This level provides enough moisture for gluten development and yeast activity but keeps the dough firm enough to handle during the demanding lamination process. Too wet, and the dough is sticky and hard to roll; too dry, and it can tear. Achieving the correct consistency is vital for successful lamination and a wonderful flaky croissant recipe outcome.
Step-by-Step Guide to Making Flaky Croissants at Home
Preparing the Détrempe: Mixing the Dough Base
The détrempe is the initial dough base before the butter is incorporated. It typically consists of flour, water or milk, yeast, a small amount of sugar (to feed the yeast and aid browning), and salt (for flavor and to control yeast activity). All ingredients should be cold. The dough is mixed until just combined, forming a slightly shaggy mass. Overmixing should be avoided, as excessive gluten development at this stage can make the dough tough and difficult to roll later.
After mixing, the détrempe is usually kneaded briefly, either by hand or machine, until it forms a relatively smooth dough. It's then often flattened into a rectangle or square, wrapped tightly, and chilled thoroughly in the refrigerator for several hours, preferably overnight. This cold rest is crucial; it allows the gluten to relax, making the dough more pliable for rolling, and it slows down yeast activity, contributing to better flavor development for your flaky croissant recipe.
Creating the Beurre Manié: Preparing the Butter Block
The beurre manié, in the context of croissants, refers to the prepared butter block that will be laminated into the dough. High-fat, cold European-style butter is paramount here. The butter needs to be malleable but not soft or greasy. It's typically pounded or rolled into a flat, even rectangle, often measuring roughly 6x8 inches or similar, depending on the détrempe size. Some recipes call for incorporating a small amount of flour into the butter (hence "beurre manié," though sometimes it's just the pure butter block), which can help stabilize it.
The butter block's temperature and consistency must match that of the chilled détrempe as closely as possible. If the butter is too cold and hard, it will crack during rolling; if too warm, it will melt into the dough. Achieving the correct plasticity ensures the butter rolls out evenly into thin layers alongside the dough, which is fundamental to the flaky croissant recipe structure you are building.
The Lamination Process: Folding for Flakiness (Detailed Instructions)
Lamination is the heart of the flaky croissant recipe. It's a series of rolling and folding steps that create the hundreds of alternating layers of dough and butter. Patience, a cold environment, and a light touch are essential. The chilled détrempe is rolled out into a rectangle, typically about twice the size of the butter block. The prepared butter block is then placed on one half of the dough rectangle.
The other half of the dough is folded over the butter block, completely enclosing it. The edges are sealed to prevent the butter from escaping. This creates the first layer of dough-butter-dough. The package is then gently rolled out again into a longer rectangle, maintaining even thickness. This is followed by the first "turn" or fold, which multiplies the layers.
First Fold: Locking in the Butter
The first fold is typically a simple fold, often called a "single" or "letter" fold. Imagine the rolled-out dough rectangle divided into three equal sections. You fold one end section into the center, and then fold the remaining section over the top, like folding a letter. This creates three layers of dough and two layers of butter from the initial dough-butter-dough sandwich.
After the first fold, the dough package is wrapped tightly and returned to the refrigerator to rest and chill, usually for 30-60 minutes. This rest period allows the gluten to relax, making the dough easier to roll for the next fold, and ensures the butter remains cold and solid within the layers. Proper chilling at this stage is critical for preventing butter leakage and achieving distinct layers in your flaky croissant recipe.
Second Fold: Building Layers
After the rest, the dough is rotated 90 degrees before being rolled out again. This ensures the dough is stretched evenly in all directions over the course of the lamination. The dough is rolled into another long rectangle, similar in dimensions to the previous step. This is followed by the second fold, which can be another single fold or sometimes a "double" fold (also called a "book" fold).
For a single fold, you repeat the letter fold, multiplying the layers further. If the dough had 3 layers of dough and 2 of butter after the first fold, a second single fold would result in (3x3) 9 layers of dough and (2x3) 6 layers of butter, plus the final dough layer on top/bottom. After the second fold, the dough is again wrapped and chilled for another 30-60 minutes. This step significantly builds the layer structure critical for a truly flaky croissant recipe.
Third Fold: Refining the Flakiness
The third fold, usually another single fold after a 90-degree rotation and rolling, further multiplies the layers. Following our example, after a third single fold, you'd have (9x3) 27 layers of dough and (6x3) 18 layers of butter. This level of layering, often achieved with three single folds or equivalent double folds, is sufficient to produce the characteristic delicate, airy structure of a classic flaky croissant.
Some recipes might call for a fourth fold, but three is common for a balance of flakiness and manageability. Excessive folds can sometimes lead to the butter breaking into the dough. After the final fold, the dough package is given a longer rest in the refrigerator, often 2-4 hours or even overnight. This final chill is essential before shaping, allowing the dough to firm up completely and the gluten to fully relax for easy handling and cutting into the iconic croissant shapes.
Resting and Proofing the Dough: Developing Flavor and Volume
After lamination and the final chill, the dough is rolled out to its final thickness, typically about 1/8 to 1/4 inch (3-5 mm). This sheet is then cut into triangles for shaping. The cut croissants are then placed on baking sheets for proofing. Proofing is a crucial step where the yeast becomes active again, causing the croissants to rise and expand significantly.
Proofing conditions are key: a warm, humid environment (ideally 75-80°F / 24-27°C) is necessary, but not so warm that the butter melts. This stage can take 1.5 to 3 hours. The croissants should look visibly puffy and jiggle slightly when gently shaken, indicating they are properly proofed and ready to bake into a wonderful flaky croissant recipe outcome. Under-proofed croissants will be dense; over-proofed ones may collapse.
Shaping the Croissants: The Classic Crescent Shape
Shaping the croissants involves taking the cut dough triangles and rolling them up from the base towards the point. A small notch or slit is often made at the base of the triangle to help create the classic crescent shape. The dough needs to be stretched slightly as it's rolled to encourage layers to separate and create volume.
Starting from the wide base, the dough is rolled tightly, ensuring no air pockets are trapped inside. The point of the triangle should end up underneath the croissant. For the crescent shape, the ends are gently curved inwards. Uniform shaping helps ensure even baking. This manual process is part of the charm and skill development when making a flaky croissant recipe at home.
Egg Wash and Baking: Achieving Golden Perfection
Before baking, the proofed croissants are typically brushed with an egg wash, a mixture of beaten egg and sometimes milk or water. This wash gives the baked croissants their beautiful golden-brown color and a slight sheen. Be careful not to let the egg wash drip between the layers, as this can glue them together and inhibit flakiness.
The croissants are baked in a hot oven, often starting at a higher temperature (e.g., 400°F / 200°C) for the first 10-15 minutes to create oven spring and promote layer separation, then reducing the temperature (e.g., 375°F / 190°C) to ensure they bake through evenly without burning. Baking time is usually 15-25 minutes total, until deeply golden brown and flaky. The high initial heat helps the butter steam and puff up the layers, contributing significantly to the flaky croissant recipe result.
Troubleshooting Common Croissant Baking Problems
Butter Leakage: Preventing Meltdown During Lamination
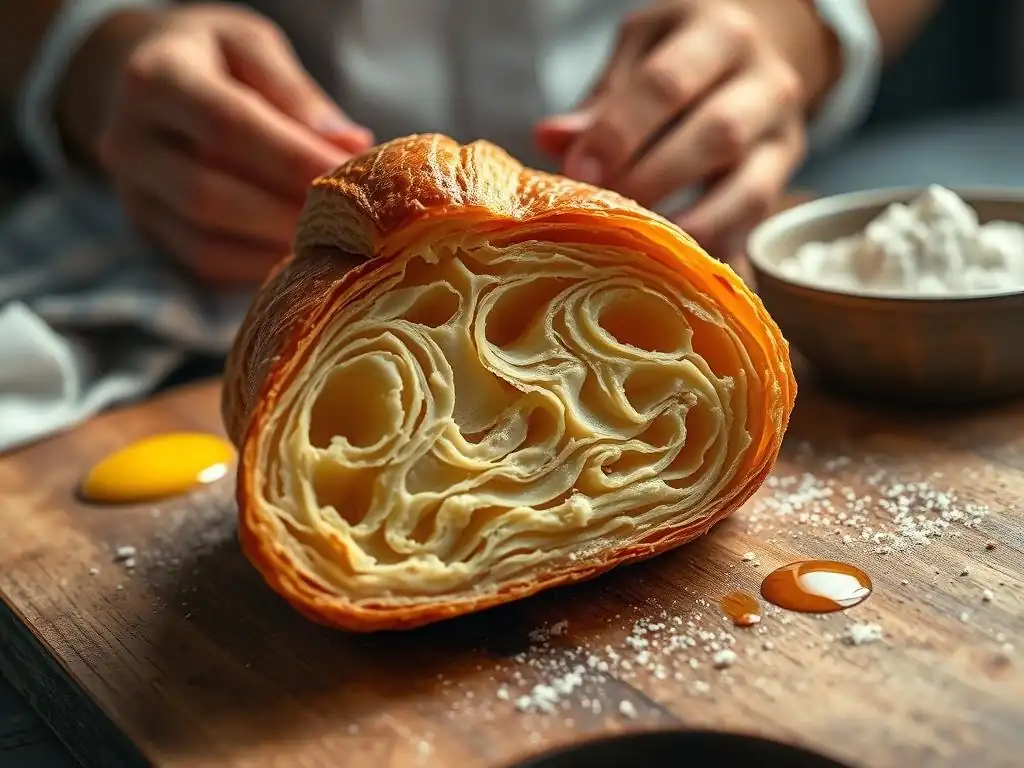
One of the most frustrating issues when making a flaky croissant recipe is butter leaking out during rolling or proofing. This typically happens if the butter is too warm, the dough isn't chilled enough, or the folds aren't sealed properly. Maintaining a consistently cold temperature for both the dough and butter is paramount throughout the lamination process.
Working quickly in a cool kitchen environment helps immensely. If the dough or butter starts to feel soft or greasy, stop and return it to the refrigerator immediately for a solid chill before continuing. Ensure the edges of the dough are well-sealed around the butter block after the initial enclosure and after each fold to trap the butter within its intended layers.
Dough Elasticity: Addressing Tough or Resistant Dough
If your dough is fighting back, springing back excessively when you try to roll it, it's likely too elastic or hasn't rested enough. Over-mixing the détrempe initially can contribute to this, developing too much gluten too early. However, the most common cause is insufficient rest time between folds.
Gluten needs time to relax after being stretched during rolling. If the dough is resistant, do not force it. Forcing it will only make it tougher and potentially tear the layers. Instead, cover the dough and let it rest in the refrigerator for another 15-30 minutes. This extra rest allows the gluten to relax, making the dough pliable and much easier to roll thinly without tearing, ensuring a better flaky croissant recipe outcome.
Uneven Baking: Ensuring Consistent Results
Unevenly baked croissants can result in some being too dark while others are pale, or some being raw in the center. This is often due to hot spots in your oven or overcrowding the baking sheet. Ovens can vary significantly in temperature and heat distribution, sometimes by as much as 25-50°F (15-30°C).
Using an oven thermometer can help you verify your oven's actual temperature. Rotating the baking sheet halfway through the baking time can also help ensure even browning and baking. Avoid placing too many croissants on one sheet; give them space for air circulation. If your oven has a convection setting, using it can sometimes help with more even heat distribution for your flaky croissant recipe.
Lack of Flakiness: Identifying and Correcting Issues
If your baked croissants are dense or bready rather than light and flaky, several factors could be the culprit. The most common reasons relate directly to the lamination process: the butter melted into the dough instead of staying in layers, or not enough layers were created (insufficient folds). Butter that is too soft or a dough that is too warm during lamination will result in the butter integrating into the dough rather than forming distinct sheets.
Insufficient proofing or baking at too low a temperature can also prevent the layers from puffing up properly. Ensure your butter is cold and pliable, your dough is well-chilled throughout lamination, you perform the correct number of folds, and your oven is hot enough initially to create steam from the butter. Reviewing these steps in your flaky croissant recipe process is key to achieving that desired airy structure.
Advanced Croissant Techniques for the Aspiring Pro
Using a Laminator for Professional Results
For those serious about high-volume or perfectly uniform croissants, a dough laminator is the tool of choice in professional bakeries. This specialized piece of equipment uses rollers to flatten the dough and butter with incredible precision and consistency, creating perfectly even layers. While not practical for most home bakers due to size and cost (often starting at several thousand dollars), understanding its function highlights the importance of even rolling in achieving professional-grade flaky croissants.
Using a laminator significantly reduces the physical effort and time required for lamination compared to hand-rolling. It ensures uniform thickness across the dough sheet, which translates to consistently shaped and baked croissants with predictable flakiness. While you can achieve excellent results by hand, a laminator takes the manual variability out of the most critical step in the flaky croissant recipe process.
Experimenting with Different Flours and Butters
Once you've mastered a basic flaky croissant recipe, you can begin experimenting with different ingredients to fine-tune the results. Trying flours with slightly varying protein levels (e.g., a mix of bread and all-purpose) can alter the dough's extensibility and the final crumb structure. Some bakers prefer the subtle chewiness provided by stronger flours, while others seek a more tender crumb with slightly lower protein.
Similarly, exploring butters from different regions or producers can impact both flavor and handling. Butters vary not just in fat percentage but also in their melting point and plasticity. Some artisan butters offer unique flavor profiles that can elevate your croissants. Documenting your results when changing ingredients is key to understanding how each variation affects your flaky croissant recipe.
Creating Variations: Pain au Chocolat and Other Viennoiseries
The laminated dough used for croissants is the foundation for a whole family of pastries known as Viennoiseries. Once you have mastered the basic flaky croissant recipe dough, you can easily adapt it to make other delicious treats. Pain au chocolat, for example, simply involves placing one or two pieces of good-quality dark chocolate batons on the dough triangle before rolling it up.
Other variations include pain aux raisins (rolled dough with pastry cream and raisins), escargots (snail-shaped pastries), or danishes filled with fruit or cheese. The lamination process remains the same; only the shaping and fillings change. Mastering the flaky croissant recipe dough opens up a world of possibilities for expanding your baking repertoire with these delightful laminated pastries.
Tips for Perfecting Your Flaky Croissant Recipe
Temperature Control: Keeping Everything Cold
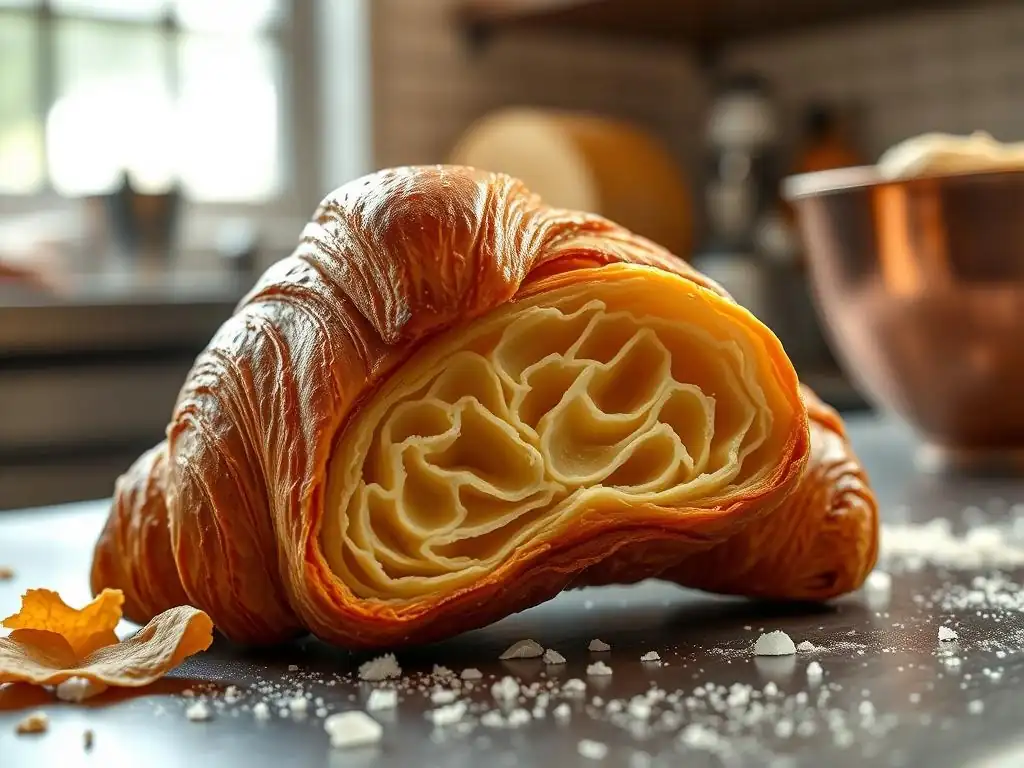
Maintaining cold temperatures is arguably the single most important factor in a successful flaky croissant recipe. The dough, the butter, your hands, the rolling surface, and even the kitchen environment should be kept as cool as possible throughout the lamination process. Warm dough is sticky and hard to roll; warm butter melts into the dough, destroying the layers.
Aim for a kitchen temperature below 70°F (21°C) if possible. Chill your rolling pin. Work quickly when the dough is out of the refrigerator, returning it for a rest whenever the butter feels like it's softening. Using cold liquids in your détrempe and ensuring sufficient chilling time between folds are non-negotiable steps for achieving those distinct, buttery layers and a truly flaky croissant recipe result.
Patience is Key: Don't Rush the Process
Making croissants is a multi-day process that requires patience and adherence to resting times. Rushing the chilling periods between folds is a common mistake that leads to butter leakage and tough dough. Each rest allows the gluten to relax and the butter to firm up, making the subsequent rolling easier and more effective.
Similarly, allowing adequate time for the final proofing is crucial for achieving a light, airy texture. While the total hands-on time for a flaky croissant recipe might only be a couple of hours, the passive chilling and proofing time stretches the process over 24 hours or more. Embrace the slower pace; the quality of the final product is a direct result of respecting these necessary pauses.
Practice Makes Perfect: Embrace the Learning Curve
Your first batch of croissants might not be perfect, and that's completely normal! Mastering a flaky croissant recipe is a skill that improves with practice. Don't be discouraged by initial challenges like uneven layers or slightly less-than-ideal flakiness. Each attempt is a learning opportunity.
Pay attention to how the dough feels at different stages, note the temperature of your kitchen, and observe how your oven bakes. Keep trying, make small adjustments based on your observations, and you will see improvement with each batch. The journey to a perfect flaky croissant is rewarding, and the skills you develop will benefit all your baking endeavors.
Storing and Enjoying Your Homemade Croissants
Freshly Baked: The Best Way to Enjoy Croissants
The absolute peak experience of a flaky croissant is undoubtedly when it's still warm from the oven. The exterior is crisp and shattering, and the interior is soft, airy, and intensely buttery. There's nothing quite like tearing into a warm croissant and seeing those perfect layers.
Plan your baking time so you can enjoy at least a few croissants immediately after they've cooled for just 10-15 minutes. This is when their texture and aroma are at their absolute best. Sharing warm, homemade flaky croissants with friends or family is one of the great joys of baking.
Freezing Croissants: Preserving Flakiness for Later
Croissants can be frozen at two stages: either after shaping but before proofing, or after they have been fully baked and cooled. Freezing unbaked croissants is often preferred as it allows you to have freshly baked goods on demand. Place shaped, unproofed croissants on a baking sheet and freeze until solid, then transfer them to an airtight container or freezer bag.
To bake from frozen, place the frozen croissants on a baking sheet and allow them to proof at room temperature until they are fully thawed and proofed, which can take 4-6 hours or longer. Bake as usual. If freezing baked croissants, cool them completely, wrap tightly, and freeze. Reheat from frozen in a moderate oven (350°F / 175°C) for 10-15 minutes until crisp, though the texture won't be quite as delicate as freshly baked.
Reheating Croissants: Restoring Crispness and Flavor
Even if not frozen, croissants are best enjoyed warm. To reheat a baked croissant, the oven is the best method for restoring its flaky texture. A microwave will warm it but can make it soft and chewy, destroying the crisp layers you worked so hard to create in your flaky croissant recipe.
Preheat your oven or a toaster oven to around 350°F (175°C). Place the croissant directly on the oven rack or on a baking sheet and heat for 5-10 minutes, or until warmed through and the exterior feels crisp again. This gentle reheating brings back some of the delightful texture and releases the wonderful buttery aroma, making a day-old flaky croissant feel almost like new.
Frequently Asked Questions
How much experience do I need to attempt this croissant recipe?
This recipe is designed for intermediate bakers. Some prior baking experience is recommended, especially with dough handling. It's not a beginner recipe, but with patience, it can be conquered!
What makes this croissant recipe different from a beginner's recipe?
This recipe focuses on achieving maximum flakiness, which requires more precise techniques and a slightly more complex process than simpler recipes. Dough lamination is a key difference.
What are the most common mistakes people make when baking croissants?
Common mistakes include not keeping the dough cold enough, overworking the dough, and using incorrect butter ratios. Maintaining a consistent cold temperature is crucial.
What kind of butter is best for making flaky croissants?
European-style butter with a high fat content (82% or higher) is highly recommended for achieving the best flakiness. Lower fat butter will melt too quickly.
Can I freeze the croissant dough at any stage?
Yes, you can freeze the dough after the first few folds and rests. Make sure to wrap it tightly to prevent freezer burn and thaw it completely in the refrigerator before continuing.
Final Reflection: The Enduring Allure of the Flaky Croissant
The pursuit of the perfect flaky croissant is more than just a baking challenge; it's a testament to the power of patience, precision, and the enduring magic of transforming simple ingredients into something truly extraordinary. This guide has explored the intricacies of achieving that coveted flakiness, demystifying techniques often perceived as intimidating for intermediate bakers. But the journey to mastering the croissant is far from over; it's a continuous process of learning and refinement.
The impact of the croissant transcends mere culinary achievement. It represents a connection to tradition, a celebration of artistry in the kitchen, and a tangible symbol of dedication and reward. The croissant is a poem in pastry,
as a renowned French chef once said. This sentiment perfectly encapsulates the beauty and complexity of this seemingly simple pastry, a beauty that resonates deeply with bakers and eaters alike. The pursuit of the perfect flake continues to inspire countless individuals, fostering a sense of community and shared passion.
Now, it's your turn. Don't be afraid to experiment, to embrace the occasional imperfect batch, and to learn from each rise and fold. The journey to mastering the flaky croissant is a rewarding one, filled with delicious discoveries and the satisfaction of creating something truly special. Remember the techniques outlined in this guide, but most importantly, remember the joy of the process. So, gather your ingredients, preheat your oven, and embark on your own croissant adventure. The perfectly flaky reward awaits.
Unleash Your Inner Croissant Master!
Thanks for taking the time to explore the world of flaky, buttery croissants! We hope you gained valuable insights into mastering this challenging yet rewarding pastry. Now it's time to put your newfound knowledge into practice.
- Bake your own masterpiece! Use the techniques you just learned to create your own batch of perfect croissants. Don't be afraid to experiment – even small adjustments can make a big difference!
- Share your creations! Post a picture of your magnificent croissants on social media and tag us @BakeWithEase – we'd love to see your baking journey!
- Explore advanced croissant techniques: Dive deeper into the world of laminated doughs. Research different types of butter, folding techniques, and even try making a pain au chocolat!
Ready to transform your kitchen into a Parisian patisserie? What unique twist will you add to your next croissant creation?