
Cutting and Shaping Viennoiseries Without Deflating Layers

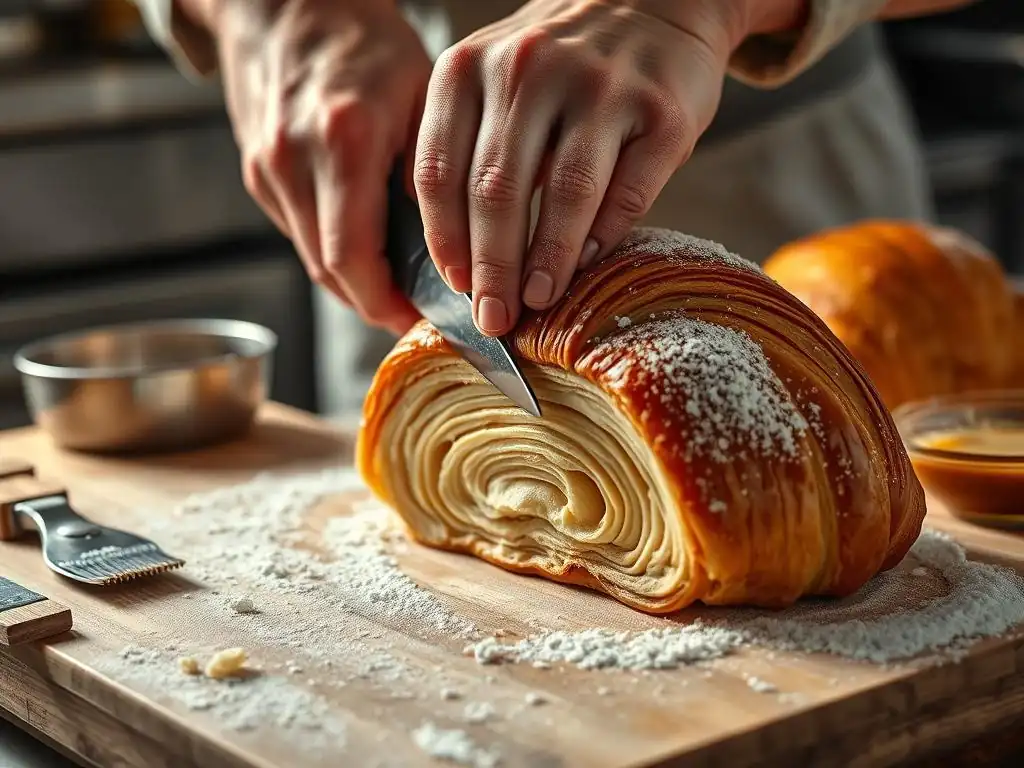
Welcome to BakeWithEase, where the secrets of perfect viennoiseries are unveiled! Tired of deflating those delicate layers you worked so hard to create? This guide dives into Viennoiseries shaping techniques, offering simple, yet effective methods that will elevate your baking from good to gorgeous. Discover the secrets to achieving professional results without the stress, and get ready to impress with your perfectly shaped croissants and pain au chocolat. Intrigued? Let's get started!
- Cutting and Shaping Viennoiseries Without Deflating Layers: A BakeWithEase Guide
- Introduction to Viennoiseries Shaping Techniques
- Essential Tools for Shaping Viennoiseries
- Viennoiseries Shaping Techniques: Step-by-Step Guide
- Pro Tips to Prevent Deflation During Shaping
- Troubleshooting Common Viennoiseries Shaping Problems
- Achieving Professional-Looking Viennoiseries at Home
- Viennoiseries Shaping Recap: Easy Steps to Success
-
Frequently Asked Questions
- What are Viennoiseries, and why is it important to avoid deflating the layers when shaping them?
- What are some common mistakes that can lead to deflating the layers when cutting and shaping Viennoiseries dough?
- What is the best type of knife to use for cutting Viennoiseries dough to preserve the layers?
- What are some tips for handling the Viennoiseries dough gently while shaping it?
- Are there any specific techniques for shaping different types of Viennoiseries (e.g., croissants vs. pain au chocolat) that help prevent deflation?
- Final Reflection: Mastering the Delicate Art of Viennoiserie Shaping
- Unleash Your Inner Viennoiserie Artist!
Cutting and Shaping Viennoiseries Without Deflating Layers: A BakeWithEase Guide
Introduction to Viennoiseries Shaping Techniques
Welcome to the wonderful world of Viennoiseries! These delicate, flaky pastries, like croissants and pain au chocolat, are a true delight. Mastering the art of cutting and shaping them is crucial for achieving that signature airy, layered texture.
It might seem intimidating at first, but with the right techniques and a little patience, you can learn easy Viennoiseries shaping techniques that yield beautiful, bakery-quality results right in your own kitchen. This guide will walk you through the essential steps, tools, and tips to shape your Viennoiseries dough without losing those precious layers you worked so hard to create during lamination.
Understanding how to handle laminated dough is key to successful Viennoiseries. The layers of dough and butter are what give these pastries their incredible flakiness when baked. Any rough handling, incorrect cutting, or improper temperature control can compress these layers, leading to a dense, heavy pastry instead of a light, airy one. Our goal here is to provide you with the knowledge and easy Viennoiseries shaping techniques needed to protect that delicate structure from the moment you roll out your dough to the second it goes into the oven.
Why Deflation Happens When Cutting Viennoiseries
Deflation in Viennoiseries dough primarily occurs when the delicate layers of dough and butter are compressed or damaged. This often happens due to using dull tools, applying too much pressure during cutting, or handling the dough when it's too warm and therefore soft and sticky. Imagine slicing through a stack of paper with a dull knife – you'd likely tear and push the layers together rather than making a clean cut. The same principle applies to laminated dough; a clean, swift cut is essential to preserve the distinct layers.
Furthermore, the act of cutting can introduce stress to the dough structure. If the gluten network hasn't been sufficiently relaxed through proper resting, the dough can spring back or tear, disrupting the uniformity of the layers. When you cut with a dragging motion instead of a sharp press, you essentially glue the edges of the layers together, preventing them from separating and puffing up correctly in the oven. Learning the right Viennoiseries shaping techniques easy on your layers starts with understanding these common pitfalls.
Understanding the Importance of Layer Integrity in Viennoiseries
The magic of Viennoiseries lies in their hundreds, sometimes thousands, of paper-thin layers. During baking, the moisture in the butter turns to steam, forcing these layers apart and creating that characteristic open, airy crumb and crispy exterior. Maintaining the integrity of these layers throughout the shaping process is paramount. Each clean layer separation is a potential pocket for steam expansion.
A well-shaped croissant, for example, can have layers so distinct they almost peel apart. This is a direct result of careful lamination and precise shaping that didn't compress or fuse the layers at the edges. Conversely, if the layers are mushed together during cutting or shaping, the steam cannot effectively separate them, resulting in a denser, less flaky pastry. Therefore, focusing on gentle, precise Viennoiseries shaping techniques is not just about aesthetics; it's fundamental to achieving the desired texture and rise.
Essential Tools for Shaping Viennoiseries
Having the right tools makes a significant difference in the ease and success of your Viennoiseries shaping techniques. While you don't need a professional bakery setup, a few key items can help you achieve cleaner cuts and more consistent shapes, ultimately protecting those delicate layers from deflation. Investing in quality versions of these basic tools will elevate your baking game and make learning Viennoiseries shaping techniques easy and enjoyable.
Beyond the basics, consider tools that help with consistency. A good ruler or measuring tape is invaluable for cutting uniform shapes, whether you're making equal pain au chocolat rectangles or consistently sized croissant triangles. A pastry brush is also useful for applying egg wash evenly before baking, contributing to a beautiful golden finish, though it's less directly involved in preventing deflation during shaping itself.
The Best Knives for Clean Viennoiseries Cuts
For cutting laminated dough, sharpness is non-negotiable. A razor-sharp knife or a pizza cutter designed for dough is essential. A long, sharp chef's knife or a dedicated pastry knife with a straight, sharp edge works well. The key is to make a single, clean cut without dragging the blade through the dough, which would seal the layers. Think of it as pressing down firmly and swiftly rather than sawing back and forth.
Many professional bakers prefer using a pizza cutter or a rolling pastry cutter for straight cuts like those needed for pain au chocolat or strips for croissants. These tools allow for a continuous, clean cut with minimal pressure, reducing the risk of compressing layers. Look for one with a large, sharp wheel. If using a knife, keep it honed and wipe the blade clean frequently to prevent dough buildup from causing drag. Mastering these clean cuts is one of the most important easy Viennoiseries shaping techniques to learn.
Recommended Rolling Pins for Layered Dough
A good rolling pin is vital for rolling out laminated dough evenly without overworking or tearing it. French-style rolling pins (tapered ends, no handles) or straight rolling pins (uniform thickness, sometimes with handles) are both suitable. The preference often comes down to personal comfort and control. A heavier pin can help with leverage, but too much weight can inadvertently compress layers if not used carefully.
Material matters too. Wood is traditional and performs well, but some bakers prefer non-stick materials or stainless steel, especially if kept chilled, as they can help keep the dough cold during rolling. Regardless of style or material, ensure your rolling pin is smooth and clean. Roll gently and evenly, applying consistent pressure across the dough to maintain uniform thickness, which is crucial for consistent layers throughout your pastry. This careful rolling is a fundamental part of effective Viennoiseries shaping techniques easy on the dough.
Essential Baking Mats and Surfaces for Shaping
Working on the right surface is crucial for handling delicate dough. A large, non-stick surface is ideal. Silicone baking mats, often called Silpats, are excellent for this. Dough is less likely to stick, allowing you to roll and shape without excessive flour, which can dry out the dough and interfere with lamination. They also provide a stable surface that doesn't absorb moisture from the dough.
Alternatively, a clean, smooth countertop or a large wooden pastry board can work. If using these, you'll likely need to use a minimal amount of flour to prevent sticking. However, be cautious not to use too much, as excess flour can get incorporated between the layers, hindering their ability to separate during baking. Some bakers even use large sheets of parchment paper or plastic wrap placed directly on the counter for easy cleanup and a non-stick surface. A smooth, cool surface helps keep the dough at the right temperature, which is vital for successful Viennoiseries shaping techniques.
Viennoiseries Shaping Techniques: Step-by-Step Guide
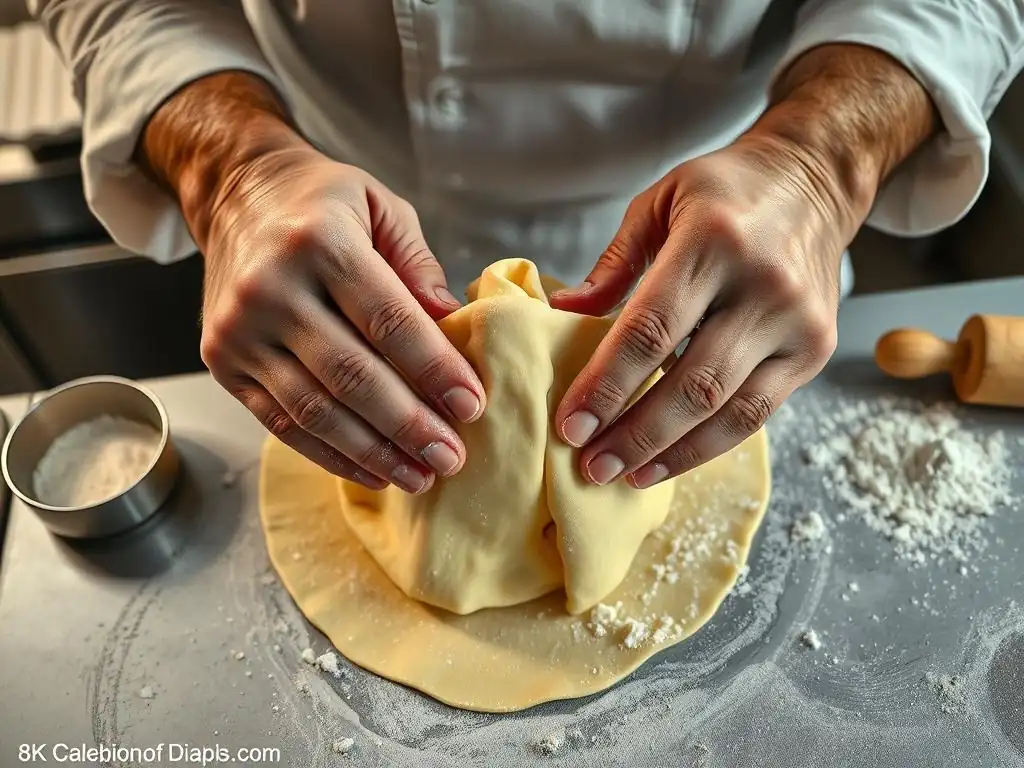
Now that you have your essential tools ready, let's dive into the specific steps for shaping different types of Viennoiseries. The core principle remains the same: handle the dough gently, work efficiently, and use sharp tools. Following these easy Viennoiseries shaping techniques will help you achieve beautiful, well-structured pastries.
This section will break down the process for some popular Viennoiseries, providing actionable steps to guide you. Remember that practice is key; don't be discouraged if your first attempts aren't perfect. Each batch is a learning opportunity to refine your approach and improve your Viennoiseries shaping techniques easy.
Preparing Your Viennoiseries Dough for Shaping
Before you even think about cutting, your laminated dough needs to be properly prepared. This involves ensuring it's at the right temperature and has had adequate time to rest. These initial steps are critical for making the cutting and shaping process smooth and successful, preventing issues like tearing or excessive shrinkage. Proper preparation sets the stage for mastering easy Viennoiseries shaping techniques.
Think of this stage as the calm before the storm. You've put in the work laminating the dough; now it's time to handle it with care. Rushing this step can undo all your previous efforts, leading to frustration and less-than-ideal results. A well-prepared dough is pliable, easy to work with, and resilient enough to withstand the shaping process without losing its structure.
Achieving the Right Dough Consistency
The ideal consistency for shaping laminated dough is cold and firm, but not frozen solid. The butter layers should be solid but still pliable enough to bend without cracking. If the dough is too warm, the butter will be soft, and the layers will meld together when cut or rolled, leading to a greasy texture and poor rise. If it's too cold and stiff, it will be difficult to roll out evenly and prone to cracking.
Aim for a dough temperature between 4°C and 7°C (39°F and 45°F). You can check this with an instant-read thermometer if you want to be precise. If your kitchen is warm, you might need to work quickly or even chill the dough periodically during the shaping process. Working on a cool surface, like marble or a chilled silicone mat, can also help maintain the desired temperature and consistency for effective Viennoiseries shaping techniques easy on the dough.
The Importance of Resting the Dough Before Cutting
After the final roll-out (to your desired thickness for shaping), the dough must rest. This resting period is crucial for allowing the gluten network to relax. If you try to cut and shape dough that hasn't rested, it will be elastic and spring back, making it difficult to get accurate shapes and potentially causing tears. A typical rest period after the final roll-out is at least 20-30 minutes in the refrigerator.
This rest also helps firm up the butter layers slightly after rolling, which makes them less likely to smear during cutting. When the dough is properly relaxed and chilled, cutting is cleaner, and the shapes hold better. Don't skip this step; it's a simple but vital part of successful Viennoiseries shaping techniques and contributes significantly to ease of handling.
Cutting Techniques for Pain au Chocolat
Pain au chocolat requires cutting the dough into precise rectangles, typically around 8-10 cm (3-4 inches) wide and 18-20 cm (7-8 inches) long, depending on how many chocolate batons you use (usually two). Accuracy here ensures uniform pastries that bake evenly. Use a sharp knife or pastry wheel and a ruler to mark and cut straight lines.
Lay your rolled-out dough flat and use a ruler to measure and lightly score your cutting lines. Then, using a sharp, non-serrated knife or a pizza cutter, make swift, decisive cuts along these lines. Avoid sawing motions. Cut straight down through all layers. If using a knife, you can place the ruler along the line and cut directly against it for extra precision. This precise cutting is a core element of easy Viennoiseries shaping techniques for this classic pastry.
Precise Cutting for Perfect Chocolate Placement
The dimensions of your rectangles should accommodate your chocolate batons with a little overlap for sealing. If your batons are 8 cm long, your rectangle should be at least that wide, plus perhaps 1-2 cm for folding. Place the chocolate baton(s) near one end of the rectangle, leaving a small margin.
When cutting, ensure your lines are parallel and perpendicular, creating true rectangles. Uneven shapes will lead to uneven rolling and baking. After cutting, place the chocolate batons on the dough. Roll the dough up around the batons, ending the roll with the seam underneath. Gently press the seam to seal, but don't flatten the pastry. This careful placement and rolling are key Viennoiseries shaping techniques easy to master with practice.
Avoiding Uneven Layers in Pain au Chocolat
Uneven layers in the final product can stem from uneven rolling or poor cutting. If the dough thickness varies across your sheet, some parts will have thinner layers than others. Roll your dough using even pressure, rotating the dough occasionally to ensure a uniform thickness, typically around 3-4 mm (about 1/8 inch) for pain au chocolat.
When cutting, make sure your tool cuts cleanly through all layers simultaneously. If the bottom layers are not cut cleanly, they can drag and distort as you separate the rectangles. Ensure your knife or wheel is sharp and you're cutting on a firm, flat surface. This attention to detail in cutting and rolling is vital for maintaining layer integrity, making these Viennoiseries shaping techniques easy to implement for better results.
Shaping Croissants: A Detailed Tutorial
Shaping croissants involves cutting the dough into triangles and then rolling them up in a specific way. This iconic shape is achieved through careful cutting and a rolling technique that encourages the layers to expand outwards during baking, creating the characteristic crescent shape. Mastering croissant shaping is often seen as a benchmark for easy Viennoiseries shaping techniques.
The size of your triangles will determine the size of your croissants. A common size is a base of 10-12 cm (4-5 inches) and a height of 20-25 cm (8-10 inches). Larger triangles yield larger croissants. Uniformity in size is important for consistent proofing and baking times.
Rolling Techniques for Maximum Flakiness
After cutting your triangles, gently stretch the base slightly wider. You can also make a small notch or cut about 1-2 cm (1/2 inch) into the center of the base. This notch helps the croissant open up into a better crescent shape. Place your hands at the base of the triangle and begin rolling towards the point.
Roll relatively tightly at the base to secure the layers around the starting point. As you roll, use gentle pressure, but don't flatten the dough. The goal is to roll the triangle up while encouraging the point to stretch slightly, creating tension that helps form the crescent. This rolling method is one of the most satisfying easy Viennoiseries shaping techniques to perfect.
Creating the Classic Croissant Shape
Once rolled, the straight shape needs to be curved into the classic crescent. Gently bend the ends of the rolled croissant inwards towards each other. Some bakers find it helpful to slightly pull and curve the ends simultaneously. Place the shaped croissants on your baking sheet with the point tucked underneath to prevent it from unraveling during proofing and baking.
Ensure there is enough space between croissants on the baking sheet, as they will expand significantly during proofing and baking. Typically, leave at least 8-10 cm (3-4 inches) between them. The final shape should be a nice, even crescent, ready for the crucial proofing stage. This step completes the visual aspect of these easy Viennoiseries shaping techniques.
Shaping Other Viennoiseries: Palmiers
Palmiers, also known as elephant ears or palm leaves, are one of the simplest Viennoiseries to shape, making them an excellent starting point for learning easy Viennoiseries shaping techniques. They are made by coating a rectangle of laminated dough with sugar (sometimes cinnamon sugar), rolling both ends towards the center, and then slicing the resulting roll into individual cookies.
Roll your dough into a large rectangle, typically about 3-4 mm (1/8 inch) thick. Sprinkle generously and evenly with granulated sugar (about 50-100g per standard batch of dough, depending on preference). Starting from one long edge, roll the dough inwards towards the center. Repeat from the opposite long edge until both rolls meet in the middle.
Achieving Symmetrical Palmiers
To get symmetrical palmiers, ensure you roll both sides inwards at the same rate and with even tension. The two rolls should meet precisely in the center line of the rectangle. Once rolled, gently press the two rolls together to adhere them. For easier slicing and to maintain the shape, chill the rolled log for at least 30 minutes in the refrigerator until it's firm.
To slice, use a sharp knife and cut the log into slices about 1-1.5 cm (1/2 inch) thick. Place the slices cut-side down on your baking sheet, leaving space for expansion. The sugar helps caramelize and create a crisp texture during baking. This straightforward roll-and-slice method highlights how easy Viennoiseries shaping techniques can be for certain pastries.
Shaping Other Viennoiseries: Chausson aux Pommes (Apple Turnovers)
Chausson aux Pommes, or apple turnovers, are essentially pockets of laminated dough filled with apple compote. Shaping involves cutting the dough into squares or circles, placing the filling, and sealing the edges. While seemingly simple, creating a secure seal is critical to prevent the filling from leaking during baking and compromising the layers.
Roll your dough to about 3-4 mm (1/8 inch) thick. Cut into squares (e.g., 12x12 cm or 5x5 inches) or circles using a cutter. Place a spoonful of cooled, thick apple compote slightly off-center on each square or circle. Don't overfill, as this makes sealing difficult.
Creating a Secure Seal to Prevent Filling Leakage
To seal, brush the edges of the dough lightly with egg wash or water. Fold the dough over the filling to create a half-square or half-circle (a triangle or a half-moon shape). Press the edges firmly together to seal. You can use your fingers, a fork, or a pastry wheel to crimp the edges decoratively and ensure a strong seal.
A common issue is filling leaking out, which can cause the pastry to stick to the baking sheet and prevent proper puffing. Ensure the compote is not too wet and is completely cooled. Double-check that the edges are sealed tightly all the way around. Placing the sealed turnovers on a baking sheet lined with parchment paper or a silicone mat provides an extra layer of security against sticking, completing these easy Viennoiseries shaping techniques for turnovers.
Pro Tips to Prevent Deflation During Shaping
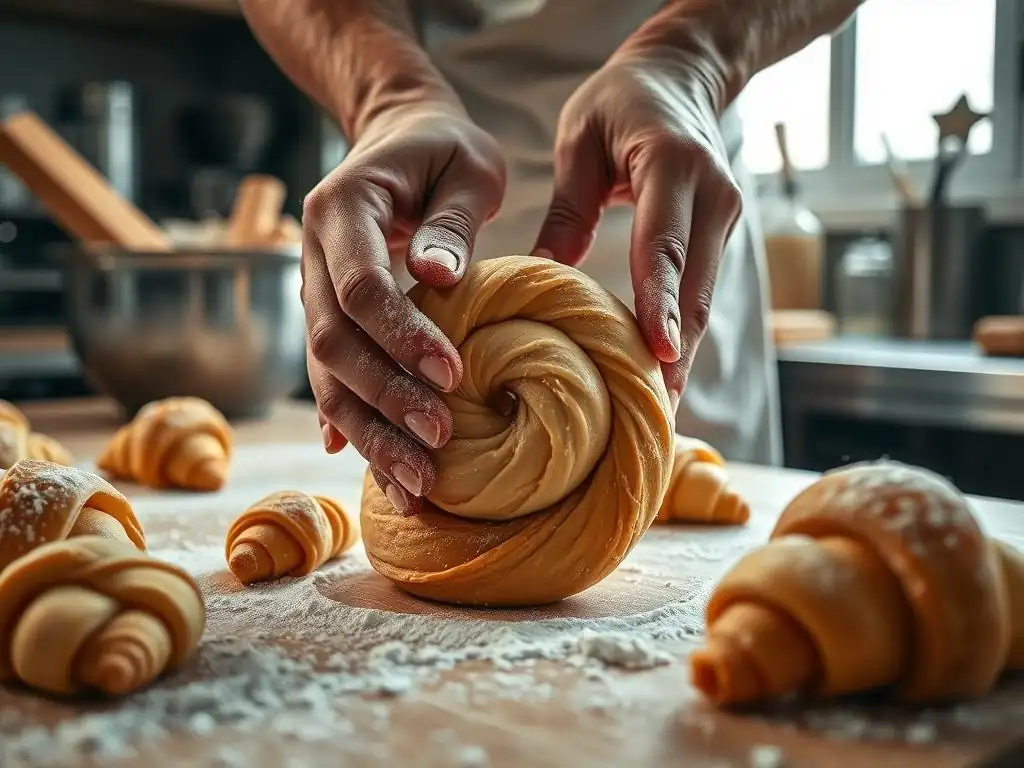
Beyond the specific techniques for each pastry type, there are overarching principles that apply to all Viennoiseries shaping techniques and are easy to incorporate into your process. These pro tips focus on maintaining the integrity of the delicate layers and handling the dough with the care it deserves. Following these guidelines consistently will significantly improve your results.
Preventing deflation is largely about respecting the structure you've built during lamination. Any step that compresses, smears, or tears the layers will hinder the final rise and flakiness. By being mindful of temperature, pressure, and the sharpness of your tools, you can avoid the most common causes of deflation and achieve those beautiful, airy pastries.
Keeping Your Dough Cold: Temperature Control Strategies
Temperature is perhaps the single most critical factor in preventing deflation. Laminated dough must be kept cold throughout the shaping process. As mentioned earlier, the ideal temperature range is typically 4°C to 7°C (39°F to 45°F). If the dough becomes too warm, the butter softens, making the layers prone to smearing and sticking together when cut or rolled.
Work in a cool environment if possible. If your kitchen is warm (above 22°C or 72°F), consider chilling your tools (like rolling pins or cutting surfaces) or placing the dough back in the refrigerator for 10-15 minutes if it starts to feel soft or sticky. Work efficiently; don't let the dough sit out for extended periods. These simple temperature control strategies are among the most effective easy Viennoiseries shaping techniques for preserving layers.
The Gentle Touch: Avoiding Over-Handling
Excessive handling generates heat from your hands and can compress the layers. Touch the dough only as much as necessary. When rolling, use even pressure and let the rolling pin do the work. When shaping, be gentle as you roll or fold. Avoid squeezing or pressing the dough firmly unless you are specifically sealing an edge.
Think of the layers as delicate sheets of glass; you want to move and shape them without breaking or pressing them together. If you need to move cut pieces, use a bench scraper or spatula rather than picking them up with your hands, especially if they are large or thin. Gentle handling is a cornerstone of successful and easy Viennoiseries shaping techniques.
As highlighted earlier, a sharp cutting tool is non-negotiable. A dull knife or pizza cutter will drag through the dough, compressing and sealing the layers at the cut edges. This prevents the layers from separating properly during baking, resulting in a less flaky texture.
Ensure your knife is honed before you begin cutting. If using a pizza cutter, check that the wheel turns freely and has a sharp edge. Wipe your cutting tool clean frequently during the process, especially if dough or butter starts to build up on the blade, as this can cause drag. A clean, sharp cut is one of the most impactful easy Viennoiseries shaping techniques for maintaining layer definition.
Troubleshooting Common Viennoiseries Shaping Problems
Even with the best techniques, you might encounter issues when shaping Viennoiseries. Recognizing common problems and knowing how to address them is part of the learning process. Don't be discouraged by imperfections; they are opportunities to refine your easy Viennoiseries shaping techniques for the next batch.
Understanding the likely causes of these issues can help you adjust your approach in real-time or plan better for future baking sessions. Most problems related to shaping can be traced back to dough temperature, handling, or tool sharpness.
Tears and Rips in the Dough: Causes and Solutions
Tears and rips typically occur when the dough is too cold and stiff, hasn't rested long enough (gluten is too tight), or is being rolled or stretched too aggressively. If the butter layers are too cold, they can crack, causing the dough to tear around them. If the gluten hasn't relaxed, the dough will resist stretching and snap.
If you notice tears while rolling, try letting the dough warm up slightly at room temperature for 5-10 minutes, or give it a short rest in the refrigerator if it feels warm but is tearing due to tightness. Roll more gently, applying less pressure. Patch small tears by gently pressing the edges together. For larger tears, you might need to trim the affected area, although this will result in less yield. Ensuring proper resting time after the final roll-out is key to preventing this issue and making Viennoiseries shaping techniques easy on the dough.
Uneven Layers After Baking: Addressing the Issue
If your baked pastries have uneven layers – some areas very flaky, others dense – it often points to inconsistencies during rolling or cutting. Uneven thickness in the dough sheet means some parts have more layers or thicker layers than others. Uneven pressure during rolling can also compress layers in certain spots.
To address this, focus on rolling your dough to a uniform thickness across the entire sheet. Use a ruler or calipers to check thickness if necessary. Ensure your cutting tool makes clean cuts through all layers. Sometimes, uneven proofing or inconsistent oven temperature can also contribute to uneven rise and layer separation. Reviewing your rolling and cutting technique is a primary step in refining your easy Viennoiseries shaping techniques for better consistency.
Croissants Unraveling During Baking: Prevention Tips
Croissants unraveling in the oven usually means the final seam wasn't sealed properly or wasn't placed underneath the croissant on the baking sheet. When the dough expands rapidly in the hot oven, an unsecured seam will open up.
To prevent this, ensure you finish rolling the croissant with the point firmly tucked underneath the base. Press the seam gently to help it adhere, but not so much that you flatten the layers. Place the shaped croissants on the baking sheet with the seam side down. This provides weight and contact with the sheet to help keep it sealed during the initial oven spring. Checking that the seam is secure is a small but vital part of successful Viennoiseries shaping techniques.
Achieving Professional-Looking Viennoiseries at Home
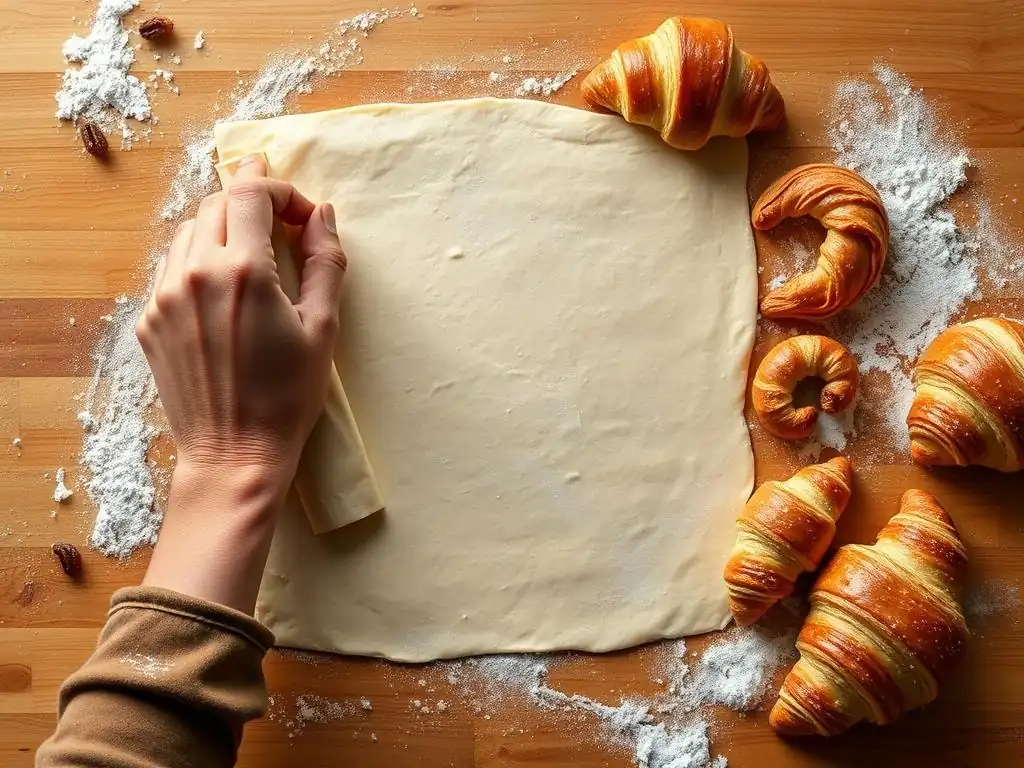
Making Viennoiseries that look like they came from a Parisian patisserie is a rewarding goal. It's not just about the taste and texture; the appearance is part of the experience. Achieving that beautiful shape, golden-brown color, and distinct layers requires attention to detail throughout the process, including mastering easy Viennoiseries shaping techniques and understanding the subsequent steps.
From the initial lamination to the final bake, each stage contributes to the final product's appearance and quality. Focusing on precision during shaping, allowing for proper proofing, and using the correct baking method will elevate your homemade Viennoiseries to a professional standard.
Mastering the Art of the Laminate
While this article focuses on shaping, the quality of your laminate is the foundation. A well-executed lamination process creates distinct, numerous layers of dough and butter. If the butter breaks through the dough during rolling or the layers aren't even, no amount of perfect shaping will fix it.
Practice your folds (single or double) and ensure the dough and butter are at the right temperature and consistency during lamination. Keep everything cold, and rest the dough adequately between folds. A good laminate provides the raw material – defined layers – that your Viennoiseries shaping techniques easy will then preserve and highlight.
The Importance of Proofing for Optimal Layer Development
After shaping, Viennoiseries require a specific proofing process. This is where the dough rises significantly and the layers begin to separate slightly before baking. Proper proofing happens in a warm, humid environment, typically around 24-26°C (75-79°F) with 75-80% humidity, for 2-3 hours or until the pastries are visibly expanded and jiggly.
Under-proofing will result in less rise and a denser texture. Over-proofing can cause the butter to melt out before baking or the structure to collapse. The surface of a well-proofed croissant should look slightly fragile and airy. Proofing is the stage where the shaping work is validated; the layers you protected during shaping now expand, ready for the oven. This step is just as crucial as the easy Viennoiseries shaping techniques themselves.
Baking Techniques for a Golden-Brown Finish
Baking at the correct temperature is essential for achieving that beautiful golden-brown color and maximum puff. Viennoiseries are typically baked at a relatively high temperature, often starting around 200-220°C (400-425°F) for the first 10-15 minutes to create rapid oven spring, then sometimes lowered to 175-190°C (350-375°F) to finish baking through and achieve an even color.
An egg wash applied before proofing and sometimes again before baking contributes to the golden shine. Ensure your oven is preheated correctly and consider using a baking stone or steel for better heat transfer to the base of the pastries. Baking until deeply golden ensures a crispy exterior and fully cooked interior.
Viennoiseries Shaping Recap: Easy Steps to Success
Let's quickly review the key points for successfully cutting and shaping Viennoiseries without deflating those crucial layers. Remember that mastering easy Viennoiseries shaping techniques is a journey, and each attempt brings you closer to perfection.
By focusing on these core principles – temperature, tools, technique, and patience – you can significantly improve your results and enjoy the process of creating these magnificent pastries.
Key Takeaways for Perfect Layered Pastries
- Keep it Cold: Maintain dough temperature between 4-7°C (39-45°F) throughout shaping to prevent butter smearing.
- Rest is Best: Always rest the dough after the final roll-out (20-30 mins chilled) to relax gluten and prevent tearing.
- Sharp Cuts: Use a very sharp knife or pastry wheel and cut with a single, decisive motion to avoid sealing layers.
- Gentle Hands: Handle the dough minimally and gently to avoid compressing the layers.
- Roll Evenly: Apply consistent pressure when rolling to maintain uniform dough thickness.
- Seal Securely: For filled pastries like Chausson aux Pommes, ensure edges are tightly sealed to prevent leaks.
- Proper Proofing: Allow adequate proofing time in a warm, humid environment for layers to expand before baking.
Practice Makes Perfect: Embrace the Learning Curve
Don't expect your first batch of croissants or pain au chocolat to be flawless. Viennoiseries are considered one of the more challenging areas of baking, and mastering them takes time and practice. Each time you make them, you'll learn something new about how the dough behaves, how temperature affects handling, and how to refine your easy Viennoiseries shaping techniques.
Embrace the learning curve. Pay attention to what works and what doesn't. Take notes. Soon, you'll develop an intuition for the dough and find that these Viennoiseries shaping techniques become second nature. The reward of biting into a perfectly flaky, homemade pastry is well worth the effort!
Frequently Asked Questions
What are Viennoiseries, and why is it important to avoid deflating the layers when shaping them?
Viennoiseries are baked goods like croissants and pain au chocolat, made with layered dough. Deflating the layers ruins the flaky texture that defines them.
What are some common mistakes that can lead to deflating the layers when cutting and shaping Viennoiseries dough?
Overworking the dough, using too much pressure, or a dull knife are common mistakes. Warm dough is also harder to handle and more prone to deflation.
What is the best type of knife to use for cutting Viennoiseries dough to preserve the layers?
A sharp knife or pizza cutter is recommended. A dull knife compresses the dough, destroying the layers.
What are some tips for handling the Viennoiseries dough gently while shaping it?
Keep the dough cold and work quickly. Avoid stretching or pulling the dough unnecessarily; focus on gentle folds and rolls.
Are there any specific techniques for shaping different types of Viennoiseries (e.g., croissants vs. pain au chocolat) that help prevent deflation?
Croissants benefit from a long, even stretch before rolling, while pain au chocolat require precise cuts and minimal handling after filling.
Final Reflection: Mastering the Delicate Art of Viennoiserie Shaping
The pursuit of perfectly layered viennoiseries, light and airy yet structurally sound, remains a constant challenge for bakers of all levels. This seemingly simple act of shaping profoundly impacts the final product, determining whether the delicate layers rise majestically or collapse into a dense, disappointing mass. Understanding the nuances of handling this sensitive dough is key to unlocking the true potential of your baking.
The techniques explored in this article—from gentle stretching and folding to the precise application of pressure—are not merely technical exercises; they represent a deeper connection to the craft of baking. They speak to the patience, precision, and respect required to work with such a finicky dough. As the renowned pastry chef, Michel Roux, once said, Baking is a science, but it's also an art. You need to understand the science, but you also need to feel it.
This sentiment perfectly encapsulates the journey of mastering viennoiserie shaping; it's a blend of technical knowledge and intuitive understanding.
Now, consider your own baking journey. Perhaps you've experienced the frustration of deflated layers or the joy of achieving that perfect, airy crumb. Take the knowledge gained here and apply it to your next baking project. Experiment with different techniques, observe the dough's behavior, and trust your instincts. Remember, every perfectly shaped croissant, pain au chocolat, or brioche is a testament to your dedication and skill. Embrace the challenge, refine your technique, and savor the delicious rewards of your efforts. The journey of mastering viennoiserie shaping is a rewarding one, filled with both challenges and triumphs. Embrace it.
Unleash Your Inner Viennoiserie Artist!
Thanks for joining us on this buttery journey into the world of perfectly shaped viennoiseries! We hope you now feel confident tackling even the most delicate layers. Ready to put your new skills to the test?
- Master the art of the perfect fold: Practice your shaping techniques with your favorite viennoiserie recipe— even a simple croissant will do! Document your progress with photos to track your improvements.
- Share your baking triumphs (or challenges!): Join our BakeWithEase community on social media and share your creations using #BakeWithEaseViennoiseries. Let's inspire each other!
- Consider experimenting with a new, more intricate viennoiserie shape. What will you create next?
What unexpected shaping technique are you most excited to try?