
Your First Homemade Puff Pastry: An Intermediate Baker's Path

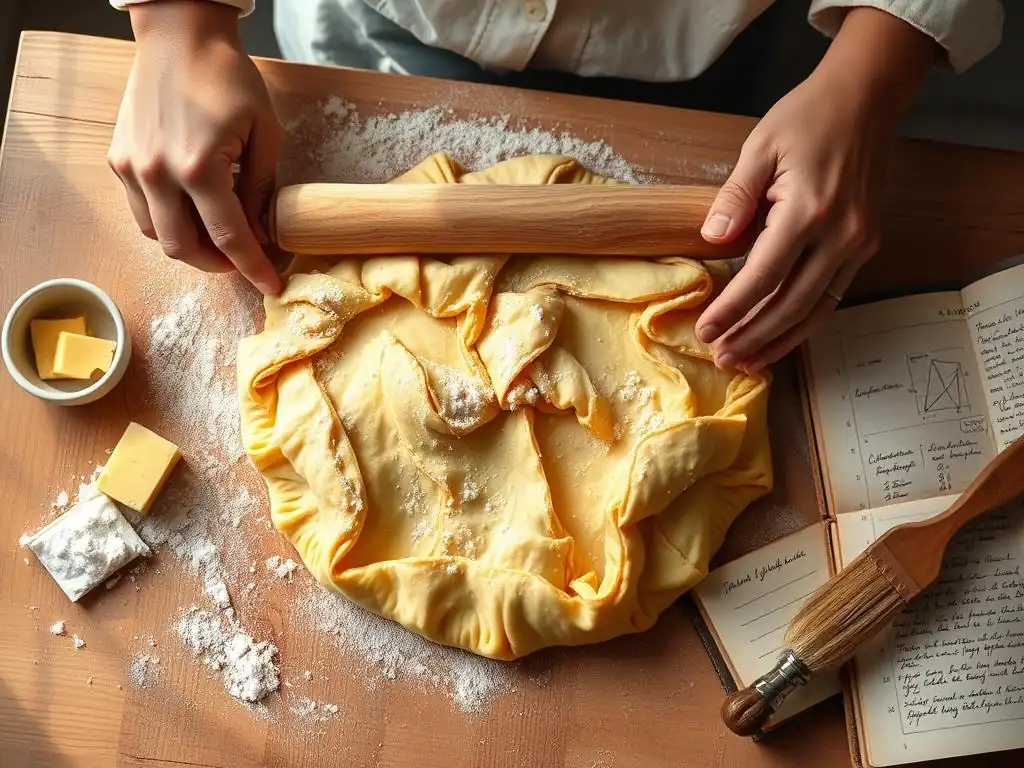
Welcome to BakeWithEase, your trusted guide to the delightful world of baking! Ever dreamt of creating flaky, golden layers that melt in your mouth? Our latest article, "Your First Homemade Puff Pastry: An Intermediate Baker's Path," unlocks the secrets to a surprisingly achievable homemade puff pastry beginner recipe. Intrigued? Discover the simplified steps and pro tips that will have you crafting impressive pastries in no time. Let's get baking!
- Introduction to Homemade Puff Pastry for Intermediate Bakers
- Understanding the Basics: Puff Pastry Ingredients and Tools
- The Puff Pastry Dough-Making Process: A Step-by-Step Guide
- Troubleshooting Common Puff Pastry Problems
- Baking Your Homemade Puff Pastry: Achieving Golden Perfection
- Puff Pastry Recipe Ideas: Putting Your Skills to the Test
- Storing Homemade Puff Pastry: Maintaining Freshness
- Conclusion: Embrace the Art of Homemade Puff Pastry
-
Frequently Asked Questions
- What is the best type of flour to use for a homemade puff pastry?
- What is detrempe in the context of puff pastry?
- How do I ensure my butter stays cold during the lamination process?
- What causes puff pastry to not rise properly in the oven?
- What's the best way to store homemade puff pastry dough before baking?
- Final Reflection: Mastering the Flaky Frontier of Puff Pastry
- Unleash Your Inner Pastry Chef!
Introduction to Homemade Puff Pastry for Intermediate Bakers
Why Attempt Homemade Puff Pastry? Stepping Up Your Baking Game
Embarking on the journey of making homemade puff pastry is a significant step for any intermediate baker looking to refine their skills. It's a technique-driven process that builds patience and precision, rewarding you with layers of flaky, buttery goodness far superior to store-bought versions.
Unlike a simple cookie or quick bread, creating puff pastry from scratch involves understanding dough hydration, gluten development, and, most importantly, the intricate process of lamination – encasing a block of butter within dough and repeatedly folding and rolling it. This layering is what creates the signature "puff" as the water in the butter turns to steam during baking, pushing the layers apart.
Mastering homemade puff pastry opens up a world of classic and modern pastry creations. Imagine crafting your own perfect croissants, elegant vol-au-vents, delicate palmiers, or impressive tarts. The satisfaction of cutting into a pastry you made yourself, seeing those distinct, airy layers, is immense. It’s a fundamental skill in patisserie that, once learned, builds confidence for tackling other complex laminated doughs. While the process requires time and attention to detail, it is entirely achievable for a dedicated intermediate baker.
BakeWithEase's Guide to Mastering Puff Pastry
At BakeWithEase, we believe that complex techniques are simply a series of manageable steps. This guide is designed to demystify the process of making homemade puff pastry, providing you with clear instructions and helpful tips to navigate the challenges. We'll walk you through selecting the right ingredients, preparing your workspace, executing the crucial lamination steps, and troubleshooting common issues that might arise when working on your very first homemade puff pastry beginner recipe.
Our approach focuses on understanding the why behind each step, not just the how. We'll explain the science of lamination, the role of temperature, and how seemingly small details can impact the final result. By following this comprehensive guide, you'll gain the knowledge and confidence needed to successfully create beautiful, flaky homemade puff pastry from scratch. Think of this as your personal roadmap to achieving pastry perfection, one fold at a time.
Understanding the Basics: Puff Pastry Ingredients and Tools
Essential Ingredients for Homemade Puff Pastry Success
Creating exceptional homemade puff pastry starts with quality ingredients. The simplicity of the recipe – typically just flour, butter, water, and salt – means that the quality of each component significantly impacts the final texture and flavor. Using the right type and temperature of each ingredient is paramount to achieving those desired flaky layers.
The interaction between these few ingredients, particularly the gluten developed in the flour and the fat layers from the butter, is the magic behind the puff. Paying attention to the specifics, like the protein content of your flour or the fat percentage of your butter, can make a noticeable difference in the ease of handling the dough and the ultimate flakiness of your baked goods.
High-Quality Flour: The Foundation of Flaky Layers
For homemade puff pastry, a medium-protein flour is generally recommended. All-purpose flour typically works well, usually having a protein content between 10-12%. This provides enough gluten structure to allow the dough to be rolled thin without tearing, while not developing so much gluten that the dough becomes overly elastic and difficult to work with during lamination. Some bakers prefer a mix of all-purpose and cake flour (lower protein, around 8-10%) for a more tender crumb, but a standard all-purpose is a great starting point for a homemade puff pastry beginner recipe.
Ensuring your flour is fresh and properly stored is also important. Stale flour can affect hydration and flavor. While sifting isn't strictly necessary for the initial dough (détrempe), weighing your flour accurately is crucial for consistent results. A digital kitchen scale is highly recommended over volume measurements (cups) for baking, as flour can pack differently, leading to variations of 10-20 grams per cup, which can impact dough consistency.
Butter: Choosing the Right Fat for Puff Pastry Lamination
Butter is the star of homemade puff pastry, providing both flavor and the essential fat layers for puffing. High-quality unsalted butter with a high fat content (typically 82% or higher) is ideal. European-style butters often have a higher fat percentage than standard American butters (around 80%), which means less water content. Less water in the butter block makes it easier to handle and less likely to squeeze out during rolling, contributing to cleaner layers and better puff.
The temperature of the butter is absolutely critical. It needs to be cold but pliable – firm enough to hold its shape when rolled, but not so hard that it breaks or tears the dough. Around 50-55°F (10-13°C) is often cited as the sweet spot. If your butter is too cold, it will crack; if it's too warm, it will melt into the dough, destroying the layers. Using unsalted butter allows you to control the salt level in the final product.
Water: Hydration and Dough Development
Cold water is used to hydrate the flour and form the initial dough (détrempe). Using cold water helps keep the butter solid during the initial mixing and rolling stages, which is crucial for lamination. The amount of water needed can vary slightly depending on the flour's absorption rate and humidity levels, but a typical ratio for homemade puff pastry might be around 50-60% of the flour weight.
The water activates the gluten in the flour, creating the dough's structure. It also provides the steam necessary for the puffing action during baking. Ensuring the water is sufficiently cold, ideally ice water (though you won't use the ice), helps maintain the overall low temperature of the dough, which is vital for keeping the butter solid throughout the folding process.
Salt: Flavor Enhancement and Gluten Control
Salt plays a dual role in homemade puff pastry. Primarily, it enhances the flavor, balancing the richness of the butter and the subtle sweetness that develops during baking. Without salt, the pastry can taste flat and bland.
Secondly, salt helps to control gluten development. It tightens the gluten structure, making the dough more elastic and easier to handle, preventing it from becoming sticky. However, too much salt can make the dough tough. A typical amount might be around 1.5-2% of the flour weight. Dissolving the salt in the cold water before adding it to the flour ensures even distribution throughout the détrempe.
Necessary Equipment for Puff Pastry Production
While fancy gadgets aren't required, having the right basic tools makes the homemade puff pastry process much smoother and increases your chances of success. Precision and cleanliness are key when working with laminated doughs.
Ensuring your tools are ready and your workspace is clean and cool before you begin will save you frustration later on. Having everything within reach means you can work efficiently, minimizing the time the dough and butter spend warming up at room temperature.
Rolling Pin: Achieving Uniform Dough Thickness
A good rolling pin is indispensable for homemade puff pastry. You'll be doing a lot of rolling to create those thin, even layers. A heavy, smooth rolling pin, such as a marble or stainless steel French-style pin (tapered ends, no handles) or a traditional wooden rolling pin with ball bearings, is ideal. The weight helps you roll without excessive effort, which can warm the dough.
Crucially, the rolling pin helps you achieve uniform thickness across your dough rectangle during each turn. Inconsistent thickness leads to uneven layers and uneven puffing. Practice rolling with even pressure from the center outwards to maintain a consistent sheet of dough approximately 1/4 to 1/3 inch thick before each fold, and much thinner (perhaps 1/8 inch) before cutting and baking.
Dough Scraper: Essential for Clean Lamination
A bench scraper, also known as a dough scraper or bench knife, is a simple but incredibly useful tool for making homemade puff pastry. It helps you clean your work surface, gather scraps, and, most importantly, handle the dough during folding and transferring without tearing or stretching it unevenly.
Use the scraper to gently lift the dough if it sticks slightly or to help guide the dough during folds. It's also perfect for portioning the finished dough accurately. A metal bench scraper is preferred as it stays cooler than plastic, which is beneficial when working with cold dough.
Baking Sheet and Parchment Paper: Preventing Sticking
You'll need baking sheets for chilling the dough between turns and for baking the finished pastries. Standard half-sheet pans (approximately 18x13 inches) are versatile. Covering them with parchment paper is essential.
Parchment paper prevents the dough from sticking to the pan during chilling and baking, ensuring your delicate layers don't get damaged. It also makes cleanup significantly easier. Ensure you have enough parchment paper to line your sheets and possibly cover the dough during chilling to prevent it from drying out. Silicone baking mats can also be used, but parchment is often favored for its ease of cutting and covering.
The Puff Pastry Dough-Making Process: A Step-by-Step Guide
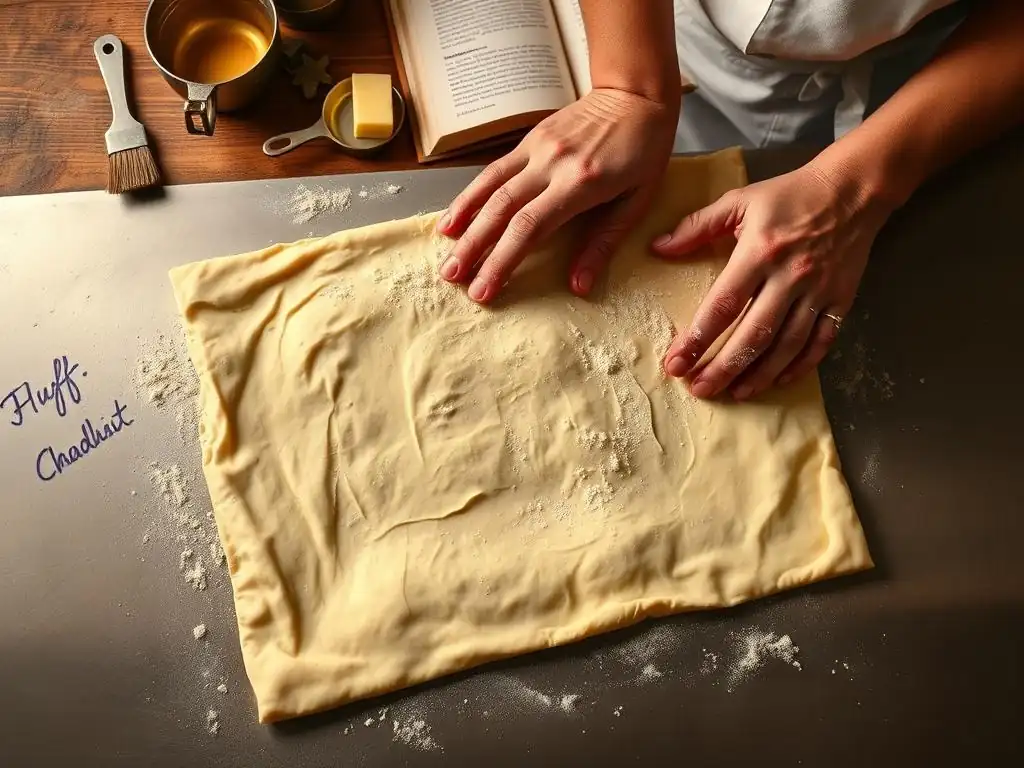
Making homemade puff pastry is a process involving two main components: the dough base (détrempe) and the butter block (beurre), which are then combined and folded in a technique called lamination. Patience and keeping everything cold are your greatest allies.
This section outlines the core steps involved in creating a classic puff pastry dough. While variations exist, the principles remain the same: create a pliable dough, encase cold butter, and perform a series of folds and rests to build hundreds of layers.
Step 1: Preparing the Détrempe (Dough Base)
The détrempe is the initial dough that will encase the butter. It's a simple mixture but getting the consistency right is important for successful lamination.
This dough needs to be firm enough to handle but pliable enough to stretch without tearing around the cold butter block during rolling. It also needs sufficient gluten structure to hold its shape through multiple turns.
Combining Flour, Water, and Salt
Start by combining the flour and salt in a large bowl. Whisk them together to distribute the salt evenly. In a separate bowl or measuring cup, add the very cold water. If using ice water, measure the water first, then add ice cubes to chill it thoroughly for a few minutes before removing the ice and measuring the exact amount needed.
Pour the cold water into the flour mixture. Use a fork, a pastry blender, or your hands to bring the mixture together. Mix until the flour is just hydrated and a shaggy dough forms. Avoid overmixing at this stage; you don't want to develop too much gluten yet. The goal is just to get the ingredients to come together.
Achieving the Right Dough Consistency
Once the shaggy dough forms, turn it out onto a lightly floured surface and gently knead it a few times – just enough to bring it into a cohesive ball. The dough should be relatively firm and not sticky. If it feels too dry, add a tiny amount more cold water (a teaspoon at a time). If it's too wet, add a tiny bit more flour.
Shape the dough into a rectangle or square, about 1-inch thick. Wrap it tightly in plastic wrap and refrigerate for at least 30 minutes, or ideally 1-2 hours. This rest period allows the gluten to relax, making the dough easier to roll later, and ensures the dough is thoroughly chilled, matching the temperature of the butter block you're about to prepare.
Step 2: Preparing the Beurre (Butter Block)
The beurre is simply a block of cold butter shaped specifically to be enclosed by the détrempe. Its consistency and shape are critical for successful lamination.
The butter needs to be cold enough to remain distinct from the dough layers but pliable enough to roll out evenly without breaking into pieces. If the butter is too hard, it will crack and puncture the dough; if too soft, it will melt into the dough during rolling.
Shaping the Butter into a Rectangle
Take your cold butter (ideally around 50-55°F or 10-13°C). If it's straight from the fridge and too hard, you can gently pound it with your rolling pin a few times to make it more pliable. Do this carefully on a piece of parchment paper.
Place the butter block on a piece of parchment paper. Cover it with another piece of parchment or plastic wrap. Use your rolling pin to roll and shape the butter into a uniform rectangle. The size of this rectangle should be roughly half the surface area of your rolled-out détrempe rectangle, and about the same thickness (around 1/2 inch). A common target size might be 6x8 inches, depending on your initial dough size. Aim for sharp corners and even thickness.
Keeping the Butter Cold
Once shaped, the butter block must remain cold and firm but pliable. Slide the parchment-wrapped butter onto a baking sheet and refrigerate it while your détrempe is chilling, or until you are ready to enclose it.
It's important that the butter and the détrempe are at similar temperatures and consistency when you bring them together. If the détrempe is much colder than the butter, the butter will be too hard to roll; if the butter is much colder than the détrempe, the détrempe will tear. Aim for both to be cold and slightly firm to the touch.
Step 3: Lamination: Creating the Layers
Lamination is the heart of homemade puff pastry. This is the process of enclosing the butter block within the détrempe and repeatedly rolling and folding the dough to create alternating layers of dough and fat. Each fold multiplies the number of layers.
A standard recipe typically calls for 4 to 6 "turns" (folds). A single turn (or letter fold) involves folding the dough into thirds, like a letter. A double turn (or book fold) involves folding both ends towards the center, then folding the dough in half. The number and type of turns determine the final layer count and flakiness.
The First Turn: Single or Double Fold?
After chilling, roll out your détrempe on a lightly floured surface into a rectangle roughly twice the size of your butter block (e.g., 12x8 inches if your butter is 6x8 inches). Ensure the edges are straight and the corners are square. Place the butter block on one half of the détrempe rectangle, leaving a small border around the edges.
Fold the other half of the détrempe over the butter block, carefully sealing the edges to completely encase the butter. Pinch the seams firmly to prevent the butter from leaking out during rolling. This is your first "encasement." You can then proceed directly to your first fold (turn).
For a single turn, roll the dough into a long rectangle (about 18-24 inches long, depending on width), then fold one end towards the center, and the other end over that, like folding a letter into thirds. For a double turn, roll into a wider rectangle and fold both ends to the center line, then fold in half like a book. Most homemade puff pastry beginner recipes recommend starting with single turns as they are slightly easier to execute cleanly.
The Importance of Resting the Dough Between Turns
Resting the dough between turns is non-negotiable. After each turn, wrap the dough tightly in plastic wrap, ensuring square corners, and refrigerate it for at least 30-60 minutes. This rest is crucial for two main reasons:
- Relaxing the Gluten: Rolling develops gluten, making the dough elastic and resistant to rolling. Resting allows the gluten strands to relax, making the dough pliable and preventing it from shrinking back excessively during the next roll.
- Chilling the Butter: Rolling also warms the butter. Resting in the refrigerator hardens the butter layers again, ensuring they remain distinct from the dough. If the butter warms up too much, it will meld with the dough, and you won't get those beautiful layers.
Subsequent Turns: Building Flakiness
After the first rest, take the dough out, unwrap it, and place it on your lightly floured surface with the folded edge facing you (like the spine of a book if you did a double fold, or the seam if you did a single fold). This orientation is important for ensuring even layering with each subsequent turn.
Roll the dough out again into a rectangle of similar dimensions as the first rolling step. Perform the chosen fold (single or double). Mark the dough (e.g., by pressing the number of turns with your finger) so you don't lose track. Rewrap tightly and refrigerate for another 30-60 minutes. Repeat this process for the required number of turns, typically 4 to 6 single turns, or 3 to 4 double turns. Each turn significantly increases the number of layers; for example, 6 single turns result in over 700 layers!
Step 4: Chilling the Dough: A Crucial Step
Once you have completed all the required turns, the homemade puff pastry dough needs a final, longer chill before it's ready to be rolled, cut, and baked. This final rest is just as important as the rests between turns.
Proper chilling ensures the butter is completely firm and the gluten is fully relaxed. This makes the dough easy to roll thin without shrinking or tearing and guarantees maximum separation and puff during baking.
Preventing Butter Melt and Gluten Relaxation
After the final fold and rest, the dough is full of hundreds of delicate layers of dough and butter. A final chill of at least 2-4 hours, or ideally overnight, in the refrigerator is necessary. This allows the butter layers to solidify completely. If the butter is too soft when the dough goes into the hot oven, it will melt and absorb into the dough before the water has a chance to turn to steam and create separation, resulting in a greasy, flat pastry instead of a light, airy one.
This extended chill also allows the gluten developed during the repeated rolling to relax fully. A relaxed dough is easier to roll very thinly without resistance, ensuring uniform thickness for cutting and baking. If the dough resists rolling or snaps back, it hasn't rested long enough or isn't cold enough.
Optimal Chilling Time for Puff Pastry
While a minimum of 2-4 hours is necessary, chilling the homemade puff pastry dough overnight in the refrigerator is often optimal. This gives the dough and butter ample time to reach a consistently cold temperature throughout.
The dough can typically be stored in the refrigerator for 2-3 days after the final turn, giving you flexibility. Just ensure it's tightly wrapped to prevent it from drying out or absorbing odors. If you won't use it within a few days, it's better to freeze it.
Troubleshooting Common Puff Pastry Problems
Even with careful technique, making homemade puff pastry can present challenges. Knowing how to identify and address common issues is part of the learning process for any intermediate baker tackling this homemade puff pastry beginner recipe.
Don't be discouraged if your first attempt isn't perfect. Puff pastry is notoriously sensitive to temperature and handling. Understanding why a problem occurs is the first step to fixing it on your next try or even salvaging your current batch.
Butter Leaking: Causes and Solutions
Butter leaking out during rolling is a common frustration. This usually happens because the butter is too soft (too warm), the dough isn't cold enough, or the seams weren't sealed properly during the initial encasement or subsequent folds. Rolling too aggressively or unevenly can also force butter out.
If you notice butter leaking, immediately stop rolling. Wrap the dough tightly and return it to the refrigerator for a minimum of 30-60 minutes to allow the butter to firm up again. When you resume rolling, use lighter, more even pressure. Ensure your work surface is well-floured (but not excessively) to prevent sticking, which can also cause tearing and leakage. If the leak is significant, you may need to patch the dough gently with a small piece of trimmed dough before chilling.
Dough Resistance: Overworked Gluten
If your dough springs back significantly when you try to roll it, or is very difficult to roll out thinly, the gluten is likely too tense. This is usually a sign that the dough hasn't rested long enough between turns or for the final chill.
The solution is simple: more rest! Wrap the dough well and put it back in the refrigerator for another 30-60 minutes (or longer if needed). Resist the urge to force the dough – rolling against resistance will only make it tougher and harder to handle, potentially leading to tearing or uneven layers. Ensure you are rotating the dough 90 degrees after each rest before the next roll, as this helps in developing even layers and managing gluten.
Uneven Layers: Inconsistent Rolling and Folding
Uneven layers, which result in some areas puffing more than others, are often caused by inconsistent rolling and folding technique. If the dough rectangle isn't uniform in thickness or shape before folding, or if the folds aren't precise (e.g., not lining up edges, folding uneven sections), the layers won't be distributed evenly throughout the dough block.
Focus on rolling the dough into a neat, even rectangle of consistent thickness before each fold. Use a ruler if necessary. When folding, ensure the edges align as precisely as possible. Practicing your rolling technique and paying close attention during the folding steps will improve layer consistency over time. Working on a large, flat surface also helps maintain evenness.
Puff Pastry Not Puffing: Temperature Issues and Dough Handling
The most disheartening problem is when your baked homemade puff pastry comes out flat and dense instead of light and airy. The primary cause of this is usually that the butter layers melted into the dough before the pastry hit the hot oven. This can happen if the dough wasn't chilled enough before baking, the oven wasn't hot enough, or the dough was handled too much (warming it up) before baking.
Ensure your dough is thoroughly chilled and firm just before cutting and baking. Your oven must be properly preheated to a high temperature (often 400-425°F or 200-220°C) to create immediate steam. Handle the dough minimally when rolling and cutting, and transfer it to the baking sheet quickly. Avoid overcrowding the baking sheet, as this lowers the ambient temperature around the pastries. If the layers look merged before baking, it indicates the butter has melted, and the puff will be compromised.
Baking Your Homemade Puff Pastry: Achieving Golden Perfection
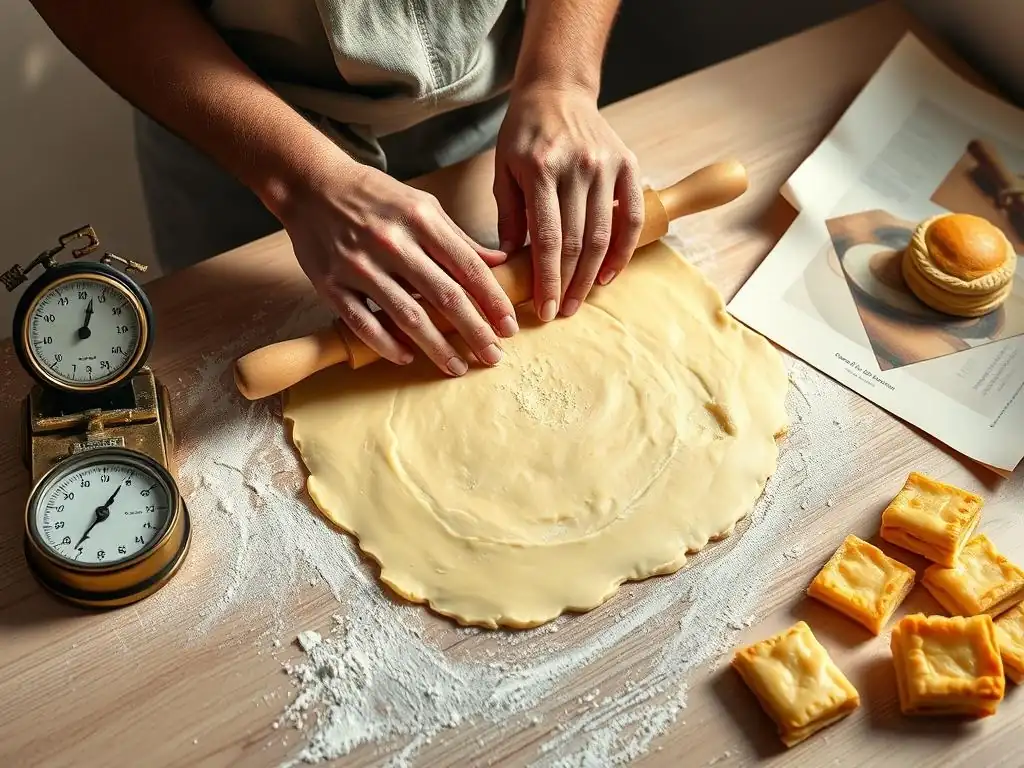
Once your homemade puff pastry dough is successfully made and chilled, the final step is baking. The baking process is where the magic happens, transforming the layered dough into a light, crispy, and flaky pastry.
Proper baking temperature and time are crucial for achieving maximum puff and a beautiful golden-brown color. It's a delicate balance – too low a temperature and the butter melts out before the puff; too high and the outside burns before the inside cooks.
Preheating the Oven: Optimal Temperature for Puff Pastry
A hot oven is essential for baking homemade puff pastry. The high heat causes the water in the butter layers to instantly turn to steam, which rapidly expands and pushes the layers of dough apart. This is the science behind the "puff."
Preheat your oven to a high temperature, typically between 400°F and 425°F (200°C to 220°C), depending on your specific recipe and oven calibration. It's wise to use an oven thermometer to verify your oven's actual temperature, as many home ovens can be off by 25°F or more. Ensure the oven is fully preheated for at least 15-20 minutes after it indicates it has reached temperature, to ensure the heat is stable and the baking stone or steel (if using) is hot.
Preparing the Puff Pastry for Baking: Cutting and Shaping
Work quickly with your chilled homemade puff pastry dough. Roll it out on a lightly floured surface to the desired thickness for your recipe, usually between 1/8 and 1/4 inch. Use a sharp knife or pastry wheel to cut the dough into your desired shapes (squares, rectangles, circles, strips, etc.). A sharp cut is important to allow the layers to rise freely; a dull knife can compress the edges, hindering the puff.
Transfer the cut shapes to a baking sheet lined with parchment paper. Keep the dough cold until it goes into the oven. If you're cutting many pieces, keep the un-cut dough and cut pieces in the refrigerator while you work. Avoid re-rolling scraps more than once, as the layers become less defined with excessive handling.
Baking Time and Temperature: Monitoring for Doneness
Baking time will vary significantly depending on the size and thickness of your pastries and your oven. Small items like palmiers or cheese straws might bake in 12-18 minutes, while larger tarts or vol-au-vents could take 20-30 minutes or longer.
Start with the high temperature (400-425°F) for the first 10-15 minutes to maximize the puff. Then, some recipes recommend reducing the temperature slightly (to around 375-400°F or 190-200°C) for the remainder of the baking time to ensure the layers cook through and the pastry achieves a deep golden-brown color without burning the exterior. Watch the pastries carefully; they should be significantly puffed and deeply colored on both the top and bottom when done.
Achieving a Golden-Brown Color: Egg Wash or Milk Wash
For a beautiful, shiny, golden-brown finish, brush the tops of your homemade puff pastry shapes with an egg wash (usually a beaten egg mixed with a tablespoon of water or milk) before baking. This provides a lovely color and slight sheen.
Alternatively, you can use a milk wash for a slightly less intense color, or simply bake without any wash for a more matte finish. Apply the wash lightly with a pastry brush, being careful not to let it drip down the sides, as this can seal the layers together and inhibit puffing. Some bakers apply the wash after cutting but before transferring to the sheet, to further minimize drips down the edges.
Puff Pastry Recipe Ideas: Putting Your Skills to the Test
Successfully making your first batch of homemade puff pastry is a significant achievement! Now comes the fun part: using it in delicious recipes. The versatility of puff pastry means you can create an array of both sweet and savory treats.
Having a batch of your own homemade puff pastry ready to go in the fridge or freezer opens up countless possibilities for impressive baked goods that are surprisingly quick to assemble once the dough is made.
Classic Applications: Vol-au-Vents and Palmiers
Two iconic uses for homemade puff pastry are vol-au-vents and palmiers. Vol-au-vents are small, hollow puff pastry cases, perfect for filling with savory stews or creamy sweet mixtures. They showcase the incredible puff and crispness of the pastry. You typically cut two rounds (one with a smaller circle cut out of the center) and stack them, then bake.
Palmiers, also known as elephant ears or palm leaves, are simple yet elegant cookies made by rolling the dough with sugar (and sometimes cinnamon) from two sides towards the center, then slicing and baking. The sugar caramelizes, creating a delightful crunch and highlighting the numerous layers. These are a great way to test the flakiness of your homemade puff pastry beginner recipe.
Savory Delights: Puff Pastry Tarts and Quiches
Puff pastry makes a fantastic base for savory tarts and quiches. Simply roll out a sheet, place it in a tart pan or on a baking sheet, prick the bottom with a fork (docking) to prevent it from puffing up too much in the center, and fill it with your desired ingredients like vegetables, cheese, meats, or egg custard.
Consider making simple cheese straws by cutting strips of dough, twisting them, and sprinkling with grated cheese and paprika before baking. Or create quick sausage rolls by wrapping strips of dough around cooked sausages. The rich, buttery layers complement savory fillings beautifully.
Sweet Treats: Cream Horns and Apple Turnovers
For those with a sweet tooth, homemade puff pastry is indispensable. Cream horns are made by wrapping strips of dough around conical molds and baking, then filling the hollow shells with whipped cream or pastry cream.
Apple turnovers, another classic, involve filling squares of puff pastry with sweetened apple slices, folding them into triangles, sealing the edges, and baking until golden and flaky. You can also make simple fruit tarts by topping squares or circles of dough with sliced fruit and sugar before baking. The possibilities for sweet pastries are nearly endless.
Storing Homemade Puff Pastry: Maintaining Freshness
One of the great advantages of making homemade puff pastry is that it can be made ahead of time. Proper storage is key to maintaining its quality and ensuring it's ready to use when inspiration strikes.
Whether you plan to use it within a few days or a few months, knowing how to store your homemade puff pastry dough correctly will save you time and effort later.
Refrigerating Puff Pastry Dough: Short-Term Storage
After completing all the turns and the final chill, your homemade puff pastry dough can be stored in the refrigerator for up to 2-3 days. It's crucial to wrap the dough very tightly in plastic wrap. Use at least two layers to prevent it from drying out or absorbing odors from the refrigerator.
Store the dough as a neat rectangle or square. When you're ready to use it, take it out of the refrigerator about 15-20 minutes before rolling to allow it to become slightly pliable, but still very cold. If it's too hard, it will crack when rolled.
Freezing Puff Pastry Dough: Long-Term Storage
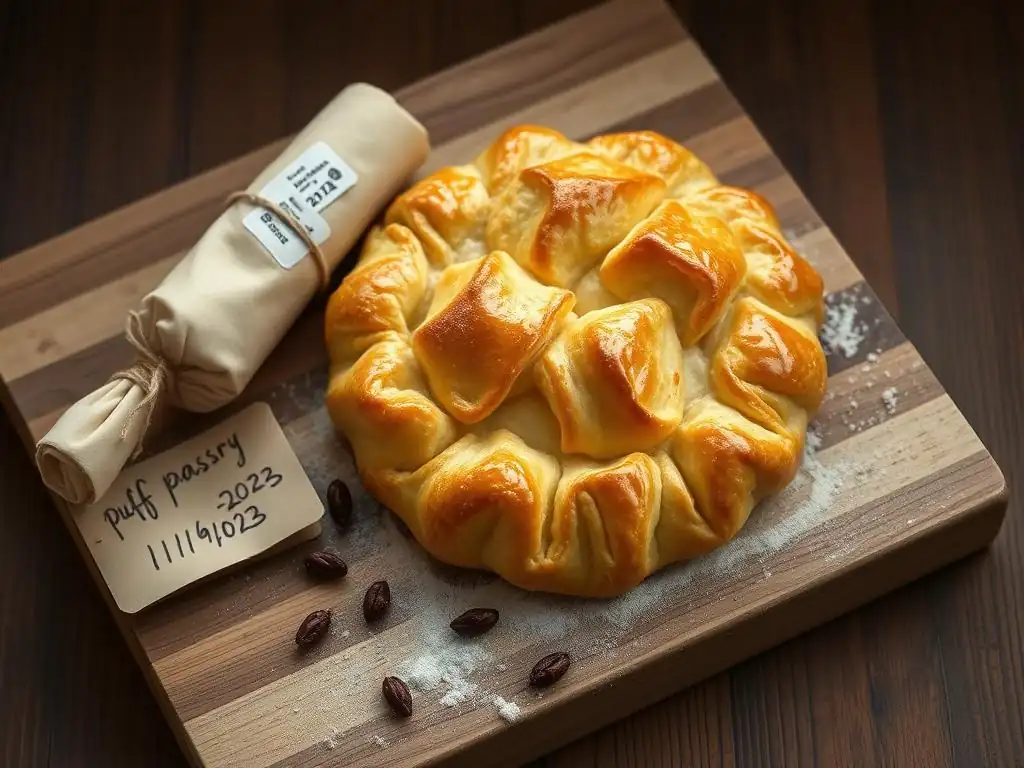
For longer storage, homemade puff pastry freezes exceptionally well. After completing all the turns and the final chill, wrap the dough block very tightly in multiple layers of plastic wrap, followed by a layer of aluminum foil or placing it in a freezer-safe bag. Ensure it is well-sealed to prevent freezer burn.
Label the package with the date. Frozen puff pastry can be stored for up to 2-3 months. Freezing allows you to make a large batch and have it readily available for impromptu baking projects, making your homemade puff pastry beginner recipe efforts even more rewarding.
Baking with Frozen Puff Pastry: Thawing and Usage Tips
When you're ready to use frozen homemade puff pastry, the most important step is proper thawing. Transfer the wrapped dough from the freezer to the refrigerator the day before you plan to use it. A standard block of dough will typically take 12-24 hours to thaw in the refrigerator.
Avoid thawing at room temperature, as the outside will warm up and soften while the inside remains frozen, leading to melted butter layers. Once thawed, the dough should be cold but pliable, just like freshly made dough after its final chill. Roll, cut, and bake as you would with fresh dough. Do not refreeze thawed puff pastry dough.
Conclusion: Embrace the Art of Homemade Puff Pastry
Mastering Puff Pastry: A Rewarding Baking Journey
Making homemade puff pastry from scratch is undoubtedly a labor of love, requiring time, patience, and attention to detail. However, the result is a pastry that is leagues above anything you can buy, with incredible flakiness, rich butter flavor, and a delicate texture that is truly unmatched. Successfully creating those hundreds of distinct layers is a rewarding achievement for any intermediate baker.
Each attempt builds your intuition for dough handling and temperature control – skills that are transferable to many other areas of baking. Don't be discouraged by imperfections on your first try; consider it a learning experience. With practice, your homemade puff pastry will become consistently beautiful and delicious.
BakeWithEase: Further Resources for Intermediate Bakers
At BakeWithEase, we are dedicated to helping you grow your baking skills. This guide to homemade puff pastry is just one step in expanding your repertoire. We offer a wealth of resources, including detailed guides on other intermediate techniques like working with yeast doughs, making custards and creams, and mastering cake decorating.
Explore our website for specific recipes using homemade puff pastry, tips for scaling up batches, and advice on adapting techniques. We encourage you to continue challenging yourself in the kitchen. The journey of baking is one of continuous learning and delicious discovery, and we're here to support you every step of the way.
Frequently Asked Questions
What is the best type of flour to use for a homemade puff pastry?
For the best results, use bread flour or a strong all-purpose flour. These flours contain higher gluten content, crucial for creating the flaky layers in puff pastry.
What is detrempe in the context of puff pastry?
Detrempe refers to the dough base of the puff pastry. It’s a simple mixture of flour, water, and sometimes a little butter that forms the foundation for the laminated dough.
How do I ensure my butter stays cold during the lamination process?
Keep your butter block and detrempe well-chilled in the refrigerator between each turn. Cold butter is essential for creating distinct layers of fat and dough.
What causes puff pastry to not rise properly in the oven?
Insufficient cold butter layers or overworked dough are common culprits. Ensure your butter remains cold and avoid over-mixing the dough during preparation.
What's the best way to store homemade puff pastry dough before baking?
Wrap the dough tightly in plastic wrap and refrigerate it for up to 2-3 days. You can also freeze it for longer storage, thawing it in the refrigerator before using.
Final Reflection: Mastering the Flaky Frontier of Puff Pastry
The pursuit of perfect, flaky puff pastry is more than just a culinary challenge; it's a testament to patience, precision, and the rewarding magic of transforming simple ingredients into something truly extraordinary. This journey, detailed in this article, highlights the accessibility of this seemingly daunting task, even for intermediate bakers. The techniques outlined, from the initial chilling stages to the delicate layering process, are designed to demystify puff pastry and empower you to create this culinary masterpiece in your own kitchen.
The impact of mastering a skill like puff pastry making extends far beyond the delicious results. It fosters a deeper appreciation for the process of baking, encouraging experimentation and a willingness to embrace challenges. The best things in life are worth the wait,
a sentiment perfectly encapsulates the rewarding experience of creating homemade puff pastry. The sense of accomplishment, the pride in presenting a perfectly layered creation, and the sheer joy of sharing it with loved ones are invaluable. This process, for me, represents a connection to culinary traditions, a respect for the craft, and a celebration of the simple elegance of good food.
Now, I invite you to embark on your own puff pastry adventure. Don't be intimidated by the seemingly complex steps; embrace the process, savor the moments of creation, and allow yourself to be amazed by the results. The journey may require some practice, but the reward – the taste of buttery, flaky perfection – is well worth the effort. So, gather your ingredients, roll up your sleeves, and discover the joy of creating your own magnificent puff pastry. The flaky frontier awaits!
Unleash Your Inner Pastry Chef!
Thanks for joining us on this buttery adventure! You've just unlocked the secrets to crafting flaky, delicious puff pastry from scratch – a skill that will impress even the most discerning palates. Now it's time to put your newfound knowledge into action.
- Bake your masterpiece! Try the recipe again, experimenting with different fillings or shapes. This time, challenge yourself to perfect those delicate layers.
- Share your creation! Post a picture of your puff pastry on social media and tag us – we'd love to see your baking brilliance!
- Dive deeper: Explore our other intermediate baking recipes to continue expanding your culinary repertoire.
Ready to take on your next baking challenge? What exciting flavor combinations will you create with your homemade puff pastry?