
Your Intermediate Baker's Start Guide to Homemade Pizza Dough

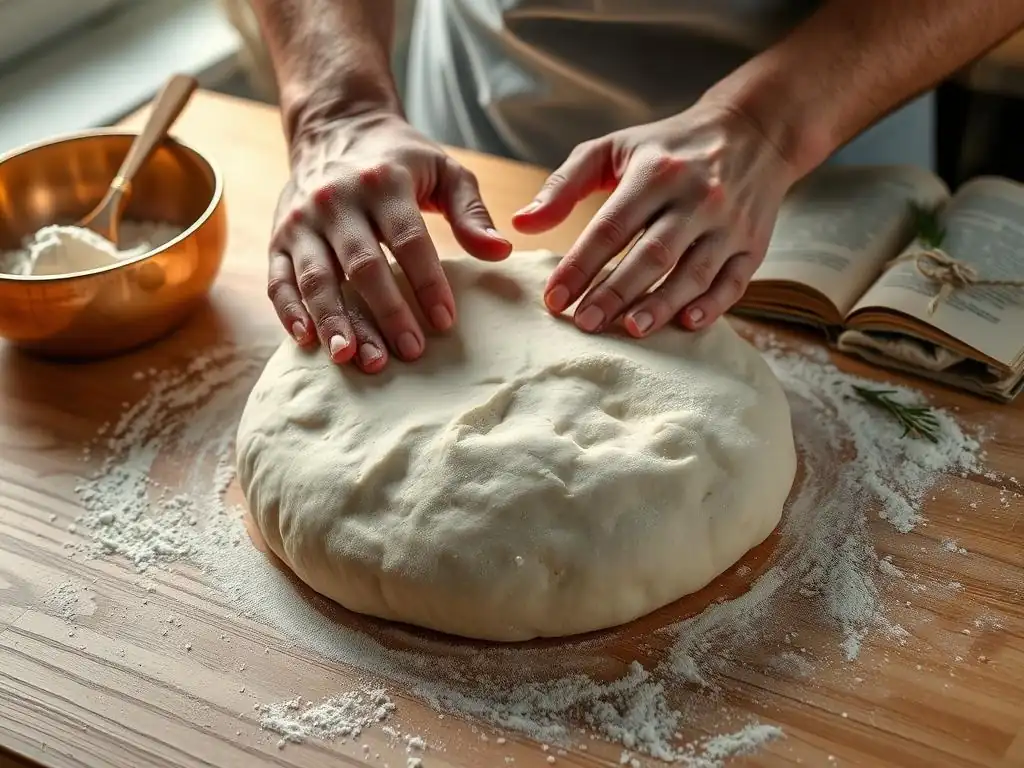
Welcome to BakeWithEase, where baking dreams become delicious realities! Are you ready to elevate your pizza game beyond the delivery box? In this article, we're diving into a homemade pizza dough recipe beginner can master, transforming simple ingredients into a culinary masterpiece. Intrigued? Let's unlock the secrets to that perfect crust and discover why homemade is always the best choice!
- Introduction to Baking Homemade Pizza Dough
- Essential Ingredients for Homemade Pizza Dough (Intermediate Level)
- Mastering the Intermediate Pizza Dough Recipe
- Intermediate Techniques for Better Homemade Pizza
- Troubleshooting Common Pizza Dough Problems (Intermediate Edition)
- Beyond the Basics: Exploring Advanced Pizza Dough Techniques
- Storing Homemade Pizza Dough
- Conclusion: Mastering Homemade Pizza Dough with BakeWithEase
-
Frequently Asked Questions
- What makes this pizza dough recipe suitable for an intermediate baker, and not a complete beginner?
- Can I substitute any of the flours in this homemade pizza dough recipe?
- How long should I proof the pizza dough, and what factors affect the proofing time?
- What's the best way to store leftover pizza dough?
- What are some common mistakes beginners make when making homemade pizza dough, and how can I avoid them?
- Final Reflection: The Joy of Kneading: From Beginner Baker to Pizzaiolo
- Unleash Your Inner Pizzaiolo!
Introduction to Baking Homemade Pizza Dough
Why Make Your Own Pizza Dough? (Beyond Beginner Basics)
Moving beyond simply following a basic homemade pizza dough recipe beginner guide opens up a world of flavor and texture possibilities. While convenience is king, the difference in quality between store-bought and truly homemade dough is vast. Crafting your own dough allows you to control every ingredient, from the type of flour to the amount of salt and yeast, directly impacting the final taste and chewiness of your crust. This level of control means you can tailor the dough specifically to your preferences, whether you crave a thin and crispy Roman-style crust or a thick and airy Neapolitan-inspired base.
Furthermore, the process of making dough is incredibly rewarding. It connects you to age-old culinary traditions and provides a tangible sense of accomplishment. For the intermediate baker, understanding why certain ingredients and techniques are used is just as important as knowing how. You begin to appreciate the science behind the rise, the development of gluten, and how fermentation contributes complex flavors. This deeper understanding transforms baking from a task into a craft, making every homemade pizza a unique creation.
Leveling Up Your Pizza Dough Game: From Beginner to Intermediate
Transitioning from a beginner to an intermediate level in making homemade pizza dough involves embracing nuances that significantly elevate the final product. A beginner might simply follow a recipe step-by-step, aiming for a usable dough. An intermediate baker starts asking questions: How does hydration affect the crust? What's the difference between active dry and instant yeast? Why is cold fermentation recommended? This guide is designed to answer those questions and introduce techniques like proper gluten development through effective kneading and the benefits of long, slow fermentation, moving you beyond the quick, basic homemade pizza dough recipe beginner methods.
This progression isn't about mastering overly complicated steps, but rather refining fundamental techniques and understanding their impact. It's about achieving consistency, improving texture, and developing richer flavors. You'll learn to read the dough, understand its feel, and make minor adjustments based on environmental factors like humidity. By focusing on these details, your homemade pizza dough will transform from merely functional to truly exceptional, setting the stage for delicious pizzas every time.
What This Guide Covers: Your Intermediate Pizza Dough Journey
This guide is structured to take you on a focused journey through the world of intermediate homemade pizza dough baking. We'll start by revisiting essential ingredients, delving deeper into how different types of flour impact your crust and the science behind yeast activation and water hydration. Forget the simplified instructions often found in a basic homemade pizza dough recipe beginner resource; we'll explore the 'why' behind each component.
Next, we'll present a detailed homemade pizza dough recipe specifically tailored for the intermediate baker, complete with precise measurements and step-by-step instructions covering everything from combining ingredients to the crucial steps of bulk fermentation and proofing. We'll then introduce key intermediate techniques like cold fermentation for enhanced flavor and proper stretching methods for achieving the desired crust shape and thickness. Finally, we'll cover troubleshooting common issues and offer a glimpse into more advanced concepts like sourdough and alternative flours, ensuring you have the knowledge to consistently produce fantastic homemade pizza dough.
Essential Ingredients for Homemade Pizza Dough (Intermediate Level)
High-Quality Flour: Choosing the Right Flour for Perfect Pizza
The type of flour you choose is perhaps the single most important factor influencing the texture of your homemade pizza dough. For intermediate bakers looking to improve upon a basic homemade pizza dough recipe beginner, moving beyond standard all-purpose flour is key. Flour provides the structure for the dough through its protein content, which forms gluten when hydrated and kneaded. Different flours have varying protein levels and milling processes, leading to different gluten potentials and absorption rates.
A higher protein flour generally develops more gluten, resulting in a chewier crust, while a lower protein flour yields a more tender result. Understanding this relationship allows you to select flour based on the desired outcome. For instance, a Neapolitan-style pizza requires a very high protein flour to achieve its characteristic airy, chewy crust, while a thin and crispy crust might benefit from a slightly lower protein content or a blend. Paying attention to the protein percentage listed on the flour bag (often between 10% and 14%) is a critical step for the intermediate baker.
Understanding Different Types of Flour: 00 Flour vs. Bread Flour for Pizza
Two flours commonly discussed for homemade pizza dough are 00 flour and bread flour. 00 flour, particularly Italian Tipo 00, is a finely milled flour with a protein content typically ranging from 10-12.5%. Despite a potentially lower protein percentage than some bread flours, the quality of the gluten is very high and develops smoothly, resulting in a dough that is both elastic and extensible, ideal for achieving a thin crust that puffs up nicely around the edges in a very hot oven (like a Neapolitan pizza). Its fine texture also contributes to a silky dough feel.
Bread flour, on the other hand, generally has a higher protein content, often between 12-14%. This higher protein level leads to strong gluten development, which is excellent for creating a chewy, structured crust, such as those found in New York-style pizzas. While it might not produce the exact same airy char as 00 flour in extremely high heat, bread flour is more readily available for many home bakers and provides a robust, satisfying chew. An intermediate baker might experiment with both or even blend them to find their preferred balance of chewiness and extensibility for their homemade pizza dough.
Yeast: Activating and Using Yeast Effectively
Yeast is the leavening agent responsible for making your homemade pizza dough rise, giving it volume and contributing to its flavor through fermentation. For the intermediate baker, understanding how yeast works and how to use it effectively goes beyond simply adding it to the mix as a homemade pizza dough recipe beginner might. Yeast are living microorganisms that feed on sugars in the flour, producing carbon dioxide gas (which makes the dough rise) and alcohol (which contributes to flavor). Their activity is highly dependent on temperature and hydration.
Proper activation (if using active dry yeast) and controlled fermentation times are crucial for both rise and flavor development. Using the correct amount of yeast relative to the flour and managing the dough temperature during mixing and rising are key skills. Too much yeast can lead to a rapid, uncontrolled rise and an overly yeasty flavor, while too little can result in a dense dough. Intermediate bakers learn to observe the dough's rise, understanding what a properly proofed dough looks and feels like, rather than strictly adhering to time estimates which can vary based on ambient temperature.
Types of Yeast for Pizza Dough: Active Dry, Instant, and Fresh
There are three primary types of yeast commonly used for homemade pizza dough: active dry, instant (also called rapid rise or quick rise), and fresh. Active dry yeast consists of dehydrated granules that typically need to be proofed or activated in warm water (around 105-115°F or 40-46°C) before being added to the dry ingredients. This step confirms the yeast is alive and gives it a head start.
Instant yeast is more finely ground and doesn't require proofing; it can be added directly to the dry ingredients. It's designed to be faster acting than active dry yeast. Fresh yeast (also known as cake yeast) is a moist, perishable block of yeast cells.
It provides a slightly different flavor profile that some bakers prefer, but it has a shorter shelf life and needs to be dissolved in liquid before use. An intermediate baker might experiment with different types to see how they affect the rise time and subtle flavors in their homemade pizza dough. Instant yeast is often preferred for its reliability and ease of use in many standard recipes.
Water: The Key to Dough Hydration
Water plays a critical role in homemade pizza dough by hydrating the flour, allowing gluten to form, and activating the yeast. The amount of water relative to the amount of flour is known as hydration percentage, and it significantly impacts the dough's texture and handling characteristics. A typical homemade pizza dough recipe beginner might use a hydration level of around 60-65% (water weight divided by flour weight). Intermediate bakers often explore higher hydration levels, perhaps 65-75% or even higher, as more water can lead to a more open crumb structure and a lighter, airier crust.
However, higher hydration also results in a stickier dough that can be more challenging to handle, requiring different techniques like stretch and folds instead of just traditional kneading. Understanding how hydration affects the dough's feel and learning to adjust slightly based on the specific flour used and even the humidity in your kitchen are hallmarks of an intermediate baker. It's a balance between achieving the desired texture and maintaining manageable dough.
Water Temperature: Achieving the Ideal Dough Consistency
The temperature of the water used in your homemade pizza dough directly impacts the yeast's activity and, consequently, the dough's fermentation rate. For active dry yeast, warm water (105-115°F or 40-46°C) is needed for proofing. For instant yeast, lukewarm water (around 85-95°F or 30-35°C) is often sufficient, or you can even use room temperature water, though it will slow down the initial fermentation. Using water that is too hot will kill the yeast, while water that is too cold will inhibit its activity, leading to a slow or non-existent rise.
Beyond activating the yeast, the water temperature, combined with the temperature of the flour and the ambient room temperature, influences the final dough temperature after mixing. Many recipes aim for a mixed dough temperature in the range of 75-80°F (24-27°C) for optimal initial fermentation. Measuring the temperature of your ingredients and adjusting the water temperature accordingly is a technique employed by intermediate bakers to better control the dough's rise and development, ensuring consistent results beyond what a basic homemade pizza dough recipe beginner might achieve.
Salt: Enhancing Flavor and Controlling Yeast
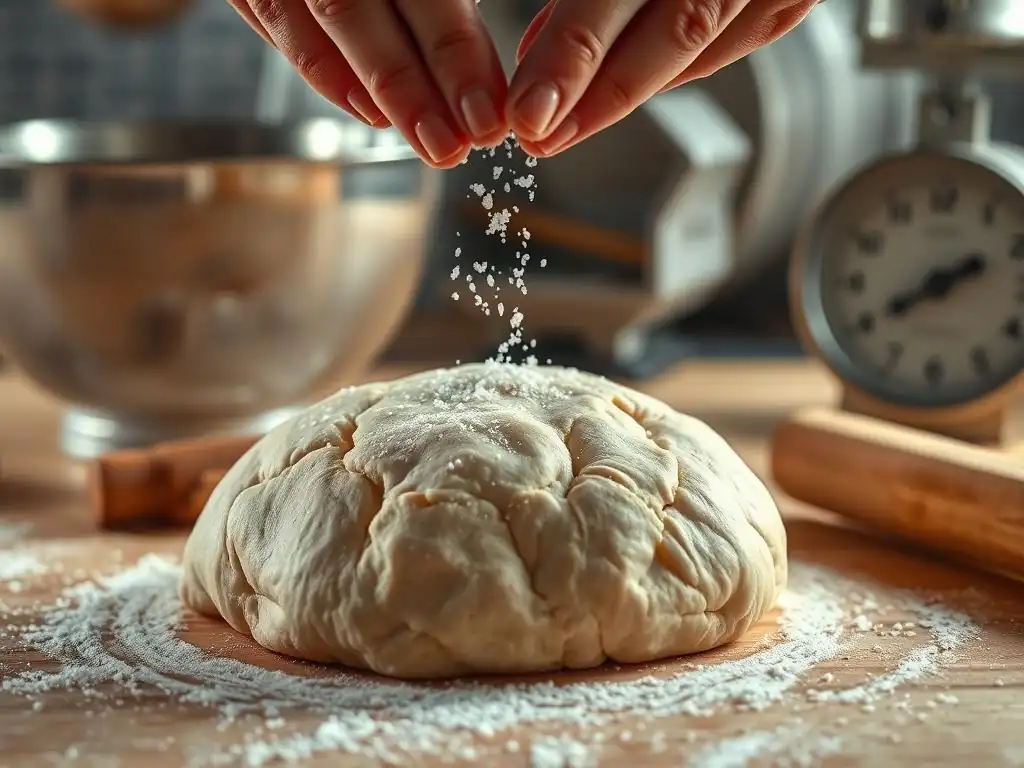
Salt is a crucial, yet often underestimated, ingredient in homemade pizza dough. Its primary roles are to enhance the flavor of the dough, making it taste less bland, and to control the rate of yeast fermentation. Without salt, yeast can ferment too rapidly, leading to a dough that rises too quickly and may not develop sufficient gluten structure or complex flavors. Salt slows down the yeast activity, allowing for a more controlled and gradual rise, which contributes to better flavor development over time, especially in longer fermentation periods.
The amount of salt typically used in homemade pizza dough is around 1.5% to 2.5% of the flour weight. Using too little salt will result in a bland dough with potentially poor texture, while too much can inhibit yeast activity excessively and make the dough taste overly salty. Intermediate bakers understand this balance and measure salt accurately, often by weight, rather than just volume, for consistency. They also know to avoid direct contact between salt and yeast during the initial mixing phase, especially when proofing active dry yeast, as salt can kill the yeast if it's in high concentration.
Olive Oil: Adding Flavor and Texture
Olive oil is an optional but common addition to many homemade pizza dough recipes, particularly for styles like New York or Roman pizza, though it's typically excluded from traditional Neapolitan dough. When included, olive oil serves multiple purposes. It adds richness and flavor to the dough, contributing to a more tender crumb and a slightly crispier exterior crust. It also helps to make the dough more extensible, meaning it's easier to stretch without tearing, a benefit for intermediate bakers aiming for thin crusts.
The amount of olive oil used can vary, typically ranging from 1% to 5% of the flour weight. Using extra virgin olive oil will impart a more distinct flavor than lighter varieties. While not strictly necessary for all pizza styles, incorporating olive oil is a simple way to modify the texture and taste of your homemade pizza dough, offering another layer of control for the intermediate baker looking to customize their results beyond a simple homemade pizza dough recipe beginner. It helps create a softer, more pliable dough that handles beautifully.
Mastering the Intermediate Pizza Dough Recipe
The BakeWithEase Intermediate Homemade Pizza Dough Recipe: A Step-by-Step Guide
This section provides a detailed step-by-step process for creating a fantastic homemade pizza dough suitable for intermediate bakers. This recipe moves beyond the simplest methods, incorporating techniques that enhance flavor and texture. We'll assume you're using instant dry yeast for ease, but instructions for active dry yeast are included. This recipe is designed for a hydration level of approximately 68%, providing a balance of manageability and potential for a good crumb structure. It makes enough dough for about two 12-14 inch pizzas.
Following these steps carefully will guide you through the essential stages of dough making, from initial mixing to the crucial first and second rises. Pay attention to the feel of the dough and the visual cues during fermentation. This process, while slightly more involved than a basic homemade pizza dough recipe beginner might use, lays the foundation for truly excellent results and prepares you for exploring even more advanced techniques later on.
Step 1: Activating the Yeast (If Using Active Dry Yeast)
If your recipe calls for active dry yeast, this is your first step. Measure out the required amount of warm water (around 105-115°F or 40-46°C). Add a pinch of sugar (optional, but it gives the yeast a quick food source) and sprinkle the active dry yeast over the water. Do not stir initially.
Let it sit for 5-10 minutes. You should see a foamy layer develop on the surface; this indicates the yeast is alive and active. If no foam appears, your yeast may be dead or the water temperature was incorrect, and you should start over with fresh yeast. Once foamy, stir gently to combine before adding to your dry ingredients.
If you are using instant yeast, you can skip this activation step and add the yeast directly to the dry ingredients in Step 2. Instant yeast is designed to be mixed in without proofing, which simplifies the process slightly while still providing reliable leavening for your homemade pizza dough.
Step 2: Combining the Ingredients
In a large mixing bowl (or the bowl of a stand mixer fitted with a dough hook), whisk together the flour and salt. If using instant yeast, add it to the dry ingredients now and whisk to distribute evenly. Create a well in the center of the dry ingredients. Pour in the water (with activated active dry yeast, if applicable) and the olive oil (if using).
Using a spoon or spatula (or the stand mixer on a low speed), begin mixing the ingredients until a shaggy dough forms and most of the flour is incorporated. At this stage, the mixture will look rough and perhaps a bit dry in places, but it should start to come together into a mass. Avoid overmixing at this point; the goal is just to bring everything together before kneading. This initial combination sets the stage for gluten development in the next step of your homemade pizza dough journey.
Step 3: Kneading the Dough: Developing Gluten for a Chewy Crust
Kneading is the process of working the dough to develop the gluten structure. Gluten is what gives homemade pizza dough its elasticity and chewiness. As you knead, the protein strands in the flour align and strengthen, creating a network that traps the gases produced by the yeast, allowing the dough to rise and hold its shape. Proper kneading is essential for achieving a desirable crust texture, moving beyond the minimal kneading sometimes suggested in a homemade pizza dough recipe beginner.
You'll know the dough is sufficiently kneaded when it becomes smooth, elastic, and no longer sticky (or only slightly sticky, depending on hydration). It should pass the "windowpane test," where a small piece of dough can be gently stretched thinly enough to see light through it without tearing. This typically takes 8-10 minutes by hand or 6-8 minutes in a stand mixer on medium speed.
Kneading by Hand vs. Using a Stand Mixer
Kneading homemade pizza dough by hand is a traditional method that allows you to truly feel the dough's development. Turn the shaggy dough onto a lightly floured surface. Fold the dough over on itself, press down and push it away from you with the heels of your hands, then fold it back over. Repeat this motion rhythmically. Avoid adding too much extra flour, which can make the dough tough. Keep kneading until the dough is smooth and elastic, approximately 8-10 minutes. Your hands might get sticky initially, but as gluten develops, the dough will become less tacky.
Using a stand mixer with a dough hook attachment is faster and requires less physical effort. After combining ingredients, turn the mixer to low speed until the dough comes together, then increase to medium speed. Let the mixer knead the dough for about 6-8 minutes. Scrape down the sides of the bowl occasionally. The dough should eventually pull away from the sides of the bowl and form a smooth ball around the hook. The stand mixer provides consistent kneading action, making it easier to achieve proper gluten development consistently.
Step 4: First Rise: Bulk Fermentation for Flavor Development
The first rise, also known as bulk fermentation, is a critical period where the yeast is most active, producing carbon dioxide and alcohol. This process not only makes the homemade pizza dough rise but also develops complex flavors and aromas. After kneading, shape the dough into a ball, place it in a lightly oiled bowl, turning to coat. Cover the bowl tightly with plastic wrap or a damp towel to prevent the surface from drying out.
Allow the dough to rise in a warm, draft-free place until it has roughly doubled in size. This can take anywhere from 1 to 2 hours at room temperature (around 70-75°F or 21-24°C), though cooler temperatures will slow the rise. For intermediate bakers, understanding that this time is approximate is important; look for the visual cue of doubled size rather than relying solely on the clock. This stage is essential for creating a light and flavorful crust.
Step 5: Dividing and Shaping the Dough
Once the homemade pizza dough has completed its first rise and doubled in size, gently turn it out onto a lightly floured surface. Avoid punching down the dough aggressively, as this can expel too much of the gas built up during fermentation. Use a bench scraper or knife to divide the dough into the desired number of portions for your pizzas (typically two for this recipe).
Shape each portion into a round ball by gently tucking the edges underneath to create surface tension. You can do this by placing the dough ball on the counter and rotating it while gently pulling the sides down and tucking them under with your fingers, or by cupping your hand over the dough and moving it in a circular motion against the counter. This shaping step helps create tension for a good rise during proofing and makes the dough easier to stretch later.
Step 6: Second Rise: Proofing for a Light and Airy Crust
The second rise, or proofing, allows the individual dough balls to relax and build up gas again before baking. This step is crucial for achieving a light and airy crust, particularly around the edges. Place the shaped dough balls on a lightly floured surface, baking sheet, or in individual proofing containers. Leave enough space between them as they will expand.
Cover the dough balls loosely with plastic wrap or a clean kitchen towel to prevent drying. Let them proof at room temperature for another 30-60 minutes, or until they look visibly puffy and have increased in size by about 50%. They should feel soft and airy when gently poked. Over-proofing can lead to a dough that is difficult to handle and results in a less robust crust, while under-proofing will yield a denser crust. This step is key to moving beyond a basic homemade pizza dough recipe beginner and achieving professional-looking results.
Intermediate Pizza Dough Recipe: Detailed Measurements and Instructions
Here is a more detailed breakdown of the homemade pizza dough recipe for intermediate bakers, building on the steps above.
Yields: 2 medium (12-14 inch) pizzas Prep time: 30 minutes Rise time: 1.5 - 3 hours (depending on temperature)
Ingredients:
- 500 grams (about 4 cups) High-quality Bread Flour or 00 Flour
- 340 grams (about 1 1/3 cups) Water, lukewarm (85-95°F or 30-35°C)
- 10 grams (about 2 tsp) Fine Sea Salt
- 2 grams (about 3/4 tsp) Instant Dry Yeast (or 2.5g Active Dry Yeast, proofed)
- 15 grams (about 1 tbsp) Extra Virgin Olive Oil (optional)
Instructions:
- Combine Dry Ingredients: In a large bowl or stand mixer, whisk together the flour and salt. If using instant yeast, whisk it in now.
- Add Wet Ingredients: Create a well in the center. Pour in the lukewarm water (and proofed active dry yeast, if using) and olive oil (if using).
- Mix: Stir with a spoon or spatula until a shaggy dough forms. If using a stand mixer, mix on low speed until combined.
- Knead: Turn the dough onto a lightly floured surface and knead by hand for 8-10 minutes until smooth and elastic, or use a stand mixer with a dough hook on medium speed for 6-8 minutes. The dough should pass the windowpane test.
- First Rise (Bulk Fermentation): Shape the dough into a ball. Place in a lightly oiled bowl, turn to coat, and cover tightly with plastic wrap. Let rise at room temperature (70-75°F) for 1.5 to 2 hours, or until doubled in size. (Alternatively, see the Cold Fermentation section for longer flavor development).
- Divide and Shape: Gently turn the dough onto a lightly floured surface. Divide into two equal portions. Shape each portion into a taut ball by tucking the edges underneath.
- Second Rise (Proofing): Place the dough balls on a lightly floured surface or baking sheet, spaced apart. Cover loosely with plastic wrap or a towel. Let proof at room temperature for 30-60 minutes, or until visibly puffy and increased by about 50%.
- Stretch and Bake: Your homemade pizza dough is now ready to be stretched, topped, and baked according to your preferred method (see Intermediate Techniques section).
Intermediate Techniques for Better Homemade Pizza
Cold Fermentation: Enhancing Flavor and Texture
Cold fermentation is a technique where homemade pizza dough is allowed to rise slowly in the refrigerator for an extended period, typically 24 to 72 hours, or even longer. This slow, cool environment significantly slows down yeast activity but allows enzymes in the flour to break down complex carbohydrates into simpler sugars. This process results in several benefits that noticeably improve the final pizza crust, moving well beyond the simple quick rise of a basic homemade pizza dough recipe beginner.
The primary advantage of cold fermentation is the development of deeper, more complex flavors and aromas in the dough. The slow enzymatic activity creates compounds that simply don't form during a rapid room-temperature rise. Additionally, cold fermentation improves the dough's texture. The extended time allows gluten to relax and become more extensible, making the dough easier to stretch thinly without tearing. It also contributes to a more open crumb structure and a crispier crust upon baking.
The Benefits of Cold Fermenting Pizza Dough
Implementing cold fermentation for your homemade pizza dough offers tangible improvements in taste and texture. Flavor-wise, you'll notice a more nuanced, slightly tangy, and less overtly yeasty profile compared to dough that only undergoes a short room-temperature rise. This complexity elevates the crust from a mere vehicle for toppings to a delicious component of the pizza itself. The slower fermentation also produces less alcohol initially, resulting in a cleaner taste.
From a textural standpoint, cold fermentation leads to a dough that is remarkably easy to handle after it's been allowed to warm slightly from the fridge. The gluten is relaxed yet strong, allowing for effortless stretching to achieve a thin base. When baked, cold-fermented dough tends to develop a better oven spring and a more irregular, open crumb structure with desirable air pockets. The crust often crisps up beautifully while remaining tender inside. Furthermore, cold fermentation offers scheduling flexibility; you can make the dough days in advance and bake when convenient.
How to Cold Ferment Pizza Dough: A Detailed Explanation
Incorporating cold fermentation into your homemade pizza dough routine is straightforward. After the initial kneading (Step 4 in the recipe above), instead of letting the dough double at room temperature for 1-2 hours, shape it into a ball, lightly oil it, and place it in an airtight container or a bowl tightly covered with plastic wrap. Immediately place the container in the refrigerator (ideally at around 38-40°F or 3-4°C).
Allow the dough to ferment in the refrigerator for at least 24 hours, and ideally for 48 to 72 hours for maximum flavor development. During this time, the dough will still rise, but at a much slower pace. When you're ready to make pizza, remove the dough from the refrigerator approximately 1-2 hours before you plan to stretch and bake it. This allows the dough to warm up slightly, relax, and become easier to handle. If the dough is too cold, it will be stiff and difficult to stretch. Shape and bake as usual.
Stretching and Shaping Techniques for a Perfect Crust
Once your homemade pizza dough has proofed (either from a room temperature second rise or after warming up from cold fermentation), the way you stretch and shape it is crucial for achieving the desired crust thickness and structure. For intermediate bakers, moving beyond simply pressing dough into a circle involves techniques that preserve the airy structure developed during fermentation and create a uniform base. The goal is often to push the gas to the edges to form a puffy rim while creating a thinner center.
Before stretching, ensure your dough ball is at a manageable temperature (not too cold). Lightly flour your work surface and your hands. Place the dough ball on the surface and gently press down from the center outwards, leaving a small border (about 1/2 inch) around the edge untouched. This border will become the crust. Be gentle to avoid deflating the dough too much.
Hand Stretching vs. Using a Rolling Pin
Hand stretching is the preferred method for many intermediate and advanced pizza makers because it helps maintain the airy structure of the homemade pizza dough and creates a more rustic, irregular, and open crust (like a Neapolitan). After the initial pressing, pick up the dough and let gravity help stretch it, rotating it and gently pulling the edges. You can also drape the dough over the backs of your hands or knuckles, rotating and gently stretching outwards. Avoid tearing the dough. Aim for an even thickness, pushing gas bubbles towards the rim.
Using a rolling pin, while easier for achieving a uniform thickness, tends to push out too much of the gas from the dough, resulting in a denser, less airy crust. It's acceptable for very thin, cracker-like crusts but less ideal for achieving a puffy, chewy edge. For intermediate bakers aiming for improved texture beyond a homemade pizza dough recipe beginner, practicing hand stretching is a valuable skill that contributes significantly to a superior pizza crust.
Achieving a Thin and Even Crust
Achieving a thin and even crust with your homemade pizza dough requires practice and a gentle touch. After pressing the dough from the center outwards, pick up the dough and continue stretching it using your preferred method (hand stretching recommended). Focus on stretching the dough evenly in all directions, rotating it frequently. If the dough resists stretching and springs back, let it rest on the counter for 5-10 minutes before trying again; this allows the gluten to relax.
Aim to create a uniform thickness across the base, while consciously leaving the outer rim slightly thicker to form the crust. The thickness you aim for depends on your desired pizza style – very thin for Roman or Neapolitan, slightly thicker for New York style. Practice helps you gauge the dough's elasticity and how far you can stretch it before it becomes too thin or tears. A well-developed, properly proofed dough (especially cold-fermented) will be much easier to stretch thinly and evenly.
Baking Your Pizza: Oven Temperature and Baking Time
Baking is the final, crucial step for transforming your stretched homemade pizza dough into a delicious crust. High heat is essential for achieving a crispy exterior and a well-cooked interior quickly, mimicking the conditions of a professional pizza oven. Most home ovens can reach temperatures between 500-550°F (260-290°C). Preheat your oven to its highest possible temperature for at least 30-60 minutes, allowing your baking surface (stone or steel) to get screaming hot.
The baking time will vary depending on your oven temperature, the thickness of your crust, and your desired level of crispness. At 500-550°F, pizzas typically bake in 8-12 minutes. A thinner crust will bake faster than a thicker one. Look for visual cues: the crust should be golden brown and puffy, and the cheese should be melted and bubbly, perhaps with some browning or charring on the edges of the crust, especially if using a very hot stone/steel.
Baking Stone vs. Baking Sheet: Which is Better?
Using a baking stone or a baking steel is highly recommended for baking homemade pizza dough in a home oven, especially for intermediate bakers seeking superior results compared to a standard baking sheet. A pizza stone (made of ceramic or cordierite) or steel (made of steel) is preheated in the oven and acts as a thermal mass. When the pizza is placed directly on the hot surface, the stone or steel quickly transfers intense heat to the bottom of the dough, causing it to cook rapidly and develop a crispy bottom crust and good oven spring.
A standard baking sheet, while functional for a basic homemade pizza dough recipe beginner, doesn't retain and transfer heat as effectively. This can result in a pale, less crispy bottom crust. For the best results with your intermediate homemade pizza dough, invest in a baking stone or steel and always preheat it thoroughly in the oven before launching your pizza onto it. A baking steel generally conducts heat faster and more intensely than a stone.
Achieving a Crispy Crust
Achieving a perfectly crispy crust on your homemade pizza dough involves several factors working together. First, high oven temperature is key – 500°F (260°C) or higher is ideal. Second, using a preheated baking stone or steel provides the necessary direct heat to the bottom of the dough for rapid crisping. Ensure the stone/steel has preheated for at least 30 minutes, preferably 60 minutes.
Third, avoid overloading your pizza with toppings, as excess moisture from toppings can steam the dough rather than crisp it. Fourth, ensure your dough is properly hydrated and has undergone sufficient fermentation (especially cold fermentation), as this contributes to a good internal structure that supports a crispy exterior. Finally, ensure the dough is stretched to an appropriate thickness for the desired crispness; very thin crusts naturally crisp up more than thick ones. Baking directly on the hot surface for the full duration without transferring to a cooler rack helps maximize bottom crispness.
Troubleshooting Common Pizza Dough Problems (Intermediate Edition)
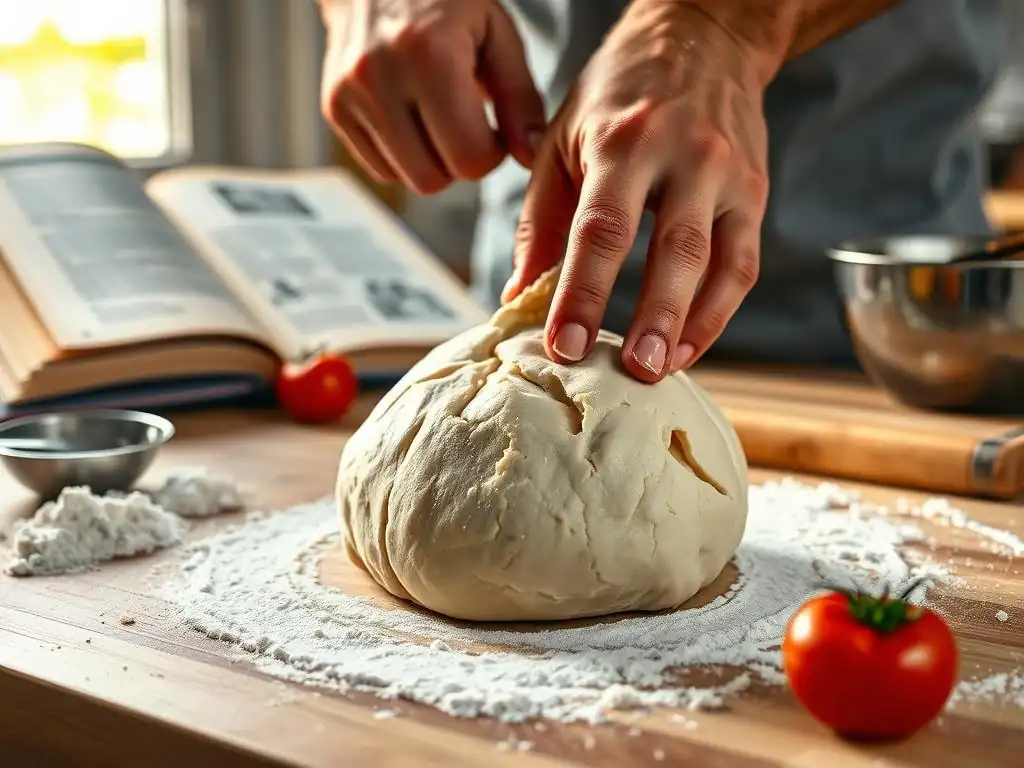
Even with a solid homemade pizza dough recipe beginner guide and intermediate techniques, you might encounter issues. Learning to troubleshoot is a mark of the intermediate baker. Understanding why a problem occurred helps you fix it and prevent it in the future. Here are some common issues and their likely causes and solutions.
- Dough Too Sticky: Likely too high hydration or insufficient kneading.
- Dough Too Dry: Likely too low hydration or too much flour added during kneading/shaping.
- Dough Not Rising: Yeast is inactive (dead), water temperature was wrong, or kitchen is too cold.
- Tough or Chewy Crust: Over-kneading or insufficient fermentation time.
- Soggy Crust: Oven not hot enough, stone/steel not preheated, or too many wet toppings.
Let's delve into these common problems and how to address them effectively with your homemade pizza dough.
Dough Too Sticky: How to Adjust Hydration
If your homemade pizza dough feels excessively sticky and difficult to handle after kneading, even sticking stubbornly to your hands and the work surface, it's likely a hydration issue – specifically, the hydration percentage is too high for the type of flour used or your comfort level. While high hydration can yield a great crust, it requires practice to handle.
To remedy overly sticky dough, you can gradually add small amounts of flour (a tablespoon at a time) during the final stages of kneading until the dough reaches a more manageable, less sticky consistency. Be cautious not to add too much, as this will lower the hydration and could result in a tougher dough. For future batches, consider slightly reducing the water amount (by 10-20 grams for 500g flour) or increasing the flour amount slightly in your homemade pizza dough recipe. Ensure you are weighing your ingredients for accuracy, as volume measurements can be inconsistent, especially for flour.
Dough Too Dry: Adding Moisture
Conversely, if your homemade pizza dough feels stiff, crumbly, and doesn't come together easily during mixing or kneading, it's likely too dry. This indicates the hydration is too low, or perhaps too much flour was accidentally added. Dry dough is difficult to knead, lacks elasticity, and will result in a dense, tough crust that doesn't rise well.
To fix dry dough, you can gradually add small amounts of water (a teaspoon at a time) during the kneading process. Dip your hands in water and continue kneading, or drizzle a tiny bit of water onto the dough and work it in. The dough will absorb the extra moisture and become more pliable.
For your next batch of homemade pizza dough, increase the water amount slightly (by 10-20 grams for 500g flour) or double-check your measurements to ensure accurate hydration. Remember that different flours absorb water differently, so minor adjustments might be needed based on the brand or type you use.
Dough Not Rising: Yeast Issues and Solutions
If your homemade pizza dough shows little to no signs of rising during the first or second fermentation, the most common culprit is inactive or dead yeast. This can happen if the yeast is old, was killed by hot water (above 130°F or 54°C), or was exposed directly to salt for too long before being mixed into the bulk of the flour. Another reason could be that the dough is too cold, as yeast activity is significantly inhibited below 70°F (21°C), especially for a quick rise.
To troubleshoot, first check the expiration date of your yeast. If using active dry yeast, ensure it foamed when proofed in warm water; if not, discard and use fresh yeast.
If your kitchen is cold, find a warmer spot for the dough to rise (like inside a turned-off oven with just the light on, or near a warm appliance). If the dough has been sitting for a couple of hours with no activity and you suspect dead yeast, you might need to start over, ensuring your yeast is fresh and your water temperature is correct for your homemade pizza dough.
Tough or Chewy Crust: Over-Kneading and Gluten Development
While proper gluten development is essential for homemade pizza dough, over-kneading can result in a tough, overly dense, and unpleasantly chewy crust. Kneading develops gluten, but excessive kneading tightens the gluten network too much, making the dough stiff and difficult to relax and expand properly during baking. Insufficient fermentation time can also contribute to toughness, as the enzymes haven't had enough time to tenderize the gluten and develop a more open structure.
To avoid over-kneading, pay attention to the dough's texture. Stop kneading once it is smooth, elastic, and passes the windowpane test. There's no need to continue past this point. If you suspect your dough is tough from over-kneading, allow it an extended rest period (30-60 minutes) before shaping to let the gluten relax. Ensuring adequate fermentation time, especially incorporating cold fermentation, is also key to developing a tender crumb structure alongside a good chew. For a homemade pizza dough recipe beginner, it's better to slightly under-knead than significantly over-knead.
Soggy Crust: Avoiding Common Mistakes
A soggy or undercooked bottom crust is a frustrating problem, often encountered when moving from a basic homemade pizza dough recipe beginner to baking on a home oven. The primary causes are insufficient heat transfer to the bottom of the dough and/or excess moisture on the pizza. If your oven isn't hot enough (below 500°F or 260°C) or your baking surface (stone/steel) hasn't been preheated sufficiently (less than 30-60 minutes), the bottom of the dough won't cook quickly enough before the top is done.
To prevent a soggy crust on your homemade pizza dough, always preheat your oven to its highest setting with the baking stone or steel inside for at least 30-60 minutes. Launch the pizza directly onto the hot surface. Be mindful of toppings; use sauces sparingly, drain fresh mozzarella, and avoid piling on too many watery vegetables without pre-cooking them slightly. Ensure your dough isn't too thick in the center. If using a baking sheet, try placing it on a lower rack closer to the heating element, though a stone/steel is preferable for crispness.
Beyond the Basics: Exploring Advanced Pizza Dough Techniques
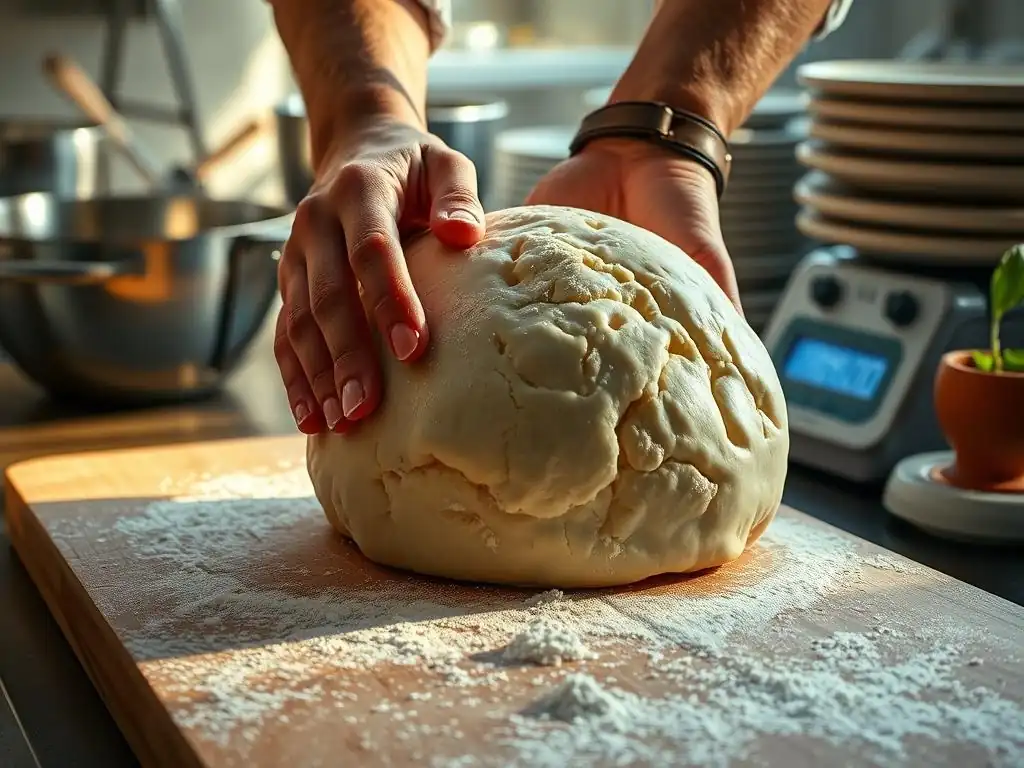
Once you've mastered the intermediate homemade pizza dough recipe and techniques like cold fermentation and hand stretching, you might be curious about pushing your skills further. The world of pizza dough offers numerous avenues for exploration, from natural leavening to incorporating different flours and flavors. These techniques can add new dimensions of flavor, texture, and complexity to your crust, moving you towards advanced baking.
Exploring advanced techniques is about experimenting and understanding how different variables impact the final outcome. It's a journey of refining your craft and finding what you enjoy most. Whether it's the tangy complexity of sourdough or the unique texture provided by alternative grains, these methods offer exciting possibilities for your homemade pizza dough.
Sourdough Pizza Dough: A Natural Rise
Sourdough pizza dough relies on a wild yeast and bacteria culture (a sourdough starter) for leavening instead of commercial yeast. This natural fermentation process is slower but imparts a distinctive tangy flavor and creates a unique, often more open and irregular crumb structure. Making sourdough homemade pizza dough requires maintaining an active starter and understanding the fermentation process controlled by wild cultures, which react differently than commercial yeast.
The process typically involves feeding your starter, mixing it with flour, water, and salt, and then undergoing a long fermentation period, often involving several hours at room temperature followed by a cold fermentation period in the refrigerator. The resulting dough has a more complex flavor profile and is often considered easier to digest by some. It's a rewarding challenge for the intermediate baker ready to embrace natural leavening.
Using Different Flours: Whole Wheat, Semolina, and More
Experimenting with flours other than standard bread or 00 flour can dramatically change the flavor, texture, and appearance of your homemade pizza dough. Whole wheat flour, for example, adds a nutty flavor and increases fiber content, but its bran particles can interfere with gluten development, often resulting in a denser crust. It's often used in combination with white flour (e.g., 20-30% whole wheat).
Semolina flour, especially durum semolina, can be added in small amounts (perhaps 10-20%) or used for dusting. When incorporated into the dough, it can add a subtle sweetness and a slightly gritty, pleasant texture. For dusting, it prevents sticking and creates a beautiful, rustic bottom crust. Other flours like spelt or rye can also be incorporated in small percentages for unique flavors. Understanding how different flours behave is key to successfully modifying your homemade pizza dough recipe.
Adding Flavors to Your Dough: Herbs, Garlic, and Spices
Beyond the basic ingredients, you can infuse your homemade pizza dough with additional flavors to complement your toppings. Finely chopped fresh herbs like rosemary, thyme, or oregano can be kneaded into the dough. Roasted garlic or garlic powder adds a savory depth. Spices such as red pepper flakes or black pepper can provide a subtle kick.
When adding dry ingredients like herbs or spices, you can incorporate them during the initial mixing stage. For wet additions like roasted garlic, ensure they are mashed finely and distributed evenly. Start with small amounts (e.g., 1-2 teaspoons of dried herbs or a clove of roasted garlic per 500g flour) and adjust in future batches based on your preference. These additions are a simple way to customize your homemade pizza dough and add an extra layer of flavor to your pizza creation.
Storing Homemade Pizza Dough
Having a batch of homemade pizza dough ready to go is incredibly convenient. Whether you've made extra or planned ahead using cold fermentation, proper storage is essential to maintain the dough's quality and usability. Yeast is still active in the refrigerator, albeit slowly, so adequate packaging is necessary to prevent drying out and control expansion.
Understanding how to store dough correctly allows you to make larger batches and enjoy fresh, homemade pizza dough whenever the craving strikes, without needing to start from scratch each time. Both short-term refrigeration and long-term freezing are viable options, each with its own considerations for optimal results.
Properly Storing Dough for Later Use
For storage in the refrigerator (for cold fermentation or holding dough for a few days), place the shaped dough balls in individual airtight containers or bowls. Alternatively, lightly oil the dough balls and place them in a large zip-top bag, squeezing out excess air before sealing. Ensure there is ample room for the dough to expand, even at cold temperatures; containers that are too small can lead to dough pushing off lids.
Refrigerated homemade pizza dough is typically good for 3 to 5 days, though flavor development often peaks around 48-72 hours. As the dough ages in the fridge, it may become more tangy and develop small dark spots (indicating enzymatic activity), which is normal. Always bring the dough out of the refrigerator 1-2 hours before use to allow it to warm up and relax, making it easier to stretch.
Freezing Pizza Dough for Future Pizzas
Freezing is an excellent option for long-term storage of your homemade pizza dough. After the first rise (bulk fermentation), divide and shape the dough into individual balls. Lightly oil each dough ball and place them on a baking sheet lined with parchment paper, ensuring they are not touching. Place the baking sheet in the freezer for 1-2 hours, or until the dough balls are frozen solid.
Once frozen, transfer the solid dough balls to individual freezer-safe bags or wrap them tightly in plastic wrap followed by aluminum foil. This double layer of protection helps prevent freezer burn. Frozen homemade pizza dough can be stored for up to 2-3 months. To use, remove the dough from the freezer and place it in a lightly oiled bowl or container. Cover and thaw in the refrigerator overnight, then let it sit at room temperature for 1-2 hours before stretching and baking. Avoid thawing at room temperature from frozen, as this can lead to uneven thawing and texture issues.
Conclusion: Mastering Homemade Pizza Dough with BakeWithEase
Congratulations! You're Now an Intermediate Pizza Dough Baker
You've taken the steps to move beyond a basic homemade pizza dough recipe beginner and explored the nuances that elevate your pizza crust from good to great. By understanding the role of ingredients, mastering kneading and fermentation techniques, troubleshooting common issues, and experimenting with methods like cold fermentation, you've significantly expanded your baking skills. Crafting your own homemade pizza dough is a rewarding process that puts you in control of the texture, flavor, and quality of your pizza base.
Each batch of dough you make is an opportunity to learn and refine your technique. Pay attention to how the dough feels, how it rises, and how it bakes. Keep notes on what works well and what you'd like to improve. This journey of continuous learning is what baking is all about. You now have the foundational knowledge of an intermediate baker, ready to tackle more complex recipes and techniques with confidence.
Further Resources for Advanced Baking Techniques on BakeWithEase.com
Your exploration of homemade pizza dough is just one part of a larger baking adventure. BakeWithEase.com offers a wealth of resources to help you continue developing your skills. If you're interested in diving deeper into the world of natural leavening, explore our comprehensive guides on creating and maintaining a sourdough starter and baking sourdough bread.
For those eager to experiment with different types of flour or explore alternative pizza styles, our articles cover a range of specialized techniques and recipes. Continue to visit BakeWithEase.com for detailed tutorials, troubleshooting tips, and inspiration for your next baking project. We're here to support your growth as you move from intermediate to advanced baking techniques, helping you create delicious results every time.
Frequently Asked Questions
What makes this pizza dough recipe suitable for an intermediate baker, and not a complete beginner?
This recipe builds upon basic baking knowledge, introducing techniques like autolysing the flour and understanding the importance of hydration for a better crust. It assumes familiarity with basic kitchen equipment and measurements.
Can I substitute any of the flours in this homemade pizza dough recipe?
While you can experiment, the recipe is designed with a specific blend for optimal texture. Strong bread flour is crucial for gluten development, but you could try a small percentage of whole wheat for flavor.
How long should I proof the pizza dough, and what factors affect the proofing time?
Proofing time varies depending on temperature. Aim for doubling in size, which can take anywhere from 1 to 2 hours at room temperature. Warmer environments will speed up the process.
What's the best way to store leftover pizza dough?
Wrap the dough tightly in plastic wrap and refrigerate for up to 3 days, or freeze for longer storage. Be sure to let the refrigerated dough come to room temperature before shaping and baking.
What are some common mistakes beginners make when making homemade pizza dough, and how can I avoid them?
Over-kneading or using water that is too hot can negatively impact the dough. Ensure you knead until smooth and elastic, and use lukewarm water to activate the yeast properly.
Final Reflection: The Joy of Kneading: From Beginner Baker to Pizzaiolo
The pursuit of the perfect homemade pizza dough is more than just a recipe; it's a journey of culinary discovery. This guide aimed to demystify the process for beginner bakers, providing a clear path from initial apprehension to the satisfying aroma of a freshly baked pie. The simplicity of the recipe belies the profound satisfaction of creating something delicious from scratch, a feeling increasingly valued in our fast-paced world.
The impact of homemade food, and specifically the joy of baking, resonates deeply within our culture. It's a connection to tradition, a celebration of simple pleasures, and a powerful antidote to the homogenization of mass-produced goods. The best things in life are homemade.
This simple phrase encapsulates the heart of this article – the immeasurable value of creating something with your own two hands, the pride in the process, and the shared joy of enjoying the fruits of your labor with loved ones. The act of kneading dough, itself, becomes a meditative practice, a moment of mindful creation in a busy life.
Now, it's your turn. Don't be intimidated by the seemingly complex world of pizza dough. Take a deep breath, gather your ingredients, and embark on this rewarding culinary adventure. The journey may have its challenges, but the taste of your first homemade pizza, born from your own effort and dedication, will be a reward beyond measure. Embrace the process, experiment with toppings, and share the joy of your creation. You might surprise yourself with your newfound pizza-making prowess!
Unleash Your Inner Pizzaiolo!
Thanks for joining us on this delicious journey into the world of homemade pizza dough! You've now got the skills to create truly amazing pizzas from scratch. Ready to take your pizza-making to the next level?
- Craft your masterpiece: Use this recipe to make your first perfect pizza tonight! Experiment with different toppings and share your creations with us.
- Share the love: Post a picture of your homemade pizza on social media and tag BakeWithEase—let's inspire other bakers!
- Discover your next dough adventure: Explore other exciting bread recipes on our website for even more baking inspiration.
What unique topping combination will you create for your first homemade pizza?