
Proofing Viennoiseries: The Key to Light and Airy Pastries

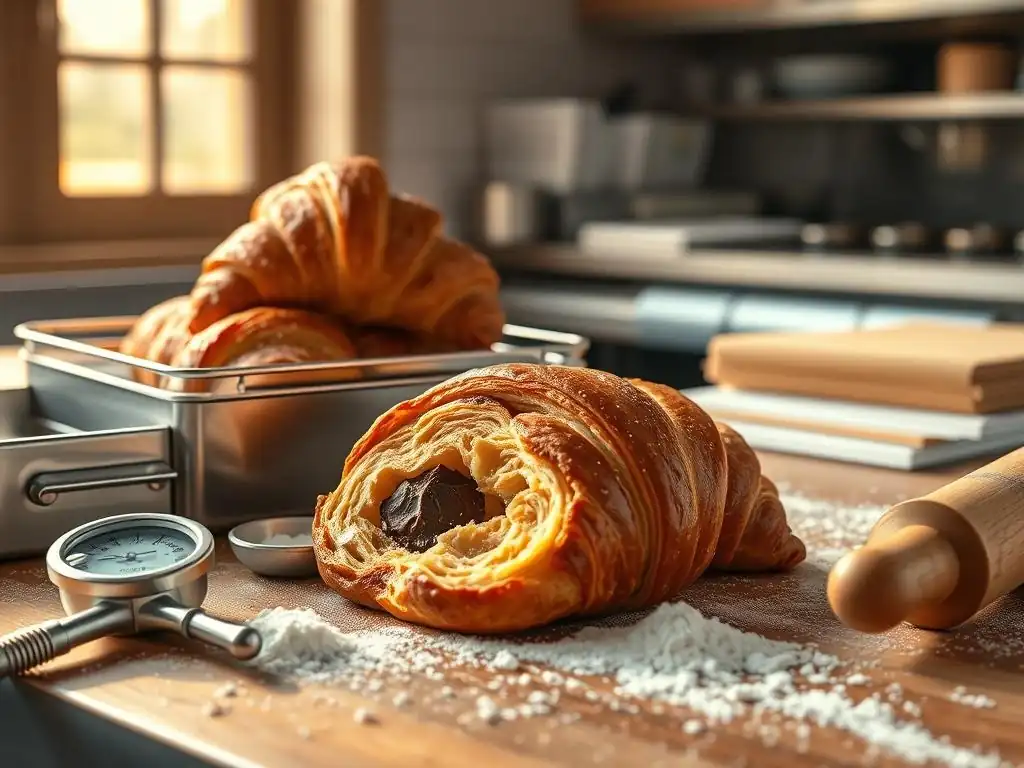
Welcome to BakeWithEase, your trusted companion on your baking journey! Ever wondered how professional bakeries achieve those perfectly light and airy viennoiseries? Our latest article delves into the secrets of easy viennoiseries proofing techniques, unlocking the key to bakery-quality pastries in your own kitchen. Discover the simple adjustments that can transform your dough and elevate your baking game. Eager to learn more? Let's get started!
- Understanding the Importance of Proofing for Viennoiseries
- Effective Viennoiseries Proofing Techniques for Home Bakers
- Mastering the Proofing Process: Step-by-Step Guide
- Troubleshooting Common Proofing Problems for Viennoiseries
- Advanced Viennoiseries Proofing Tips for Experienced Bakers
- Achieving Light and Airy Viennoiseries: The Role of Proofing in the Final Result
-
Frequently Asked Questions
- What exactly are viennoiseries, and why is proofing so important for them?
- How do Easy viennoiseries proofing techniques differ from proofing other types of dough?
- What's the ideal temperature range for Easy viennoiseries proofing techniques?
- How can I tell if my viennoiseries are properly proofed using Easy viennoiseries proofing techniques?
- What are some common mistakes to avoid when using Easy viennoiseries proofing techniques?
- Final Reflection: Mastering the Art of Viennoiserie Proofing
- Unlock Your Inner Pastry Chef: Rise to the Occasion!
Understanding the Importance of Proofing for Viennoiseries
What is Proofing and Why is it Crucial for Perfect Viennoiseries?
Proofing, also known as proving, is a critical step in the baking process for enriched doughs like those used in viennoiseries. It's the final rise the dough takes before baking, occurring after the shaping stage. During proofing, yeast ferments sugars in the dough, producing carbon dioxide gas.
This gas gets trapped within the gluten structure, causing the dough to expand and become light and airy. Without proper proofing, your carefully crafted croissants, pain au chocolat, or other pastries would be dense, heavy, and lack the characteristic flaky layers and delicate texture that define excellent viennoiseries. It's one of the most impactful easy viennoiseries proofing techniques to master for a successful bake.
Beyond just increasing volume, proofing also allows enzymes in the dough to break down complex carbohydrates and proteins. This enzymatic activity contributes significantly to the development of flavor compounds. A well-proofed dough will have a more complex, nuanced taste compared to one that was rushed. Think of it as the dough ripening, much like fruit needs time to develop its full flavor profile. Mastering these easy viennoiseries proofing techniques is fundamental to achieving not just the right texture but also the rich, buttery flavor we expect from these beloved pastries.
The Science Behind Viennoiseries Proofing: Yeast Activation and Gluten Development
The magic of proofing viennoiseries lies in the symbiotic relationship between yeast activity and gluten development. Active yeast, whether it's commercial instant or active dry yeast, or a natural sourdough starter, thrives in a warm, slightly humid environment. As the yeast consumes sugars, it releases carbon dioxide gas and alcohol. The gas inflates the dough, creating air pockets. Simultaneously, the kneading and folding steps prior to proofing develop the gluten network – a matrix of proteins that provides elasticity and strength, allowing the dough to stretch and hold the gas bubbles.
Proper proofing allows the yeast to work optimally and the gluten network to relax and become pliable. If the gluten is too tight (under-proofed), it resists expansion, resulting in a dense crumb. If the dough proofs for too long (over-proofed), the gluten structure can weaken and collapse, leading to a dough that might rise initially in the oven but then fall flat. Finding the sweet spot through careful temperature and humidity control is key to successful viennoiseries proofing. Understanding this science is a core component of effective easy viennoiseries proofing techniques.
Impact of Proper Proofing on Viennoiseries Texture and Flavor
The impact of proper proofing on the final viennoiseries is profound, influencing both its texture and flavor profile. When viennoiseries are proofed correctly, the dough expands significantly, creating a light, open crumb structure with distinct layers. In laminated doughs like croissants or pain au chocolat, this expansion helps separate the layers of dough and butter, resulting in that coveted flaky exterior and tender interior. An under-proofed pastry will be dense, heavy, and potentially chewy, while an over-proofed one might lack structure and collapse, becoming flat or gummy.
Furthermore, the extended fermentation time during proofing allows the yeast and enzymes to produce various aromatic compounds. These compounds contribute to the complex, rich flavor characteristic of well-made viennoiseries. A dough that hasn't proofed long enough will taste relatively bland, primarily of flour and butter, lacking the depth achieved through fermentation. Conversely, an over-proofed dough can develop an overly acidic or alcoholic off-flavor. Achieving the perfect balance through easy viennoiseries proofing techniques ensures both delightful texture and exquisite taste.
Effective Viennoiseries Proofing Techniques for Home Bakers
Controlling Temperature: The Ideal Environment for Viennoiseries Proofing
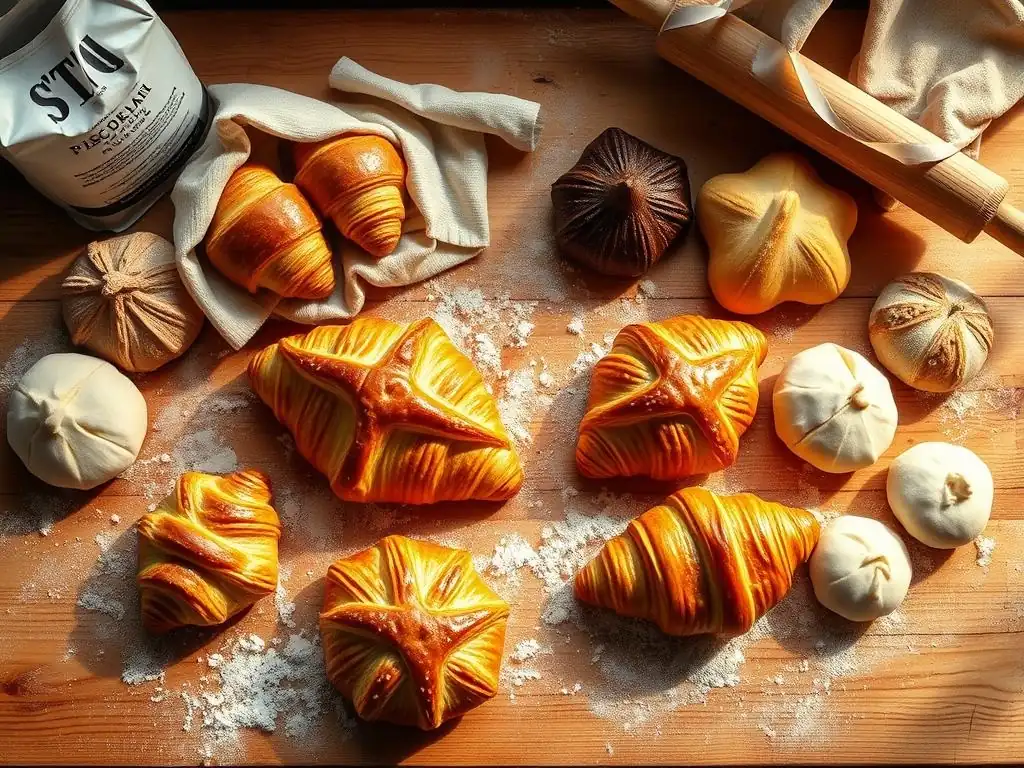
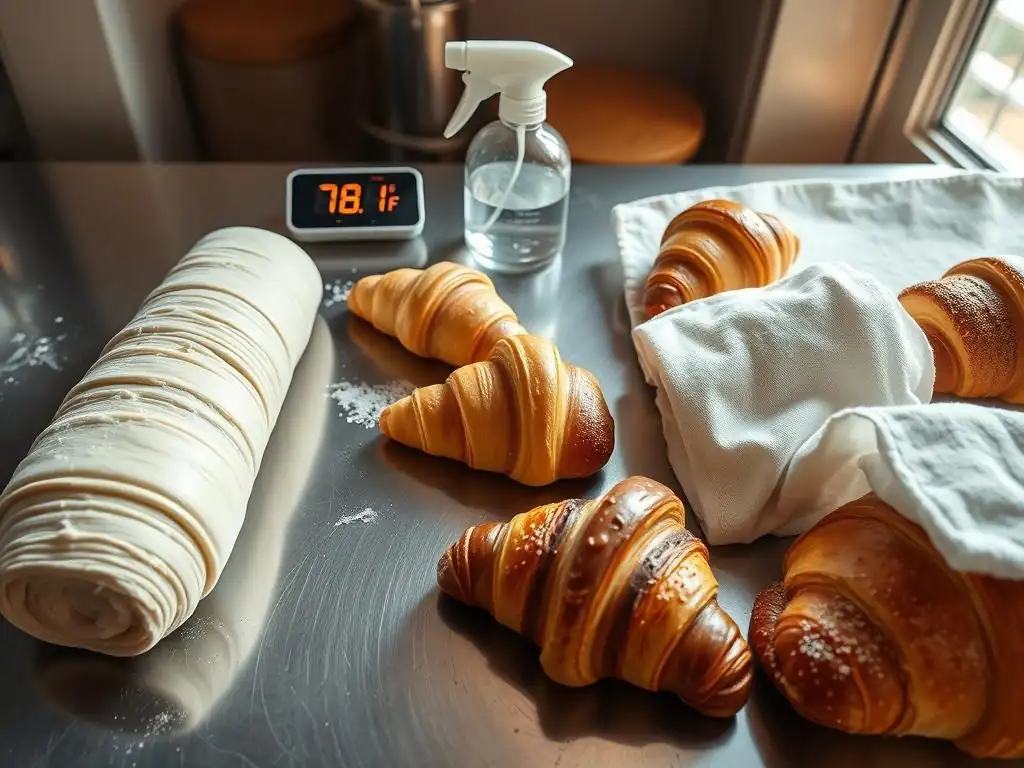
Controlling temperature is paramount when proofing viennoiseries dough. Yeast is highly sensitive to temperature; it becomes sluggish in cold conditions and can die in excessive heat. The ideal temperature range for proofing most enriched doughs, including viennoiseries, is typically between 75°F and 80°F (24°C to 27°C). This range encourages steady, active fermentation without being so fast that it compromises flavor development or risks over-proofing too quickly. Consistency is key, as fluctuating temperatures can lead to uneven proofing. Implementing effective temperature control is one of the most important easy viennoiseries proofing techniques you can adopt at home.
Maintaining this temperature can be challenging in a home kitchen, especially during cooler months. A drafty environment or a cold countertop can significantly slow down or even halt the proofing process. Finding a warm spot away from drafts is essential. Some bakers find success near a warm appliance like a refrigerator (the top can be warm) or inside a microwave or oven (turned off). The goal is a stable environment within the optimal range to facilitate the yeast's work and ensure your pastries achieve the desired rise and texture.
Using a Proofer or Oven with Proofing Setting
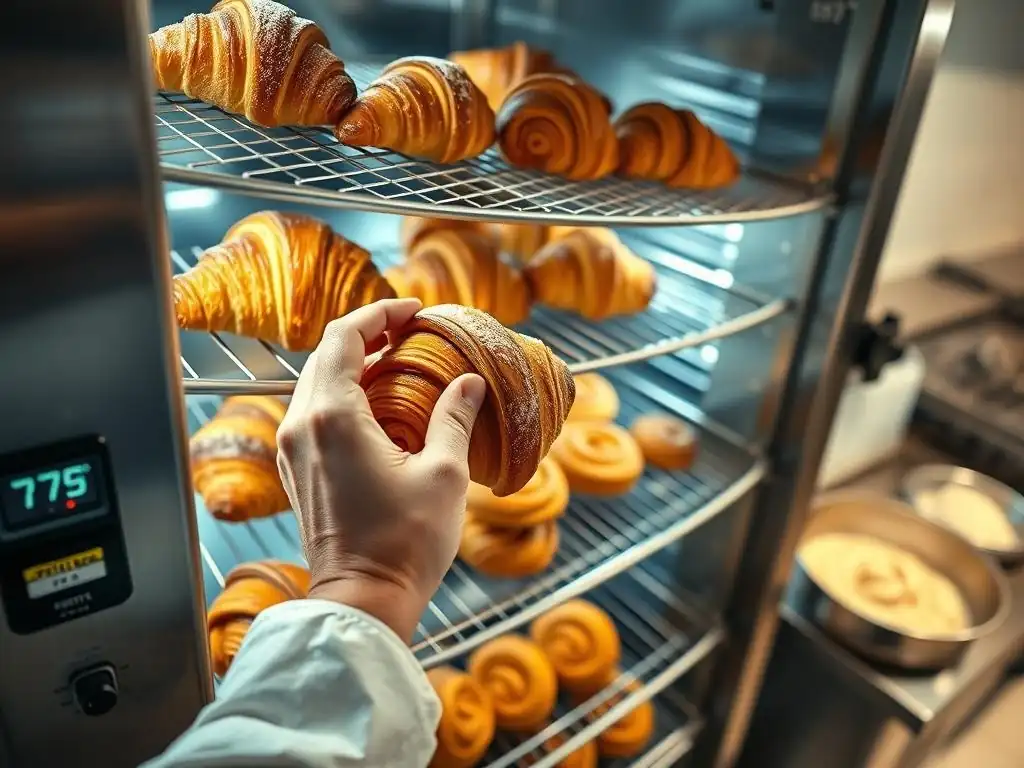
For bakers who frequently make viennoiseries or other yeasted goods, investing in a dedicated proofing box or using an oven with a proofing setting can be incredibly beneficial. These tools provide precise temperature and often humidity control, taking much of the guesswork out of the process. A proofing box, typically a collapsible unit, maintains a consistent temperature within the desired range, ensuring uniform proofing across all your pastries. Many modern ovens have a "Proof" setting, which gently heats the oven cavity to around 80°F-90°F (27°C-32°C) – sometimes a bit warmer than ideal, so monitoring is still needed.
Using an oven's proof setting often requires placing a pan of hot water on the bottom rack to create a humid environment, preventing the surface of the dough from drying out. While these tools make easy viennoiseries proofing techniques even more reliable, it's crucial to still monitor the dough's progress visually, as proofing time can vary based on dough temperature, yeast activity, and ambient conditions. A consistent, controlled environment leads to more predictable and successful results, allowing you to confidently reproduce excellent pastries.
Creating a Warm and Humid Proofing Environment Without Special Equipment
Even without a dedicated proofer or special oven setting, you can create an effective warm and humid environment for your viennoiseries. One common method is the "oven-off with light on" technique. Turn your oven light on for a few minutes to gently warm the cavity to a suitable temperature (usually around 80°F-85°F, 27°C-29°C), then turn it off before placing the pastries inside. Alternatively, you can heat the oven to its lowest setting (often 150°F or 65°C) for just one minute, then turn it off completely before adding the pastries. Always ensure the oven is off before putting dough inside.
To add humidity, which is crucial for preventing a dry skin from forming on the dough, place a pan of hot or boiling water on the bottom rack of the oven before you put the pastries in. The steam from the water will create a moist atmosphere. This combination of gentle warmth and humidity mimics a professional proofing environment and is an accessible and easy viennoiseries proofing technique for any home baker looking to achieve light and airy results without specialized tools.
Monitoring Humidity: Maintaining Optimal Moisture Levels During Proofing
Maintaining adequate humidity during viennoiseries proofing is just as important as controlling temperature. As the dough rises, its surface is exposed to the air. If the air is dry, the surface of the dough will dry out and form a crust.
This crust can restrict the dough's ability to expand fully, leading to a less voluminous and potentially unevenly risen pastry. A dry surface can also make the dough prone to tearing as it expands, disrupting the delicate structure, especially in laminated doughs. Proper humidity ensures the dough surface remains pliable, allowing for maximum expansion and a smooth, even rise.
Optimal humidity levels for proofing enriched doughs are generally around 70-80%. This might seem high, but it's necessary to counteract the tendency for exposed dough surfaces to dry. Achieving and maintaining this level without specialized equipment requires conscious effort. Simple methods like covering the pastries loosely or creating a steamy environment are fundamental easy viennoiseries proofing techniques that can significantly impact the final outcome, preventing common issues like a tough or restricted crust.
The Importance of Humidity in Preventing a Dry Crust
A dry crust forming on the surface of your viennoiseries during proofing is detrimental to achieving a light and airy texture. As the yeast produces gas, the dough expands. If the surface is dry and rigid, it cannot stretch easily. This resistance forces the gas to push harder, potentially causing blowouts or uneven expansion. Furthermore, a dry crust can hinder the development of a beautiful, golden-brown color during baking, as it doesn't brown as evenly as a moist surface.
Preventing this dry crust ensures that the delicate gluten structure can expand smoothly and uniformly, allowing the pastries to reach their full potential volume. It also contributes to a more tender crumb and a better overall appearance. Implementing techniques to maintain humidity is a simple yet crucial step in the proofing process, ensuring your viennoiseries proof effectively and bake up perfectly.
Techniques for Increasing Humidity During Proofing: [Damp Towel Method, Spritzing, Bowl of Hot Water]
Several easy viennoiseries proofing techniques can be used to increase humidity in your proofing environment. One common method is the "damp towel method." After placing your shaped pastries on a baking sheet, loosely cover the entire sheet with a clean, damp (not wet) kitchen towel or plastic wrap that has been lightly greased with cooking spray to prevent sticking. The moisture from the towel or the sealed environment under the plastic wrap helps maintain humidity around the dough.
Another technique is periodic spritzing. If proofing uncovered or with just a loose cover, you can lightly mist the air around the pastries with a water spray bottle every 15-20 minutes. Be careful not to spray directly onto the dough, as large water droplets can damage the surface.
Finally, as mentioned earlier, placing a bowl or pan of hot water in the proofing area (like the bottom of an oven cavity) is a highly effective way to create a humid atmosphere. The steam generated by the hot water envelops the pastries, keeping their surfaces moist and pliable throughout the proofing period.
Mastering the Proofing Process: Step-by-Step Guide
Preparing Your Viennoiseries for Proofing: [Shaping and Placement on Baking Sheets]
Proper preparation before proofing is essential for success. Once your viennoiseries dough has been laminated, rested, and is ready for shaping, handle it gently to avoid deflating the delicate layers and trapped air. Shape your croissants, pain au chocolat, or other pastries according to the recipe instructions, ensuring even tension and sealing edges well. The way you shape directly impacts the final rise and appearance. For example, when rolling croissants, aim for consistent tightness and size.
After shaping, carefully place the pastries on baking sheets lined with parchment paper. Give them ample space, as they will expand significantly during proofing and baking. Overcrowding can lead to uneven proofing and pastries sticking together. Typically, leave about 2-3 inches between items. This careful placement is the first step in setting up your easy viennoiseries proofing techniques for success.
Determining Proofing Time: Visual Cues and the "Poke Test"
Determining the exact proofing time for viennoiseries isn't a strict science measured only by the clock; it's more about observing the dough's condition. Factors like ambient temperature, dough temperature, yeast activity, and the amount of enrichment (butter, sugar, eggs) in the dough all influence how quickly it proofs. Instead of relying solely on a timer, look for visual cues: the pastries should have increased significantly in size, often doubling or nearly doubling, and appear visibly puffy and airy. The layers in croissants should be more defined.
The most reliable method for determining readiness is the "poke test." Gently press the surface of a pastry with a lightly floured finger. If the indentation springs back immediately, the dough is under-proofed and needs more time. If the indentation remains completely or slowly springs back only slightly, the dough is likely perfectly proofed. If the indentation remains completely and the dough feels fragile and collapses slightly, it is over-proofed. Mastering this test is a key easy viennoiseries proofing technique.
Avoiding Over-Proofing: Recognizing the Signs and Preventing Collapse
Over-proofing is a common pitfall when making viennoiseries, and it can ruin your pastries. The signs of over-proofed dough include a puffy, fragile appearance that looks like it might pop. The poke test will show an indentation that doesn't spring back at all, and the dough may feel slack and lacking structure. If you gently shake the baking sheet, the pastries might jiggle excessively. The pleasant yeasty aroma may also become overly alcoholic or sour.
Preventing over-proofing requires vigilant monitoring, especially as the dough approaches its peak. If you're proofing in a warm environment, check the dough frequently, perhaps every 10-15 minutes in the later stages. If you anticipate being away or need more flexibility, consider retarding the proofing in the refrigerator (see Advanced Tips). This slows down fermentation significantly, giving you a wider window. Learning to recognize these signs and adjusting your timing is crucial for successful easy viennoiseries proofing techniques.
What Happens When Viennoiseries are Over-Proofed?
When viennoiseries are significantly over-proofed, the gluten structure becomes stretched too thin and weak to support the gas produced by the yeast. During baking, the initial oven spring may be minimal or non-existent because the structure lacks the strength to expand further. The dough might collapse in the oven, resulting in flat, dense, and heavy pastries. The beautiful layers in croissants or pain au chocolat can merge together, losing their distinctness and flakiness.
Furthermore, the excessive fermentation can lead to off-flavors. The yeast may consume all available sugars, resulting in pastries that don't brown well and lack sweetness. The build-up of alcohol and acids can give the pastries an unpleasant, sometimes sour or alcoholic taste. The texture can also become gummy or crumbly.
Tips for Addressing Slightly Over-Proofed Dough
If you catch your viennoiseries just slightly over-proofed (they pass the poke test but feel very delicate), there might be a chance to salvage them. Handle them with extreme care to avoid collapsing the fragile structure. You can try carefully placing the baking sheet in the freezer for 10-15 minutes before baking. This chills the butter layers, firming them up slightly, and slows down any remaining yeast activity. The slight chill can help the pastries hold their shape better when they hit the hot oven.
Another approach is to bake them immediately, but be prepared for a potentially less dramatic oven spring and a slightly different texture than perfectly proofed pastries. While you can't fully reverse over-proofing, these steps can sometimes mitigate the worst effects. Learning the signs of over-proofing is key to avoiding this issue in the first place, making your easy viennoiseries proofing techniques more reliable.
Under-Proofing: The Consequences and How to Avoid It
Under-proofing is the opposite problem of over-proofing, and it also leads to disappointing results. When viennoiseries are under-proofed, the dough hasn't had enough time to expand sufficiently and develop its full flavor potential. The gluten structure is likely still too tight, and the yeast hasn't produced enough gas to create a light, open crumb.
To avoid under-proofing, ensure your proofing environment is within the optimal temperature range (75-80°F or 24-27°C) and that you allow sufficient time for the dough to rise. Don't rush the process, especially if your kitchen is cool. Rely on visual cues and the poke test rather than just the clock. If your dough seems sluggish, double-check the temperature of your proofing area.
Identifying Under-Proofed Viennoiseries
You can identify under-proofed viennoiseries through several signs. Visually, they will not have doubled in size; they might look only slightly puffy compared to their shaped state. The layers in laminated doughs might not appear well-defined. When you perform the poke test, the indentation will spring back immediately and completely, indicating that the dough is still too elastic and hasn't relaxed enough. The dough will feel firm and dense to the touch rather than light and airy.
During baking, under-proofed pastries will experience significant oven spring, sometimes even bursting at the seams as the trapped gas desperately tries to escape the tight gluten structure. This excessive oven spring can lead to misshapen pastries with a dense, tight crumb.
Adjusting Proofing Time Based on Dough Condition
Since proofing time is variable, it's crucial to adjust based on the dough's condition rather than a rigid timer. If your viennoiseries are under-proofed according to the visual cues and poke test, simply allow them more time in your warm, humid proofing environment. Check on them frequently using the poke test until they reach the desired state. It might take an extra 15 minutes or even an hour or two, depending on the initial conditions and the dough's temperature.
If you started proofing in a cooler environment and the dough is rising very slowly, you can try moving it to a slightly warmer spot or using one of the easy viennoiseries proofing techniques to increase the temperature of the proofing area (like the oven-off-with-light method). Conversely, if the dough is proofing too quickly, move it to a cooler spot to slow it down. Being responsive to what the dough tells you is key to successful proofing.
Troubleshooting Common Proofing Problems for Viennoiseries
Dough Not Rising: Identifying the Cause and Solutions
One of the most frustrating proofing problems is dough that simply isn't rising. If your viennoiseries look the same after an hour or more in the proofing environment, the primary culprits are usually inactive yeast or an improper proofing temperature. First, check the date on your yeast package to ensure it hasn't expired. Yeast is a living organism, and old yeast loses its potency.
Next, evaluate your proofing environment. Is it warm enough? If the temperature is too low (below 70°F or 21°C), the yeast will be very sluggish. Is it too hot? Temperatures above 130°F (54°C) can kill yeast. Ensure your hot water for humidity isn't making the environment too hot. Addressing these factors is crucial for getting your dough to rise and employing effective easy viennoiseries proofing techniques.
Inactive Yeast: Testing and Reviving Yeast
If you suspect your yeast is inactive, you can test it. For active dry yeast, dissolve it in a small amount of warm water (around 105-115°F or 40-46°C) with a pinch of sugar. Wait 5-10 minutes; it should become foamy and bubbly. If not, the yeast is dead and needs to be replaced. Instant yeast doesn't require proofing beforehand, but if your dough isn't rising, you can test it similarly or assume it's inactive if it's old.
If your dough was made with inactive yeast, unfortunately, there's not much you can do to revive the entire batch of dough. You'll likely need to start over with fresh, active yeast. However, if you used active dry yeast and didn't proof it first, you might try dissolving a little more active dry yeast in warm sugary water, letting it foam, and then carefully kneading that mixture into your dough. This is a bit of a long shot but occasionally works for slightly sluggish dough.
Room Temperature Issues: Adjusting for Cold or Hot Environments
Room temperature plays a significant role in proofing speed. In a cold kitchen (below 70°F/21°C), proofing can take significantly longer than the recipe suggests, potentially doubling the time. In this case, you must actively create a warmer environment using methods like the oven-off-with-light, a proofing box, or placing the dough in a warmer spot in the house. Patience is key, but don't give up just because it's slow.
Conversely, in a very hot kitchen (above 80°F/27°C), proofing can happen very quickly, increasing the risk of over-proofing. You'll need to monitor the dough more frequently, perhaps checking every 15-20 minutes. If it's proofing too fast, moving it to a slightly cooler spot can help. Consistent temperature control is one of the most impactful easy viennoiseries proofing techniques.
Dry and Crusted Dough: Maintaining Proper Humidity
Dry, crusted dough is almost always a sign of insufficient humidity during proofing. The surface has dried out, forming a skin that inhibits expansion. If your dough has developed a significant crust, it's difficult to completely fix, but you can try to mitigate it. Gently mist the surface of the dough very lightly with water and then immediately cover it loosely with greased plastic wrap or a damp towel to trap moisture.
Going forward, prevent this issue by always ensuring adequate humidity from the start. Use one of the techniques mentioned earlier: covering with greased plastic wrap, using a damp towel, or placing a bowl of hot water in the proofing area. Proactive humidity control is much more effective than trying to fix a dried-out crust.
Uneven Proofing: Ensuring Consistent Temperature and Humidity
Uneven proofing, where some pastries on the sheet are perfectly proofed while others lag behind or are already over-proofed, is typically caused by inconsistent temperature or humidity within the proofing environment. For example, pastries closer to a heat source (like a warm oven light or a window) will proof faster than those farther away. Similarly, if humidity isn't evenly distributed, some areas of the sheet might dry out more than others.
To ensure even proofing, try to create as uniform an environment as possible. If using an oven with hot water, ensure the heat and steam can circulate evenly around the baking sheet. Rotate the baking sheet halfway through the proofing time to expose all pastries equally to the warmest and most humid spots. If using plastic wrap or a damp towel, ensure it covers all pastries loosely and evenly. Using a dedicated proofing box often minimizes this issue due to its consistent environment.
Advanced Viennoiseries Proofing Tips for Experienced Bakers
Using a Sourdough Starter for Enhanced Flavor and Proofing
While commercial yeast provides reliable and fast proofing, using a well-maintained sourdough starter can elevate the flavor complexity of your viennoiseries. Sourdough starters contain a symbiotic culture of wild yeasts and lactic acid bacteria. The wild yeasts contribute to leavening, albeit often more slowly than commercial yeast, while the bacteria produce lactic and acetic acids. These acids contribute a subtle tang and depth of flavor that complements the richness of the butter in viennoiseries beautifully.
Proofing with sourdough requires a slightly different approach. Sourdough proofing times are generally longer and more variable, depending on the starter's activity level and the ambient temperature. The "poke test" is still your primary guide, but you'll often need to allow several hours, sometimes even overnight at room temperature, for the dough to reach the correct proof. Many sourdough viennoiseries recipes also incorporate a small amount of commercial yeast alongside the starter to ensure a reliable and sufficient rise, balancing flavor development with structural integrity.
Retarding Viennoiseries: Developing Complex Flavors
Retarding, or cold proofing, is an advanced technique where shaped viennoiseries are proofed slowly in a cool environment, typically the refrigerator (around 38-40°F or 3-4°C), for an extended period, often 8 to 16 hours or even longer. This significantly slows down yeast activity but allows the enzymes in the dough more time to break down complex starches and proteins. This enzymatic action unlocks more flavor compounds, resulting in a richer, more nuanced taste profile.
Retarding also offers practical benefits. It allows bakers to prepare pastries ahead of time and bake them fresh the next morning. The cold also solidifies the butter layers in laminated dough, which can contribute to better oven spring and flakier layers when the cold pastries hit the hot oven. It's important to cover the pastries well to prevent drying in the refrigerator. After retarding, pastries may need a short period at room temperature before baking, depending on how long they were chilled and the recipe's instructions.
Adjusting Proofing Times for Different Viennoiseries Recipes
Not all viennoiseries proof the same way or require the same proofing time. The specific recipe, the amount of enrichment (butter, sugar, eggs), the type and amount of yeast used, and the dough's temperature all play a role. A highly enriched dough with lots of butter and sugar might proof more slowly than a leaner dough because these ingredients can inhibit yeast activity slightly.
Recipes for different types of viennoiseries might also recommend different proofing levels. For instance, croissants are often proofed until they are very light and airy, showing significant expansion and defined layers, as this contributes to their signature flakiness. Pain au chocolat, while similar, might have slightly different proofing cues depending on the specific shaping method and desired final texture. Always refer to your specific recipe's guidance while still using the poke test and visual cues as your primary indicators of readiness.
Pain au Chocolat Proofing Considerations
Pain au chocolat, with its internal chocolate batons, has specific proofing considerations. The weight and presence of the chocolate can slightly affect how the dough rises. It's crucial that the dough is sufficiently proofed to lift and expand around the chocolate without tearing. Like croissants, they need to become significantly puffy and airy, showing defined layers. The poke test is vital here; the dough around the chocolate should feel light and hold the indentation well.
Ensure the chocolate is fully enclosed during shaping to prevent it from leaking out during proofing or baking. Proofing them with adequate space on the baking sheet is also important, as they expand both in width and height. Aim for a proof that results in a light, airy pastry that can support the chocolate within its structure during the bake.
Croissant Proofing Specifics
Croissants are perhaps the most iconic example where proofing level is paramount for achieving the desired outcome. Properly proofed croissants should look dramatically different from their shaped state – they should be significantly larger (often appearing double or more in volume), visibly puffy, and the layers should be clearly defined, almost separated, around the edges. They will feel incredibly light and delicate.
The poke test for croissants is particularly telling. A perfectly proofed croissant will retain the indentation from a gentle poke and feel like a fragile cloud. Under-proofing leads to a dense, bread-like interior and less flaky exterior, while over-proofing risks the layers collapsing and the final pastry being flat and greasy. Achieving this specific level of puffiness through careful temperature, humidity, and timing is the hallmark of successful easy viennoisseries proofing techniques for croissants.
Achieving Light and Airy Viennoiseries: The Role of Proofing in the Final Result
Linking Proper Proofing to the Desired Texture and Appearance
Proper proofing is the bridge between a well-made dough and a light, airy, and beautifully layered viennoiserie. The expansion during proofing creates the internal structure – the network of air pockets and separated layers – that defines the final texture. When the dough is proofed just right, it enters the oven ready to achieve maximum oven spring, expanding further as the trapped gases and melting butter create steam, pushing the layers apart.
This results in that characteristic open, tender crumb and the numerous flaky layers on the exterior. Visually, a well-proofed viennoiserie will have a significant volume increase and a delicate, almost translucent appearance before baking. The final baked pastry will be tall, golden brown, and exceptionally light for its size. It's clear that mastering easy viennoiseries proofing techniques is indispensable for achieving these desired qualities.
Final Baking Steps: Optimizing Oven Temperature and Baking Time After Proofing
Proofing sets the stage, but the final bake is where the magic is locked in. Viennoiseries are typically baked at a relatively high temperature, often starting around 400-425°F (200-220°C), sometimes with an initial burst of even higher heat. This high temperature causes rapid oven spring, quickly solidifies the gluten structure, and helps melt the butter to create steam, separating the layers.
Baking time varies depending on the size and type of pastry, but it's crucial to bake them until they are deeply golden brown on all sides. Under-baked viennoiseries will be doughy and lack structure. The high heat ensures a crisp exterior, while the steam from the melting butter and trapped moisture keeps the interior tender. Properly proofed pastries will bake more evenly and achieve a better rise than those that were under- or over-proofed.
Enjoying Your Perfectly Proofed Viennoiseries: Serving Suggestions
Once your perfectly proofed and baked viennoiseries emerge from the oven, the final step is to enjoy the fruits of your labor! Allow them to cool on a wire rack for at least 15-20 minutes before cutting or serving. This allows the internal structure to set and the steam to dissipate slightly, preventing a gummy interior.
Serve them warm for the best experience, perhaps with a dusting of powdered sugar, a dollop of jam, or simply on their own to appreciate the rich, buttery flavor and exquisite texture achieved through careful attention to detail, especially those easy viennoisseries proofing techniques. Share them with friends and family and take pride in the light, airy pastries you created.
Frequently Asked Questions
What exactly are viennoiseries, and why is proofing so important for them?
Viennoiseries are yeast-leavened pastries, like croissants and pain au chocolat. Proofing is essential because it allows the yeast to produce carbon dioxide, creating the light and airy texture that defines them. Without proper proofing, they'll be dense and flat.
How do Easy viennoiseries proofing techniques differ from proofing other types of dough?
Viennoiseries often contain high amounts of butter and sugar, which can inhibit yeast activity. Easy viennoiseries proofing techniques often involve controlled temperature and humidity to overcome these challenges and ensure optimal rise.
What's the ideal temperature range for Easy viennoiseries proofing techniques?
The ideal temperature range is generally between 75-80°F (24-27°C). Higher temperatures can melt the butter layers, while cooler temperatures will significantly slow down the proofing process, impacting the final texture.
How can I tell if my viennoiseries are properly proofed using Easy viennoiseries proofing techniques?
Properly proofed viennoiseries will be visibly larger, feel light and airy, and jiggle slightly when gently shaken. They should also have a slightly glossy surface indicating the yeast is active.
What are some common mistakes to avoid when using Easy viennoiseries proofing techniques?
Over-proofing can lead to collapsed pastries. Under-proofing will result in dense, heavy textures. Maintaining consistent temperature and humidity is crucial, as is avoiding drafts that can dry out the dough's surface.
Final Reflection: Mastering the Art of Viennoiserie Proofing
The pursuit of the perfect viennoiserie, light and airy as a cloud, hinges on a single, often underestimated, element: proofing. This seemingly simple step is the cornerstone of successful viennoiserie baking, transforming dough into delicate, layered masterpieces. Mastering proofing techniques isn't just about following a recipe; it's about understanding the delicate dance between time, temperature, and dough.
The impact of proper proofing extends far beyond the individual baker's kitchen. It's a testament to the power of patience and precision in achieving culinary excellence. The subtle nuances of a perfectly proofed croissant, the ethereal lightness of a pain au chocolat – these are sensory experiences that speak to a deeper appreciation for the craft. As the renowned pastry chef, Michel Roux, once said, Baking is a science, but it's also an art. You need to understand the science to appreciate the art.
This perfectly encapsulates the journey of mastering viennoiserie proofing – a journey that blends scientific understanding with artistic intuition.
Now, consider your own baking journey. What techniques have you found most effective in achieving that perfect proof? Perhaps you've discovered the ideal temperature for your environment, or maybe you've experimented with different proofing containers. Don't be afraid to experiment, to adapt, and to refine your techniques. The path to mastering viennoiserie proofing is a personal one, filled with discoveries and delightful surprises. Embrace the process, savor the results, and let the aroma of perfectly proofed pastries fill your kitchen with the sweet scent of success.
Unlock Your Inner Pastry Chef: Rise to the Occasion!
Thanks for taking the time to explore the secrets of light and airy viennoiseries! We hope you’ve gained valuable insights into perfecting your proofing techniques. Now, it's time to put your newfound knowledge into action.
- Bake your dream viennoiserie: Choose your favorite recipe (or try a new one!) and apply your improved proofing skills. Don't be afraid to experiment! This is the key step.
- Share your success (or challenges!): Snap a picture of your beautiful creations and share them on social media using #BakeWithEaseViennoiseries. Let's inspire each other!
- Dive deeper into the world of baking: Explore other articles on our site to expand your baking knowledge and discover new techniques.
Ready to transform your baking game? What’s the first viennoiserie you’ll be tackling with your newly honed proofing skills?