
Traveling with Sourdough: Keeping Your Starter Alive on the Go


Welcome to BakeWithEase, your trusted companion on your baking journey! Ever wondered how to keep your precious sourdough starter thriving while you're on the move? Traveling with a sourdough starter doesn't have to be a daunting task. Discover our essential travel tips and tricks below, ensuring your bubbly friend arrives safely and ready to create delicious, tangy masterpieces. Let's explore the secrets to keeping your starter happy, no matter where life takes you!
- Introduction: Sourdough Starter Travel Tips for Bakers
- Why Travel with Your Sourdough Starter? Benefits & Considerations
- Pre-Travel Preparation: Preparing Your Sourdough Starter for its Journey
- Packing Your Sourdough Starter for Travel: Safe and Secure
- Maintaining Your Sourdough Starter While Traveling: Daily Care on the Road
- Reviving Your Sourdough Starter After Travel: Getting Back to Baking
- Sourdough Starter Travel Checklist: Essential Items
- Advanced Sourdough Travel Techniques: Tips for Experienced Bakers
- Conclusion: Enjoying Sourdough Baking on Your Travels
-
Frequently Asked Questions
- How do I prepare my sourdough starter for travel?
- What's the best container for transporting my sourdough starter?
- How often should I feed my sourdough starter while traveling?
- How do temperature changes affect my sourdough starter during travel?
- What do I do if my sourdough starter becomes inactive during travel?
- Final Reflection: The Enduring Journey of a Sourdough Starter
- Unleash Your Wandering Baker: Keep Your Starter Thriving!
Introduction: Sourdough Starter Travel Tips for Bakers
Bringing your sourdough starter with you on vacation or a business trip might seem like a daunting task. After all, this isn't just an ingredient; it's a living culture that requires care and attention. Many bakers feel tied to their kitchens, worrying about leaving their starter behind. But with the right sourdough starter travel tips and preparation, you absolutely can take your beloved starter on the road and even bake with it wherever you go!
This guide will walk you through everything you need to know, from preparing your starter for the journey to maintaining its health while traveling and reviving it upon arrival. Whether you're going on a short weekend getaway or a longer adventure, these tips will help ensure your starter survives the trip and is ready to bake when you are. Traveling with sourdough adds a unique element to your journeys, allowing you to enjoy fresh, homemade bread no matter your location.
Why Travel with Your Sourdough Starter? Benefits & Considerations
The Allure of Baking Sourdough on Vacation
There's a unique satisfaction in baking with your own starter in a new environment. Imagine waking up in a cozy cabin or a rental home and baking a fresh loaf of sourdough bread for breakfast. It connects you to your baking passion even when away from your usual routine. For many, the starter is a part of their daily rhythm, and bringing it along simply maintains that comforting connection.
Baking on vacation can also be a fun way to explore local ingredients. You might find unique flours at a regional market or use different water sources, potentially influencing the flavor and texture of your bread in interesting ways. Sharing a loaf baked with your familiar starter in a new place creates memorable experiences, whether you're baking for family, friends, or simply for yourself to enjoy the fruits of your labor in a different setting.
Challenges of Traveling with a Live Sourdough Starter
While the idea is appealing, traveling with a live sourdough starter presents several challenges. The most significant is managing temperature fluctuations. Starters are sensitive to heat and cold; extreme temperatures can stress or even kill them. A starter left in a hot car, for example, could overheat and collapse quickly, while prolonged exposure to cold can make it sluggish.
Another challenge is maintaining a consistent feeding schedule and finding suitable flour and water. Different locations have varying water quality, and not all grocery stores carry the type of flour your starter is accustomed to. Security regulations, especially when flying, also need consideration. Liquid starters can be subject to volume restrictions, requiring careful planning to comply with TSA guidelines if traveling by air. These are all factors bakers must consider when planning their sourdough starter travel tips strategy.
Pre-Travel Preparation: Preparing Your Sourdough Starter for its Journey
Feeding Your Starter Before Traveling: Timing is Key
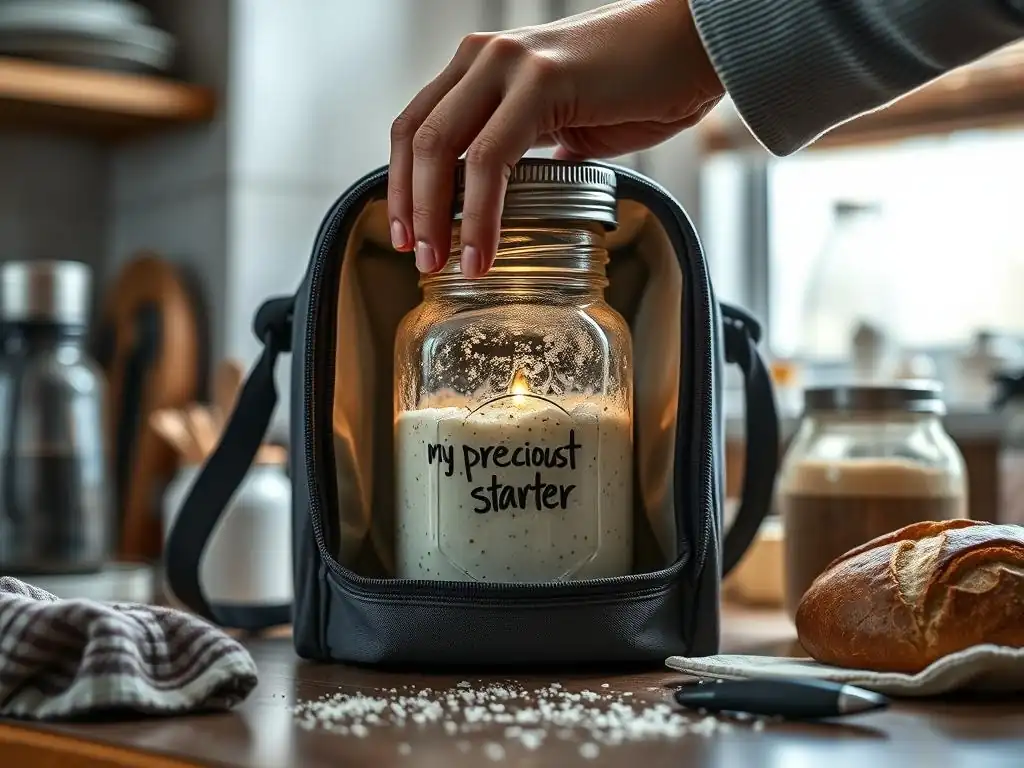
Properly feeding your starter before you leave is crucial for its survival and health during travel. A robust, well-fed starter is more resilient to changes in environment. For most trips lasting a few days, feeding your starter 4-12 hours before departure is ideal. This ensures it's active and has a good amount of food to consume while on the go.
Consider feeding your starter a slightly larger ratio than usual, perhaps a 1:2:2 ratio (1 part starter, 2 parts water, 2 parts flour) by weight, instead of the standard 1:1:1. This provides more 'fuel' for its journey, allowing it to remain active for a longer period before needing another feed. Using warm water (around 75-80°F or 24-27°C) for the final feed can also help ensure peak activity before packing it up.
Dehydrating Your Sourdough Starter: A Space-Saving Option
For longer trips or when space is limited, dehydrating your sourdough starter is an excellent option. This process involves spreading a thin layer of active starter onto parchment paper or a silicone mat and allowing it to dry completely until it's brittle and flaky. Once dried, it can be easily broken into pieces or ground into a powder and stored in an airtight container or bag.
Dehydrated starter is incredibly resilient. It doesn't require feeding and is not sensitive to temperature fluctuations in the same way a liquid starter is. A small bag of dried starter takes up minimal space and easily passes through security checks. You can typically dehydrate about 50-100 grams of active starter to have plenty for revival later, knowing that even a few flakes are enough to bring it back to life.
Preparing a Sourdough Starter Backup: Just in Case
Even with the best sourdough starter travel tips, unforeseen issues can arise. It's always a good idea to prepare a backup of your starter before you leave. This could be a small amount left with a trusted friend or family member who knows how to feed it, or a portion of your starter that you've dehydrated and left at home.
Having a backup provides peace of mind. If your traveling starter becomes moldy, dies due to extreme temperatures, or is lost during transit, you won't have to start from scratch. A small backup, even just 10-20 grams of active starter or a few grams of dehydrated starter, can save you weeks of effort in rebuilding your culture when you return home.
Packing Your Sourdough Starter for Travel: Safe and Secure
Choosing the Right Container for Your Sourdough Starter
Selecting an appropriate container is vital for transporting your liquid sourdough starter. An airtight container is necessary to prevent leaks, but it's important not to seal it completely airtight if your starter is very active and you won't be opening it for several hours, as the gas buildup could cause it to burst. Wide-mouth mason jars or plastic containers with secure, but not vacuum-sealed, lids are good choices.
Choose a container size that is slightly larger than the amount of starter you plan to travel with. This allows room for expansion, especially if your starter is active. A 16-ounce (500ml) jar is often sufficient for traveling with 50-100 grams of fed starter. Ensure the container is clean and dry before adding your starter.
Packing Dehydrated Sourdough Starter for Travel
Packing dehydrated starter is much simpler. Since it's not active and won't produce gas, it can be stored in any airtight container or bag. Small zip-top bags or tiny jars work perfectly. Ensure the starter is completely dry before sealing it to prevent mold growth during storage.
Label the container clearly so you know exactly what it is when you unpack. Store it in a cool, dry place away from direct sunlight within your luggage. Because it's dry and non-perishable in this state, it's the easiest form of sourdough starter to travel with, requiring minimal special handling during transit.
Temperature Control: Keeping Your Starter Happy
Maintaining a stable temperature is critical for a liquid starter while traveling. Avoid leaving your starter in places that experience extreme temperature swings, such as a hot car dashboard or a freezing airplane cargo hold (if traveling internationally and checking bags). If traveling by car, keep the starter inside the climate-controlled cabin.
For added protection, consider using an insulated bag or small cooler, especially if you anticipate being in warm conditions or if your journey involves periods where the starter might be left unattended (like in a hotel room while you're out). Packing it snugly amongst clothes in your suitcase can offer some insulation against minor temperature changes during transport. Aim to keep your starter within a temperature range of approximately 60-80°F (15-27°C) if possible.
Maintaining Your Sourdough Starter While Traveling: Daily Care on the Road

Feeding Schedule Adjustments: Adapting to Your Travel Itinerary
While on the road, you might need to adjust your starter's feeding schedule. If your starter is refrigerated at home, you'll need to feed it more frequently at room temperature while traveling. A standard ratio like 1:1:1 (starter:water:flour by weight) every 12-24 hours should suffice, depending on the ambient temperature. Warmer temperatures mean more frequent feeding, perhaps every 8-12 hours if it's quite warm (above 75°F or 24°C).
If you can't feed it on its usual schedule, don't panic. Your starter is more resilient than you might think. If you miss a feeding, simply feed it when you can. It might be a bit sluggish initially, but consistent feeding will bring it back to its usual activity level. Observe its behavior – the rise and fall – to guide your feeding frequency.
Finding Suitable Water and Flour While Traveling
Finding the right ingredients is part of the sourdough starter travel tips adventure. Most municipal tap water is fine for feeding, although some chlorinated water can slow a starter down. If you suspect high chlorine, letting the tap water sit uncovered for 24 hours or using filtered or bottled water can help. Look for plain, unflavored bottled water without added minerals.
For flour, aim for unbleached all-purpose flour or bread flour if possible, as this is what most starters are accustomed to. Small bags of flour are available at many grocery stores. If you can only find bleached flour or a different type, your starter will likely adapt, though it might behave slightly differently. Using a small amount of whole wheat or rye flour (even just a tablespoon) can sometimes boost a sluggish starter if you're having trouble finding suitable white flour.
Monitoring Starter Activity: Watch for Signs of Health
Keep an eye on your starter's activity levels while traveling. A healthy starter should rise after feeding, showing bubbles throughout the culture and on the surface. It should also have a pleasant, slightly tangy aroma. If your starter isn't rising as much, seems very liquidy, or has a strong, unpleasant smell (like nail polish remover), it might be stressed or hungry.
Increased feeding frequency or a slightly warmer spot might help. If it develops a liquid layer on top (hooch), it's a sign it's hungry and needs a feed. Simply stir the hooch back in or pour it off before feeding. A healthy starter will typically double or triple in size within 4-12 hours after a feed at room temperature, depending on the temperature and feeding ratio.
Reviving Your Sourdough Starter After Travel: Getting Back to Baking
Rehydrating Dehydrated Sourdough Starter: Step-by-Step Guide
Reviving dehydrated starter is straightforward. Start by placing a small amount (e.g., 10-20 grams) of the dried flakes or powder in a clean jar. Add an equal weight of warm water (e.g., 10-20 grams) and let it sit for a few hours until the flakes soften and dissolve into a paste. Stir well to ensure no dry bits remain.
Once it's a paste, feed it a small amount of flour, perhaps equal to the initial dry weight (10-20 grams). Mix thoroughly. Over the next 1-3 days, continue feeding it daily with equal parts water and flour (e.g., 20g paste, 20g water, 20g flour). Keep it in a warm spot (75-80°F or 24-27°C if possible). You'll gradually see signs of life – small bubbles, a slightly tangy smell, and eventually, a noticeable rise after feeding. Once it's consistently doubling within 6-12 hours, it's ready to bake with.
- Place 10-20g dry starter in jar.
- Add 10-20g warm water. Let sit ~2-4 hours until paste forms.
- Stir, add 10-20g flour. Mix.
- Feed daily (1:1:1 ratio) until active (doubles in size).
Feeding and Refreshing a Liquid Starter After Travel
If you traveled with a liquid starter, it might be quite hungry upon arrival, especially if you couldn't feed it regularly. It might have a layer of hooch and smell strongly of alcohol or acetone. Don't worry; it's usually fine. Pour off the hooch if desired (or stir it in), discard most of the starter, leaving a small amount (e.g., 20-30 grams), and give it a generous feeding.
A feeding ratio of 1:2:2 or even 1:3:3 (starter:water:flour) can help revive it quickly. Use warm water (around 80°F or 27°C) to encourage activity. Feed it every 12-24 hours, discarding down to the same small amount (20-30g) before each feed, until it's consistently doubling or tripling in size within 6-12 hours after feeding. This process might take 1-3 refresh cycles depending on how stressed the starter became during travel.
Troubleshooting: What to Do if Your Starter is Sluggish
A sluggish starter after travel is common. The change in environment, temperature stress, or irregular feeding can all impact its activity. First, ensure you're using suitable flour and water and that the temperature is warm enough (ideally 75-80°F or 24-27°C). Move it to a warmer spot if necessary – near a warm appliance or in a proofing box if you have one.
Try incorporating a small amount of rye or whole wheat flour into its feedings (e.g., 10% rye, 90% white flour). These flours are rich in nutrients that can help kickstart microbial activity. Ensure you are discarding enough starter before feeding; keeping too much old, hungry starter can dilute the activity of the fresh feed. If it's been neglected for an extended period, you may need several consistent feedings (2-4 days) to see it return to its former glory.
Sourdough Starter Travel Checklist: Essential Items
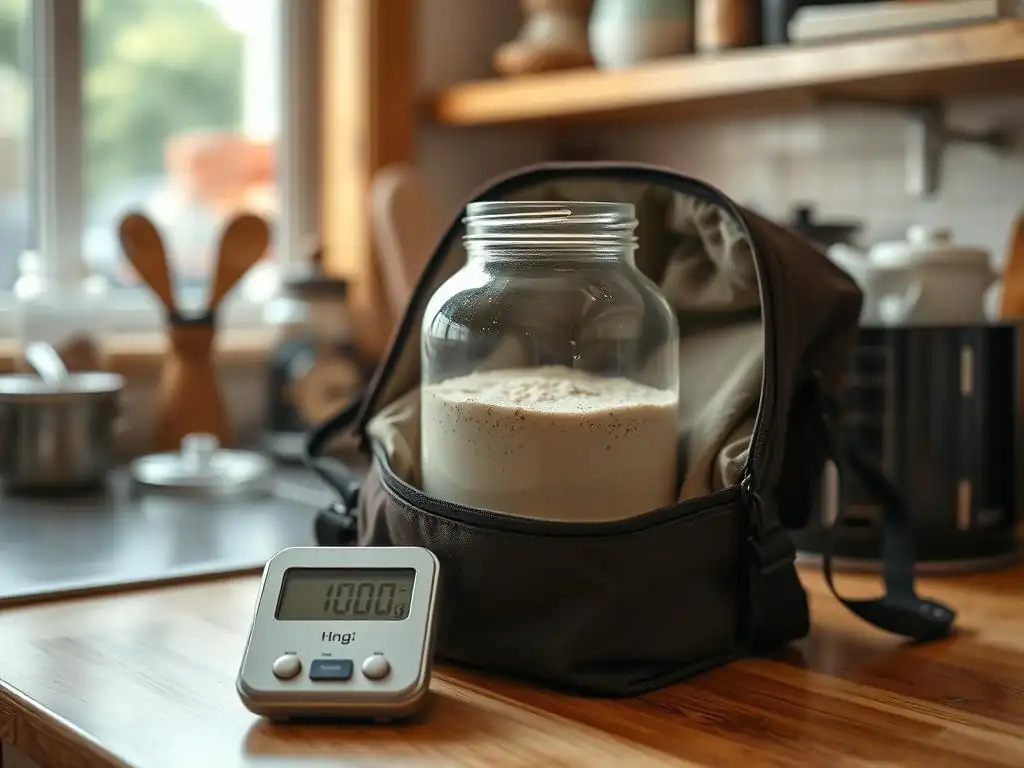
Preparing a small kit can make traveling with your sourdough starter much easier. Having the right tools and supplies on hand prevents last-minute scrambling and ensures you can care for your starter properly no matter where you are. This sourdough starter travel tips checklist covers the basics.
Container Options for Sourdough Travel
- Clean, leak-proof container with a lid (mason jar with plastic lid, secure plastic container)
- Optional: Insulated bag or small cooler for temperature control
- For dehydrated starter: Small airtight bag or jar
Feeding Supplies on the Go
- Small bag of the type of flour your starter prefers (approx. 1-2 cups or 250-500g)
- Small scale for measuring (a portable digital scale is ideal, weighing just a few ounces)
- Water (bottled or filtered if tap water quality is uncertain)
- Small spoon or spatula for stirring
- Optional: Small amount of rye or whole wheat flour for boosting activity
Temperature Monitoring Tools
- Optional: Small probe thermometer or stick-on thermometer for the container/location
- Awareness of ambient temperature
[ ] Choose travel container
[ ] Feed starter before travel
[ ] Pack flour
[ ] Pack scale
[ ] Pack spoon/spatula
[ ] Pack water (or plan to buy)
[ ] Pack insulated bag (if needed)
[ ] Pack thermometer (if desired)
[ ] Prepare backup (dehydrate/leave at home)
Advanced Sourdough Travel Techniques: Tips for Experienced Bakers
Long-Term Sourdough Starter Travel
For extended travel (weeks or months), dehydrating is often the most practical solution. However, if you prefer to keep a liquid starter, you'll need a strategy for consistent feeding. This might involve finding a baker or friend at your destination willing to care for it, or planning for regular feeding stops if on a road trip.
Alternatively, you can put your starter into a very low-maintenance state. Feed your starter a very stiff ratio (e.g., 1 part starter, 0.5 parts water, 1 part flour) and store it in a cooler part of your accommodation (like a mini-fridge if available). This stiff consistency and cooler temperature significantly slow down fermentation, requiring feeding only once every 5-7 days or even less frequently. You'll need to revive it with a few liquid feedings before baking, but it's viable for longer periods.
Baking Sourdough in Different Climates
Baking results can vary significantly depending on climate, particularly humidity and temperature. High humidity can make dough stickier, requiring slightly less water or more flour. Low humidity can cause dough to dry out faster, requiring more careful hydration management and covering.
Temperature directly affects fermentation speed. In warm climates (above 75°F or 24°C), dough will rise much faster; you might need to reduce bulk fermentation or proofing times or use cooler water. In cold climates (below 65°F or 18°C), fermentation slows down; you might need to find a warmer spot for your dough or extend rise times. Experienced bakers learn to read their dough and adjust based on the environmental cues, making small tweaks to their usual process. For example, in a humid Florida climate, you might decrease hydration by 2-3% compared to baking in a dry Arizona climate.
Conclusion: Enjoying Sourdough Baking on Your Travels
Traveling with your sourdough starter is not only possible but can also enrich your travel experience. By following these sourdough starter travel tips, you can ensure your starter remains healthy and vibrant, ready to bake delicious bread wherever your journey takes you. From careful pre-travel preparation, like strategic feeding or dehydration, to smart packing and attentive care on the road, each step contributes to successful sourdough travel.
Don't let the fear of leaving your starter behind limit your adventures. With a little planning and care, you can enjoy the satisfying process of sourdough baking and the taste of homemade bread, bringing a piece of your home kitchen with you on your travels. So pack your bags, pack your starter, and get ready to bake your way around the world!
Frequently Asked Questions
How do I prepare my sourdough starter for travel?
Before traveling, feed your starter and let it ferment until it's slightly past its peak. This will give it the most sustained activity during transport. Ensure it is in a secure container to prevent leaks.
What's the best container for transporting my sourdough starter?
A screw-top jar with a wide mouth is ideal to prevent pressure build-up. Make sure the lid is tightly sealed and consider using a clip or rubber band for extra security. A plastic container with a secure lid is also a good option.
How often should I feed my sourdough starter while traveling?
The frequency of feeding depends on the length of your trip and the temperature. If travelling for a short period (1-3 days), you might not need to feed it at all if properly prepared. For longer trips, feed it as needed, usually every 2-3 days, or if it appears deflated.
How do temperature changes affect my sourdough starter during travel?
Extreme temperature changes can impact starter activity. Keep it in a cool, stable environment if possible, avoiding direct sunlight or extreme heat. If temperatures are very cold, insulate it slightly to prevent it from becoming dormant.
What do I do if my sourdough starter becomes inactive during travel?
If your starter appears inactive, don't panic! Once you arrive at your destination, feed it regularly (every 12-24 hours) at room temperature. It might take a few feedings for it to revive and become active again.
Final Reflection: The Enduring Journey of a Sourdough Starter
The enduring appeal of sourdough bread transcends mere culinary delight; it's a testament to patience, nurturing, and the symbiotic relationship between human and microbe. This journey of keeping your starter alive while traveling, as detailed in this article, highlights not only practical tips for maintaining your bubbly companion but also the deeper connection we forge with the natural world through simple acts of cultivation. The seemingly small act of caring for a sourdough starter mirrors the larger responsibility we have towards our environment and the delicate ecosystems that sustain us.
The impact of sourdough's resurgence extends far beyond the kitchen; it represents a return to slower, more mindful practices in a fast-paced world. It's a tangible link to traditions past, a reminder of the interconnectedness of life, and a source of immense satisfaction. Bread is the staff of life,
they say, and in the case of sourdough, that staff is imbued with a living history, a testament to the enduring power of simple ingredients and patient care. This personal connection to the process, the daily ritual of feeding and caring for my starter, has profoundly impacted my appreciation for the food I consume and the world around me.
Now, consider your own journey. Will you embrace the challenge of traveling with your sourdough starter, embracing the adventure and the responsibility it entails? Perhaps you'll discover a new appreciation for the patience and care required to nurture something living, something that thrives on your attention and dedication. Or maybe this article will inspire you to start your own sourdough journey, embarking on a path of culinary exploration and mindful living. Either way, remember the enduring power of a simple starter – a potent symbol of connection, patience, and the enduring magic of nature's gifts.
Unleash Your Wandering Baker: Keep Your Starter Thriving!
Thanks for joining us on this sourdough journey! We hope you now feel confident about keeping your bubbly friend alive, even while exploring the world. Ready to put your newfound knowledge into practice?
- Plan your starter's travel itinerary: Consider its feeding schedule and pack accordingly. Think mini-containers and lightweight, non-perishable food for feeding!
- Share your travel baking adventures: Post pictures of your sourdough creations from the road on social media – use #BakeWithEaseTravel to connect with other adventurous bakers!
- Experiment with local flours: Try baking with different flours from your destinations – discover how they impact your sourdough's flavor and texture!
What unique sourdough adventures await you and your starter? Let's hear your plans in the comments below!