
My Starter Isn't Bubbly: Why and How to Fix It

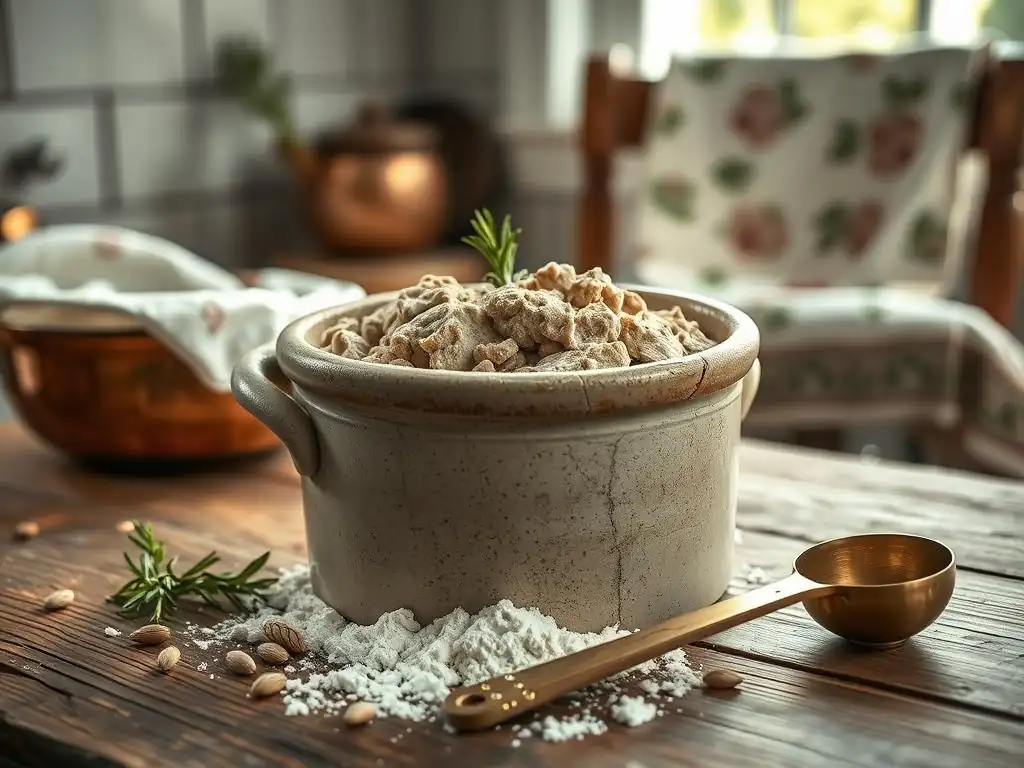
Welcome to BakeWithEase, your companion in the delightful world of baking! Ever wondered why your sourdough starter isn't bubbly despite your best efforts? You're not alone! Unlocking the secrets to a thriving starter is crucial for perfect loaves, and we're here to guide you. Dive into our expert tips and troubleshooting techniques to revive your starter and embark on your sourdough journey with confidence. Get ready to transform that sluggish starter into a bubbling powerhouse!
- My Sourdough Starter Isn't Bubbly: Why and How to Fix It
- Understanding Sourdough Starter Activity: Why the Lack of Bubbles?
-
Common Reasons for a Sourdough Starter Not Bubbling
- Inconsistent Feeding Schedule: Affecting Starter Activity
- Incorrect Flour Type: Impact on Fermentation
- Water Temperature Issues: Too Hot or Too Cold?
- Room Temperature Fluctuations: Slowing Down or Speeding Up Fermentation
- Contamination: Unwanted Bacteria Inhibiting Growth
- Initial Starter Stage: Patience is Key
- Using Chlorinated Water: Negatively Affecting Microorganisms
- Troubleshooting a Non-Bubbly Sourdough Starter: A Step-by-Step Guide
- Signs of a Healthy, Active Sourdough Starter (Beyond Bubbles)
- Preventing Future Issues: Maintaining a Bubbly Sourdough Starter
- Reviving a Sluggish Starter: Advanced Techniques
- When to Start Over: Recognizing Unrecoverable Starters
-
Frequently Asked Questions
- Why is my sourdough starter not bubbly?
- What temperature is ideal for a bubbly sourdough starter?
- What type of flour should I use to feed my sourdough starter?
- How often should I feed my sourdough starter to encourage bubbles?
- How long does it typically take for a sourdough starter to become bubbly and active?
- Final Reflection: The Unexpected Joys (and Frustrations) of a Living Starter
- Unleash Your Inner Baker: Get Baking Today!
My Sourdough Starter Isn't Bubbly: Why and How to Fix It
Understanding Sourdough Starter Activity: Why the Lack of Bubbles?
A thriving sourdough starter is the heart of artisan bread baking. It's a living culture, a symbiotic community of wild yeast and lactic acid bacteria that work together to leaven your bread and give it that characteristic tangy flavor. The visible signs of this activity, particularly bubbles, are often the first indicators bakers look for to gauge their starter's health and readiness. When you find your starter isn't showing those expected bubbles, it can be disheartening, leading you to wonder why sourdough starter not bubbly.
Understanding the biological processes happening within your jar is key. The wild yeasts consume sugars present in the flour and produce carbon dioxide gas and alcohol as byproducts. The lactic acid bacteria ferment sugars into lactic and acetic acids, contributing to the flavor and helping to break down the flour. Bubbles are primarily the carbon dioxide gas produced by the yeast getting trapped in the gluten network formed by the flour and water. A lack of bubbles suggests that either the yeast activity is low, the gas is escaping, or the environment isn't conducive to gas production or retention.
The Importance of Bubbles in Sourdough Starter
Bubbles serve as a crucial visual cue for bakers. They indicate that the wild yeast population within your starter is actively consuming the food (flour) and producing gas. This gas production is what will eventually leaven your bread, causing it to rise. A starter with vigorous bubble activity, especially after feeding, suggests a healthy, active yeast population capable of providing the lift needed for a successful loaf.
Beyond just leavening, bubbles also indirectly reflect the overall health of the microbial community. A starter that bubbles reliably after feeding is likely in a balanced state, where yeast and bacteria are coexisting and thriving. While other factors like rise and fall are also important, the presence and consistency of bubbles are often the most immediate and accessible indicators of fermentation progress and strength for many home bakers.
What Does "Bubbly" Actually Mean for Your Starter?
"Bubbly" in the context of a sourdough starter typically refers to visible pockets of gas trapped within the starter's matrix. These can range from large, obvious bubbles on the surface or sides of the jar to smaller, more numerous bubbles distributed throughout the starter's mass. The amount and size of bubbles can vary depending on the starter's hydration level, the type of flour used, and the stage of fermentation.
A starter is considered "bubbly" when you see this active gas production, usually peaking several hours after a feeding. For instance, a starter fed a 1:1:1 ratio (starter:flour:water) at 75°F (24°C) might start showing significant bubbles within 4-6 hours, doubling or tripling in volume and displaying a network of bubbles throughout before starting to fall. The presence of these bubbles, along with a noticeable rise, confirms that the yeast are metabolizing effectively and generating the necessary gas for leavening.
Common Reasons for a Sourdough Starter Not Bubbling
When you're asking why sourdough starter not bubbly, several factors could be at play. Pinpointing the exact cause often involves reviewing your current practices and the starter's environment. These issues are frequently related to food, water, temperature, or the age and state of the starter itself.
Understanding these common culprits is the first step in troubleshooting. It's rare for a starter to die completely unless mold or an off smell is present; more often, it's just sluggish or dormant due to suboptimal conditions. By systematically checking each potential issue, you can often revive a quiet starter and get it back to a bubbly, active state, ready to make delicious bread.
Inconsistent Feeding Schedule: Affecting Starter Activity
One of the most frequent reasons why sourdough starter not bubbly is an irregular or infrequent feeding schedule. Sourdough starters are living cultures that need consistent nourishment. If you don't feed your starter often enough, the yeast and bacteria consume all the available food (flour) and become dormant or weaken significantly. Imagine not eating for days – you wouldn't have much energy either!
Feeding provides fresh flour, which is the fuel for the microorganisms. A starter that is fed regularly, say every 12 or 24 hours when kept at room temperature, maintains a healthy and active population because it always has a fresh supply of sugars to ferment. Conversely, a starter left unfed for too long will deplete its food source, and its activity will decrease dramatically, resulting in minimal to no bubble production until it is properly fed again.
Incorrect Flour Type: Impact on Fermentation
The type of flour you use plays a significant role in starter activity and bubble production. Bleached all-purpose flour, for instance, has had much of its bran and germ removed, which contain many of the nutrients and microorganisms wild yeast thrive on. While you can make a starter with it, it may take longer to become active or produce fewer visible bubbles compared to unbleached flour.
Unbleached flours, especially whole wheat or rye, contain more nutrients and often a higher concentration of natural microorganisms present on the grain. Using a small amount of rye or whole wheat flour (even just a tablespoon or two per feeding) can often give a sluggish starter a significant boost in activity and bubble formation. The enzymes in these flours also help break down complex starches into simpler sugars, providing more readily available food for the yeast.
Water Temperature Issues: Too Hot or Too Cold?
The temperature of the water you use for feeding can either help or hinder your starter's activity. Water that is too cold can shock the microorganisms and slow down their metabolic processes, leading to reduced gas production and fewer bubbles. Using cold tap water, especially in a cool kitchen, will likely result in a very sluggish starter.
Conversely, water that is too hot can kill the delicate balance of yeast and bacteria in your starter. While they like warmth, they cannot survive extreme temperatures. Using water hotter than about 85°F (29°C) is risky and can severely damage or kill your starter culture, explaining why sourdough starter not bubbly in such cases. Aim for lukewarm water, ideally between 75°F and 80°F (24°C-27°C), which is the sweet spot for encouraging yeast and bacterial activity.
Room Temperature Fluctuations: Slowing Down or Speeding Up Fermentation
Environmental temperature is a major factor influencing how active your sourdough starter is. Yeast and bacteria are more active in warmer temperatures, typically between 70°F and 80°F (21°C-27°C). If your kitchen is cool, say below 65°F (18°C), the microorganisms will be sluggish, fermenting slowly and producing very few bubbles. This is a common reason why sourdough starter not bubbly during colder months.
Conversely, very high temperatures, consistently above 85°F (29°C), can cause the starter to ferment too quickly, potentially leading to a faster depletion of food and a quicker fall, making it seem less bubbly over a typical observation period, or it could encourage the growth of less desirable microorganisms. Finding a stable, warm spot is crucial for consistent and visible activity.
Contamination: Unwanted Bacteria Inhibiting Growth
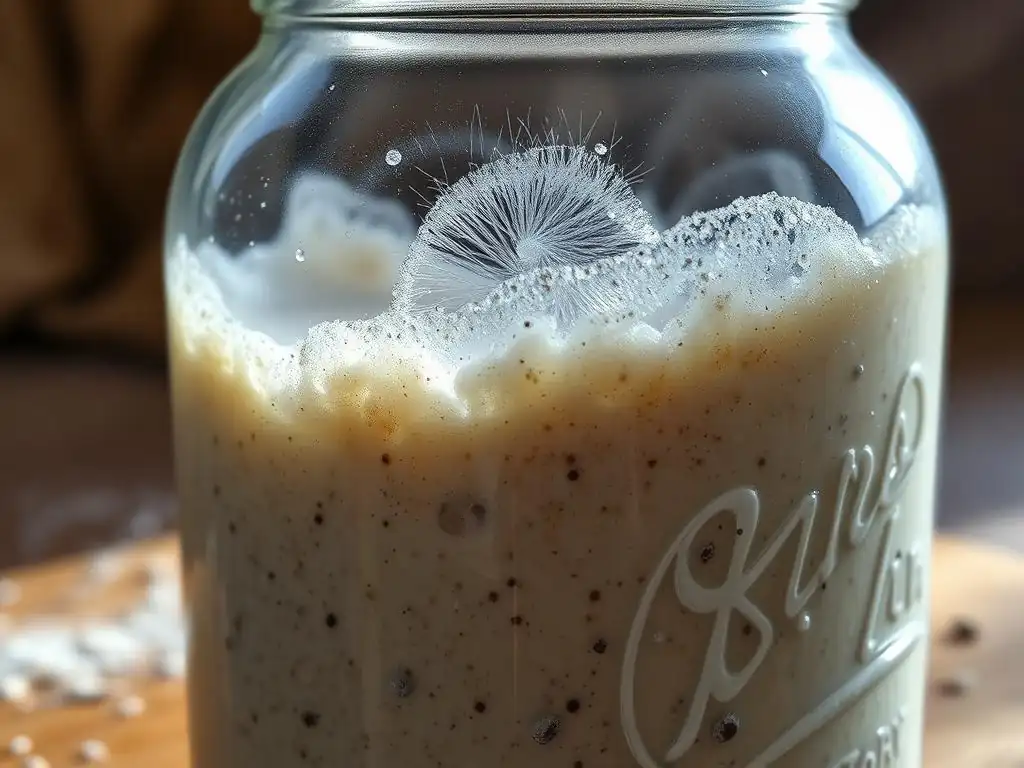
While sourdough starters are robust cultures, they can occasionally become contaminated with unwanted microorganisms that outcompete or inhibit the beneficial yeast and bacteria. Mold is the most obvious sign of contamination, appearing as fuzzy patches (white, green, black, or pink) on the surface. A foul or "off" smell (like rotten cheese or alcohol wipes, distinct from the usual tangy or yeasty aroma) can also indicate contamination.
If you suspect contamination, especially if you see mold, it's generally best to discard the starter and begin anew. While some people attempt to salvage a moldy starter by scraping off the top layer, this isn't always successful, and the unwanted microbes can still be present. Preventing contamination involves using clean jars and utensils and ensuring your feeding flour and water are fresh.
Initial Starter Stage: Patience is Key
If you've recently started a new sourdough culture from scratch, a lack of bubbles in the first few days is completely normal and not a sign of failure. The initial period involves a complex microbial succession. Often, you'll see some activity (maybe a few bubbles or a slight rise) in the first 2-3 days, primarily due to bacteria that are not the wild yeast needed for leavening.
Around day 4-7, this initial activity often subsides, and the starter might appear dormant with few to no bubbles. This is when the desired wild yeasts and lactic acid bacteria are establishing themselves and outcompeting other microbes. Significant, consistent bubbling and rising typically don't appear until day 7-14 or even later, depending on environmental conditions. Patience and consistent feeding through this "dormant" phase are essential.
Using Chlorinated Water: Negatively Affecting Microorganisms
Tap water in many areas is treated with chlorine or chloramine to kill harmful bacteria. While this makes the water safe for drinking, these chemicals can also inhibit or kill the beneficial wild yeast and bacteria in your sourdough starter. Using heavily chlorinated water directly from the tap can be a reason why sourdough starter not bubbly or active.
The amount of chlorine varies by location, but even small amounts can negatively impact the delicate microbial balance. To avoid this, it's recommended to use filtered water, bottled spring water, or simply let tap water sit in an open container for 24 hours. This allows the chlorine gas to dissipate into the air. Chloramine is more stable and may require filtering or using a specific water treatment.
Troubleshooting a Non-Bubbly Sourdough Starter: A Step-by-Step Guide
When your starter isn't showing the activity you expect, it's time for some focused troubleshooting. Don't panic! Most sluggish starters can be revived with attention and care. This guide will walk you through a systematic approach to identifying and fixing the issue, helping you understand why sourdough starter not bubbly and what steps to take.
This process involves evaluating the starter's current state, making adjustments to its environment and feeding routine, and being patient as it responds. Think of yourself as a caregiver adjusting the conditions for a finicky pet. By following these steps, you can significantly increase your chances of seeing those happy bubbles return.
Step 1: Assess Your Current Starter Conditions
Before making changes, take a moment to observe your starter and its environment. What temperature is your kitchen? How often have you been feeding it? What kind of flour and water are you using? This initial assessment provides crucial clues.
-[ ] Check the room temperature. -[ ] Note the last time the starter was fed. -[ ] Observe the starter's appearance (consistency, color). -[ ] Smell the starter (tangy, yeasty, or off?). -[ ] Identify the type of flour and water used.
Check for Mold or Off-Putting Smells
The first and most important step is to rule out contamination. Carefully examine the surface and sides of your starter for any signs of mold. Mold can appear as fuzzy spots of various colors (white, green, black, pink). Also, take a good whiff. A healthy starter smells pleasantly tangy, yeasty, or like fermented fruit or yogurt. A foul smell, such as rotten cheese, garbage, or strong alcohol/acetone that doesn't dissipate quickly, could indicate undesirable microbial growth.
If you see mold, discard the starter entirely and start fresh using clean equipment. If the smell is strongly off, it's often safer to discard, though sometimes a very strong acetone smell just indicates it's starved and needs a few vigorous feedings to balance out. When in doubt, starting over with clean supplies and fresh ingredients is the safest bet for a healthy culture.
Evaluate the Consistency and Color of Your Starter
Observe the texture and color of your starter. A healthy starter typically has a consistency similar to a thick batter or pancake mix, depending on your hydration ratio. If it's extremely liquidy, it might be over-fermented or the ratio is too wet, which can make it harder to see trapped gas. If it's very stiff, the yeast might not be able to move and create bubbles easily.
The color should generally reflect the flour used – off-white for white flour, light brown for whole wheat, darker for rye. Discoloration beyond the flour's natural hue, especially pink or orange streaks, can be a sign of contamination. A healthy starter might have some brownish liquid on top (hooch), which indicates it's hungry but isn't necessarily a sign of a problem unless it's excessive or accompanied by a bad smell.
Step 2: Adjust Your Feeding Schedule
If your starter is dormant or sluggish, it likely needs more frequent and consistent feeding to build up its population of active microorganisms. Infrequent feeding is a prime reason why sourdough starter not bubbly.
Adjusting the ratio of starter, flour, and water can also impact activity. A smaller amount of starter relative to fresh flour and water (e.g., a 1:5:5 ratio) provides more food for the existing microbes, allowing the population to grow and become more vigorous over time.
More Frequent Feedings: Boosting Activity
If you've been feeding your starter infrequently (e.g., once every few days or weekly from the fridge), try feeding it more often at room temperature. For a sluggish starter, feeding every 12 hours can provide the consistent food supply needed to wake up the yeast and bacteria and encourage fermentation. Use a consistent ratio like 1:1:1 (starter:flour:water by weight) or even 1:2:2 if you want to build up strength faster.
For example, if you have 50g of starter, discard down to 25g, then feed with 25g flour and 25g water. Repeat this process every 12 hours. Within a few days, you should start seeing increased activity, including more visible bubbles and a noticeable rise and fall, as the microbial population grows and strengthens with the regular influx of fresh nutrients.
Adjusting the Flour to Water Ratio: Finding the Right Balance
The hydration level (water content) of your starter affects its consistency and how easily bubbles are trapped and visible. A stiffer starter (lower hydration, e.g., 50% hydration) tends to trap gas more effectively, potentially showing a dramatic rise, but the bubbles might be smaller and less numerous throughout the mass. A more liquid starter (higher hydration, e.g., 100% or higher) might show bubbles more readily distributed throughout, but might not rise as dramatically as the gas escapes more easily.
Most standard recipes use a 100% hydration starter (equal weights of flour and water). If your starter is very stiff or very liquid and not bubbling, try adjusting towards a 100% hydration. For example, if using weights, feed 1 part starter, 1 part flour, 1 part water. If using cups, this ratio is less precise but often approximates to 1 cup starter, 1 cup flour, 1/2 cup water (as flour weighs less than water). Consistency is key; choose a ratio and stick with it for several feedings.
Step 3: Optimize the Temperature
Temperature is paramount for microbial activity. If your kitchen is cool, your starter will be slow. Finding a warmer spot can make a dramatic difference in seeing bubbles return.
Yeast and bacteria in sourdough starter thrive in warm, stable environments. Aim for a consistent temperature between 75°F and 80°F (24°C-27°C). This range encourages vigorous fermentation and gas production. Temperatures below 65°F (18°C) will significantly slow down activity, making it seem like your starter isn't doing anything.
Finding the Ideal Fermentation Temperature
Identify warm spots in your home. This could be on top of your refrigerator (heat rises), inside a microwave or oven (turned off but with the light on), or near a warm appliance. Avoid direct sunlight, which can overheat the starter. Using a thermometer to check the temperature of the starter itself, or the environment around it, can be very helpful.
For example, if your kitchen is 68°F (20°C), moving the starter to a spot consistently at 76°F (24.5°C) can potentially cut the time it takes to reach peak activity in half and result in significantly more bubble production. Experiment with different locations to find the warmest, most stable spot in your home.
Using a Proofing Box or Warm Spot
If you struggle to find a consistently warm spot, consider creating one. A proofing box, either a purchased unit or a DIY version (like an insulated cooler with a jar of warm water inside), can maintain a steady temperature. Alternatively, placing the starter in an oven that has been briefly warmed (turn it on to the lowest setting for just a minute or two, then turn it off) can provide a warm environment. Just be absolutely sure the oven is off before leaving the starter inside!
Another simple trick is to heat a cup of water in the microwave until very hot, place the starter jar inside the microwave (oven off! ), and place the hot water cup next to it. Close the door. The residual heat and steam will create a warm, humid environment. Check the temperature periodically to ensure it's not getting too hot or cooling down too much.
Step 4: Change Your Flour
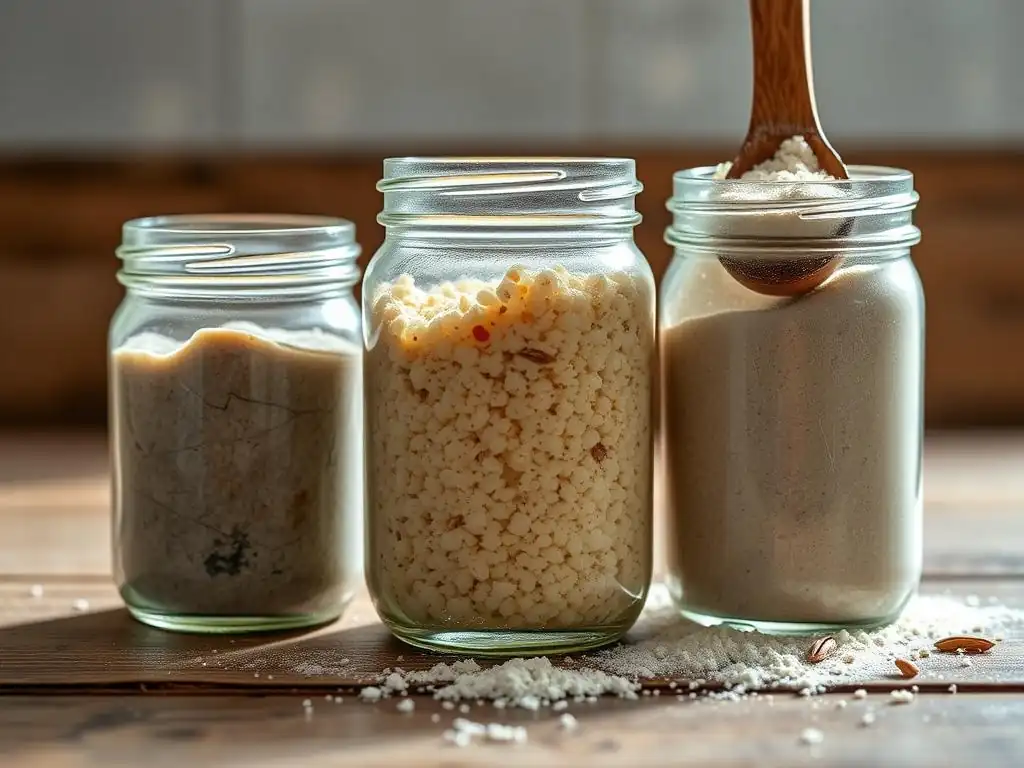
The type and quality of flour directly impact your starter's food source and microbial environment. If you're using bleached flour, or a very low-protein flour, it might not be providing the necessary nutrients or structure for robust bubble formation.
Switching to a different flour type, even temporarily, can often jumpstart a sluggish starter. Unbleached flours provide more nutrients and enzymatic activity beneficial to the culture.
Using Unbleached, All-Purpose Flour
If you are currently using bleached flour, try switching to unbleached all-purpose flour. Unbleached flour contains more natural enzymes and nutrients that can help feed the yeast and bacteria more effectively. This simple change can sometimes be enough to increase activity and bubble production.
For instance, if your starter made with bleached flour has been consistently sluggish, feed it with unbleached all-purpose flour for several consecutive feedings. You might notice a difference in activity levels within 1-3 days as the culture adapts to the new food source. Many bakers find unbleached flour provides more consistent results for starter maintenance.
Experimenting with Whole Wheat or Rye Flour
Whole wheat and rye flours are particularly rich in nutrients and wild microorganisms present on the grain husks. Adding even a small percentage of whole wheat or rye flour to your regular feeding can give your starter a significant boost. Try feeding your starter with a mix, such as 80% unbleached all-purpose and 20% whole wheat or rye by weight.
Rye flour, in particular, is known for rapidly increasing starter activity due to its high enzyme content and readily available sugars. A starter fed partially with rye often becomes incredibly bubbly and active within hours. While you don't have to feed exclusively with these flours, incorporating them periodically can help strengthen a weak starter and encourage better bubble formation.
Step 5: Ensure Water Quality
As mentioned earlier, chemicals in tap water can inhibit starter activity. Ensuring you use clean, non-chlorinated water is vital for a healthy, bubbly starter.
Poor water quality is a common, yet often overlooked, reason why sourdough starter not bubbly. Making a simple switch can sometimes solve the problem entirely.
Using Filtered or Bottled Water
The simplest way to avoid chlorine and chloramine is to use filtered water from a reliable filter (like a Brita or carbon filter) or bottled spring water. These sources are typically free of the chemicals that harm your starter's microbes.
Make a conscious effort to use only filtered or bottled water for all your starter feedings for at least a week. Observe if the activity increases. If you see a noticeable improvement in bubble formation, then your tap water was likely the issue.
Letting Tap Water Sit to Dissipate Chlorine
If you prefer to use tap water, you can easily remove chlorine by letting it sit out. Fill a container with tap water and leave it uncovered at room temperature for at least 24 hours. The chlorine gas will evaporate.
Note that this method works primarily for chlorine, but not as effectively for chloramine, which is sometimes used as a disinfectant and is more stable. If your municipal water uses chloramine (you can often check your local water report online), using filtered or bottled water is a more reliable solution.
Step 6: Discard and Feed Regularly
Consistent discarding and feeding are fundamental to maintaining a healthy, active starter. Simply adding new flour and water to a large amount of old starter can dilute the food source too much and slow down activity.
Discarding removes a portion of the old, acidic starter, making room for fresh flour and water. This ensures the microorganisms have ample new food and helps manage the starter's volume.
The Importance of Discarding
Discarding a portion of your starter before each feeding is crucial for maintaining a healthy balance and providing enough fresh food per microorganism. Keeping too much old starter relative to the amount of new flour and water added means each microbe gets less food, leading to slower fermentation and fewer bubbles.
A common feeding ratio is 1:1:1 (starter:flour:water by weight). This means you discard all but a small amount of starter (e.g., keep 25g), then feed it with equal weights of fresh flour (25g) and water (25g). This provides a high ratio of new food to existing microbes, encouraging vigorous growth and activity. If you don't need to discard, you're likely keeping too much starter and not providing enough fresh food relative to the population size.
Consistent Feeding for Revival
Once you've assessed conditions and made adjustments (temperature, water, flour), the most important step is to establish a consistent feeding routine. For a sluggish starter at room temperature, feeding every 12 hours without fail is often necessary to build strength.
Commit to feeding your starter at roughly the same times each day (e.g., 8 am and 8 pm) for at least 3-5 days. Use your chosen ratio (like 1:1:1). Observe its behavior during this period. With consistent nourishment and optimal conditions, you should start seeing more predictable and vigorous bubble formation and rising within a few days as the yeast and bacteria population becomes more robust.
Signs of a Healthy, Active Sourdough Starter (Beyond Bubbles)
While bubbles are a great indicator, a truly healthy and active starter demonstrates several signs. Observing these other characteristics can give you a more complete picture of your starter's readiness and vitality, even if bubble production isn't as dramatic as you might expect.
Understanding these signs helps you look beyond just the visible bubbles and assess the overall health of your culture. This is particularly useful if you've changed flours or hydration, which can alter the appearance of bubbles.
Rise and Fall: Observing Volume Changes
A key indicator of an active starter is its ability to rise significantly after feeding and then gradually fall back down as the food is consumed. A healthy starter, fed at a 1:1:1 ratio at optimal temperature (75-80°F), should ideally double or even triple in volume within 4-8 hours. Use a straight-sided jar and mark the level of the starter immediately after feeding with a rubber band or marker to easily track its rise.
The "fall" is also important; it shows that the yeast have consumed most of the available sugars and are becoming less active. If your starter rises well but never falls, it might be too stiff or you might be feeding it too much. If it rises and falls predictably within a 12-hour cycle, even if the bubbles aren't huge, it's likely healthy and ready to use for baking when at its peak (usually when it has doubled or just started to recede).
Pleasant, Tangy Aroma: Identifying a Healthy Scent
A healthy sourdough starter should have a pleasant aroma that evolves over its fermentation cycle. Immediately after feeding, it might smell mostly like flour. As it ferments, it should develop a clean, tangy, slightly acidic smell, sometimes with notes of yogurt, fruit, or yeast. This tangy aroma comes from the lactic and acetic acids produced by the bacteria.
A strong, pungent acetone or nail polish remover smell indicates the starter is very hungry and producing a lot of alcohol. While not necessarily unhealthy, it means you waited too long to feed it. A foul, rotten, or cheesy smell, distinct from the usual tang, can indicate undesirable bacteria and potential contamination. Trust your nose – a good smell is a strong sign of a healthy culture.
Domed Texture: Indicating Strong Gluten Development
An active starter, particularly one made with bread or all-purpose flour, often develops a domed or slightly rounded top when it reaches its peak rise. This doming indicates that the gluten network in the flour is strong enough to trap the gas produced by the yeast effectively, creating structure and tension.
If your starter is flat on top even at its peak, it might suggest weaker gluten development (possibly due to the flour type or hydration) or less vigorous gas production. While not as critical as rise and fall or aroma, a domed top is another visual cue that your starter is active and has developed sufficient structure, which is beneficial for bread making.
Preventing Future Issues: Maintaining a Bubbly Sourdough Starter
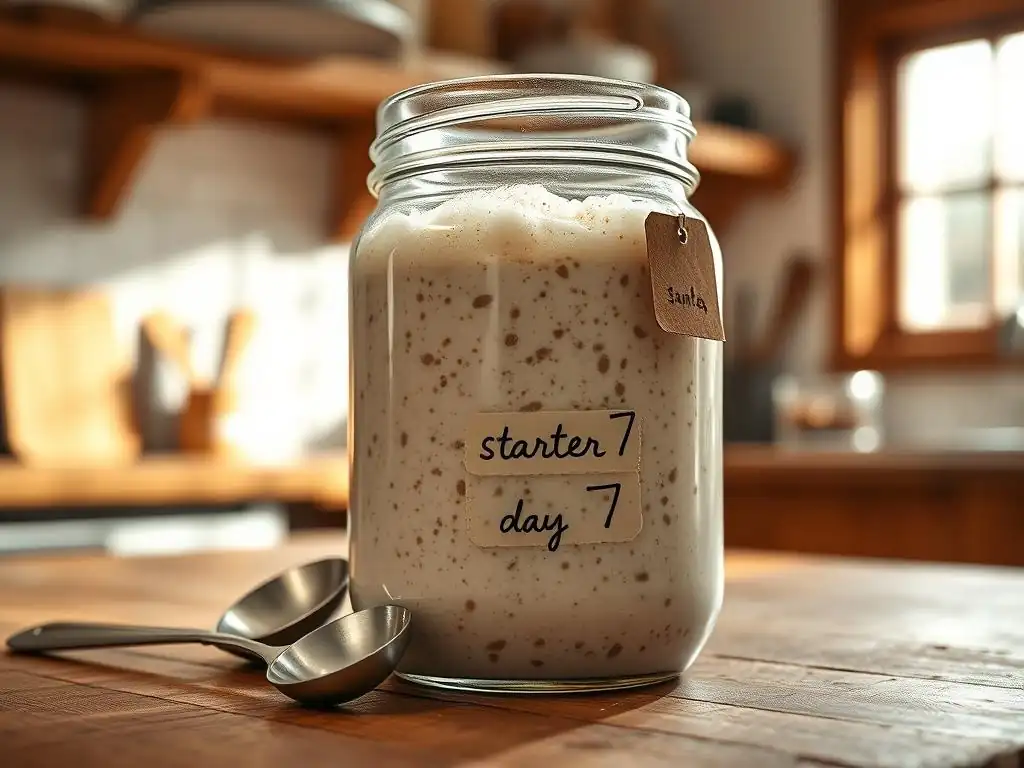
Once you've successfully revived a sluggish starter or established a new, active one, the key is maintaining its health and vigor. Prevention is easier than troubleshooting why sourdough starter not bubbly after the fact.
Consistency and attention to basic needs are the cornerstones of a happy, bubbly starter. By establishing good habits, you can significantly reduce the likelihood of future issues and ensure your starter is always ready to bake with.
Establishing a Consistent Routine
Microorganisms thrive on routine. Feeding your starter at roughly the same time each day (or every 12 hours if keeping it very active at room temp) provides a predictable influx of food, preventing it from becoming overly hungry or dormant. Use a kitchen scale for accuracy, feeding the same ratio of starter, flour, and water each time.
If you need a break from daily feeding, refrigerate your starter. When refrigerated, it goes dormant and only needs feeding about once a week. Remember to revive it with 2-3 room-temperature feedings before baking. A consistent routine, whether daily at room temp or weekly from the fridge with proper revival, is vital for long-term health.
Monitoring Temperature and Humidity
Be mindful of your environment's temperature. If seasons change or you move your starter, observe its activity and adjust feeding frequency or location accordingly. If your home is consistently cool (below 70°F), commit to using a warmer spot or a proofing method to ensure optimal fermentation temperature.
While humidity is less critical than temperature, extreme dryness can cause the starter's surface to dry out and form a crust. Keep the lid loosely covered (not airtight) to prevent drying while allowing gases to escape. If your environment is very dry, adding a tiny bit more water or keeping it in a slightly more humid spot can help.
Using High-Quality Ingredients
The quality of your flour and water directly impacts the health of your starter. Stick to unbleached flour for regular feedings if possible, and consider incorporating small amounts of whole wheat or rye periodically for extra nutrients. Ensure your water is non-chlorinated and ideally within the optimal temperature range (75-80°F).
Just as you wouldn't thrive on a diet of junk food, your starter needs good nourishment. Using fresh, high-quality ingredients consistently provides the best foundation for a robust, active, and bubbly sourdough culture, minimizing the chances you'll need to ask why sourdough starter not bubbly again.
Reviving a Sluggish Starter: Advanced Techniques
Sometimes, despite following the basic troubleshooting steps, a starter remains stubbornly inactive. In these cases, slightly more intensive methods can be employed to give the microbial population a significant boost and encourage bubble formation. These techniques involve manipulating hydration or feeding ratios to maximize microbial access to food and water.
These "advanced" techniques are essentially just variations on feeding, designed to make the starter's environment as appealing as possible for the yeast and bacteria to multiply rapidly. They can be very effective for a starter that seems otherwise healthy but just isn't showing much life.
The "Slurry" Method: Intense Hydration
The "slurry" method involves feeding your starter with a very high hydration mix, making it almost liquid. This increased water content makes the food (flour) more accessible to the microorganisms and allows gas bubbles to form and become visible more easily throughout the starter's mass.
To use this method, take a small amount of your sluggish starter (e.g., 10-20g). Feed it with an equal weight of flour (e.g., 10-20g) but a significantly higher weight of water, perhaps 1.5 to 2 times the weight of the flour (e.g., 15-40g water). Mix into a thin, pancake-batter-like consistency. Keep this slurry warm (75-80°F) and feed it this high-hydration ratio every 12 hours. The increased liquidity and available food often kickstart fermentation, and you should see bubbles appearing within 24-48 hours.
The "Double Feed": Maximizing Yeast Activity
The "double feed" technique focuses on giving the existing yeast population two consecutive, generous meals within a short period to encourage rapid multiplication and activity. This is useful if your starter seems hungry and collapses quickly after feeding, or if you want to build strength rapidly.
Instead of feeding every 24 hours, feed your starter twice within a 12-hour period. For example, feed it at 8 am using your standard ratio (like 1:1:1). Then, just 6-8 hours later, feed it again using the same ratio, even if it hasn't fully peaked or fallen yet. Keep it warm. This provides a continuous supply of fresh food, allowing the yeast to double their population more quickly than with a single daily feed, often resulting in more vigorous bubbling and rising.
When to Start Over: Recognizing Unrecoverable Starters
While most sluggish starters can be revived, there are instances where it's wiser and safer to simply discard your current starter and begin cultivating a new one. Trying to save a truly compromised starter can be frustrating and potentially lead to wasted ingredients if you attempt baking with it.
Knowing when to cut your losses is part of the sourdough journey. It’s not a failure to start fresh; it’s a practical decision to ensure you have a healthy, reliable culture for your baking endeavors.
There are two primary indicators that your starter may be unrecoverable and it's time to start over: persistent, visible mold growth or a consistently foul, putrid smell that goes beyond a strong acetone or hungry aroma. Mold spores can permeate the entire culture, even if you scrape off the visible patches, and trying to bake with a moldy starter is unsafe.
A truly foul smell, distinct from the normal fermentation aromas, suggests the presence of undesirable bacteria that have taken over the culture. While a hungry starter smells strongly of acetone, this typically dissipates after feeding. A smell like rot, cheese, or chemicals that doesn't improve after several consistent feedings in optimal conditions is a strong sign the starter is compromised. If your starter shows either mold or a persistent foul smell after you've attempted troubleshooting basic issues, it's best to discard it, clean your jar thoroughly, and begin cultivating a new, healthy starter from scratch.
Frequently Asked Questions
Why is my sourdough starter not bubbly?
A lack of bubbles in your sourdough starter usually indicates that the yeast and bacteria aren't active enough. This could be due to temperature, flour quality, or the starter's age.
What temperature is ideal for a bubbly sourdough starter?
The ideal temperature range for a bubbly sourdough starter is between 70-75°F (21-24°C). Warmer temperatures can accelerate activity, while colder temperatures can slow it down significantly.
What type of flour should I use to feed my sourdough starter?
A combination of unbleached all-purpose flour and whole wheat flour is generally recommended. Whole wheat flour provides more nutrients to help the yeast and bacteria thrive.
How often should I feed my sourdough starter to encourage bubbles?
In the initial stages, feed your starter once or twice a day. Once it's active, you can feed it less frequently, depending on your baking schedule and storage method.
How long does it typically take for a sourdough starter to become bubbly and active?
It can take anywhere from 5 to 14 days for a new sourdough starter to become bubbly and active. Patience is key, as the microbial ecosystem needs time to develop.
Final Reflection: The Unexpected Joys (and Frustrations) of a Living Starter
The seemingly simple act of nurturing a sourdough starter reveals a profound connection to the history of baking and the delicate balance of nature. It's more than just a recipe; it's a living organism, demanding patience, attention, and a willingness to adapt. The frustration of a stubbornly inactive starter, as many readers will attest, is a common experience, but understanding the "why" behind the bubbles (or lack thereof) unlocks a deeper appreciation for this fascinating process.
The journey of cultivating a sourdough starter mirrors the unpredictable nature of life itself. There are moments of exhilarating success, marked by vigorous bubbling and the promise of delicious bread, but also periods of quiet contemplation, even disappointment, when the starter seems to slumber. Patience is a virtue, and nowhere is this more true than in the art of sourdough baking.
This quote, though not directly about starters, perfectly encapsulates the emotional rollercoaster of this endeavor. It's a lesson in resilience, reminding us that even setbacks can lead to a greater understanding and appreciation of the process.
Now, armed with the knowledge to troubleshoot your starter's inactivity, I invite you to reflect on your own relationship with this living entity. Consider the patience you've developed, the connection to a centuries-old tradition, and the satisfaction of creating something truly unique from simple flour and water. Don't be discouraged by setbacks; embrace the learning process, and remember that even the most inactive starter can be revived with a little care and understanding. The journey, with all its bubbles and lulls, is ultimately the most rewarding part.
Unleash Your Inner Baker: Get Baking Today!
Thanks for taking the time to troubleshoot your starter woes! We hope you now feel confident in tackling those bubbly challenges. Ready to put your newfound knowledge to the test?
- Bake your dream bread: Use your now-thriving starter to create the loaf you've always wanted. Don't be afraid to experiment with different flour types and hydration levels.
- Share your baking journey: Show off your freshly baked creation on social media—tag us @BakeWithEase so we can see your delicious results!
- Join our baking community: Head over to our forums to connect with other bakers, share tips, and ask questions. Let's bake together!
What delicious creation will you bake first? Let us know in the comments below!