
Decorate Your Layer Cake Like a Pro: StepbyStep Guide

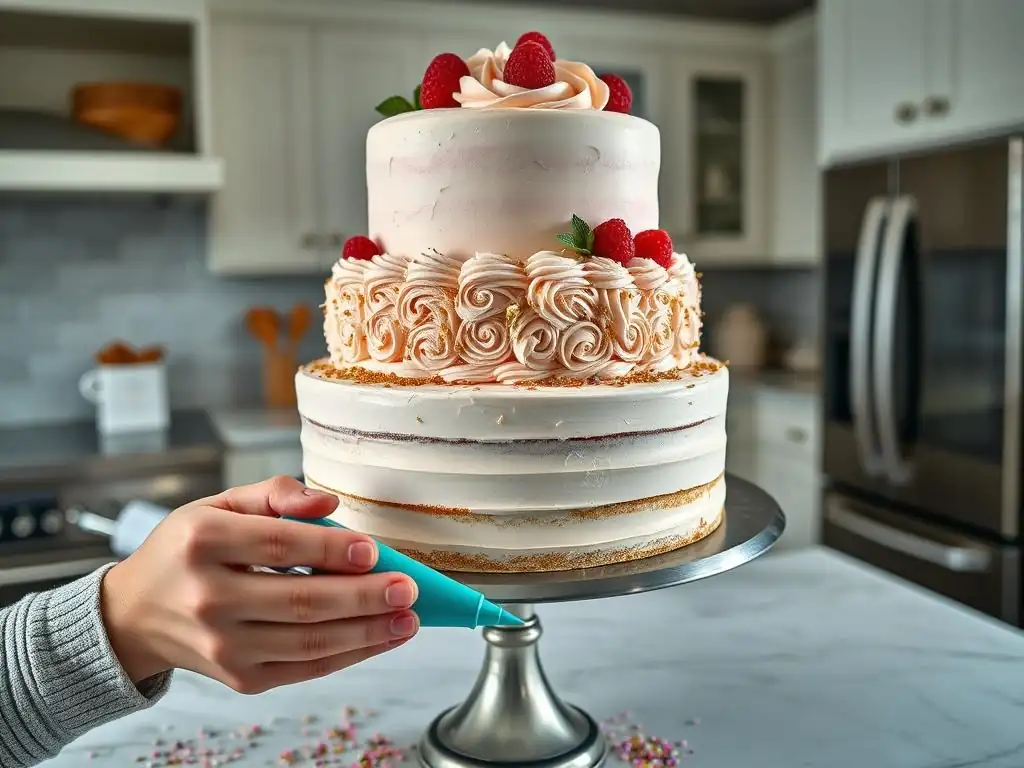
Welcome to BakeWithEase, your partner in creating delicious and beautiful baked goods! Ever wondered how to achieve that flawlessly smooth finish on a layer cake? Unlock the secrets to professional-looking desserts with our step-by-step guide to layer cake frosting techniques. Discover the tips and tricks that will transform your cakes from simple to stunning, and leave your guests utterly impressed. Ready to elevate your baking game? Let's get started!
- Decorate Your Layer Cake Like a Pro: Step-by-Step Guide | BakeWithEase.com
- Introduction to Professional Layer Cake Decoration
- Step 1: Leveling Your Cake Layers for a Flawless Finish
- Step 2: Preparing Your Frosting for Optimal Application
- Step 3: Crumb Coating: The Key to a Perfect Finish
- Step 4: Applying the Final Layer of Frosting: Smooth and Even
- Step 5: Decorating Your Layer Cake: Creative Cake Decorating Ideas
- Step 6: Achieving Professional-Looking Edges and Borders
- Step 7: Cake Decorating Troubleshooting: Common Problems and Solutions
- Conclusion: Elevate Your Baking with Expert Cake Decorating
-
Frequently Asked Questions
- What are some basic layer cake frosting techniques suitable for beginners?
- What is the purpose of a crumb coat when frosting a layer cake?
- What type of frosting is best for achieving sharp edges on a layer cake?
- How can I prevent my frosting from sliding off the sides of my layer cake?
- What tools are essential for achieving professional-looking layer cake frosting?
- Final Reflection: The Sweet Art of Layer Cake Frosting
- Unleash Your Inner Cake Artist!
Decorate Your Layer Cake Like a Pro: Step-by-Step Guide | BakeWithEase.com
Introduction to Professional Layer Cake Decoration
Transforming a simple stack of baked layers into a stunning centerpiece is one of the most rewarding aspects of baking. While baking the layers themselves is crucial, mastering the art of decoration, particularly the application of frosting, is what truly elevates your creation from a homemade dessert to a professional-looking masterpiece. This guide will walk you through the essential steps and techniques to achieve that polished finish.
Why Mastering Layer Cake Frosting Techniques Matters
The way you apply frosting can make or break the visual appeal and even the texture of your cake. Smooth, even frosting provides a clean canvas for further decoration, while poorly applied frosting can highlight imperfections and detract from the overall design. Mastering different layer cake frosting techniques allows you to control the look and feel of your cake, from a rustic naked cake to a perfectly smooth, sharp-edged creation.
Beyond aesthetics, proper frosting application helps lock in moisture, keeping your cake fresh for longer. Techniques like crumb coating are vital for preventing stray crumbs from ruining your final, smooth layer of frosting. Understanding how different frostings behave and how to work with them effectively is key to achieving both beauty and longevity in your layered bakes.
Essential Tools & Equipment for Cake Decorating Success
Having the right tools makes a significant difference in the ease and quality of your cake decorating. You don't need a professional kitchen full of gadgets, but a few key items are indispensable. An offset spatula, for instance, is far superior to a regular knife for spreading frosting smoothly across large surfaces and around the sides of the cake.
Other essential tools include a cake turntable (a rotating stand that allows you to easily access all sides of the cake), a bench scraper or cake smoother (for achieving perfectly smooth sides), and piping bags and tips if you plan on adding borders or decorative elements. For leveling layers, a serrated knife or a dedicated cake leveler is necessary. Investing in these basic tools will dramatically improve your ability to execute various layer cake frosting techniques with precision and ease.
Step 1: Leveling Your Cake Layers for a Flawless Finish
Before you even think about frosting, your cake layers need to be flat and uniform. Uneven layers will lead to a lopsided cake, making frosting application incredibly difficult and the final result less appealing. Leveling ensures that each layer stacks neatly, creating a stable foundation for your decorating efforts.
This initial step is foundational to all successful layer cake frosting techniques. Whether you're aiming for a tall, multi-tiered cake or a simple two-layer dessert, flat layers are non-negotiable. Skipping this step will result in frustration later on when you try to stack or frost, as the cake will want to lean and the frosting will appear thicker in some areas than others to compensate for the unevenness.
How to Use a Cake Leveler or Serrated Knife Effectively
Using a cake leveler is perhaps the simplest method for achieving perfectly flat layers. Adjust the wires to the desired height (typically the height of your shortest layer), place the cake on a flat surface, and saw through the cake using the leveler, keeping it parallel to the surface. This ensures a consistent cut all the way across.
If you don't have a cake leveler, a long serrated knife works well. Place the cake on a flat surface or turntable. Position the knife parallel to the surface at the desired height. Use a gentle sawing motion, rotating the cake as you go, keeping your non-cutting hand on top of the cake gently pressing down to stabilize it. The key is to keep your hand and the knife steady and level throughout the process to avoid creating slopes.
Achieving Even Cake Layers: Tips and Tricks
Beyond leveling, baking techniques play a role in achieving even layers from the start. Avoid overmixing the batter, which can lead to a dense cake that domes excessively. Ensuring your oven temperature is accurate and the cake pans are placed centrally can also help. Using cake strips (wet fabric strips wrapped around the outside of the pan) can help the cake bake more evenly, reducing the dome significantly.
If you consistently get large domes, consider slightly reducing your oven temperature and extending the baking time. For instance, if a recipe calls for 350°F (175°C), try 325°F (160°C) and bake for a few extra minutes. This allows the cake to rise more slowly and evenly. Chilling your cakes before leveling also makes them firmer and easier to slice cleanly.
Step 2: Preparing Your Frosting for Optimal Application
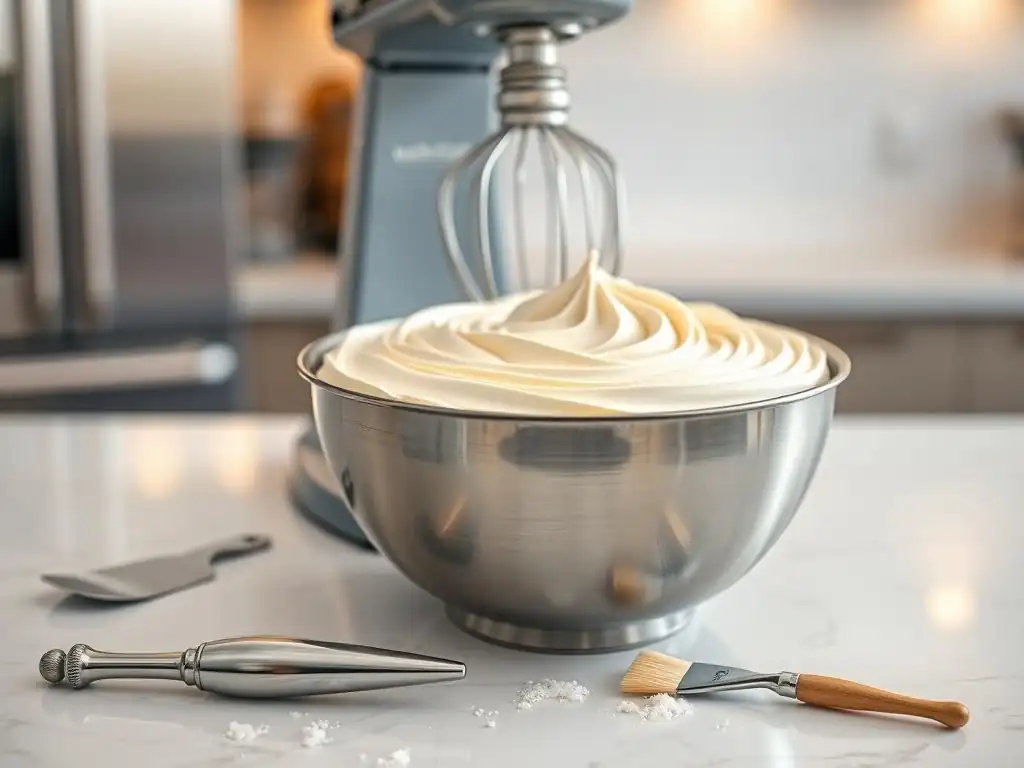
The success of your layer cake frosting techniques heavily relies on the condition of your frosting. It needs to be the right consistency, free of lumps, and at a workable temperature. Whether you're using a classic buttercream or a smooth ganache, proper preparation is key to achieving a beautiful, smooth finish.
Frosting that is too stiff will be difficult to spread smoothly and can tear the cake. Frosting that is too soft will slide off the cake and won't hold its shape for decoration. Getting the consistency just right is a learned skill that comes with practice and understanding the different types of frosting.
Choosing the Right Frosting: Buttercream, Ganache, and More
The type of frosting you choose impacts both the flavor and the ease of applying layer cake frosting techniques. Buttercream, in its many forms (American, Swiss Meringue, Italian Meringue, French), is perhaps the most common and versatile. American buttercream is simple but can be very sweet; Swiss and Italian meringue buttercreams are lighter and silkier, making them ideal for smooth finishes.
Ganache, a mixture of chocolate and cream, provides a rich, smooth coating that hardens slightly as it cools. Cream cheese frosting is tangy and delicious but often softer than buttercream, requiring careful handling. For very smooth finishes, consider a sturdy buttercream like Swiss meringue, which is less prone to trapping air bubbles and holds sharp edges beautifully.
Achieving the Perfect Frosting Consistency: Tips for Smoothness
The perfect frosting consistency for coating a cake is typically described as smooth and spreadable, like soft peanut butter. If your frosting is too stiff, add liquid (milk, cream, or even a splash of water) a teaspoon at a time, mixing thoroughly until it reaches the desired consistency.
If your frosting is too soft, especially buttercream, it might be too warm. Refrigerate it for 10-20 minutes, then re-whip it. This often stiffens it up. For ganache, if it's too runny, let it cool at room temperature or refrigerate briefly until it thickens. Over-whipping buttercream can incorporate too much air, leading to bubbles; mix on low speed for a few minutes at the end to help remove them.
Coloring Your Frosting: Techniques for Vibrant Hues
Achieving vibrant, even colors in your frosting requires using the right type of coloring and technique. Gel food coloring is highly concentrated and recommended over liquid food coloring, as liquid can alter the frosting's consistency. Start with a small amount of gel coloring on a toothpick and gradually add more until you achieve the desired shade, mixing thoroughly after each addition.
For deep colors like red or black, it can take a significant amount of coloring. Add the color gradually and let the frosting sit for 10-15 minutes; colors often deepen over time. For the most vibrant results without affecting taste or texture, consider using specialized food colorings designed for frosting, such as those from reputable brands like Wilton or AmeriColor. Ensure the color is completely mixed in, with no streaks, before applying it to the cake.
Step 3: Crumb Coating: The Key to a Perfect Finish
The crumb coat is a thin layer of frosting applied to the cake before the final layer. Its primary purpose is to trap any loose crumbs, preventing them from showing up in your final, smooth frosting layer. This step is absolutely essential for achieving a clean, professional look with your layer cake frosting techniques.
Think of the crumb coat as a primer for your cake. It seals the surface, provides a stable base for the final layer of frosting, and helps smooth out any minor imperfections on the cake's surface. Skipping this step almost guarantees that crumbs will mix into your beautiful final frosting, creating an undesirable texture and appearance.
Applying the Crumb Coat: A Thin Layer for a Smooth Surface
To apply the crumb coat, use an offset spatula to spread a very thin layer of frosting over the entire cake – the top and sides. Don't worry about making it perfectly smooth at this stage; the goal is simply to cover the cake and trap crumbs. Use the spatula to scrape off any excess frosting, leaving just a thin, even layer.
Work quickly but gently to avoid pulling up too many crumbs. If you encounter a particularly crumbly spot, you can dab frosting onto it rather than spreading. Ensure the entire surface is covered, creating a sealed layer that looks slightly messy but serves its purpose. This step is crucial for setting the stage for expert layer cake frosting techniques.
Chilling the Crumb Coat: Setting the Stage for the Final Frosting
Once the crumb coat is applied, chill the cake in the refrigerator for at least 20-30 minutes, or until the frosting is firm to the touch. This chilling period is vital. As the crumb coat firms up, it locks all those pesky crumbs into place.
A firm crumb coat also provides a solid surface for applying the final layer of frosting. The cold surface helps the subsequent frosting layer adhere smoothly and makes it easier to scrape and smooth without disturbing the cake structure or the trapped crumbs. For best results, some bakers even chill the crumb-coated cake for an hour or longer.
Step 4: Applying the Final Layer of Frosting: Smooth and Even
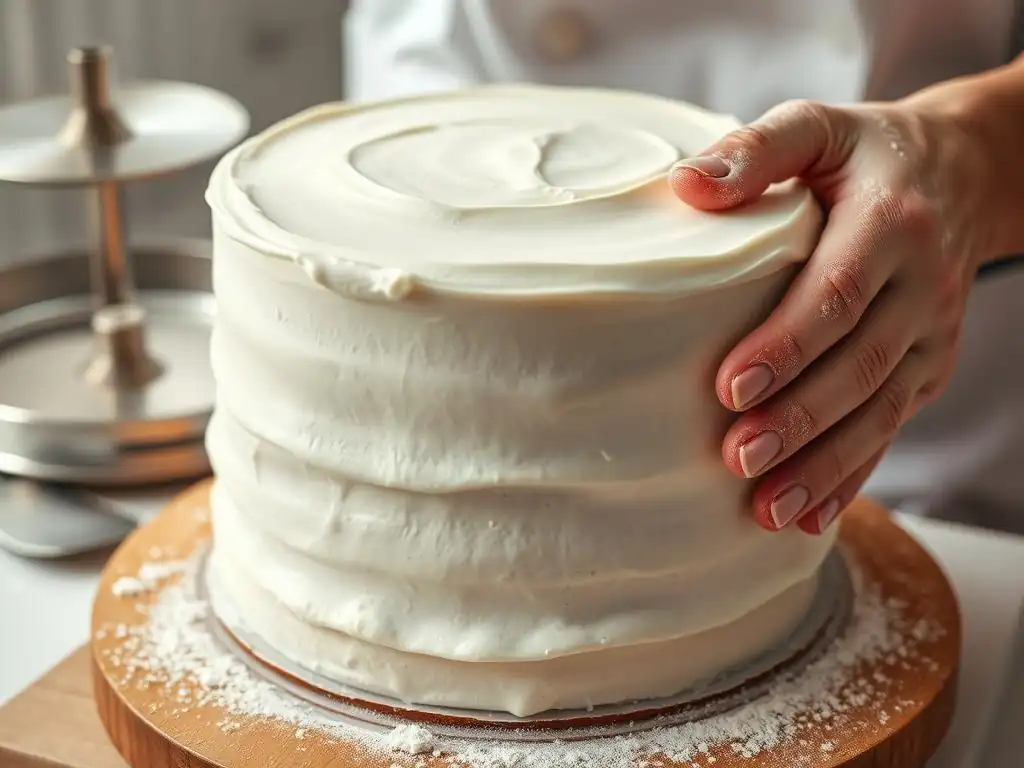
With the crumb coat chilled and firm, you're ready for the main event: applying the final layer of frosting. This is where your layer cake frosting techniques truly come into play. The goal is to apply a thicker, even layer of frosting that will serve as the finished exterior of your cake, whether you're aiming for a perfectly smooth surface or a textured look.
This step requires patience and a steady hand, but with the right technique, you can achieve results that look like they came from a professional bakery. Don't be discouraged if your first attempt isn't perfect; practice is key to mastering these skills.
Achieving a Smooth Finish with an Offset Spatula
Start by placing a generous dollop of frosting on top of the cake. Use a large offset spatula to spread the frosting evenly across the top, pushing it slightly over the edges. Then, apply frosting to the sides of the cake, working from the bottom up. Don't skimp on the frosting; applying enough initially makes it easier to smooth.
Once the cake is covered, use the offset spatula to smooth the sides. Hold the spatula vertically against the side of the cake, applying gentle, even pressure, and rotate the turntable. Scrape off excess frosting from the spatula onto the side of your frosting bowl as needed. For the top edge, hold the spatula horizontally and pull excess frosting from the edge towards the center of the cake. Repeat until relatively smooth.
Techniques for a Perfectly Smooth Cake: The Hot Knife Method
For an ultra-smooth finish, often desired for sharp edges, the hot knife method can be very effective. After applying and smoothing the final layer of frosting as much as possible with an offset spatula, dip a metal bench scraper or a long, flat metal spatula into hot water. Wipe it completely dry.
Quickly and smoothly run the warm, dry scraper or spatula against the sides of the cake, holding it vertically and rotating the turntable. The warmth slightly melts the surface of the frosting, allowing you to achieve a glass-like smoothness. Repeat this process, re-warming and drying the scraper as needed, until the sides are perfectly smooth. Use a smaller hot spatula to smooth the top edge towards the center. This technique is a staple in advanced layer cake frosting techniques.
Mastering the Art of the Frosting Swirl
Not every cake needs to be perfectly smooth! A beautiful, rustic frosting swirl can be achieved with just an offset spatula. After applying the final layer of frosting, use the back of a spoon or the tip of your offset spatula to create swirls or peaks on the top and sides of the cake.
For a classic look, start from the center of the cake top and swirl outwards with the tip of the spatula, creating ridges. For side swirls, apply frosting generously and then use the spatula tip to create waves or peaks as you rotate the cake. This technique is forgiving and adds lovely texture, making it a great option when practicing your layer cake frosting techniques.
Step 5: Decorating Your Layer Cake: Creative Cake Decorating Ideas
Once your final layer of frosting is applied, the fun really begins! This is your chance to personalize your cake and add decorative elements that enhance its beauty. From simple piped borders to elaborate floral arrangements, the possibilities are nearly endless.
Decoration allows you to express creativity and tailor the cake to a specific theme or occasion. While mastering the base frosting layers is crucial, these final touches are what truly make your cake unique and eye-catching.
Simple Border Techniques: Piping Basics for Beginners
Piping borders are a great way to finish the edge of your cake and add a touch of elegance. For beginners, simple techniques like stars, dots, or shells are easy to learn. Fill a piping bag fitted with a star tip (like a #1M or #21) with frosting.
Hold the bag at a 45-degree angle to the cake. For stars, apply pressure, let the frosting build up into a star shape, then stop pressure and pull straight away. For shells, apply pressure, move the tip slightly forward and then back, releasing pressure as you pull away, creating a tapered tail. Practice on parchment paper first to get a feel for the pressure needed. These basic layer cake frosting techniques with a piping bag add a lovely finish.
Advanced Piping Techniques: Rosettes, Shells, and More
Once you're comfortable with basic piping, you can move on to more complex designs. Rosettes are made with a star tip, starting in the center and swirling outwards. Ruffles can be created with a petal tip (like a #104), holding the wide end against the cake and the narrow end facing out, applying pressure while moving the tip up and down.
Basketweave patterns require a basketweave tip and careful layering of horizontal and vertical lines. Mastering these techniques takes practice, but the results can be stunning. Experiment with different tips and frosting consistencies to see what effects you can create.
Using Sprinkles, Edible Glitter, and Other Embellishments
Sprinkles and edible glitter are perhaps the easiest way to add sparkle and color to your cake. You can apply them to the sides by gently pressing them into the frosting, or scatter them over the top. Jimmies, nonpareils, sanding sugar, and edible glitter all offer different textures and effects.
Other simple embellishments include chocolate shavings, toasted nuts, or crushed cookies pressed into the sides or sprinkled on top. Edible pearls or dragees can add a touch of sophistication. These elements are fantastic for adding texture and visual interest with minimal effort.
Fresh Fruit and Floral Decorations for Cakes
For a natural and elegant look, fresh fruit and edible flowers are wonderful options. Arrange berries, sliced citrus, or other fruits on top of the cake or cascading down the sides. Ensure fruit is dry before placing it on the frosting to prevent colors from bleeding.
Use food-safe flowers, either specifically grown for consumption or properly prepared non-toxic varieties. If using non-edible flowers, insert the stems into plastic floral picks or wrap them tightly in floral tape before inserting into the cake to prevent contact with the frosting and cake. Always research flowers to ensure they are safe if they might touch the cake.
Step 6: Achieving Professional-Looking Edges and Borders
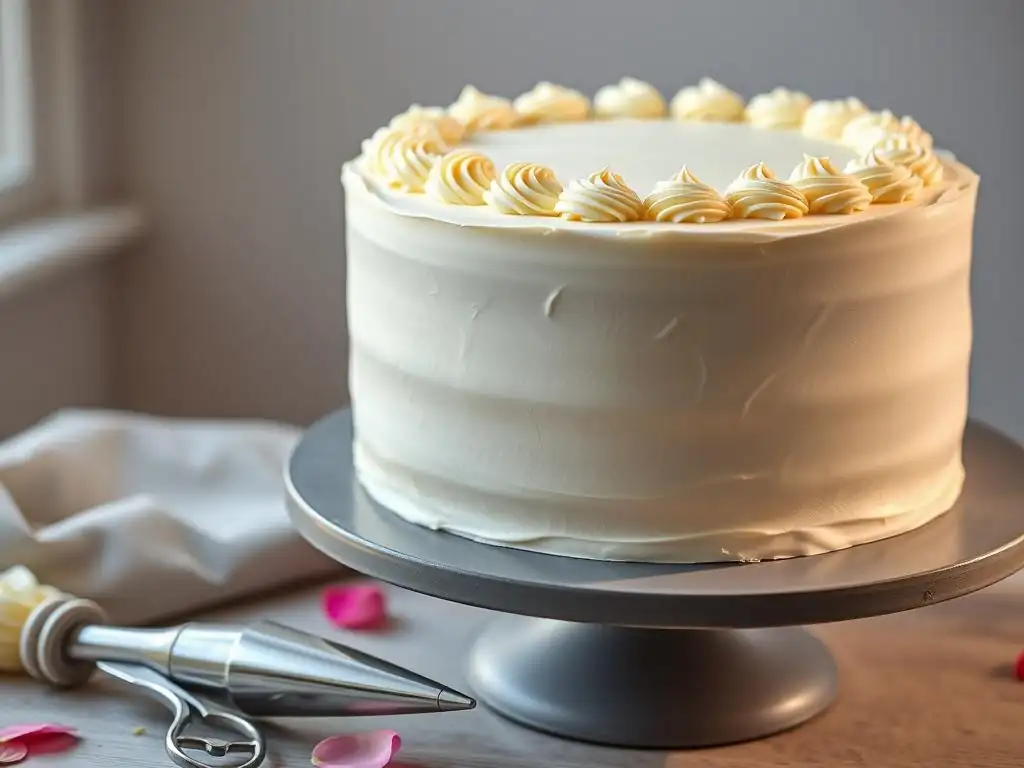
Sharp edges and clean borders are hallmarks of professional layer cake frosting techniques. Achieving them requires precision and practice, but they make a significant difference in the overall appearance of your cake.
Whether you prefer the crisp look of sharp edges or the defined finish of a piped border, paying attention to these details elevates your cake from homemade to bakery-quality.
To get sharp edges, you need a sturdy frosting (like Swiss meringue or ganache) and a cold cake. After applying the final layer of frosting, use a bench scraper held at a 90-degree angle to the cake side, pressing gently and rotating the turntable to smooth the sides.
Once the sides are smooth, excess frosting will build up on the top edge. Use an offset spatula held horizontally, starting from the outside edge and pulling the excess frosting towards the center of the cake in short, smooth strokes. Wipe the spatula clean after each stroke. Repeat this process around the entire top edge until it is sharp and clean. Chilling the cake again after this step can help set the edges.
Different Border Styles: From Classic to Modern
Beyond basic piping, explore various border styles. A shell border is a classic choice, creating a continuous wave around the base or top edge. A rope border uses a round tip and overlapping curves to mimic a twisted rope.
For a modern look, consider a simple line of dots, a series of small rosettes, or even a textured edge created by dragging a spatula or comb through the frosting. The style of border should complement the overall design of your cake and the specific layer cake frosting techniques you've employed.
Step 7: Cake Decorating Troubleshooting: Common Problems and Solutions
Even experienced bakers encounter issues when decorating cakes. Frosting can misbehave, cakes can shift, and designs don't always turn out as planned. Knowing how to troubleshoot common problems can save your cake and your sanity.
Identifying the problem and having a few go-to solutions will help you recover gracefully and still achieve a beautiful result. Don't let minor setbacks derail your decorating efforts.
Fixing Frosting Imperfections: Bumps, Cracks, and Air Bubbles
Bumps often occur from trapped crumbs (highlighting the need for a crumb coat!) or uneven frosting application. For small bumps, gently smooth them down with a warm, dry spatula. For larger bumps, carefully scrape off the affected area and reapply frosting.
Cracks can happen if the frosting is too stiff or the cake is too cold. If the cracks are minor, you can sometimes smooth them over with a warm spatula. For larger cracks, you may need to apply a little more frosting and re-smooth the area. Air bubbles in buttercream can be frustrating; try mixing the frosting on low speed for several minutes before use to help them surface, or use a warm spatula to smooth over bubbles after application.
Preventing Cake from Sliding: Stabilizing Techniques
A sliding cake is a decorator's nightmare. To prevent this, ensure your cake layers are level and cooled completely before stacking. Place a small dab of frosting on the cake board or stand before placing the first layer; this helps it stick.
For multi-tiered cakes, dowels are essential for support. Insert food-safe dowels into the bottom layer, cutting them flush with the top surface of that layer. The next layer rests on these dowels, distributing its weight and preventing it from crushing the layer below. Use sufficient dowels for the size and weight of the layers above.
Conclusion: Elevate Your Baking with Expert Cake Decorating
Decorating a layer cake is a skill that develops with practice and patience. By understanding the fundamental layer cake frosting techniques, from leveling and crumb coating to applying smooth finishes and adding decorative touches, you can transform your home-baked cakes into impressive creations.
Each cake you decorate is an opportunity to learn and refine your skills. Don't be afraid to experiment with different frostings, colors, and tools. The process should be enjoyable, and the result, whether perfectly smooth or charmingly rustic, will be a delicious testament to your efforts.
Practice Makes Perfect: Tips for Continued Improvement
The best way to improve your layer cake frosting techniques is simply to bake and decorate more cakes! Start with simple designs and gradually challenge yourself with more complex ones. Don't expect perfection on your first try.
Save leftover frosting (if appropriate for storage) or make a small batch specifically for practicing piping techniques on parchment paper. Watch tutorials, read guides, and observe other bakers. Pay attention to the consistency of your frosting and how temperature affects it. With consistent practice, you'll build muscle memory and gain confidence.
Once you've created a beautiful cake, share it! Take photos and share them with friends, family, or online communities. Sharing your work not only allows you to celebrate your achievements but can also inspire others to try their hand at cake decorating.
Explain the layer cake frosting techniques you used, the challenges you faced, and how you overcame them. Your journey can encourage fellow bakers and create a supportive community where everyone can learn and grow together. Happy decorating!
Frequently Asked Questions
What are some basic layer cake frosting techniques suitable for beginners?
Beginners can start with simple techniques like the crumb coat to seal in crumbs, followed by a smooth layer of frosting using an offset spatula. Focus on even distribution and consistent pressure.
What is the purpose of a crumb coat when frosting a layer cake?
A crumb coat is a thin layer of frosting applied to "trap" loose crumbs before the final frosting layer. This prevents crumbs from appearing in the final, smooth finish and ensures a professional look.
What type of frosting is best for achieving sharp edges on a layer cake?
Buttercream frostings, particularly Swiss Meringue or Italian Meringue, are excellent for achieving sharp edges. They are stable and can be smoothed to a crisp finish with proper technique.
How can I prevent my frosting from sliding off the sides of my layer cake?
Ensure your cake layers are completely cool before frosting. A stable frosting recipe and a proper crumb coat are also crucial to prevent sliding. Chilling the cake between layers can also help.
What tools are essential for achieving professional-looking layer cake frosting?
Essential tools include an offset spatula, a cake turntable for even frosting, a bench scraper for smoothing sides, and piping bags with various tips for decorative elements and precise application.
Final Reflection: The Sweet Art of Layer Cake Frosting
Mastering layer cake frosting isn't just about creating a beautiful dessert; it's about expressing creativity and sharing joy. The techniques explored in this guide—from achieving perfectly smooth surfaces to crafting intricate designs—are more than just steps; they're pathways to unlocking your inner pastry artist. The ability to transform a simple cake into a stunning centerpiece speaks volumes about the power of dedication and practice.
The impact of visually appealing desserts on our culture is undeniable. From Instagram-worthy creations to the celebratory cakes that mark life's milestones, frosting techniques have become a powerful form of visual communication. A cake is a celebration of life, a moment of joy, a symbol of happiness.
This sentiment resonates deeply, as the artistry of cake decorating transcends mere aesthetics; it's about crafting memories and sharing sweetness with those we love. The techniques discussed here are a testament to this enduring power.
Now, it's your turn. Don't be intimidated by the seemingly complex world of layer cake frosting. Take a deep breath, gather your tools, and experiment! Each swirl, each piped rose, each carefully smoothed surface is a step towards mastering your craft and creating cakes that are as delicious as they are beautiful. Embrace the process, celebrate your successes, and remember that the most important ingredient is your passion. Let your creativity flow, and watch your layer cakes transform into edible masterpieces.
Unleash Your Inner Cake Artist!
Thanks for joining us on this delicious journey into layer cake decorating! We hope you gained some valuable tips and tricks to elevate your baking game. Now it's time to put your newfound skills to the test.
- Master your first masterpiece: Try out one of the techniques we covered today – maybe that stunning rosette pattern or the elegant chocolate drip? We’re confident you'll be amazed at the results!
- Share your creation: Post a picture of your decorated cake on social media and tag us @BakeWithEase – we'd love to see your beautiful work!
- Explore our other cake decorating guides: Dive deeper into the world of cake artistry with our extensive collection of tutorials on BakeWithEase.com.
What unique decorating technique will you try first to impress your friends and family?