
The Secret to Flaky Layers: Making Puff Pastry from Scratch

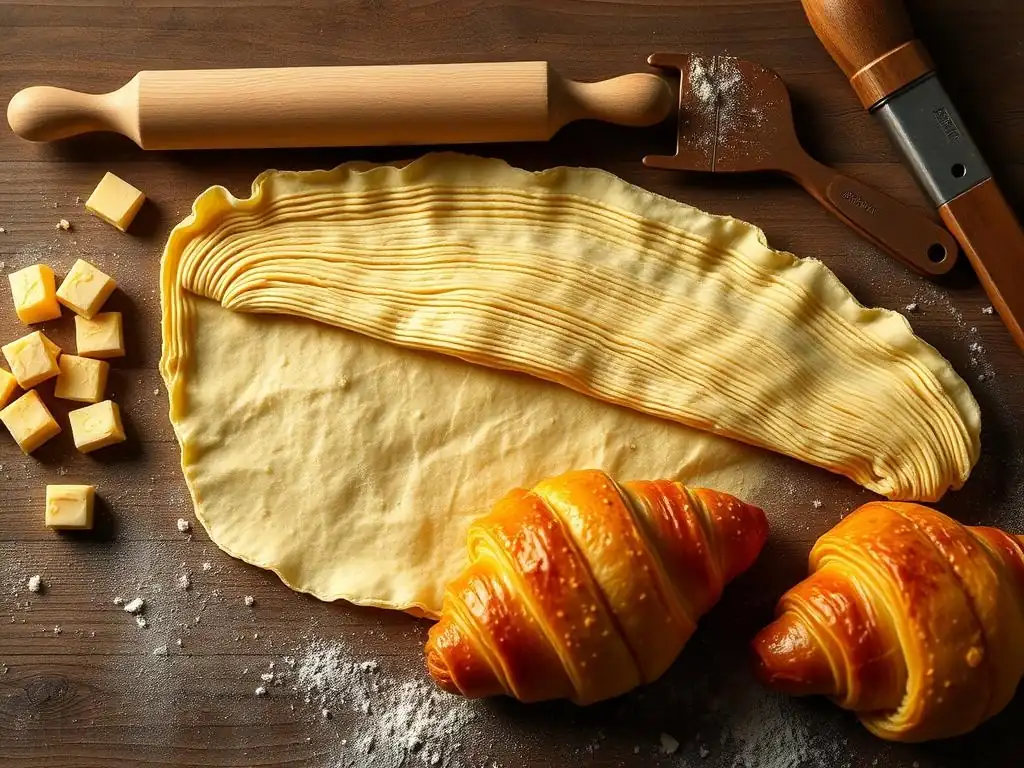
Welcome to BakeWithEase, your guide to baking bliss! Ever wondered how to achieve those impossibly flaky layers in your favorite pastries? Unlocking the secrets to a perfect puff pastry is easier than you think. Dive into our guide and discover the step-by-step process of creating your own flaky puff pastry recipe from scratch, and prepare to amaze your friends and family with bakery-worthy creations. Ready to embark on a delectable adventure?
- BakeWithEase: Unlocking the Secrets of Homemade Puff Pastry
- What is Puff Pastry and Why Make it at Home?
-
The Ultimate Flaky Puff Pastry Recipe: A Step-by-Step Guide
- Gathering Your Ingredients: The Puff Pastry Checklist
- Equipment You'll Need for Perfect Puff Pastry
- Step 1: Creating the Détrempe (Base Dough)
- Step 2: Preparing the Butter Block (Beurrage)
- Step 3: Encasing the Butter: The First Turn
- Step 4: Completing the Turns: Building the Layers
- Step 5: Resting and Chilling: Patience is a Virtue
- Step 6: Baking Your Homemade Puff Pastry
- Puff Pastry Troubleshooting: Common Problems and Solutions
- Delicious Puff Pastry Creations: Recipes and Ideas
- Storing Your Homemade Puff Pastry: Freshness Guaranteed
- Conclusion: Enjoy the Rewards of Homemade Flaky Puff Pastry
- Frequently Asked Questions
- Final Reflection: Mastering the Art of Flaky Perfection
- Unleash Your Inner Pastry Chef!
BakeWithEase: Unlocking the Secrets of Homemade Puff Pastry
Welcome to BakeWithEase, your guide to mastering baking techniques, even those that seem daunting at first glance. Puff pastry, or pâte feuilletée as it's known in French, often falls into that category – a delicate dance of dough and butter that promises ethereal flakiness. But fear not! With the right approach and a bit of patience, creating your own truly flaky puff pastry recipe from scratch is absolutely within your reach. We're here to demystify the process and show you how rewarding homemade can be.
This article will break down the art and science behind perfect puff pastry, guiding you through each step from simple ingredients to stunning layers. We'll cover the essential techniques, explain why they work, and provide a reliable flaky puff pastry recipe that you can follow. Get ready to impress yourself and others with pastries that boast that signature shatteringly crisp texture.
What is Puff Pastry and Why Make it at Home?
Understanding Puff Pastry: A Baker's Essential
Puff pastry is a classic laminated dough, meaning it's made by repeatedly folding a lean dough (détrempe) around a block of butter (beurrage). The magic happens in the oven: as the butter melts, it creates steam between the layers of dough. This steam forces the layers apart, causing the pastry to puff up dramatically and become incredibly flaky. It's a fundamental dough used in countless sweet and savory applications, from delicate palmiers and turnovers to impressive vol-au-vents and the crust for Beef Wellington.
Mastering this dough opens up a world of possibilities in your baking repertoire. Unlike yeast-leavened doughs, puff pastry relies solely on physical lift from steam. A well-made batch can expand to eight times its original height, showcasing hundreds, if not thousands, of distinct, crisp layers. Understanding the interaction between dough, butter, and temperature is key to achieving this remarkable texture.
The Benefits of Homemade Puff Pastry: Freshness and Flavor
While convenient, store-bought puff pastry often can't compare to the quality of a homemade flaky puff pastry recipe. The primary advantage of making it yourself is control over ingredients. You can use high-quality butter, which imparts a superior, richer flavor compared to the blends of fats sometimes found in commercial products. This fresh butter taste is noticeable in every bite.
Furthermore, homemade pastry, when baked fresh, delivers unparalleled flakiness and rise. Store-bought versions may contain stabilizers or emulsifiers that affect texture, and the layers can sometimes be less distinct. Baking your own ensures you get the maximum potential for lift and the most delicate, crisp layers possible, making the effort truly worthwhile for special occasions or simply for the joy of baking excellence.
Debunking the Myth: Puff Pastry Isn't as Hard as You Think!
Many bakers perceive making puff pastry from scratch as an advanced, intimidating task, reserved only for professionals. While it does require precision, patience, and attention to detail, it's not inherently difficult. The process is repetitive, focusing on rolling, folding, and chilling – steps that become intuitive with practice. The key is to understand the why behind each step, particularly the importance of keeping everything cold.
Think of it as a series of manageable steps rather than one complex challenge. Each "turn" (the folding process) builds layers, and chilling periods are built-in breaks. By following a reliable flaky puff pastry recipe and focusing on technique rather than speed, even beginner bakers can achieve impressive results. It's a skill that builds confidence and unlocks a new level of baking satisfaction.
The Ultimate Flaky Puff Pastry Recipe: A Step-by-Step Guide
Gathering Your Ingredients: The Puff Pastry Checklist
Having the right ingredients, properly prepared, is the first critical step in any flaky puff pastry recipe. Quality matters, especially when there are so few components. Ensure everything is measured accurately before you begin.
High-Quality Flour: The Foundation of Flaky Layers
For classic puff pastry, a good quality all-purpose flour is typically recommended. It provides sufficient gluten development for structure but isn't so strong that the dough becomes tough or difficult to roll. Aim for a flour with a protein content around 10-12%. For a standard batch yielding about 1 kg of dough, you'll likely need around 250-300 grams of flour. Using a consistent brand you trust is also helpful.
Sifting your flour before measuring and mixing can help aerate it and ensure there are no lumps. While not strictly necessary if your flour is fresh, it can contribute to a smoother détrempe. The flour provides the framework for the layers and absorbs the moisture from the ice water.
Cold Butter: The Key to Steam and Lift
This is arguably the most crucial ingredient. You need very cold, high-quality unsalted butter. European-style butter with a higher fat content (typically 82% compared to 80% in many standard US butters) is often preferred as it's firmer and easier to work with during lamination. You'll need roughly 200-250 grams for the butter block, plus a small amount (maybe 20-30g) potentially cut into the détrempe depending on the specific flaky puff pastry recipe method used.
The butter must remain cold and solid throughout the rolling and folding process. When it hits the hot oven, these solid pockets of fat melt rapidly, instantly turning into steam and forcing the layers apart. If the butter is too soft or melts prematurely into the dough, you won't get the desired separation and flakiness.
Ice Water: Binding and Cooling
Ice water serves two main purposes: it binds the flour and salt to create the détrempe, and it helps keep the dough cold during the initial mixing phase. The exact amount needed will vary slightly depending on your flour and humidity, but typically ranges from 120-150 milliliters for the amount of flour mentioned above. It's best to start with slightly less and add just enough to bring the dough together.
Using water that is genuinely ice-cold is important for controlling the dough's temperature from the outset. Have a glass of water with ice cubes ready, and measure out the required amount just before adding it to the flour mixture. This simple step contributes to keeping the overall dough temperature down, which is vital for successful lamination.
A Pinch of Salt: Enhancing Flavor
Salt is a minor but important ingredient in any flaky puff pastry recipe. It enhances the flavor of both the dough and the butter, balancing the richness and bringing out the subtle sweetness that develops during baking. A small amount, typically 1 to 2 teaspoons for a standard batch, is sufficient.
Ensure the salt is evenly distributed in the flour before adding the liquid. While its primary role is flavor, salt also has a slight effect on gluten development. However, in puff pastry, its contribution to taste is the most significant benefit.
Equipment You'll Need for Perfect Puff Pastry
Having the right tools makes the puff pastry process smoother and helps ensure consistent results. You don't need highly specialized equipment, but a few basics are essential.
A Clean Work Surface: Marble or Stainless Steel Preferred
An ideal work surface for puff pastry is one that stays cool, such as marble or stainless steel. These materials help prevent the butter in the dough from warming up too quickly as you roll. A large surface area is also beneficial, allowing you plenty of room to roll out the dough without it hanging off the edges.
If you don't have a marble or stainless steel counter, a large, clean wooden surface can work, but you may need to chill the dough more frequently. Alternatively, a large silicone pastry mat placed on any cool surface can also be effective. The key is to keep your workspace as cool as possible.
Rolling Pin: Achieving Even Thickness
A sturdy rolling pin is indispensable for puff pastry. A heavier pin, whether French-style (tapered) or American-style (straight), can help you roll the dough more efficiently and evenly. The goal is to roll the dough to a consistent thickness at each stage.
Uneven rolling leads to uneven layers, which can result in some parts of the pastry puffing more than others. Take your time and apply even pressure across the dough as you roll, frequently checking the thickness to ensure uniformity.
Plastic Wrap: Resting the Dough
Plastic wrap is essential for wrapping the dough tightly during its crucial resting periods in the refrigerator. Proper wrapping prevents the dough from drying out and forming a skin, which can hinder the lamination process and result in less tender pastry.
Ensure you wrap the dough securely, pressing out any air bubbles, before chilling. This also helps maintain the dough's shape and keeps it compact for easier handling during the next turn. You'll use quite a bit of plastic wrap throughout the process.
Sharp Knife or Pizza Cutter: Precise Cuts
When it's time to shape and cut your finished puff pastry dough before baking, a very sharp knife or a pizza cutter is necessary. Using a sharp tool ensures clean cuts through the many layers of dough and butter.
If you use a dull knife or press down too hard, you risk sealing the edges of the layers together. Sealed edges prevent the steam from escaping and separating the layers during baking, resulting in a pastry that doesn't puff properly along the cut lines.
Step 1: Creating the Détrempe (Base Dough)
The détrempe is the initial, lean dough that will encase the butter block. It's a simple mixture, but the method of combining ingredients is important.
Mixing the Flour, Water, and Salt: A Gentle Approach
In a large bowl, whisk together the flour and salt. If your flaky puff pastry recipe calls for cutting a small amount of butter into the détrempe, do so now until it resembles coarse crumbs. Then, gradually add the ice water, mixing with your hands or a wooden spoon until the dough just comes together into a shaggy mass. Avoid adding all the water at once; you may not need it all.
The goal here is minimal mixing. You want the ingredients to be combined, but you don't want to develop too much gluten at this stage. Overmixing the détrempe will make it elastic and difficult to roll later, leading to shrinkage.
Kneading the Détrempe: Developing Gluten Strength
Once the shaggy dough has formed, turn it out onto your lightly floured work surface. Briefly knead it for just 1-2 minutes until it forms a relatively smooth ball. It doesn't need to be perfectly smooth or elastic, as the subsequent rolling and folding will develop the necessary gluten structure.
This short kneading period helps ensure the dough is cohesive and easy to handle. It provides just enough structure to hold up to the lamination process without becoming overly resistant to rolling.
Resting the Détrempe: Allowing Gluten to Relax
Shape the dough into a thick rectangle or square, depending on how you plan to incorporate the butter block. Wrap it tightly in plastic wrap and refrigerate for at least 30-60 minutes. Some recipes recommend cutting an 'X' or score marks into the top to help it chill evenly.
This resting period is crucial. It allows the gluten you just developed to relax, making the dough pliable and easy to roll without excessive spring-back. It also ensures the dough is sufficiently cold, which is essential before you introduce the cold butter block.
Step 2: Preparing the Butter Block (Beurrage)
The beurrage is simply the block of cold butter that will be encased within the détrempe. Its preparation is key to creating even layers.
Shaping the Butter: Achieving Uniform Thickness
Take your cold butter (the main block amount, e.g., 200-250g) and place it between two sheets of parchment paper or in a large resealable plastic bag. Use your rolling pin to pound the butter until it starts to soften slightly and become pliable. Then, roll it out into a uniform square or rectangle. The size should be about 1/4 to 1/3 the size of your planned rolled-out détrempe, and the thickness should be consistent, around 1 to 1.5 centimeters.
Uniform thickness of the butter block is vital. If the butter is thicker in some spots than others, the layers will be uneven, leading to inconsistent puffing. Pounding helps soften the butter just enough so it doesn't break into pieces when rolled, but isn't so soft that it melts.
Chilling the Butter Block: Maintaining Solid Form
Once shaped, place the butter block back in the refrigerator while your détrempe is resting. The butter needs to be cold and firm, but still slightly pliable – it should bend slightly without snapping. If it's too hard, it will break through the dough when you try to roll.
Getting the temperature of both the détrempe and the beurrage just right (cold but pliable) is one of the trickiest parts of making a flaky puff pastry recipe. It's a balance that ensures the butter stays in distinct layers during rolling and folding.
Step 3: Encasing the Butter: The First Turn
This is where the magic truly begins – you're creating the first sandwich of dough and butter that will be multiplied through subsequent turns.
Placing the Butter on the Détrempe: Precise Positioning
Take your chilled détrempe and roll it out on a lightly floured surface into a rectangle roughly twice the length of your butter block and slightly wider. The thickness should be relatively even. Place the chilled butter block neatly on one half of the rolled-out détrempe, leaving a small border around the edges.
Ensure the butter block is centered on its half of the dough. This positioning allows you to fold the other half of the dough over the butter cleanly, fully encasing it without gaps or thin spots.
Folding the Dough: Creating the First Layer
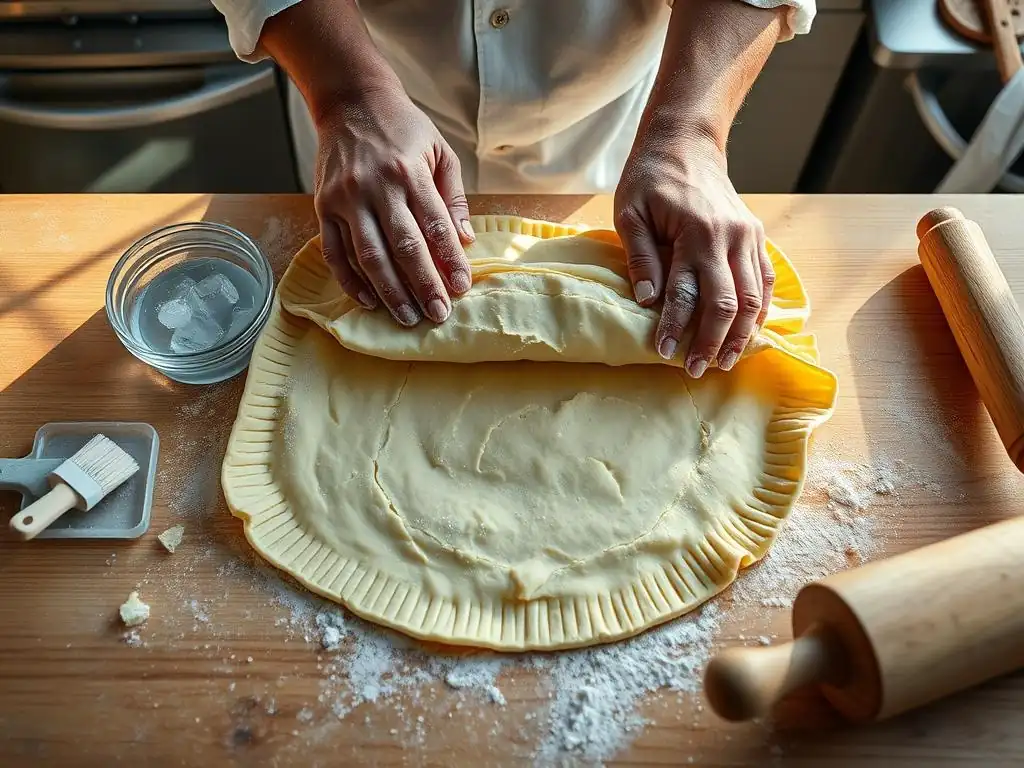
Fold the other half of the détrempe over the butter block, aligning the edges. Pinch the edges together firmly to completely seal the butter inside the dough package. You've now created a single layer of butter sandwiched between two layers of dough.
This initial fold is critical for sealing the butter. Any gaps or leaks will cause butter to escape during rolling, disrupting the layers and reducing flakiness. Gently press down on the sealed package to ensure the butter is evenly distributed within.
Resting the Dough: Chilling is Crucial
After the first fold, you must rest and chill the dough again. Wrap the dough package tightly in plastic wrap and refrigerate for at least 30-60 minutes. This allows the gluten to relax after rolling and folding, and more importantly, it firms up the butter again.
Attempting to roll the dough for the next turn before it's properly chilled will result in the butter melting or squishing out, ruining the layers. Patience during the chilling phases is non-negotiable for a successful flaky puff pastry recipe.
Step 4: Completing the Turns: Building the Layers
This is the repetitive core of making puff pastry, where the layers are built through a series of rolling and folding actions. The specific method (single or double turn) and the number of turns determine the final number of layers and thus the ultimate flakiness.
The Single Turn Method: Step-by-Step
A single turn (also called a "book fold") is a common method. Take your chilled dough, place it on a lightly floured surface with a short end facing you. Roll it into a rectangle about three times as long as it is wide. Brush off any excess flour. Fold the bottom third of the dough up towards the center, then fold the top third down over that, like folding a letter. Then, fold the dough in half lengthwise (bringing the short ends together), like closing a book.
This process creates four layers of dough/butter from the previous stage's single layer. After each single turn, wrap the dough and chill for another 30-60 minutes before the next turn. It's helpful to make a small indentation on the dough with your finger to keep track of how many turns you've completed (e.g., one dent for the first turn, two for the second, etc. ).
The Double Turn Method: An Alternative Approach
The double turn (or "letter fold") is another way to build layers. Roll the chilled dough into a rectangle about four times as long as it is wide. Brush off excess flour. Fold one short end towards the center, about one-third of the way down. Then fold the other short end over the first fold, meeting the edge. This results in three layers of dough/butter.
Some bakers prefer the double turn as it builds layers faster with fewer overall turns, potentially reducing handling time. However, it can be slightly trickier to execute neatly. Regardless of the method, ensuring your folds are straight and the dough is evenly rolled is key.
How Many Turns are Needed for Perfect Flakiness?
The number of turns directly impacts the number of layers, which dictates how flaky your pastry will be. Each single turn multiplies the existing layers by four, while each double turn multiplies them by three. Starting with the initial three layers (dough/butter/dough sandwich), six single turns (3 * 4^6) or four double turns (3 * 3^4) are common goals.
Six single turns result in a very high number of layers (over 12,000 theoretical layers if perfectly executed), leading to exceptionally fine and flaky results. Four double turns also yield a substantial number (over 240 layers). Most flaky puff pastry recipes call for 4 to 6 turns in total, depending on the desired flakiness and the specific folding method. Achieving a very high layer count is the secret to maximum puff and crispness.
Step 5: Resting and Chilling: Patience is a Virtue
We've mentioned it before, but it bears repeating: proper chilling is absolutely critical throughout the puff pastry process. It's not just a suggestion; it's essential for success.
Why Resting is Essential: Preventing Gluten Development
Resting the dough in the refrigerator between turns serves two main purposes. Firstly, it allows the gluten, which has been stretched and worked during rolling, to relax. This relaxation prevents the dough from shrinking back excessively when you try to roll it for the next turn, making the process much easier and resulting in more evenly shaped pastry.
Secondly, and perhaps more importantly for a flaky puff pastry recipe, chilling keeps the butter firm and distinct from the dough layers. If the dough or butter becomes warm, the butter will start to soften and integrate into the dough, destroying the separation needed for lamination.
Optimal Chilling Time: Ensuring Butter Stays Cold
Between each turn, the dough should be chilled for a minimum of 30-60 minutes. This gives the butter ample time to firm up again. If your kitchen is warm or you work slowly, you may need longer chilling times. The dough should feel firm and cold to the touch before you attempt the next turn.
The final rest before you shape and bake the dough is often longer, typically 1-2 hours, or even overnight. This extended chill ensures the dough is thoroughly relaxed and the butter is completely firm, setting the stage for maximum puff and flakiness in the oven. Don't rush this step!
Step 6: Baking Your Homemade Puff Pastry
The moment of truth! Proper baking technique is the final step to unleashing the incredible flakiness you've worked so hard to create.
Preheating the Oven: Achieving Optimal Rise
For puff pastry, a very hot oven is essential. Preheat your oven to a high temperature, typically between 400°F and 425°F (200°C to 220°C). Ensure the oven is fully preheated for at least 15-20 minutes before baking to ensure the temperature is stable and the oven cavity is saturated with heat.
The high initial heat is crucial because it causes the cold butter layers to melt almost instantly and produce a burst of steam. This rapid creation of steam is what forces the dough layers apart, resulting in that dramatic puff and separation.
Baking Temperature: Finding the Sweet Spot
While starting at a high temperature is key for the initial lift, some recipes recommend reducing the temperature slightly after the first 10-15 minutes (e.g., down to 375°F or 190°C) to ensure the interior layers cook through without the exterior burning. This two-stage baking process helps achieve both maximum puff and even cooking.
Monitor your pastry closely as it bakes. The correct temperature ensures the butter steams effectively while the dough cooks and sets around the expanding layers. Too low a temperature and the butter might melt and leak before steaming; too high and the outside burns before the inside is cooked.
Baking Time: Monitoring for Golden Brown Perfection
Baking time will vary significantly depending on the size and thickness of your pastry pieces. Small items like palmiers or turnovers might bake in 15-20 minutes, while larger items or shells could take 25-35 minutes or longer.
The pastry is done when it is dramatically puffed, deep golden brown all over, and feels light and crisp. If it's not baked long enough, the layers might collapse slightly after cooling, and the interior can be doughy. Look for even coloration across the surface as a sign of thorough baking.
Puff Pastry Troubleshooting: Common Problems and Solutions
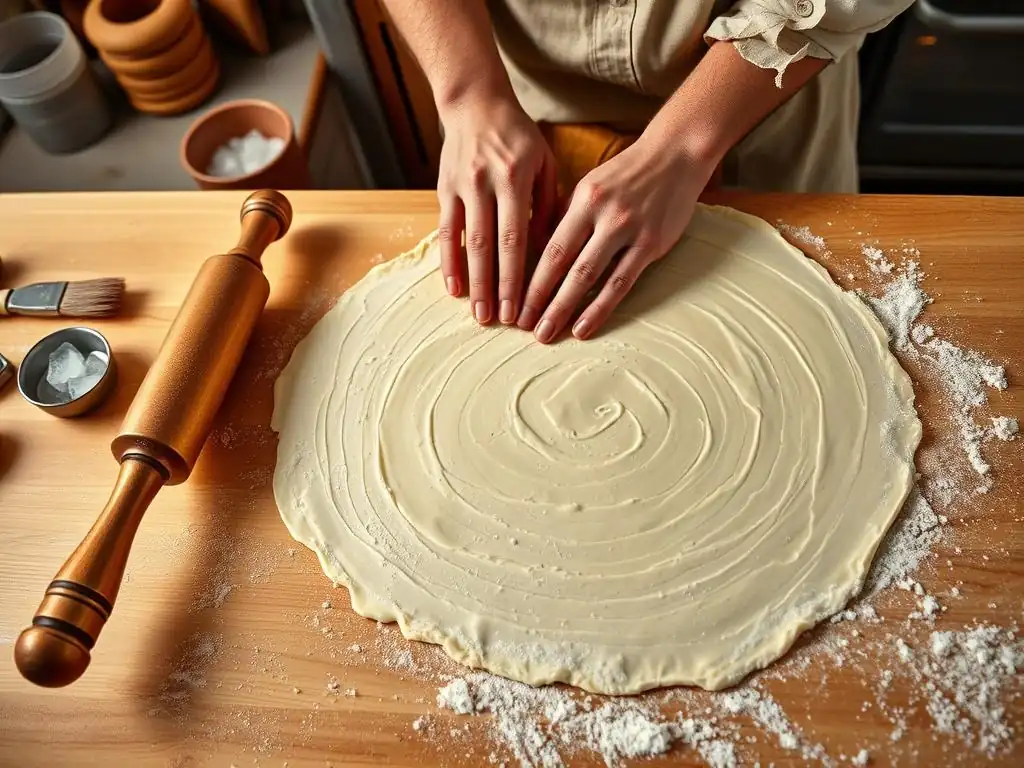
Even with the best flaky puff pastry recipe, issues can arise. Knowing how to identify and fix common problems will save your pastry.
Butter Leaking: Preventing Meltdown
Problem: You notice butter oozing out from the edges of the dough during rolling or baking.
This is a common issue and usually indicates that the butter or the dough was too warm, or that the edges were not sealed properly during the initial encasing or subsequent folds. Warm butter softens and merges with the dough rather than staying in distinct layers.
Solution: Ensure all ingredients and your work surface are kept cold. If the butter starts to feel too soft during rolling, stop immediately, wrap the dough, and chill it thoroughly (at least 30 minutes) before continuing. When folding, make sure the edges are neatly aligned and gently sealed to prevent butter from escaping. Working quickly also helps keep the dough cool.
Dough Shrinking: Addressing Gluten Overdevelopment
Problem: The dough springs back significantly when you try to roll it, making it difficult to achieve the desired size and thickness.
Excessive shrinkage is typically a sign that the gluten in the dough is too developed or hasn't had enough time to relax. This can happen if the détrempe was over-kneaded initially or if the dough hasn't rested sufficiently between turns or before final rolling.
Solution: Ensure you only knead the détrempe minimally (1-2 minutes). The most effective solution for shrinkage during rolling is to stop, wrap the dough tightly, and let it rest in the refrigerator for a longer period (at least 45-60 minutes, or even longer if needed). This extra rest allows the gluten strands to relax, making the dough more pliable and less resistant to rolling. Roll gently without forcing the dough.
Uneven Layers: Achieving Consistent Flakiness
Problem: Some parts of the baked pastry puff up beautifully, while others remain flat or have less distinct layers.
Uneven layers are usually a result of inconsistent rolling or folding during the lamination process. If the dough or butter block is thicker in some areas than others, or if the folds aren't straight and even, the layers won't be uniform, leading to patchy puffing.
Solution: Focus on rolling the dough into a consistent rectangle of even thickness at each stage. Use a ruler if necessary. Ensure your butter block is also uniformly thick. When folding, make sure the edges align neatly and the folds are sharp and straight. Practice helps improve uniformity in rolling and folding technique, crucial for a truly flaky puff pastry recipe.
Problem: Dough is too sticky
Problem: The dough is sticking excessively to the work surface and rolling pin during handling.
While a little bit of flour is expected on the surface when rolling, dough that is constantly sticking indicates too much moisture relative to the flour, or that the dough has become too warm, causing the butter (or moisture) to surface.
Solution: Add more Flour
Solution: While the instinct might be to add a lot of flour, adding too much flour during rolling can actually dry out the dough and create streaks of unincorporated flour, which can negatively impact the final texture and flakiness. The best solution for sticky dough during lamination is almost always to chill the dough thoroughly. Wrap it tightly and refrigerate for at least 30-60 minutes until it is firm and cold.
When you resume rolling, use only minimal flour on your surface and rolling pin – just enough to prevent sticking, brushing off any excess. If the initial détrempe was too wet, adding a tiny bit more flour at that mixing stage is better than trying to compensate later.
Delicious Puff Pastry Creations: Recipes and Ideas
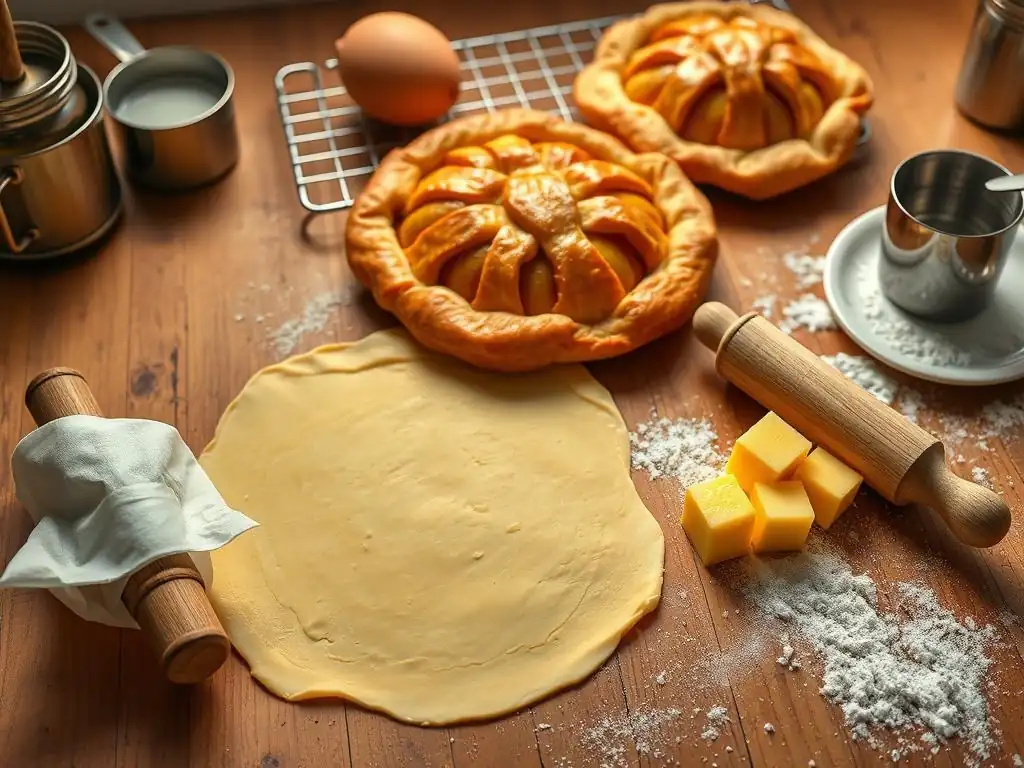
Once you've mastered making a flaky puff pastry recipe from scratch, a world of delicious possibilities opens up! Here are a few classic examples to get you started.
Sweet Puff Pastry Delights: Palmiers Recipe
Palmiers, also known as elephant ears or palm leaves, are one of the simplest and most delightful ways to showcase homemade puff pastry. They require just two ingredients: puff pastry and sugar.
To make palmiers, roll your chilled puff pastry dough into a rectangle about 1/8 inch (3-4 mm) thick. Generously sprinkle the surface with granulated sugar (about 1/4 to 1/2 cup per standard batch). Fold the two short ends towards the center so they meet in the middle. Then, fold the dough in half lengthwise, like closing a book.
Slice the log into 1/2 inch (1 cm) thick pieces. Place them on a baking sheet lined with parchment paper, leaving space between them. Bake in a preheated oven (around 400°F or 200°C) for 10-15 minutes, flipping halfway through, until deeply golden brown and caramelized. The high heat causes the layers to separate and the sugar to melt into a crisp glaze.
Savory Puff Pastry Applications: Beef Wellington Recipe
Beef Wellington is a show-stopping dish that relies on high-quality puff pastry. It typically involves wrapping a seared beef tenderloin, often coated in a mushroom duxelles (finely chopped mushrooms cooked until dry) and sometimes prosciutto or pâté, within a layer of puff pastry before baking.
This dish demonstrates the pastry's ability to create a beautiful, edible crust for savory fillings. The baking process is more complex than palmiers, as you need to perfectly cook the beef inside while ensuring the pastry is golden and crisp. Baking temperature often starts high (around 400°F or 200°C) for the initial puff and then may be reduced, with total baking time varying significantly based on the size of the beef and desired internal temperature, typically ranging from 20 to 40 minutes or more. It's a true test of your flaky puff pastry recipe skills combined with meat cookery.
Mastering the Classics: Croissant Recipe
While technically a different dough (croissants are yeast-leavened laminated dough), the technique of creating layers through rolling and folding butter into dough is shared with puff pastry. Mastering a flaky puff pastry recipe provides an excellent foundation for tackling croissants.
Croissants involve a similar process of encasing a butter block and performing turns, but the dough also contains yeast, requiring proofing (rising) time. After the turns, the dough is shaped into the iconic crescent shape and proofed until light and airy before being baked, typically with an egg wash for a golden finish. Baking usually occurs at around 375-400°F (190-200°C) for 15-20 minutes until deeply golden and flaky. It's a logical next step for bakers who have conquered puff pastry.
Storing Your Homemade Puff Pastry: Freshness Guaranteed
You've put in the effort to make a beautiful flaky puff pastry recipe from scratch. Proper storage ensures you can use it when needed without sacrificing quality.
Refrigerating Puff Pastry: Short-Term Storage
If you plan to use your puff pastry within a few days, refrigeration is suitable. Wrap the dough tightly in several layers of plastic wrap to prevent it from drying out or absorbing refrigerator odors. You can store it as a block or rolled out and folded depending on how you plan to use it.
Homemade puff pastry can be refrigerated for up to 2-3 days. Beyond this, the butter can become excessively hard, making it difficult to roll, or the dough quality might start to deteriorate. Always allow refrigerated dough to sit at room temperature for 10-15 minutes before rolling to make it pliable, but don't let it get warm.
Freezing Puff Pastry: Long-Term Preservation
For longer storage, freezing is the best option. Properly wrapped, homemade puff pastry can be frozen for 1 to 2 months without significant loss of quality. This is perfect if you make a large batch or only need a portion for a specific recipe.
To freeze, wrap the well-chilled dough tightly in plastic wrap, then add an outer layer of aluminum foil or place it in a freezer-safe bag. This double layer of protection helps prevent freezer burn. To use frozen pastry, thaw it overnight in the refrigerator. Avoid thawing at room temperature, as this can cause the butter layers to soften too much. Once thawed, it's ready to be rolled and shaped according to your flaky puff pastry recipe.
Conclusion: Enjoy the Rewards of Homemade Flaky Puff Pastry
You've Mastered the Art: Celebrate Your Baking Success!
Congratulations! By following these steps, you've unlocked the secret to creating a truly flaky puff pastry recipe from scratch. It's a process that requires care and patience, but the results – incredibly light, crisp, and flavorful layers – are immensely rewarding. You've moved beyond simply following instructions and have gained a deeper understanding of lamination, a fundamental technique in classic pastry.
Now that you've mastered this skill, don't hesitate to use your beautiful homemade puff pastry in a variety of applications, from simple turnovers and elegant tarts to impressive savory dishes like Beef Wellington. The superior texture and taste of your homemade creation will elevate any recipe. Celebrate your baking success and enjoy the delicious fruits of your labor – that perfect, flaky puff pastry you made with your own hands!
Frequently Asked Questions
What makes puff pastry flaky?
The flakiness comes from alternating layers of dough and butter. During baking, the butter melts and creates steam, which separates the layers and makes them rise.
Is it difficult to make puff pastry at home?
While it requires patience, making puff pastry at home isn't overly difficult. The key is keeping the butter cold and following the turning process carefully.
What kind of butter is best for puff pastry?
European-style butter with a high fat content is generally recommended. This type of butter creates more steam and results in a flakier pastry.
How many turns are needed for good puff pastry?
Typically, 4-6 single turns or 2-3 double turns are sufficient. Overworking the dough can result in a tougher, less flaky pastry.
Can puff pastry be frozen?
Yes, puff pastry can be frozen before baking. Wrap it tightly in plastic wrap and then foil. Allow it to thaw in the refrigerator overnight before using for best results.
Final Reflection: Mastering the Art of Flaky Perfection
The pursuit of the perfect flaky puff pastry transcends mere culinary skill; it's a testament to patience, precision, and the transformative power of simple ingredients. From the initial chilling of the butter to the final golden-brown bake, each step in the process reveals a deeper understanding of texture and flavor. This journey into the heart of puff pastry isn't just about creating a delicious treat; it's about embracing a process that rewards dedication with unparalleled results.
The enduring appeal of puff pastry lies not only in its exquisite texture but also in its versatility. It's a blank canvas for both sweet and savory creations, a testament to the enduring power of culinary tradition. The simplest things are often the most beautiful,
a sentiment that rings true when considering the elegant simplicity of puff pastry, yet the complexity of its creation. This recipe, passed down through generations of bakers, continues to inspire and challenge, reminding us of the artistry inherent in even the most basic of ingredients.
Now, I invite you to embark on your own puff pastry adventure. Don't be intimidated by the seemingly intricate process; embrace the challenge. Each fold, each chill, brings you closer to mastering this timeless technique. The reward? Not just a delicious pastry, but a newfound appreciation for the dedication and precision required to create something truly extraordinary. The flaky layers you create will be a testament to your own patience and skill, a delicious reward for your efforts, and a source of pride for years to come.
Unleash Your Inner Pastry Chef!
Thanks for taking the time to explore the wonderful world of homemade puff pastry! You've now unlocked the secrets to creating incredibly flaky, buttery layers—a skill that will impress even the most discerning palates. Ready to put your new knowledge to the test?
- Bake a masterpiece! Try your hand at making a classic apple tart or a savory quiche using your freshly made puff pastry. Let your creativity shine!
- Share the joy! Post a picture of your creation on social media and tag us @BakeWithEase – we’d love to see your delicious results!
- Challenge a friend! Dare a fellow baking enthusiast to try their hand at making puff pastry from scratch. Let the flaky fun begin!
So, what delicious adventure will your homemade puff pastry take you on next?