
Baking with High Hydration Doughs Using Artisan Flours

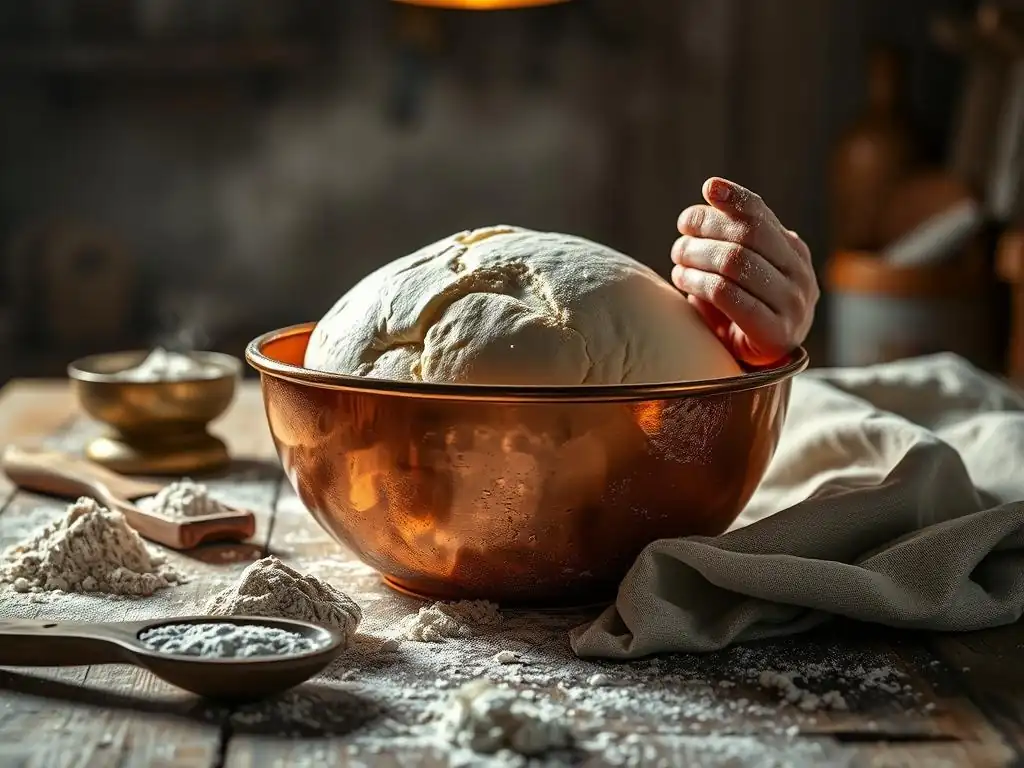
Welcome to BakeWithEase, where the magic of baking comes alive! Ever wondered how to unlock the full potential of your artisan flours? This article dives deep into the secrets of achieving that perfect texture using a high hydration dough. Discover our artisan flour hydration recipe and prepare to be amazed by the results. We're about to explore techniques that will elevate your baking to a whole new level. Intrigued? Let's get started!
- Baking with High Hydration Doughs Using Artisan Flours: A BakeWithEase Guide
- Mastering High Hydration Bread with Artisan Flours
- Choosing the Right Artisan Flour for Your High Hydration Dough
- The High Hydration Artisan Dough Recipe: A Step-by-Step Guide
- Shaping and Baking Your High Hydration Artisan Bread
- Troubleshooting High Hydration Artisan Bread Recipes
- High Hydration Artisan Flour Recipe Variations: Beyond the Basic Loaf
- Conclusion: Elevate Your Baking with High Hydration Artisan Flour Techniques
-
Frequently Asked Questions
- What is considered a high hydration dough when using artisan flours?
- Why is hydration particularly important when baking with artisan flours?
- What are some of the benefits of using high hydration doughs with artisan flours?
- What are some challenges I might face when working with high hydration doughs from artisan flours?
- Where can I find artisan flour hydration recipes suitable for beginners?
- Final Reflection: The Transformative Power of Hydration in Artisan Baking
- Unleash Your Inner Artisan Baker!
Baking with High Hydration Doughs Using Artisan Flours: A BakeWithEase Guide
Mastering High Hydration Bread with Artisan Flours
Diving into the world of high hydration bread can feel like a leap, but when you pair this technique with quality artisan flours, the results are truly rewarding. This guide from BakeWithEase explores how to successfully bake beautiful, airy loaves using an artisan flour hydration recipe. High hydration simply means using a higher percentage of water relative to the flour weight, often 70% or more. This increased water content unlocks incredible potential in the dough, leading to a more open crumb structure and a wonderfully crisp crust, hallmarks of traditional artisan bread.
Working with high hydration doughs requires a slightly different approach than standard bread recipes. The dough will be stickier and more challenging to handle initially. However, the benefits – enhanced flavor development, improved texture, and impressive oven spring – make the extra effort well worth it. By understanding the properties of artisan flours and the science behind high hydration, you can confidently create stunning loaves right in your home kitchen.
Understanding Artisan Flour & High Hydration Doughs
Using an artisan flour hydration recipe starts with understanding your key ingredients. Artisan flour is often less processed than standard all-purpose flour, retaining more of the grain's natural character and nutrients. This typically means it has unique protein structures and enzymatic activity that behave differently in dough, especially when dealing with high water ratios. Choosing a high-quality artisan flour is fundamental to achieving the desired structure and flavor in a high hydration loaf.
High hydration doughs rely on gluten development to hold their shape despite the large amount of water. The extra water helps fully hydrate the flour's proteins, allowing gluten strands to stretch and form a strong network that traps gases produced during fermentation. This network is what gives high hydration breads their characteristic open, irregular crumb. Mastering the technique involves careful handling and development of this gluten structure through methods like stretching and folding.
- What is Artisan Flour and Why Use It?
Artisan flour refers to flours that are often stone-ground or milled in traditional ways, preserving more of the grain's natural components like the germ and bran (though sometimes sifted out for white artisan flours). They are typically unbleached and unbromated, offering a purer flavor profile. Using these flours in an artisan flour hydration recipe adds complexity and depth to your bread that you simply can't achieve with standard commodity flours.
The unique characteristics of artisan flours, such as varying protein levels, milling techniques, and grain varieties, contribute significantly to the final texture and taste of your bread. For instance, some artisan flours might absorb water differently or ferment at a slightly different rate than highly refined flours. Embracing these nuances allows you to bake loaves with authentic character, a robust crust, and a crumb that tells the story of the grain.
- The Science Behind High Hydration Dough
The science behind high hydration dough is fascinating. Water plays a crucial role in activating enzymes within the flour and hydrating the gluten-forming proteins, glutenin and gliadin. When mixed with water, these proteins link together to form gluten. In a high hydration dough, there's ample water for these proteins to fully hydrate and move freely, allowing for extensive gluten development without the dough becoming overly stiff.
This high water content also promotes enzymatic activity, particularly amylase, which breaks down starches into sugars. These sugars then become food for the yeast (or sourdough starter), leading to active fermentation and the production of carbon dioxide gas. The strong, elastic gluten network developed in a high hydration dough is essential for trapping this gas, allowing the bread to rise dramatically and develop its signature airy structure during baking.
- Benefits of Baking with High Hydration Artisan Bread Recipes
Baking an artisan flour hydration recipe offers several distinct advantages. Firstly, the high water content leads to a more gelatinized starch structure during baking, resulting in a wonderfully moist and open crumb. This is a key characteristic of many beloved artisan loaves like ciabatta or rustic country bread.
Secondly, the extended fermentation often associated with high hydration doughs, especially when using natural leavening, allows for complex flavors to develop. The enzymes and microbes have more time to work on the flour, breaking down starches and proteins into flavorful compounds. Finally, high hydration contributes to a thinner, crisper crust, which provides a delightful contrast to the soft, airy interior.
Choosing the Right Artisan Flour for Your High Hydration Dough
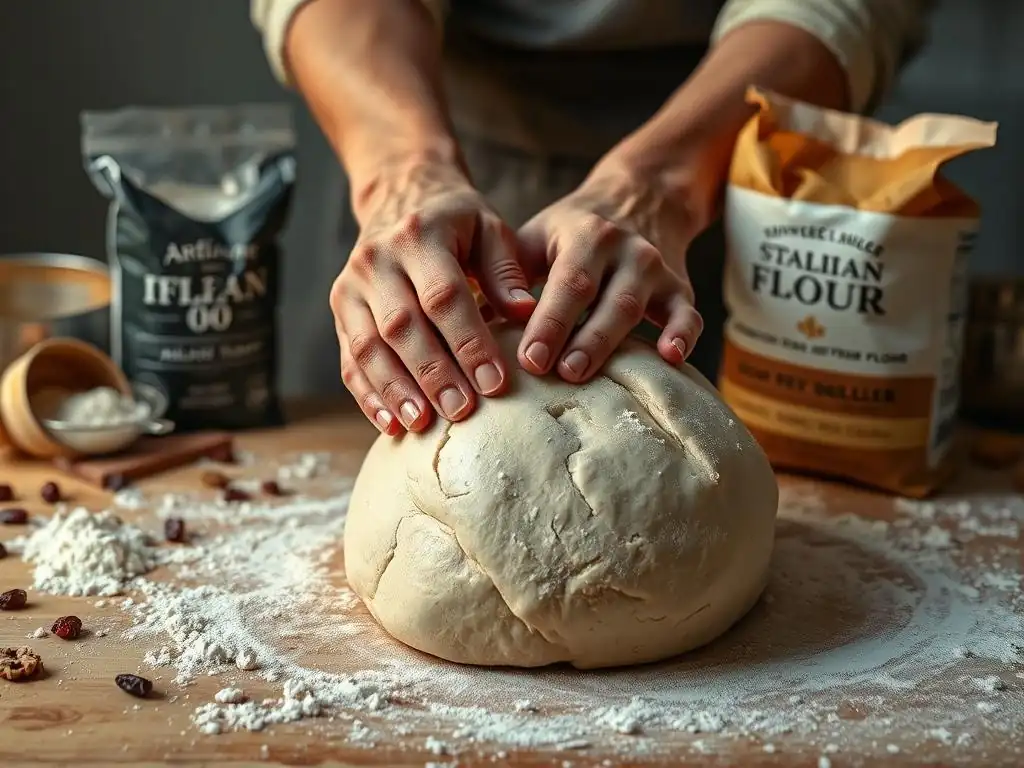
Selecting the appropriate artisan flour is critical when developing an artisan flour hydration recipe. Different flours have varying protein levels, absorption capacities, and flavor profiles, all of which significantly impact how a high hydration dough behaves and the final characteristics of the baked loaf. Understanding these differences helps you match the flour to the specific type of bread you want to create.
For example, a flour with a higher protein content, like a strong bread flour (often 12-14% protein), is excellent for high hydration doughs because it can form a robust gluten network capable of supporting a large amount of water and trapping fermentation gases effectively. Conversely, a lower protein flour might require slightly less hydration or different handling techniques to achieve a similar structure. Experimenting with various artisan flours is part of the fun in perfecting your high hydration baking skills.
Exploring Different Types of Artisan Flours
Let's look at a few popular artisan flours and how they perform in a high hydration context, which is essential for any successful artisan flour hydration recipe. Each offers unique qualities that can elevate your bread.
- Caputo Pizzeria Flour: For a delicate crumb structure.
Caputo Pizzeria flour, particularly the '00' type, is a very finely milled Italian wheat flour often used for Neapolitan-style pizza doughs. While traditionally used for lower hydration pizzas, its high protein content (around 12.5-13.5%) and specific gluten quality make it surprisingly effective for certain high hydration applications, especially if you desire a very tender, light crumb. Its finely ground nature allows for rapid water absorption.
When used in a high hydration artisan flour recipe for bread, Caputo '00' can produce a very delicate, almost cloud-like interior crumb. It requires careful handling due to its extensibility, but the result can be a bread with a thin, crackly crust and a wonderfully soft interior, perfect for roles like focaccia or certain types of rustic Italian loaves.
- King Arthur White Whole Wheat Flour: Adding nutty flavor and texture.
King Arthur White Whole Wheat Flour is a 100% whole wheat flour milled from a lighter colored wheat berry. It typically has a protein content similar to standard bread flour (around 13%) but includes the bran and germ, which adds a nutty, slightly sweet flavor and denser texture compared to white flour. Incorporating this flour into a high hydration artisan flour recipe adds nutritional value and complex taste.
Using white whole wheat in a high hydration dough requires ensuring sufficient hydration to soften the bran particles, which can otherwise cut the gluten strands. A hydration level of 80% or even higher might be necessary depending on the specific loaf. The resulting bread will have a lovely whole-grain character, a slightly tighter but still open crumb, and a beautiful aroma.
- Bob's Red Mill Dark Rye Flour: Enhancing depth and complexity.
Bob's Red Mill Dark Rye Flour is a stone-ground flour containing the rye berry's bran, germ, and endosperm. Rye flour is known for its distinctive tangy flavor and its high levels of pentosans, which are gums that absorb a lot of water but interfere with gluten development. Dark rye typically has a moderate protein content (around 10-12%) but doesn't form the same kind of gluten network as wheat.
Including dark rye in an artisan flour hydration recipe, usually as a percentage of the total flour (e.g., 10-30% rye, 70-90% strong wheat flour), adds significant depth of flavor and moisture retention. High hydration is often used with rye blends to help manage its stickiness and create a more open structure than pure rye loaves. The resulting bread is dense but moist, with a characteristic tangy, earthy taste.
- Jovial Einkorn Flour: A healthier and flavorful alternative.
Jovial Einkorn Flour is made from one of the oldest cultivated wheat varieties. It has a unique, slightly sweet, nutty flavor and a different gluten structure compared to modern wheat. Einkorn typically has a protein content around 13-14%, but its gluten is weaker and less elastic, making it challenging to work with in high hydration doughs if used alone.
When developing an artisan flour hydration recipe using Einkorn, it's often best to use it as a partial substitute (e.g., 25-50%) mixed with a stronger wheat flour to provide structural support. High hydration (often 80%+) is used to help manage its stickiness and encourage a more open crumb, but the dough will still be quite fragile. The reward is a bread with a truly unique flavor and potentially easier digestibility for some individuals.
- Understanding Protein Content and Its Impact on Hydration
Protein content in flour is a primary factor influencing how much water it can absorb and how strong the gluten network will be. Flours with higher protein (12-14%+) are generally preferred for high hydration doughs because their gluten potential is higher, allowing them to support the increased water weight and gas production. For instance, a strong bread flour might comfortably handle 80% hydration or more.
Lower protein flours (like pastry flour, around 8-10%) absorb less water and form weaker gluten, making them unsuitable for typical high hydration artisan bread recipes where structure is key. Even within the 'artisan' category, protein varies. A finely milled white artisan flour might have 11-12% protein, while a robust whole grain artisan flour could be 13-14% or higher, requiring different hydration strategies. Always check the protein content on your flour bag if possible.
- Matching Flour to Your Desired Bread Style (e.g., Sourdough, Ciabatta)
The choice of artisan flour should align with the type of bread you aim to bake. For a classic, open-crumbed sourdough or a rustic country loaf using an artisan flour hydration recipe, a strong white bread flour or a blend including a portion of whole wheat or rye is ideal for structure and flavor complexity. A flour like Central Milling Organic Artisan Bakers Craft Plus, with its consistent performance and protein level around 11.5%, is a popular choice for these styles at hydration levels typically between 75% and 85%.
For a very open, irregular crumb like ciabatta, which often uses extremely high hydration (sometimes 90-100%), a flour specifically milled for high extensibility and moderate strength is beneficial. Some Italian flours or specific artisan white bread flours are designed for this. For breads aiming for a denser, moist crumb with unique flavor, incorporating flours like rye or spelt into your artisan flour hydration recipe mix is the way to go.
The High Hydration Artisan Dough Recipe: A Step-by-Step Guide
Ready to get your hands wet? This section walks you through a basic high hydration artisan flour recipe, focusing on the techniques that make these doughs successful. Remember, precision in measuring, especially water and flour, is key to managing hydration levels effectively. Using a digital scale for all ingredients is highly recommended for consistent results.
This guide uses a typical hydration level as an example, but you can adjust it based on your flour and desired outcome. A common starting point for an artisan flour hydration recipe might be 75-80% hydration. Don't be intimidated by the stickiness; it's part of the process!
Ingredients for the Perfect High Hydration Loaf
A high hydration artisan flour recipe is deceptively simple, relying on a few core ingredients to achieve complex results. The quality of each component matters.
- Artisan Flour: Central Milling Organic Artisan Bakers Craft Plus
This flour is a popular choice among artisan bakers for its balance of extensibility and strength, making it well-suited for an artisan flour hydration recipe. It's an unbleached, unbromated white flour with a protein content around 11.5%. It performs reliably in high hydration doughs, typically absorbing water well and developing a good gluten structure.
Using a consistent, high-quality flour like Central Milling's helps eliminate variability in your results. While you can substitute other artisan bread flours, be aware that hydration levels might need slight adjustment based on their specific absorption properties. Starting with a known performer builds confidence when tackling high hydration techniques.
- Water: The Key to Hydration
Water is the second most important ingredient in a high hydration artisan flour recipe, as its quantity defines the hydration percentage. Using filtered water is often recommended, especially if your tap water is heavily chlorinated, as chlorine can potentially inhibit yeast activity. The temperature of the water can also influence dough temperature and fermentation speed; lukewarm water (around 80-85°F or 27-29°C) is a common starting point to kickstart fermentation.
The exact amount of water will depend on your flour's absorption capacity and your desired hydration level. For 500g of flour at 80% hydration, you would use 400g of water (500g * 0.80 = 400g). Precision here is crucial. Using a scale to measure water by weight rather than volume (grams vs. milliliters) is far more accurate for baking.
- Salt: Enhancing Flavor and Structure
Salt (Sodium Chloride) plays several vital roles in an artisan flour hydration recipe beyond just flavor. It strengthens the gluten network by tightening the protein structure, which is particularly important in wet doughs. Salt also helps control the rate of fermentation, slowing down yeast activity for more controlled rising and better flavor development.
Typically, salt is added at a rate of 1.8% to 2.2% of the total flour weight. For 500g of flour, this would be 9-11g of salt. It's usually added after the initial mixing or autolyse phase, as adding it too early might interfere with water absorption by the flour proteins. Using non-iodized salt, like fine sea salt or kosher salt, is often preferred as iodine can sometimes affect yeast.
- Yeast: Instant Dry Yeast
Instant dry yeast is a convenient leavening agent for an artisan flour hydration recipe, requiring no proofing before being added directly to the flour. It's more potent than active dry yeast, so you typically use slightly less. The amount needed depends on the desired fermentation time and temperature, but a common range for an overnight or several-hour bulk fermentation is 0.2% to 0.5% of the flour weight.
For 500g of flour, this translates to 1-2.5g of instant dry yeast. Ensure your yeast is fresh; check the expiration date and store it properly (usually in the refrigerator or freezer after opening). Alternatively, you can use active dry yeast (which requires proofing in water first, adjusting your total water slightly) or a sourdough starter for a naturally leavened artisan flour hydration recipe.
Mixing and Developing Your High Hydration Dough
Developing the gluten structure is paramount in a high hydration artisan flour recipe. Because the dough is so wet, it needs specific techniques to build strength and elasticity.
- Autolyse: The Secret to a Smooth Dough
Autolyse is a simple yet powerful technique that dramatically improves dough handling and structure, especially in high hydration doughs. It involves mixing just the flour and water from your artisan flour hydration recipe together until no dry bits remain, then letting it rest for 20-60 minutes (or even longer). During this rest, the flour fully hydrates, and enzymatic activity begins to break down proteins and starches.
This resting period allows gluten development to start naturally without mechanical mixing. The dough becomes smoother, more extensible, and easier to work with when you later add the salt and yeast. It also reduces the total mixing time needed, minimizing oxidation and resulting in a loaf with better flavor and color.
- Gentle Mixing Techniques: Avoiding Over-Mixing
High hydration doughs are often mixed using gentle techniques to avoid over-developing the gluten too early or damaging the delicate network. After the autolyse, add the salt and yeast (or starter) and mix until incorporated. For very wet doughs, techniques like the Rubaud method (using your hand to scoop and stretch the dough in the bowl) or a stand mixer on a very low speed for a short time are effective.
Unlike lower hydration doughs that might be kneaded vigorously, high hydration doughs benefit more from time and periodic folding to build strength. The goal is to achieve initial incorporation without developing excessive tension upfront. The real strength building comes during the bulk fermentation phase.
- Bulk Fermentation: Allowing the Dough to Develop Flavor
Bulk fermentation, or the first rise, is where the magic happens in an artisan flour hydration recipe. It's the period from when all ingredients are mixed until the dough is divided and shaped. During this time, yeast produces gases, and enzymatic activity continues, developing complex flavors and aromas. For high hydration doughs, this phase is also crucial for building dough strength through periodic folds.
The duration of bulk fermentation depends heavily on the ambient temperature and the amount of yeast/starter used. It can range from 2-4 hours at warmer room temperatures (75-80°F or 24-27°C) to 12-18 hours or longer in a cooler environment or refrigerator (40-50°F or 4-10°C). Look for the dough to increase significantly in volume (often 50-100%) and show signs of fermentation like bubbles.
- Stretch and Folds: Strengthening the Dough Structure
Stretch and folds are essential for developing strength and structure in a high hydration artisan flour recipe without intensive kneading. This technique involves wetting your hands, gently stretching a portion of the dough up from the bowl, and folding it back over itself. You typically repeat this process around the dough (like folding the four sides of a square towards the center).
Perform stretch and folds several times during the first 1-3 hours of bulk fermentation, usually every 30-60 minutes. This action aligns the gluten strands, distributes the yeast evenly, and builds tension in the dough, making it easier to handle and shape later. As you perform the folds, you'll notice the dough becoming smoother, more elastic, and holding its shape better.
- Proofing Baskets: Brotform for optimal bread shape
Proofing baskets, often called bannetons or brotforms, are tools used during the final proofing stage of an artisan flour hydration recipe. They support the wet dough, helping it maintain its shape and preventing it from spreading outwards as it rises. They are typically made from rattan or cane, which are dusted with flour (often rice flour to prevent sticking) before the shaped dough is placed inside.
Using a brotform is particularly beneficial for high hydration doughs which lack the inherent stiffness of lower hydration doughs. The basket gives the loaf structure as it proofs, ensuring a good shape for baking. The rattan coils also impart a beautiful, rustic pattern on the crust, adding to the artisan appeal of your finished loaf.
Shaping and Baking Your High Hydration Artisan Bread
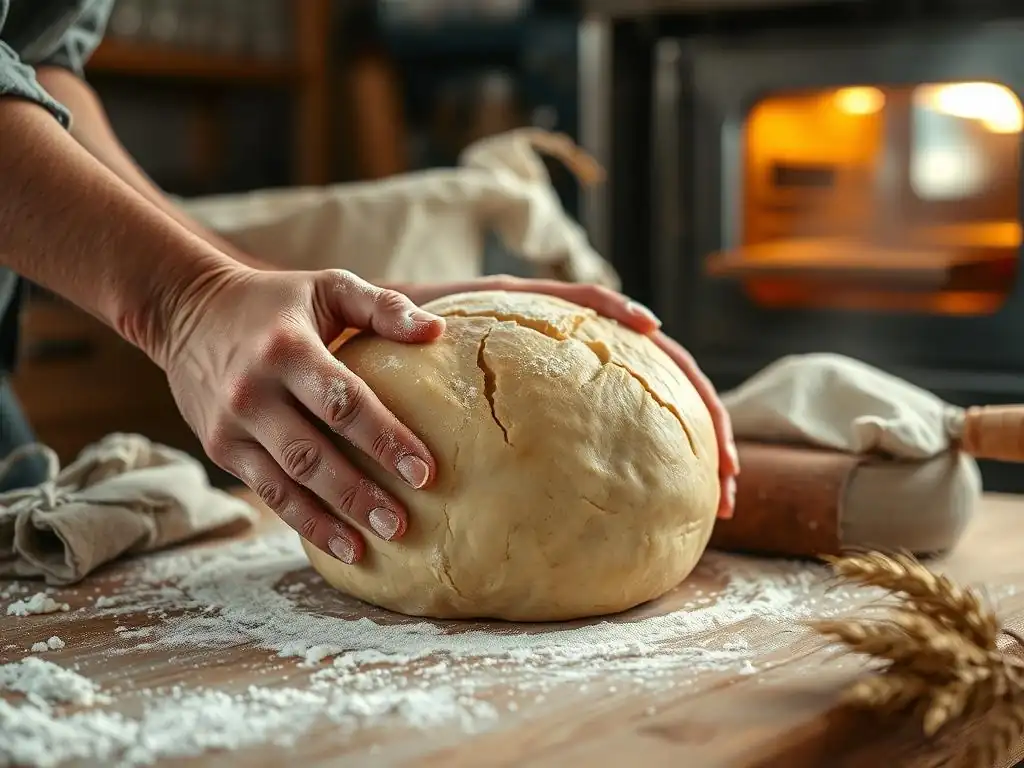
Shaping and baking are the final steps in bringing your artisan flour hydration recipe to life. These stages are crucial for achieving the desired loaf structure, crust development, and overall appearance.
Mastering the Art of Shaping Wet Doughs
Working with wet, high hydration dough requires a gentle touch and specific techniques to build surface tension without degassing the dough too much.
- Gentle Handling: Preventing Deflation
After bulk fermentation, your high hydration dough will be airy and delicate. The key to shaping is to handle it as gently as possible to preserve the gas bubbles created during fermentation. Turn the dough out onto a lightly floured surface rather than scraping it roughly from the bowl. Use a bench scraper to help manage the sticky dough.
Avoid pressing or punching the air out of the dough. Think of it more as coaxing the dough into shape by folding and tucking, rather than forcing it. Your hands should be lightly floured, or you can work on a surface with minimal flour, using the dough's stickiness against itself to create tension.
- Creating Tension: Shaping a Round or Oblong Loaf
Building sufficient surface tension is vital for a high hydration loaf to hold its shape and achieve good oven spring. For a round loaf (boule), gently pull the edges of the dough towards the center, flipping it over so the seam is underneath, then cup your hands around the dough and rotate it on the surface to create a tight, smooth skin on top.
For an oblong loaf (batard), gently stretch the dough into a rectangle, fold the top third down, then the bottom third up over that, and finally fold the dough in half lengthwise, sealing the seam with your fingers. Then, roll the loaf back and forth slightly under your hands to create even tension along its length. The goal is a taut surface that will expand upwards during baking.
- Proofing: Ensuring a Light and Airy Crumb
Final proofing, also known as the second rise or 'proofing in the basket,' allows the shaped loaf to relax and build a little more volume before baking. Place the shaped dough seam-side up in a well-floured proofing basket (brotform). The duration of the final proof depends on temperature and fermentation activity.
A warm proof (at room temperature for 30-60 minutes) will be faster, while a cold proof (in the refrigerator for 4-12 hours or longer) slows fermentation dramatically but develops more flavor and makes the dough easier to score. For high hydration doughs, a cold proof is often preferred as the chilled dough is much easier to handle and score cleanly before baking.
Baking Techniques for High Hydration Artisan Loaves
Proper baking is essential to achieve a beautiful crust and crumb from your artisan flour hydration recipe. High heat and steam are key elements.
- Preheating Your Oven: Achieving Optimal Oven Spring
Achieving maximum oven spring – the final burst of expansion when the loaf hits the hot oven – requires a very hot baking environment. Preheat your oven to a high temperature, typically between 450°F and 500°F (230°C and 260°C), for at least 30-60 minutes. If using a Dutch oven or baking stone, preheat it inside the oven as well.
This intense initial heat rapidly sets the crust, forcing the expanding gases within the dough to push upwards, creating a tall, airy loaf. Insufficient preheating can result in a flatter loaf with less impressive volume.
- Using a Dutch Oven: Creating a Shiny Crust
Baking in a preheated Dutch oven is one of the most effective ways to replicate professional bakery results at home, especially for an artisan flour hydration recipe. The sealed environment of the Dutch oven traps the moisture released by the dough as it bakes, creating steam.
This steam keeps the surface of the dough moist during the initial phase of baking, allowing it to expand fully before the crust hardens. It also contributes to a thinner, crispier, and more beautifully colored crust. Typically, the lid is kept on for the first 20-25 minutes, then removed to allow the crust to brown and crisp up.
- Steam Injection: Creating a Shiny Crust
If you're not using a Dutch oven but baking on a stone or baking sheet, creating steam in your oven is crucial for achieving a good crust on a high hydration loaf. Steam keeps the dough surface pliable, allowing for maximum expansion. Methods include placing a tray of hot water on the bottom rack of the oven when you put the bread in, or even adding ice cubes to a hot tray.
Be cautious when adding water or ice to a hot oven to avoid burns. Maintain the steam for the first 15-20 minutes of baking, then remove the steam source to allow the crust to dry and brown. Adequate steam is a non-negotiable step for a beautiful, shiny, and crispy crust from an artisan flour hydration recipe baked on an open surface.
- Baking Time and Temperature: Adjusting for Your Oven
Typical baking temperatures for high hydration artisan bread range from 450°F to 500°F (230°C to 260°C). The baking time will vary depending on the size and shape of your loaf and your oven's calibration, but a common duration is 30-45 minutes total.
If using a Dutch oven, bake covered for about 20-25 minutes at the higher end of the temperature range, then remove the lid and reduce the temperature slightly (to 425-450°F or 220-230°C) for another 15-20 minutes until the crust is deeply golden brown. Baking directly on a stone with steam might follow a similar temperature curve. Always monitor your loaf towards the end of the bake to prevent burning.
- Monitoring Internal Temperature
The most reliable way to know if your artisan flour hydration recipe loaf is fully baked is to check its internal temperature. A fully baked lean bread (made just from flour, water, salt, and yeast/starter) should register between 205°F and 210°F (96°C and 99°C) when measured with an instant-read thermometer inserted into the center of the loaf.
Baking until the correct internal temperature ensures the crumb is fully set and not gummy. If the crust is browning too quickly but the internal temperature is low, you can loosely tent the loaf with foil for the remainder of the baking time.
Troubleshooting High Hydration Artisan Bread Recipes
Working with high hydration doughs can present unique challenges. Don't get discouraged if your first few attempts aren't perfect! Understanding common issues and their solutions is part of the learning process for any artisan flour hydration recipe.
Common Challenges and Solutions
Here are some frequent problems encountered when baking high hydration bread and how to address them.
- Dough Too Sticky: Adjusting Hydration Levels
One of the most common complaints with an artisan flour hydration recipe is excessive stickiness, making the dough difficult to handle. While high hydration dough is inherently sticky, it shouldn't be unmanageable after proper development. If it's excessively gluey and doesn't build any tension during folds, your hydration level might be too high for the specific flour you are using or your comfort level.
Solution: Start with a slightly lower hydration percentage (e.g., 70-75%) and gradually increase it in future bakes as you become more comfortable. Ensure you are measuring ingredients accurately with a scale. Also, make sure you are developing sufficient gluten through stretch and folds during bulk fermentation. Working on a lightly floured surface and keeping your hands slightly wet can also help manage stickiness during shaping.
- Lack of Oven Spring: Ensuring Proper Proofing and Baking Temperature
If your loaf spreads outwards instead of rising upwards in the oven (poor oven spring), several factors could be at play. It might be under-proofed (not enough gas production), over-proofed (gluten network collapsed), or the oven wasn't hot enough to set the crust quickly.
Solution: Check your bulk fermentation and final proofing times and temperatures. Ensure the dough shows signs of fermentation (increased volume, bubbles). If cold proofing, ensure the dough is fully chilled before scoring and baking. Most importantly, guarantee your oven and baking vessel (like a Dutch oven) are thoroughly preheated to a high temperature, typically 450-500°F (230-260°C), before the loaf goes in.
- Dense Crumb: Improving Dough Development
A dense, tight crumb in a high hydration loaf suggests insufficient gluten development or poor handling that degassed the dough. The open structure characteristic of these breads relies on a strong, elastic gluten network to trap fermentation gases.
Solution: Ensure you are performing sufficient stretch and folds during bulk fermentation to build strength. Don't skip the autolyse step, as it aids initial development. Be gentle when handling and shaping the dough to avoid knocking out too much air. Make sure your yeast or starter is active and that fermentation is proceeding correctly.
- Flat Loaf: Strengthening the Dough Structure
A loaf that spreads excessively and bakes flat is often a result of insufficient dough strength or tension, or over-proofing. High hydration dough needs robust internal structure and external tension to support itself.
Solution: Focus on building dough strength through adequate stretch and folds during bulk fermentation (3-4 sets are often necessary). Ensure you are creating sufficient surface tension during the shaping process. If cold proofing, make sure not to proof for too long, as this can lead to over-proofing even at low temperatures. Baking in a proofing basket (brotform) helps the dough hold its shape during the final proof.
High Hydration Artisan Flour Recipe Variations: Beyond the Basic Loaf
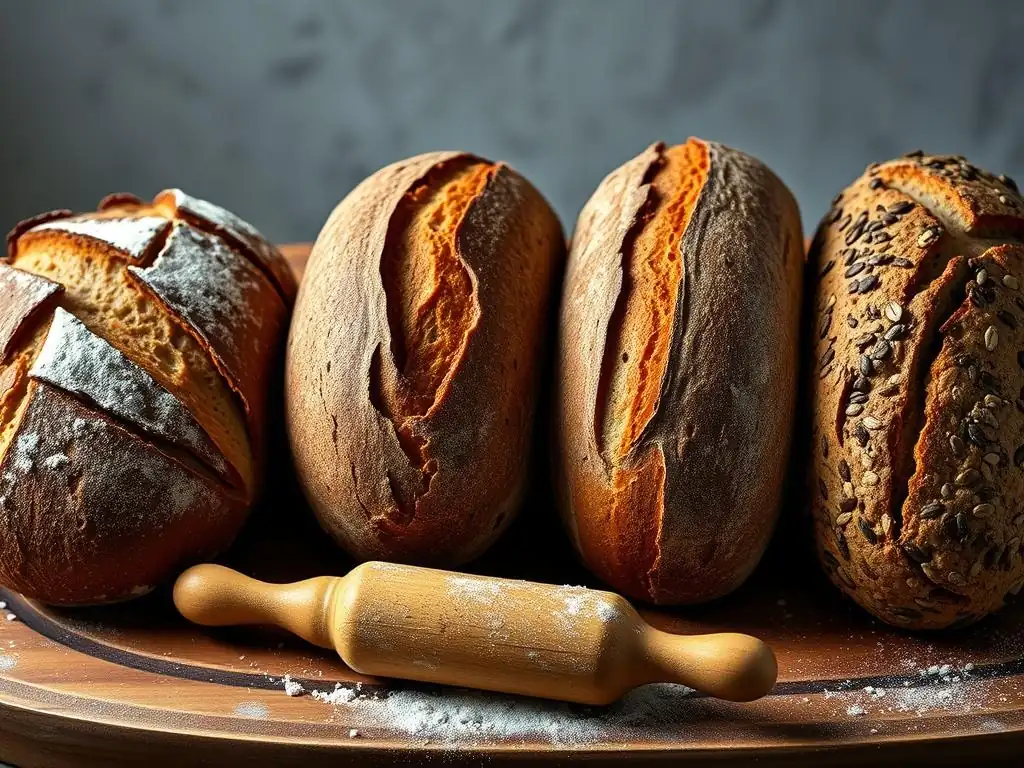
Once you've mastered the basic high hydration artisan flour recipe, a world of variations opens up. You can easily adapt the core technique to incorporate different flavors or switch to natural leavening for even greater complexity.
Exploring Different Flavor Profiles
Introducing other ingredients can transform a simple artisan flour hydration recipe into a culinary adventure. The high hydration helps distribute inclusions evenly and keeps the crumb moist around them.
- Adding Herbs and Spices
Fresh or dried herbs and spices can be kneaded into the dough during the initial mixing phase (after the autolyse) or folded in during the first stretch and fold. Popular additions include rosemary, thyme, oregano, black pepper, or even a pinch of red pepper flakes for heat.
For 500g of flour, start with 1-2 tablespoons of fresh chopped herbs or 1-2 teaspoons of dried herbs/spices. These additions infuse the crumb with flavor and create a wonderful aroma as the bread bakes.
- Including Olives, Cheese, or Nuts
Adding larger inclusions like olives, cheese cubes, or chopped nuts creates pockets of flavor and texture within the crumb. These are best folded in during the last set of stretch and folds during bulk fermentation. This prevents them from interfering with initial gluten development but ensures they are well distributed.
For 500g of flour, you might add 75-150g of chopped olives, cheese (like Gruyère or cheddar), or toasted nuts (walnuts, pecans). Ensure wet inclusions like olives are well-drained.
- Creating Sweet High Hydration Doughs (e.g., Brioche)
While most artisan high hydration recipes are savory, the technique can be adapted for enriched, slightly sweet doughs like brioche. Traditional brioche uses a high percentage of butter and eggs, but some modern variations also use higher hydration levels (relative to a standard enriched dough) to achieve a lighter texture.
These doughs are typically mixed more vigorously to incorporate the fats and develop the gluten. The hydration calculation might be based on the water content from eggs and milk in addition to added water. While more complex than a lean dough, a high hydration brioche offers an incredibly tender and rich result.
High Hydration Sourdough with Artisan Flour: A Powerful Combination
Combining a high hydration technique with sourdough starter is arguably the pinnacle of artisan baking. The natural leavening from the starter interacts beautifully with the high water content and complex carbohydrates of artisan flour, resulting in loaves with deep flavor, excellent texture, and impressive keeping qualities. This artisan flour hydration recipe variation is a favorite for many.
Sourdough fermentation is slower than commercial yeast, which allows for a longer bulk fermentation and proofing period. This extended time is crucial for developing the characteristic tangy flavor and complex aroma. The acidity produced by the lactic acid bacteria in the starter also helps break down the flour, potentially improving digestibility and certainly influencing crumb structure.
- Using a Mature Sourdough Starter
A healthy, active, and mature sourdough starter is essential for a successful high hydration sourdough artisan flour recipe. A mature starter is one that has been regularly fed and is active, doubling or tripling in size within a few hours after feeding. Using a starter that is at its peak activity (often referred to as 'ripe') ensures it has the leavening power needed to lift a wet dough.
The amount of starter used, typically calculated as a percentage of the total flour weight (e.g., 10-30%), influences the fermentation speed. Using a higher percentage of starter will accelerate the process, while a lower percentage allows for a longer, slower fermentation, often preferred for flavor development.
- Adjusting Hydration for Sourdough
When converting a commercial yeast artisan flour hydration recipe to sourdough, you need to account for the water and flour contained within the starter itself when calculating total hydration. If your starter is fed at a 1:1:1 ratio (flour:water:starter), it is 100% hydration. The water and flour from the starter contribute to the overall hydration and total flour weight of the dough.
For example, if your recipe calls for 500g flour and 400g water (80% hydration) and you use 100g of 100% hydration starter (50g flour, 50g water), your actual total flour is 500g + 50g = 550g, and total water is 400g + 50g = 450g. The true hydration is (450g water / 550g flour) * 100% = approximately 81.8%. Always calculate true hydration when using starter to understand how wet your dough will be.
- Long Fermentation for Complex Flavors
One of the main benefits of a high hydration sourdough artisan flour recipe is the opportunity for long fermentation, often involving an extended cold proof in the refrigerator. This slow fermentation allows the wild yeasts and bacteria in the starter ample time to interact with the flour, producing a wide range of organic acids and other compounds.
This process not only develops that characteristic sourdough tang but also breaks down starches and proteins more thoroughly, contributing to a more complex flavor profile and potentially improving the bread's digestibility. A typical schedule might involve a 3-4 hour bulk fermentation at room temperature followed by a 12-24 hour cold proof.
Conclusion: Elevate Your Baking with High Hydration Artisan Flour Techniques
Embarking on the journey of baking high hydration bread with artisan flours is a rewarding experience that pushes your skills and delivers exceptional results. While the initial stickiness and handling challenges might seem daunting, the payoff in terms of flavor, texture, and crust quality is immense. Each artisan flour hydration recipe you attempt will teach you something new about the interplay of water, flour, and time.
Remember that baking is both a science and an art. Pay attention to the details – accurate measurements, dough temperature, fermentation signs, and oven behavior – but also trust your instincts and learn to feel the dough. The more you practice, the more intuitive the process becomes.
Embrace the Challenge and Enjoy the Rewards
Don't be afraid to experiment with different artisan flours, hydration levels, and fermentation schedules. Start with a manageable artisan flour hydration recipe, perhaps at 75% hydration, and work your way up as you gain confidence. Each loaf provides valuable feedback on your process. Did it spread too much? Maybe more stretch and folds next time. Is the crust not crispy? Ensure sufficient steam.
The satisfaction of pulling a beautifully baked, open-crumbed loaf from your oven that you made with your own hands using a carefully crafted artisan flour hydration recipe is unparalleled. Sharing this bread with friends and family is a joy. Keep baking, keep learning, and most importantly, enjoy the delicious journey!
- Continue Experimenting and Refining Your Skills
- Share Your Creations with BakeWithEase!
Frequently Asked Questions
What is considered a high hydration dough when using artisan flours?
High hydration dough, especially with artisan flours, typically refers to doughs with a water-to-flour ratio exceeding 70%. This increased water content significantly impacts the final baked product.
Why is hydration particularly important when baking with artisan flours?
Artisan flours often have higher protein content and varying gluten development capabilities compared to all-purpose flour. Hydration levels need careful adjustment to achieve the desired texture and crumb.
What are some of the benefits of using high hydration doughs with artisan flours?
High hydration can lead to a more open crumb structure, a chewier texture, and enhanced flavor development when using artisan flours. The increased water allows for better fermentation.
What are some challenges I might face when working with high hydration doughs from artisan flours?
High hydration doughs can be stickier and more difficult to handle. Artisan flours also require practice to master, because each flour absorbs moisture differently.
Where can I find artisan flour hydration recipes suitable for beginners?
BakeWithEase.com offers simple, step-by-step guides and artisan flour recipes specifically designed for beginners. These recipes focus on achieving success with high hydration baking.
Final Reflection: The Transformative Power of Hydration in Artisan Baking
The pursuit of the perfect loaf, with its open crumb and nuanced flavor, hinges on understanding the crucial role of hydration in working with artisan flours. This isn't just about following a recipe; it's about unlocking the potential within each grain, allowing its unique character to shine through. The journey from a stiff, unyielding dough to a supple, elastic mass is a testament to the power of water, a seemingly simple ingredient with profound effects.
The exploration of high-hydration doughs has profoundly shifted my own approach to baking, moving me beyond the limitations of conventional recipes. It's a process that demands patience, observation, and a willingness to embrace imperfection. The subtle nuances in texture and taste achieved through careful hydration are truly rewarding. The baker's hands are the instruments of the soul,
a wise baker once said, and I believe this is especially true when working with high-hydration doughs, where the feel of the dough guides every step.
Now, it's your turn. Don't be afraid to experiment with different hydration levels, to feel the dough between your fingers, and to trust your intuition. Each flour, each batch, will present its own unique challenges and rewards. Embrace the learning process, celebrate the successes, and learn from the failures. The journey of mastering high-hydration doughs with artisan flours is a continuous one, filled with delicious discoveries and the profound satisfaction of creating something truly beautiful and delicious from simple ingredients. Begin your own exploration today – your perfect loaf awaits.
Unleash Your Inner Artisan Baker!
Thanks for taking the time to explore the world of high-hydration doughs with artisan flours! We hope you gained valuable insights into creating truly exceptional bread. Now it's time to put your knowledge to the test.
- Bake your own masterpiece: Try out one of the recipes mentioned in the article – or experiment with your own flour blend and hydration levels! The possibilities are endless.
- Share your baking journey: Post a picture of your creation on social media using #BakeWithEaseHighHydration and tag us – we'd love to see your results!
- Join our community: Head over to our forums on bakewithease.com (this would be replaced with an actual link in a live setting) and share your experiences, tips, and questions with fellow bread enthusiasts. Let’s learn together!
What unique flavor or texture will you create with your next high-hydration loaf?