
Vegan GlutenFree Bread That's Light and Airy

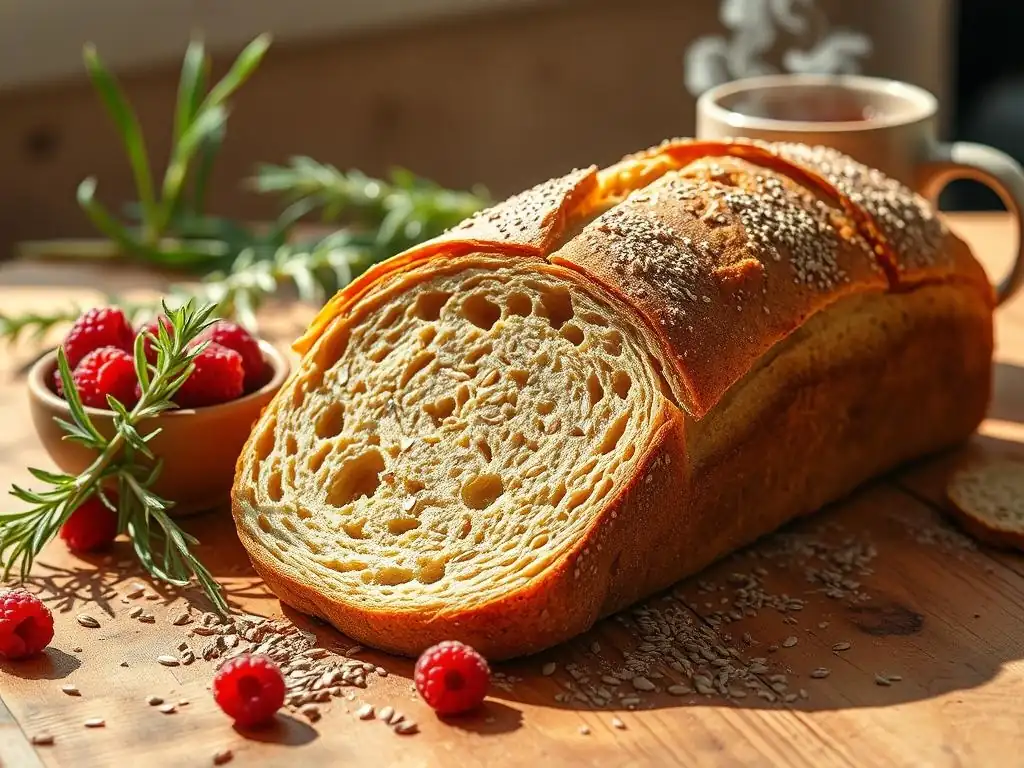
Welcome to BakeWithEase, your haven for effortless baking! Ever dreamed of a fluffy, delicious loaf that fits your dietary needs? Today, we're diving into the world of Vegan GlutenFree Bread, revealing a surprisingly simple recipe that will redefine your expectations. Forget dense, crumbly disappointments; prepare to be amazed. Curious how to achieve that light and airy texture? Let's get baking!
- Vegan Gluten-Free Bread: Light and Airy Recipe
- Introduction to Vegan Gluten-Free Baking
- Key Ingredients for Vegan Gluten-Free Bread
- Step-by-Step Guide: Baking Your Vegan Gluten-Free Bread
- Tips and Tricks for Vegan Gluten-Free Bread Success
- Vegan Gluten-Free Bread Recipe Variations
- Storing Your Vegan Gluten-Free Bread
- Conclusion: Enjoying Homemade Vegan Gluten-Free Bread
-
Frequently Asked Questions
- What makes this vegan gluten-free bread recipe different from others?
- What are the key ingredients for ensuring a successful vegan gluten-free bread?
- Can I substitute any of the flours listed in the vegan gluten-free bread recipe?
- How do I prevent my vegan gluten-free bread from being too dry?
- What's the best way to store leftover vegan gluten-free bread to keep it fresh?
- Final Reflection: The Joy of a Light and Airy Vegan Gluten-Free Loaf
- Unleash Your Inner Baker: Craft the Perfect Loaf!
Vegan Gluten-Free Bread: Light and Airy Recipe
Introduction to Vegan Gluten-Free Baking
The Challenges and Rewards of Vegan Gluten-Free Baking
Baking without gluten and animal products presents unique challenges, primarily related to structure and texture. Gluten provides elasticity and strength, trapping gases to create a light, airy crumb. Eggs, dairy, and other animal products contribute moisture, richness, and binding properties. Replacing these requires careful selection and combination of alternative flours, binders, and leavening agents. For instance, achieving a truly light crumb in a vegan gluten-free loaf can be tricky, often resulting in dense, heavy bread if not formulated correctly.
However, mastering a vegan gluten-free bread recipe offers immense rewards. It opens the world of fresh, homemade bread to individuals with dietary restrictions, whether due to allergies, intolerances, or ethical choices. The satisfaction of pulling a beautifully baked loaf from the oven, knowing it meets specific dietary needs while still being delicious, is unparalleled. This process encourages creativity in the kitchen and a deeper understanding of ingredient interactions, making you a more versatile baker.
Why This Vegan Gluten-Free Bread Recipe is Accessible
Developing a reliable vegan gluten-free bread recipe often involves extensive trial and error, trying different flour blends and binder ratios. Many recipes online can be overly complicated or require obscure ingredients. This particular approach focuses on commonly available gluten-free flours and binders, simplifying the process for beginners. We aim to demystify the steps, breaking down the process into manageable parts, unlike some complex traditional bread methods.
While achieving the perfect loaf still requires attention to detail, this guide is designed with the novice vegan and gluten-free baker in mind. We explain the 'why' behind each step, from selecting flours to mixing and baking. By focusing on fundamental techniques adapted for gluten-free vegan dough, this guide makes baking light and airy gluten-free vegan bread an achievable goal, rather than an intimidating challenge. It's about building confidence one loaf at a time.
Key Ingredients for Vegan Gluten-Free Bread
Gluten-Free Flour Blend: The Foundation
The success of any vegan gluten-free bread recipe hinges on the flour blend used. Unlike wheat flour, which contains gluten, gluten-free flours require a mix of different types to mimic wheat's properties. A typical blend might include a mix of starchy flours (like tapioca starch, potato starch, or cornstarch) for tenderness and lightness, and wholegrain flours (like brown rice flour, sorghum flour, or millet flour) for structure, flavor, and nutrients. Using a single type of gluten-free flour, such as just rice flour, would likely result in a dense, crumbly loaf.
Understanding the role of each flour type is crucial. For example, brown rice flour provides structure but can be gritty; tapioca starch adds chewiness and helps bind, but too much can make the bread gummy. A common ratio in successful blends is roughly 60-70% whole grain flours and 30-40% starches, though this varies significantly depending on the specific flours chosen. Some recipes might also incorporate nut flours (like almond flour) or seed flours (like sunflower seed flour) for added flavor and richness, although these can affect the crumb structure and require careful balance.
Common Gluten-Free Flours and Their Properties
Brown rice flour is a staple in many gluten-free blends, offering a neutral flavor and decent structure. It's a good source of fiber and nutrients, but its texture can be slightly gritty if not finely ground. For instance, using 1 cup of brown rice flour in a blend provides a solid base but needs softer flours or starches to balance it out. White rice flour is finer and produces a tender crumb but lacks the nutritional value of brown rice flour.
Tapioca starch (or flour) is derived from the cassava root and is essential for providing elasticity and chewiness in gluten-free baking, properties typically provided by gluten. It helps create a soft interior and a crisp crust. Potato starch serves a similar purpose, contributing to a light texture and binding ability. Using too much tapioca or potato starch, perhaps exceeding 40% of the blend in some cases, can result in a gummy texture, so careful measurement is key when working on a vegan glutenfree bread recipe.
Creating Your Own Blend vs. Using Commercial Mixes
Creating your own gluten-free flour blend allows for customization and control over the final texture and flavor, potentially leading to a superior light and airy gluten-free vegan bread. You can tailor the blend to your specific needs, perhaps increasing the proportion of sorghum flour for a nuttier taste or using more tapioca starch for extra chewiness. This also means you know exactly what ingredients are in your bread, avoiding potential cross-contamination or unwanted additives found in some commercial mixes.
However, using a commercial gluten-free bread blend offers convenience and consistency, especially for beginners. Many reputable brands have spent years perfecting their ratios to produce reliable results. Look for blends specifically designed for bread baking, as they often contain a balanced mix of flours and starches, and sometimes binders like xanthan gum. While they might be slightly more expensive than buying individual flours, they eliminate the guesswork of creating your own blend, making the process of baking a vegan glutenfree bread recipe much simpler initially.
Binders: Essential for Structure
In the absence of gluten and eggs, binders are critical for holding vegan gluten-free dough together and providing structure. They absorb liquid and create a gel-like consistency that mimics the binding properties of gluten, preventing the bread from becoming crumbly. Without effective binders, a gluten-free vegan loaf would likely collapse and fall apart rather than holding its shape and developing a coherent crumb structure.
Common binders include psyllium husk, xanthan gum, chia seeds, and flax seeds. Each behaves slightly differently and can impact the final texture. Psyllium husk is particularly effective at creating an elastic, dough-like consistency that can even be shaped to some extent, unlike many gluten-free doughs which are more like thick batters. Xanthan gum is a powerful thickener and stabilizer, often used in smaller quantities.
Psyllium Husk vs. Xanthan Gum
Psyllium husk is derived from the seeds of the Plantago ovata plant and is a highly effective binder in gluten-free baking. When mixed with liquid, it forms a gelatinous mass that provides structure and elasticity to the dough, allowing it to be handled more like traditional wheat dough.
Using psyllium husk often results in a bread with a better crust and a less gummy interior compared to using only xanthan gum. For instance, a typical recipe might call for 2-4 tablespoons of whole psyllium husks or 1-2 tablespoons of psyllium husk powder per loaf, depending on the hydration level and other ingredients.
Xanthan gum is a polysaccharide produced by fermentation and acts as a powerful stabilizer and emulsifier in gluten-free baking. It prevents ingredients from separating and helps trap air, contributing to a lighter texture. However, too much xanthan gum can result in a gummy or slimy texture. It's typically used in smaller amounts than psyllium husk, often measured in teaspoons rather than tablespoons (e.g., 1-2 teaspoons per loaf). While some vegan glutenfree bread recipes use only one binder, combining psyllium husk and a smaller amount of xanthan gum can sometimes yield the best results, balancing structure and texture.
Chia Seeds and Flax Seeds as Binders
Ground chia seeds and ground flax seeds (often called flax meal) also serve as effective binders in vegan gluten-free baking, particularly when mixed with water to form a gel, known as a "chia egg" or "flax egg." This gel mimics some of the binding and moisturizing properties of eggs. For example, mixing 1 tablespoon of ground flaxseed with 3 tablespoons of water and letting it sit for 5-10 minutes creates a gel equivalent to one egg in binding power for many recipes.
Using chia or flax seeds adds fiber and nutrients to the bread and can contribute a slightly nutty flavor. They are often used in combination with other binders like psyllium husk or xanthan gum to enhance the overall structure and texture of a light and airy gluten-free vegan bread. While they provide good binding, they don't offer the same level of elasticity as psyllium husk, which is why they are often used in conjunction with other binders in a robust vegan glutenfree bread recipe.
Liquid: Hydration and Dough Consistency
The liquid component, typically water or a plant-based milk (like almond, soy, or oat milk), is crucial for hydrating the flours and activating the binders and leavening agents. The amount of liquid significantly impacts the dough's consistency, which in turn affects the final texture of the bread. Gluten-free vegan doughs are often much wetter than traditional wheat doughs, sometimes resembling a thick batter more than a kneadable dough.
Achieving the correct hydration level is key to a light and airy gluten-free vegan bread. Too little liquid results in a dry, dense loaf that may not rise properly. Too much liquid can make the dough difficult to handle and may result in a gummy interior. Recipes often specify a hydration percentage relative to the flour weight, but for home bakers, focusing on the described consistency (e.g., "like thick muffin batter" or "sticky but manageable") is often more practical when following a vegan glutenfree bread recipe.
Importance of Liquid Temperature
The temperature of the liquid is particularly important when using yeast as a leavening agent. Warm liquid, typically between 105°F and 115°F (40°C-46°C), is ideal for activating dry active yeast. Water that is too cold will not activate the yeast, while water that is too hot can kill it, preventing the bread from rising. Using a thermometer to check the temperature ensures optimal yeast activity.
Even when using baking powder or soda, liquid temperature can affect the dough's initial consistency and how quickly ingredients combine. However, the precise temperature is less critical than with yeast. For a yeast-leavened vegan glutenfree bread recipe, ensuring the liquid is at the right temperature is a fundamental step for successful fermentation and a good rise.
Salt: Flavor Enhancer and Dough Stabilizer
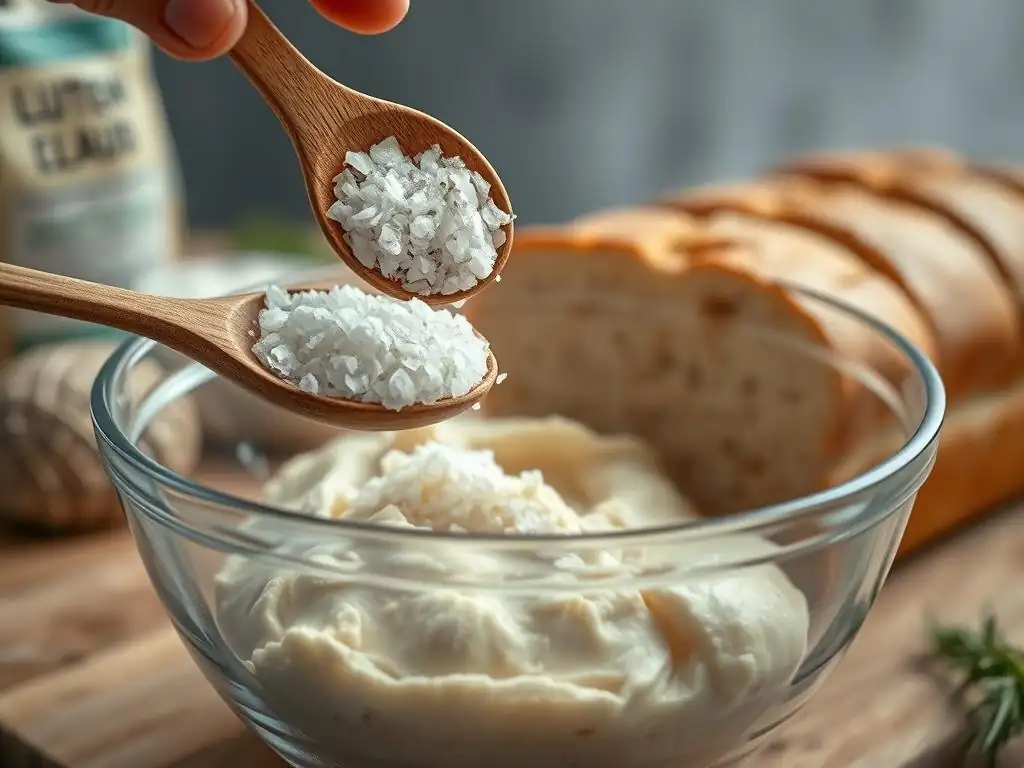
Salt plays a multifaceted role in baking, extending beyond merely adding flavor. In traditional bread making, it also helps control yeast activity and strengthens the gluten network. While the gluten-strengthening aspect isn't applicable in gluten-free baking, salt remains vital for enhancing the overall taste and balancing the flavors of the different flours and binders. Without salt, gluten-free bread can taste bland or overly starchy.
Furthermore, salt can impact the texture of gluten-free bread to some extent by affecting how starches gelatinize and how binders hydrate. It helps create a more balanced structure and can contribute to a better crust development during baking. The amount of salt used is typically around 1.5% to 2% of the total flour weight, a standard ratio across many bread types, including a good vegan glutenfree bread recipe.
The Role of Salt in Vegan Gluten-Free Baking
In vegan gluten-free baking, salt's primary function is flavor enhancement. It prevents the bread from tasting flat and brings out the subtle nuances of the different flours and any added ingredients like herbs or seeds. A loaf baked without enough salt can taste surprisingly one-dimensional, lacking the depth of flavor expected from good bread.
While salt doesn't interact with gluten in this context, it can still influence the dough's hydration slightly by competing for water with binders like psyllium husk. However, this effect is generally minor compared to its impact on flavor and yeast activity (if yeast is used). Ensuring the correct amount of salt, typically about 1 to 1.5 teaspoons per standard loaf, is an easy step to significantly improve the taste of your homemade light and airy gluten-free vegan bread.
Leavening: Achieving Lightness
Leavening agents are what make bread rise, creating the light and airy texture desired in a good loaf. In vegan gluten-free baking, this can be achieved through biological leavening (yeast) or chemical leavening (baking powder and baking soda). The choice of leavener impacts the flavor, texture, and rising time of the bread.
Yeast produces carbon dioxide gas through fermentation, which is trapped by the dough's structure (provided by binders in this case) to create a slow, steady rise and characteristic bread flavor. Chemical leaveners react with moisture and/or acid to produce carbon dioxide quickly, often resulting in a faster rise and a more cake-like or muffin-like texture. Many vegan glutenfree bread recipes use a combination of yeast and chemical leaveners to achieve a good rise and texture.
Yeast vs. Baking Powder and Soda
Yeast (active dry or instant) requires warmth and time to produce gas, typically involving one or two rising periods. This fermentation process also contributes complex flavors to the bread. When using yeast in a vegan gluten-free bread recipe, ensuring the yeast is active by proofing it in warm liquid with a pinch of sugar is a good practice, especially for active dry yeast. Instant yeast can often be mixed directly with the dry ingredients.
Baking powder and baking soda (often used with an acid like vinegar or lemon juice) provide a quicker rise. Baking powder is a complete leavener containing both acid and base, while baking soda needs an additional acid source to react fully. Using chemical leaveners results in a faster bake but less of the characteristic "yeasty" flavor. They are often used in conjunction with yeast in vegan gluten-free recipes to give an extra lift, helping achieve that desired light and airy gluten-free vegan bread texture.
Step-by-Step Guide: Baking Your Vegan Gluten-Free Bread
Combining Dry and Wet Ingredients
The first step in most vegan gluten-free bread recipes is to combine the dry ingredients thoroughly. This ensures that the different flours, starches, binders (if dry, like xanthan gum or psyllium powder), salt, and leavening agents are evenly distributed throughout the mix. Using a whisk is an effective way to blend everything together, breaking up any clumps and incorporating air. An uneven mix can lead to pockets of unactivated binder or uneven leavening, resulting in an inconsistent crumb texture.
Once the dry ingredients are mixed, the wet ingredients (liquid, oil or melted vegan butter, sweetener if used, and activated yeast if applicable) are added. The specific order can vary, but often the wet ingredients are poured into the dry. This stage requires careful mixing to ensure all the dry components are hydrated. Gluten-free doughs don't require the same gentle handling as wheat dough; thorough mixing is often necessary to activate binders properly.
Achieving the Right Batter Consistency
Unlike wheat dough, which becomes elastic, vegan gluten-free dough is typically quite wet and sticky, often resembling a thick batter or a very soft cookie dough. The exact consistency will depend on the specific flour blend and binder used, as well as the hydration level specified in the vegan glutenfree bread recipe. It should not be a firm, kneadable dough.
The goal is a uniform mixture with no dry pockets of flour. It should hold its shape loosely but be too sticky to handle easily with your hands. If it's too dry, add a tablespoon of liquid at a time until the desired consistency is reached. If it's too wet, a little extra flour blend or psyllium husk powder might be needed, but be cautious not to add too much. Getting this consistency right is fundamental for the texture of your light and airy gluten-free vegan bread.
Mixing to Activate Binders
Once the wet and dry ingredients are combined, the mixture needs to be thoroughly mixed to activate the binders. This is a critical step, as binders like psyllium husk and xanthan gum need time and agitation to absorb liquid and form their gel-like structure, which is essential for providing structure in a vegan glutenfree bread recipe. A stand mixer with a paddle attachment or sturdy wooden spoon is recommended for this stage, as the dough can be quite thick and sticky.
Mixing for several minutes (often 5-7 minutes on medium speed in a stand mixer) allows the binders to fully hydrate and distribute throughout the dough. This process replaces the gluten development stage in traditional bread making. Proper binder activation ensures the dough has enough internal structure to trap the gases produced by the leavening agent during rising and baking, preventing the loaf from collapsing.
Importance of Thorough Mixing
Under-mixing is a common pitfall in vegan gluten-free baking. If the binders aren't fully activated, the dough won't have sufficient structure. This can lead to a dense, heavy bread that crumbles easily because there isn't a cohesive network to hold it together. The dough might look mixed on the surface, but pockets of unhydrated binder or flour can remain within.
Thorough mixing ensures that the binders form a consistent matrix throughout the dough. This matrix provides the elasticity and stability needed for the dough to rise and maintain its shape during baking. It's this activated binder network that helps create a light and airy gluten-free vegan bread texture. Don't be afraid to mix for the recommended time, even if the dough seems very sticky – that stickiness is often a sign that the binders are working.
Techniques for Mixing Vegan Gluten-Free Dough
Given the often-wet and sticky nature of vegan gluten-free dough, traditional kneading techniques like those used for wheat bread are not applicable. Instead, the mixing process focuses on incorporating ingredients and activating binders. Using a stand mixer is the most efficient method, allowing you to mix for several minutes without tiring. The paddle attachment works well for bringing the initial mixture together, and some bakers switch to a dough hook for the final mixing stage, although the dough consistency may make the hook less effective than the paddle.
If mixing by hand, a sturdy wooden spoon or spatula is necessary. You'll need to vigorously stir and fold the dough against the sides of the bowl to ensure everything is combined and the binders are activated. This requires more effort than machine mixing, but it's certainly doable. Scraping down the sides of the bowl frequently ensures all parts of the dough are subjected to the mixing action, crucial for a uniform vegan glutenfree bread recipe outcome.
First Rise (Bulk Fermentation Equivalent)
After mixing, the dough needs time to rise. This is the equivalent of bulk fermentation in traditional bread making. If using yeast, this is when the yeast consumes sugars and produces carbon dioxide, causing the dough to increase in volume. If using only chemical leaveners, the rise will be minimal or non-existent at this stage, but the resting period still allows the flours to fully hydrate and the binders to set further.
The duration of the first rise depends on the leavening agent used, the temperature of the environment, and the specific vegan glutenfree bread recipe. With yeast, it typically takes 60-90 minutes at room temperature (around 70-75°F or 21-24°C) for the dough to noticeably increase in volume, perhaps by 50-75%. If using only chemical leaveners, a shorter rest of 20-30 minutes might be sufficient before shaping.
Monitoring the Rise
Monitoring the rise is important to ensure the dough doesn't over-proof, especially when using yeast. Over-proofed gluten-free dough can sometimes collapse or develop a poor texture. Instead of doubling in size like wheat dough often does, gluten-free vegan dough may only increase by about 50-75%. Look for visual cues: the dough should appear puffy and slightly expanded.
A gentle poke test can also help, though it behaves differently than with wheat dough. A gluten-free vegan dough may not spring back as much. Relying on the visual increase in volume and the specified time in your vegan glutenfree bread recipe is usually the best approach. Note the time you started the rise and check periodically, especially if your kitchen is warm.
Gentle Handling of the Dough
Unlike elastic wheat dough that benefits from folding during bulk fermentation, vegan gluten-free dough is often too fragile and sticky for such manipulation. Once the dough has completed its first rise or rest, it should be handled very gently to preserve the air bubbles that have formed. Aggressive handling can deflate the dough, resulting in a denser loaf.
If your vegan glutenfree bread recipe calls for incorporating add-ins like seeds or nuts, it's usually best to do this during the final minutes of mixing or just before transferring to the loaf pan. The goal after the first rise is to disturb the dough as little as possible before shaping and the second rise, ensuring the delicate structure developed by the binders and leaveners is maintained for a light and airy gluten-free vegan bread.
Shaping the Dough/Batter
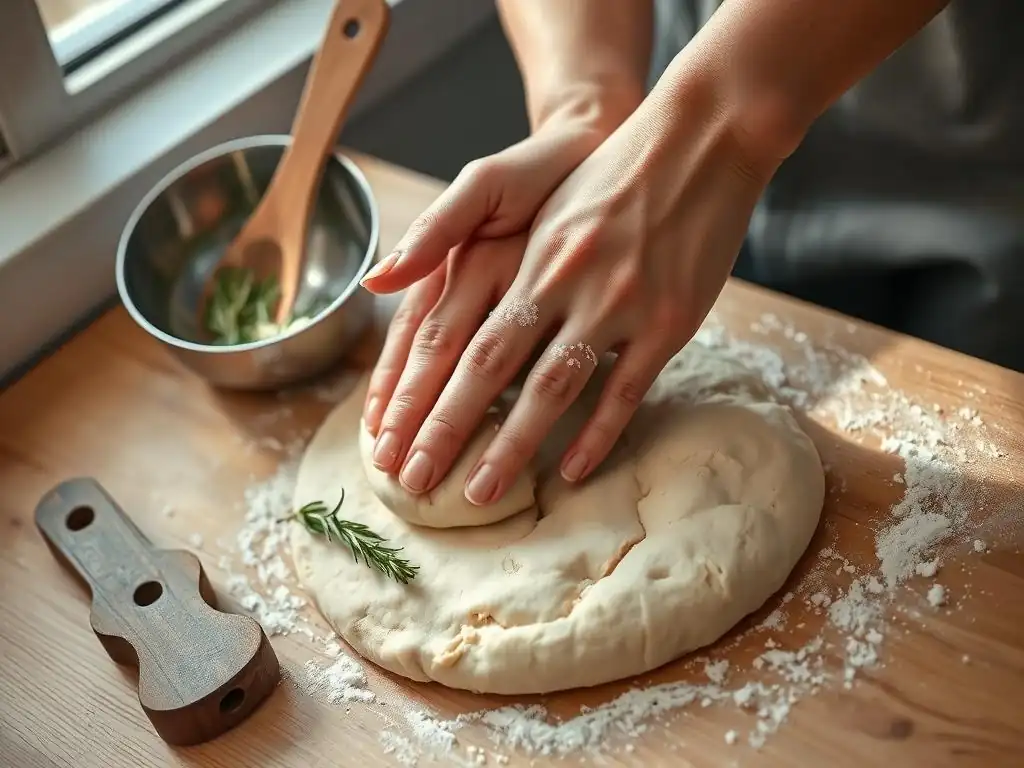
Shaping vegan gluten-free bread dough is often less about creating tension and structure than about transferring a wet, sticky mass into a loaf pan. Because gluten-free dough lacks the elasticity of wheat dough, it cannot be kneaded and shaped in the traditional sense. Instead, the focus is on gently forming the dough into a loaf shape (if possible) and placing it carefully into the pan.
Using wet hands or a wet spatula can help manage the stickiness. Some recipes involve simply scraping the dough into the pan and smoothing the top. Others with higher binder content might allow for a minimal amount of handling on a lightly floured surface (using gluten-free flour, of course) to roughly form a log shape before placing it in the pan.
Transferring to the Loaf Pan
A well-greased or parchment-lined loaf pan is essential for preventing the sticky dough from adhering during proofing and baking. Parchment paper is often preferred as it allows you to lift the baked loaf easily out of the pan. Cut the parchment to fit the length of the pan, with some overhang on the sides to act as handles.
Carefully scrape or pour the dough into the prepared pan. Use a wet spatula or the back of a wet spoon to gently spread the dough evenly in the pan and smooth the top. This helps ensure a uniform shape and even rise. Avoid pressing down on the dough, which could compress the air bubbles. The goal is to get the dough into the pan with minimal disturbance, setting it up for the second rise in your vegan glutenfree bread recipe.
Second Rise (Proofing Equivalent)
The second rise, or proofing, allows the shaped dough to increase in volume further before baking. This is particularly important when using yeast, as it's the final opportunity for the yeast to produce gas and expand the loaf. Even with chemical leaveners, a short proofing period allows the dough to relax slightly and the leaveners to prepare for their final push in the oven.
Proofing time varies depending on the leavening agent, temperature, and recipe. For yeast-leavened vegan gluten-free bread, it might take 30-60 minutes at room temperature. The dough should look visibly puffy and feel airy, but again, it may not double in size. Over-proofing is a risk, as the fragile structure can collapse.
Proofing Environment
A warm, draft-free environment is ideal for proofing yeast-leavened vegan gluten-free bread. A slightly warm oven (turned off) or a microwave with a cup of hot water inside can create a suitable microclimate. Covering the loaf pan loosely with plastic wrap or a damp tea towel prevents the surface from drying out and forming a crust prematurely, which could restrict the rise.
Maintaining a consistent temperature helps ensure a predictable rise time. If the environment is too cool, the rise will be slow; if it's too warm, it can be too rapid, potentially leading to over-proofing. Aiming for a temperature around 75-80°F (24-27°C) is often recommended for yeast-based vegan glutenfree bread recipes.
Proofing Time Considerations
Proofing time is not an exact science and often depends on visual cues as much as the clock. For yeast-leavened dough, the dough is ready to bake when it looks significantly expanded and feels light and airy. Gently poking the dough with a wet finger should leave a small indentation that springs back slowly, or partially. If it springs back immediately, it needs more time. If the indentation remains completely, it may be over-proofed.
Using solely chemical leaveners typically requires a much shorter proof, perhaps just 15-20 minutes, primarily as a resting period before hitting the heat of the oven. Always refer to your specific vegan glutenfree bread recipe for guidance on proofing times, but be prepared to adjust based on your kitchen environment and how the dough looks and feels.
Baking: Achieving a Golden Crust
Baking is the final step where the dough transforms into a loaf of bread. The heat of the oven causes a final burst of rising (oven spring) as gases expand, sets the structure provided by the flours and binders, and develops the crust and interior crumb. Achieving a good crust and a properly cooked interior is crucial for a delicious light and airy gluten-free vegan bread.
Baking temperature and time are key factors. Many vegan gluten-free bread recipes call for baking at a moderate temperature, often around 350-375°F (175-190°C), for 45-60 minutes, or until the internal temperature reaches about 200-210°F (93-99°C). The crust should be golden brown, and the loaf should sound hollow when tapped on the bottom.
Baking Temperature and Time
Starting at a slightly higher temperature for the first 10-15 minutes (e.g., 400°F or 200°C) before reducing it can sometimes help with oven spring and crust development in a vegan glutenfree bread recipe. This initial burst of heat helps set the outer layer quickly. However, baking too hot for too long can result in a burnt crust and undercooked interior.
Conversely, baking at too low a temperature will result in a pale crust and potentially a dense or gummy interior because the structure doesn't set properly. Using an oven thermometer is recommended to ensure your oven is heating accurately. The total baking time will depend on the size and thickness of the loaf. A standard 1.5 lb loaf may take around 50-60 minutes, while smaller rolls might take only 20-30 minutes.
Creating Steam (Optional but Helpful)
While not always necessary for vegan gluten-free bread, creating steam in the oven during the initial baking phase can improve crust development. Steam keeps the surface of the dough moist, allowing it to expand fully before a hard crust forms. This can lead to a slightly thinner, crispier crust and potentially better oven spring.
Methods for creating steam include placing a tray of hot water on the bottom rack of the oven when you preheat it, or spraying the inside of the oven with water a couple of times during the first 10 minutes of baking. Be cautious when adding water to a hot oven. While steaming is more critical for traditional sourdough, it can still offer benefits for some vegan glutenfree bread recipes aiming for a better crust.
Tips and Tricks for Vegan Gluten-Free Bread Success
Troubleshooting Common Vegan Gluten-Free Issues
Baking vegan gluten-free bread can sometimes be challenging, leading to common issues like dense texture, crumbling, or poor rise. Density is often due to insufficient leavening, inactive yeast, or under-activated binders. Ensure your leavening agents are fresh and that you've mixed the dough thoroughly to give binders time to work in your vegan glutenfree bread recipe.
Crumbling is typically a sign of insufficient binding or hydration. Make sure you're using the correct amount of binders like psyllium husk or xanthan gum and that the dough consistency was wet enough before baking. Sometimes, slightly increasing the hydration (adding a little more liquid) can help. If the bread doesn't rise well, check the temperature of your liquid if using yeast, ensure the yeast isn't expired, and give the dough enough time to proof in a warm environment.
Understanding the Role of Binders and Hydration
Binders and hydration are the pillars of structure in vegan gluten-free bread, replacing the role of gluten. Psyllium husk, for instance, can absorb up to 40 times its weight in water, creating a gel that gives the dough elasticity and structure. The correct ratio of liquid to flour blend to binder is crucial. Too little liquid means the binders won't fully hydrate, resulting in a dry, crumbly loaf.
Too much liquid can make the dough difficult to handle and may result in a gummy interior, as the starches and binders become oversaturated. The interaction between the specific flour blend and the chosen binder also matters. Different flours absorb liquids differently, and different binders have varying capacities. Experimenting slightly within the ranges provided by a reliable vegan glutenfree bread recipe can help you find the perfect balance for your specific ingredients and environment.
Achieving Good Texture and a Nice Crust
While a truly open, holey crumb like traditional sourdough is difficult to achieve in vegan gluten-free bread, you can aim for a pleasant, relatively light interior texture. This is achieved through proper leavening, adequate binder activation, and correct hydration. Don't expect large air pockets; instead, look for a uniform, soft crumb that isn't overly dense or gummy.
A nice crust provides texture contrast and flavor. Baking at the correct temperature, potentially starting slightly higher, helps brown the exterior. Ensuring the dough surface isn't dry before baking (by covering during proofing) also helps. Baking in a loaf pan generally yields a softer crust on the sides and bottom compared to freeform loaves, but the top crust can still be satisfyingly golden and slightly crisp.
Adjusting Hydration
Adjusting hydration is one way to fine-tune the texture of your light and airy gluten-free vegan bread. If your loaf consistently turns out too dry or dense, try adding a tablespoon or two of extra liquid during the initial mixing stage in your next attempt at the vegan glutenfree bread recipe. Observe how the dough consistency changes – it should become stickier and more like a thick batter.
Conversely, if your bread is too wet or gummy, reduce the liquid slightly next time. Keep detailed notes on the amounts used and the results to help you refine your process. Factors like humidity and the specific brands of gluten-free flour used can affect how much liquid is needed, so a little adjustment is sometimes necessary.
Using a Baking Pan Effectively
A standard loaf pan (e.g., 9x5 inches) provides support for the often-wet vegan gluten-free dough, helping it rise upwards rather than spreading outwards. Using a non-stick pan or lining it with parchment paper is essential to prevent sticking. Ensuring the dough is evenly distributed in the pan allows for a uniform rise and shape.
For a slightly crisper crust on the top and sides, some bakers use a covered baking vessel like a Dutch oven, similar to sourdough techniques, adapted for the GF vegan dough. Place the loaf pan inside the preheated Dutch oven for the first part of the bake before removing the lid. This traps steam around the loaf, promoting better crust development. This method, while less common than just using a loaf pan for a vegan glutenfree bread recipe, can elevate the final result.
Vegan Gluten-Free Bread Recipe Variations
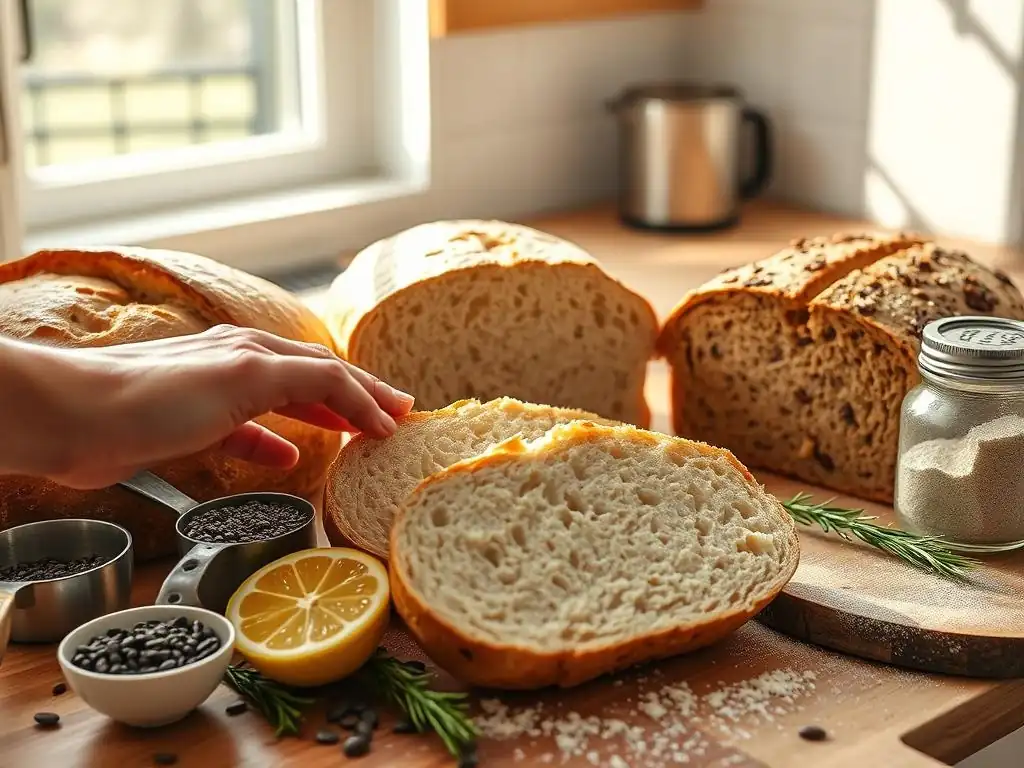
Seeded Vegan Gluten-Free Bread
Adding seeds is a simple way to enhance the flavor, texture, and nutritional value of your light and airy gluten-free vegan bread. Incorporate a mix of seeds like sunflower, pumpkin, flax, chia, and sesame seeds into the dough during the final stages of mixing. A typical addition might be 1/4 to 1/2 cup of mixed seeds per loaf.
Alternatively, you can sprinkle seeds generously over the top of the shaped dough just before baking. Press them gently into the surface so they adhere. This adds a lovely crunch to the crust. Seeded vegan glutenfree bread is fantastic toasted and spread with vegan butter or avocado.
Herb and Garlic Vegan Gluten-Free Bread
For a savory twist on your basic vegan gluten-free bread recipe, add dried herbs and garlic powder to the dry ingredients. About 1-2 teaspoons of dried Italian herbs (like oregano, basil, and thyme) and 1/2 to 1 teaspoon of garlic powder work well for a standard loaf. You could also incorporate finely minced fresh garlic or chopped fresh herbs, adding them during the final mix.
This variation is perfect for serving with soups or pasta dishes. The herbs infuse the bread with aromatic flavor, while the garlic adds a savory depth. Adjust the quantities to suit your taste preferences for a truly custom light and airy gluten-free vegan bread.
Sweet Vegan Gluten-Free Bread: [Adding Cinnamon and Raisins]
Transform your vegan gluten-free bread recipe into a sweet treat by adding cinnamon and raisins. Mix 1-2 teaspoons of ground cinnamon and 1/4 to 1/2 cup of raisins into the dough during the final mixing stage. You might also add a tablespoon or two of sugar or maple syrup to the wet ingredients to enhance the sweetness.
This variation is wonderful for breakfast or a snack, sliced and served plain or lightly toasted. The raisins become plump and juicy during baking, and the cinnamon adds warmth. Ensure the raisins are evenly distributed throughout the dough for consistent flavor in every slice of this delightful light and airy gluten-free vegan bread.
Storing Your Vegan Gluten-Free Bread
Maintaining Freshness
Vegan gluten-free bread tends to dry out more quickly than wheat bread due to the lack of gluten and specific starches. To maintain freshness and prevent it from becoming hard or crumbly, store it properly. Once completely cooled, the best way to store it for short-term use (1-2 days) is wrapped tightly in plastic wrap or beeswax wraps, or placed in a sealed bread bag or container at room temperature.
Avoid refrigerating vegan gluten-free bread, as this can actually make it stale faster. If you won't consume the loaf within a couple of days, freezing is the best option for preserving its quality. Proper storage ensures you can enjoy your light and airy gluten-free vegan bread for as long as possible.
Freezing Vegan Gluten-Free Bread for Later
Freezing is an excellent way to extend the life of your homemade vegan gluten-free bread, allowing you to bake a loaf and enjoy it piece by piece over several weeks. Ensure the bread is completely cooled before freezing. Slice the loaf before freezing if you plan to use individual slices, or freeze it whole.
Wrap the bread or slices tightly in plastic wrap, then place in a freezer-safe bag or aluminum foil to prevent freezer burn. Properly wrapped vegan gluten-free bread can be stored in the freezer for up to 2-3 months. Thaw slices as needed or thaw a whole loaf at room temperature. Toasting frozen or thawed slices can help restore some of the texture. Freezing is a great way to manage your supply from a single vegan glutenfree bread recipe batch.
Conclusion: Enjoying Homemade Vegan Gluten-Free Bread
The Satisfaction of Baking Your Own Vegan Gluten-Free Bread
There is a unique sense of accomplishment in baking a loaf of bread from scratch, especially when it meets specific dietary requirements like being vegan and gluten-free. Overcoming the challenges of working with alternative ingredients and achieving a light and airy texture is incredibly rewarding. Each successful loaf is a testament to your patience, skill, and willingness to experiment in the kitchen.
Sharing your homemade light and airy gluten-free vegan bread with others, particularly those who also follow a vegan or gluten-free diet, adds another layer of joy. Knowing you've created something delicious and inclusive makes the effort worthwhile. It transforms the simple act of baking into a gesture of care and community, all starting with a reliable vegan glutenfree bread recipe.
Once your beautiful light and airy gluten-free vegan bread is baked and cooled, the best part is sharing it. Slice it thickly and serve it warm with your favorite vegan spread, use it for sandwiches, or toast it for breakfast. Its versatility makes it a welcome addition to any meal.
Don't hesitate to share your journey and your delicious results with friends and family. Encourage others to try baking their own vegan gluten-free bread using this recipe. The process can be a fun and educational experience, and the reward of a fresh, homemade loaf is truly unbeatable. Celebrate your baking success and inspire others to explore the world of vegan and gluten-free baking!
Frequently Asked Questions
What makes this vegan gluten-free bread recipe different from others?
This recipe focuses on achieving a light and airy texture often missing in vegan gluten-free breads. It utilizes specific ingredients and techniques to avoid a dense or gummy result.
What are the key ingredients for ensuring a successful vegan gluten-free bread?
The success hinges on using a blend of gluten-free flours, a binding agent like psyllium husk or flaxseed meal, and a rising agent suitable for vegan baking, such as baking powder or yeast.
Can I substitute any of the flours listed in the vegan gluten-free bread recipe?
Substituting flours can significantly affect the texture and rise. It's best to stick to the recipe, but if you must, ensure the replacement has similar starch and protein properties.
How do I prevent my vegan gluten-free bread from being too dry?
Proper hydration is critical. Ensure you're measuring liquids accurately and consider adding ingredients like applesauce or mashed banana to increase moisture retention.
What's the best way to store leftover vegan gluten-free bread to keep it fresh?
Store the bread in an airtight container at room temperature for a day or two, or slice and freeze it for longer storage. Freezing preserves the best texture.
Final Reflection: The Joy of a Light and Airy Vegan Gluten-Free Loaf
The quest for a truly delicious and satisfying vegan gluten-free bread is over. This recipe, born from a desire to enjoy the simple pleasure of fresh bread without compromise, offers a solution that's both accessible and incredibly rewarding. It proves that healthy eating doesn't have to mean sacrificing taste or texture.
The journey of creating this recipe has been a personal one, fueled by a deep appreciation for the power of food to bring people together and nourish the body and soul. It's a testament to the creativity and innovation within the vegan and gluten-free communities, constantly pushing boundaries and challenging preconceived notions about what's possible. Food is symbolic of love when words are inadequate.
- Alan D. Wolfelt. This sentiment rings especially true when considering the effort and care that goes into crafting a loaf of bread, especially one that caters to specific dietary needs.
Now, it's your turn. Don't be intimidated by the seemingly complex world of gluten-free baking. This recipe is a gateway, a starting point for your own culinary adventures. Experiment with different flours, add your favorite spices, and most importantly, enjoy the process of creating something delicious and healthy for yourself and those you love. The satisfaction of biting into a perfectly light and airy slice of homemade vegan gluten-free bread is an experience worth savoring. Embrace the challenge, and let the joy of baking fill your kitchen.
Unleash Your Inner Baker: Craft the Perfect Loaf!
Thanks for taking the time to explore our recipe for light and airy vegan gluten-free bread! We hope you found the process as enjoyable as the results. Now it's time to put your new skills to the test.
- Bake your own masterpiece: Try our recipe today! Adjust ingredients to your liking and experiment with different additions – seeds, herbs, or even dried fruit.
- Share your creations: Show off your baking prowess on social media! Use #BakeWithEaseVeganBread to connect with other bakers and inspire others.
- Leave a comment below: What's your favorite addition to gluten-free bread?
Ready to experience the joy of baking delicious, healthy bread?