
Sweet vs. Savory: Which Viennoiseries Will You Bake Next?

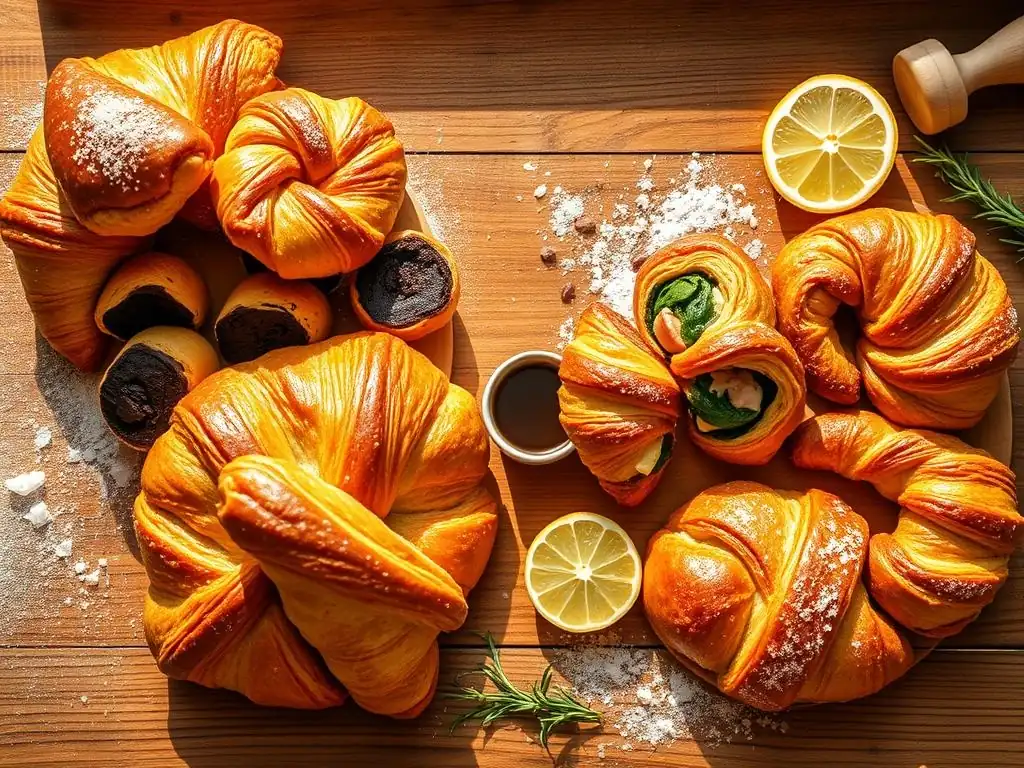
Welcome to BakeWithEase, your kitchen companion for unlocking baking brilliance! Are you ready to elevate your baking game beyond the basics? This week, we're diving into the delightful world of Viennoiseries, those flaky, buttery pastries that make mornings magical. But there's a twist: Sweet vs. Savory! Which side will you choose? Discover our easy Viennoiseries baking recipes and prepare to impress with creations that are both beautifully delicious and surprisingly simple. Intrigued? Let's get baking and explore the endless possibilities!
- Sweet vs. Savory: Which Viennoiseries Will You Bake Next? - BakeWithEase
- Discover Easy Viennoiseries Baking Recipes for Intermediate Bakers
- Understanding Viennoiseries: A Baker's Introduction
- Sweet Viennoiseries: Classic Recipes and Baking Techniques
- Savory Viennoiseries: Expanding Your Baking Repertoire
- Mastering the Art of Viennoiseries: Baking Tips and Tricks
- Easy Viennoiseries Baking Recipes: Choosing Your Next Bake
- Conclusion: Elevate Your Baking with BakeWithEase Viennoiseries
-
Frequently Asked Questions
- What exactly are Viennoiseries, and what makes them "easy" to bake?
- Does BakeWithEase offer both sweet and savory Viennoiseries recipes?
- What level of baking experience do I need to successfully use your "easy" Viennoiseries recipes?
- Can I find ingredient substitutions if I have dietary restrictions or allergies?
- Where can I find more resources on baking techniques mentioned in your Viennoiseries recipes, like laminating dough?
- Final Reflection: The Enduring Allure of Easy Viennoiseries
- Unleash Your Inner Pâtissier: What Viennoiserie Will You Craft Next?
Sweet vs. Savory: Which Viennoiseries Will You Bake Next? - BakeWithEase
Discover Easy Viennoiseries Baking Recipes for Intermediate Bakers
Elevate Your Baking Skills with Delicious Viennoiseries
Moving into the world of viennoiseries is a fantastic step for any intermediate baker looking to refine their technique and create truly impressive pastries at home. These baked goods, often characterized by enriched, sometimes laminated dough, offer a delightful challenge and immense reward. Mastering the art of viennoiserie production means learning precision in ingredient handling, patience in proofing, and finesse in shaping – skills that translate beautifully to other areas of baking.
Exploring easy viennoiseries baking recipes is your gateway to unlocking a new level of baking confidence. Whether you're aiming for the classic flaky layers of a croissant or the rich indulgence of a brioche, the journey is incredibly rewarding. Each successful bake builds upon the last, allowing you to understand dough structure, fermentation, and the magic of butter melting within layers to create that signature texture. Dive in, and prepare to impress yourself and everyone you bake for!
Understanding Viennoiseries: A Baker's Introduction
What Defines a Viennoiserie?
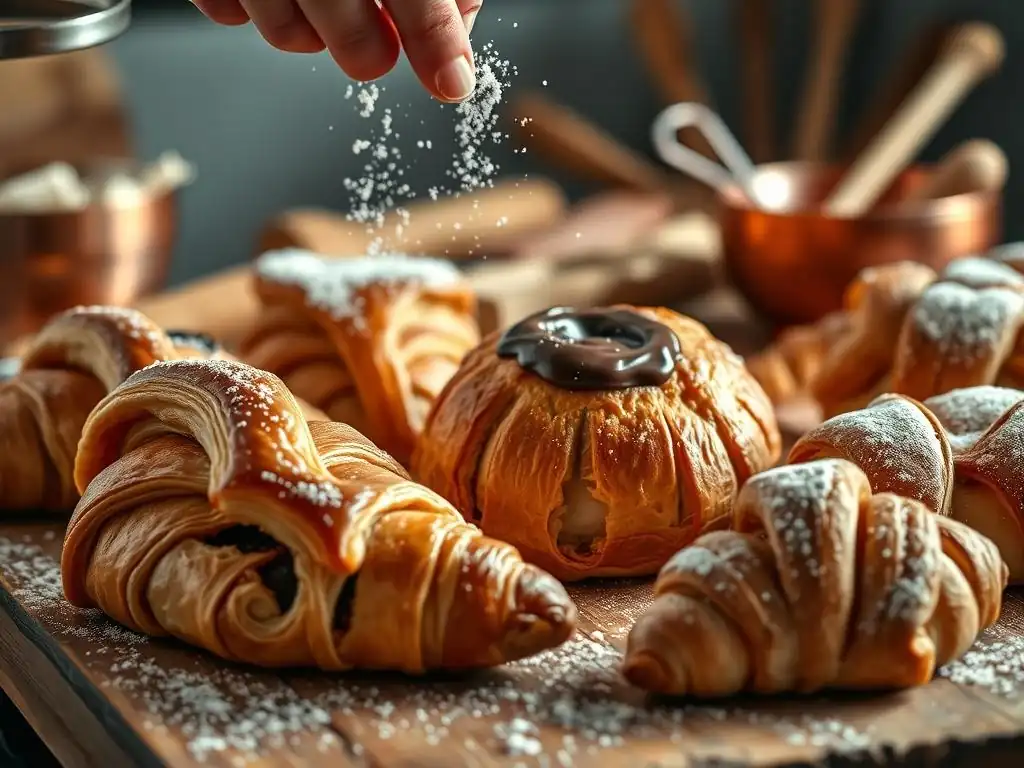
Viennoiseries occupy a unique space between bread and pastry. They are typically made from an enriched dough, meaning they include ingredients like eggs, milk, sugar, and butter, which add richness and tenderness compared to a basic bread dough. A key characteristic for many classic viennoiseries, such as croissants and pain au chocolat, is lamination – the process of repeatedly folding dough around a block of butter, creating dozens or even hundreds of thin layers.
This lamination process is what gives viennoiseries their characteristic flaky, airy texture. During baking, the water in the butter turns to steam, separating the dough layers. The rich ingredients contribute to a softer crumb and a more golden crust than traditional bread. While the technique might seem complex at first, breaking it down into manageable steps makes easy viennoiseries baking recipes achievable for intermediate bakers.
The Essential Ingredients for Perfect Viennoiseries
High-quality ingredients are paramount when baking viennoiseries. The foundation often starts with a strong bread flour, providing the necessary gluten structure to withstand lamination and proofing. Butter is arguably the most critical ingredient; a high-fat butter (typically 82% fat or higher) is preferred because it contains less water, leading to better lamination and flakiness. It must be kept consistently cold throughout the process.
Other essential components include milk (whole milk adds richness), sugar (provides sweetness and aids browning), eggs (enrich the dough and contribute to tenderness and color), salt (enhances flavor and controls yeast activity), and yeast (usually instant or active dry yeast, responsible for leavening). The ratio of these ingredients is crucial; for instance, the butter content in a classic croissant dough can be as high as 25-50% of the flour weight, a significant amount compared to standard bread. Using precise measurements and maintaining cold temperatures for the dough and butter are key steps in mastering easy viennoiseries baking recipes.
Sweet Viennoiseries: Classic Recipes and Baking Techniques
Pain au Chocolat: Mastering the Chocolate Croissant
Pain au chocolat, literally "chocolate bread," is a beloved sweet viennoiserie consisting of laminated dough wrapped around one or two pieces of dark chocolate. It's a delightful variation on the classic croissant, offering pockets of melted chocolate within the flaky layers. Mastering this pastry is a stepping stone in learning to handle laminated dough and fillings.
Despite its sophisticated appearance, creating pain au chocolat at home is achievable with patience and attention to detail. The process involves the same dough preparation as croissants, making it an excellent follow-up bake once you've tackled plain croissants. The key is using good quality chocolate batons designed for baking, as they melt nicely but hold their shape somewhat during baking.
Step-by-Step Pain au Chocolat Recipe for Home Bakers
Here's a simplified breakdown of the process for making pain au chocolat:
- Prepare the Dough: Mix flour, yeast, sugar, salt, milk, and a small amount of butter to form a smooth dough. Rest and chill thoroughly (at least 4-8 hours).
- Prepare the Butter Block: Shape cold, high-fat butter into a flat rectangle, about 1 cm thick. Keep it cold.
- Laminate: Roll the dough into a rectangle twice the size of the butter block. Place the butter on one half, fold the other half over. Roll out and perform a "turn" (e.g., a single fold, folding into thirds like a letter). Chill for 30-60 minutes. Repeat the roll and fold process 2-3 more times, chilling between each turn.
- Shape: Roll the laminated dough to about 3-4mm thickness. Cut into rectangles (roughly 8x10 cm). Place one or two chocolate batons at one end of each rectangle.
- Roll: Tightly roll the dough around the chocolate batons.
- Proof: Place shaped pastries on a baking sheet, leaving space. Proof in a warm, humid, draft-free place until they have doubled in size and look puffy (1.5-3 hours at room temp, or overnight in the fridge).
- Bake: Brush with egg wash. Bake in a preheated oven (e.g., 200°C initially, then reduced to 180°C) for 15-20 minutes until golden brown and flaky.
Tips for Achieving Flaky Layers in Your Pain au Chocolat
Achieving those coveted flaky layers requires careful handling. First and foremost, ensure your butter and dough are consistently cold throughout the lamination process. If the butter melts into the dough, you won't get distinct layers. Work quickly, especially in warm kitchens, and don't hesitate to pop the dough back into the fridge if it becomes too soft.
When rolling, apply even pressure to maintain uniform thickness across the dough sheet. This ensures consistent layers that bake evenly. Also, avoid using too much flour when rolling, as excess dry flour can make the layers stick together. Gentle handling during shaping and proofing is also key; treat the dough delicately to preserve the delicate layers you've created.
Croissants: The Quintessential Viennoiserie Experience
The classic croissant is arguably the most iconic viennoiserie, celebrated for its delicate, buttery, and incredibly flaky structure. Mastering the croissant is often considered a benchmark for intermediate bakers venturing into laminated doughs. While it requires precision and patience, the result – a light, airy pastry with shatteringly crisp layers – is immensely satisfying.
Croissants are made from the same basic laminated dough as pain au chocolat, but their shaping is distinct, creating the crescent form. Achieving the perfect "honeycomb" interior structure, where you see visible air pockets separated by thin layers of dough, is the goal. It speaks to successful lamination, proofing, and baking. Tackling a reliable easy viennoiseries baking recipe for croissants is a truly rewarding challenge.
Simple Croissant Dough Recipe: BakeWithEase Guide
A basic croissant dough recipe typically includes strong bread flour (around 500g), cold water or milk (around 250g), yeast (around 10g fresh or 3-4g instant), sugar (around 50g), salt (around 10g), and a small amount of butter (around 25g) for the dough itself, plus a significant amount of very cold butter for lamination (around 250-300g).
The process begins by mixing the dough ingredients (except the lamination butter) until a smooth but not overly developed dough forms. This dough is then chilled thoroughly. The lamination butter is shaped into a flat block. The cold dough is then rolled out, the butter block is enclosed, and the dough is repeatedly rolled and folded (typically 3-4 "turns" with chilling in between) to create many thin layers of dough separated by layers of butter.
Shaping and Baking Perfect Croissants: A Visual Guide
Shaping croissants involves rolling the laminated dough into a large rectangle, typically about 3-4mm thick. This rectangle is then cut into long triangles. Starting from the wide base of the triangle, the dough is rolled up towards the point, stretching the point slightly as you roll to create tension. The ends are then gently curved inwards to form the classic crescent shape.
Proofing is critical; shaped croissants are placed on a baking sheet and left to rise in a warm, humid, draft-free environment until they look significantly larger, puffy, and slightly wobbly when gently shaken (this can take 2-3 hours at room temperature, or an overnight cold proof which develops more flavor). Before baking, they are often brushed with an egg wash for a golden finish. They are typically baked in a hot oven, around 180-200°C, for 15-25 minutes, until deeply golden brown and the layers are clearly separated and flaky.
Pain aux Raisins: A Sweet and Fruity Delight
Pain aux raisins, also known as escargots (snails) due to their spiral shape, are another classic sweet viennoiserie. They combine the flaky layers of laminated dough with a swirl of rich pastry cream and sweet raisins. This pastry offers a different texture and flavor profile compared to the pure butteriness of a croissant or pain au chocolat, adding creamy and fruity notes.
Making pain aux raisins involves preparing the same laminated dough base. The key difference is the addition of two components before shaping: a smooth, vanilla-flavored pastry cream (crème pâtissière) and plump, often rehydrated, raisins. Spreading these evenly over the dough sheet before rolling is essential for getting a good distribution in the final swirl. It's a delightful pastry that feels a bit more indulgent than a simple croissant.
Easy Pain aux Raisins Recipe for Intermediate Skill Levels
An easy viennoiseries baking recipe for pain aux raisins starts with a batch of chilled, laminated dough (as used for croissants). While the dough chills, prepare the pastry cream by whisking egg yolks, sugar, and flour/cornstarch, then whisking in hot milk and cooking until thickened. Cool the pastry cream completely, often covering the surface directly with plastic wrap to prevent a skin from forming. Plump raisins by soaking them in hot water, rum, or orange juice for about 15-30 minutes, then drain them thoroughly.
Once the dough is rolled out into a large rectangle (about 3-4mm thick), spread the cooled pastry cream evenly over the surface, leaving a small border. Sprinkle the plumped raisins generously over the cream. Starting from one long edge, tightly roll the dough into a log. Chill the log briefly if needed to firm up, then slice it into rounds about 2-3 cm thick. Place the sliced 'snails' cut-side up on a baking sheet, proof them as you would croissants, and bake until golden brown.
Variations on the Classic Pain aux Raisins: Rum-Soaked Raisins, Pastry Cream Swirls
While the classic combination of pastry cream and raisins is wonderful, there are easy variations to explore. Soaking the raisins in rum, brandy, or orange juice before adding them provides an extra layer of flavor; just ensure they are well-drained. For a slightly different twist, you could add a hint of orange zest to the pastry cream during cooking.
Beyond the traditional filling, consider swirling in other elements with or instead of the raisins. A thin layer of almond cream (frangipane) can be spread over the dough before adding the pastry cream and raisins. Alternatively, skip the raisins entirely and create a cinnamon-sugar swirl within the pastry cream, similar to a cinnamon roll but with flaky laminated dough. These small tweaks offer exciting new flavor profiles while using the same fundamental techniques from easy viennoiseries baking recipes.
Other Sweet Viennoiseries to Explore
Beyond the core laminated pastries like croissants and pain au chocolat, the world of sweet viennoiseries includes other rich and delicious treats. Brioche, while not always laminated, is a key member of the family due to its enriched dough structure. Kouign Amann, a specialty from Brittany, takes lamination to a new level with the addition of sugar within the layers, creating a unique texture and caramelized crust.
Exploring these other types allows you to expand your baking skills further. Brioche teaches you about handling a very soft, high-fat dough. Kouign Amann introduces the challenge of incorporating sugar into lamination and managing caramelization during baking. Each offers a different but equally rewarding experience for the intermediate baker seeking to master easy viennoiseries baking recipes and beyond.
Brioche: A Rich and Buttery Treat
Brioche is a classic French bread known for its incredibly rich and tender crumb, thanks to a high proportion of butter and eggs. Unlike laminated doughs, traditional brioche dough is kneaded extensively to develop gluten, then large amounts of softened butter and eggs are incorporated. The result is a smooth, elastic, and very soft dough that requires significant chilling before shaping.
Brioche is incredibly versatile. It can be baked as a large loaf, individual buns (often with a small "head" on top, known as brioche à tête), or used as the base for other pastries like tarte tropézienne. Its rich flavor and soft texture make it perfect for breakfast, alongside coffee, or even used for decadent French toast.
Kouign Amann: The Buttery Breton Cake
Kouign Amann (pronounced queen-a-mon) is a round, multi-layered cake originating from Douarnenez in Brittany, France. It's made from a laminated dough similar to croissant dough, but with sugar layered in along with the butter during the folding process. As it bakes, the butter and sugar melt, creating a sticky, caramelized exterior and tender, sweet layers inside.
Making Kouign Amann involves careful handling of the dough and ensuring the sugar is evenly distributed within the layers. The high sugar content means it bakes at a moderate temperature to allow for caramelization without burning. The finished pastry is dense, buttery, and intensely sweet, with a wonderfully crisp, caramelized bottom and edges.
Savory Viennoiseries: Expanding Your Baking Repertoire
Cheese Croissants: A Savory Twist on a Classic
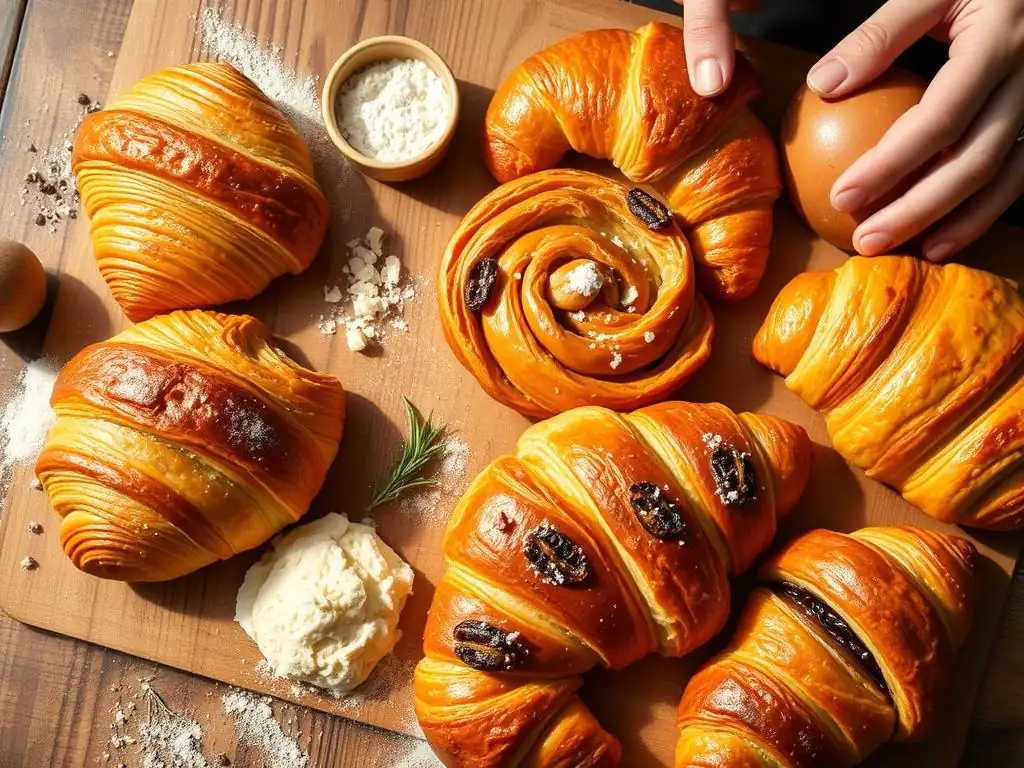
While sweet viennoiseries are the most commonly known, savory variations offer a delicious alternative, perfect for brunch, lunch, or a substantial snack. Cheese croissants are perhaps the most popular savory adaptation, taking the flaky, buttery layers of a classic croissant and infusing them with the flavor of cheese. They provide a satisfying contrast to their sweet counterparts.
Creating cheese croissants involves the same fundamental laminated dough technique. The savory element is introduced by incorporating cheese, either within the layers before shaping or added to the shaped pastry before baking. This allows intermediate bakers to practice their lamination skills while exploring new flavor combinations.
Easy Cheese Croissant Recipe: Baking with Cheese
To make cheese croissants, start with a batch of laminated dough prepared as for sweet croissants. When you are ready to shape the dough, roll it out as usual. For an easy viennoiseries baking recipe with cheese, simply cut the dough into triangles and, before rolling, sprinkle a generous amount of grated cheese (about 1-2 tablespoons per triangle) over the surface. Roll up the triangles as you would a regular croissant.
Alternatively, for a more even distribution of cheese, you can incorporate the cheese during the lamination process. After a turn or two, lightly sprinkle grated cheese over the dough before folding. However, adding cheese during lamination can make rolling slightly more challenging. The simplest method for home bakers is adding the cheese during shaping.
Choosing the Right Cheese for Your Savory Croissants: Gruyere, Emmental, Sharp Cheddar
The choice of cheese significantly impacts the final flavor and texture of your savory croissants. Classic French cheeses like Gruyere and Emmental are excellent choices. They melt beautifully, offer a nutty, slightly sweet flavor, and are commonly used in baked goods. Using about 50-75 grams of grated cheese per batch of 8-10 croissants provides a noticeable cheese flavor.
For a sharper, more pronounced taste, consider using a sharp cheddar. While less traditional in French viennoiseries, cheddar melts well and pairs wonderfully with buttery dough. You could also sprinkle some finely grated Parmesan cheese over the shaped croissants before baking for an extra crispy, salty crust. Experimenting with different cheeses allows you to customize your easy viennoiseries baking recipes to your preference.
Ham and Cheese Croissants: A Hearty and Flavorful Option
Taking the cheese croissant one step further, adding ham creates a heartier, more substantial pastry. Ham and cheese croissants are a popular choice for breakfast or a light lunch, combining the flaky layers with savory ham and melted cheese. This variation is simple to execute once you've mastered basic cheese croissants.
Incorporating ham requires a bit of care to prevent the added moisture from making the pastry soggy. Using a relatively dry ham and ensuring it's finely diced helps distribute it evenly and minimizes moisture release during baking. The combination of salty ham and rich cheese nestled within buttery dough is incredibly satisfying.
BakeWithEase's Ham and Cheese Croissant Recipe
Start with your prepared laminated dough. Roll it out and cut it into triangles. For each triangle, sprinkle about 1-1.5 tablespoons of grated cheese (like Gruyere or cheddar) over the wide base. Then, add about 1 tablespoon of finely diced ham (cooked and relatively dry) on top of the cheese.
Roll up the triangles tightly from the base to the point, ensuring the filling stays enclosed. Shape into crescents, if desired. Proof the shaped pastries on a baking sheet. Before baking, you can brush with egg wash and, optionally, sprinkle a little extra cheese on top for a crisp finish. Bake until golden brown and the cheese is melted and bubbling slightly.
Tips for Preventing Soggy Ham and Cheese Croissants
Preventing sogginess is key when adding fillings like ham. Use a ham that isn't overly wet or briney; deli ham or leftover roasted ham works well if patted dry. Dicing the ham finely helps distribute it evenly and reduces the amount of moisture concentrated in one spot.
Don't overfill the croissants. Too much filling can cause the dough layers to separate improperly or lead to moisture leakage during baking. Ensure the dough is well-sealed around the filling. Finally, make sure your oven is properly preheated to the correct temperature; a hot oven helps the pastry set quickly before moisture has a chance to create a soggy bottom. These tips help ensure your easy viennoiseries baking recipes with fillings turn out perfectly.
Olive and Herb Viennoiseries: A Mediterranean-Inspired Treat
For a different kind of savory flavor, olive and herb viennoiseries offer a taste of the Mediterranean. This less common but equally delicious variation incorporates chopped olives and fragrant herbs into the dough, creating a pastry with a wonderful aroma and savory depth. It's a great way to use your laminated dough skills for something unique.
This type of viennoiserie can be shaped in various ways – as croissants, swirls (like pain aux raisins, but savory), or even small rolls. The combination of salty olives, aromatic herbs, and buttery dough is surprisingly addictive and makes a perfect accompaniment to a soup or salad, or simply enjoyed on its own.
Olive and Herb Viennoiserie Recipe for Home Baking
Start with your chilled laminated dough. You can incorporate the olives and herbs in a couple of ways for an easy viennoiseries baking recipe. One method is to finely chop about 50-70 grams of pitted olives (such as Kalamata or green olives) and 1-2 tablespoons of fresh herbs (like rosemary, thyme, or oregano). Gently knead or fold the chopped olives and herbs into the dough sheet after the first turn of lamination, or spread them over the dough before the final fold.
Another approach is to roll out the finished laminated dough and spread a thin layer of olive tapenade or pesto over the surface before rolling it up and slicing, similar to making pain aux raisins. Shape the dough as desired (croissants, swirls, or rectangles). Proof and bake as you would other viennoiseries until golden brown.
Incorporating Different Herbs and Olives: Rosemary & Kalamata, Thyme & Green Olives
The possibilities for flavor combinations with olives and herbs are vast. A classic pairing is Kalamata olives with fresh rosemary or oregano, evoking the flavors of Greece and Italy. Green olives pair well with thyme or marjoram. Consider adding a pinch of red pepper flakes for a subtle heat.
You can also add other savory elements like sun-dried tomatoes (drained and chopped) or a sprinkle of crumbled feta cheese along with the olives and herbs. When choosing herbs, fresh is always best for maximum aroma and flavor. Chop them finely so they distribute evenly within the dough.
Other Savory Viennoiseries Ideas
The concept of savory viennoiseries is limited only by your imagination! Once you have a handle on the basic laminated dough, you can fill it with various savory ingredients. Two popular and delicious options include spinach and feta or mushroom and Gruyere.
These offer heartier fillings that can turn a simple pastry into a satisfying snack or light meal. They demonstrate the versatility of the viennoiserie dough and provide more opportunities to practice your easy viennoiseries baking recipes skills with different textures and moisture levels in fillings.
Spinach and Feta Viennoiseries
For spinach and feta viennoiseries, prepare a filling by sautéing fresh spinach until wilted, then squeezing out as much moisture as possible. Chop the spinach finely and mix it with crumbled feta cheese, a pinch of nutmeg, salt, and pepper.
Roll out the laminated dough and cut it into rectangles or squares. Place a spoonful of the spinach and feta filling on each piece of dough and fold or roll to enclose it. Shape as desired (e.g., turnovers, rolls). Proof and bake until golden and the filling is heated through.
Mushroom and Gruyere Viennoiseries
A mushroom and Gruyere filling is rich and savory. Sauté finely chopped mushrooms (such as cremini, button, or a mix) in a little butter or olive oil until they release their moisture and start to brown. Season with salt, pepper, and perhaps a pinch of thyme. Let the mushrooms cool slightly, then mix them with grated Gruyere cheese.
Fill squares or rectangles of laminated dough with the mushroom and cheese mixture. Fold and seal, shaping into turnovers or small parcels. Proof and bake until the dough is golden brown and flaky, and the cheese is melted.
Mastering the Art of Viennoiseries: Baking Tips and Tricks
Achieving the Perfect Flaky Texture
The hallmark of a great viennoiserie is its incredibly flaky texture, the result of successful lamination. This texture comes from the many thin layers of dough separated by equally thin layers of butter. When the pastry bakes, the water in the butter turns to steam, forcing the dough layers apart and creating air pockets.
Mastering this texture is the primary goal of tackling easy viennoiseries baking recipes. It requires attention to detail at every stage, from ingredient temperature to handling technique. When you achieve that perfect shatter on the first bite and see the beautiful honeycomb structure inside, you know you've succeeded.
The Importance of Cold Butter and Dough
Maintaining cold temperatures for both your butter and dough is non-negotiable for successful lamination. The butter must be cold and pliable enough to roll out with the dough without melting. If the butter is too warm, it will simply incorporate into the dough rather than staying in distinct layers. Aim for butter that bends slightly without breaking.
Similarly, the dough needs to be cold and firm. This allows you to roll it thinly without tearing the layers and prevents the butter from warming up too quickly. Chilling the dough between each fold (turn) is crucial to relax the gluten and firm up the butter, making the next roll-out easier and preserving the layers. Skipping chilling steps is a common mistake that prevents achieving that desired flakiness.
Laminating Techniques for Viennoiseries Dough
Lamination involves enclosing a block of cold butter within the dough and then repeatedly rolling and folding the dough. The most common folds are the single fold (folding the dough into thirds, like a letter) and the double fold (folding both ends towards the center, then folding the whole thing in half, creating four layers).
A typical recipe might call for 3 or 4 single folds, or a combination of single and double folds. Three single folds result in 3^3 = 27 layers of dough separated by butter. Four single folds result in 4^3 = 81 layers. The number of layers, combined with proper proofing and baking, determines the final flakiness. Roll the dough evenly and consistently in one direction as much as possible during each turn.
Proofing Viennoiseries: Getting it Right
Proofing is the final rise of the shaped viennoiseries before baking. This step is crucial for developing flavor, achieving the correct texture, and ensuring good oven spring. During proofing, the yeast ferments, producing carbon dioxide gas that expands the dough, including the layers created during lamination.
Proper proofing results in pastries that are light and airy. Under-proofing leads to dense, heavy pastries that don't rise well in the oven. Over-proofing causes the dough structure to collapse, potentially leading to flat pastries with poor layer separation. Getting the proofing right is a key part of mastering easy viennoiseries baking recipes.
Understanding Proofing Times and Temperatures
Proofing time is highly dependent on temperature. At room temperature (around 20-24°C), viennoiseries typically take 2-3 hours to proof. In a slightly warmer, humid environment (around 24-26°C, like a proofing box or oven with the light on and a tray of hot water), it might take 1.5-2.5 hours. The pastries should look visibly larger (nearly doubled in size) and feel light and puffy.
Many bakers prefer a cold proof, placing the shaped pastries in the refrigerator overnight (8-12 hours). This slows down fermentation, developing more complex flavors, and also firms up the butter again, which can sometimes lead to better oven spring and flakiness. Cold-proofed pastries may need 30-60 minutes at room temperature before baking.
Over-Proofing vs. Under-Proofing: Troubleshooting
Identifying correctly proofed dough comes with practice. Properly proofed viennoiseries will jiggle slightly when the tray is gently shaken. If you gently press the dough with a finger, the indentation should spring back slowly.
Over-proofed pastries will look excessively puffy and may start to spread sideways. The indentation from a finger poke will remain. Baking over-proofed dough often results in flat, heavy pastries because the gluten structure has weakened. Under-proofed pastries will look dense and firm; a finger poke will spring back immediately. They won't expand much in the oven and will result in a dense, bready texture rather than flaky layers.
Baking Viennoiseries: Temperature and Timing
Baking is the final step where the magic happens. The high heat of the oven causes the butter to melt and create steam, separating the layers. It also causes the dough to rise rapidly (oven spring) and the crust to brown. Correct temperature and timing are essential for achieving a golden, flaky result.
Most viennoiseries are baked at a relatively high initial temperature, often around 200-220°C, to maximize oven spring and set the layers quickly. The temperature is then sometimes reduced to 180-190°C to allow the inside to cook through without the exterior burning.
Achieving a Golden-Brown Crust
An egg wash applied before baking is key to achieving that beautiful, glossy, golden-brown crust. A simple egg wash is made by whisking one egg with a tablespoon of milk or water. Brush it gently over the surface of the proofed pastries, being careful not to let it drip down the sides, which can seal the layers together.
Baking on a hot surface, like a preheated baking stone or steel, or placing the baking sheet on a lower rack to begin with, can help ensure the bottom crust is also golden and crisp. Proper oven temperature and adequate baking time (typically 15-25 minutes depending on the size and type of pastry) are also crucial for even browning.
Preventing Burning: Baking Strategies
Given the sugar and butter content, viennoiseries can brown quickly. If you notice the tops are getting too dark before the pastries are cooked through, you can tent the baking sheet loosely with aluminum foil. This reflects some of the heat and allows the inside to finish baking.
Ensure your oven temperature is accurate using an oven thermometer. Hot spots can cause uneven browning; rotating the baking sheet halfway through the baking time can help. If baking multiple sheets, swap their positions in the oven to ensure even cooking. Don't overcrowd the baking sheet, as this can affect air circulation and lead to uneven baking.
Easy Viennoiseries Baking Recipes: Choosing Your Next Bake
Sweet or Savory: Which Viennoiserie Suits Your Taste?
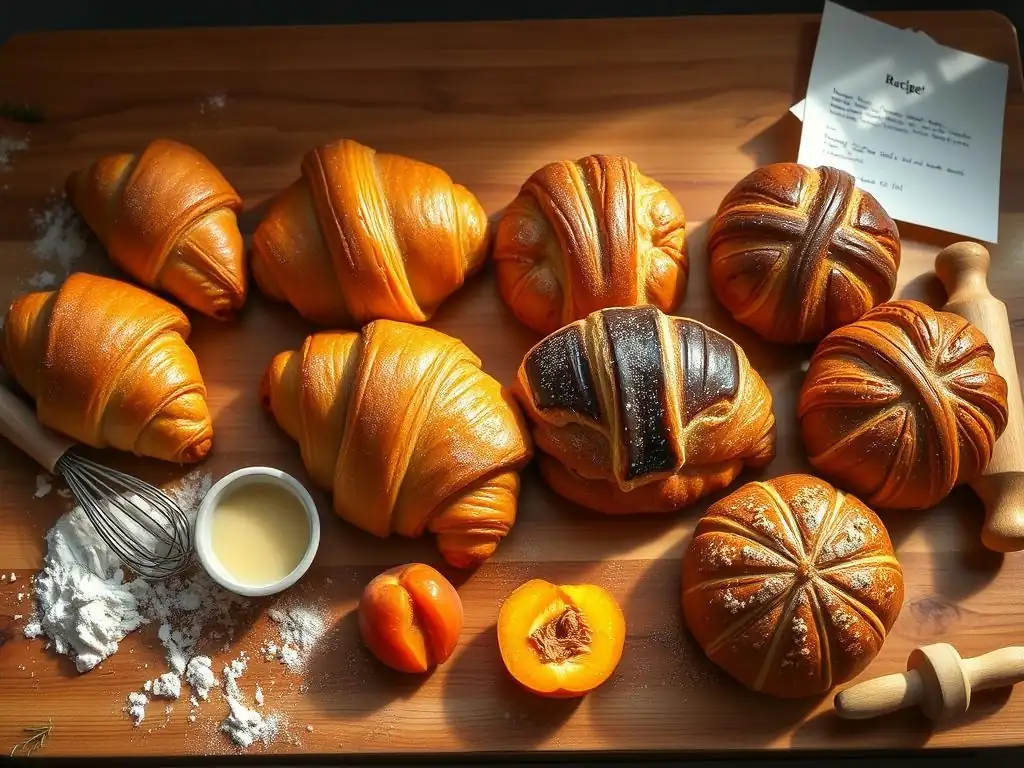
Now that you've explored the possibilities, the question is: which viennoiserie will you bake next? Your choice might depend on the occasion or your personal preference. Are you craving a classic breakfast pastry to enjoy with coffee? A sweet pain au chocolat or a simple croissant might be the perfect fit from our easy viennoiseries baking recipes.
Or perhaps you're looking for something different for brunch or a light lunch? A savory cheese croissant, ham and cheese, or an olive and herb variation could be just right. Consider what flavors you enjoy and what kind of baking challenge you're up for. Both sweet and savory options utilize similar foundational techniques, making them excellent practice grounds for intermediate bakers.
Recipe Round-Up: Your Guide to Easy Viennoiseries Baking
BakeWithEase offers a range of easy viennoiseries baking recipes designed for home bakers. Start with the foundational laminated dough recipe. Once you're comfortable with that, try a classic croissant or pain au chocolat. Then, branch out to pain aux raisins or explore the savory options like cheese or ham and cheese croissants.
Each recipe builds upon the core skills of dough handling, lamination, proofing, and baking. Don't be discouraged if your first attempt isn't perfect; viennoiserie baking takes practice. Pay attention to ingredient temperatures, proofing signs, and oven behavior. With each bake, you'll gain confidence and refine your technique, bringing you closer to those perfectly flaky results.
Conclusion: Elevate Your Baking with BakeWithEase Viennoiseries
Frequently Asked Questions
What exactly are Viennoiseries, and what makes them "easy" to bake?
Viennoiseries are basically baked goods made in a similar manner to bread, but with enriched doughs. Our recipes focus on simplified techniques and readily available ingredients to make them easy for home bakers.
Does BakeWithEase offer both sweet and savory Viennoiseries recipes?
Yes, absolutely! We have a wide range of both sweet Viennoiseries, like croissants and pain au chocolat, and savory options, featuring fillings such as cheese and herbs.
What level of baking experience do I need to successfully use your "easy" Viennoiseries recipes?
Our recipes are designed for all skill levels. We provide step-by-step instructions and helpful tips, making them accessible even for beginner bakers.
Can I find ingredient substitutions if I have dietary restrictions or allergies?
We aim to offer suggestions for common substitutions where possible within the recipe descriptions. However, baking is a science, so substitutions may affect the final result.
Where can I find more resources on baking techniques mentioned in your Viennoiseries recipes, like laminating dough?
BakeWithEase.com has a dedicated section for baking techniques. You'll find detailed guides and videos on laminating dough and other essential skills for successful Viennoiseries baking.
Final Reflection: The Enduring Allure of Easy Viennoiseries
The pursuit of flaky, buttery perfection needn't be a daunting task. This exploration of easy viennoiserie recipes demonstrates that achieving delicious results is entirely within reach, even for beginner bakers. The joy of crafting these delicate pastries, from the simple croissant to the elegant pain au chocolat, is far more accessible than many believe.
The enduring appeal of viennoiseries lies not just in their exquisite taste, but in the process itself. The rhythmic folding, the anticipation of the oven's warmth, the intoxicating aroma filling the kitchen – these are experiences that connect us to a rich culinary heritage. Baking is at once child's play and adult joy. And love, of course.
– Paul Hollywood. This quote perfectly encapsulates the satisfaction derived from mastering even the simplest viennoiserie recipe, transforming humble ingredients into something truly special. It's a process that fosters creativity and self-sufficiency in the kitchen, offering a rewarding escape from the everyday.
Now, it's your turn. Don't be intimidated by the seemingly complex world of viennoiseries. Choose a recipe that sparks your interest, gather your ingredients, and embrace the journey. The satisfaction of creating your own perfectly golden, melt-in-your-mouth pastry is a reward in itself. Let the aroma of freshly baked viennoiseries fill your home, and share the joy with those you love. You might be surprised at what you can achieve.
Unleash Your Inner Pâtissier: What Viennoiserie Will You Craft Next?
Thanks for joining us on this delicious journey into the world of viennoiseries! We hope you've discovered new inspiration and techniques to elevate your baking game. Ready to put your newfound knowledge into practice?
- Bake your dream viennoiserie! Choose your favorite recipe from the article (or perhaps try a completely new one!) and get started. Don't be afraid to experiment with flavors and fillings.
- Share your creations! Show us your baking masterpieces on social media using #BakeWithEaseViennoiseries – we'd love to see them!
- Explore our other recipes to find your next baking adventure! Discover new techniques and explore the incredible diversity of the world of bread and pastry.
So, what delightful viennoiserie will you be crafting next? Let us know in the comments below!