
Your Guide to Baking Traditional Viennoiseries at Home

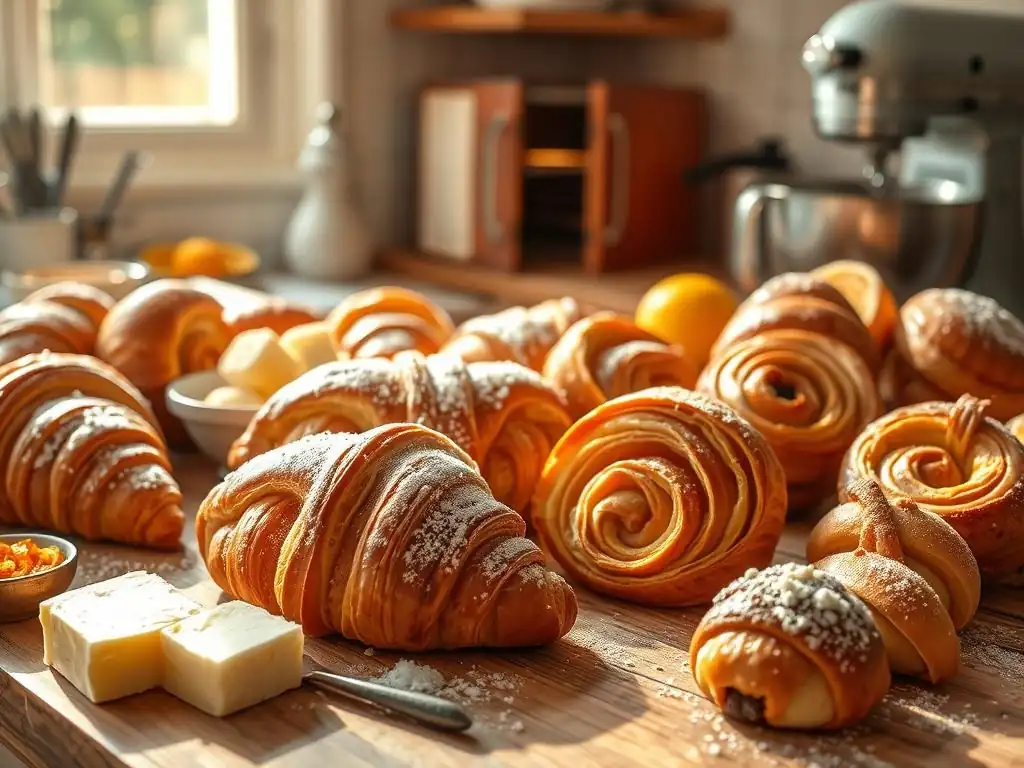
Welcome to BakeWithEase, where baking becomes a joy, not a chore! Ever dreamed of crafting those flaky, buttery delights you find in Parisian bakeries? This week, we're unlocking the secrets to an Easy Homemade Viennoiseries Recipe that will transform your kitchen into a patisserie. Curious about the simple steps that lead to authentic croissants and pain au chocolat? Let's get baking!
- Your Guide to Baking Croissants and Pain au Chocolat at Home
- BakeWithEase Presents: Mastering Homemade Croissants and Pain au Chocolat
- Understanding Viennoiseries: A Baker's Introduction
- Homemade Croissants and Pain au Chocolat Recipe: Getting Started
- Step-by-Step: Crafting the Perfect Viennoiserie Dough
- Shaping Traditional Viennoiseries: A Visual Guide
- Baking Your Viennoiseries: Achieving Golden Perfection
- Tips for Success: Troubleshooting Common Viennoiseries Baking Issues
- Elevate Your Baking: Variations and Creative Twists on Viennoiseries
- Enjoy Your Homemade Viennoiseries: Serving Suggestions
- Conclusion: The Joy of Baking Homemade Croissants and Pain au Chocolat
- Frequently Asked Questions
- Final Reflection: The Sweet Symphony of Homemade Viennoiseries
- Unleash Your Inner Boulanger: Master Viennoiserie at Home!
Your Guide to Baking Croissants and Pain au Chocolat at Home
BakeWithEase Presents: Mastering Homemade Croissants and Pain au Chocolat
Welcome to the delightful world of Viennoiseries! If you've ever dreamed of pulling warm, flaky croissants or rich pain au chocolat straight from your own oven, you're in the right place. While often perceived as challenging, mastering these pastries at home is incredibly rewarding. This guide from BakeWithEase will walk you through the process, making an easy homemade Viennoiseries recipe achievable for intermediate bakers. We'll demystify the steps, from preparing the dough to achieving that perfect golden crust, helping you create bakery-quality treats without leaving your kitchen.
Making Viennoiseries is a journey that requires patience and precision, but the result – layer upon layer of buttery goodness – is well worth the effort. This article is designed to break down the complex techniques into manageable steps, focusing on the core principles that make these pastries so special. We'll explore the essential ingredients, the crucial process of lamination, and tips for shaping and baking. Get ready to impress yourself and your loved ones with your newfound ability to bake classic French pastries.
Understanding Viennoiseries: A Baker's Introduction
Viennoiseries are a category of baked goods made from a leavened dough, similar to bread dough, but with the addition of eggs, butter, milk, and sometimes sugar, giving them a richer, softer texture. The defining characteristic of many Viennoiseries, including croissants and pain au chocolat, is their laminated dough structure, created by repeatedly folding butter into the dough. This process results in hundreds of thin layers that puff up when baked, yielding that signature flaky texture. Originating from Vienna (hence the name), these pastries became iconic in French baking and are now enjoyed worldwide.
Beyond croissants and pain au chocolat, the Viennoiserie family includes treats like brioche, pain aux raisins, and chausson aux pommes (apple turnovers). What unites them is this enriched, often laminated dough base. They represent a delightful fusion of bread-making techniques with the richness typically associated with pastry, making them a unique and beloved part of breakfast and snack traditions in many cultures. Mastering the techniques for croissants and pain au chocolat provides a solid foundation for exploring other delicious items in this category.
What are Croissants and Pain au Chocolat? Exploring the Delights
A croissant is a buttery, flaky pastry named for its historical crescent shape. It's traditionally made from laminated dough, which gives it its characteristic airy interior and crisp exterior. The process involves incorporating a large amount of butter into the dough through a series of folds and rests, creating numerous thin layers. When baked, the water in the butter turns to steam, separating the dough layers and resulting in the croissant's signature structure. A classic croissant should be light, airy, and intensely buttery, with a delicate shatter when you bite into it.
Pain au chocolat, often called a chocolate croissant, is essentially the same laminated dough wrapped around one or two pieces of dark chocolate. The name translates literally from French as "bread with chocolate." While sharing the same dough base as a plain croissant, the addition of melting chocolate adds another dimension of flavor and texture. A well-made pain au chocolat should have the same flaky exterior and airy interior as a croissant, with the added joy of warm, slightly melted chocolate running through the center. It's a simple addition that elevates the already delicious pastry.
Key Differences Between Croissants and Bread
While both croissants and traditional bread are made from flour, water, yeast, and salt, their composition and preparation differ significantly, leading to vastly different results. Standard bread dough typically contains a relatively low percentage of fat, often just a small amount of oil or butter, if any. It relies on gluten development and fermentation to create structure and flavor, resulting in a chewier texture and a more open crumb. The kneading process for bread focuses on building a strong gluten network throughout the entire dough mass.
In contrast, croissants and other Viennoiseries use an enriched dough that includes substantial amounts of butter, milk, and sometimes eggs and sugar. The most crucial difference is the lamination process, where a large block of butter is encased within the dough and folded repeatedly. This creates distinct layers of dough separated by thin layers of butter.
When baked, these butter layers melt, and the steam they produce separates the dough layers, resulting in the incredibly light, flaky texture characteristic of croissants, which is fundamentally different from the denser, chewier texture of most breads. The fat content in croissant dough is typically around 25-30% of the flour weight, plus the significant amount of butter used for lamination, which can be 50-75% of the flour weight, whereas traditional bread might have 0-5% fat.
Essential Ingredients for Authentic Croissants and Pain au Chocolat
Crafting authentic croissants and pain au chocolat requires a few key ingredients, and the quality of each makes a significant difference. High-protein bread flour is often preferred because its strong gluten structure can withstand the rigorous folding and rolling process during lamination. All-purpose flour can be used, but it might be slightly trickier to handle. Granulated sugar is used to provide food for the yeast and contribute to browning, typically in a quantity of around 10-15% of the flour weight. Fine sea salt is essential for flavor balance, usually about 1.8-2% of the flour weight.
Active dry or instant yeast is the leavening agent, helping the dough rise and develop flavor. The amount varies but is typically around 1-2% of the flour weight for an overnight cold proof. Cold milk (whole milk is recommended for richness) and cold water are used as the liquid components, contributing to the dough's hydration and keeping it cool during initial mixing.
Finally, the star ingredient is unsalted butter – a significant quantity is needed for both the dough enrichment (around 5-10% of flour weight) and, crucially, for the lamination process (50-75% of flour weight). For pain au chocolat, you'll need high-quality dark chocolate sticks (batons de chocolat) designed specifically for baking.
Homemade Croissants and Pain au Chocolat Recipe: Getting Started
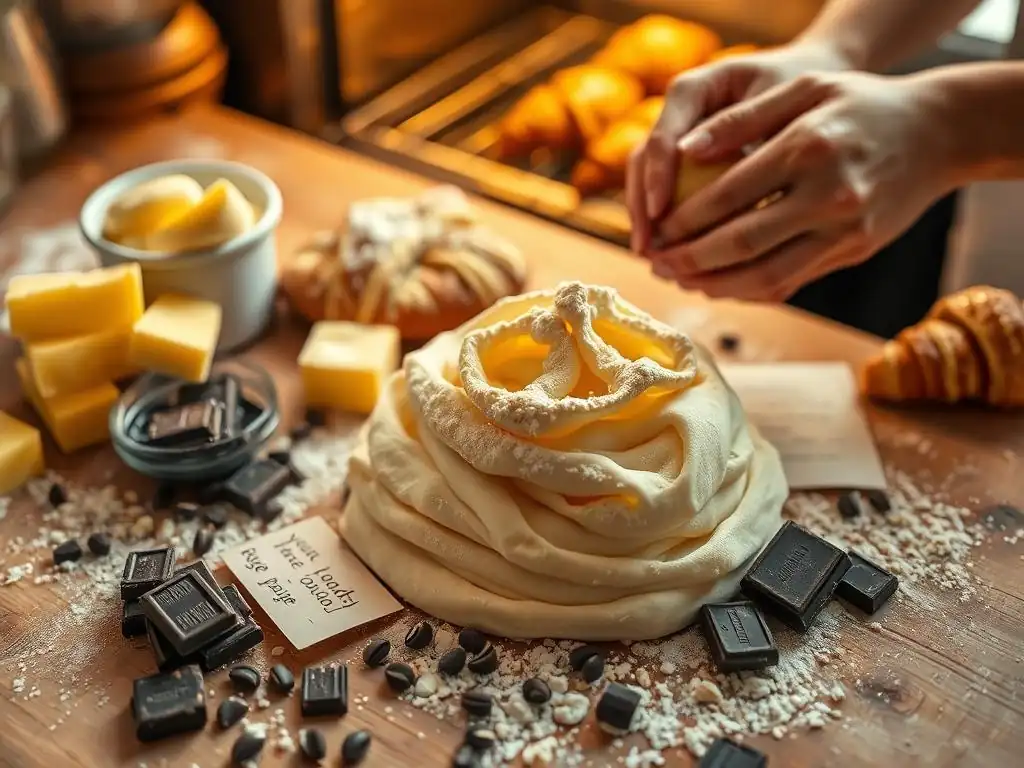
Embarking on your easy homemade Viennoiseries recipe journey starts with gathering the right tools and understanding the importance of your ingredients, particularly the butter. Baking these pastries is a process that unfolds over several steps and often two days, allowing for crucial chilling and resting periods that are vital for developing flavor and structure. Don't be intimidated; each step is manageable when approached with patience and attention to detail.
The initial phase involves preparing the basic dough, known as the détrempe, and getting the butter ready for lamination. This is where you set the foundation for the hundreds of flaky layers to come. Having all your ingredients measured and tools ready before you begin will make the process much smoother. Remember, temperature control is your best friend when working with laminated dough; keeping everything cold is key to success.
Assembling Your Baking Toolkit for Viennoiseries
Having the right tools on hand makes the process of baking homemade Viennoiseries significantly easier and more efficient. A stand mixer with a dough hook is highly recommended for mixing the initial dough, as it ensures proper gluten development without overheating the ingredients. However, it's possible to mix by hand with careful attention to temperature. You'll need a large, clean work surface, preferably one that stays cool, like granite or marble, or you can use a large silicone baking mat.
Essential tools include a sturdy rolling pin, ideally a French-style tapered one or a heavy cylindrical one, for rolling out the dough evenly. A sharp knife or a pizza cutter is needed for portioning and shaping the dough. A ruler or measuring tape is helpful for ensuring precise dimensions during rolling and cutting, which is crucial for consistent layers. Parchment paper is indispensable for lining baking sheets and wrapping dough during chilling. Finally, a pastry brush is needed for applying egg wash before baking.
The Importance of High-Quality Butter for Viennoiseries
The quality and type of butter are paramount to achieving the characteristic flakiness and rich flavor of croissants and pain au chocolat. European-style butter, which typically has a higher butterfat content (around 82-84%) compared to American butter (around 80%), is often preferred by professional bakers. This higher fat content means less water, which helps create more distinct layers during lamination and results in a richer taste.
Beyond the fat content, the consistency of the butter is critical. For lamination, the butter needs to be pliable but cold – firm enough to be rolled out without melting into the dough, but not so hard that it breaks or tears the dough. This requires careful temperature management. Using butter specifically designed for lamination, sometimes sold as "beurrage butter," can make the process easier as it's formulated for optimal pliability over a wider temperature range. However, standard high-quality unsalted butter, properly tempered, works perfectly well for a successful easy homemade Viennoiseries recipe.
Step-by-Step: Crafting the Perfect Viennoiserie Dough
The heart of any successful croissant or pain au chocolat is the dough. This section guides you through the critical stages of preparing, laminating, and proofing the dough – the steps that transform simple ingredients into the foundation of flaky, buttery pastries. Each step builds upon the last, requiring attention to detail and, most importantly, patience. Don't rush the chilling periods; they are as vital as the kneading and folding.
Mastering the dough involves understanding the interplay between gluten development, yeast activity, and temperature control. The goal is to create a dough that is elastic yet extensible, capable of being rolled thin without tearing, and that can encapsulate the butter block effectively. This process is often spread over two days, allowing for long, slow fermentation in the refrigerator which develops deeper flavors and makes the dough easier to handle.
Preparing the Détrempe: The Foundation of Flaky Viennoiseries
The détrempe is the initial dough base for Viennoiseries. It's a lean dough made from flour, water, milk, yeast, sugar, and salt, with a small amount of butter incorporated directly into the mix. The process typically begins by dissolving the yeast (if using active dry) in the cold liquid (water and milk).
Then, the dry ingredients (flour, sugar, salt) are combined, and the liquid mixture is added. The dough is mixed, often in a stand mixer, until it just comes together and starts to develop a basic gluten structure – it should be smooth but not overly elastic at this stage.
Once the dough is mixed, the small amount of soft butter is added and mixed until fully incorporated. The key is to keep the dough relatively cool throughout this process to prevent premature yeast activity and make it easier to handle later. After mixing, the détrempe is typically shaped into a rectangle, wrapped tightly in plastic wrap, and placed in the refrigerator to chill for several hours, ideally overnight.
This chilling period allows the gluten to relax, makes the dough firm and easy to roll, and initiates a slow fermentation that enhances flavor. A typical détrempe hydration might be around 55-60% (liquid weight relative to flour weight).
Mastering the Beurrage: Encasing the Butter for Layers
The beurrage is the block of butter that will be incorporated into the détrempe to create the layers. Preparing the beurrage correctly is just as important as preparing the dough. You need a block of high-quality, cold butter, typically around 50-75% of the flour weight used in the détrempe.
This butter needs to be shaped into a flat, even rectangle, usually about 1/2 to 3/4 inch thick. This can be done by pounding cold butter with a rolling pin between two sheets of parchment paper or by simply shaping softened butter on parchment and chilling it until firm but still pliable.
Once the beurrage is ready and the détrempe has chilled, the détrempe is rolled out into a rectangle approximately twice the size of the butter block. The butter block is then placed on one half of the dough, and the other half of the dough is folded over to completely encase the butter. The edges are sealed tightly to prevent the butter from leaking during the subsequent rolling and folding steps. The goal is to create a single package of dough with the butter fully enclosed, ready for the lamination process to begin.
Laminating the Dough: Creating the Signature Flaky Texture
Lamination is the magical process that transforms the dough and butter package into hundreds of paper-thin layers. It involves repeatedly rolling the dough out into a long rectangle and then folding it. Each fold multiplies the number of layers.
For example, a single fold (folding the dough into thirds) triples the layers, while a double fold (folding it like a business letter, into quarters) quadruples them. A typical croissant recipe might involve 3-4 folds in total, alternating between single and double folds, resulting in hundreds of layers (e.g., 3 single folds give 3^3 = 27 layers; 4 single folds give 3^4 = 81 layers; a combination like single, single, double can give 3 x 3 x 4 = 36 layers).
Between each fold, the dough must be rested and chilled in the refrigerator for at least 30-60 minutes, and sometimes longer (1-2 hours). This resting period is crucial. It allows the gluten in the dough to relax, preventing it from snapping back when rolled, and ensures the butter stays cold and firm, preventing it from melting into the dough layers.
Trying to rush the lamination process or working with dough that is too warm will result in the butter mixing with the dough, leading to a bread-like texture instead of distinct, flaky layers. Precision in rolling and folding is key to maintaining even layers throughout the dough.
Folding Techniques for Viennoiseries: Single vs. Double Folds
There are two primary folding techniques used in laminating Viennoiserie dough: the single fold and the double fold. The single fold, also known as a 'letter fold' or 'tri-fold', involves rolling the dough into a long rectangle, then folding one end about two-thirds of the way down the rectangle, and finally folding the remaining end over the top, like folding a letter into thirds. This technique is simpler and creates three layers of dough (and two layers of butter) with each fold.
The double fold, sometimes called a 'book fold' or 'four-fold', involves rolling the dough into a long rectangle and then folding both ends towards the center, so they meet in the middle. The dough is then folded in half along the center line, like closing a book. This technique is slightly more complex but creates four layers of dough (and three layers of butter) with each fold.
Recipes often call for a combination of single and double folds to achieve a desired number of layers and dough handling characteristics. For an easy homemade Viennoiseries recipe, starting with just single folds might be simpler.
The Importance of Resting the Dough Between Folds
Resting the dough between folds is arguably one of the most critical steps in successful lamination. After rolling and folding, the gluten in the dough becomes stressed and tight. If you try to roll it out again immediately, it will resist, snap back, and potentially tear, disrupting the delicate layers of dough and butter. Chilling the dough allows the gluten network to relax, making the dough pliable and easy to roll evenly without excessive force.
Furthermore, the chilling period keeps the butter cold and solid. If the butter warms up during rolling, it will melt and integrate into the dough, destroying the distinct layers needed for flakiness. A standard rest time is 30-60 minutes in the refrigerator, but longer rests, up to 2 hours or even overnight, can be beneficial, especially if your kitchen is warm or you are new to the process. These rests are non-negotiable steps in achieving that signature flaky texture.
Proofing the Dough: Achieving Optimal Rise for Viennoiseries
After the dough has been laminated, shaped, and filled (for pain au chocolat), it undergoes a final rise called proofing. Proofing allows the yeast to produce carbon dioxide gas, causing the pastries to expand and become light and airy before baking. Proper proofing is essential for achieving the correct volume and internal structure; under-proofed pastries will be dense, while over-proofed ones may collapse in the oven or lose their shape.
Viennoiseries are typically proofed in a warm, humid environment. This could be a proofing box set to around 75-80°F (24-27°C) with some humidity, or simply in a slightly warm oven (turned off) with a pan of hot water to create steam. The proofing time varies depending on the temperature and yeast activity, but it typically takes 2-3 hours at room temperature or can be done slowly overnight in the refrigerator (cold proofing).
Cold proofing develops more flavor and is often preferred. The pastries are ready to bake when they look significantly puffed up, feel light, and jiggle slightly when gently shaken, but haven't quite doubled in size.
Shaping Traditional Viennoiseries: A Visual Guide
Shaping the laminated dough into the iconic forms of pain au chocolat and croissants is a rewarding step that brings you closer to enjoying your homemade Viennoiseries. While it might seem intimidating at first, the process is quite straightforward once you understand the basic cuts and rolling techniques. Precision in this stage ensures uniform pastries that bake evenly and look beautiful.
Before shaping, the laminated dough is typically rolled out one last time into a large, thin rectangle, usually about 1/8 inch (3-4 mm) thick. Keeping the dough cold during shaping is important, so work relatively quickly or shape in batches, returning the rest of the dough to the refrigerator. A sharp knife or pizza cutter is essential for making clean cuts without dragging or compressing the layers.
How to Shape Pain au Chocolat: The Classic Chocolate Croissant
To shape pain au chocolat, roll the laminated dough into a rectangle approximately 1/8 inch (3-4 mm) thick. Trim the edges to create clean lines – these scraps can be baked off as "croissant bites." Cut the dough into rectangles, typically around 3-4 inches (8-10 cm) wide and 7-8 inches (18-20 cm) long. The size can be adjusted based on your desired pastry size.
Place one or two chocolate batons (chocolate sticks) along one of the shorter edges of the rectangle, about 1/2 inch from the edge. Roll the dough tightly around the chocolate once, then place a second chocolate baton just behind the roll. Continue rolling the dough to completely enclose the chocolate. Place the formed pain au chocolat seam-side down on a parchment-lined baking sheet. Aim for tight rolls to prevent the chocolate from leaking out during baking. Repeat with the remaining dough and chocolate batons.
Creating Croissants: The Crescent Moon Shape
Shaping classic croissants requires cutting the rolled-out laminated dough into triangles. Roll the dough into a rectangle about 1/8 inch (3-4 mm) thick, as you did for pain au chocolat. Trim the edges. Then, using a ruler or guide, cut the dough into long, isosceles triangles. A common base width for the triangles is about 3.5-4 inches (9-10 cm), with a length of 9-10 inches (23-25 cm) from base to tip.
To shape a croissant, make a small slit, about 1/2 inch (1-1.5 cm), in the center of the base of the triangle. Gently pull the two corners of the base outwards to widen the base slightly. Starting from the base, roll the triangle up towards the tip, pulling gently on the tip as you roll to create tension. The slit at the base helps the croissant open up into a crescent shape during rolling. Place the rolled croissants on a parchment-lined baking sheet, curving the ends inwards to form the classic crescent shape.
Baking Your Viennoiseries: Achieving Golden Perfection
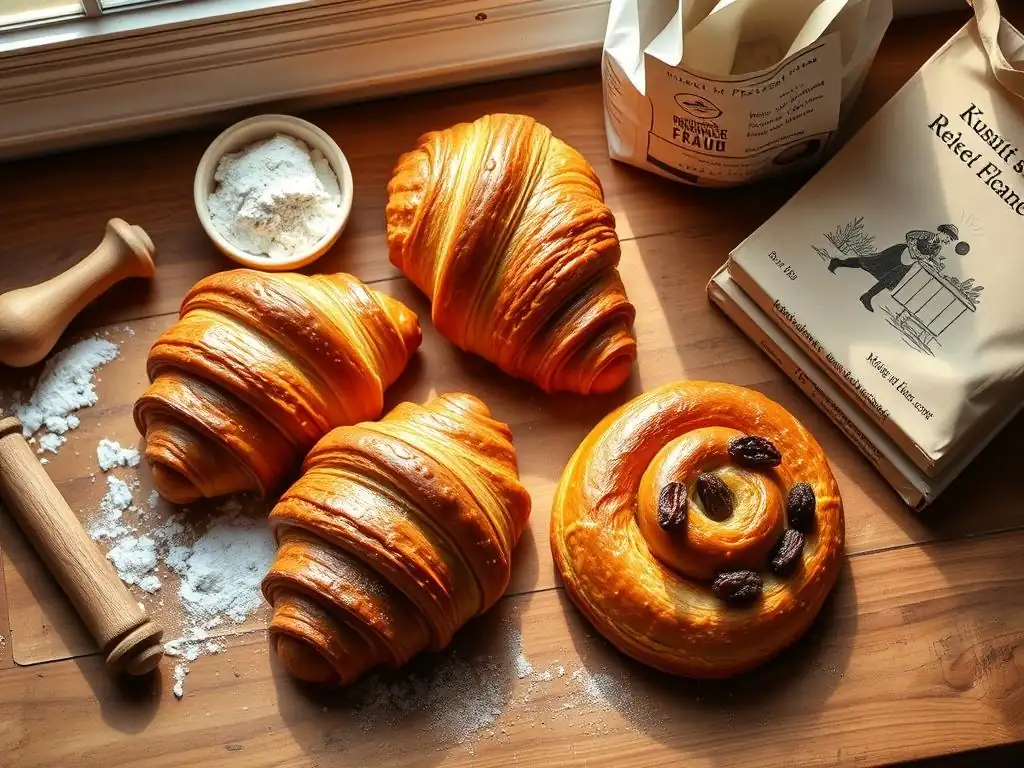
Baking is the final, exhilarating step where your carefully crafted dough transforms into light, flaky pastries. Getting the baking temperature and time right is crucial for achieving that beautiful golden-brown crust and fully baked interior. A few simple techniques can elevate your results from good to truly exceptional, showcasing the hundreds of layers you worked so hard to create.
Proper oven temperature ensures that the butter melts slowly, creating steam that lifts the layers, before the dough structure sets. Too low a temperature and the butter might leak out; too high and the outside might burn before the inside is cooked. Monitoring your oven's actual temperature with an oven thermometer is always a good practice, as oven thermostats can be inaccurate.
Optimal Oven Temperature for Baking Viennoiseries
Baking Viennoiseries, including croissants and pain au chocolat, typically requires a relatively high oven temperature to ensure a rapid rise and crisp exterior. A common temperature range is between 375°F and 400°F (190°C to 200°C). Some recipes recommend starting at a higher temperature, like 400°F (200°C), for the first 10-15 minutes to encourage maximum oven spring and layer separation, then reducing the temperature to 375°F (190°C) for the remaining baking time to allow the interior to cook through without the exterior burning.
The exact temperature and timing may need slight adjustments based on your specific oven and the size of your pastries. Baking on the middle rack usually provides the most even heat distribution. Using a baking stone or steel can help provide consistent bottom heat, contributing to a better rise and crispier base. Ensure your oven is fully preheated to the correct temperature before loading the pastries.
Baking Time: Knowing When Your Viennoiseries are Ready
The baking time for homemade croissants and pain au chocolat varies depending on their size, the oven temperature, and your specific oven's characteristics. Generally, they take anywhere from 15 to 25 minutes to bake. Smaller pastries will take less time, while larger or more generously filled ones will require longer.
You'll know your Viennoiseries are ready when they have puffed up significantly, are a deep golden-brown color all over (including the sides and bottom), and sound hollow when tapped lightly on the bottom. The layers should be clearly defined and separated. If they are browning too quickly on top but still seem pale on the sides, you can loosely tent them with aluminum foil for the remaining baking time. Baking them sufficiently is important; underbaked Viennoiseries will be doughy and heavy inside.
Achieving a Golden-Brown Crust: Egg Wash Techniques
Applying an egg wash before baking is key to achieving that desirable glossy, deep golden-brown crust on your homemade Viennoiseries. A standard egg wash is made by whisking one whole egg with a tablespoon or two of milk or cream and a pinch of salt. Some bakers prefer just the egg yolk mixed with liquid for a richer color.
Apply the egg wash gently and evenly using a pastry brush after the pastries have finished proofing, just before they go into the oven. Be careful not to let the egg wash pool between the layers, especially at the base, as this can glue the layers together and inhibit flaking. A thin, even coat is sufficient. Some recipes call for a second light egg wash halfway through baking for an extra shiny finish, but a single wash before baking is standard for achieving a beautiful crust.
Tips for Success: Troubleshooting Common Viennoiseries Baking Issues
Baking homemade Viennoiseries can present a few challenges, but understanding common issues and how to address them will significantly improve your results. Even experienced bakers encounter hiccups occasionally. Don't be discouraged by imperfections; each batch is a learning opportunity on your journey to perfecting your easy homemade Viennoiseries recipe.
Most issues relate to temperature control, lamination technique, or proofing. Paying close attention to these stages is key. We'll cover some of the most frequent problems and offer practical solutions to help you achieve beautiful, flaky pastries consistently.
Preventing Butter Leakage During Baking
Butter leakage during baking is a common frustration and usually indicates one of several issues:
- Insufficient chilling: If the dough and butter are not kept cold enough during lamination and shaping, the butter can soften and melt before the dough structure is set in the oven. Ensure adequate chilling time between folds and before baking.
- Improper sealing: When encasing the butter or shaping the pastries (especially pain au chocolat), make sure the seams are tightly sealed to prevent butter from oozing out.
- Over-proofing: If the pastries over-proof, the dough structure can weaken, making it less able to hold the melting butter during baking.
- Oven temperature too low: If the oven isn't hot enough, the butter melts and leaks before the dough bakes and sets. Ensure your oven is properly preheated to the recommended temperature.
Working quickly when the dough is out of the refrigerator and handling it gently are also important steps in preventing butter leakage.
Achieving the Perfect Flaky Texture
The signature flaky texture is the hallmark of a great croissant or pain au chocolat. Issues with flakiness are almost always related to the lamination process or temperature control:
- Butter melting into the dough: If the butter becomes too warm during lamination and mixes with the dough instead of staying in distinct layers, you won't get flakiness. Ensure the butter is pliable but cold, and chill the dough adequately between folds.
- Insufficient folds: Not performing enough folds will result in fewer layers, leading to a less flaky texture. Most recipes call for at least 3-4 folds.
- Uneven rolling: If the dough is rolled unevenly, some sections will have fewer layers or thicker layers, resulting in inconsistent flakiness. Practice rolling evenly.
- Overworking the dough: Over-developing the gluten in the initial détrempe can make the dough too tough and less extensible, hindering the creation of thin, distinct layers during lamination.
Proper proofing also contributes to texture; under-proofed pastries won't rise sufficiently to separate the layers fully.
Avoiding a Dense or Doughy Center
A dense or doughy center in your Viennoiseries can be disappointing. This issue is typically caused by:
- Under-baking: The most common reason is simply not baking the pastries long enough or at a sufficient temperature. The interior needs time to cook through and set. Ensure they are a deep golden-brown and sound hollow when tapped.
- Under-proofing: If the pastries didn't proof sufficiently, they won't have developed enough internal air structure, leading to a denser result. Allow adequate proofing time until they are visibly puffed and feel light.
- Too thick dough: If the dough was rolled too thick before shaping, the layers are thicker and harder to cook through evenly, potentially leaving the center dense. Aim for the recommended thickness (usually around 1/8 inch or 3-4 mm).
- Butter leakage: Excessive butter leakage can leave the interior greasy and dense instead of light and airy.
Ensure your oven temperature is accurate and consistent throughout the bake.
Storing and Refreshing Homemade Viennoiseries
Homemade Viennoiseries are best enjoyed fresh from the oven, ideally within a few hours of baking. This is when their texture is at its peak: crisp exterior and airy interior. However, if you have leftovers, they can be stored and refreshed.
Store cooled pastries in an airtight container at room temperature for up to 1-2 days. The crust will soften over time. To refresh them and regain some of their crispness, place them on a baking sheet in a preheated oven at around 350°F (175°C) for 5-10 minutes. This will warm them through and re-crisp the exterior slightly. Avoid storing them in the refrigerator, as this tends to make them stale faster. Unbaked, shaped pastries can often be frozen and baked from frozen (with adjusted baking time) for fresh-baked treats anytime.
Elevate Your Baking: Variations and Creative Twists on Viennoiseries
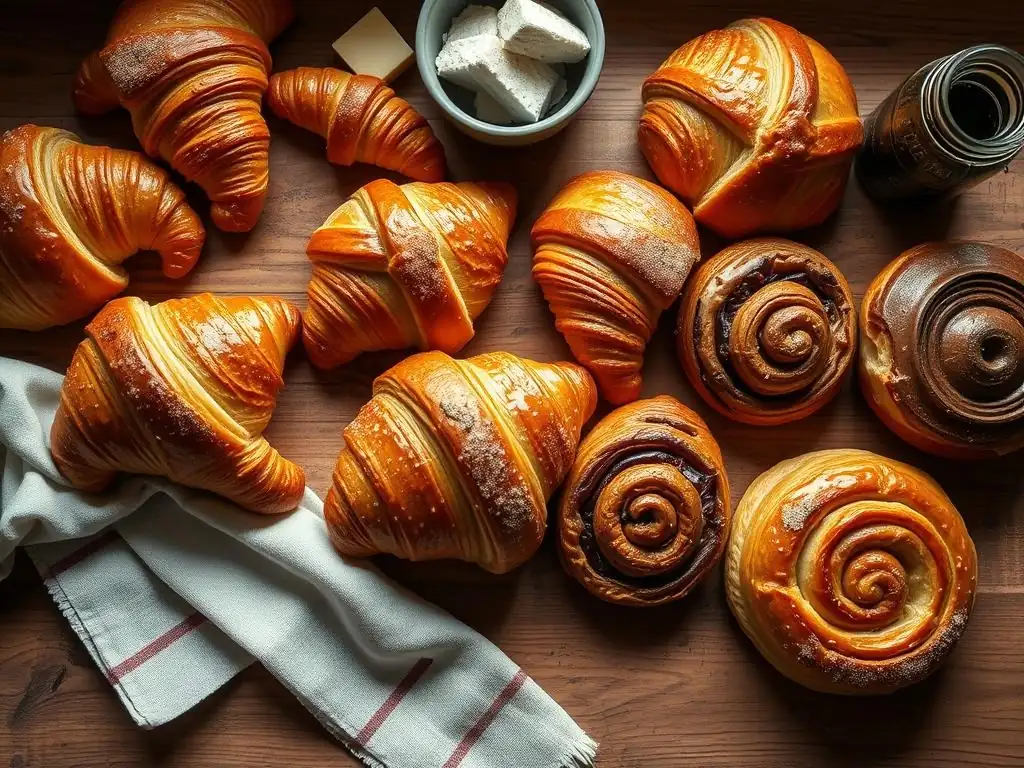
Once you've mastered the basic easy homemade Viennoiseries recipe for croissants and pain au chocolat, you can start experimenting with variations and creative twists. The laminated dough provides a versatile base for incorporating different flavors and fillings, allowing you to personalize these classic pastries. This is where you can let your creativity shine and discover new favorite treats.
Exploring variations keeps baking exciting and offers opportunities to cater to different tastes. From sweet additions like fruit or nuts to savory options, the possibilities are numerous. These modifications often involve adding elements during the shaping stage or incorporating flavors into the dough itself.
Experimenting with Different Fillings: Almond Paste or Frangipane
Beyond the classic plain or chocolate, one of the most popular variations is the almond croissant or pain au chocolat. This typically involves splitting a baked or slightly under-baked croissant or pain au chocolat horizontally, filling it with a rich almond cream called frangipane or simply almond paste, dipping or brushing the top in a sugar syrup (often flavored with rum or almond extract), topping with more frangipane, scattering with sliced almonds, and baking again until golden and bubbly.
Other sweet filling ideas include:
- Fruit fillings: Apple compote, cherry filling, or raspberry jam can be rolled inside the dough before shaping.
- Pastry cream: A dollop of vanilla or chocolate pastry cream can be added during shaping.
- Nutella or other chocolate-hazelnut spreads.
- Pistachio paste.
Savory options are also possible, such as ham and cheese (often made with a slightly different dough or shaping method).
Adding Flavors to the Dough: Orange Zest, Almond Extract, and More
You can also infuse the Viennoiserie dough itself with subtle flavors to add another dimension to your pastries. This is usually done by adding flavorings to the liquid ingredients or the initial dough mix (détrempe).
Ideas for flavoring the dough include:
- Citrus zest: Finely grated orange or lemon zest adds a bright, fragrant note that pairs beautifully with butter. Add about 1-2 teaspoons of zest per standard batch of dough during the initial mixing.
- Extracts: A few drops of almond extract or vanilla extract can enhance the overall flavor profile. Be mindful not to add too much, as extracts can be potent.
- Spices: A pinch of cardamom, cinnamon, or nutmeg can add warmth, especially if you plan to add fruit fillings.
- Cocoa powder: A small amount of unsweetened cocoa powder can be added to the flour mix for a chocolate-flavored dough base before adding chocolate batons.
Experiment gradually with flavorings to find your preferred balance, ensuring they complement any planned fillings.
Enjoy Your Homemade Viennoiseries: Serving Suggestions
After the effort and anticipation, the best part of baking homemade Viennoiseries is finally getting to enjoy them! Pulling a warm, flaky croissant or a gooey pain au chocolat from the oven is a truly satisfying experience. While they are absolutely delicious on their own, pairing them with beverages or serving them as part of a larger meal can elevate the experience.
Serving these pastries warm is highly recommended, as this is when the butter layers are most distinct and the aroma is most enticing. Allow them to cool slightly from the oven so the butter isn't molten, but enjoy them while they are still warm to the touch.
Pairing Viennoiseries with Coffee and Tea
The classic pairing for a croissant or pain au chocolat is a hot beverage. The richness and butteriness of the pastry are beautifully complemented by the slight bitterness and warmth of coffee or tea.
- Coffee: A strong, black coffee, such as an espresso, Americano, or drip coffee, provides a robust counterpoint to the pastry's richness. A latte or cappuccino offers a creamier pairing that echoes the dairy in the dough.
- Tea: Black teas like Earl Grey or English Breakfast are classic choices, their tannins cutting through the butter. Green tea offers a lighter, more refreshing contrast. Herbal teas like chamomile or peppermint can also be pleasant, offering a calming balance.
Consider the flavor profile of your pastry; a plain croissant pairs well with almost anything, while a pain au chocolat might be best with a less intense beverage that doesn't compete with the chocolate.
Serving Viennoiseries for Brunch
Homemade croissants and pain au chocolat are perfect additions to a brunch spread, instantly adding a touch of elegance and indulgence. Arrange them in a basket on the table for guests to enjoy.
They can be served alongside:
- Fresh fruit salad: The lightness and acidity of fruit provide a refreshing contrast to the rich pastries.
- Yogurt and granola: A healthier option that complements the pastries without being overly heavy.
- Eggs: Scrambled eggs, omelets, or quiche offer a savory balance.
- Cured meats and cheeses: For a more European-style brunch.
- Jams, preserves, honey, or butter: While not strictly necessary for a fresh, buttery croissant, these offer optional enhancements.
Presenting a variety of homemade Viennoiseries, perhaps including some plain croissants, some pain au chocolat, and maybe an almond variation, offers guests a delightful selection.
Conclusion: The Joy of Baking Homemade Croissants and Pain au Chocolat
Baking homemade croissants and pain au chocolat is undoubtedly a project that requires time, effort, and patience, but the rewards are immense. There's a unique satisfaction in transforming simple ingredients into these iconic, flaky pastries through the meticulous process of lamination. This easy homemade Viennoiseries recipe guide has aimed to break down the steps, making this seemingly complex bake accessible for you to master in your own kitchen.
From understanding the role of high-quality butter to perfecting your folding techniques and recognizing when your pastries are perfectly proofed and baked, each step contributes to the final delicious outcome. Troubleshooting common issues helps build your skills and confidence. Whether you stick to the classics or venture into creative fillings and flavors, the journey of baking Viennoiseries is a rewarding one. So gather your ingredients, clear your schedule, and embark on this delicious baking adventure. The taste of a warm, flaky, buttery pastry, fresh from your own oven, is an unparalleled culinary achievement.
Frequently Asked Questions
What exactly are Viennoiseries?
Viennoiseries are yeast-leavened baked goods similar to pastries, often enriched with butter, eggs, and sugar. Think of them as the delicious cousins of bread and pastries.
Are Viennoiseries difficult to make at home?
While they can seem intimidating, with BakeWithEase's easy homemade Viennoiseries recipe, they are achievable. Our step-by-step guide simplifies the process.
What are some common examples of Viennoiseries?
Popular examples include croissants, pain au chocolat, and brioche. These are all considered part of the Viennoiserie family.
What ingredients are essential for a successful Viennoiseries recipe?
High-quality butter, flour, yeast, and eggs are crucial. Also, don't skip the resting and proofing stages for the best results.
Can I adapt the Viennoiseries recipe to be gluten-free or vegan?
Adapting the recipe requires careful substitutions and may affect the final texture. Gluten-free flour blends and plant-based butter alternatives can be used, but research is key.
Final Reflection: The Sweet Symphony of Homemade Viennoiseries
The art of crafting delicate, flaky Viennoiseries at home is no longer a distant dream, but a delicious reality accessible to all. This guide has demystified the process, proving that with patience and the right techniques, even the most intricate pastries can be successfully recreated in your own kitchen. The seemingly daunting task of achieving that perfect, airy texture is, in fact, achievable with careful attention to detail and a touch of culinary courage.
The journey of mastering Viennoiserie has been a deeply rewarding one, not just for the delectable results, but for the connection it fosters with tradition and craftsmanship. It's a testament to the enduring power of simple ingredients transformed into something extraordinary. Baking is at once child's play and adult joy. And love, of course.
This quote perfectly encapsulates the experience, blending the simple pleasure of creation with the profound satisfaction of sharing something beautiful and delicious with others. The influence of Viennoiserie extends beyond the simple act of eating; it's a cultural touchstone, a symbol of patience, precision, and the enduring appeal of timeless recipes.
Now, it's your turn. Don't be intimidated by the seemingly complex process. Pick a recipe, gather your ingredients, and embark on your own Viennoiserie adventure. Embrace the challenge, savor the process, and revel in the joy of creating something truly special. The aroma of freshly baked croissants or pain au chocolat filling your home is a reward in itself, a testament to your dedication and a delicious invitation to share the fruits of your labor with loved ones. The world awaits your perfectly crafted, homemade Viennoiseries.
Unleash Your Inner Boulanger: Master Viennoiserie at Home!
Thanks for joining us on this delicious journey into the world of viennoiserie! We hope you've gained the confidence and knowledge to tackle these beautiful pastries. Now it's time to put your new skills to the test!
- Bake your first masterpiece: Choose your favorite recipe from the guide and start baking! Don't be afraid to experiment – even small adjustments can lead to big flavor discoveries.
- Share your creations: Tag us on social media with your baking triumphs (and even your delicious fails!). We love seeing what our readers create.
- Join our baking community: Share your tips, tricks, and questions in the comments below. Let's learn and grow together!
Ready to transform your kitchen into a Parisian patisserie? What's the first viennoiserie you'll be tackling?