
Basic Sourdough Recipe: Getting an Open Crumb Explained

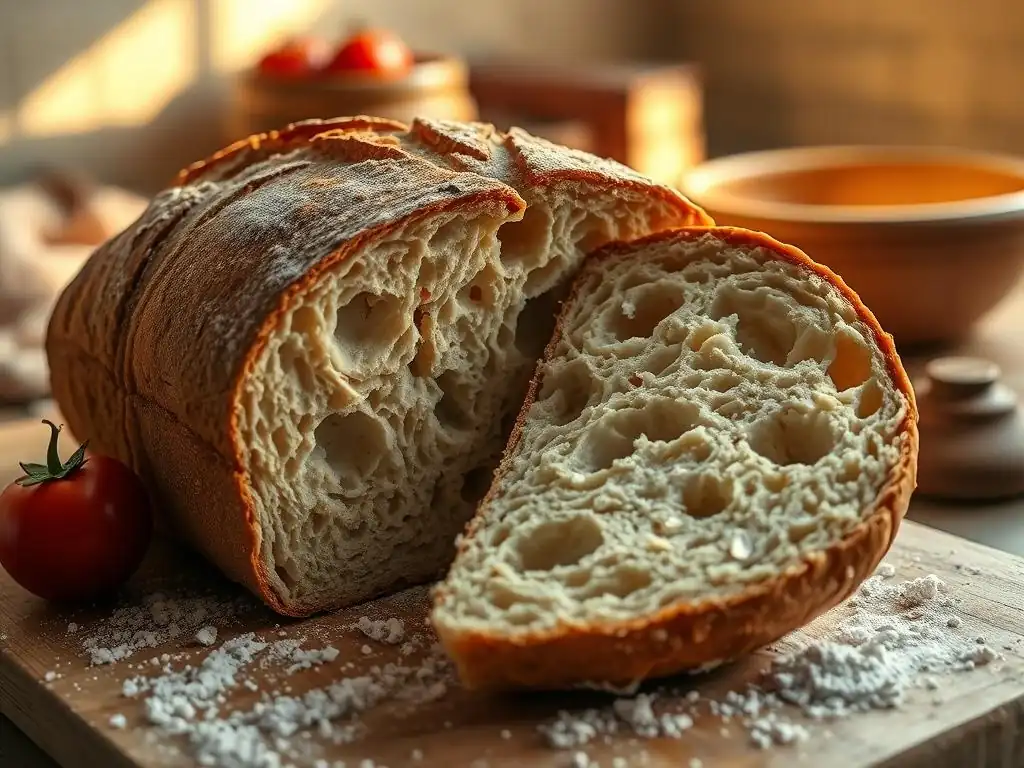
Welcome to BakeWithEase, where baking becomes a joy, not a chore! Ever dreamt of achieving that perfect, airy sourdough bread open crumb? You're in the right place. We'll demystify the process, providing you with the essential know-how to bake loaves that are as beautiful as they are delicious. Ready to unlock the secrets? Let's get started!
- Basic Sourdough Recipe: Achieving an Open Crumb - The Artisan Baker
- Introduction to Achieving the Perfect Sourdough Open Crumb
- Understanding the Sourdough Open Crumb: What It Is and Why It Matters
- The Artisan Baker's Basic Sourdough Recipe for Open Crumb
-
Step-by-Step Guide to Baking Sourdough with an Open Crumb
- Step 1: Preparing the Sourdough Starter for Optimal Activity
- Step 2: Autolyse: Hydrating the Flour for Improved Dough Development
- Step 3: Mixing the Dough and Developing Gluten
- Step 4: Bulk Fermentation: Building Strength and Flavor
- Step 5: Shaping the Dough for Open Crumb
- Step 6: Proofing the Dough: The Final Rise
- Step 7: Baking the Sourdough Bread
- Troubleshooting Common Sourdough Open Crumb Problems
- Advanced Techniques for an Even More Open Crumb
- Sourdough Bread Open Crumb Variations
- Enjoying Your Perfect Open Crumb Sourdough Bread
- Conclusion: Mastering the Art of the Sourdough Open Crumb with The Artisan Baker
-
Frequently Asked Questions
- What is an open crumb in sourdough bread, and why is it desirable?
- What are the key factors that contribute to achieving an open crumb in sourdough?
- How does hydration level affect the crumb structure of sourdough bread?
- What is bulk fermentation, and how does it impact the final crumb of sourdough?
- What are some common mistakes that prevent bakers from achieving an open crumb in sourdough bread?
- Final Reflection: Unveiling the Secrets of the Open Crumb
- Unleash Your Inner Baker: Craft the Perfect Sourdough Loaf!
Basic Sourdough Recipe: Achieving an Open Crumb - The Artisan Baker
Introduction to Achieving the Perfect Sourdough Open Crumb
Welcome, fellow baking enthusiasts! There's something truly magical about slicing into a freshly baked loaf of sourdough and revealing a beautiful, airy interior – the coveted open crumb. This structure isn't just visually appealing; it contributes significantly to the texture and overall eating experience of your sourdough bread. While achieving a consistent sourdough bread open crumb can seem daunting at first, it's a skill that improves with practice and understanding the science behind it.
In this guide, we'll walk you through a basic sourdough recipe specifically designed to help you achieve that desirable open crumb. We'll break down each step, explaining its importance and offering tips rooted in the practices of artisan bakers. Whether you've baked sourdough before or are just starting out, mastering the open crumb is a rewarding milestone on your baking journey. Let's dive in and unlock the secrets to creating stunning sourdough bread with an open crumb.
Understanding the Sourdough Open Crumb: What It Is and Why It Matters
Achieving a perfect sourdough bread open crumb is a common goal for many home bakers. It signifies a well-developed dough and a successful fermentation process. But what exactly constitutes an open crumb, and why is it so highly sought after in the world of sourdough?
Defining the Sourdough Open Crumb Structure
The sourdough open crumb refers to the internal structure of the bread, characterized by irregularly shaped air pockets (alveoli) of varying sizes. These holes are distributed throughout the loaf, creating a light, airy texture. A loaf with a truly open crumb will often have some larger holes interspersed with smaller ones, rather than a uniform, dense network of tiny pores. Think of it less like a sponge and more like a complex, bubbly matrix.
In contrast, a dense or tight crumb has very small, uniformly distributed holes, or sometimes appears almost solid with few visible air pockets. The degree of "openness" can vary, but generally, a more open crumb is associated with higher hydration doughs and specific fermentation techniques that preserve gas within the dough structure.
The Importance of Open Crumb in Sourdough Bread
Beyond aesthetics, the open crumb significantly impacts the sensory experience of eating sourdough bread. The airy texture provides a delightful chewiness and lightness, preventing the bread from feeling heavy or gummy. This structure also increases the surface area of the interior, which many bakers believe enhances the perception of the complex flavors developed during the long fermentation process.
Furthermore, an open crumb is often seen as an indicator of quality and skill in sourdough baking. It suggests that the baker has successfully managed hydration, gluten development, and fermentation – key elements for great bread. While a tight crumb doesn't necessarily mean the bread tastes bad, achieving a consistent sourdough bread open crumb is a hallmark of mastering the craft.
Factors Influencing Sourdough Bread Crumb Structure
Several critical factors interplay to determine the final crumb structure of your sourdough bread. Understanding these elements is key to intentionally achieving a more open crumb. The hydration level of the dough is perhaps the most discussed factor; higher hydration generally allows for more gas expansion, but also makes the dough harder to handle. For instance, a dough at 80% hydration can yield a more open crumb than one at 65%, assuming other factors are equal.
Equally important are gluten development and fermentation health. Gluten creates the elastic network that traps the gases produced by the sourdough starter. Without sufficient gluten strength, the dough cannot hold the larger bubbles needed for an open crumb. Healthy, active fermentation is required to produce enough gas in the first place. Factors like bulk fermentation time and temperature, the strength of your starter, and gentle handling during shaping all play crucial roles in preserving the gas structure you've worked to build.
The Artisan Baker's Basic Sourdough Recipe for Open Crumb
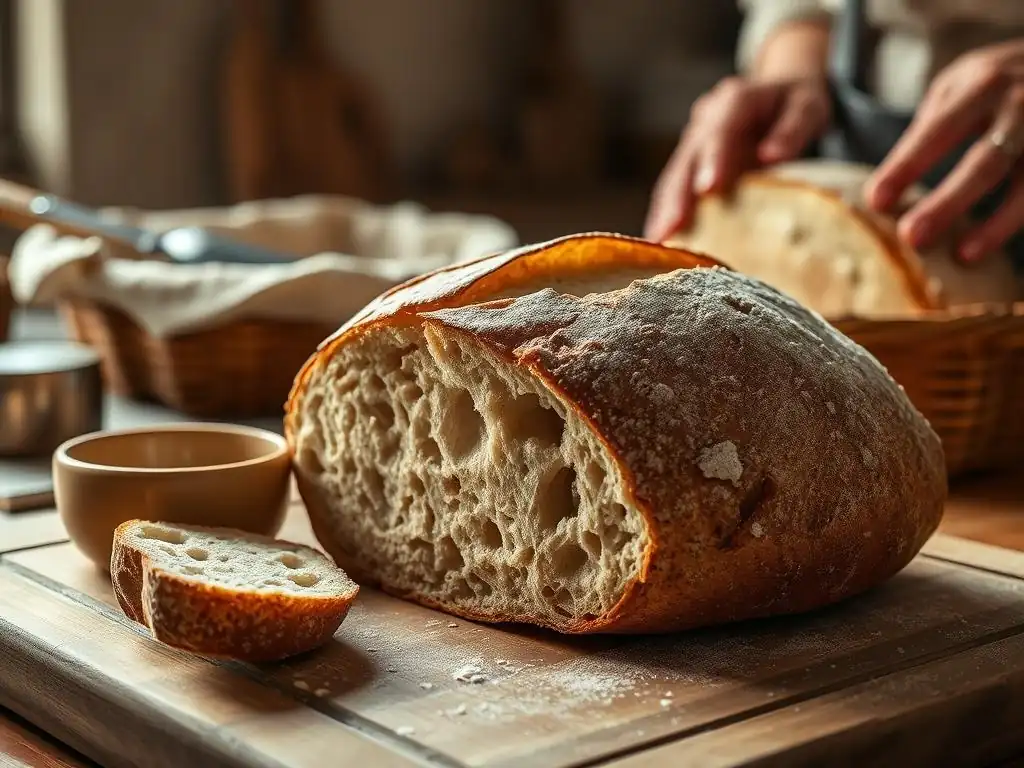
This recipe is designed as a solid starting point for achieving a beautiful sourdough bread open crumb. It uses a moderate-to-high hydration level and incorporates techniques that promote gas retention and gluten development.
Ingredients for Sourdough Bread with Open Crumb
To bake a standard loaf aiming for an open crumb, you'll need the following ingredients. Precision is key in sourdough, so using a digital scale is highly recommended. This recipe is based on approximately 75% hydration relative to the flour weight.
- 500 grams Strong Bread Flour (look for protein content of 12% or higher)
- 375 grams Water (around 75°F / 24°C)
- 100 grams Active Sourdough Starter (at peak activity, fed 4-8 hours prior)
- 10 grams Fine Sea Salt
Using strong bread flour provides the necessary protein to build a robust gluten network capable of trapping gases for an open crumb. The water hydration level (75%) is high enough to encourage openness but still manageable for most bakers. The salt is crucial for controlling fermentation rate and strengthening the gluten structure, adding flavor along the way. The active starter is the engine, providing the leavening power needed to inflate the dough and create those desirable holes.
Equipment Needed for Baking Sourdough
Having the right tools can make the process of baking sourdough bread significantly easier and contribute to better results, including a more pronounced open crumb. You don't need a professional setup, but a few key items are highly beneficial.
Essential equipment includes a reliable digital kitchen scale for accurate measurements, a large mixing bowl (glass or plastic is fine), a dough scraper for handling sticky dough, and a proofing basket (banneton) lined with floured cloth or rice flour to prevent sticking. For baking, a Dutch oven is ideal as it traps steam, creating a humid environment that allows the crust to expand fully before setting, contributing to oven spring and a better open crumb.
If you don't have a Dutch oven, you can simulate steam in your oven by placing a tray of hot water or lava rocks on the bottom rack during preheating and initial baking. A razor blade (lame) is also helpful for scoring the dough just before baking, guiding expansion and influencing the final shape and crumb.
Step-by-Step Guide to Baking Sourdough with an Open Crumb
Follow these steps carefully, paying attention to timing and dough feel, to guide your dough towards that beautiful sourdough bread open crumb.
Step 1: Preparing the Sourdough Starter for Optimal Activity
A vigorous, active sourdough starter is non-negotiable for achieving a light, airy loaf with a good open crumb. A weak starter won't produce enough gas to lift the dough adequately.
Feeding Your Sourdough Starter for Open Crumb Success
To ensure your starter is ready, feed it 4-8 hours before you plan to mix your dough. Use a feeding ratio that you know works well for your starter, such as 1:2:2 or 1:3:3 (starter:water:flour by weight). For example, feeding 20g of starter with 40g of water and 40g of flour (1:2:2) is a common practice.
Use the same type of flour you plan to use in your bread, or a mix you know your starter thrives on, like bread flour or a mix of bread and whole wheat flour. The goal is to have the starter reach its peak volume and activity just as you're ready to mix the dough.
Recognizing Peak Starter Activity
You'll know your starter is at peak activity when it has roughly doubled or tripled in volume since feeding, is full of bubbles, and the surface is domed. A classic test is the float test: drop a small spoonful of starter into a glass of water; if it floats, it's likely ready.
This usually occurs within 4-8 hours at room temperature (around 70-78°F / 21-26°C), but timing can vary significantly based on temperature and starter health. Using starter just as it starts to recede slightly from its peak can also work well, as it indicates it's still very active but hasn't exhausted its food supply.
Step 2: Autolyse: Hydrating the Flour for Improved Dough Development
Autolyse is a simple yet powerful technique that significantly benefits gluten development and dough handling, contributing to a better open crumb.
The Role of Autolyse in Open Crumb Formation
Autolyse involves mixing just the flour and water from your recipe and letting it rest. During this rest period, the flour fully hydrates, and enzymatic activity begins to break down starches into sugars, which feed the starter later. More importantly, the gluten proteins start to link up on their own without mechanical mixing. This pre-hydration and initial gluten development make the dough more extensible and easier to work with after the starter and salt are added, ultimately helping create a stronger, more elastic network capable of trapping gas effectively for an open crumb.
Autolyse Time and Temperature Considerations
The autolyse period can range from 30 minutes to several hours, depending on the flour used and your schedule. For most bread flours, a 30-60 minute autolyse at room temperature (around 70-75°F / 21-24°C) is sufficient. Longer autolyses (2-3 hours) can be beneficial, especially with whole wheat flours, but avoid exceeding 4-6 hours as enzymes can start to degrade the gluten structure. Ensure the water is fully incorporated into the flour, with no dry bits remaining, before letting it rest covered to prevent a skin from forming.
Step 3: Mixing the Dough and Developing Gluten
After the autolyse, it's time to incorporate the remaining ingredients and build the initial gluten structure needed for an open crumb.
Incorporating the Starter and Salt
Add the active sourdough starter on top of the autolysed dough. Dimple it in with wet fingers or a dough scraper. Then, sprinkle the salt over the dough. Using wet hands can help prevent the dough from sticking excessively during this initial mixing phase. The salt is added now because it inhibits enzymatic activity during autolyse and tightens the gluten network, which is beneficial after the initial hydration and relaxation have occurred.
Achieving the Right Dough Consistency
Begin mixing by hand or with a stand mixer on low speed. If mixing by hand, techniques like the Rubaud method (scooping and folding the dough over itself repeatedly) or simple squeezing and folding work well. Mix until the starter and salt are fully incorporated and the dough starts to come together into a shaggy mass. It will be sticky, especially at 75% hydration.
Continue mixing for 5-10 minutes by hand, or 3-5 minutes by machine, until the dough shows some initial signs of strength and elasticity. It should feel smoother and pull away from the sides of the bowl slightly. The goal here isn't full gluten development, but a good starting point before bulk fermentation.
Step 4: Bulk Fermentation: Building Strength and Flavor
Bulk fermentation (or first rise) is the crucial period where the dough develops strength, flavor, and gas production – all essential for an open crumb.
Understanding Bulk Fermentation Time and Temperature
This phase typically lasts 4-6 hours at a warm room temperature (around 75-80°F / 24-27°C), but can take longer in cooler conditions. The key is to watch the dough, not the clock. The dough should increase significantly in volume, roughly 50-75%, and appear bubbly and alive. You should see activity on the surface and potentially through the sides of a transparent container. Over-fermentation can lead to a collapsed, dense crumb, while under-fermentation results in poor oven spring and a tight crumb.
Performing Folds for Dough Strength
During bulk fermentation, you'll perform a series of stretch and folds or coil folds. These gentle manipulations build strength and structure in the dough, distribute the yeast and bacteria evenly, and help equalize the dough temperature. Perform 3-4 sets of folds during the first 2-3 hours of bulk fermentation, spaced 30-60 minutes apart. For a stretch and fold, wet your hands, grab one side of the dough, gently stretch it upwards without tearing, and fold it over the rest of the dough.
Rotate the bowl and repeat 3 more times. For coil folds, lift the dough from the center with wet hands, letting the ends fall and fold underneath. Repeat this lifting motion 2-3 times. These folds are vital for developing the gluten network that supports an open crumb.
Step 5: Shaping the Dough for Open Crumb
Shaping is where you give the dough its final form and build tension, but it must be done gently to preserve the gas bubbles created during fermentation.
Gentle Shaping Techniques
After bulk fermentation, gently turn the dough out onto a lightly floured surface. Avoid aggressively degassing the dough. If making a boule (round loaf), gently pre-shape the dough into a loose round using a bench scraper or your hands, tucking the edges underneath to create surface tension. Let it rest, uncovered, for 20-30 minutes.
This rest period allows the gluten to relax before the final shape. For the final shape, gently flatten the dough slightly, then fold the edges into the center, creating tension on the surface as you bring it into a tight ball or batard (oval). The goal is a taut surface without tearing the dough or pushing out all the gas.
Avoiding Over-Handling the Dough
Over-handling or degassing the dough too much during shaping is a common mistake that can collapse the delicate gas structure, resulting in a less open or even dense crumb. Be confident and efficient with your movements. Use just enough flour to prevent sticking, not so much that it toughens the dough. The tension created during shaping is important for oven spring, but it shouldn't come at the expense of deflating the dough.
Step 6: Proofing the Dough: The Final Rise
Proofing is the final rise before baking. This step allows the dough to build a little more gas and relax slightly, preparing it for oven spring.
Understanding Proofing Times and Temperatures
After shaping, place the dough seam-side up into a floured proofing basket. The proofing time depends heavily on temperature. A warm proof (around 75-80°F / 24-27°C) might take 1-3 hours. Cold proofing in the refrigerator (38-40°F / 3-4°C) is a popular technique, typically lasting 8-16 hours (or even up to 24 hours). Cold proofing slows fermentation, develops more complex flavors, and makes the dough much easier to score and handle directly from the fridge, often contributing to better oven spring and potentially a more open crumb.
The Poke Test: Determining Readiness for Baking
Regardless of warm or cold proofing, the poke test is the most reliable way to determine if your dough is ready to bake. Gently flour your finger and press it about a half-inch (1-2 cm) into the side of the dough.
- If the indentation springs back immediately, the dough is under-proofed.
- If the indentation springs back slowly, about halfway, the dough is perfectly proofed and ready.
- If the indentation remains completely, the dough is over-proofed.
Baking slightly under-proofed dough often results in better oven spring and a more open crumb than baking over-proofed dough.
Step 7: Baking the Sourdough Bread
Baking is where the magic happens, transforming the dough into a beautiful loaf with a crispy crust and that sought-after sourdough bread open crumb.
Oven Temperature and Baking Time
Preheat your oven thoroughly with your Dutch oven inside (if using) for at least 45-60 minutes at a high temperature, typically 450-500°F (230-260°C). This high initial heat is crucial for achieving good oven spring. Once preheated, carefully transfer the dough from the proofing basket into the hot Dutch oven (or onto a baking stone). Score the dough quickly with a sharp razor blade. Bake covered for the first 20-25 minutes. This traps steam released by the dough, keeping the crust pliable and allowing the loaf to expand fully.
After the initial covered bake, remove the lid (or steam setup) and reduce the oven temperature slightly, usually to 425-450°F (220-230°C). Continue baking for another 20-25 minutes, or until the crust is a deep golden brown and the internal temperature reaches around 205-210°F (96-99°C). The second phase of baking develops the color and crispness of the crust.
Using a Dutch Oven for Optimal Oven Spring
Baking sourdough in a preheated Dutch oven is highly recommended for home bakers aiming for an open crumb. The sealed environment simulates a professional steam-injected oven. The trapped steam keeps the surface of the dough moist initially, allowing the gluten structure to stretch and expand significantly during the first few minutes of baking (oven spring) before the crust hardens. This maximum expansion directly contributes to the openness of the crumb structure.
Steam Injection for a Crispy Crust
If you don't have a Dutch oven, you can create steam by placing a cast iron pan or baking tray on the bottom rack of your oven while preheating. Carefully pour a cup of boiling water or a handful of ice cubes into the hot pan just as you load the dough. Close the oven door quickly to trap the steam. This method achieves a similar effect to the Dutch oven, promoting oven spring and a crispy crust. Maintain steam for the first 15-20 minutes of baking before removing the steam source for the remainder of the bake.
Troubleshooting Common Sourdough Open Crumb Problems
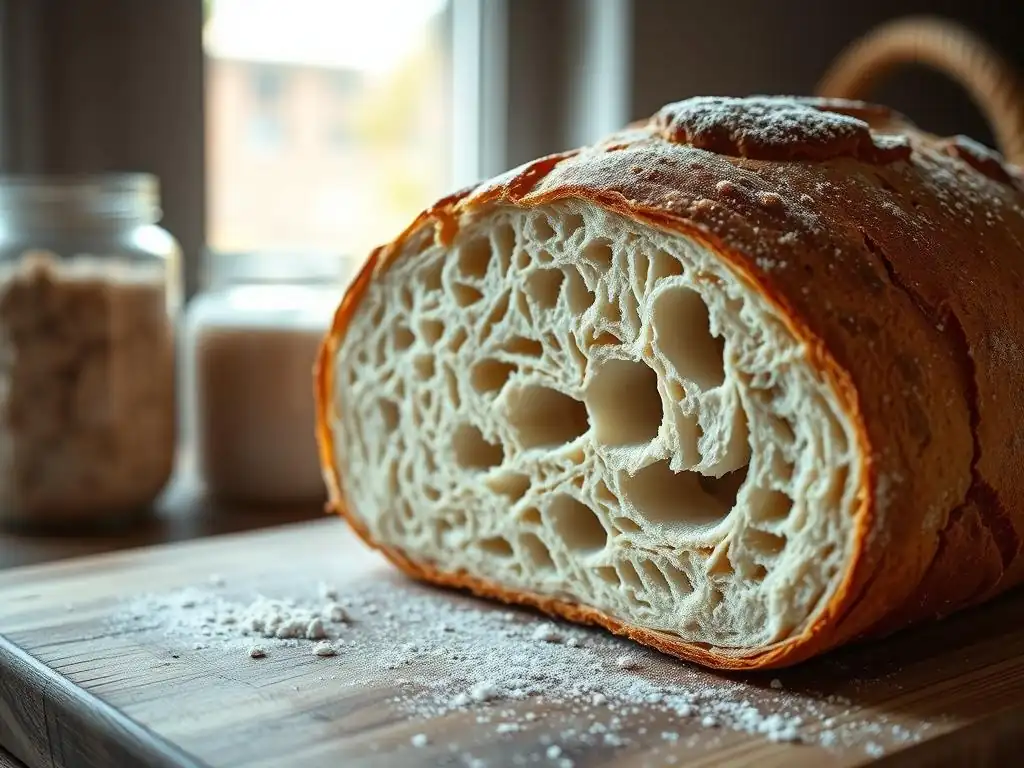
Even following a recipe closely, achieving a consistent sourdough bread open crumb can present challenges. Here are some common issues and how to address them.
Dense Crumb: Causes and Solutions
A dense crumb, lacking significant air pockets, is often the result of insufficient leavening or structural issues. Common causes include an inactive sourdough starter that didn't produce enough gas, under-fermentation (bulk or proofing) where the dough didn't have enough time to rise and develop gas, or over-proofing where the gluten structure collapsed after reaching peak volume.
To solve a dense crumb issue, first ensure your starter is consistently active and doubles or triples predictably after feeding. Consider extending your bulk fermentation time, especially in cooler environments, watching for a significant volume increase (50-75%). If you suspect over-proofing, reduce the final proofing time or try cold proofing, which is more forgiving. Baking slightly under-proofed dough can often improve crumb openness.
Tight Crumb: Addressing Insufficient Gluten Development
A tight crumb, characterized by small, uniform holes, often points to issues with gluten development or hydration management. Causes can include using flour with insufficient protein content (below 12%), not performing enough stretch and folds or coil folds during bulk fermentation to build strength, or insufficient hydration for the flour used (some flours can handle and benefit from higher hydration).
To address a tight crumb, ensure you are using a high-quality bread flour. Increase the number of stretch and folds or coil folds you perform during the first half of bulk fermentation (e.g., 4-5 sets). If you've been baking at lower hydration (e.g., 65-70%), gradually increase the water content in future bakes by 5-10 grams at a time, as long as you can still handle the dough. Higher hydration often correlates with a more open crumb potential.
Large, Uneven Holes: Identifying and Correcting the Issue
While large holes are desired for an open crumb, if they are concentrated in one area with dense spots elsewhere, it indicates uneven gas distribution or shaping issues. This can happen if not enough folds were performed to distribute gas bubbles evenly throughout the dough, or if large gas pockets were trapped during shaping due to overly gentle handling or insufficient pre-shaping.
To correct large, uneven holes, ensure you are performing adequate sets of folds during bulk fermentation to build strength and distribute bubbles. During pre-shaping, you can gently release some overly large, obvious gas pockets by lightly patting them down, but be careful not to degas the entire dough. Practice your final shaping technique to ensure you are creating even tension across the surface without trapping large air pockets inside.
Troubleshooting Table: Problem, Possible Cause, Solution
Here's a quick reference for common sourdough bread open crumb issues:
- Problem: Dense Crumb
- Possible Cause: Inactive Starter
- Solution: Feed Starter Regularly, Use Starter at Peak
- Problem: Dense Crumb
- Possible Cause: Under/Over Proofing
- Solution: Watch Dough Volume, Use Poke Test, Consider Cold Proofing
- Problem: Tight Crumb
- Possible Cause: Insufficient Gluten Development
- Solution: Use Strong Flour, Increase Folds/Coil Folds
- Problem: Tight Crumb
- Possible Cause: Low Hydration
- Solution: Gradually Increase Water in Future Bakes
- Problem: Large, Uneven Holes
- Possible Cause: Uneven Gas Distribution
- Solution: Ensure Sufficient Folds During Bulk Fermentation
- Problem: Large, Uneven Holes
- Possible Cause: Shaping Issues
- Solution: Practice Gentle, Even Shaping Techniques
Advanced Techniques for an Even More Open Crumb
Once you've mastered the basic sourdough recipe and are consistently achieving a decent open crumb, you might be interested in exploring techniques to push the boundaries further.
High Hydration Sourdough Bread Recipes
Working with higher hydration doughs (typically 80% water or more relative to flour) is a common path towards achieving a more dramatic sourdough bread open crumb. The increased water makes the dough slacker and stickier, allowing for potentially larger air pockets to form and expand during baking. For example, moving from 75% to 85% hydration requires significant adjustments in handling techniques, relying more on coil folds and less on traditional stretch and folds.
While high hydration offers the potential for a very open crumb, it also significantly increases the difficulty of handling and shaping the dough. It requires a well-developed gluten structure to support the extra water and gas. Bakers often use techniques like slap and fold during mixing and shape on a lightly wet, rather than floured, surface to manage the stickiness. Patience and practice are essential when venturing into high hydration sourdough bread recipes.
Using Different Types of Flour for Open Crumb
The type of flour used plays a significant role in crumb structure. High-protein bread flour (12-14% protein) is excellent for building a strong gluten network capable of supporting a very open crumb. Using some lower-protein all-purpose flour (10-11.5% protein) will generally result in a tighter crumb unless compensated for with higher hydration and careful handling. Adding whole wheat or rye flour, while fantastic for flavor, can make achieving a very open crumb more challenging because the bran particles cut the gluten strands.
Many bakers find success in achieving an open crumb by using a blend of bread flour and a smaller percentage of whole wheat or rye (e.g., 80-90% bread flour, 10-20% whole wheat). This allows for some of the nutritional and flavor benefits of whole grains while still leveraging the strength of bread flour for structure. Experimenting with different flour combinations will reveal how they impact your sourdough bread open crumb.
Cold Fermentation Techniques for Enhanced Flavor and Crumb
Proofing the dough in the refrigerator for an extended period (cold fermentation or retarding) is a technique widely used by artisan bakers, not just for convenience but also for its benefits to flavor and crumb structure. The cold temperature slows down the fermentation process significantly, allowing enzymes more time to break down complex carbohydrates into simpler sugars, resulting in a more nuanced and less sour flavor profile.
From a crumb perspective, cold fermentation makes the dough firmer and easier to handle and score directly from the fridge, which can lead to better oven spring. The slow, controlled fermentation might also contribute to a more even distribution of gas pockets, potentially resulting in a more consistently open crumb throughout the loaf. A typical cold proof lasts 8-16 hours at refrigerator temperatures (around 38-40°F / 3-4°C), but some bakers successfully extend this to 24-48 hours for even deeper flavor development.
Sourdough Bread Open Crumb Variations
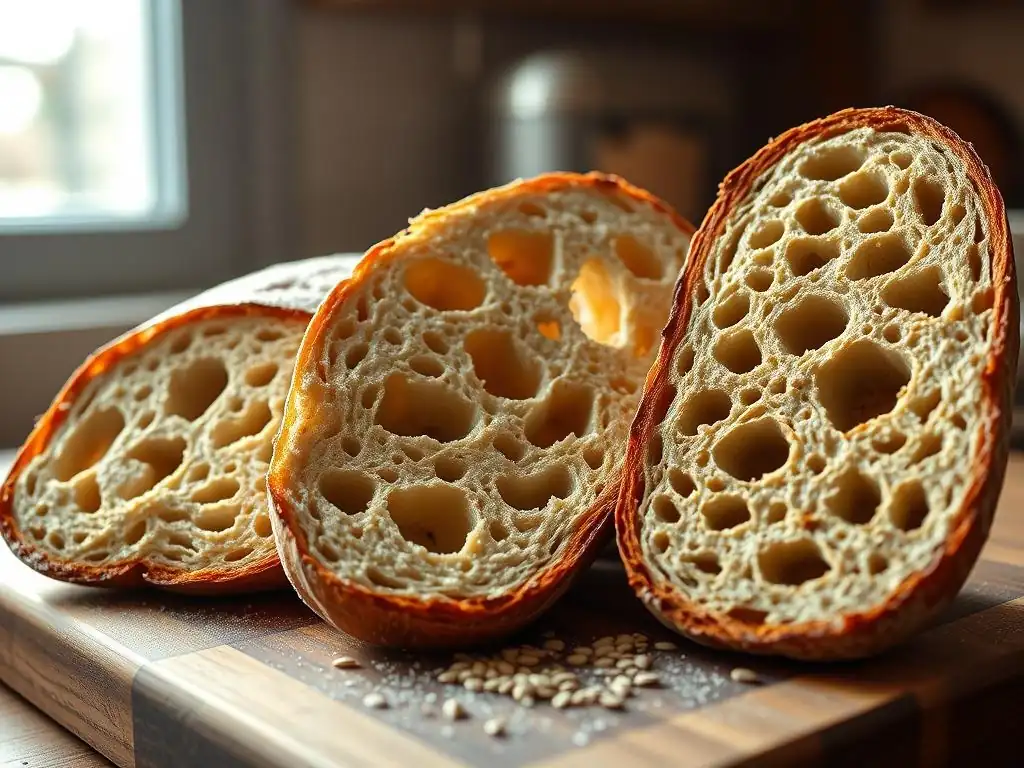
Once you're comfortable with the basic recipe and techniques for achieving an open crumb, you can start experimenting with variations. Adding inclusions not only enhances flavor but can also subtly change the dough's handling characteristics.
Experimenting with Different Flours
As mentioned earlier, changing the flour mix is a primary way to vary your sourdough bread. Try substituting a small portion of the bread flour (e.g., 50g out of 500g) with whole wheat, rye, or even a specialty flour like spelt or einkorn. Be aware that these flours absorb water differently and have varying gluten potential, which will affect the dough's feel and potentially the openness of the crumb. Start with small substitutions and adjust hydration as needed.
Adding Inclusions for Flavor and Texture
Adding ingredients like herbs, cheese, nuts, or seeds can transform your sourdough. These inclusions are typically added during the later sets of folds during bulk fermentation or just before the final shape. Adding inclusions can sometimes slightly tighten the crumb as they disrupt the gluten network, but the flavor payoff is often well worth it. Ensure inclusions like cheese or wet ingredients are well-distributed to avoid creating dense pockets.
Recipe Variation 1: Rosemary and Olive Oil Open Crumb Sourdough
Add 2 tablespoons of finely chopped fresh rosemary and 2 tablespoons of good quality olive oil to the dough during the second or third set of folds in bulk fermentation. The olive oil adds richness and can slightly increase the hydration feel, while the rosemary provides a wonderful aromatic element.
Recipe Variation 2: Jalapeño Cheddar Open Crumb Sourdough
During the final set of folds or just before pre-shaping, gently fold in 1 cup of shredded sharp cheddar cheese and 1-2 finely diced jalapeños (remove seeds for less heat). Ensure even distribution. The cheese can slightly inhibit oven spring, but the flavor combination is a classic. Bake as usual, perhaps keeping an eye on the crust as cheese can sometimes cause sticking.
Enjoying Your Perfect Open Crumb Sourdough Bread
Congratulations on baking a beautiful loaf with a fantastic sourdough bread open crumb! Now comes the best part: enjoying your creation.
Serving Suggestions and Pairings
Allow your loaf to cool completely on a wire rack for at least 1-2 hours before slicing. Slicing too early can result in a gummy texture and can actually compress that lovely open crumb you worked so hard to achieve. Enjoy slices simply with butter, dip torn pieces into high-quality olive oil and balsamic vinegar, or use it as the base for incredible sandwiches or avocado toast. The sturdy yet airy structure of an open crumb sourdough holds up well to various toppings and fillings. It pairs wonderfully with soups, stews, or alongside a cheese board.
Storing Your Sourdough Bread
To keep your sourdough bread fresh and preserve its crust and open crumb texture, store it properly. Avoid refrigerating it, as this can dry it out quickly. The best method is to store the loaf cut-side down on a cutting board or in a breathable bread bag made of linen or cotton.
For longer storage, you can slice the cooled loaf and freeze the slices in an airtight bag or container. To enjoy, simply toast slices directly from the freezer. A whole loaf can also be frozen and thawed at room temperature when needed, then refreshed in a warm oven for a few minutes to revive the crust.
Conclusion: Mastering the Art of the Sourdough Open Crumb with The Artisan Baker
Achieving a consistent sourdough bread open crumb is a journey that requires patience, observation, and practice. It's a dance between managing hydration, developing gluten strength, and nurturing healthy fermentation. By following this basic recipe and understanding the 'why' behind each step, you are well on your way to mastering this rewarding aspect of sourdough baking.
Remember that every loaf is a learning opportunity. Pay attention to how your dough feels, how it rises, and the resulting crumb structure. Don't be discouraged by loaves that aren't perfectly open initially. With each bake, you'll refine your skills and intuition. Keep experimenting, keep learning, and most importantly, keep baking delicious sourdough bread with that beautiful open crumb. Happy baking!
Frequently Asked Questions
What is an open crumb in sourdough bread, and why is it desirable?
An open crumb refers to the large, irregular holes found within the interior of sourdough bread. It's desirable because it indicates a well-fermented dough and a light, airy texture.
What are the key factors that contribute to achieving an open crumb in sourdough?
Several factors are crucial, including hydration level of the dough, proper fermentation time (bulk fermentation), and gentle handling of the dough during shaping.
How does hydration level affect the crumb structure of sourdough bread?
Higher hydration levels, meaning more water in the dough, generally lead to a more open crumb. This is because the water creates steam during baking, which helps to expand the air pockets.
What is bulk fermentation, and how does it impact the final crumb of sourdough?
Bulk fermentation is the initial fermentation process after mixing the dough. A sufficiently long and active bulk fermentation is critical for developing the gases that create the open crumb structure.
What are some common mistakes that prevent bakers from achieving an open crumb in sourdough bread?
Common mistakes include under-fermenting the dough, over-handling the dough during shaping, and using insufficient hydration. Addressing these ensures a better outcome.
Final Reflection: Unveiling the Secrets of the Open Crumb
The pursuit of the perfect sourdough loaf, with its airy, open crumb, is more than just baking; it's a journey of understanding fermentation and the delicate dance between flour, water, and time. This quest, so popular today, reflects a growing appreciation for handcrafted foods and the satisfaction of creating something beautiful and delicious from simple ingredients. The desire for that signature open crumb speaks to a deeper yearning for connection – to the process, to the tradition, and even to ourselves.
The journey to mastering the open crumb is a testament to patience and observation. It's a process that demands attention to detail, yet rewards the baker with a loaf that is not only visually stunning but also possesses a unique texture and flavor. The best bread is made with love and patience.
This simple statement encapsulates the essence of sourdough baking, highlighting the emotional investment and the rewarding outcome. The ongoing fascination with sourdough, and specifically the open crumb, reflects a broader cultural shift towards mindful consumption and appreciation for the artistry of food production.
Now, consider your own baking journey. What have you learned from the process of creating sourdough bread? What adjustments will you make to your technique based on the information presented here? Don't be afraid to experiment, to embrace the imperfections, and to find joy in the process. The open crumb isn't just a visual goal; it's a symbol of the dedication and understanding that comes from mastering a craft. So, gather your ingredients, embrace the challenge, and embark on your own journey to baking the perfect sourdough loaf. The reward awaits.
Unleash Your Inner Baker: Craft the Perfect Sourdough Loaf!
Thanks for taking the time to explore the world of sourdough baking with us! We hope you now feel more confident in achieving that coveted open crumb. Ready to put your newfound knowledge into practice?
- Bake your own sourdough masterpiece! Use the recipe and techniques from the article to create a loaf you'll be proud of. Don't be afraid to experiment – that's part of the fun!
- Share your baking journey! Snap a photo of your creation and tag us on social media – we'd love to see your results!
- Explore our other sourdough recipes and tips on BakeWithEase.com to further enhance your skills.
What unique twist will you add to your next sourdough loaf?