
Shaping Pain au Chocolat Like a Pro: A Visual Guide

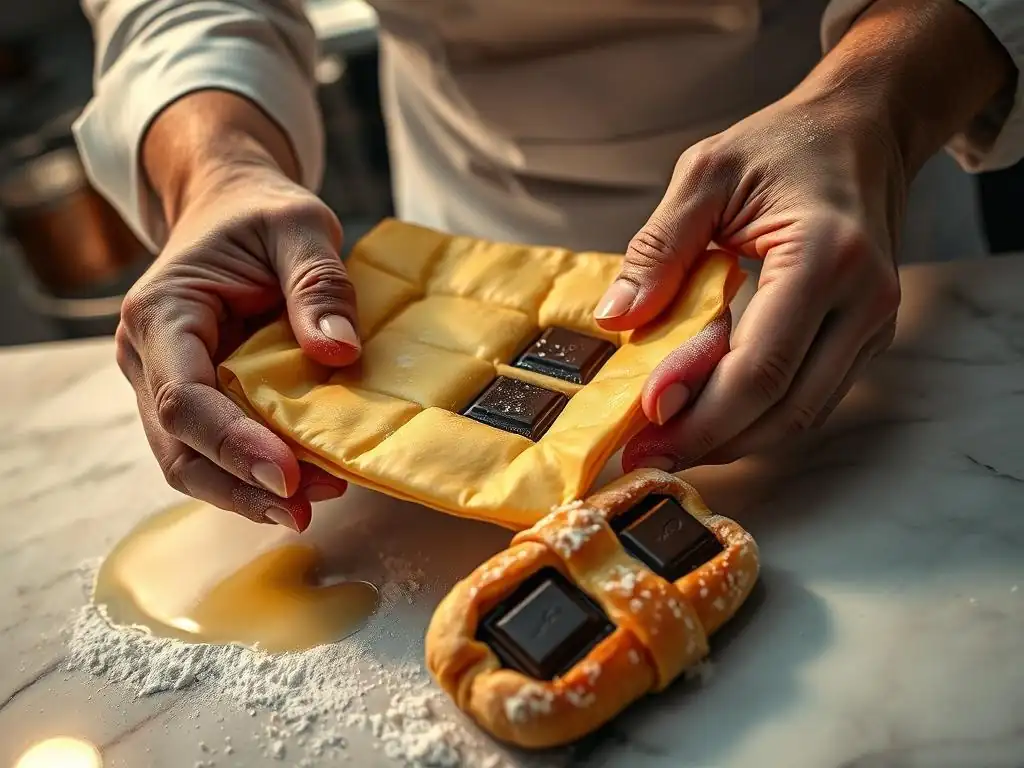
Welcome to BakeWithEase! Ever dreamed of crafting those perfectly laminated, chocolate-filled pastries you see in Parisian bakeries? Get ready to turn that dream into reality. This week, we're diving deep into an Pain au chocolat shaping tutorial that will elevate your baking game. Unravel the secrets to achieving that signature flaky texture and impeccable shape. Intrigued? Let's get started and transform your kitchen into your very own boulangerie!
- Shaping Pain au Chocolat Like a Pro: A Visual Guide from BakeWithEase
- Introduction to Pain au Chocolat Shaping: Elevate Your Baking Skills
- Essential Tools and Ingredients for Perfect Pain au Chocolat Shaping
-
Step-by-Step Pain au Chocolat Shaping Tutorial: A Visual Guide
- Preparing the Dough for Shaping: Achieving the Right Texture
- Step 1: Rolling Out the Dough: Thickness and Dimensions
- Step 2: Cutting the Dough: Precise Rectangles for Pain au Chocolat
- Step 3: Placing the Chocolate Batons: Positioning for Optimal Flavor
- Step 4: The First Fold: Securing the Chocolate
- Step 5: The Second Fold: Creating the Classic Shape
- Step 6: Proofing the Shaped Pain au Chocolat: Achieving Maximum Rise
- Step 7: Egg Washing for a Golden Crust: Enhancing Visual Appeal
- Step 8: Baking to Perfection: Time and Temperature Guidelines
- Visual Tips and Tricks for Pain au Chocolat Shaping
- Troubleshooting Common Pain au Chocolat Shaping Issues
- Pain au Chocolat Shaping Variations and Creative Twists
- Achieving a Professional Finish: Tips for Presentation
- Conclusion: Mastering the Art of Pain au Chocolat Shaping with BakeWithEase
-
Frequently Asked Questions
- How crucial is the dough temperature when shaping pain au chocolat?
- What is the best type of chocolate to use for pain au chocolat?
- Why is it important to rest the dough during the shaping process?
- What are some common mistakes when shaping pain au chocolat, and how can I avoid them?
- Can I freeze pain au chocolat after shaping but before baking?
- Final Reflection: The Art and Soul of the Perfect Pain au Chocolat
- Unleash Your Inner Pastry Chef!
Shaping Pain au Chocolat Like a Pro: A Visual Guide from BakeWithEase
Introduction to Pain au Chocolat Shaping: Elevate Your Baking Skills
Why Mastering Pain au Chocolat Shaping Matters
Achieving the perfect pain au chocolat goes far beyond having a great dough recipe and high-quality chocolate. The shaping technique is absolutely critical to developing those signature flaky layers and ensuring the chocolate is perfectly encased. A properly shaped pain au chocolat will have a beautiful, uniform appearance, consistent layers throughout, and the chocolate will melt just right during baking, staying within the pastry instead of leaking out. Mastering the shaping process transforms a good pastry into an exceptional one, delivering that satisfying crunch and rich flavor in every bite.
Precision in shaping directly impacts the final texture and rise of the pastry. Incorrect folding or rolling can compress layers, leading to a dense or uneven crumb structure instead of the desired light and airy interior with distinct, buttery layers. This section of our pain au chocolat shaping tutorial will guide you through the nuances, helping you avoid common pitfalls and elevate your baking results to a professional standard. Understanding the 'why' behind each step in shaping pain au chocolat is the first step to baking excellence.
BakeWithEase's Commitment to Baking Excellence: Pain au Chocolat & Viennoiseries
At BakeWithEase, our mission is to empower bakers of all levels to create delicious and beautiful pastries right in their own kitchens. We believe that with the right guidance, tools, and techniques, anyone can master classic viennoiseries like pain au chocolat. Our resources are designed to demystify complex processes, breaking them down into manageable steps that build confidence and skill. This detailed guide is a testament to our commitment, focusing specifically on the often-intimidating process of shaping pain au chocolat.
We provide not just recipes, but comprehensive tutorials that cover every aspect of baking, from ingredient selection to the final presentation. Our Pain au Chocolat & Viennoiseries section is dedicated to helping you achieve flaky, golden perfection. Through clear instructions and helpful tips, we aim to make this pain au chocolat shaping tutorial your trusted companion on your baking journey, ensuring success and enjoyment in crafting these delightful pastries.
Essential Tools and Ingredients for Perfect Pain au Chocolat Shaping
List of Necessary Tools
To successfully shape pain au chocolat, having the right tools makes the process much smoother and helps ensure consistent results. Here's a list of essentials you'll need:
- [ ] Large, clean work surface (preferably cool, like marble or granite)
- [ ] Rolling pin (a French-style tapered pin or a heavy, straight pin works well)
- [ ] Sharp knife or pizza cutter for clean cuts
- [ ] Ruler or measuring tape for precise dimensions
- [ ] Pastry brush for egg wash
- [ ] Baking sheets lined with parchment paper or silicone mats
These tools are standard in most kitchens but are particularly important for viennoiserie. A ruler is crucial for cutting uniform rectangles, which is fundamental to achieving consistent pain au chocolat shapes. A sharp cutting tool prevents dragging the delicate dough layers, ensuring clean edges that puff up beautifully during baking.
High-Quality Ingredients for Delicious Pain au Chocolat
The quality of your final pain au chocolat is intrinsically linked to the quality of your ingredients. While the shaping is key, starting with excellent components provides the best foundation. You'll need:
- High-quality laminated dough (often a croissant dough recipe)
- Pain au chocolat batons (chocolate sticks), typically semi-sweet or dark chocolate
- Egg for egg wash
- A pinch of salt (often incorporated into the dough)
Using a well-made laminated dough, whether homemade or a high-quality store-bought version suitable for croissants, is paramount. The layers of butter and dough are what create the flaky texture. For the chocolate, standard pain au chocolat batons (often weighing around 10-15 grams each and about 8-10 cm long) are ideal as they are specifically designed to melt slowly and maintain their shape somewhat within the pastry. Using chocolate chips or chopped bar chocolate might result in the chocolate spreading too much.
Step-by-Step Pain au Chocolat Shaping Tutorial: A Visual Guide
Preparing the Dough for Shaping: Achieving the Right Texture
Before you begin shaping, your laminated dough needs to be properly prepared. It should be well-chilled, ideally having rested in the refrigerator for at least 2-4 hours after its final fold (or overnight). This chilling period is vital; it allows the gluten to relax, making the dough easier to roll, and keeps the butter cold and firm, which is essential for creating distinct layers. The dough should feel firm but pliable, not hard or sticky.
Take the dough out of the refrigerator about 10-15 minutes before rolling to allow it to slightly soften, making it less likely to crack. Dust your work surface lightly with flour, but avoid using too much, as excess flour can be incorporated into the dough layers and inhibit flakiness. The goal is a dough that is cold enough to hold its structure but warm enough to roll without excessive force.
Step 1: Rolling Out the Dough: Thickness and Dimensions
Begin rolling your chilled dough into a large rectangle. Start from the center and roll outwards, rotating the dough occasionally to prevent sticking and ensure even thickness. Aim for a rectangle that is roughly 3-4 mm thick. Precision here is important for consistent pastry size and structure.
For standard-sized pain au chocolat, a common dimension for the rolled sheet of dough is around 30-40 cm wide and 40-50 cm long, depending on how many pastries you plan to make and the size of your batons. Use a ruler to periodically check the dimensions and thickness across the entire sheet. An even thickness ensures that all your pain au chocolat bake uniformly.
Step 2: Cutting the Dough: Precise Rectangles for Pain au Chocolat
Once the dough is rolled to the desired thickness and dimensions, it's time to cut it into the individual pieces for shaping. Using a sharp knife or pizza cutter and a ruler, cut the large rectangle into smaller rectangles. The typical dimensions for these smaller rectangles are about 8-10 cm wide and 18-20 cm long.
The width (8-10 cm) is crucial as it determines the final width of your pain au chocolat, and the length (18-20 cm) allows for two full wraps around the chocolate batons. Make clean, decisive cuts to avoid dragging the dough layers. You should get multiple identical rectangles from your large sheet of dough, ready for the next step in this pain au chocolat shaping tutorial.
Step 3: Placing the Chocolate Batons: Positioning for Optimal Flavor
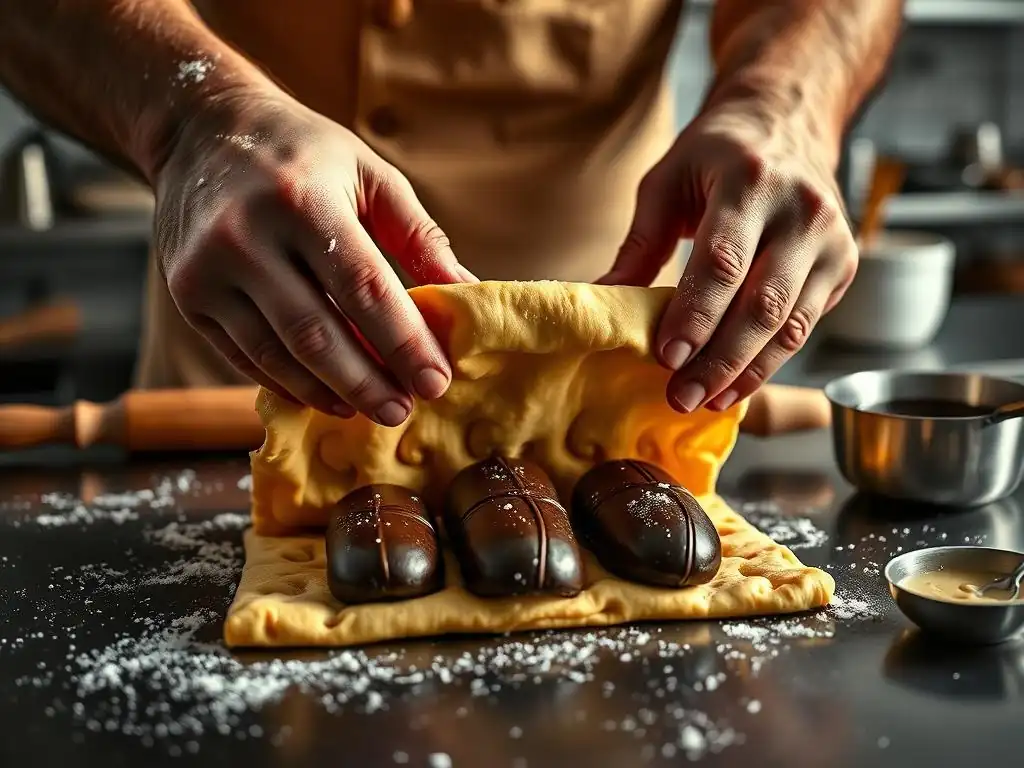
Now, lay out your cut dough rectangles with the longer side facing you. Place the first chocolate baton horizontally across the dough, about 1-2 cm up from the bottom edge. Ensure the baton is centered horizontally within the rectangle.
Some bakers prefer to place two batons per pain au chocolat for extra chocolatey goodness. If using two, place the first baton as described, and the second one about 1-2 cm above the first one. The positioning is strategic; it allows the dough to wrap around the chocolate effectively, securing it within the pastry during baking.
Step 4: The First Fold: Securing the Chocolate
With the chocolate baton(s) in place, gently lift the bottom edge of the dough (the edge closest to you) and fold it up and over the first chocolate baton. The dough should snugly enclose the baton. Lightly press down just behind the baton to help seal the dough around it.
This first fold is important for securing the chocolate and starting the rolling process that builds the classic pain au chocolat shape. Ensure the fold is relatively tight but doesn't stretch or tear the dough. The top edge of this fold should meet or just slightly overlap the first chocolate baton if you are using two.
Step 5: The Second Fold: Creating the Classic Shape
After completing the first fold, lift the dough again from the bottom edge (which is now the folded section) and roll it forward, wrapping it over the second chocolate baton (if using two) or simply continuing the roll until the seam is on the bottom. The dough should wrap around the chocolate and form a neat rectangle.
The goal is to complete the roll with the seam positioned underneath the pain au chocolat. This helps prevent the pastry from unrolling during proofing and baking. You should now have a recognizable pain au chocolat shape, a neat rectangle with the chocolate batons securely encased inside.
Step 6: Proofing the Shaped Pain au Chocolat: Achieving Maximum Rise
Proofing is a critical step after shaping pain au chocolat. Arrange the shaped pastries on your prepared baking sheets, leaving ample space between them (at least 5-7 cm) as they will expand significantly. Cover the baking sheets loosely with plastic wrap or a large plastic bag to prevent the dough from drying out.
Allow the pain au chocolat to proof in a warm, draft-free environment until they have increased in size by about 75-100% and the layers are visibly separated and puffy. This typically takes 1.5 to 2.5 hours at a room temperature of around 24-26°C (75-79°F). Proper proofing is essential for achieving a light, airy, and flaky texture; under-proofing will result in dense pastries, while over-proofing can cause them to collapse in the oven.
Step 7: Egg Washing for a Golden Crust: Enhancing Visual Appeal
Just before baking, gently brush the top and sides of each proofed pain au chocolat with egg wash. An egg wash is typically made by whisking one egg with a tablespoon of milk or water and a pinch of salt. This step is key to achieving that beautiful, glossy, golden-brown crust characteristic of classic viennoiseries.
Be careful not to let the egg wash pool between the layers, as this can glue them together and inhibit the flaky separation during baking. Use a soft pastry brush and apply a thin, even coat. The egg wash adds color and shine, significantly enhancing the visual appeal of your baked pain au chocolat.
Step 8: Baking to Perfection: Time and Temperature Guidelines
Preheat your oven to the correct temperature, typically between 180°C and 200°C (350°F and 400°F), depending on your oven. The exact temperature and time can vary based on your oven's calibration and the size of your pastries, so it's helpful to use an oven thermometer.
Bake the pain au chocolat for approximately 15-20 minutes, or until they are deep golden brown all over and the layers are clearly defined and well-risen. Rotate the baking sheet halfway through baking for even coloring. The chocolate inside should be melted and warm. Baking at the right temperature ensures the dough cooks through, the butter creates steam for lift, and the crust develops that irresistible crispness.
Visual Tips and Tricks for Pain au Chocolat Shaping
Ensuring Uniform Shape: Avoiding Common Mistakes
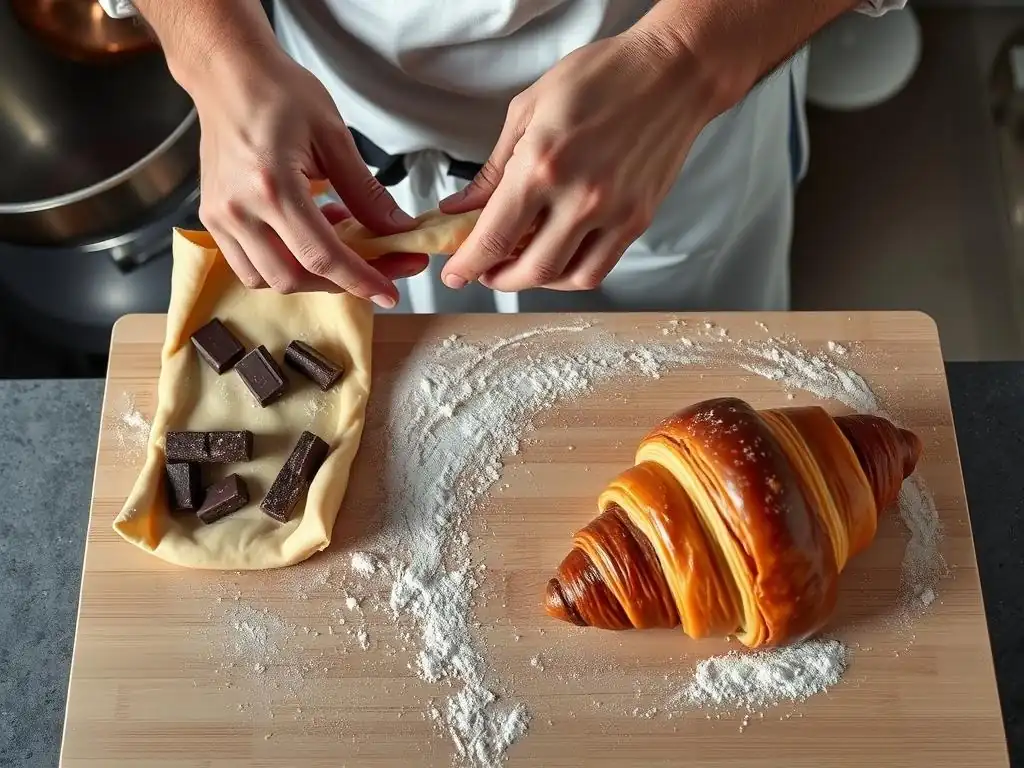
Consistency in shape is a hallmark of professionally made pain au chocolat. To achieve this, precise cutting of the dough rectangles is paramount. Use a ruler and a sharp tool to ensure all your rectangles are the same width and length (e.g., consistently 9 cm x 19 cm).
When rolling the dough, aim for even thickness across the entire sheet before cutting. During the folding steps, try to roll the dough evenly and consistently across all pieces. Avoid stretching the dough excessively, as this can distort the shape and damage the layers. Taking a moment to square up each piece before rolling can also help maintain uniformity throughout your batch.
Achieving a Flaky Texture: Dough Handling Techniques
The key to a flaky texture lies in preserving the distinct layers of butter and dough created during lamination. Handle the dough gently and keep it cold. Rolling should be firm but not forceful, allowing the dough to extend without tearing the layers.
Avoid overworking the dough at any stage. Excessive handling can warm the butter, causing it to blend into the dough rather than remaining in discrete layers. Lightly flour your surface and tools, but wipe away excess flour, as incorporating it into the dough can toughen the texture. Keeping the dough chilled between steps, even briefly, is crucial for maintaining layer integrity.
Sealing the Edges: Preventing Chocolate Leakage
One common issue when shaping pain au chocolat is the chocolate leaking out during baking. Proper sealing is essential to prevent this. When you make your first fold, ensure the dough wraps snugly around the chocolate baton.
When completing the second fold, make sure the final seam is positioned firmly on the bottom of the pastry. You can gently press down along this seam to help it adhere, but be careful not to flatten the pastry. Some bakers also lightly press the short ends of the pain au chocolat to slightly seal them, though this is less critical than securing the bottom seam.
Troubleshooting Common Pain au Chocolat Shaping Issues
Dough Too Sticky: Solutions and Adjustments
If your laminated dough feels too sticky during rolling or shaping, it's likely too warm. The best solution is to immediately stop working with the dough and return it to the refrigerator for 20-30 minutes. Chilling helps firm up the butter and makes the dough much more manageable.
Ensure your work surface and rolling pin are also cool. You can lightly dust your surface and pin with flour, but use it sparingly. If using too much flour, brush off any excess before folding, as incorporating it into the dough can make it tough. Working quickly in a cool kitchen environment also helps prevent the dough from becoming too warm and sticky.
Uneven Shaping: Techniques for Consistency
Uneven shaping often stems from inconsistent rolling or cutting. To improve uniformity, always use a ruler to measure your large dough rectangle before cutting and to check the dimensions of your individual rectangles. Aim for straight, clean cuts.
When rolling the individual pieces, focus on rolling evenly from the center outwards. If a piece seems slightly off-shape, you can gently nudge or square it up with your hands before rolling the chocolate inside. Practicing the rolling technique – lifting and rotating the dough – helps prevent one side from becoming thicker or wider than the other.
Chocolate Batons Shifting: Prevention Methods
Sometimes, the chocolate batons can shift within the pastry during proofing or baking, ending up off-center or even breaking through the dough. This can happen if the dough isn't wrapped tightly enough around the batons or if the seam isn't properly sealed.
Ensure the first fold wraps snugly around the baton. When completing the second fold, roll the pastry so the seam is directly underneath and gently press to help it seal. Avoid over-proofing the pastries, as excessively proofed dough can become too fragile to hold the chocolate in place. Placing the seam side down on the baking sheet also helps gravity keep it sealed.
Pain au Chocolat Shaping Variations and Creative Twists
Exploring Different Chocolate Placement Techniques
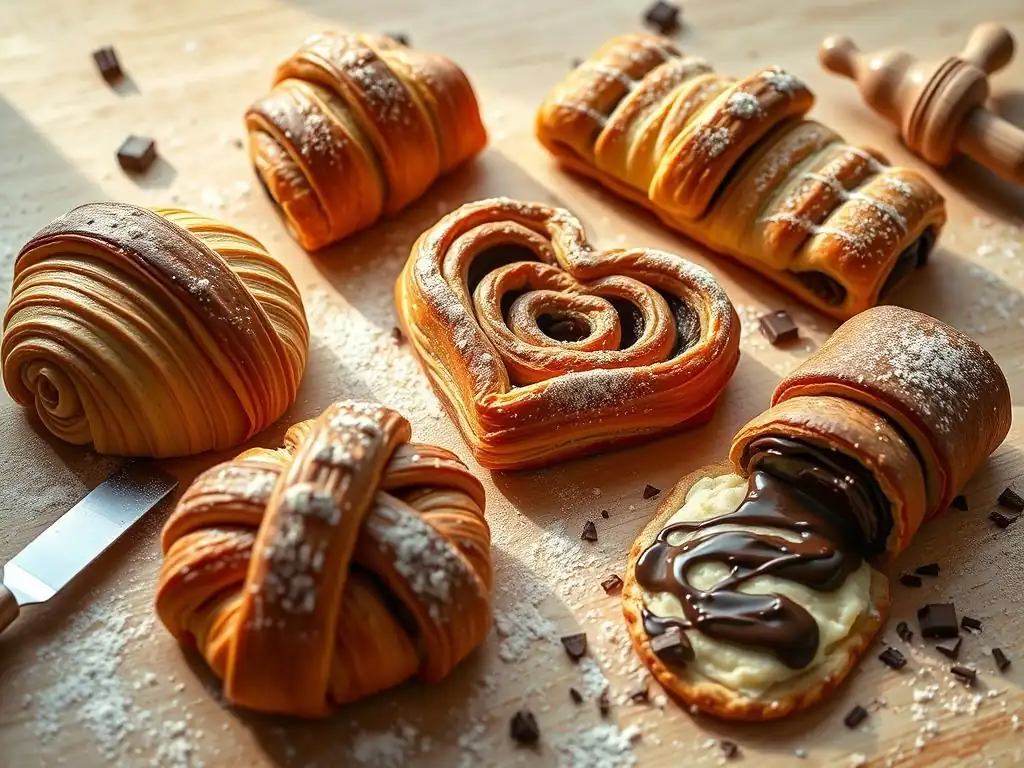
While the classic method involves placing one or two batons horizontally and rolling, there are slight variations you can explore. Some bakers prefer placing the batons slightly closer together or further apart depending on how they want the chocolate distributed.
Another technique involves starting the roll with the baton placed directly on the bottom edge, rolling once, placing a second baton, and then completing the roll. This can result in the chocolate being stacked more vertically within the pastry. Experimenting with these minor adjustments in this pain au chocolat shaping tutorial can lead to subtle differences in the final chocolate distribution.
Adding Flavored Fillings: Beyond the Classic
While the classic pain au chocolat is divine, you can introduce other flavors alongside or instead of the chocolate batons for a creative twist. Consider adding a thin layer of frangipane (almond cream) before placing the batons, or even a strip of fruit paste or jam.
Ensure any additional filling is relatively firm and not too wet, as excess moisture can damage the dough layers. Spread or place it thinly and evenly before adding the chocolate. This allows you to create unique flavor combinations like almond-chocolate or raspberry-chocolate pain au chocolat, expanding your viennoiserie repertoire.
Creating Mini Pain au Chocolat: Bite-Sized Delights
For smaller, bite-sized treats, you can adapt the pain au chocolat shaping tutorial to create mini versions. Simply cut your rolled dough sheet into smaller rectangles, perhaps half the size of standard ones (e.g., 8-10 cm wide by 9-10 cm long).
You might need to use smaller chocolate batons or even cut standard batons in half to fit the smaller dimensions. The shaping process remains the same: place the chocolate on the dough and roll it up. Mini pain au chocolat will require a shorter baking time, likely closer to 12-15 minutes, so keep a close eye on them in the oven.
Achieving a Professional Finish: Tips for Presentation
Cooling and Storing Pain au Chocolat
Once baked to a beautiful golden-brown, transfer the pain au chocolat from the hot baking sheet to a wire rack to cool. Allowing them to cool properly on a rack is crucial; it allows air circulation, preventing the bottom from becoming soggy and helping to set the flaky layers.
Pain au chocolat are best enjoyed warm, ideally within a few hours of baking, when the layers are crispest and the chocolate is perfectly melted. If you need to store them, cool completely and store in an airtight container at room temperature for up to 1-2 days. Reheat gently in a low oven (around 160°C / 325°F) for a few minutes to revive the crispness.
Serving Suggestions: Pairing Ideas for Pain au Chocolat
Pain au chocolat are traditionally enjoyed for breakfast or as a snack with coffee or tea. The rich, buttery pastry and melted chocolate pair wonderfully with a strong espresso, a creamy latte, or a classic black tea.
For a more indulgent treat, serve warm pain au chocolat with a dusting of powdered sugar, a side of fresh berries, or even a scoop of vanilla ice cream for a dessert twist. They are a delightful addition to a brunch spread or a lovely accompaniment to an afternoon coffee break, showcasing the results of your successful pain au chocolat shaping tutorial efforts.
Conclusion: Mastering the Art of Pain au Chocolat Shaping with BakeWithEase
Recap of Key Shaping Techniques
Mastering pain au chocolat shaping is an achievable goal with practice and attention to detail. We've covered the essential steps: starting with chilled, properly rested dough, rolling it to a consistent 3-4 mm thickness, cutting precise 8-10 cm by 18-20 cm rectangles, carefully placing 1-2 chocolate batons, and executing two neat folds to enclose the chocolate with the seam on the bottom.
Remember the importance of proper proofing for maximum rise and flakiness, the egg wash for a golden crust, and baking at the correct temperature (typically 180-200°C for 15-20 minutes) until deep golden. Paying attention to dough temperature, using a ruler for accuracy, and sealing the seam are key takeaways from this pain au chocolat shaping tutorial for consistent, beautiful results.
Further Resources for Viennoiserie Baking at BakeWithEase
This pain au chocolat shaping tutorial is just one piece of the puzzle in mastering viennoiserie. At BakeWithEase, we offer a wealth of resources to help you continue your baking journey. Explore our other guides on creating the perfect laminated dough, troubleshooting common croissant issues, and recipes for other delightful pastries like croissants, danishes, and brioche.
Our Pain au Chocolat & Viennoiseries section is continuously updated with tips, techniques, and recipes designed to build your skills and confidence. Whether you're perfecting your pain au chocolat or venturing into new viennoiserie creations, BakeWithEase is here to guide you every step of the way. Happy baking!
Frequently Asked Questions
How crucial is the dough temperature when shaping pain au chocolat?
Maintaining the correct dough temperature is absolutely crucial. If the dough is too warm, the butter will melt, resulting in a greasy and flat pain au chocolat.
What is the best type of chocolate to use for pain au chocolat?
Traditionally, bâtons de chocolat specifically designed for pain au chocolat are used. These are typically dark chocolate and come in a stick shape, but good quality dark chocolate bars cut to size will also work.
Why is it important to rest the dough during the shaping process?
Resting the dough allows the gluten to relax, making it easier to roll and shape without tearing. This also prevents the dough from springing back too much.
What are some common mistakes when shaping pain au chocolat, and how can I avoid them?
Common mistakes include overworking the dough, using dough that's too warm, or not tightly sealing the edges. Avoid these by being gentle, keeping the dough chilled, and ensuring a secure seal.
Can I freeze pain au chocolat after shaping but before baking?
Yes, you can freeze shaped pain au chocolat before baking. Make sure to freeze them on a baking sheet lined with parchment paper before transferring them to a freezer bag for long-term storage.
Final Reflection: The Art and Soul of the Perfect Pain au Chocolat
The precise shaping of a pain au chocolat isn't merely a technical skill; it's the key to unlocking a truly transcendent pastry experience. From the delicate layering of the dough to the elegant presentation of the finished product, every detail contributes to the overall sensory delight. This visual guide aimed to demystify the process, empowering bakers of all levels to achieve professional-looking results.
The enduring appeal of the pain au chocolat lies not just in its rich, chocolatey flavor, but in the artistry involved in its creation. It's a testament to the power of simple ingredients transformed by skilled hands into something beautiful and delicious. The simplest things are often the most beautiful,
as Leonardo da Vinci once observed, and this sentiment perfectly captures the essence of this seemingly simple yet deeply satisfying pastry. The process itself becomes a meditative practice, a mindful connection between baker and creation.
Now, I invite you to consider your own approach to baking. Perhaps you've already tried your hand at shaping your own pain au chocolat, or maybe this guide has inspired you to give it a try. Regardless, remember that the journey towards perfection is as rewarding as the destination. Embrace the process, experiment with different techniques, and most importantly, enjoy the journey of creating something beautiful and delicious. The next time you bite into a perfectly shaped pain au chocolat, savor not only the taste but also the artistry that went into its making.
Unleash Your Inner Pastry Chef!
Thanks for joining us on this delicious journey into the world of pain au chocolat! We hope you gained some valuable techniques to perfect your own. Now it's time to put your new skills to the test!
- Master the fold: Practice your lamination techniques with your next batch – you'll be amazed at the difference! Aim for those perfectly layered, melt-in-your-mouth results.
- Share your creations: Show off your beautiful pain au chocolat on social media using #BakeWithEasePainAuChocolat – let's inspire each other!
- Try a flavor twist: Experiment with different chocolate types or add nuts, spices, or even a hint of orange zest to create your signature pain au chocolat. What unexpected flavor combination will you try?
Ready to bake something truly extraordinary?