
Soft Meringue Cookies That Won’t Hold Their Shape? Firm Up with This Method

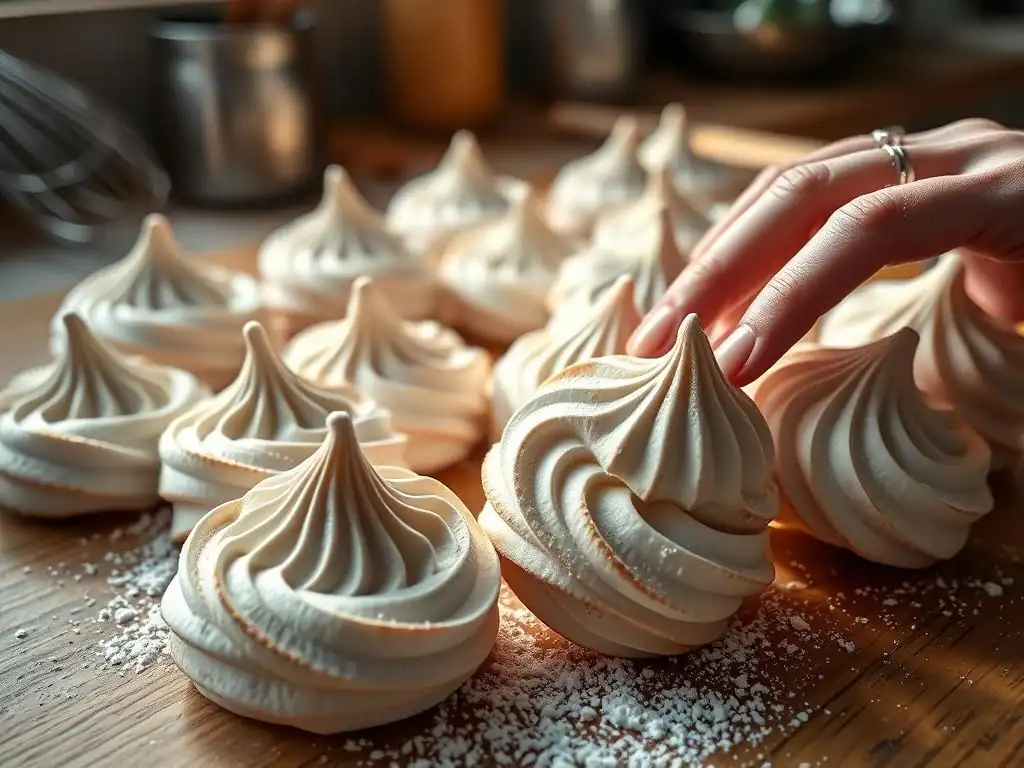
Welcome to BakeWithEase, your haven for all things baking! Ever dreamt of light-as-air meringue cookies that actually hold their shape, instead of collapsing into a sticky mess? You're in the right place. Discover the secret to achieving perfectly firm meringue cookies hold shape with our expert tips and techniques. Ready to unlock baking bliss? Let's get started!
- Achieving Perfect Meringue Cookies: Preventing Spread and Maintaining Shape
- Mastering Meringue Cookie Stability: A Comprehensive Guide
- Understanding Meringue Cookie Spread: Causes and Solutions
- The Italian Meringue Method: A Key to Stable and Beautiful Cookies
-
Italian Meringue Recipe: A Step-by-Step Guide for Perfect Cookie Shapes
- Preparing Ingredients and Equipment for Italian Meringue Success
- Cooking Sugar Syrup to the Correct Temperature: Critical for Meringue Structure
- Incorporating Hot Sugar Syrup into Whipping Egg Whites: A Gentle Approach
- Achieving Stiff, Glossy Peaks: Identifying the Ideal Meringue Consistency
- Flavor and Color Infusion: Maintaining Meringue Volume and Stability
- Baking Techniques for Italian Meringue Cookies: Ensuring Optimal Shape
- Tips and Tricks for Consistently Perfect Meringue Cookie Shapes
- Enjoy Perfect Meringue Cookies: A Recipe for Consistent Shape and Texture
-
Frequently Asked Questions
- What causes meringue cookies to lose their shape and become soft?
- How does the BakeWithEase method ensure a firm meringue cookie?
- What ingredients or tools are crucial for achieving firm meringue cookies?
- Can I make meringue cookies on a humid day, and if so, how?
- What are some common mistakes that lead to soft meringue cookies, and how can I avoid them?
- Final Reflection: The Unexpected Strength of a Delicate Treat
- Unlock Perfectly Shaped Meringues: Your Next Baking Adventure Awaits!
Meringue cookies, those delicate, airy confections, can be a baker's delight or a frustrating challenge. Achieving that perfect crisp exterior and melt-in-your-mouth interior while ensuring your meringue cookies hold shape beautifully is the goal. Often, bakers struggle with meringues spreading or collapsing in the oven, resulting in flat, sticky discs instead of tall, elegant swirls. This guide delves into the science and technique behind achieving firm meringue cookies that hold shape consistently, focusing on a reliable method that minimizes common pitfalls.
Understanding the factors that influence meringue stability is the first step towards mastering these ethereal treats. From the quality of your ingredients to the temperature of your oven and even the humidity in your kitchen, numerous variables can impact the final outcome. By addressing these factors systematically and employing proven techniques, you can significantly improve your success rate and consistently produce firm meringue cookies that hold shape, delivering that desired visual appeal and delicate texture every time you bake.
The shape of your meringue cookies is highly sensitive to environmental and procedural factors. One primary culprit is moisture, both from the air (humidity) and within the meringue itself. If the meringue mixture is too wet, either from under-whipped egg whites, added liquid flavorings without compensation, or excessive moisture in the baking environment, it struggles to maintain its structure when heated. A study by Kansas State University on egg white foams highlights that water content is a critical factor in foam stability and volume, directly impacting how well a meringue can hold its shape.
Furthermore, residual fat in your mixing bowl or on your utensils can drastically impair the ability of egg whites to whip into a stable foam. Even a tiny amount of grease can prevent the proteins in the egg whites from denaturing and forming the strong network required to trap air.
This results in a weak foam that easily collapses or spreads during baking. Professional bakers often emphasize the importance of meticulously cleaning all equipment with hot, soapy water or even wiping them down with a bit of vinegar or lemon juice to ensure they are completely fat-free before beginning the meringue process.
Humidity Control for Meringue Stability
High humidity is a significant enemy of firm meringue cookies that hold shape. Egg whites are hygroscopic, meaning they readily absorb moisture from the air. When the ambient humidity is high, the whipped egg whites in the meringue mixture can absorb this extra moisture, weakening the protein structure and making the meringue less stable.
This leads to spreading before or during baking, and often results in a chewy or sticky texture instead of the desired crispness. For instance, baking meringues on a rainy or very humid day without climate control can be significantly more challenging than on a dry, sunny day.
To combat humidity, consider using a dehumidifier in your kitchen if you live in a moist climate. Baking on days with lower humidity is also advisable. During the baking process, some recipes recommend slightly propping open the oven door towards the end to allow moisture to escape, promoting a drier environment for the cookies to crisp up. This technique helps achieve firm meringue cookies that hold shape by facilitating the drying-out process necessary for their structure.
Oven Temperature Accuracy for Consistent Results
An oven temperature that is too high is a common cause of meringue cookies spreading and developing cracks. Meringues are essentially dried foams, and they require a low, slow bake to gently evaporate the moisture and solidify the protein structure without burning the sugar.
If the oven is too hot (e.g., above 225-250°F or 110-120°C), the outside of the meringue will cook and set too quickly while the inside is still moist and expanding. This rapid expansion against a set exterior can cause the meringue to puff up excessively and then collapse or spread as it cools, failing to produce firm meringue cookies that hold shape.
Conversely, an oven temperature that is too low might mean the meringues take excessively long to bake, potentially drying out too much or, in humid conditions, absorbing too much moisture over time. Using an oven thermometer to verify the actual temperature inside your oven is crucial, as built-in thermostats can often be inaccurate by as much as 25-50°F (15-30°C). Baking within the recommended low-temperature range, typically between 175°F and 225°F (80°C and 110°C), allows the moisture to evaporate slowly and evenly, ensuring the meringue sets into a stable, firm shape.
Achieving Stiff Peaks: The Foundation of Meringue Structure
The degree to which egg whites are whipped is fundamental to achieving firm meringue cookies that hold shape. Egg whites must be whipped to "stiff peaks," which means that when the whisk is lifted, the peaks stand straight up without drooping. This stage indicates that the egg white proteins have denatured and formed a strong, stable network capable of trapping a maximum amount of air. Under-whipped egg whites result in a weak, unstable foam that will likely spread or collapse when baked, as the structure isn't robust enough to support itself under heat.
Over-whipping, however, can also be detrimental. While less common than under-whipping for meringues, over-whipped egg whites can become dry and granular, causing the protein structure to break down. This results in a meringue that is difficult to pipe smoothly and may also become unstable during baking. The ideal stiff peak stage is when the meringue is glossy, smooth, and holds its shape firmly when the whisk is removed – a visual cue that signals readiness for piping and baking to achieve those desired firm meringue cookies that hold shape.
Sugar to Egg White Ratio: Balancing Sweetness and Stability
The ratio of sugar to egg white is critical for both the sweetness and structural integrity of meringue cookies. Sugar plays a dual role: it sweetens the meringue and, more importantly for stability, it helps stabilize the whipped egg white foam. Sugar granules dissolve slowly into the egg white, bonding with the proteins and strengthening the foam structure.
A common ratio for stable meringues, particularly French meringue used for baking, involves using about twice the weight of sugar to egg whites (e.g., 100g egg whites to 200g sugar). Using too little sugar can result in a less stable foam that is prone to weeping (leaking liquid) and spreading during baking because the protein network isn't sufficiently supported.
However, adding too much sugar too quickly or at the wrong stage can also hinder proper whipping, potentially preventing the egg whites from reaching their full volume or developing stiff peaks. The key is to add the sugar gradually once the egg whites have reached a soft peak stage, allowing each addition to dissolve and incorporate before adding more. This gradual addition ensures the sugar effectively strengthens the foam, contributing significantly to achieving firm meringue cookies that hold shape and possess a pleasant, not overly sweet, flavor profile.
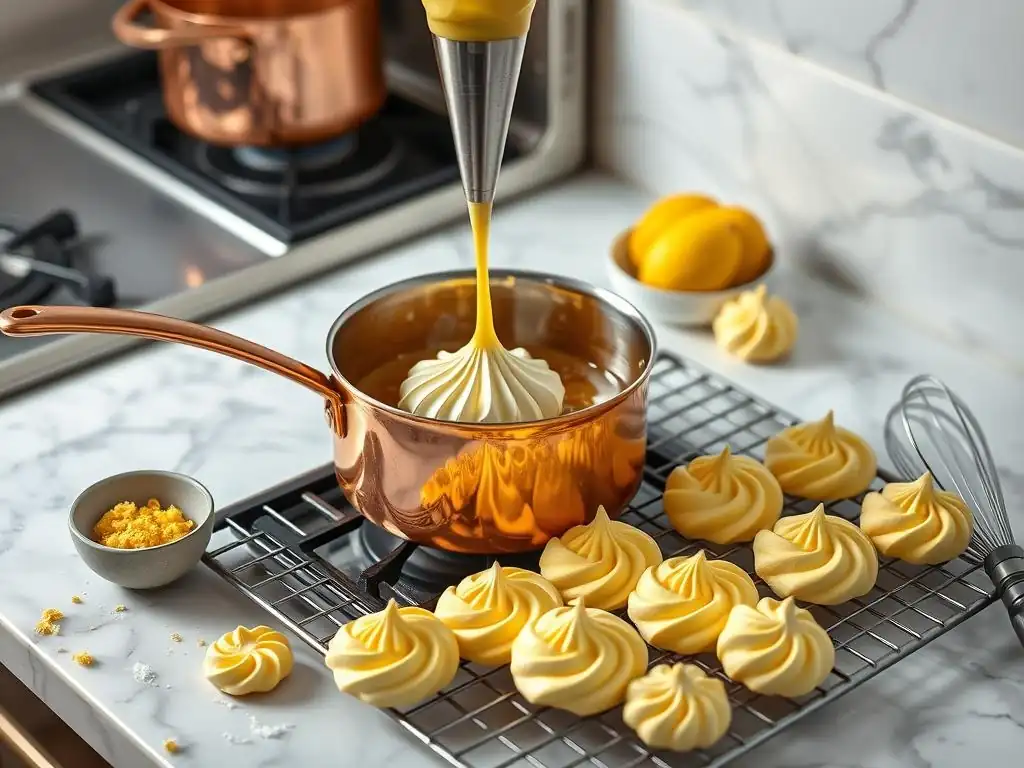
The Italian meringue method stands out for its exceptional stability, making it an ideal choice for achieving firm meringue cookies that hold shape beautifully. Unlike French meringue, where granulated sugar is simply whipped into raw egg whites, Italian meringue involves whipping egg whites while slowly drizzling in a hot sugar syrup (heated to the soft-ball stage, typically 238-245°F or 114-118°C).
The heat from the syrup partially cooks the egg whites, denaturing the proteins and creating a far more robust and stable foam structure compared to cold methods. This 'pre-cooked' nature means the meringue is less prone to weeping, less susceptible to humidity, and significantly more stable before it even goes into the oven.
This inherent stability translates directly into cookies that maintain their piped form during baking. The strong protein matrix created by the hot syrup addition provides internal scaffolding that resists spreading. Furthermore, because the sugar is added as a dissolved syrup, it integrates seamlessly and quickly into the egg whites, preventing the gritty texture sometimes associated with French meringue baked at low temperatures. The resulting meringue is incredibly smooth, glossy, and pipeable, allowing bakers to create intricate shapes that hold their definition perfectly, ensuring you get those desirable firm meringue cookies that hold shape.
When it comes to making meringue cookies, bakers typically choose between three main methods: French, Swiss, and Italian. French meringue is the simplest, involving whipping sugar into raw egg whites. While quick, it's the least stable and most susceptible to humidity and spreading, often requiring a higher sugar ratio for any semblance of structure.
Swiss meringue involves gently heating egg whites and sugar over a double boiler while whisking until the sugar dissolves, then whipping the mixture off the heat. This method partially cooks the egg whites, offering better stability than French meringue, resulting in a smoother, glossier meringue that holds shape reasonably well for cookies.
However, Italian meringue surpasses both French and Swiss methods in terms of stability for baked cookies. The high temperature of the sugar syrup (238-245°F) ensures the egg whites are thoroughly denatured, creating the strongest possible protein network.
This results in a meringue that is exceptionally stable, less prone to collapsing or spreading, and capable of holding intricate piped shapes throughout the baking process. While Italian meringue requires a bit more technique and equipment (a candy thermometer is essential), the payoff in achieving consistently firm meringue cookies that hold shape makes it the preferred method for many professional bakers and those serious about meringue cookie success.
Preparing Ingredients and Equipment for Italian Meringue Success
Success with Italian meringue starts with meticulous preparation. You'll need fresh egg whites, ideally at room temperature, as they whip to a greater volume than cold ones (though some argue cold egg whites can be separated cleaner). For a typical batch yielding about 2-3 dozen small cookies, you might use egg whites from 3-4 large eggs (approximately 100-120g). The sugar quantity is crucial; a common ratio for Italian meringue is about twice the weight of sugar to egg whites, plus a small amount of water for the syrup.
So, for 100g egg whites, you'd use roughly 200g granulated sugar and about 50-75ml water. Ensure all your equipment – mixing bowl, whisk attachment, saucepan – is spotlessly clean and grease-free. Even a trace of fat can ruin your meringue.
Gathering all your ingredients and equipment before you start is key, as the process moves quickly once the sugar syrup begins to heat. Have your stand mixer fitted with the whisk attachment ready. Measure your sugar and water into a small, heavy-bottomed saucepan. Separate your egg whites carefully, ensuring absolutely no yolk contaminates them, and place them in the clean mixing bowl. Having everything prepped allows you to focus on the critical timing and temperatures required to create a stable Italian meringue that will produce firm meringue cookies that hold shape reliably.
Cooking Sugar Syrup to the Correct Temperature: Critical for Meringue Structure
The temperature of the sugar syrup is the most critical factor in creating a stable Italian meringue. The syrup must reach the "soft-ball" stage, which corresponds to a temperature range of 238°F to 245°F (114°C to 118°C). Heating the sugar and water together over medium-high heat, stirring only until the sugar dissolves, is the first step. Once boiling, stop stirring and let the syrup bubble away. Using a reliable candy thermometer is non-negotiable here; clip it to the side of the saucepan, ensuring the bulb is submerged in the syrup but not touching the bottom of the pan.
As the syrup approaches the target temperature, typically around 230°F (110°C), begin whipping your egg whites on medium speed. The timing is crucial: the egg whites should be at the soft peak stage just as the syrup reaches 238-245°F. If the syrup reaches temperature too early, you'll have to stop cooking it and wait for the egg whites to catch up, which can affect the syrup's consistency.
If the egg whites are ready too early, stop the mixer and wait for the syrup. Reaching the precise soft-ball stage ensures the syrup is hot enough to cook the egg whites sufficiently for stability but not so hot that it burns the sugar or causes the meringue to become brittle, ensuring a smooth, glossy meringue that yields firm meringue cookies that hold shape.
Incorporating Hot Sugar Syrup into Whipping Egg Whites: A Gentle Approach
Adding the hot sugar syrup to the whipping egg whites requires a steady hand and careful technique. Once the sugar syrup reaches 238-245°F (114-118°C) and the egg whites are at soft peaks, increase the mixer speed to medium-high. With the mixer running, slowly and carefully pour the hot syrup down the side of the mixing bowl in a thin, steady stream.
Avoid pouring the syrup directly onto the whisk attachment, as it can splash onto the sides of the bowl and harden before incorporating properly. Pouring down the side allows the syrup to run into the whipping egg whites gradually, ensuring it is evenly distributed and incorporated into the foam.
This process is known as "cooking" the meringue. As the hot syrup streams in, it instantly heats the egg whites, denaturing the proteins and creating the incredibly strong, stable network characteristic of Italian meringue. Continue whipping at medium-high speed throughout the addition. The goal is to fully incorporate the hot syrup into the egg whites, transforming the soft peaks into a thick, glossy, and incredibly stable meringue base. This step is fundamental to achieving firm meringue cookies that hold shape and resist spreading during baking.
Achieving Stiff, Glossy Peaks: Identifying the Ideal Meringue Consistency
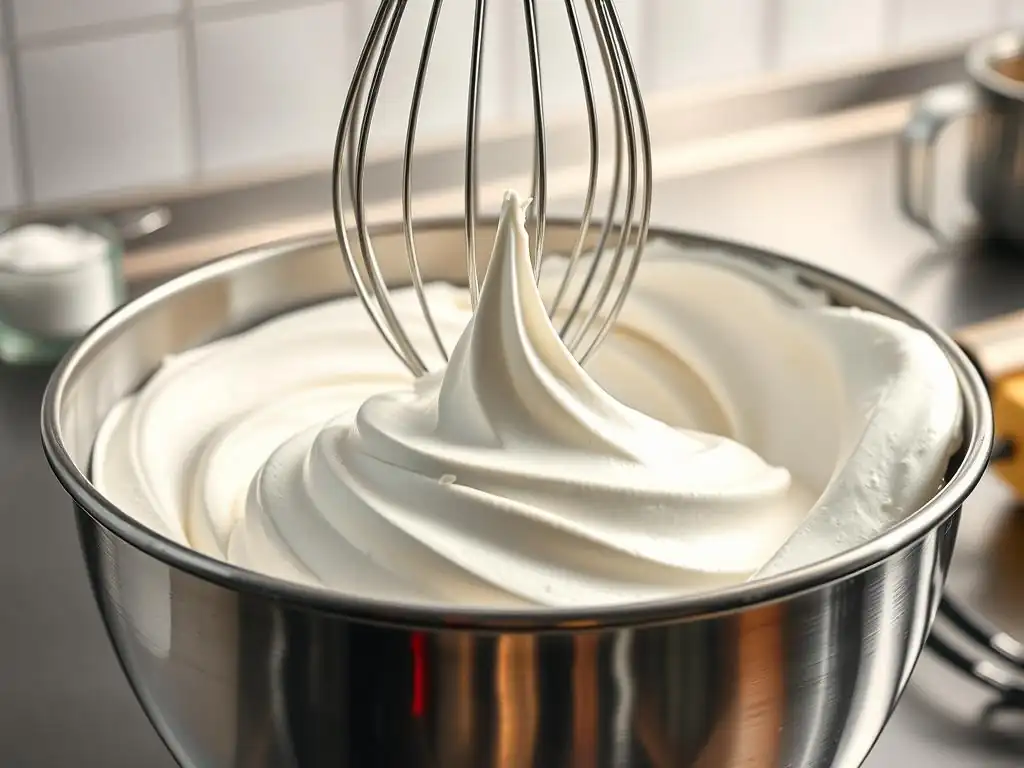
After all the hot sugar syrup has been incorporated, continue whipping the meringue on high speed. This is where the magic happens, as the mixture transforms into a thick, incredibly glossy, and stable meringue. You'll notice the volume increase significantly, and the meringue will become very shiny and smooth. The ideal consistency for piping meringue cookies is stiff peaks. To test for stiff peaks, stop the mixer and lift the whisk attachment straight up. The meringue peaks should stand straight up without drooping at all.
Another indicator of readiness is the temperature of the meringue itself. As you whip, the hot syrup heats the bowl, but the whipping process cools the meringue down. Continue whipping until the outside of the mixing bowl feels cool to the touch, typically around 90-100°F (32-38°C). This cooling process further stabilizes the meringue structure. The final result should be a satiny-smooth, extremely stable meringue that holds its shape perfectly when piped – the perfect foundation for firm meringue cookies that hold shape and bake beautifully.
Flavor and Color Infusion: Maintaining Meringue Volume and Stability
Once the Italian meringue has reached stiff, cool peaks, you can gently incorporate flavorings and colors. This should be done carefully to avoid deflating the stable meringue. Use gel or paste food coloring rather than liquid, as excess liquid can weaken the structure. Add a small amount of coloring and gently fold it in with a spatula using an upward motion, cutting through the center, and folding over the top. Repeat until the desired color is achieved, minimizing the number of folds.
For flavor, extracts like vanilla or almond should be added sparingly, again using gel or high-quality concentrated extracts if possible to limit added liquid. Add the extract after the meringue is fully whipped and cooled, and fold it in gently. Over-mixing or vigorous stirring at this stage can knock the air out of the meringue, compromising its stability and ability to hold shape during baking. Gentle handling after achieving stiff peaks is key to ensuring your meringue remains robust enough to become firm meringue cookies that hold shape.
Proper piping technique is essential for ensuring your firm meringue cookies hold shape as intended. Use a sturdy piping bag fitted with your desired nozzle (star tips are popular for classic shapes). Fill the bag no more than two-thirds full to make it easier to handle. Hold the piping bag perpendicular to the baking sheet, which should be lined with parchment paper or a silicone baking mat. Apply even, steady pressure to pipe the meringue onto the sheet, lifting straight up at the end to create a clean break rather than swirling off to the side.
Avoid overcrowding the baking sheet; leave at least an inch between cookies to allow for air circulation. Uneven pressure or dragging the tip as you pipe can lead to misshapen cookies that are more prone to spreading or collapsing. For consistent sizes and shapes, practicing your piping technique before starting with the meringue can be helpful. The stable nature of Italian meringue makes it very forgiving for piping, allowing for precise shapes that are far more likely to result in firm meringue cookies that hold shape perfectly after baking compared to less stable meringues.
Baking Italian meringue cookies requires a low temperature and a long duration to dry them out rather than cook them in the traditional sense. The ideal temperature range is typically between 175°F and 225°F (80°C and 110°C). A temperature of 200°F (95°C) is often recommended as a good starting point. The baking time will vary significantly depending on the size of your cookies and the specifics of your oven, but it can range anywhere from 1.5 to 3 hours or even longer for larger meringues.
The goal is for the meringue to become completely dry and crisp all the way through. You can test for doneness by gently lifting a cookie; it should feel light, detach easily from the baking sheet, and sound hollow when tapped on the bottom. If the inside still feels soft or sticky, continue baking. Baking at the correct low temperature for sufficient time is crucial for achieving firm meringue cookies that hold shape and possess that characteristic crisp, dry texture, preventing them from becoming chewy or collapsing after cooling.
Cooling is a critical, often overlooked, step in ensuring firm meringue cookies hold shape and remain crisp. Once baked, turn off the oven but leave the cookies inside with the oven door slightly ajar. This allows the cookies to cool down very gradually within the drying environment of the oven. Removing them immediately and exposing them to cooler, potentially more humid room air can cause them to absorb moisture, becoming soft or sticky and potentially losing some of their crispness and shape.
Allow the cookies to cool completely in the oven, which can take another hour or two depending on their size. This slow cooling process helps to set the internal structure fully and prevents the rapid temperature change that can lead to cracking or softening. Once fully cooled inside the oven, transfer the firm meringue cookies that hold shape perfectly to an airtight container for storage. Proper cooling and storage are key to preserving their delicate texture and preventing them from becoming chewy.
Even with the stable Italian method, challenges can arise. If your cookies spread, it could be due to residual fat on equipment, under-whipped meringue (not reaching stiff peaks), or the sugar syrup not reaching the correct temperature (below 238°F). If they crack, the oven temperature might be too high, causing the exterior to set too quickly while the interior expands. Try lowering the oven temperature by 10-20°F (5-10°C). If they are chewy or sticky inside, they likely haven't baked long enough to dry out completely; increase the baking time.
Humidity remains a major factor. If baking on a humid day, the cookies may take significantly longer to dry out, and you might need to extend the baking time considerably or even consider adding a stabilizer. By systematically checking your technique – ensuring clean equipment, accurate syrup temperature, stiff peaks, low oven temperature, and sufficient baking/cooling time – you can troubleshoot most issues and consistently produce firm meringue cookies that hold shape beautifully.
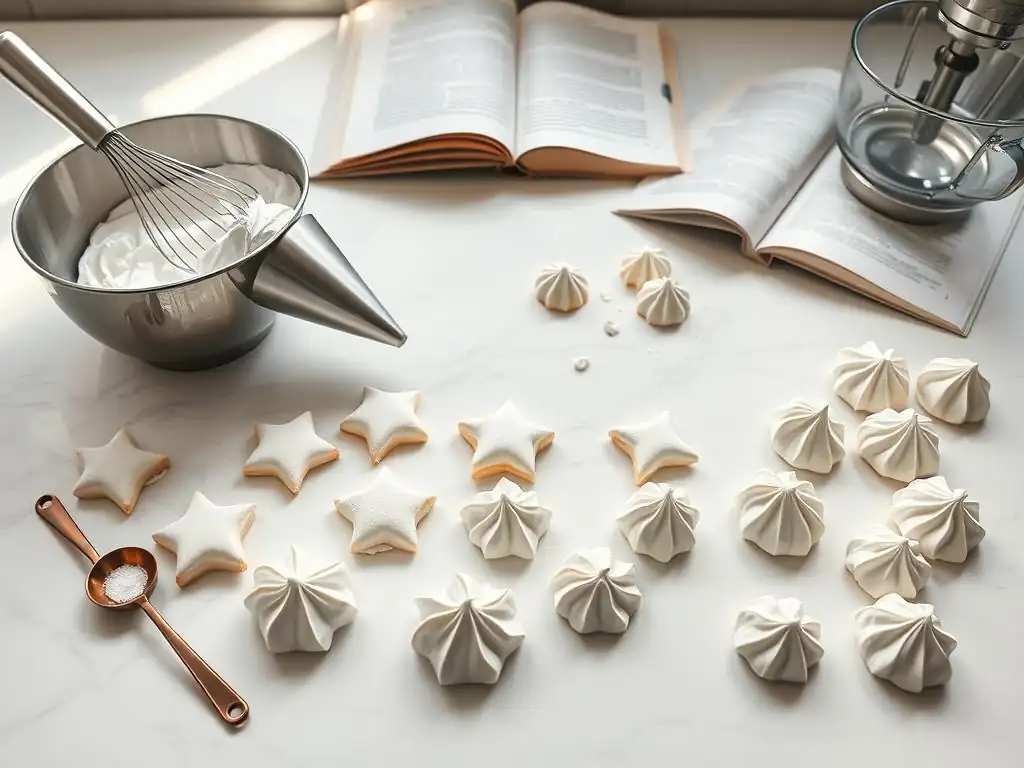
Proper storage is paramount for maintaining the crisp texture and firm shape of your meringue cookies after they've been successfully baked. Meringues are highly susceptible to moisture, so they must be stored in an airtight container immediately after they have completely cooled. A metal tin or a plastic container with a tight-fitting lid works well. Avoid storing them in the refrigerator, as the humid environment inside can quickly turn them soft and sticky.
Store the container at room temperature in a cool, dry place, away from direct sunlight or heat sources. If you live in a very humid climate, you might consider adding a small food-safe desiccant packet (like those found in packaging for dried foods) to the container to help absorb any residual moisture. Storing your firm meringue cookies that hold shape correctly ensures they retain their delicate crunch for up to two weeks, though they are best enjoyed within the first few days.
Adjusting the Recipe for Different Oven Characteristics
Every oven is slightly different, and what works perfectly in one might require minor adjustments in another. Factors like calibration accuracy, hot spots, and how well the oven holds a low temperature can all impact meringue baking. If your oven runs hot, you might need to set it lower than the recipe suggests, perhaps starting at 180°F (80°C) instead of 200°F (95°C). Conversely, if your oven struggles to maintain a consistent low temperature, you might need to monitor it closely with an oven thermometer and adjust as necessary.
It's also beneficial to rotate your baking sheets halfway through the baking time to ensure even drying, especially if you know your oven has hot spots. Pay attention to how your first batch bakes and be prepared to tweak the temperature or time for subsequent batches. Keeping a baking journal to note oven settings, baking times, and results can help you fine-tune the process specifically for your equipment, leading to more consistently firm meringue cookies that hold shape beautifully.
Once you've mastered the basic Italian meringue technique for achieving firm meringue cookies that hold shape, you can easily experiment with flavors and colors. For flavoring, a small amount of pure vanilla extract (1/2 to 1 teaspoon per 100g egg whites) is classic. Other extracts like almond, peppermint, or lemon can add delightful variations. You can also gently fold in finely crushed freeze-dried fruit powder for natural color and intense flavor after the meringue is whipped – think raspberry or strawberry powder for pink meringues.
Swirling in a tiny amount of gel food coloring with a toothpick or adding cocoa powder (sifted and gently folded in) can create visually stunning cookies. Remember to use gel or paste colors sparingly to avoid adding excess moisture. Adding a small amount of finely grated citrus zest (lemon, lime, or orange) can also infuse bright flavor without adding significant liquid. Experimenting with these additions allows you to create a wide range of delicious and visually appealing firm meringue cookies that hold shape.
Stabilizers: Enhancing Meringue Structure with Cream of Tartar or Cornstarch
While Italian meringue is inherently stable, sometimes a little extra help is desired, especially in very humid conditions or when aiming for exceptionally tall, intricate shapes. Cream of tartar, an acidic salt, is a common stabilizer for egg whites.
Adding a pinch (about 1/8 teaspoon per egg white, or 1/4 teaspoon per 100g egg whites) to the egg whites before you begin whipping helps lower the pH, which strengthens the protein network and allows the egg whites to whip faster and achieve greater volume and stability. This makes it easier to achieve those crucial stiff peaks necessary for firm meringue cookies that hold shape.
Cornstarch can also be used as a stabilizer, typically added towards the end of the whipping process or folded in gently with the sugar. It helps absorb any residual moisture and provides structural support. A common ratio is 1 teaspoon of cornstarch per 2 large egg whites (approx. 60g). Adding a small amount of either cream of tartar or cornstarch can provide an extra layer of security against weeping and spreading, helping you consistently produce firm meringue cookies that hold shape beautifully, even when conditions aren't ideal.
Frequently Asked Questions
Meringue cookies often lose shape and soften due to excess moisture in the environment or from under-whipped egg whites. Humidity can cause the sugar to absorb water, while weak egg whites lack the structure to maintain their form.
The BakeWithEase method likely focuses on techniques like proper egg white whipping to stiff peaks and low and slow baking to dry out the cookies thoroughly. This method also emphasizes using accurate measurements of ingredients.
Essential ingredients include room temperature egg whites and granulated sugar. Crucial tools are a clean, grease-free bowl and a reliable mixer for achieving stiff peaks.
While challenging, you can bake meringue cookies on a humid day by extending the baking time at a low temperature to ensure thorough drying. Using dehumidifier in your kitchen can also help.
Common mistakes include over-mixing the meringue after adding sugar, baking at too high a temperature, and opening the oven frequently. Avoiding these will help maintain the cookie's structure and firmness.
Final Reflection: The Unexpected Strength of a Delicate Treat
The seemingly fragile nature of a meringue cookie belies its potential for strength and resilience. Mastering the art of creating firm, perfectly-shaped meringues isn't just about achieving a visually appealing result; it's about understanding the delicate balance of ingredients and technique that transforms a simple mixture into a sturdy, delightful treat. This understanding extends beyond the kitchen, mirroring the way seemingly small details can significantly impact larger outcomes.
The journey of perfecting the meringue recipe highlighted the importance of precision and patience, qualities often overlooked in our fast-paced world. The process itself became a metaphor for perseverance and the rewards of attention to detail. The best things in life are worth waiting for,
a sentiment perfectly encapsulates the satisfaction of biting into a perfectly formed, crisp meringue after mastering the technique. This extends beyond baking; the meticulous approach required resonates with many aspects of life, reminding us that careful planning and execution often lead to the most satisfying results.
Now, consider your own projects, your own goals. What seemingly fragile aspects of your life require the same careful attention to detail and unwavering patience that perfect meringue cookies demand? I invite you to reflect on where you can apply the principles of precision and perseverance to achieve a stronger, more satisfying outcome, no matter how delicate the task may initially seem. Embrace the challenge, and savor the sweet reward of success.
Unlock Perfectly Shaped Meringues: Your Next Baking Adventure Awaits!
Thanks for taking the time to explore the world of meringue cookies with us! We hope you now feel confident in tackling even the trickiest meringue recipes. Ready to put your newfound knowledge into practice?
- Bake a batch of flawless meringues: Use our tips to create those perfectly crisp, picture-perfect cookies you've always dreamed of. Experiment with different flavors and colors!
- Share your meringue masterpieces: Tag us on social media – we'd love to see your creations!
- Challenge yourself with a new meringue recipe: Find a more advanced recipe online and see if you can master it using the techniques you learned today.
Have you ever experimented with different types of sugar when making meringues? Let’s discuss your findings in the comments below!