
Quick & Easy Whole Wheat Bread Ready in Under 2 Hours


Welcome to BakeWithEase, your kitchen companion for crafting delicious homemade goods! Ever dreamt of enjoying the wholesome goodness of freshly baked bread without spending hours in the kitchen? Discover our quick and easy whole wheat bread recipe, perfect even for the busiest schedules. Unlock the secrets to a flavorful loaf ready in under two hours, and let the aroma of homemade bread fill your home. Ready to bake?
- Introduction: Bake a Delicious Whole Wheat Loaf with Ease
- The Secret to a Fast & Flavorful Whole Wheat Bread
- Step-by-Step Guide: Baking Your Easy Whole Wheat Bread
- Tips & Tricks for Baking the Best Whole Wheat Bread
- Serving & Storing Your Homemade Whole Wheat Bread
- Conclusion: Enjoy Your Quick & Easy Homemade Whole Wheat Bread
-
Frequently Asked Questions
- What makes this whole wheat bread recipe "quick and easy"?
- Can I substitute any of the ingredients in this Easy Whole Wheat Bread Recipe?
- Is kneading really necessary for a good whole wheat bread?
- What if my dough isn't rising properly?
- How should I store my Quick & Easy Whole Wheat Bread to keep it fresh?
- Final Reflection: The Humble Loaf and the Modern Kitchen
- Unleash Your Inner Baker: Make Amazing Bread Today!
Introduction: Bake a Delicious Whole Wheat Loaf with Ease
Discover the Simple Joy of Baking Whole Wheat Bread at Home
There's a unique satisfaction that comes from pulling a warm, golden loaf of bread from your oven. The aroma alone is enough to make your kitchen feel like the heart of your home. Baking bread, especially a hearty whole wheat loaf, doesn't have to be a daunting task reserved for experienced bakers. With the right approach and a simple recipe, anyone can experience this joy. This guide focuses on an easy whole wheat bread recipe designed for speed and minimal effort, proving that delicious, homemade bread is well within your reach, even on a busy day.
Imagine slicing into a warm, tender loaf that you made yourself, knowing exactly what ingredients went into it. This recipe simplifies the process, cutting down on traditional long fermentation times without sacrificing flavor or texture significantly. It’s about embracing the simplicity of baking and creating something wholesome and delicious relatively quickly. Whether you're new to baking or looking for a faster way to get your whole wheat fix, this approach offers a rewarding experience and a fantastic result in under two hours.
Why This Easy Whole Wheat Bread Recipe is Perfect for Beginners
Many traditional bread recipes require hours of rising time, multiple kneads, and complex handling. This can be intimidating for someone just starting out. Our easy whole wheat bread recipe streamlines the process considerably. We use techniques that encourage a faster rise and simplify the kneading, making it accessible even if you've never baked bread before. The ingredient list is straightforward, requiring items commonly found in most kitchens.
For example, unlike sourdough which requires maintaining a starter culture for days or weeks, this recipe relies on commercial yeast which activates quickly. The structure of the steps is designed to be logical and easy to follow, breaking down the process into manageable parts. We aim to build your confidence with each step, from mixing the dough to shaping and baking. This isn't just about getting a loaf of bread quickly; it's about building foundational baking skills in a low-stress environment, proving that baking an easy whole wheat bread recipe can be a fun and rewarding experience.
The Secret to a Fast & Flavorful Whole Wheat Bread

Key Ingredients for Your Quick Whole Wheat Bread
The success of a quick bread recipe hinges on the quality and interaction of a few core ingredients. For this easy whole wheat bread recipe, you'll need whole wheat flour, warm water, active dry or instant yeast, a touch of sweetener (like honey or maple syrup), salt, and a little oil or butter. The precise measurements are crucial for consistency, but the beauty of this method is its flexibility within those bounds.
Ingredients:
- 3 cups (about 360g) Whole Wheat Flour
- 1/4 cup (about 30g) Gluten Flour (optional, for better structure)
- 1 1/4 cups (about 300ml) Warm Water (105-115°F / 40-46°C)
- 2 1/4 tsp (1 standard packet) Active Dry or Instant Yeast
- 1-2 tbsp Honey or Maple Syrup
- 1 tsp Salt
- 1 tbsp Olive Oil or Melted Butter
Using gluten flour is optional but highly recommended when working with 100% whole wheat, as it helps compensate for the shorter gluten strands in whole wheat compared to white flour, leading to a better rise and texture in a quick recipe. The warm water is essential for activating the yeast quickly. The sweetener provides food for the yeast, boosting its activity, while salt controls the yeast and enhances flavor. The fat (oil or butter) contributes to tenderness and moisture.
Understanding the Role of Whole Wheat Flour in Baking
Whole wheat flour is made from the entire wheat kernel – the bran, germ, and endosperm. This is what gives it its characteristic color, nutty flavor, and nutritional density, including higher fiber and vitamins compared to refined white flour. However, the bran and germ particles can interfere with gluten development, which is crucial for the structure of leavened bread. This is often why 100% whole wheat breads can be denser than those made with white flour or a blend.
In a quick recipe like this easy whole wheat bread recipe, optimizing gluten development is key to achieving a good rise in a short time. While traditional methods rely on long fermentation and multiple folds to develop gluten, this recipe uses warm liquids and potentially added vital wheat gluten to assist the process. Understanding that whole wheat flour absorbs water differently and develops gluten less readily than white flour helps manage expectations and ensures you handle the dough appropriately to get the best possible loaf.
Choosing the Right Yeast for a Rapid Rise
Yeast is the magical ingredient that makes bread rise by producing carbon dioxide gas as it consumes sugars. For a quick recipe like this easy whole wheat bread recipe, the type of yeast you choose can impact the rise time. Active dry yeast needs to be proofed in warm liquid before being added to the dry ingredients, typically taking 5-10 minutes to become foamy. Instant yeast, on the other hand, can be mixed directly with the dry ingredients and usually rises faster and requires only one rise period in many recipes.
For this specific quick whole wheat bread, both active dry and instant yeast work well, provided your water temperature is correct (105-115°F / 40-46°C is ideal for rapid activation without killing the yeast). If using active dry, ensure it proofs properly – it should get bubbly and foamy, indicating it's alive. Instant yeast often provides a slightly more vigorous and reliable rise in faster recipes. Whichever you choose, ensure it's fresh; old yeast is a common culprit for bread that doesn't rise.
Step-by-Step Guide: Baking Your Easy Whole Wheat Bread
Step 1: Preparing the Dough – Mixing and Kneading
The first step in creating your easy whole wheat bread recipe is combining the ingredients. Start by activating your yeast (if using active dry) in the warm water with the sweetener. Let it sit for 5-10 minutes until foamy. If using instant yeast, you can skip the proofing step and mix it directly with the flour, salt, and optional gluten flour in a large bowl. Once the yeast is ready (or mixed in), add the liquid mixture and the oil/melted butter to the dry ingredients.
Mix everything together with a spoon or spatula until a shaggy dough forms. At this point, turn the dough out onto a lightly floured surface for kneading. Kneading develops the gluten network, giving the bread structure and elasticity.
For this quick recipe, aim to knead for about 8-10 minutes by hand, or 5-7 minutes using a stand mixer with a dough hook on medium speed. The dough should become smoother and more elastic, though 100% whole wheat dough will remain a bit denser than white dough. You can perform the windowpane test – gently stretch a small piece of dough; if it stretches thin enough to see light through without tearing, the gluten is well-developed.
Step 2: First Rise – Achieving the Perfect Proof
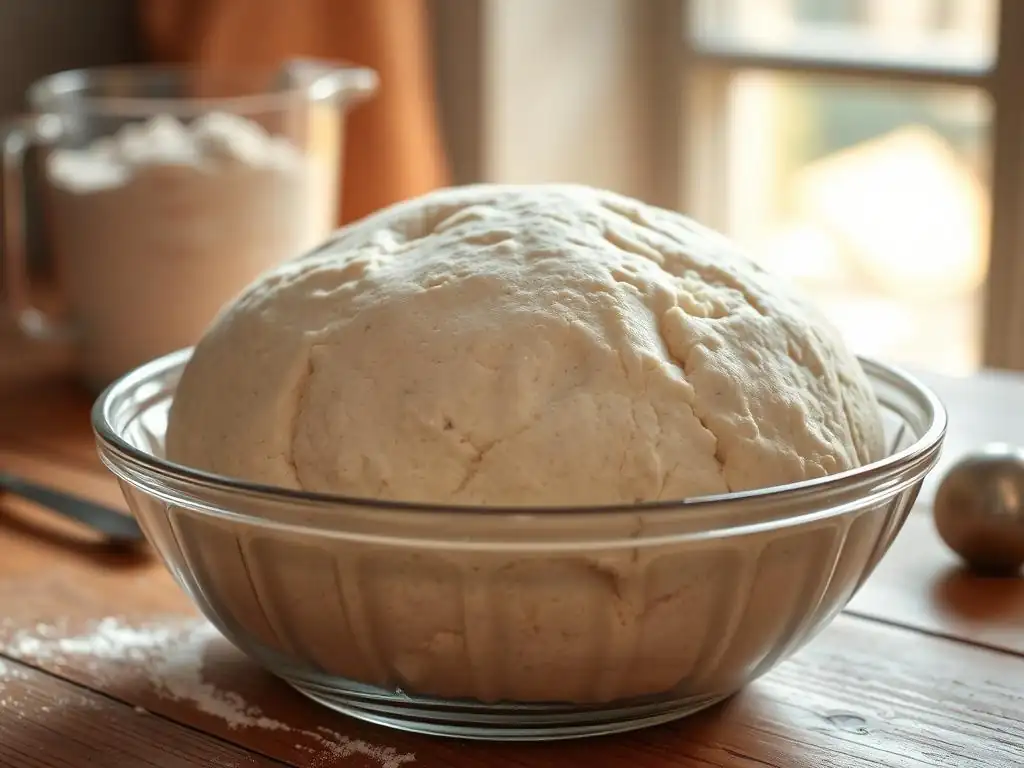
After kneading, the dough needs to rise, or proof. In a typical easy whole wheat bread recipe designed for speed, this first rise is often shorter than traditional methods. Place the kneaded dough in a lightly oiled bowl, turning to coat all sides. Cover the bowl tightly with plastic wrap or a damp kitchen towel to prevent the dough from drying out.
Place the bowl in a warm, draft-free place. An oven with the light on (but not heated) is an excellent spot, typically reaching about 80-90°F (27-32°C). For this quick recipe, the first rise should take approximately 30-45 minutes, or until the dough has roughly doubled in size. The exact time will depend heavily on your kitchen temperature and the yeast activity. Don't over-proof at this stage in a quick recipe, as it can lead to a weaker structure.
Step 3: Shaping the Loaf – Creating a Beautiful Form
Once the dough has completed its first rise, gently punch it down to deflate the air bubbles. This step redistributes the yeast and relaxes the gluten, making the dough easier to handle for shaping. Turn the dough out onto a lightly floured surface. For a classic loaf shape suitable for a loaf pan, gently pat the dough into a rectangle approximately the width of your loaf pan.
To shape, fold the top third of the rectangle down towards the center, then fold the bottom third up over the top fold, like a letter. Gently seal the seam with your fingers. Then, starting from one end, roll the dough tightly into a log, sealing the final seam at the bottom. This creates tension on the surface of the dough, which helps the loaf hold its shape and contributes to a good rise in the oven. Ensure the ends are tucked under slightly if needed.
Step 4: Second Rise – Optimizing Texture and Volume
After shaping, the loaf needs a second, shorter rise before baking. This final proof is crucial for achieving optimal texture and volume in your easy whole wheat bread recipe. Place the shaped loaf, seam-side down, into a greased 9x5-inch loaf pan. Cover the pan loosely with plastic wrap or a light kitchen towel.
Allow the loaf to rise again in a warm, draft-free place for about 20-30 minutes. The loaf should increase in size by about 50-75% and should look visibly puffy, peaking just above the rim of the pan. To test if it's ready, gently press a finger into the side of the loaf; if the indentation springs back slowly, leaving a slight mark, it's ready to bake. If it springs back immediately, it needs more time. If it collapses, it's over-proofed. Preheat your oven during the final part of this rise.
Step 5: Baking to Perfection – Achieving a Golden Crust
Preheat your oven to 375°F (190°C). Baking at the correct temperature is vital for achieving a good crust and ensuring the interior cooks through properly. For an even browner crust, you can lightly brush the top of the loaf with milk or water just before placing it in the oven.
Bake the loaf for 30-40 minutes. The exact time will vary depending on your oven. The bread is done when the crust is a deep golden brown and the internal temperature reaches 190-200°F (88-93°C) when measured with an instant-read thermometer inserted into the center of the loaf.
Another reliable test is to tap the bottom of the loaf; it should sound hollow. Once baked, immediately remove the loaf from the pan and place it on a wire rack to cool completely. Cooling on a rack allows air to circulate around the loaf, preventing the bottom crust from becoming soggy and allowing steam to escape, which is necessary for the interior texture to set properly.
Tips & Tricks for Baking the Best Whole Wheat Bread
Achieving a Soft and Fluffy Texture
Getting a soft crumb in a 100% whole wheat loaf, especially in a quick recipe, can be a challenge, but it's achievable with a few key techniques. Ensuring proper kneading is fundamental; developing that gluten network is crucial for structure and tenderness. Aim for the dough to pass the windowpane test as described earlier. Using warm liquids (around 105-115°F / 40-46°C) helps activate the yeast quickly and thoroughly, contributing to a vigorous rise and lighter texture.
Incorporating a fat like oil or butter into the dough also helps tenderize the crumb by coating the gluten strands, limiting their development slightly but resulting in a softer loaf. Adding vital wheat gluten (as suggested in the ingredients) is perhaps the most effective way to improve texture in a 100% whole wheat quick bread, compensating for the bran's interference with gluten. Finally, don't skip the cooling step! Letting the bread cool completely on a wire rack is essential for the internal structure to set, resulting in a better texture when sliced.
Troubleshooting Common Whole Wheat Bread Baking Problems
Even with an easy whole wheat bread recipe, you might encounter some bumps along the way. One common issue is a loaf that doesn't rise enough, resulting in a dense brick. This is often due to inactive yeast (check the expiration date and water temperature) or insufficient kneading. If your dough feels stiff and doesn't become elastic after kneading, it needs more work. Another problem is a loaf that rises beautifully but then collapses in the oven. This can indicate over-proofing during the second rise; the gluten structure weakens when stretched too far.
- Problem: Dense loaf.
- Possible causes: Inactive yeast, insufficient kneading, too much flour, over-proofing.
- Solutions: Ensure yeast is fresh and water is warm (not hot). Knead until dough is elastic. Measure flour accurately (using a scale is best). Don't let dough over-proof.
- Problem: Loaf collapses in the oven.
- Possible cause: Over-proofing during the second rise.
- Solution: Reduce the second rise time slightly. Ensure the dough springs back slowly when poked.
- Problem: Dry crumb.
- Possible causes: Too much flour, not enough liquid, over-baking.
- Solutions: Measure flour accurately. Ensure correct water ratio. Bake until internal temperature is 190-200°F (88-93°C), not longer. Adding fat helps.
Flavor Variations: Enhancing Your Whole Wheat Bread Recipe
While this easy whole wheat bread recipe is delicious on its own, you can easily customize it with flavor additions. These should generally be added during the initial mixing stage. For a touch of sweetness and texture, try adding 1/4 cup of rolled oats or 2 tablespoons of flax seeds to the dry ingredients. These additions also boost the nutritional profile.
To add nutty depth, incorporate 1/4 cup of chopped walnuts or pecans. For a savory twist, mix in 1 teaspoon of dried herbs like rosemary or thyme, or 1/4 cup of grated cheese like cheddar or Parmesan. Seeds like sunflower or pumpkin seeds (1/4 cup) can add crunch. Remember that adding significant amounts of 'heavy' ingredients like nuts or cheese might slightly impact the rise, but usually not enough to ruin the loaf, especially in a robust easy whole wheat bread recipe like this.
Serving & Storing Your Homemade Whole Wheat Bread

Delicious Ways to Enjoy Your Freshly Baked Bread
The best way to enjoy your easy whole wheat bread recipe creation is undoubtedly warm, straight from the oven, with a generous smear of butter. The nutty flavor of the whole wheat shines through beautifully. It makes fantastic toast, perfect for pairing with eggs, avocado, or jam.
Consider using thick slices for hearty sandwiches, pairing well with everything from classic turkey and cheese to vibrant vegetarian fillings. It's also excellent served alongside soups and stews, perfect for soaking up every last drop. Don't forget the simple pleasure of a slice with a drizzle of olive oil and a sprinkle of flaky sea salt. The versatility of this simple whole wheat loaf means it can be enjoyed in countless ways throughout the day.
Keeping Your Whole Wheat Bread Fresh for Longer
Homemade bread, especially whole wheat which can dry out faster than white bread due to the bran, doesn't contain the preservatives found in commercial loaves. To keep your easy whole wheat bread recipe fresh, allow it to cool completely on a wire rack before storing. Storing warm bread traps moisture and can make the crust soggy and encourage mold growth.
Once cooled, store the loaf at room temperature in a bread box, a clean paper bag, or wrapped loosely in plastic wrap or beeswax wrap. A plastic bag will keep it soft but can soften the crust. For longer storage, slice the cooled loaf and place the slices in a freezer-safe bag or container. Frozen bread slices can be toasted directly from the freezer and will maintain their quality for several months. Avoid storing bread in the refrigerator, as it can actually cause it to go stale faster.
Conclusion: Enjoy Your Quick & Easy Homemade Whole Wheat Bread
Celebrate the Simplicity of Baking with BakeWithEase
Baking bread from scratch doesn't have to be a time-consuming ordeal. This easy whole wheat bread recipe demonstrates that you can achieve a delicious, nutritious loaf with minimal fuss and in under two hours from start to finish. We hope this step-by-step guide, filled with tips and troubleshooting advice, has empowered you to try baking whole wheat bread at home. It's about embracing the process, enjoying the wonderful aromas filling your kitchen, and savoring the taste of freshly baked goodness.
At BakeWithEase, our goal is to make baking accessible and enjoyable for everyone, regardless of experience level. This quick whole wheat bread is a perfect example of how simple ingredients and straightforward techniques can yield impressive results. It's a recipe you can easily fit into a weekend morning or even a busy weeknight.
Your New Go-To Easy Whole Wheat Bread Recipe
You now have a reliable, fast method for baking a wholesome whole wheat loaf. This easy whole wheat bread recipe is designed to become a staple in your baking repertoire. Its speed and simplicity mean you no longer need to wait for a special occasion or have hours of free time to enjoy homemade bread.
Keep these steps and tips handy, and don't be afraid to experiment with the flavor variations suggested. With a little practice, you'll be baking beautiful, tender whole wheat loaves with confidence. Enjoy the fruits of your labor – a warm, delicious loaf of easy whole wheat bread recipe goodness, ready to be shared (or not!) with family and friends. Happy baking!
Frequently Asked Questions
What makes this whole wheat bread recipe "quick and easy"?
This recipe is designed for speed, utilizing simple ingredients and a no-knead approach to significantly reduce preparation time. It's ready in under 2 hours thanks to efficient techniques.
Can I substitute any of the ingredients in this Easy Whole Wheat Bread Recipe?
While substitutions are possible, they may affect the final outcome. Whole wheat flour is crucial for the recipe's character, but you can experiment with other flours at your own risk.
Is kneading really necessary for a good whole wheat bread?
This recipe skips traditional kneading. Instead, it relies on a longer, slower rise to develop gluten and flavor, making it exceptionally easy.
What if my dough isn't rising properly?
Several factors can impact rising. Make sure your yeast is active, and the environment is warm enough (around 75-85°F). Also, check your flour's freshness.
How should I store my Quick & Easy Whole Wheat Bread to keep it fresh?
Store your bread in an airtight container at room temperature for up to 3 days, or in the freezer for longer storage. Slicing before freezing can make it easier to use later.
Final Reflection: The Humble Loaf and the Modern Kitchen
The pursuit of wholesome, homemade bread needn't be a daunting task. This recipe proves that delicious, nutritious whole wheat bread can be a reality even for the busiest among us, ready in under two hours. We've debunked the myth that homemade bread requires days of proofing and specialized equipment, demonstrating that simple ingredients and a straightforward method can yield extraordinary results.
The ease of this recipe, I believe, speaks to a deeper cultural shift. We're increasingly valuing homemade, from-scratch meals, not just for their taste, but for the connection they provide to our food and its origins. This recipe offers a tangible entry point into that world, a way to reclaim a piece of culinary tradition in our fast-paced lives. Bread is the staff of life,
they say, and this recipe makes that staff readily accessible to everyone.
Now, I invite you to roll up your sleeves and try this recipe. Don't be intimidated by the seemingly complex process; embrace the simplicity and the satisfaction of creating something nourishing and delicious with your own hands. The aroma of freshly baked bread filling your kitchen is a reward in itself, a testament to your effort and a delicious invitation to share the fruits of your labor with loved ones. The journey to a perfectly risen loaf is just the beginning; the real reward lies in the experience and the connection it fosters.
Unleash Your Inner Baker: Make Amazing Bread Today!
Thanks for taking the time to explore the world of quick and easy whole wheat bread! We hope you're feeling inspired to get baking. Now it's time to put those new skills to the test.
- Bake your own loaf today: Use the recipe from the article as your guide and enjoy the satisfaction of fresh, homemade bread. Let us know how it turns out!
- Share your baking journey: Post a picture of your delicious creation on social media and tag us – we’d love to see it!
- Explore more whole wheat wonders: Dive into our recipe archives for other delicious whole wheat recipes and expand your baking horizons.
Ready to taste the difference homemade bread makes? What other whole wheat treats will you bake next?