
Bake Fluffy Focaccia Consistently: Top Tips

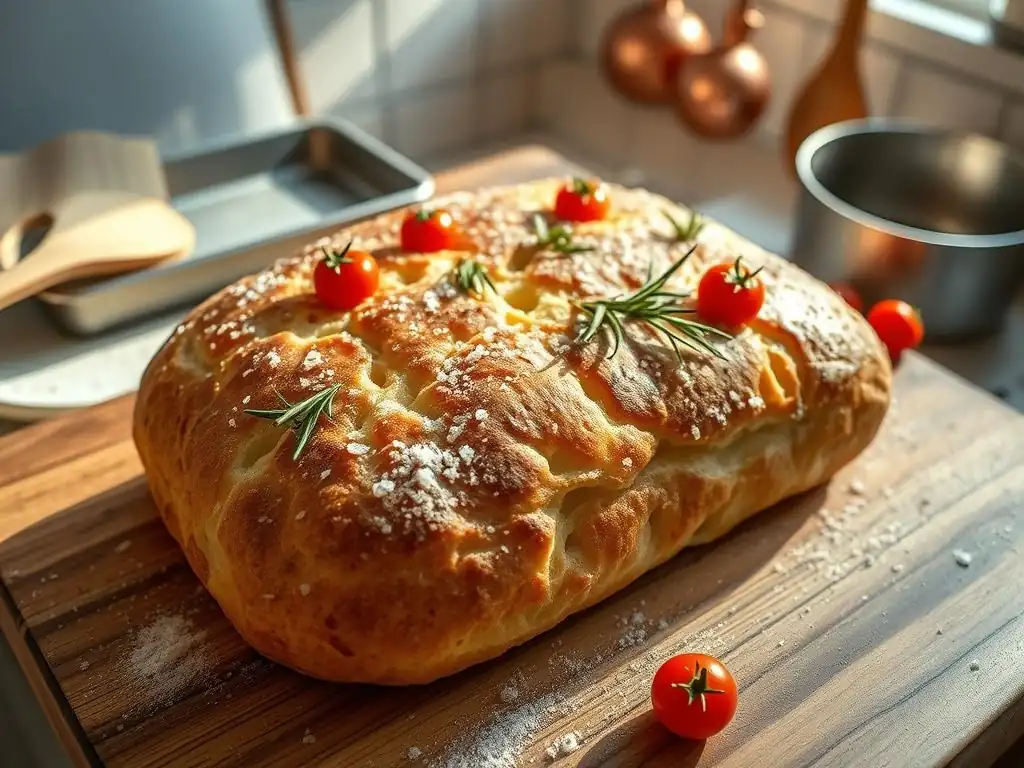
Welcome to BakeWithEase, where baking dreams become delicious realities! Ever struggled to achieve that perfect, airy texture in your focaccia? Unlock the secrets to a consistent fluffy focaccia recipe within, and say goodbye to dense, uneven bread. Dive in to discover our top tips and techniques that will elevate your baking game and leave everyone asking for more. Are you ready to bake focaccia perfection?
- Mastering Focaccia: Techniques for a Light and Airy Texture
- Introduction: Achieving Consistent Focaccia Quality at Home
- Essential Ingredients for Exceptional Focaccia
- Dough Preparation: Achieving the Ideal Focaccia Consistency
- Proofing for Perfect Fluffiness: A Step-by-Step Guide
- Baking to Perfection: Achieving a Golden Crust and Tender Interior
- Topping Strategies: Enhancing Flavor Without Sacrificing Texture
- Cooling and Storage: Preserving Freshness and Texture
- Troubleshooting Common Issues: Achieving Consistent Results
- Conclusion: Elevating Your Focaccia Baking Skills
-
Frequently Asked Questions
- What is the most important factor in achieving a consistent fluffy focaccia?
- How can I ensure my focaccia has a good rise and airy texture?
- What type of olive oil should I use for the best focaccia flavor?
- What are some common mistakes that prevent focaccia from being fluffy?
- Can I add toppings to my focaccia before or after baking?
- Final Reflection: The Enduring Allure of Perfectly Fluffy Focaccia
- Unlock Your Focaccia Flour Power!
Mastering Focaccia: Techniques for a Light and Airy Texture
Introduction: Achieving Consistent Focaccia Quality at Home
Baking focaccia is a wonderfully rewarding experience, offering a delightful combination of a crisp bottom crust, a tender, airy interior, and a flavorful, oil-kissed top. However, achieving that perfect, consistent fluffy focaccia can sometimes feel elusive. Variations in ingredients, technique, and even ambient temperature can lead to results that aren't quite what you hoped for. This article is designed to guide you through the essential steps and nuances of creating a reliable fluffy focaccia every time you bake.
Whether you're aiming for a simple classic or a more elaborate creation, understanding the foundational principles is key. We'll break down each stage of the process, from selecting the right flour to mastering proofing and baking temperatures. By paying attention to these details, you'll be well on your way to perfecting your consistent fluffy focaccia recipe and impressing everyone with your baking prowess. Let's dive into the secrets behind that coveted light and airy texture.
Common Focaccia Baking Mistakes: Identifying and Avoiding Them
One frequent pitfall when baking focaccia is using insufficient hydration. A dough that is too dry will result in a dense, bread-like texture rather than the open, airy crumb characteristic of great focaccia. Many beginner recipes might err on the side of lower hydration to make the dough easier to handle, but this compromises the final texture. Aiming for a higher hydration, often 70-85% water relative to flour weight, is crucial for encouraging the large air pockets that contribute to fluffiness. For example, if using 500 grams of flour, you'd typically use between 350 and 425 grams of water.
Another common issue is inadequate proofing. Focaccia requires significant time for fermentation to develop flavor and structure. Rushing the proofing stages, especially the final rise in the pan, leads to a flat, dense loaf. The dough needs ample time to expand and create the necessary internal structure. Over-proofing is also a risk, resulting in a dough that collapses or has a poor texture. Finding the sweet spot for proofing, often involving multiple hours at room temperature or even a cold fermentation in the refrigerator for enhanced flavor, is vital for a consistent fluffy focaccia.
Essential Ingredients for Exceptional Focaccia
Flour Selection: Understanding Protein Content for Desired Texture
The type of flour you choose significantly impacts the final texture of your focaccia. Protein content dictates gluten development, which in turn provides the structure to trap air and create that light, open crumb. Bread flour, with its higher protein content (typically 12-14%), is often preferred for focaccia because it develops strong gluten networks, allowing the dough to stretch and hold large air bubbles. This contributes directly to a fluffy focaccia.
Using an all-purpose flour (typically 10-12% protein) is also possible and can yield good results, though the texture might be slightly less chewy and open than with bread flour. Some bakers even blend bread flour with a small amount of whole wheat flour for added flavor, though this can affect the texture slightly due to the bran interfering with gluten development. For the most reliable consistent fluffy focaccia recipe, starting with a good quality bread flour is highly recommended.
Olive Oil's Role: Impact on Flavor, Moisture, and Crust
Olive oil is not just a topping for focaccia; it's a crucial ingredient mixed directly into the dough and used generously in the pan. Incorporating olive oil into the dough inhibits gluten development slightly, which helps tenderize the crumb and contributes to a softer interior. It also adds richness and flavor. A good quality extra virgin olive oil will impart a distinct, desirable aroma and taste to the final product.
Using plenty of olive oil in the baking pan is equally important. The oil creates a barrier between the dough and the pan, preventing sticking and, more importantly, frying the bottom crust. This results in that characteristic crisp, golden-brown base that contrasts beautifully with the soft interior. Don't be shy with the oil – a generous coating, often several tablespoons for a standard 9x13 inch pan, is key for achieving the signature focaccia crust and contributing to the overall moisture and texture of your consistent fluffy focaccia.
Yeast Types: Instant Dry vs. Active Dry for Optimal Rise
Yeast is the leavening agent responsible for creating the air pockets that make focaccia light and airy. The two most common types are instant dry yeast and active dry yeast. Instant dry yeast is designed to be mixed directly into the dry ingredients without prior activation. It's reliable and works quickly, making it a popular choice for many focaccia recipes.
Active dry yeast, on the other hand, requires activation in warm water (typically 105-115°F or 40-46°C) before being added to the dry ingredients. This step ensures the yeast is alive and active before you commit it to the dough. While it takes an extra step and slightly longer proofing times compared to instant yeast, some bakers believe active dry yeast contributes to a more complex flavor profile over longer fermentation periods. Both types can produce a consistent fluffy focaccia if used correctly and given adequate time to work.
Dough Preparation: Achieving the Ideal Focaccia Consistency
Hydration Levels: Determining the Right Water Percentage
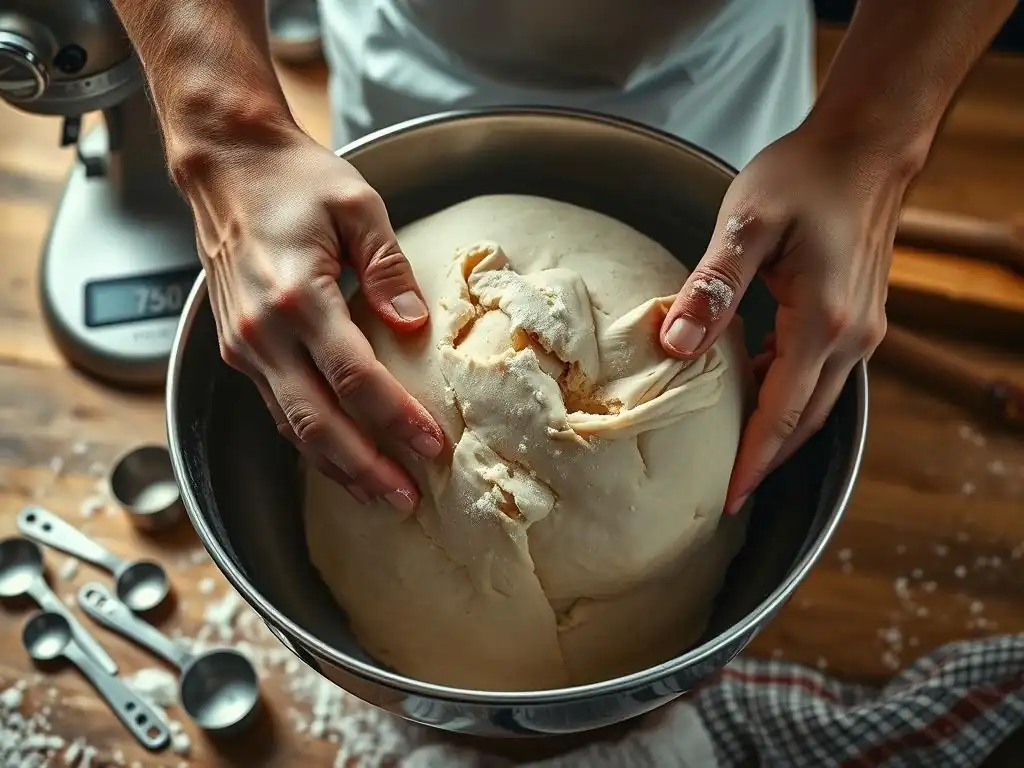
Hydration is the ratio of water to flour by weight, and it's perhaps the most critical factor in achieving a truly fluffy focaccia. High hydration doughs, typically ranging from 75% to 85% or even higher, are inherently wetter and stickier than standard bread doughs, but this high water content is what allows the dough to expand dramatically and form large, irregular air pockets during fermentation and baking. For example, a recipe using 500g of flour might use 375g to 425g of water, resulting in 75-85% hydration.
Working with high-hydration dough can be challenging initially as it's less structured. Techniques like stretch and folds or coil folds, performed wet hands or a bench scraper, are essential for building gluten structure without adding excessive flour. The visual cue for sufficient hydration is a very wet, shaggy dough that eventually smooths out but remains sticky. Adjusting the water slightly based on the flour's absorption rate and ambient humidity is part of mastering a consistent fluffy focaccia recipe.
Kneading Techniques: Developing Gluten for Structure and Air Pockets
While focaccia dough is often very wet, it still requires gluten development to provide the framework for trapping gas produced by the yeast. Traditional kneading can be difficult with high-hydration doughs. Instead, many focaccia recipes employ techniques like stretch and folds or no-knead methods with long fermentation times. Stretch and folds involve wetting your hands, grabbing a portion of the dough, stretching it upwards, and folding it back over itself. This is repeated around the dough, usually every 30-60 minutes during the first few hours of bulk fermentation.
These gentle manipulations align the gluten strands, building strength and elasticity without incorporating too much air initially. This allows the dough to become more manageable and hold its shape better during proofing. Alternatively, a very long, slow fermentation (like 12-24 hours in the refrigerator) can develop gluten through enzymatic activity with minimal handling. Both approaches can lead to the necessary structure for a consistent fluffy focaccia.
Bulk Fermentation: Maximizing Flavor and Dough Strength
Bulk fermentation, also known as the first rise, is the period after mixing where the dough doubles or triples in volume. This is where the yeast does the heavy lifting, producing carbon dioxide that creates air pockets, and where complex flavors develop through enzymatic action. For focaccia, bulk fermentation often takes 1.5 to 3 hours at warm room temperature (around 75-80°F or 24-27°C), or significantly longer (8-24 hours) in a cooler environment like the refrigerator.
During bulk fermentation, performing stretch and folds (typically 2-4 sets in the first couple of hours) is crucial. This builds dough strength, evens out the temperature, and redistributes the yeast and gas. The dough should become noticeably smoother, more elastic, and filled with visible air bubbles. Proper bulk fermentation is fundamental to achieving a consistent fluffy focaccia, as it sets the stage for the final rise and oven spring.
Proofing for Perfect Fluffiness: A Step-by-Step Guide
First Proof: Creating a Robust and Flavorful Dough
The first proof, or bulk fermentation, is the initial rise of the dough after mixing and initial gluten development (through kneading or stretch-and-folds). This stage is critical for building the foundational structure and flavor of your focaccia. The dough is typically placed in a lightly oiled bowl, covered, and left to rise until it has significantly increased in volume – usually doubling or even tripling. The duration varies greatly depending on the ambient temperature and the amount of yeast used; it could be anywhere from 1.5 to 4 hours at room temperature (around 70-75°F or 21-24°C).
During this time, the yeast consumes sugars and produces carbon dioxide gas and alcohol, which contributes to both the rise and the flavor. Performing stretch and folds during the first hour or two helps strengthen the dough and ensures even fermentation. A well-executed first proof results in a robust, airy dough with good elasticity, ready for the next stage of becoming a consistent fluffy focaccia.
Second Proof (Pan Proof): Achieving Optimal Volume and Airiness
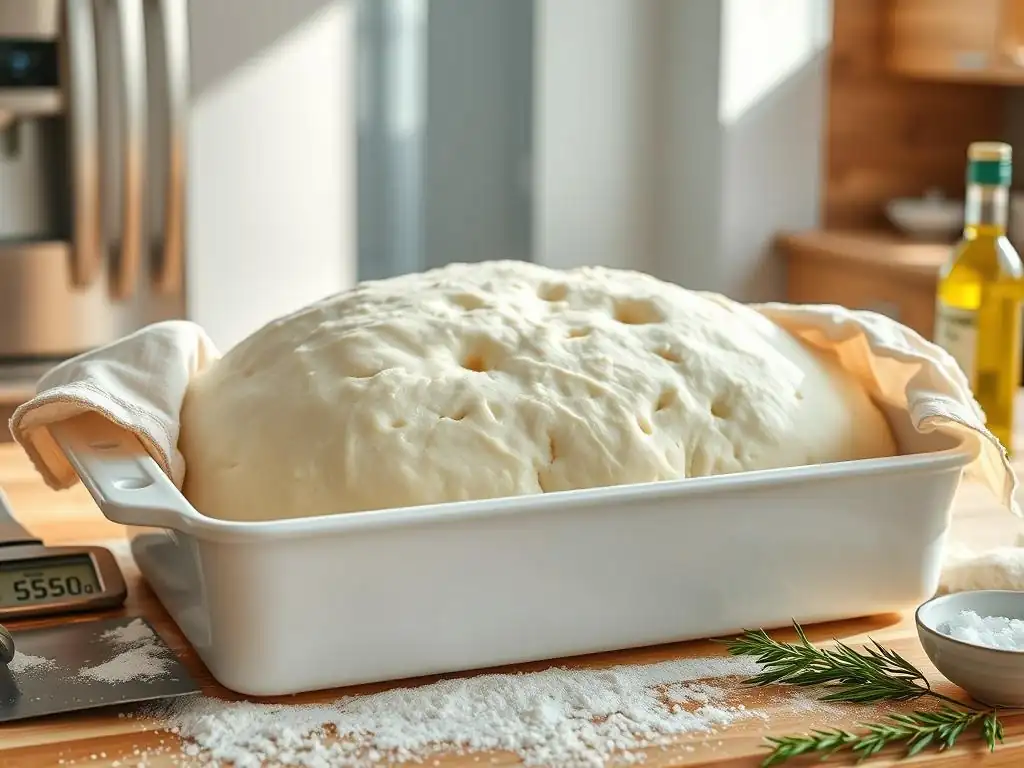
The second proof, also known as the final proof or pan proof, happens after the dough has been transferred to its baking pan and dimpled. This is arguably the most important stage for achieving maximum fluffiness and the characteristic dimpled surface of focaccia. The dough, now spread out in the oiled pan, is allowed to rise again until it is significantly puffy and has regained most of its initial volume. This typically takes 1 to 3 hours at room temperature.
During the pan proof, the dough relaxes into the pan, and the yeast continues to produce gas, filling the dough with air. Gentle dimpling before or early in this stage helps distribute the gas and creates the signature texture. The dough should look visibly pillowy and airy before it goes into the oven. Under-proofing at this stage will result in a dense focaccia, while over-proofing can lead to a collapsed structure. Judging the readiness of the dough by its feel and appearance is key to a consistent fluffy focaccia.
Temperature and Time: Mastering the Proofing Environment
Controlling the proofing environment's temperature and time is vital for predictable results. Yeast activity is highly sensitive to temperature. Warmer temperatures (75-85°F or 24-29°C) accelerate fermentation, while cooler temperatures slow it down. For a relatively quick focaccia (3-4 hours total proofing), a warmer environment is beneficial. You can create a warm spot by placing the covered dough in a turned-off oven with the light on, which typically reaches around 80-85°F (27-29°C).
For enhanced flavor development, a longer, slower proof in the refrigerator (40°F or 4°C) for 12-24 hours is often recommended. This cold fermentation significantly slows yeast activity but allows enzymes to break down starches into sugars, resulting in a more complex taste and often a more manageable dough. Regardless of the temperature chosen, monitoring the dough's volume and feel, rather than strictly adhering to a time, is the best way to ensure your dough is perfectly proofed for a consistent fluffy focaccia.
Baking to Perfection: Achieving a Golden Crust and Tender Interior

Oven Temperature: Optimizing for Even Baking and Texture
Baking temperature is critical for achieving the desired focaccia texture: a golden, crispy crust and a soft, airy interior. Focaccia is typically baked at a relatively high temperature, often between 400°F and 450°F (200°C and 230°C). A hot oven ensures rapid oven spring – the final burst of rising that occurs when the dough hits the heat – which contributes significantly to the dough's internal structure and fluffiness.
Preheating your oven thoroughly is essential. Allow at least 20-30 minutes after the oven reaches the set temperature to ensure the oven walls and rack are fully heated. Baking on a preheated baking stone or steel can also help create a more consistently crisp bottom crust. The high heat helps set the crust quickly while allowing the interior to cook through without drying out, leading to a consistent fluffy focaccia.
Baking Time: Preventing Over-Baking and Maintaining Moisture
The baking time for focaccia varies depending on the oven, the pan size, and the desired level of browning, but it typically ranges from 20 to 30 minutes. The goal is to bake the focaccia until the top is golden brown, the edges are crisp, and the bottom crust is a deep golden brown. Over-baking will dry out the interior, resulting in a tougher, less fluffy focaccia.
You can check for doneness by carefully lifting a corner of the focaccia with a spatula to inspect the bottom crust or by using an instant-read thermometer. The internal temperature should register around 200-210°F (93-99°C). If the top is browning too quickly but the bottom isn't ready, you can tent the focaccia loosely with aluminum foil for the remaining baking time.
Steam Injection: Enhancing Crust Development and Interior Softness
Introducing steam into the oven during the initial stages of baking can significantly improve the crust and texture of your focaccia. Steam keeps the surface of the dough moist for the first few minutes, delaying the formation of the top crust. This allows the dough to expand more fully during oven spring, contributing to a lighter, airier interior. Once the crust begins to set, the steam dissipates, allowing the crust to crisp up beautifully.
You can create steam by placing a heat-safe pan (like a cast iron skillet or broiler pan) on the bottom rack of your oven while it preheats. Just before loading the focaccia, carefully pour about a cup of hot water into the hot pan. Close the oven door quickly to trap the steam. Be cautious when working with hot water and steam. While not strictly necessary for a good focaccia, using steam can help achieve a more reliably crisp crust and a more open crumb structure in your consistent fluffy focaccia.
Topping Strategies: Enhancing Flavor Without Sacrificing Texture
Topping Selection: Choosing Ingredients that Complement the Dough
The beauty of focaccia lies not only in its texture but also in its versatility with toppings. Classic toppings like fresh rosemary and flaky sea salt are simple yet incredibly effective. Other popular choices include olives, cherry tomatoes, thinly sliced onions, garlic, or various herbs. When selecting toppings, consider their moisture content and how they will interact with the dough during baking.
Ingredients like fresh mozzarella or pesto can add wonderful flavor but should be added towards the end of the baking time to prevent the dough from becoming soggy underneath them. Drier toppings like herbs and salt can be added before baking. The key is to choose toppings that enhance, rather than detract from, the delicate structure of your fluffy focaccia.
Even Distribution: Ensuring Uniform Flavor and Texture
Proper distribution of toppings is important for both flavor and texture. Sprinkling flaky sea salt evenly over the surface ensures every bite gets that pleasant salty crunch. Distributing herbs like rosemary evenly means their aromatic oils will infuse the entire loaf. For toppings like cherry tomatoes or olives, spacing them out ensures they cook properly and don't create overly moist spots on the crust.
Dimpling the dough generously before adding toppings helps create little pockets for olive oil and salt to settle, contributing to the signature focaccia experience. When adding toppings into the dimples, ensure they are pressed gently but firmly into the dough so they don't fall off during baking. This attention to detail contributes to a consistent fluffy focaccia with balanced flavor in every piece.
Herb and Oil Infusion: Maximizing Flavor Penetration
A crucial step for maximizing flavor in focaccia is the generous use of olive oil and herbs, often infused. Before baking, after the dough has been dimpled, the surface is typically drenched with a substantial amount of extra virgin olive oil. This oil pools in the dimples, creating flavorful pockets and contributing to the crispness of the top crust.
Fresh herbs, particularly rosemary, are often pressed into the oil-filled dimples. The heat of the oven helps the aromatic oils from the herbs infuse into the olive oil and the top layer of the dough. Some bakers also infuse the olive oil beforehand by warming it gently with garlic cloves or other herbs, then using this infused oil for the final pour-over. This technique ensures a deep, rich flavor penetrates the dough, making your consistent fluffy focaccia even more delicious.
Cooling and Storage: Preserving Freshness and Texture
Cooling Methods: Preventing Soggy Focaccia
Once your beautiful focaccia is out of the oven, proper cooling is essential to prevent the bottom crust from becoming soggy. While it's tempting to slice right in, leaving the focaccia in the hot pan will cause steam to condense on the bottom, softening the crisp crust you worked so hard to achieve.
Immediately transfer the hot focaccia from the baking pan to a wire cooling rack. This allows air to circulate freely around the bottom and sides, allowing steam to escape. Let it cool for at least 15-20 minutes before slicing. This cooling time also allows the internal structure to set properly, resulting in a better texture. Patience during cooling is key to preserving the crisp bottom and fluffy focaccia interior.
Storage Solutions: Maintaining Softness and Preventing Staling
Focaccia is best enjoyed fresh, ideally within a few hours of baking, when its texture is at its peak. However, if you have leftovers, proper storage will help maintain its quality. Once completely cooled, store focaccia at room temperature.
For short-term storage (1-2 days), wrap the focaccia loosely in aluminum foil or place it in a paper bag to allow some air circulation while preventing it from drying out too quickly. Avoid airtight plastic containers or plastic wrap for the initial storage, as this can trap moisture and make the crust soggy. If you need to store it for longer, well-wrapped focaccia can be frozen. Proper storage helps extend the enjoyment of your consistent fluffy focaccia.
Reheating Techniques: Reviving Flavor and Texture
If you need to reheat leftover focaccia, avoid the microwave, which will make it rubbery. The best way to revive focaccia and restore its texture is in the oven or a toaster oven. Preheat your oven to around 350°F (175°C).
Place the focaccia directly on the oven rack or on a baking sheet and heat for 5-10 minutes, or until warmed through and the crust has crisped up again. You can also reheat individual slices in a dry skillet over medium heat for a few minutes per side until the bottom is crisp. Reheating properly brings back the delightful texture, allowing you to enjoy your consistent fluffy focaccia again.
Troubleshooting Common Issues: Achieving Consistent Results
Dense Focaccia: Identifying and Resolving Density Problems
A dense focaccia is a common frustration and usually points to issues with hydration, gluten development, or proofing. If your focaccia is consistently dense, first check your hydration level. Are you using enough water relative to the flour weight? Increasing hydration, perhaps by 5-10%, can make a significant difference. Ensure you are measuring ingredients accurately, preferably by weight using a kitchen scale.
Secondly, consider your gluten development. Did you perform sufficient stretch and folds during the bulk fermentation? The dough should show signs of elasticity and strength. If using a no-knead method, ensure the fermentation time is long enough (e.g., 12-24 hours cold fermentation) for gluten to develop naturally. Lastly, inadequate proofing is a major culprit. Make sure the dough is visibly puffy and airy before baking; it should feel light and full of gas. Addressing these areas will help you achieve a consistent fluffy focaccia.
Flat Focaccia: Diagnosing and Correcting Rise Issues
Flat focaccia, lacking the characteristic height and airy crumb, is usually a sign of insufficient leavening or structure. This could be due to inactive yeast; check the expiration date of your yeast and ensure you're storing it properly (usually in the refrigerator or freezer). If using active dry yeast, confirm it's bubbling and active after proofing in warm water.
Another cause is under-proofing, particularly the final proof in the pan. The dough simply hasn't had enough time to build sufficient gas volume. Ensure the dough is significantly risen and looks airy before it goes into the oven. Over-proofing can also lead to a flat focaccia as the structure might collapse. Look for signs of over-proofing, such as the dough starting to deflate or showing large, irregular bubbles on the surface that pop easily. Adjusting proofing time based on your environment and dough activity is key to a consistent fluffy focaccia.
Uneven Baking: Achieving a Uniformly Golden Crust
Uneven baking, where some parts of the focaccia are darker than others or the bottom is underdone, is often related to oven performance or pan placement. Most home ovens have hot spots, leading to uneven browning. To combat this, rotate your pan halfway through the baking time.
Ensure your oven is fully preheated to the correct temperature. An oven thermometer can verify your oven's accuracy. If the bottom crust is consistently pale, try baking on a preheated baking stone or steel, or placing the pan on a lower rack. Conversely, if the top is browning too quickly, move the pan to a higher rack or tent it with foil. Using a dark metal pan can also contribute to a darker bottom crust compared to a lighter aluminum pan. Adjusting these factors will help you achieve a uniformly beautiful and consistent fluffy focaccia.
Conclusion: Elevating Your Focaccia Baking Skills
Baking a consistent fluffy focaccia is a rewarding journey that combines simple ingredients with careful technique and patience. By understanding the role of hydration, mastering proofing times, and optimizing your baking environment, you can reliably produce focaccia that is light, airy, and full of flavor. Each bake offers an opportunity to refine your skills and learn how the dough responds in your specific kitchen.
Don't be discouraged by initial results that aren't perfect. Pay attention to how your dough looks and feels at each stage, adjust your methods as needed, and keep practicing. With these tips and a commitment to the process, you'll soon be baking delicious, consistent fluffy focaccia that rivals your favorite bakery. Happy baking!
Key Takeaways: Essential Tips for Achieving Focaccia Success
To consistently bake a fluffy focaccia, keep these key points in mind:
- Hydration is King: Aim for high hydration, typically 75-85% water to flour by weight, to encourage an open crumb structure. Don't be afraid of wet dough; use techniques like stretch and folds.
- Proofing Matters: Allow ample time for both bulk fermentation and the final pan proof. Look for visual cues – the dough should be visibly puffy, light, and airy before baking. Cold fermentation can add flavor and structure.
- Hot Oven, Hot Pan: Bake at a high temperature (400-450°F or 200-230°C) in a well-preheated oven, ideally on a baking stone or steel, using plenty of olive oil in the pan, for a crisp bottom and good oven spring.
Remember to use quality ingredients, particularly good bread flour and flavorful extra virgin olive oil. Practice makes perfect, and soon, baking consistent fluffy focaccia will become second nature. Enjoy the process and the delicious results!
Frequently Asked Questions
What is the most important factor in achieving a consistent fluffy focaccia?
The most important factor is accurate measurements and consistent dough hydration. Using a kitchen scale for precise ingredient weights is crucial.
How can I ensure my focaccia has a good rise and airy texture?
A good rise relies on active yeast and a warm environment for proofing. Give the dough enough time to ferment properly.
What type of olive oil should I use for the best focaccia flavor?
Use a high-quality extra virgin olive oil for both the dough and the topping. It contributes significantly to the focaccia's overall flavor profile.
What are some common mistakes that prevent focaccia from being fluffy?
Overworking the dough, using old or inactive yeast, and not allowing enough time for proofing are common pitfalls. Avoid these to achieve optimal fluffiness.
Can I add toppings to my focaccia before or after baking?
It's best to add most toppings, like herbs and olives, before baking. This allows them to infuse their flavor into the dough. Delicate toppings, such as fresh tomatoes, can be added after baking to prevent burning.
Final Reflection: The Enduring Allure of Perfectly Fluffy Focaccia
The pursuit of the perfect focaccia, consistently fluffy and flavorful, is more than just a culinary quest; it's a reflection of our desire for mastery and the simple joy of creating something beautiful. This article explored the nuances of achieving that perfect texture, from the careful selection of ingredients to the precise techniques involved in kneading, proofing, and baking. The consistent results, however, are worth the effort.
The journey of baking focaccia, much like life itself, is filled with both triumphs and setbacks. The frustration of a dense loaf is quickly overshadowed by the satisfaction of achieving that airy, pillowy crumb. The best things in life are worth fighting for,
and a perfectly fluffy focaccia is certainly one of them. This pursuit connects us to a rich culinary heritage, reminding us of the importance of patience, precision, and the rewarding feeling of creating something delicious from simple ingredients.
Now, I invite you to take what you've learned and embark on your own focaccia adventure. Don't be afraid to experiment, to adjust the recipe to your own tastes, and to embrace the learning process. Each loaf, whether perfectly fluffy or slightly less so, is a step towards mastering this beautiful art. The journey is as important as the destination, and the reward of a perfectly risen, golden-brown focaccia is a testament to your dedication and skill. So, gather your ingredients, preheat your oven, and let the baking begin!
Unlock Your Focaccia Flour Power!
Thanks for joining us on this focaccia journey! We hope you've picked up some delicious tips and tricks to elevate your baking game. Now it's time to put your new skills to the test!
- Bake your dream focaccia: Don't just read about it—make it! Try out your favorite new technique from the article and see the difference. Share your results with us (we'd love to see it! ).
- Experiment with different toppings: Beyond rosemary and sea salt, what other flavor combinations are you excited to explore? Think olives, sun-dried tomatoes, or even figs!
- Join our baking community: Connect with other passionate bakers in our comments section below. Share your tips, recipes, and focaccia triumphs (and even your flops!) – we’re all learning together!
Ready to transform your kitchen into a fragrant focaccia haven? What's the first topping you'll be experimenting with?