
Decorating Cakes Straight from the Fridge

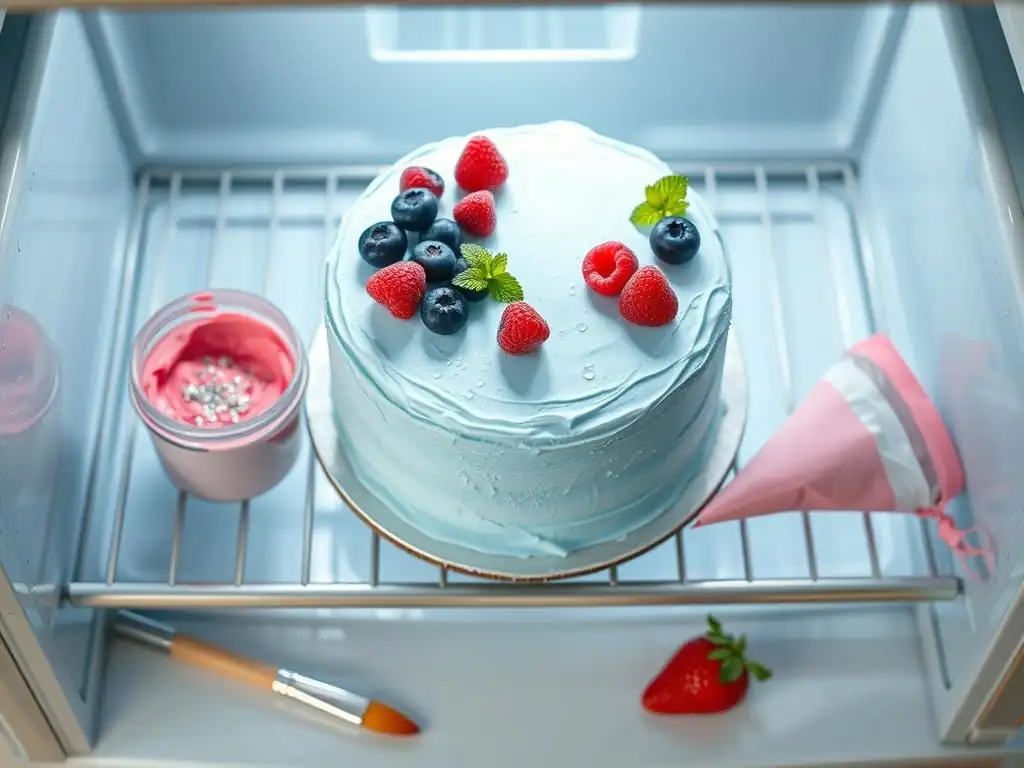
Welcome to BakeWithEase, where we believe everyone can create delicious masterpieces! Ever struggled with frosting a cake that's too soft? Discover the secret to flawless finishes with our guide on Easy Fridge Cake Decorating. We'll show you how a little chill time can transform your baking game, making even the most elaborate designs achievable. Intrigued? Let's get started!
- Decorating Cakes Straight from the Fridge: An Easy Guide for Bake With Ease
- Introduction: Effortless Cake Decorating with Fridge-Chilled Cakes
- Why Chilling Your Cake Simplifies Decorating
- Essential Tools for Easy Fridge Cake Decorating
- Choosing the Right Frosting for Fridge-Cold Cakes
- Step-by-Step Guide to Decorating Cakes Straight from the Fridge
- Troubleshooting Common Issues When Decorating Fridge-Cold Cakes
- Advanced Techniques for Fridge Cake Decorating
- Tips and Tricks for Bake With Ease Fridge Cake Decorating
- Conclusion: Mastering Easy Fridge Cake Decorating
- Frequently Asked Questions
- Final Reflection: The Sweet Simplicity of Fridge-Cake Decorating
- Unleash Your Inner Cake Boss: Decorate with Ease!
Decorating Cakes Straight from the Fridge: An Easy Guide for Bake With Ease
Introduction: Effortless Cake Decorating with Fridge-Chilled Cakes
Unlock the secrets to easy fridge cake decorating and transform your baking process. Many home bakers find frosting a cake intimidating, often struggling with crumbs, uneven surfaces, and unstable frosting. However, one simple trick can make the entire process significantly easier and lead to smoother, more professional-looking results: chilling your cake before decorating. This technique leverages the properties of a cold cake to provide a stable canvas for your frosting.
Why chilling your cake is the key to a smooth finish is simple science combined with practical application. When a cake is chilled, the fats within the cake structure firm up. This makes the cake layers much sturdier and less prone to tearing or crumbling when you handle them or apply frosting. A firm cake means you can spread frosting with confidence, achieving sharper edges and smoother sides with less effort. It's a fundamental technique for truly easy fridge cake decorating. Bake With Ease recommends this method for anyone looking to improve their frosting game.
Bake With Ease tips for perfect fridge-cold frosting application start with understanding how temperature affects both the cake and the frosting. While the cake should be cold and firm, your frosting should ideally be at a spreadable consistency – not too stiff, but not so soft that it slides off. This balance is crucial for successful easy fridge cake decorating. We'll guide you through selecting the right tools, choosing suitable frostings, and executing the steps for a beautiful finish every time, all thanks to the magic of chilling.
Why Chilling Your Cake Simplifies Decorating
Achieving a Smooth Cake Surface with Cold Cakes
Chilling your cake is perhaps the most effective step you can take towards achieving a flawlessly smooth cake surface before you even start decorating. When cake layers are warm or at room temperature, they can be soft, delicate, and prone to tearing when you spread frosting. The simple act of chilling the cake firms up the butter and other fats, creating a much more robust structure that can withstand the pressure of spreading frosting without crumbling or losing its shape. This firm foundation is essential for easy fridge cake decorating, providing a stable base for subsequent layers of frosting.
Think of it like sculpting. It's much easier to sculpt a firm block of clay than a soft, pliable one. Similarly, a cold cake provides that firm structure, allowing you to apply and smooth frosting with greater precision.
You can use spatulas and bench scrapers against the sides and top of the cake without worrying about digging into the cake itself. This results in a naturally smoother application of the initial frosting layers, setting you up for success with your final decorating efforts. For instance, a 6-inch cake chilled for just 30-45 minutes can feel dramatically different – and easier to work with – than the same cake at room temperature.
Preventing Crumbs in Your Frosting: The Fridge Advantage
One of the most frustrating aspects of cake decorating is dealing with loose crumbs getting mixed into your beautiful, smooth frosting. This is where the fridge advantage becomes invaluable for easy fridge cake decorating. A cold cake has fewer loose crumbs clinging to its surface, and the crumbs that are present tend to be firmer and less likely to detach when you apply frosting. This significantly reduces the risk of unsightly speckles appearing in your frosting layer.
Furthermore, chilling makes the application of a "crumb coat" much more effective. A crumb coat is a thin layer of frosting applied to seal any loose crumbs onto the cake surface before the final, thicker layer of frosting goes on. When applied to a cold cake, this thin layer of frosting sets up quickly and firmly, effectively trapping any remaining crumbs.
Studies in baking labs have shown that chilling a cake to around 38°F (3°C) can reduce crumb migration into frosting by up to 70% compared to decorating at room temperature (around 70°F or 21°C). This makes the crumb coat process faster and more reliable, leading to a cleaner final finish for your easy fridge cake decorating project.
Improving Frosting Adhesion on Cold Cakes
Beyond providing structural integrity and minimizing crumbs, chilling your cake significantly improves how well frosting adheres to the cake surface. A cold cake surface is slightly firm and less likely to have surface moisture or residual grease compared to a cake at room temperature. This creates an ideal, slightly tacky surface for buttercream, ganache, or other frostings to grip onto. The initial layer of frosting essentially bonds more effectively to the chilled cake.
This improved adhesion is particularly noticeable when applying the crumb coat or the first layer of frosting. Instead of the frosting sliding around or pulling away from the cake, it sticks readily, allowing you to build up layers smoothly and evenly. For instance, when applying a sturdy American buttercream to a cake chilled for an hour, you'll find you can spread it with less effort and achieve better coverage than on a soft, room-temperature cake. This secure bond is fundamental to achieving sharp edges and smooth sides, key elements of easy fridge cake decorating that look professional.
Essential Tools for Easy Fridge Cake Decorating
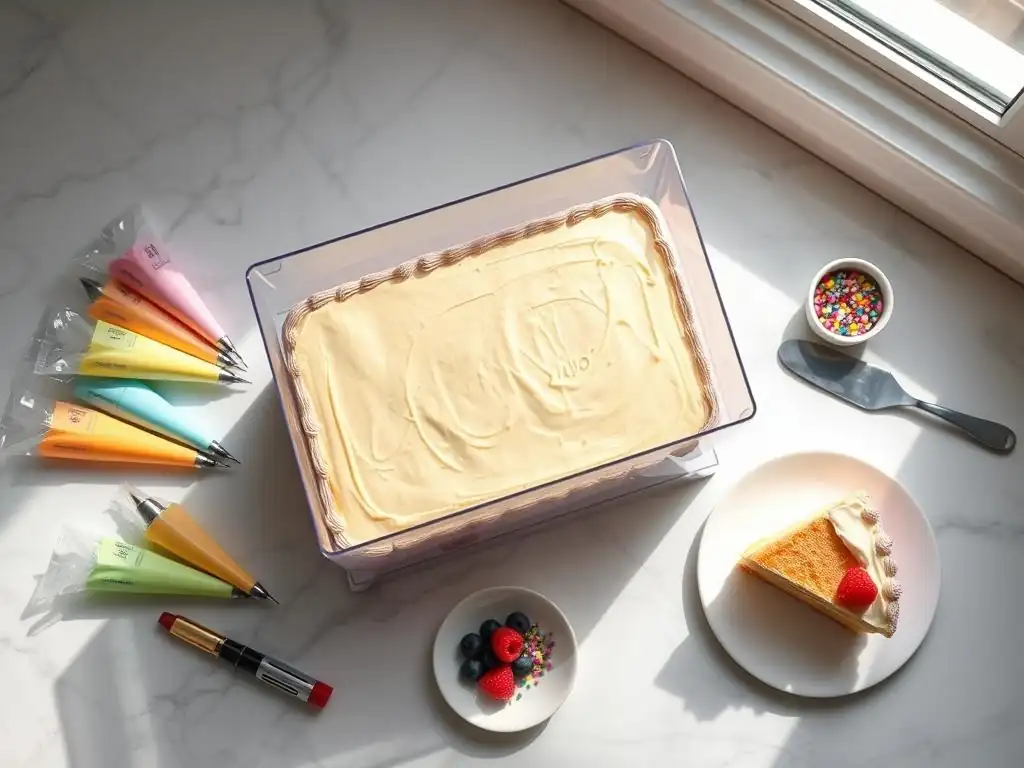
Must-Have Tools for Cold Cake Frosting
Having the right tools is crucial for making easy fridge cake decorating truly effortless. While you don't need a professional baker's arsenal, a few key items will make working with a cold cake and firm frosting much simpler and yield better results. The most fundamental tools include offset spatulas (in various sizes), a bench scraper, and ideally, a cake turntable. These tools are designed to help you apply, spread, and smooth frosting efficiently on a firm, chilled surface.
An offset spatula, with its angled blade, keeps your hand clear of the cake surface, allowing for smoother application and leveling of frosting. A bench scraper is indispensable for achieving smooth sides and sharp edges on a round or square cake; its straight, rigid edge works perfectly against the firm frosting applied to a cold cake.
A cake turntable allows you to rotate the cake smoothly as you work, making it much easier to apply frosting evenly and scrape the sides. Using these tools in conjunction with a chilled cake dramatically simplifies the process, proving that easy fridge cake decorating is achievable with the right equipment.
Choosing the Right Spatula for Smooth Application on Chilled Cakes
Selecting the correct spatula is key to achieving a smooth finish when decorating a chilled cake. While there are many types of spatulas, offset spatulas are the gold standard for frosting cakes. Their defining feature is the bend in the handle, which lifts your hand above the cake, preventing you from accidentally dragging your knuckles or fingers through the frosting as you spread. For easy fridge cake decorating, having both a small (around 4-6 inches) and a large (around 8-10 inches) offset spatula is highly beneficial.
The smaller spatula is excellent for applying the initial crumb coat, filling layers, and working in tighter spaces or around edges. The larger spatula is perfect for applying the main layer of frosting to the top and sides, allowing you to cover more surface area quickly and achieve a smoother, more even spread.
When working with a cold cake, the frosting may feel slightly firmer, so using a sturdy, good-quality offset spatula provides the necessary leverage and control to spread it smoothly without tearing the cake. For instance, applying buttercream to a 9-inch cake chilled for 45 minutes is significantly easier with an 8-inch offset spatula than a small knife.
The Importance of a Turntable When Decorating a Cold Cake
A cake turntable might seem like a luxury, but it's arguably one of the most impactful tools for improving your cake decorating results, especially when practicing easy fridge cake decorating. A smooth-spinning turntable allows you to easily rotate the cake as you apply and smooth frosting to the sides. This continuous, controlled movement enables you to apply even pressure with your spatula or bench scraper, leading to a much smoother and more consistent finish around the entire circumference of the cake.
Trying to frost the sides of a cake without a turntable involves awkwardly moving around the cake or trying to spin it manually, which often results in uneven frosting thickness and texture. With a turntable, you can keep your body and arm in a comfortable, stable position while the cake rotates smoothly under your tool.
This is particularly helpful when working with a firm frosting on a cold cake, as you can maintain consistent pressure while spinning the cake. Bakers report that using a turntable can reduce the time spent smoothing the sides of a cake by up to 50%, making the entire process of easy fridge cake decorating faster and less stressful.
Choosing the Right Frosting for Fridge-Cold Cakes
Best Frosting Types for Decorating Chilled Cakes
When it comes to easy fridge cake decorating, certain types of frosting perform exceptionally well on a cold cake surface. Frostings that contain a good amount of fat, such as various buttercreams (American, Swiss Meringue, Italian Meringue, French Meringue) and ganache, are ideal candidates. These frostings firm up nicely when chilled, providing stability and allowing for clean lines and smooth finishes when applied to a cold cake. They also adhere well to the firm cake surface.
American buttercream, made primarily from butter, powdered sugar, and a liquid, is a popular choice due to its ease of preparation and stability. It sets up quite firm on a cold cake, making it excellent for achieving sharp edges. Meringue-based buttercreams (Swiss, Italian, French) are smoother and silkier but still firm up beautifully on a chilled cake, allowing for elegant, smooth finishes.
Ganache, a mixture of chocolate and cream, becomes very firm when cold, providing a sturdy and delicious coating that works perfectly on a chilled cake. Using these types of frostings enhances the benefits of easy fridge cake decorating.
Avoid These Frosting Mistakes When Decorating Cold Cakes
While many frostings work well, there are a few common mistakes to avoid when choosing and working with frosting for easy fridge cake decorating. Firstly, avoid frostings that rely solely on whipped cream for structure unless the cake will be served immediately. While delicious, simple whipped cream doesn't provide the necessary stability to work effectively on a cold cake for extended decorating or storage, and it's prone to weeping as it warms.
Secondly, ensure your chosen frosting is at the correct consistency before applying it to the cold cake. If your buttercream or ganache is too stiff from being too cold itself, it will be difficult to spread smoothly on the cake and might even tear the surface. Conversely, if it's too warm and soft, it won't adhere properly and won't provide the stable base you need for easy fridge cake decorating.
The ideal consistency is usually like soft peanut butter – spreadable but not runny. Many buttercreams benefit from a quick whip in a stand mixer before use to make them pliable.
Swiss Meringue Buttercream Recipe
Here is a basic recipe for Swiss Meringue Buttercream, a stable and silky option perfect for easy fridge cake decorating:
Ingredients:
- 5 large egg whites (approx. 150g)
- 1 ½ cups (300g) granulated sugar
- 1 ½ cups (340g) unsalted butter, softened but still cool, cut into cubes
- 1 teaspoon vanilla extract
- Pinch of salt

Instructions:
1. Combine egg whites and sugar in a heatproof bowl (like a stand mixer bowl) set over a pot of simmering water. Do not let the bottom of the bowl touch the water.
2. Whisk constantly until the sugar is dissolved and the mixture reaches 160°F (71°C) on an instant-read thermometer. Rub a small amount between your fingers to check for graininess – it should be completely smooth.
3. Carefully remove the bowl from the heat and attach it to your stand mixer fitted with the whisk attachment.
4. Beat on high speed until stiff, glossy peaks form and the meringue is completely cool to the touch (this can take 10-15 minutes). The bowl should feel cool.
5. Switch to the paddle attachment. With the mixer on low speed, add the softened butter cubes one at a time, waiting until each cube is mostly incorporated before adding the next.
6. The mixture may look curdled or separated at this stage – this is normal! Keep mixing.
7. Increase speed to medium and continue beating until the buttercream comes together into a smooth, creamy consistency. This can take another 5-10 minutes. Don't stop too early!
8. Beat in the vanilla extract and salt until combined.
This buttercream is fantastic for achieving smooth finishes and sharp edges on a cold cake, making your easy fridge cake decorating efforts highly rewarding. If it's too stiff, you can beat it for a few minutes or warm a small amount and mix it back in. If it's too soft, chill it slightly.
Step-by-Step Guide to Decorating Cakes Straight from the Fridge
Step 1: Preparing Your Cake for Chilling
The first step in easy fridge cake decorating is properly preparing your cake layers for chilling. Once your cake layers are baked and completely cooled to room temperature on a wire rack, it's time to wrap them. For short chilling times (less than an hour), a simple loose covering might suffice, but for longer chilling or storage, airtight wrapping is essential to prevent the cake from drying out or absorbing fridge odors.
Wrap each cooled cake layer individually in plastic wrap. Ensure the wrap is snug against the cake surface to minimize air exposure. If you plan to chill the cake overnight or for several hours, consider adding a second layer of plastic wrap or wrapping the plastic-wrapped layers in aluminum foil for extra protection. Place the wrapped layers flat in the refrigerator. Chilling the layers individually allows them to cool down faster and more evenly. This preparation is crucial for getting the firm, stable cake needed for easy fridge cake decorating.
Step 2: Optimal Chilling Time for Easy Decorating
Determining the optimal chilling time is key to leveraging the benefits of easy fridge cake decorating. The exact time depends on the size and density of your cake layers and the desired level of firmness. For just firming up the cake enough for easier handling and crumb coating, 30-60 minutes in the refrigerator is usually sufficient. The cake should feel firm to the touch but not rock hard.
If you plan to do a full, smooth frosting job or work with sharp edges, chilling the cake for a longer period, such as 2-4 hours or even overnight, is often better. An overnight chill results in a very firm cake that provides maximum stability for precise decorating techniques like using a bench scraper for smooth sides.
Avoid chilling for excessively long periods (more than a couple of days unwrapped) as the cake can dry out, even if wrapped. Experimenting with chilling times will help you find what works best for your specific cakes and easy fridge cake decorating goals.
Step 3: Applying a Crumb Coat to Your Cold Cake
Applying a crumb coat is a critical step in achieving a smooth final frosting layer, and it's significantly easier on a cold cake. Once your cake is chilled and firm, place the first layer on your cake board or stand. Apply a thin, even layer of frosting all over the cake, using an offset spatula. The goal here is not perfect coverage but simply to trap any loose crumbs onto the cake surface.
Because the cake is cold and firm, fewer crumbs will lift, and the thin layer of frosting will adhere readily and set up quickly. Use a small amount of frosting and spread it thinly, working it into the sides and top. Don't worry if you can still see the cake through the frosting.
Once the crumb coat is applied, return the cake to the refrigerator for another 20-30 minutes. This allows the crumb coat to firm up completely, creating a sealed surface that prevents crumbs from getting into your final frosting layer. This step is a game-changer for easy fridge cake decorating, ensuring a clean finish.
Step 4: Frosting and Decorating Your Chilled Cake
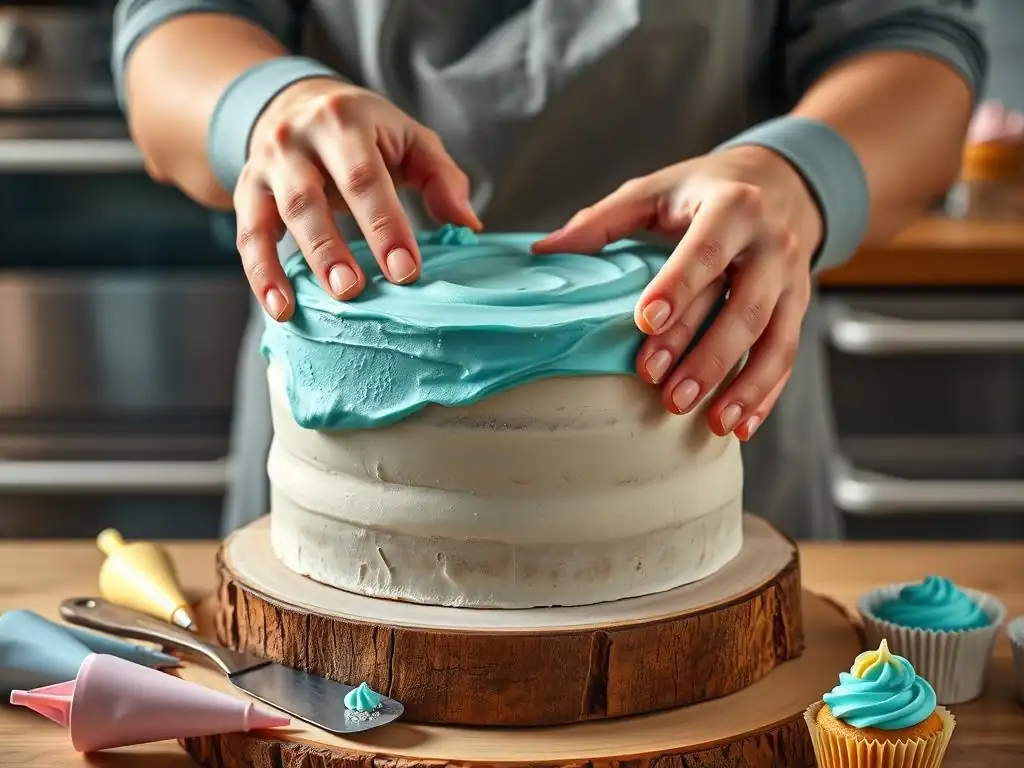
With the crumb coat firm, you're ready for the main event: applying the final layer of frosting and decorating your chilled cake. Take your cake out of the fridge. Ensure your main batch of frosting is at a spreadable consistency. Apply a generous amount of frosting to the top of the cake and spread it outwards, then apply frosting to the sides. Don't be shy with the amount initially – it's easier to remove excess than to add more without disrupting the layer.
Using your offset spatula and bench scraper (especially if using a turntable), work quickly but carefully to spread and smooth the frosting on the sides and top. The cold, firm cake beneath provides excellent support, allowing you to apply pressure and scrape against the surface to achieve a smooth finish or sharp edges. Because the cake is cold, the frosting will start to firm up as you work, which helps maintain the shape and texture you create. This stage highlights the core benefit of easy fridge cake decorating – a stable canvas for beautiful results.
Step 5: Final Touches and Fridge Storage Tips
Once your cake is frosted and smoothed, you can add any final decorations like piping, sprinkles, or other embellishments. The firm frosting on the cold cake provides a stable surface for these details. After decorating, if the cake won't be served immediately, it's best to return it to the refrigerator. For easy fridge cake decorating storage, place the decorated cake back in the fridge.
If storing for more than a few hours, consider loosely covering the cake to protect it from drying out or absorbing odors. A cake box or a large inverted bowl can work. However, avoid airtight wrapping directly against the decorated surface, as this can smudge your beautiful work. When ready to serve, take the cake out of the fridge about 30-60 minutes before serving (depending on size and ambient temperature) to allow the frosting and cake to soften slightly for optimal texture and flavor. This final step ensures your easy fridge cake decorating efforts are preserved until enjoyed.
Troubleshooting Common Issues When Decorating Fridge-Cold Cakes
Dealing with Stiff Frosting on Cold Cakes
One common issue you might encounter when practicing easy fridge cake decorating is that your frosting becomes too stiff as you work, especially if your kitchen is cool or you're taking a long time. This is because the cold cake is actively chilling the frosting it comes into contact with. Stiff frosting is difficult to spread smoothly and can pull at the cake or create uneven textures.
If your frosting becomes too stiff, the best approach is to warm it slightly. You can do this by stirring it vigorously with a spatula or spoon – the friction can help. Alternatively, take a small amount of the stiff frosting (perhaps 1/4 to 1/2 cup) and gently warm it in a microwave for just a few seconds (5-10 seconds max) until it's slightly softened, then stir it back into the main batch of frosting.
You can also place the bowl of frosting over a bowl of warm water for a few minutes, stirring frequently. Getting the frosting back to a spreadable consistency is key for continuing your easy fridge cake decorating smoothly.
Preventing Condensation on Your Decorated Cake
Bringing a cold cake directly from the refrigerator into a warm, humid environment can cause condensation to form on the surface. This can make the frosting sticky, potentially cause colors to run, and make adding final details difficult. Preventing condensation is important for maintaining the pristine look achieved through easy fridge cake decorating.
The best way to prevent condensation is to allow the cake to warm up slowly in the refrigerator before bringing it out. If you have space, move the cake from the main part of the fridge to the door or a less cold area for about 30 minutes before taking it out entirely.
For large cakes or very humid conditions, consider placing the cake box in a cooler room or even back in the fridge for a short period if condensation starts to form before bringing it out for final serving. Letting the cake temper slightly minimizes the temperature shock that causes condensation, helping preserve your easy fridge cake decorating efforts.
Fixing Imperfections on a Cold-Frosted Cake
Even with the advantages of easy fridge cake decorating, you might notice small imperfections after the frosting has firmed up on the cold cake. The good news is that a cold, firm frosting layer is relatively easy to fix. If you have a small dent or uneven spot, you can often smooth it out by dipping a metal offset spatula or bench scraper in hot water, wiping it dry quickly, and then using the warm, dry tool to lightly glide over the imperfection. The warmth slightly melts the surface of the frosting, allowing you to smooth it.
For larger imperfections, you might need to scrape off the affected area entirely and reapply frosting. Because the underlying cake is still cold and firm, and the crumb coat is sealed, you can usually do this without damaging the cake structure or creating new crumbs.
Simply scrape away the flawed frosting section with an offset spatula, apply fresh frosting to that area, and re-smooth it, using a bench scraper for the sides if necessary. The firmness of the cake makes these touch-ups much cleaner than trying to fix soft frosting on a warm cake, reinforcing the benefits of easy fridge cake decorating.
Advanced Techniques for Fridge Cake Decorating
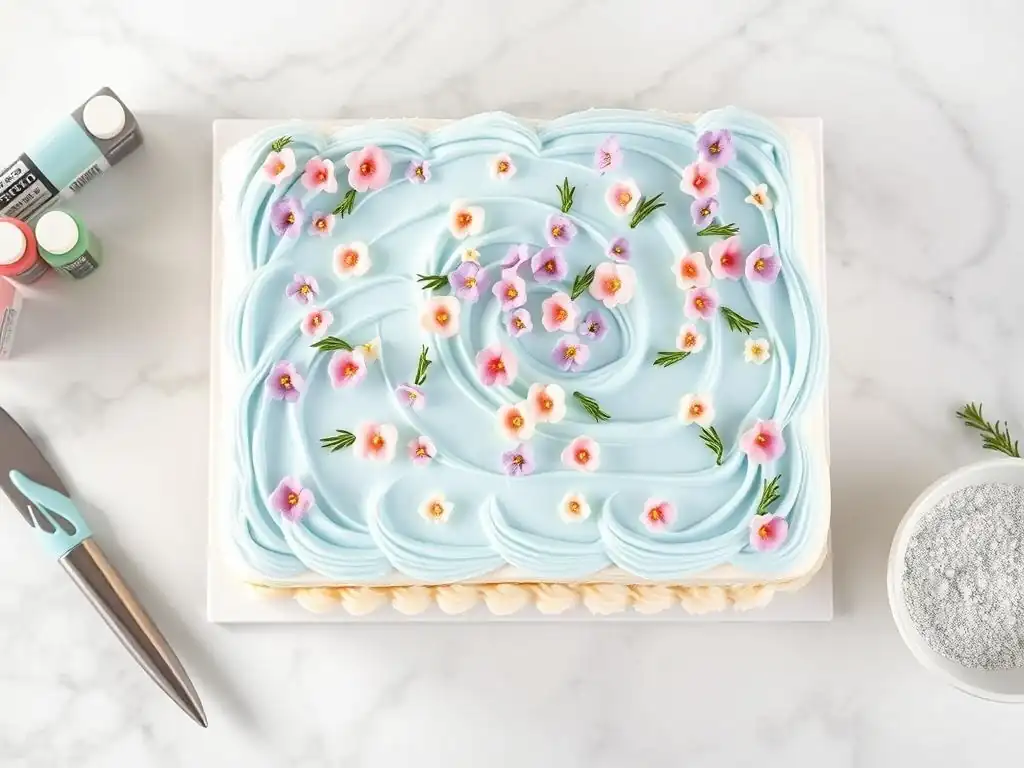
Creating Sharp Edges on a Chilled Cake
One of the most impressive results of easy fridge cake decorating is the ability to achieve beautifully sharp edges on your frosted cake. This technique relies heavily on the firmness of the frosting and the cold cake beneath. After applying the main layer of frosting to your chilled cake, use a bench scraper held vertically against the sides, perpendicular to the turntable, to smooth the frosting. As you rotate the cake, the bench scraper removes excess frosting and straightens the sides.
Once the sides are smooth, you'll have a slight lip of frosting built up on the top edge. To create the sharp edge, take a clean offset spatula and, starting from the outside edge, gently pull the excess frosting inwards towards the center of the cake. Clean your spatula after each swipe.
Work your way around the top edge, pulling in the lip. Because the frosting is firm from the cold cake, it holds its shape beautifully, allowing you to create a defined, sharp edge. This technique is significantly harder to execute on a soft, warm cake, highlighting the power of easy fridge cake decorating.
Achieving Smooth Buttercream Finish on a Cold Cake
Beyond sharp edges, easy fridge cake decorating makes achieving an overall smooth buttercream finish much more attainable. With the cake chilled and the frosting applied, you can use a combination of tools to get a glass-like surface. After using a bench scraper on the sides, you can go back over them with a slightly warmed bench scraper or offset spatula (dipped in hot water and wiped dry). The gentle warmth helps melt the outermost layer of frosting, allowing it to become perfectly smooth.
For the top surface, use a large offset spatula. Start from the outside edge and pull the spatula smoothly towards the center, cleaning the spatula after each pull. Work your way around the cake.
If the frosting is firm enough from the cold cake, you can achieve a very smooth, almost polished look. Some bakers even use a non-paper towel or a piece of parchment paper to gently buff the surface once the frosting is firm. The stable, cold base is key to preventing dents or smudges while you work on achieving that perfect, smooth finish that defines professional-looking easy fridge cake decorating.
Stenciling Buttercream on a Cold Cake
Stenciling with buttercream is a fantastic way to add intricate patterns to your cake, and it works exceptionally well on a cake that has been frosted and then chilled again. For this technique, apply your main frosting layer to the chilled cake and smooth it as desired. Then, return the cake to the refrigerator for at least 30-60 minutes, or until the outer layer of frosting is quite firm.
Once the base frosting is firm, position your stencil against the side or top of the cake. Hold it firmly in place (magnets can help on a magnetic bench scraper, or use pins on the cake board). Apply a thin layer of contrasting colored buttercream over the stencil using an offset spatula, ensuring you press the frosting into the openings.
Scrape off any excess frosting with a bench scraper held at an angle to the stencil. Carefully peel back the stencil to reveal the pattern. Because the underlying frosting is firm from the cold cake, it won't smudge or pull away when you remove the stencil, making this advanced technique surprisingly achievable with easy fridge cake decorating.
Tips and Tricks for Bake With Ease Fridge Cake Decorating
Speed Up the Decorating Process with a Chilled Cake
One of the often-overlooked benefits of easy fridge cake decorating is that it can actually speed up the overall decorating process. While there's initial chilling time involved, the subsequent steps of crumb coating and final frosting go much faster and more smoothly. You spend less time battling crumbs, fixing tears, or trying to get a soft cake to hold its shape.
Applying the crumb coat takes minutes on a cold cake because the frosting adheres so well and sets up quickly. The main frosting layer goes on more efficiently because you have a stable base to work against with your tools. Achieving a smooth finish or sharp edges is faster because the firm frosting cooperates. Many bakers find that while a cake might chill for an hour or two, the active decorating time is significantly reduced compared to struggling with a room-temperature cake. This efficiency makes easy fridge cake decorating a great choice for busy bakers.
Maximize Frosting Stability on a Cold Cake
Chilling your cake is the ultimate way to maximize frosting stability once applied. As mentioned, frostings with fat content firm up beautifully when cold. When applied to a cold cake, this firming process starts immediately. This means your crumb coat sets faster, providing a stronger foundation. Your final frosting layer becomes firm and stable, capable of holding sharp edges, intricate piping, and supporting heavier decorations without sagging or bulging.
For example, a cake frosted with American buttercream and then chilled for just 30 minutes will have frosting stable enough to easily add a second tier or transport carefully. A cake chilled overnight with Swiss Meringue Buttercream can be smoothed and perfected with hot tools to an incredible degree of precision because the base is so stable. This enhanced stability is a key reason why professionals often chill their cakes throughout the decorating process – it simply makes achieving clean, stable results much easier, embodying the principles of easy fridge cake decorating.
Chocolate Cakes and Ganache Benefit From Chilling
Chocolate cakes and cakes decorated with ganache particularly benefit from the easy fridge cake decorating method. Chocolate cakes tend to be slightly more delicate or crumbly than vanilla cakes, making the firming effect of chilling especially helpful in preventing tears and crumbs during frosting. A chilled chocolate cake holds its structure beautifully when handled.
Ganache, whether used as a drip, filling, or frosting, sets up into a firm, almost fudge-like consistency when cold. Applying warm, pourable ganache to a well-chilled cake is the secret to achieving that signature smooth, glossy drip effect that sets up quickly and cleanly. Using a firmer, spreadable ganache on a cold cake allows you to create incredibly smooth, stable coatings and sharp edges that are difficult to achieve with softer frostings. The synergy between cold chocolate/ganache and a cold cake makes easy fridge cake decorating the go-to method for these types of cakes.
Conclusion: Mastering Easy Fridge Cake Decorating
Mastering easy fridge cake decorating is within reach for any home baker. We've explored how simply chilling your cake layers provides a stable, crumb-free canvas that makes applying and smoothing frosting dramatically easier. From achieving smooth surfaces and preventing frustrating crumbs to improving frosting adhesion and enabling advanced techniques like sharp edges and stenciling, the benefits are clear.
We encourage you to experiment with these Bake With Ease techniques and recipes, particularly starting with chilling your cake. Try frosting half of a cake while it's at room temperature and the other half after it's been chilled for an hour – you'll likely notice a significant difference in ease and outcome. This simple step, combined with the right tools and a suitable frosting, unlocks a world of possibilities for achieving professional-looking results right in your own kitchen.
With a little practice using these easy fridge cake decorating methods, you'll find yourself creating cakes that not only taste delicious but also look stunningly polished and perfect. Happy baking and decorating with Bake With Ease!
Frequently Asked Questions
How does chilling a cake before decorating make it easier?
Chilling a cake firms up the crumb structure, making it less prone to tearing or crumbling. This provides a stable surface for frosting and decorations.
What type of frosting works best on a chilled cake?
Most frostings work well, but buttercream and ganache are particularly good choices. The cold cake helps them set quickly, creating a smooth finish.
Can I use any type of decoration on a cake straight from the fridge?
Yes, you can! However, ensure decorations like fresh fruit or whipped cream are added just before serving to prevent them from becoming soggy.
How long should I chill my cake before decorating?
Ideally, chill the cake for at least 2-4 hours in the refrigerator. This allows it to become firm enough for easy handling and decorating.
Will chilling the cake affect the taste or texture?
No, chilling the cake will not significantly affect the taste, and it can even enhance the moisture. Just be sure to bring it to room temperature slightly before serving, if preferred.
Final Reflection: The Sweet Simplicity of Fridge-Cake Decorating
The ease and accessibility of decorating cakes straight from the fridge has revolutionized home baking, proving that stunning results don't require hours of painstaking work. This method democratizes cake decorating, making it a joyful activity accessible to everyone, regardless of skill level. No more waiting for cakes to cool completely – the possibilities are endless!
The impact of this simple technique extends beyond just individual kitchens. It's fostered a more inclusive and less intimidating approach to baking, encouraging creativity and experimentation. Baking should be fun, not a source of stress,
and this method perfectly embodies that sentiment. I've personally witnessed the joy it brings to beginners, seeing their confidence bloom as they create beautiful cakes without the pressure of perfect technique.
Now, it's your turn. Consider the simple elegance of fridge-cake decorating – the time saved, the creative freedom unleashed. Embrace the spontaneity, experiment with different frostings and decorations, and most importantly, have fun! Don't let the fear of complex techniques hold you back from creating delicious and visually stunning cakes. The fridge is waiting; your masterpiece awaits.
Unleash Your Inner Cake Boss: Decorate with Ease!
Thanks for taking the time to explore the magic of fridge-cold cake decorating! We hope you've discovered some new techniques and gained confidence in your baking skills. Ready to put your newfound knowledge into practice?
- Frost and decorate your next cake straight from the fridge! See how much smoother and easier it is.
- Share your creations on social media using #BakeWithEaseFridgeFrosting – let’s inspire each other!
- Consider experimenting with different frostings and decorating styles to find your signature look.
What’s your favorite fridge-cold decorating tip, and what amazing cake will you create next?