
My Cake is Too Dense: Troubleshooting and Solutions


Welcome to BakeWithEase, your friendly guide to baking bliss! Ever wondered why your cake ended up more brick than buttercream? Don't despair! We're diving deep into dense cake troubleshooting solutions in this article, revealing the secrets to light, fluffy perfection. Curious to discover the common culprits and how to fix them? Let's unlock the secrets to baking the perfect cake, together!
- Troubleshooting Dense Cakes: Achieving Light and Fluffy Textures
- Understanding Density: Identifying the Problem
- Identifying the Culprit: Troubleshooting Common Issues
- Achieving Lighter Texture: Solutions for Dense Cakes
- Proactive Baking: Preventing Density Issues
- Advanced Techniques: Enhancing Cake Texture
- Salvaging Dense Cakes: Creative Repurposing Ideas
- Frequently Asked Questions
- Final Reflection: The Sweet Science of Baking Success
- Unlock Your Light & Fluffy Cake Secrets!
Troubleshooting Dense Cakes: Achieving Light and Fluffy Textures
When you pull a cake out of the oven, you're hoping for a light, airy creation that melts in your mouth. But sometimes, despite your best efforts, you end up with a cake that's heavy, tough, and disappointingly dense. This is a common baking frustration, but understanding the potential causes and learning effective dense cake troubleshooting solutions can help you achieve that perfect, fluffy texture every time. Don't despair if your latest bake didn't turn out as planned; identifying the problem is the first step towards fixing it.
Understanding Density: Identifying the Problem
Before you can fix a dense cake, you need to be able to recognize it and understand what makes a cake dense in the first place. It's more than just a feeling; there are specific visual and textural cues that signal a cake has not developed the desired light structure. Pinpointing these characteristics helps you narrow down the possible culprits behind the issue.
Recognizing a Dense Cake: Visual and Textural Cues
A dense cake often presents itself visually before you even take a bite. Look at the height; a dense cake typically hasn't risen as much as it should have. The top might be flat or even sunken, rather than having a gentle dome. When you slice into it, the cut will feel heavy, and the crumb will appear tight and compact, lacking the open, airy holes you'd expect in a well-risen cake.
Beyond the visual, the texture is the most telling sign. When you press gently on the cake, it won't spring back easily; instead, it will feel solid and unyielding. In your mouth, a dense cake feels heavy and doughy, requiring more chewing than a light, tender crumb. It might even stick to your palate. These characteristics are key indicators that you're dealing with a dense cake problem.
Characteristics of a Dense Cake: Compact Crumb, Lack of Airiness
The hallmark of a dense cake is its compact crumb structure. Unlike a fluffy cake where air pockets are visible and evenly distributed, a dense cake has very small, tightly packed cells. This lack of airiness means the cake hasn't expanded properly during baking. Think of it like a sponge versus a brick; a sponge has lots of holes and is light, while a brick is solid and heavy.
This compact crumb is a direct result of issues during the mixing, leavening, or baking process. It signifies that not enough air was incorporated, or the air that was incorporated collapsed or didn't expand sufficiently in the oven. Understanding these characteristics is crucial for effective dense cake troubleshooting solutions.
Potential Causes of a Dense Cake: Ingredient Imbalances and Mixing Issues
Several factors can contribute to a dense cake texture. One major category involves ingredient imbalances. Too much flour relative to liquid, insufficient leavening agents (like baking powder or baking soda), or an excess of heavy ingredients like butter or sugar can all weigh down the batter and prevent proper rising. For instance, a recipe calling for 2 cups of flour might specify 1.5 teaspoons of baking powder; deviating significantly from this ratio can impact the outcome.
Another significant area is mixing technique. Both overmixing and undermixing can lead to density. Overmixing develops too much gluten, making the cake tough and heavy. Undermixing, conversely, doesn't incorporate enough air into the batter, which is essential for lift. The temperature of ingredients and the oven itself also play critical roles in how the cake rises and sets. Addressing these potential causes is central to finding effective dense cake troubleshooting solutions.
Identifying the Culprit: Troubleshooting Common Issues
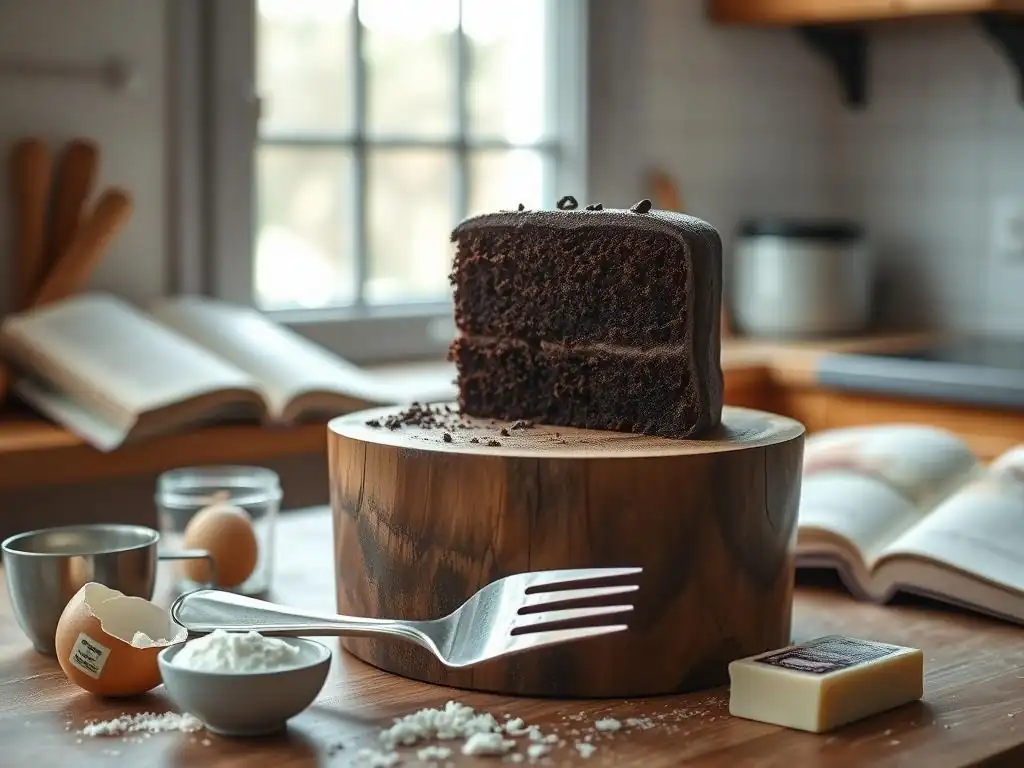
Once you understand what a dense cake looks and feels like, the next step in finding dense cake troubleshooting solutions is identifying why yours turned out that way. This involves looking closely at your process, from ingredient measurement to oven temperature.
Ingredient Ratios: Balancing for Optimal Texture
The delicate balance of ingredients is fundamental to a cake's final texture. Baking is often described as a science because the ratios of flour, sugar, fat, liquid, and leavening are designed to work together harmoniously. If these proportions are off, it can significantly impact how the cake rises and sets, potentially leading to a dense result.
Consider standard cake recipes: they often follow general guidelines, though variations exist. For example, a pound cake traditionally uses equal weights of flour, sugar, butter, and eggs. Deviating from such foundational ratios without understanding the impact can easily lead to texture problems. Getting the ingredient balance right is a primary dense cake troubleshooting solution.
Excessive Fat: Impact on Cake Structure and Tenderness
While fat contributes to tenderness and moisture in a cake, using too much can actually hinder its structure and lead to a dense texture. Fat coats flour particles, which can inhibit gluten development (good for tenderness) but also interfere with the formation of a strong enough structure to support the cake's rise. If a recipe calls for 1/2 cup of butter but you accidentally use 3/4 cup, the extra weight and richness can weigh down the batter, preventing it from rising fully.
Excessive fat also affects how air is incorporated during creaming. While fat helps trap air bubbles, too much can make the batter too heavy and greasy, causing those precious air pockets to collapse before or during baking. Balancing fat content is a key part of dense cake troubleshooting solutions.
Insufficient Leavening: Understanding Baking Powder and Baking Soda Effectiveness
Leavening agents are the magic behind a cake's rise. Baking powder and baking soda produce gases (carbon dioxide) when they react with moisture and/or acid and heat, causing the batter to expand. If you don't use enough leavening, or if your leavening agents are old and inactive, the batter won't produce enough gas to lift itself, resulting in a heavy, dense cake.
Baking powder has a double action, reacting when wet and again when heated. Baking soda requires an acidic ingredient (like buttermilk, yogurt, or vinegar) to react. Using the wrong type or amount for a specific recipe's balance of ingredients is a common cause of density. For example, a recipe relying on baking soda needs that acid; omitting it means the soda won't fully activate, leading to poor rise and a dense crumb.
Checking the freshness of your leavening is a simple yet crucial step in dense cake troubleshooting solutions. A quick test for baking powder involves adding a teaspoon to hot water; it should bubble vigorously. For baking soda, add a teaspoon to a bit of vinegar; it should fizz immediately.
Flour Overabundance: Measuring Accurately for Desired Consistency
One of the most frequent culprits behind a dense cake is using too much flour. Flour provides the structure for the cake, but an excess makes the batter too stiff and heavy, preventing proper expansion. Many home bakers scoop flour directly from the bag with their measuring cup, which compacts the flour, resulting in significantly more flour by weight than intended. A cup of scooped flour can weigh 20-30% more than a cup measured correctly.
Accurate flour measurement is perhaps one of the most impactful dense cake troubleshooting solutions. Instead of scooping, the standard method is to gently spoon flour into the measuring cup until it overflows, then level it off with a straight edge. This 'spoon and level' method ensures you're using the amount of flour the recipe developer intended, leading to a lighter, more tender crumb.
Mixing Techniques: Avoiding Over or Under-Mixing
How you combine your ingredients is just as important as the ingredients themselves. Both mixing too much and mixing too little can negatively impact the cake's texture, leading to density. Understanding the purpose of each mixing stage is key to achieving the desired light and airy outcome.
Different recipes call for different mixing methods (creaming, reverse creaming, muffin method, etc. ), and following the instructions precisely is vital. For example, creaming butter and sugar is specifically designed to incorporate air, while adding dry ingredients often requires minimal mixing to avoid gluten development. Paying attention to mixing times and visual cues (like when the batter is just combined) is essential for effective dense cake troubleshooting solutions.
Overmixing: Gluten Development and Toughening
Flour contains proteins that, when combined with liquid and agitated (mixed), develop gluten. Gluten provides structure to baked goods like bread, but in cakes, too much gluten makes the texture tough and chewy, contributing to density. When you overmix cake batter, particularly after adding the flour, you activate these gluten proteins excessively.
The result is a cake that feels heavy and bread-like rather than tender and crumbly. This is why many cake recipes instruct you to mix the dry ingredients "just until combined" or "until no dry streaks remain." Stopping mixing as soon as the flour is incorporated is a critical step in preventing overmixing and achieving a lighter texture, making it a core dense cake troubleshooting solution.
Undermixing: Inadequate Aeration and Heavy Results
While overmixing is a common pitfall, undermixing can also lead to a dense cake. Proper mixing, especially the initial creaming of butter and sugar, is crucial for incorporating air into the batter. These tiny air bubbles expand in the oven and contribute significantly to the cake's rise and light texture.
If you don't cream the butter and sugar long enough (often 3-5 minutes until light and fluffy), or if you don't mix the batter sufficiently to emulsify the ingredients properly, you won't have enough air incorporated. This lack of initial aeration means the cake won't have the lift it needs, resulting in a heavy, unevenly textured, and dense crumb.
Oven Temperature: Its Role in Cake Rise and Texture
The oven is where the magic of leavening agents truly happens, causing the batter to expand and set. The correct oven temperature is critical for this process. If the temperature is off, it can drastically affect how quickly the cake rises, how evenly it bakes, and ultimately, its final texture. Inconsistent or incorrect oven temperature is a frequent cause when troubleshooting dense cake problems.
A recipe might specify baking at 350°F (175°C) for 30-35 minutes. This temperature range is chosen because it allows the cake to rise gradually as the leavening agents activate and the structure sets, while preventing the outside from burning before the inside is cooked. Deviations from this can disrupt the delicate balance needed for a light texture.
Overly Hot Oven: Rapid Setting and Uneven Baking
If your oven is too hot, the outside of the cake will set too quickly before the center has a chance to rise properly. This can lead to a dome-shaped cake with cracked tops and often a dense, heavy layer at the bottom or middle because the leavening action was cut short by the rapidly solidifying structure. The rapid heat can also cause the cake to rise too fast initially and then collapse, resulting in a dense band.
Imagine baking a cake meant for 350°F (175°C) in an oven that's actually at 375°F (190°C). The edges and top will bake and firm up much faster than intended, trapping the still-liquid center and preventing it from expanding fully. This uneven setting is a common reason for a dense texture, particularly in the lower half of the cake.
Insufficiently Hot Oven: Slow Rise and Dense Outcome
Conversely, an oven that is not hot enough can also lead to a dense cake. If the temperature is too low, the leavening agents won't activate quickly enough, and the cake will rise very slowly. This slow rise means the structure takes longer to set, and the batter can spread out too much before it gains enough structure to lift itself.
A lukewarm oven (say, 325°F/160°C instead of 350°F/175°C) means the batter stays liquid for longer. As the gases from the leavening are produced slowly, some may escape the liquid batter before the heat sets the structure. The result is a cake that doesn't achieve its full potential height and has a heavy, squat appearance and a dense texture.
Ingredient Temperature: Impacts on Emulsification and Aeration
The temperature of your ingredients, particularly fats and eggs, significantly impacts how well they combine and how much air they can incorporate. Using ingredients at the wrong temperature can lead to issues with emulsification (the smooth blending of wet and fat ingredients) and aeration, both of which are crucial for a light cake texture.
Most standard cake recipes assume you are using ingredients, especially butter and eggs, at room temperature. This isn't just a suggestion; it's a requirement for proper technique. Ignoring this step is a common oversight when troubleshooting dense cake problems.
Cold Ingredients: Hindering Emulsification and Affecting Texture
Cold butter is hard and difficult to cream properly with sugar, which means it won't trap enough air bubbles. Cold eggs don't emulsify as well into the creamed butter mixture, leading to a broken or curdled-looking batter. A curdled batter is less likely to rise evenly and can result in a cake with a coarse, dense texture.
Using cold milk or other liquids can also stiffen the batter, making it harder to mix smoothly and potentially impacting the leavening reaction. For optimal results and a consistent texture, aim for ingredients that are between 68°F and 72°F (20°C and 22°C). This ensures they combine smoothly, create a stable emulsion, and allow for maximum air incorporation during mixing, all vital for avoiding dense cakes.
Achieving Lighter Texture: Solutions for Dense Cakes
Now that we've explored the common causes, let's dive into the practical dense cake troubleshooting solutions. These adjustments and techniques focus on correcting the issues we've identified, helping you bake cakes with a wonderfully light and airy texture.
Adjusting Ratios: Perfecting Ingredient Balance
Getting the ingredient ratios right is a fundamental step in preventing and solving dense cake issues. Reviewing your recipe and ensuring the proportions are balanced is key. Sometimes, a recipe itself might be the problem, but more often, it's an error in measurement or substitution.
Understanding the role of each ingredient allows you to make informed adjustments. For example, if you suspect your cake is too dense due to too much flour, you might slightly reduce the flour next time or increase the liquid slightly if the original recipe seems dry. Precise measurement is the most direct way to address ratio problems.
Reducing Fat: Substituting for Lighter Cakes
If you've identified excessive fat as a potential issue, consider slightly reducing the amount in your recipe, provided the recipe can handle it without becoming dry. For instance, if a recipe uses 1 cup of butter, try reducing it by 1-2 tablespoons in your next attempt. Alternatively, consider substituting some of the butter with a lighter fat source if appropriate for the recipe type, like using oil instead of butter in some cases (though this changes flavor and texture profile).
Another approach is to ensure you are not over-creaming the fat and sugar after the mixture is already light and fluffy. Over-creaming doesn't add significantly more air but can potentially warm the butter too much, affecting the emulsion. Focusing on proper creaming technique for the specified amount of fat is a more common solution than drastically altering fat ratios, unless the recipe itself seems flawed.
Boosting Leavening: Ensuring Proper Rising Action
If you suspect insufficient leavening, ensure you are using the correct type and amount of baking powder or baking soda specified in the recipe. First, check the freshness of your leavening agents. If they are old, replace them. Leavening agents can lose potency over time, often becoming less effective after 6-12 months once opened.
If your leavening is fresh but the cake is still dense, you might consider slightly increasing the amount, but be cautious. Too much leavening can cause the cake to rise too quickly and then collapse, or leave a chemical aftertaste. A general guideline for baking powder is 1 to 1.5 teaspoons per cup of flour. If your recipe uses significantly less, a small increase (e.g., adding an extra 1/4 teaspoon) might help, provided the recipe's balance can accommodate it. For baking soda, ensure there is enough acidic ingredient present to activate it fully.
Accurate Flour Measurement: Spooning and Leveling Techniques
As mentioned earlier, using the spoon and level method for measuring flour is one of the most effective dense cake troubleshooting solutions. Do not scoop flour directly from the container with your measuring cup. Instead, gently spoon the flour into the dry measuring cup until it is overflowing slightly.
Then, use a straight edge, like the back of a knife or a bench scraper, to sweep across the top of the cup, leveling off the excess flour. This method results in a more consistent and lighter measurement of flour, closer to the weight intended by the recipe developer (typically around 120-130 grams per cup, though this varies slightly). This simple change can dramatically improve your cake's texture.
Mastering Mixing: Achieving Desired Consistency
Improving your mixing technique is vital for preventing dense cakes. It's about understanding when and how to mix, focusing on incorporating air at the right stages and developing gluten minimally when adding dry ingredients.
Pay close attention to the recipe's instructions regarding mixing times and speeds. If it says "mix until just combined," stop as soon as you no longer see streaks of dry ingredients. If it says "cream until light and fluffy," don't stop after just 30 seconds; it often takes several minutes to achieve the proper aeration.
Gentle Folding: Preserving Air in the Batter
Once the wet and dry ingredients have been initially combined, further mixing should often be done using a gentle folding motion, especially if you've incorporated air through methods like creaming or whipping eggs. Folding involves using a spatula to cut down through the center of the batter, scoop up mixture from the bottom, and fold it over the top. This motion combines ingredients with minimal agitation, helping to preserve the air bubbles you've worked to create.
Over-mixing at this stage, especially with an electric mixer, will deflate the batter and develop excess gluten, both leading to a dense cake. Gentle hand-folding is often preferred after the initial incorporation of dry ingredients, making it a key technique in dense cake troubleshooting solutions.
Proper Creaming: Incorporating Air into Fat and Sugar
The creaming method, where softened butter and sugar are beaten together, is a primary way to incorporate air into many cake batters. The sharp edges of the sugar crystals cut into the softened butter, creating tiny air pockets. As you beat the mixture, these air pockets expand. Proper creaming is essential for a light texture.
Ensure your butter is properly softened (should yield slightly to pressure but not be greasy or melted) and cream it with the sugar on medium-high speed for the time recommended in the recipe, often 3-5 minutes. The mixture should become significantly lighter in color (pale yellow or almost white) and fluffy in texture. This indicates sufficient air has been incorporated. If your creamed mixture is still dense and yellow after several minutes, your butter may have been too cold or you didn't cream long enough.
Optimizing Oven: Even Baking for Optimal Rise
Even with perfect batter, an inaccurate oven can ruin your cake. Ensuring your oven is at the correct temperature and heating evenly is a crucial dense cake troubleshooting solution. Ovens, especially older ones, can be notoriously inaccurate, sometimes off by as much as 50°F (10°C) or more.
Preheating your oven thoroughly is also important. Don't put the cake in until the oven has reached the set temperature and had a few minutes to stabilize. Opening the oven door frequently during baking should also be avoided, as it causes temperature drops that can affect the cake's rise.
Calibrating Oven: Ensuring Accurate Temperature
If you suspect your oven temperature is inaccurate, consider having it professionally calibrated. This involves adjusting the oven's thermostat to match the actual temperature inside. While calibration might require a service technician, it's a permanent solution to a common baking problem.
Alternatively, you can test its accuracy yourself using an oven thermometer and adjust your baking temperature accordingly. If your oven reads 350°F but an independent thermometer shows it's actually 375°F, you know to set your oven to a lower temperature (e.g., 325°F) to achieve the desired 350°F inside.
Using Oven Thermometer: Monitoring Internal Temperature
An inexpensive oven thermometer placed inside your oven is an essential tool for accurate baking. It gives you a real-time reading of the actual temperature inside, which can differ significantly from the oven's display or dial setting. This allows you to confirm your oven is preheated correctly and maintain the proper temperature throughout the baking process.
Check the thermometer before putting the cake in and periodically during baking (without opening the door unnecessarily). If the temperature fluctuates significantly, you might need to adjust the oven setting up or down to keep it within the target range. Consistent oven temperature is a powerful dense cake troubleshooting solution.
Preparing Ingredients: Room Temperature is Key
Using ingredients at the correct temperature is fundamental for proper emulsification and aeration, directly impacting cake texture. Most standard cake recipes call for ingredients like butter and eggs to be at room temperature for a reason.
Plan ahead to take these ingredients out of the refrigerator in advance. For butter, it typically takes 1-2 hours to soften on the counter. Eggs can take 30-60 minutes. If you're in a hurry, there are quick methods: for butter, you can cut it into small pieces or gently microwave it on a very low setting for short bursts (be careful not to melt it); for eggs, place them in a bowl of warm (not hot) water for 5-10 minutes.
Softening Butter: Achieving Creamy Consistency
Properly softened butter is crucial for creaming with sugar and incorporating air. It should be pliable enough that your finger leaves an indentation easily, but still hold its shape somewhat. If it's too hard, it won't create air pockets effectively. If it's too soft or melted, it won't hold air at all, resulting in a greasy batter and a dense cake.
Aim for a temperature around 68-72°F (20-22°C). This temperature allows the butter to blend smoothly with sugar and other ingredients, forming a stable emulsion that supports a light, even crumb structure. Ensuring your butter is at the right consistency is a simple yet impactful dense cake troubleshooting solution.
Tempering Eggs: Preventing Curdling and Enhancing Emulsification
Room temperature eggs emulsify much better with the creamed butter and sugar mixture than cold eggs. When cold eggs are added to warm, creamed butter, the fat can seize up, causing the mixture to curdle. While a slightly curdled batter can sometimes still produce a decent cake, a severely curdled one often results in poor texture and density.
Room temperature eggs integrate smoothly, creating a stable, homogenous batter. This stable emulsion is better able to hold the air incorporated during creaming and mixing, leading to a finer, more tender crumb. Taking the time to bring your eggs to room temperature is a small step that can make a big difference in preventing dense cakes.
Proactive Baking: Preventing Density Issues
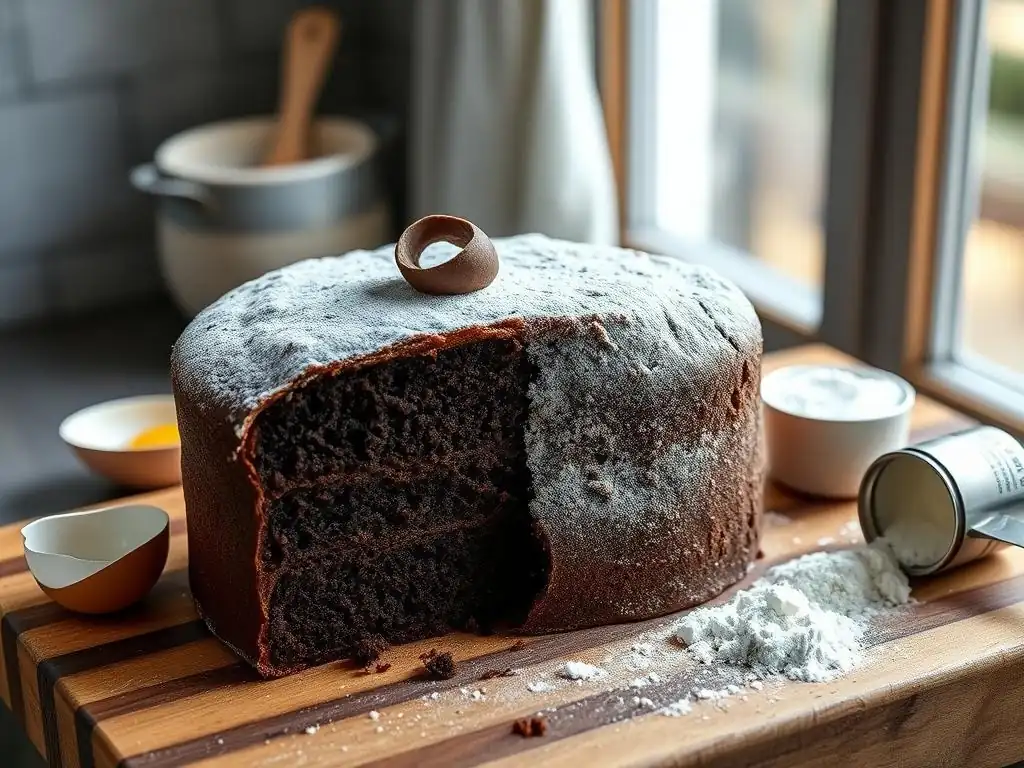
Beyond troubleshooting problems after they occur, adopting proactive baking habits can significantly reduce the likelihood of ending up with a dense cake in the first place. It's about building good practices into your routine, from choosing recipes wisely to finishing the baking process correctly.
By focusing on prevention, you save yourself the frustration of dealing with a dense cake and increase your chances of baking success every time. These proactive steps are some of the best dense cake troubleshooting solutions because they stop the problem before it starts.
Choosing Right Recipe: Recipes for Lightness and Airiness
Not all cake recipes are created equal, and some are inherently designed to produce a lighter, airier texture than others. Recipes that use methods like the reverse creaming method, include ingredients like cake flour, or have a higher proportion of eggs or leavening might be better choices if you consistently struggle with dense cakes.
Look for recipes from reputable sources that provide clear instructions and baker's tips. Sometimes, a recipe might be poorly written or have incorrect ratios, setting you up for failure regardless of your skill. Starting with a well-tested recipe specifically known for producing a light crumb is a smart preventive measure.
Accurate Measurement: Investing in Measuring Tools
Precision in baking cannot be overstated, especially when it comes to preventing dense cakes. Investing in proper measuring tools and using them correctly is fundamental. This includes a set of dry measuring cups (for flour, sugar, etc.) that you use with the spoon and level method, and a liquid measuring cup (with a spout and markings on the side) that you use on a flat surface at eye level.
For even greater accuracy, consider using a digital kitchen scale to measure ingredients by weight, especially flour. Many professional recipes provide measurements by weight (grams or ounces) because it is far more consistent than volume measurement. For example, 1 cup of all-purpose flour can vary by over an ounce depending on how it's measured by volume, but 125 grams is always 125 grams. Weight measurement is a powerful dense cake troubleshooting solution before the problem even arises.
Testing for Doneness: Avoiding Overbaking and Density
Overbaking is another common cause of dense, dry cakes. While overbaking doesn't necessarily create density in the same way ingredient ratios or mixing do, it can dry out the cake significantly, making it feel heavy and less tender. Baking just to the point of doneness is crucial for preserving moisture and achieving the best possible texture.
Test for doneness using a toothpick or cake tester inserted into the center of the cake. It should come out with a few moist crumbs attached, but no wet batter. The cake should also spring back lightly when gently pressed. Relying solely on the baking time listed in the recipe can be misleading due to oven variations. Learning to test for doneness accurately is a key skill in preventing overbaked, dense cakes.
Advanced Techniques: Enhancing Cake Texture
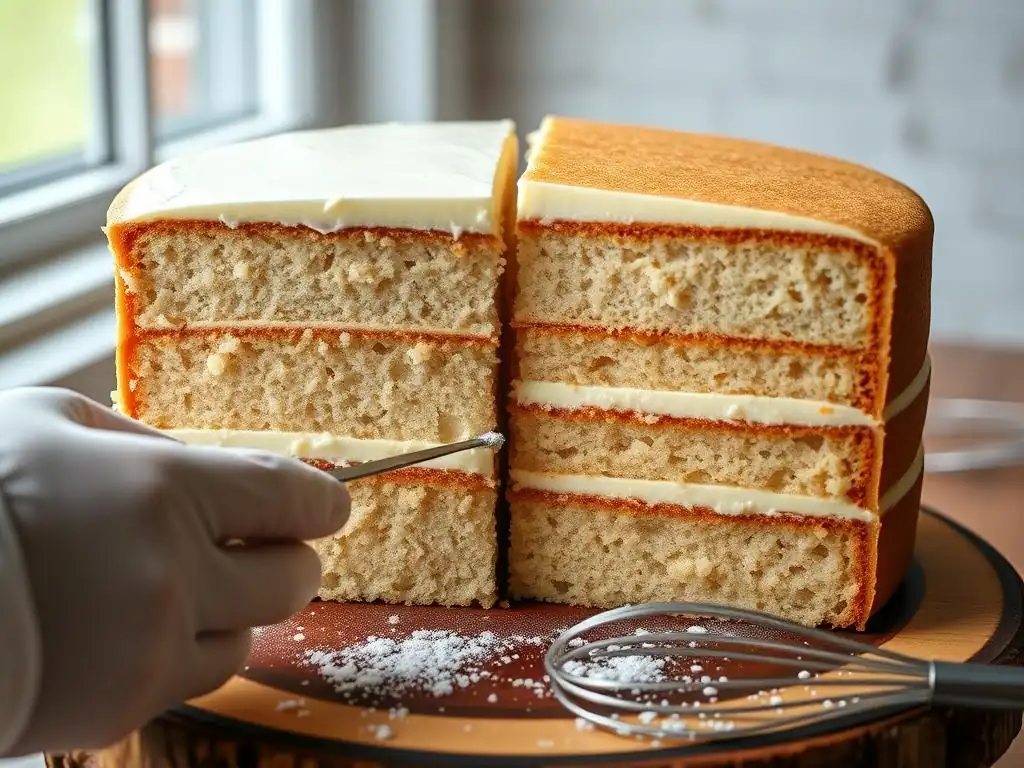
For bakers looking to go beyond the basics and further improve their cake texture, several advanced techniques can help achieve an exceptionally tender and airy crumb, offering even more sophisticated dense cake troubleshooting solutions.
These methods often involve modifying ingredients or mixing processes slightly from standard approaches but can yield noticeable improvements in lightness and fineness of crumb.
Using Cake Flour: Achieving Tender Crumb
Cake flour is a finely milled flour with a lower protein content (around 7-8%) compared to all-purpose flour (around 10-12%). Less protein means less gluten development when mixed with liquid. Using cake flour results in a more tender, softer, and less dense crumb because there's less potential for toughness from gluten.
Many recipes specifically call for cake flour for this reason. If a recipe calls for all-purpose flour but you desire a more tender texture, you can sometimes substitute cake flour, though you may need to adjust the amount slightly (some recommend using 1 cup plus 2 tablespoons of cake flour for every cup of all-purpose flour). This substitution is a simple way to proactively address potential density issues related to gluten development.
Reverse Creaming Method: Fine Texture and Even Crumb
The reverse creaming method is a technique where dry ingredients (flour, sugar, leavening, salt) are mixed together first, and then softened butter is added and mixed until the mixture resembles coarse sand. Wet ingredients (eggs, milk, vanilla) are then added in stages.
This method coats the flour particles with fat from the beginning, which inhibits gluten development even further than the standard creaming method. The result is a cake with a very fine, velvety, and even crumb structure that is less prone to toughness and density. While it requires a bit more attention to technique, it's a powerful tool for achieving superior cake texture.
Adding Acidic Ingredients: Tenderizing Gluten and Promoting Leavening
Acidic ingredients like buttermilk, yogurt, sour cream, lemon juice, or vinegar serve multiple purposes in cake baking. They react with baking soda to produce carbon dioxide gas, aiding in leavening. Additionally, acid helps to tenderize the gluten proteins that do develop, making the cake softer and less tough.
Using acidic ingredients in conjunction with baking soda is a classic method for achieving a light and tender crumb. For instance, substituting some milk with buttermilk in a recipe that uses baking soda will boost the leavening action and contribute to a more delicate texture, acting as both a leavening enhancer and a gluten tenderizer.
Salvaging Dense Cakes: Creative Repurposing Ideas
Even with the best dense cake troubleshooting solutions, occasionally a cake might still turn out denser than desired. Don't throw it away! A dense cake isn't necessarily a bad cake; it just might not be ideal for serving as a standalone layer cake. Fortunately, a slightly dense cake can be repurposed into several delicious desserts where its texture is either an asset or is transformed.
Repurposing is a great way to minimize waste and turn a baking mishap into a new culinary creation. Embracing these ideas means a "failed" cake can still bring joy.
Cake Pops: A Creative and Delicious Alternative
Dense cake is actually perfect for making cake pops. The slightly heavier, more compact texture crumbles well and mixes easily with frosting to form a moldable dough that holds its shape beautifully when rolled into balls.
To make cake pops, crumble the dense cake into fine crumbs, mix with a small amount of frosting until it's the consistency of playdough, roll into balls, chill, insert sticks, and dip in melted chocolate or candy melts. The dense texture prevents the balls from falling apart, making this an ideal use for a less-than-fluffy cake.
Trifle: Layering for Texture and Flavor
A trifle is a layered dessert that often incorporates cake, custard or pudding, fruit, and whipped cream. A dense cake, especially one that is moist, works wonderfully in a trifle. Its sturdier texture holds up well when soaked with a liquid (like fruit juice, syrup, or liqueur) and layered with other components.
Cut the dense cake into cubes, arrange them in the bottom of a glass dish, drizzle with your chosen liquid, and layer with pudding, fruit, and whipped cream. The different textures and flavors combine to create a delightful dessert where the density of the cake becomes a pleasant part of the overall experience.
Bread Pudding: A Comforting Dessert
Dense cake can be transformed into a rich and comforting bread pudding. Like bread, the cake absorbs a custard mixture (made from milk, cream, eggs, sugar, and flavorings) and bakes into a warm, soft dessert.
Cube the dense cake and place it in a baking dish. Pour the custard mixture over the cake cubes, ensuring they are well saturated. Let it soak for a while (often 20-30 minutes) to allow the cake to absorb the liquid, then bake until the custard is set and the top is golden. The dense cake holds its shape better in the custard than a very light cake might, resulting in a satisfying texture. It's a simple yet effective dense cake troubleshooting solution that yields a delicious result.
Frequently Asked Questions
What are the most common causes of a dense cake?
The most common culprits are incorrect measuring of ingredients, overmixing the batter, or using ingredients at the wrong temperature. These errors can prevent proper aeration.
How does overmixing contribute to a dense cake?
Overmixing develops the gluten in the flour, leading to a tough and dense texture. Aim for just combining the ingredients until barely mixed.
Can the oven temperature affect the density of my cake?
Yes! An oven that is too hot can cause the cake to rise too quickly and then collapse, resulting in a dense, gummy center. An oven that is too cold can cause a cake to rise too slowly, resulting in a dense, dry result.
What ingredients are crucial for achieving a light and airy cake?
Key ingredients include baking powder or baking soda for leavening, and fat (butter or oil) for tenderness. These elements help create air pockets for a lighter texture.
If my recipe calls for creaming butter and sugar, how important is that step?
Creaming butter and sugar is very important. It incorporates air into the mixture, which is essential for a light and fluffy cake base. Make sure your butter is at room temperature for optimal creaming.
Final Reflection: The Sweet Science of Baking Success
The quest for the perfect cake is a universal one, and the frustration of a dense, disappointing result is all too familiar. This journey through troubleshooting dense cakes highlights not just the technical aspects of baking, but also the importance of patience, observation, and a willingness to learn from mistakes. Every failed bake is an opportunity to refine our understanding of the delicate balance of ingredients and techniques.
The impact of a perfectly risen cake extends beyond mere culinary satisfaction; it's a symbol of accomplishment, a testament to the power of precision and understanding. It's a small victory, yet one that resonates deeply with the baker. Baking is at once child's play and adult joy. And cooking is all that and art.
– Julia Child. This quote perfectly encapsulates the emotional connection we have with the process, and the profound sense of achievement that comes with mastering it. The struggle with a dense cake, therefore, becomes a valuable lesson in perseverance and the rewarding nature of problem-solving.
Now, consider your own baking experiences. Have you encountered the frustration of a dense cake? What did you learn from that experience? I encourage you to embrace the challenges, to meticulously analyze your recipes and techniques, and to never give up on the pursuit of that perfect, light-as-air slice.
The journey may be filled with dense cakes, but the destination – the joy of baking success – is well worth the effort. Remember, even the most experienced bakers have their share of dense cakes; it's part of the learning process. So, keep baking, keep experimenting, and keep learning from every single cake, dense or otherwise.
Unlock Your Light & Fluffy Cake Secrets!
Thanks for joining us on this baking adventure! We hope you gained valuable insights into troubleshooting dense cakes. Ready to put your new knowledge to the test?
- Bake a Perfect Cake Today: Grab your favorite recipe (or try a new one!) and focus on those key techniques we discussed—proper ingredient measurements, gentle mixing, and the perfect baking temperature. This is your chance to shine!
- Share Your Success (or Questions!): Post a picture of your fluffy masterpiece (or your baking questions) in the comments below! We'd love to see your results and help you on your journey.
- Explore More Baking Tips: Dive deeper into our other articles on cake decorating, frosting techniques, and more—we're here to help you become a baking superstar!
What's the first thing you'll try differently in your next cake recipe? Let us know!