
Cracking Crust on Sourdough? Here's How to Stop It

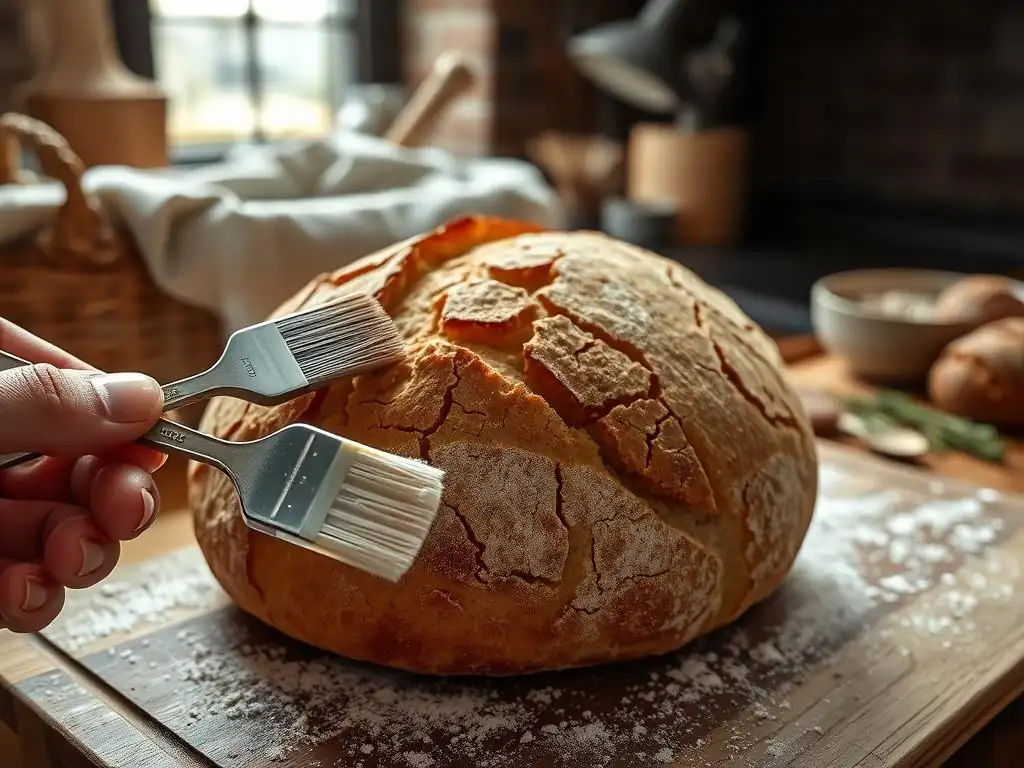
Welcome to BakeWithEase, your haven for unlocking baking brilliance! Ever wondered why your sourdough crust is cracking and how to achieve that perfect, crack-free loaf? Delve into our guide and discover expert sourdough crust cracking tips that will transform your baking game. Prepare to unravel the secrets and bake with confidence!
- Preventing Sourdough Crust Cracking: A Comprehensive Guide
- Understanding Sourdough Crust Cracking
- Preventative Measures: Key Techniques
- Troubleshooting Existing Cracks
- Advanced Techniques for Professional Results
- Common Mistakes to Avoid
- Achieving the Perfect Crust: Conclusion
- Frequently Asked Questions
- Final Reflection: The Enduring Allure of a Perfect Sourdough Crust
- Unlock Your Perfect Sourdough: Mastering the Crust
Preventing Sourdough Crust Cracking: A Comprehensive Guide
Understanding Sourdough Crust Cracking
Causes of Sourdough Bread Crust Cracking
Cracking on the surface of your beautiful sourdough loaf can be disheartening, often happening when the crust sets too early in the baking process, before the interior of the loaf has fully expanded. Think of it like a balloon: if the outer layer hardens before the gas inside has finished inflating, the pressure will find the weakest point and cause a rupture. In sourdough, this often means the crust becomes rigid while the trapped steam and CO2 from fermentation are still pushing outwards.
Insufficient steam in the initial phase of baking is a primary culprit. Steam keeps the surface of the dough pliable, allowing it to stretch and expand alongside the rising interior during the oven spring phase. Without enough humidity, the crust dries out and hardens prematurely. Other factors include insufficient scoring, which doesn't provide a controlled escape route for gases, or issues with dough hydration and fermentation that affect the dough's overall strength and elasticity. Understanding these root causes is the first step toward implementing effective sourdough crust cracking tips.
Types of Sourdough Crust Cracks
Cracks in sourdough can manifest in different ways, each potentially telling a story about what went wrong. The most common is a "blowout," a large, uncontrolled rupture, usually on the side or bottom of the loaf. This often indicates that the dough had nowhere else to expand because scoring was insufficient or the crust hardened too quickly due to lack of steam or high initial heat.
Surface cracks, which look like a spiderweb or fine lines across the top, can sometimes occur even with proper scoring. These might result from slightly dry dough, insufficient proofing (where the dough hasn't developed enough internal pressure to push against the crust evenly), or rapid temperature changes. While a controlled, artistic crack alongside a score line is desirable, uncontrolled blowouts are what most bakers aim to prevent when seeking sourdough crust cracking tips.
Preventative Measures: Key Techniques

Optimizing Dough Hydration
Impact of Hydration on Crust
Dough hydration, the ratio of water to flour, plays a significant role in the final crust texture and its propensity to crack. Higher hydration doughs (those with 75-85% hydration) tend to stay more extensible and moist during the initial bake, allowing the crust to stretch more easily with the expanding loaf. This inherent flexibility reduces the likelihood of the crust tearing uncontrollably as the internal pressure builds during oven spring. A well-hydrated dough contributes to a thinner, crispier crust when baked correctly.
Conversely, a dough that is too dry (perhaps below 65% hydration for a typical loaf) can develop a thicker, less flexible crust more quickly in the oven. This rigid crust resists expansion, leading to uncontrolled cracking or blowouts. Finding the right hydration level for your flour and baking environment is key. For many beginner sourdough bakers, starting with a moderate hydration of around 70-75% can be a good balance, offering both manageability and good crust potential, helping prevent sourdough crust cracking.
Adjusting Hydration to Prevent Cracking
Adjusting your dough's hydration involves carefully measuring your ingredients. If you consistently experience blowouts despite proper scoring and steam, consider slightly increasing your water percentage by 2-3% in your next bake. Pay attention to how the dough feels – it should be moist but still manageable. You might need to use techniques like stretch and folds or coil folds to develop sufficient strength in higher hydration doughs.
It's also important to account for the type of flour you're using; whole wheat or high-protein flours absorb more water than white bread flour. A recipe calling for 70% hydration with white flour might feel significantly different with whole wheat. Experimenting incrementally and noting the results is crucial. For instance, if your standard recipe uses 500g flour and 350g water (70% hydration), and you get cracks, try adding an extra 10-15g of water (making it 360-365g, or ~72-73% hydration) in your next attempt to see if it helps with sourdough crust cracking tips.
Mastering Sourdough Fermentation
Fermentation and Crust Development
The fermentation process, both bulk fermentation and final proofing, significantly impacts the dough's structure and its ability to expand gracefully in the oven. During fermentation, yeast and bacteria in your starter produce gases (primarily CO2) that create the internal pressure needed for oven spring. A well-fermented dough has developed a strong gluten network capable of trapping these gases and stretching without tearing the crust.
If fermentation is too short (under-proofed), the dough lacks sufficient internal gas pressure for a strong oven spring, leading to a dense crumb and potentially uneven expansion that stresses the crust. If fermentation is too long (over-proofed), the gluten structure can begin to break down, and the dough may collapse slightly. While over-proofing might seem counterintuitive to cracking, it can result in a dough that lacks the controlled push needed for expansion, sometimes leading to weak points and blowouts rather than an even rise. Proper fermentation is a core component of effective sourdough crust cracking tips.
Controlling Fermentation Time and Temperature
Controlling fermentation means paying attention to both time and temperature. Sourdough fermentation is highly sensitive to temperature; warmer temperatures accelerate activity, while cooler temperatures slow it down. A typical bulk fermentation might take 4-6 hours at room temperature (around 70-75°F or 21-24°C), but this can vary wildly depending on your starter's activity and ambient conditions.
Final proofing is equally important. This can be done at room temperature (1-3 hours) or in the refrigerator (8-16 hours or more). Cold proofing in the refrigerator slows fermentation significantly, allowing flavors to develop and the dough to strengthen. It also chills the dough, which can help control expansion in the initial hot oven phase. Learning to read your dough – looking for signs of increased volume (often 30-50% for bulk), surface bubbling, and a jiggly texture – is more reliable than sticking rigidly to times, providing valuable sourdough crust cracking tips.
Scoring Techniques for Crack Prevention
Importance of Scoring
Scoring, the act of cutting the surface of the dough just before baking, is perhaps the most direct way to prevent uncontrolled sourdough crust cracking. It provides a planned, weakened point on the crust that the expanding dough can push through. Without scoring, the rapidly hardening crust will find the path of least resistance, which is often an unpredictable spot on the side or bottom, resulting in an ugly blowout.
Proper scoring allows you to control the shape and direction of the oven spring. A single, deep score down the length of an oval loaf allows it to expand upwards and outwards symmetrically. More intricate patterns not only add aesthetic appeal but also provide multiple points for expansion, potentially leading to a more even overall rise. Mastering scoring is fundamental among sourdough crust cracking tips.
Scoring Patterns and Their Impact
Different scoring patterns yield different results in terms of loaf shape and crust expansion. A single, deep cut (often called a "lame cut") at about a 45-degree angle along the top of an oval loaf is classic and encourages significant upward and outward expansion, creating a prominent "ear." This type of cut is highly effective at preventing blowouts.
For round loaves (boules), a simple cross pattern or a square pattern of cuts can work well, allowing the dough to expand in multiple directions. More complex patterns, like overlapping cuts or decorative designs, also provide controlled release points, though the depth and angle of these cuts are crucial. Cuts that are too shallow may not provide enough release, while cuts that are too deep can cause the loaf to spread too much horizontally. Experimenting with patterns will show you how they impact your sourdough crust cracking.
Recommended Scoring Tools
The best tool for scoring sourdough is typically a lame (pronounced "lahm"), which is a handle holding a razor blade. Razor blades are incredibly sharp and thin, allowing you to make clean, swift cuts without dragging or tearing the delicate surface of the dough. This is essential for achieving a good "ear" and controlled expansion.
Alternatively, a very sharp knife, like a paring knife or utility knife, can be used, but it must be exceptionally sharp. Some bakers even use a single, new razor blade held carefully between their fingers. The key is to make confident, decisive cuts. Having a good scoring tool is a simple yet vital piece of sourdough crust cracking tips.
Baking Environment: Humidity and Temperature
The Role of Steam in Baking
Steam is absolutely critical during the first 15-20 minutes of baking sourdough. As mentioned earlier, steam keeps the surface of the dough moist and pliable. This flexibility allows the crust to stretch alongside the rapidly expanding interior of the loaf during oven spring. If the air around the loaf is dry, the crust forms too quickly and becomes rigid, leading to cracking as the internal pressure builds.
Think of baking sourdough in a steamy environment like giving the dough room to breathe and grow before its skin hardens. This initial period of steam allows for maximum loaf volume and contributes to a thinner, crispier crust later in the bake when the steam is removed and the crust is allowed to dry out and brown. Lack of steam is a leading cause of uncontrolled sourdough crust cracking.
Creating a Steamy Oven
There are several ways to create a steamy environment in a home oven. One common method is to place a baking tray or cast iron pan on the bottom rack of your oven while it preheats. Just before loading your dough, carefully pour a cup of hot water (boiling is best) into the hot tray to generate steam. Be cautious of the sudden burst of steam.
Another method is to spray the walls of the oven with water using a clean spray bottle just before and immediately after loading the loaf. Some bakers even place lava rocks or metal chains in the steam tray to increase the surface area for water to evaporate from. Maintaining this steamy environment for the first 15-20 minutes of baking is crucial for preventing sourdough crust cracking.
Using a Dutch Oven
Baking in a Dutch oven is widely considered one of the most effective ways to create a perfect baking environment for sourdough, largely because it naturally traps the moisture released from the dough itself. When the lid is on, the dough bakes in its own steamy microclimate. This ensures the crust stays pliable during the crucial oven spring phase.
Typically, you preheat the Dutch oven in your oven to a high temperature (often 450-500°F or 230-260°C). You then carefully place the scored dough inside, cover it, and bake for the first 20-25 minutes. After this initial period, you remove the lid to allow the crust to dry out and brown. This method is highly reliable for achieving excellent oven spring and minimizing sourdough crust cracking.
Troubleshooting Existing Cracks
Assessing Crack Severity
If you notice cracks forming early in the bake, it's useful to assess their severity. Small, hairline cracks might just be cosmetic and indicate minor surface tension issues. However, large, deep fissures or blowouts on the side suggest a more significant problem, likely related to insufficient scoring, lack of steam, or issues with dough structure (over/under-proofing).
Observing where the cracks occur can give you clues for future bakes. A side blowout often points to inadequate scoring on top or insufficient steam. Multiple small cracks might suggest the dough surface dried out too quickly before expansion. While you can't "fix" a crack once it's formed, understanding its nature helps refine your technique for the next loaf and improve your sourdough crust cracking tips.
Minimizing Further Cracking During Baking
Once cracks have appeared during baking, there's limited intervention you can do. However, if you catch it very early (within the first 5-10 minutes) and suspect lack of steam is the issue, you could try quickly adding more steam to the oven if your method allows (e.g., adding more water to a steam tray or spraying the oven walls), but be extremely cautious of the hot steam.
If you are baking in a Dutch oven and notice a blowout when you remove the lid, the crack is already set. At this point, focus on completing the bake to ensure the interior is cooked through. While you can't undo the crack, ensuring the rest of the bake is successful is the priority. Future success relies on applying better sourdough crust cracking tips from the start.
Post-Bake Solutions for Softening
If your baked loaf has a very hard, thick crust, perhaps exacerbated by cracking, there are a few post-bake tricks to soften it slightly, though they won't eliminate cracks. Once the loaf is out of the oven and cooling, you can lightly brush or spray the crust with water. The residual heat will turn the water into steam, which can penetrate the crust and make it slightly less brittle.
Immediately wrapping the still-warm loaf in a clean kitchen towel can also help trap residual steam and soften the crust as it cools. For a significantly tough crust, some bakers will even place the cooled loaf in a sealed plastic bag overnight, allowing moisture from the crumb to redistribute into the crust. While these methods won't fix sourdough crust cracking, they can make the resulting crust more palatable.
Advanced Techniques for Professional Results
Utilizing Baking Stones and Pizza Steels
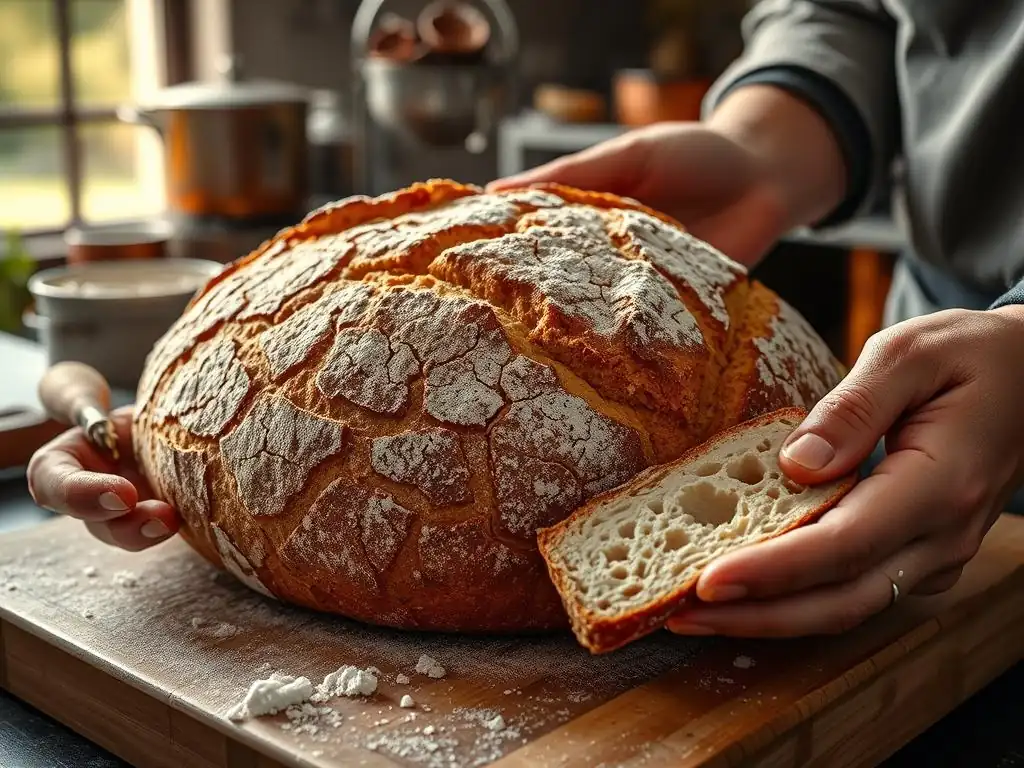
Baking stones and pizza steels are excellent tools for achieving a great sourdough crust and preventing cracking. These surfaces are preheated in the oven to a very high temperature. When the dough is placed directly onto the hot stone or steel, it receives a powerful burst of conductive heat from the bottom.
This intense bottom heat helps the loaf achieve rapid oven spring and sets the base crust quickly, but not so quickly that it hinders expansion if combined with sufficient steam from above. The consistent, high heat retention of a stone or steel ensures even baking and contributes to a beautiful, crispy crust texture without encouraging uncontrolled sourdough crust cracking.
Flour Types and Their Impact on Crust
The type of flour used significantly influences the dough's structure, hydration needs, and ultimately, the crust. High-protein bread flours (around 12-14% protein) develop a strong gluten network, which is crucial for trapping gases and allowing controlled expansion. A robust gluten structure helps prevent the dough from tearing unexpectedly during oven spring.
Using a percentage of weaker flours, like all-purpose flour (around 10-11.5% protein), or including a large proportion of whole wheat or rye flour (which can interfere with gluten development) might result in a dough that is less extensible or tears more easily. While these flours add flavor and character, they may require hydration adjustments and careful handling to prevent issues like sourdough crust cracking. Understanding your flour is key among sourdough crust cracking tips.
Cold Fermentation for Enhanced Texture
Cold fermentation, typically done during the final proofing stage in the refrigerator for 8-48 hours, offers multiple benefits for sourdough, including improving crust quality. The cold temperature slows down fermentation, allowing enzymes to break down starches into sugars, which contributes to better browning and flavor development in the crust.
Furthermore, chilling the dough firms it up, making it easier to score cleanly. The cold temperature also slightly delays the setting of the crust in the hot oven, giving the interior more time to expand before the surface becomes rigid. This controlled expansion contributes to better oven spring and significantly reduces the likelihood of uncontrolled sourdough crust cracking, making it a valuable technique for achieving professional results.
Common Mistakes to Avoid
Over-Proofing and Crust Integrity
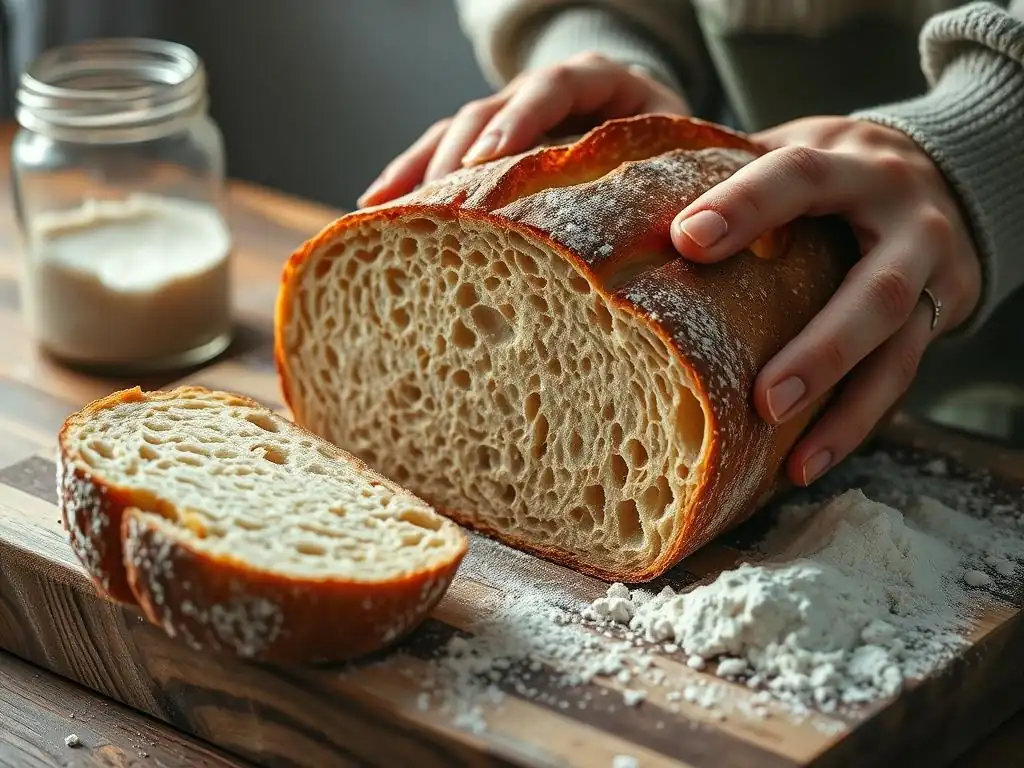
One of the common pitfalls leading to issues like sourdough crust cracking is over-proofing. An over-proofed dough has exhausted much of its fermentable sugars and the gluten structure may be weakened. When placed in the oven, it lacks the vigorous push needed for strong oven spring.
Instead of expanding upwards and outwards in a controlled manner, an over-proofed loaf might spread sideways or collapse slightly. While it might not always result in a dramatic blowout, the crust can still crack unevenly or detach from the crumb because the underlying structure isn't providing sufficient support or controlled expansion. Learning the signs of a perfectly proofed dough is crucial for preventing sourdough crust cracking.
Incorrect Oven Temperature
Baking sourdough at the wrong oven temperature can significantly impact crust formation and lead to cracking. If the oven temperature is too low, the crust sets slowly, but the oven spring might also be sluggish, potentially leading to a dense loaf. More critically for cracking, if the initial temperature isn't high enough, the steam you've created might dissipate too quickly before the crust has a chance to become pliable enough for expansion.
Conversely, an oven that is too hot can cause the crust to set too rapidly, before the interior has fully expanded. This is a prime cause of blowouts, as the rigid crust offers too much resistance to the expanding gases. Most sourdough recipes call for a high initial temperature, often 450-500°F (230-260°C), for the first part of the bake precisely to maximize oven spring and prevent premature crust setting, which are key sourdough crust cracking tips.
Handling Dough Roughly
Sourdough dough, especially after bulk fermentation and during shaping and proofing, should be handled with care. Rough handling can degas the dough excessively and damage the delicate gluten network that you've worked hard to develop. A strong, intact gluten structure is essential for the dough's ability to expand evenly and without tearing during baking.
Punching down the dough aggressively, stretching it too forcefully during shaping, or transferring it roughly into the proofing basket or oven can compromise its integrity. This weakened structure can lead to uneven expansion in the oven, creating stress points that manifest as uncontrolled sourdough crust cracking. Gentle shaping and handling techniques preserve the internal structure and contribute to a better crust.
Achieving the Perfect Crust: Conclusion
Mastering Sourdough Baking
Achieving that coveted, perfectly expanded sourdough crust without unsightly cracking is a rewarding milestone for any baker. It’s not about one single trick, but rather the successful combination of several key techniques. From ensuring your dough has optimal hydration and undergoes proper fermentation to implementing effective scoring and creating a steamy baking environment, each step plays a vital role in guiding your loaf to a beautiful, controlled rise.
By consistently applying these sourdough crust cracking tips – understanding the causes of cracks, mastering preventative measures like hydration, fermentation, scoring, and steam, and learning from common mistakes – you'll steadily improve your results. Baking sourdough is a journey of continuous learning and adjustment. Pay attention to your dough, experiment with variables like hydration or proofing time, and soon you'll be consistently pulling loaves from your oven with gorgeous, crack-free crusts.
Frequently Asked Questions
What causes a sourdough crust to crack?
Cracking is often due to a lack of moisture during the baking process, or an under-developed gluten structure. It can also be caused by too much oven spring.
How can I prevent my sourdough crust from cracking in the oven?
Introduce more steam into the oven during the initial baking phase. You can also ensure the dough is properly proofed to develop a strong gluten network.
What role does hydration play in preventing sourdough crust cracking?
Higher hydration doughs often result in a more flexible crust and are less prone to cracking. Ensure you are using the correct amount of water specified in your recipe.
Is scoring my sourdough loaf important for preventing cracks?
Yes, scoring provides a controlled release point for the steam and expansion during baking. This helps to prevent random and unsightly cracks.
What type of oven environment is best for a sourdough crust?
A hot and humid oven environment is ideal, especially at the beginning of the bake. Using a Dutch oven or adding ice cubes to a preheated pan can help create this.
Final Reflection: The Enduring Allure of a Perfect Sourdough Crust
The quest for a flawlessly crisp, crack-free sourdough crust is a journey shared by bakers worldwide, a testament to the enduring appeal of this ancient craft. The seemingly simple act of baking sourdough bread reveals a complex interplay of hydration, fermentation, and oven spring – all factors that can contribute to that dreaded cracking. Understanding these nuances, as explored in this article, is key to unlocking the secrets of a truly magnificent loaf.
The pursuit of the perfect sourdough crust is more than just aesthetics; it's a reflection of our connection to the process, a tangible representation of patience and precision. The subtle nuances of a well-developed crust – its texture, its aroma, its satisfying crackle – speak volumes about the care and attention poured into its creation. As the renowned baker, Chad Robertson, once said, Bread baking is a journey of discovery, a constant learning process.
This journey, with its challenges and triumphs, is what makes the pursuit of the perfect sourdough crust so rewarding.
Now, consider your own baking journey. What have you learned from this exploration of sourdough crust cracking? Take this knowledge and apply it to your next loaf. Don't be discouraged by imperfections; embrace them as opportunities for growth and refinement. Experiment with different hydration levels, baking techniques, and scoring methods. Remember, the path to a perfect crust is paved with experimentation and a deep appreciation for the art of sourdough baking. The next time you pull a loaf from the oven, savor the moment, and know that you are part of a long and rich tradition of bread making.
Unlock Your Perfect Sourdough: Mastering the Crust
Thanks for taking the time to explore the world of sourdough baking with us! We hope you now feel more confident in tackling that sometimes-tricky crust. Ready to put your new knowledge into practice?
- Bake your best loaf yet! Try out the techniques we discussed, focusing on one specific adjustment (like hydration or baking time) to see the impact. This is your chance to truly master the craft.
- Share your sourdough journey! Show off your newly perfected crust on social media—we’d love to see your results! Use #BakeWithEaseSourdough to join the community.
- Experiment with different flours: Explore how different types of flour impact your crust's texture and color. This is a fun way to discover your perfect sourdough recipe.
What unique element will you try in your next sourdough bake to achieve that perfect crackle?