
BakeWithEase Basic Sourdough: Simple Ingredients, Great Results

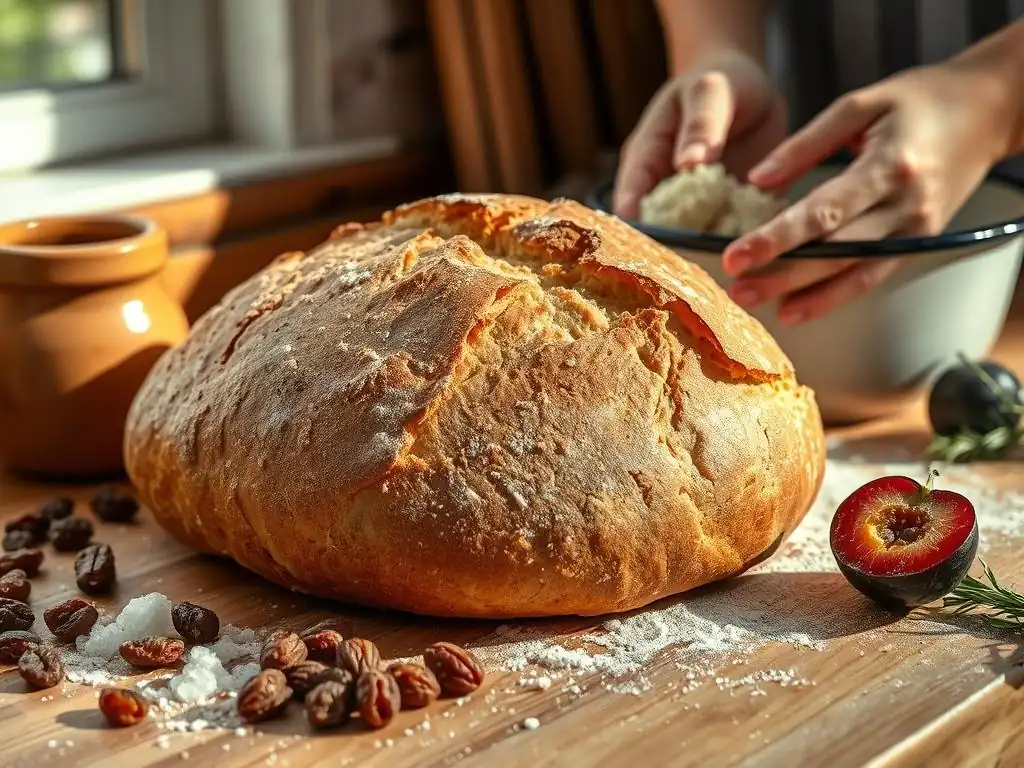
Welcome to BakeWithEase, your haven for unlocking the secrets of effortless baking! Ever dreamt of crafting artisan bread with minimal fuss? This guide unveils our Simple sourdough starter recipe easy, designed to bring the joy of naturally leavened bread to your kitchen, regardless of your experience. Curious how to transform a few basic ingredients into a bubbling, thriving starter? Let's begin your sourdough adventure and discover the magic of homemade bread!
- Introduction to Easy Sourdough Baking with BakeWithEase
- Understanding the Basics of Sourdough Starters
- The BakeWithEase Simple Sourdough Starter Recipe: Step-by-Step
-
Making Your First Loaf: A Simple Sourdough Bread Recipe
- Ingredients for BakeWithEase Basic Sourdough Bread
- Step 1: Autolyse - Hydrating the Flour
- Step 2: Mixing the Dough - Combining Starter and Flour
- Step 3: Bulk Fermentation - Building Flavor and Strength
- Step 4: Shaping Your Sourdough Loaf
- Step 5: Proofing - Preparing for the Oven
- Step 6: Baking Your Sourdough Bread to Perfection
- Troubleshooting Your Sourdough: Common Problems and Solutions
- Sourdough Starter Maintenance and Long-Term Care
- Delicious Variations: Expanding Your Simple Sourdough Repertoire
- Enjoying Your Homemade Sourdough Bread
- Conclusion: Mastering the Art of Simple Sourdough Baking with BakeWithEase
-
Frequently Asked Questions
- What exactly is a sourdough starter, and why is it important for making sourdough bread?
- Your recipe mentions "simple ingredients." What are the only ingredients needed to create and maintain a sourdough starter?
- How long does it realistically take to create a sourdough starter from scratch using your "Simple Sourdough Starter Recipe Easy"?
- What are some common signs that my sourdough starter is ready to be used for baking?
- I've tried other sourdough starter recipes before with no success. What makes the "BakeWithEase Basic Sourdough: Simple Ingredients, Great Results" recipe different and more likely to work?
- Final Reflection: The Enduring Allure of Simple Sourdough
- Unleash Your Inner Baker: Start Your Sourdough Journey Today!
Introduction to Easy Sourdough Baking with BakeWithEase
Why Sourdough? Embrace the Art of Homemade Bread
Baking sourdough bread at home is a truly rewarding experience. It connects you to a time-honored tradition, offering a depth of flavor and a unique texture that's hard to replicate with commercial yeast. Beyond the delicious crust and airy interior, the process itself is fascinating – watching a simple mixture of flour and water transform into a living, breathing entity that leavens your bread. It's a journey into microbial magic!
Furthermore, sourdough bread is often easier to digest for some people compared to bread made with commercial yeast, thanks to the long fermentation process breaking down complex starches and gluten. The tangy flavor comes from lactic and acetic acids produced by friendly bacteria, adding both taste and helping preserve the bread naturally. Embracing sourdough is embracing a healthier, more flavorful, and incredibly satisfying way to bake.
Our Promise: A Simple Sourdough Starter Recipe for Beginners
Getting started with sourdough can seem intimidating, but it doesn't have to be. At BakeWithEase, we believe anyone can bake fantastic sourdough with the right guidance. That's why we've developed a simple sourdough starter recipe designed specifically for beginners. You don't need fancy equipment or obscure ingredients – just basic flour, water, and a little patience.
This guide will walk you through every step, from creating your very first starter to baking your inaugural loaf of delicious, tangy sourdough bread. We focus on clarity and simplicity, demystifying the process so you can confidently bake beautiful bread in your own kitchen. Our goal is to make mastering a simple sourdough starter recipe easy and enjoyable for everyone.
Understanding the Basics of Sourdough Starters
What is a Sourdough Starter and Why It's Important?
A sourdough starter, often affectionately called "the mother," is a living culture of wild yeast and lactic acid bacteria thriving in a mixture of flour and water. Unlike commercial yeast which is a single strain of Saccharomyces cerevisiae, a starter contains a diverse community of microorganisms harvested naturally from the environment and the flour itself. This community works together to leaven bread and produce the signature tangy flavor.
The starter is crucial because it is the sole leavening agent in traditional sourdough bread. It consumes sugars in the flour, producing carbon dioxide gas that makes the dough rise, and organic acids that contribute to flavor, texture, and shelf life. A healthy, active starter is the foundation of successful sourdough baking; without it, your bread won't rise properly and will lack the characteristic taste. Learning how to create and maintain a simple sourdough starter recipe is the essential first step.
The Simple Science Behind Sourdough Fermentation
The magic of sourdough fermentation is a symbiotic relationship between wild yeasts and lactic acid bacteria (LAB). The wild yeasts, like Candida milleri or Saccharomyces exiguus, feed on sugars in the flour and produce ethanol and carbon dioxide. The carbon dioxide is trapped by the gluten network in the dough, causing it to rise.
Simultaneously, the LAB, primarily Lactobacillus species, convert sugars into lactic acid and acetic acid. Lactic acid provides a mellow tang, while acetic acid contributes a sharper, vinegary note. The ratio of these acids is influenced by feeding ratios, temperature, and hydration levels. This acidic environment also helps inhibit the growth of undesirable bacteria, making sourdough more stable and contributing to its unique structure and flavor profile. Understanding this simple science makes maintaining your simple sourdough starter recipe easy.
The BakeWithEase Simple Sourdough Starter Recipe: Step-by-Step
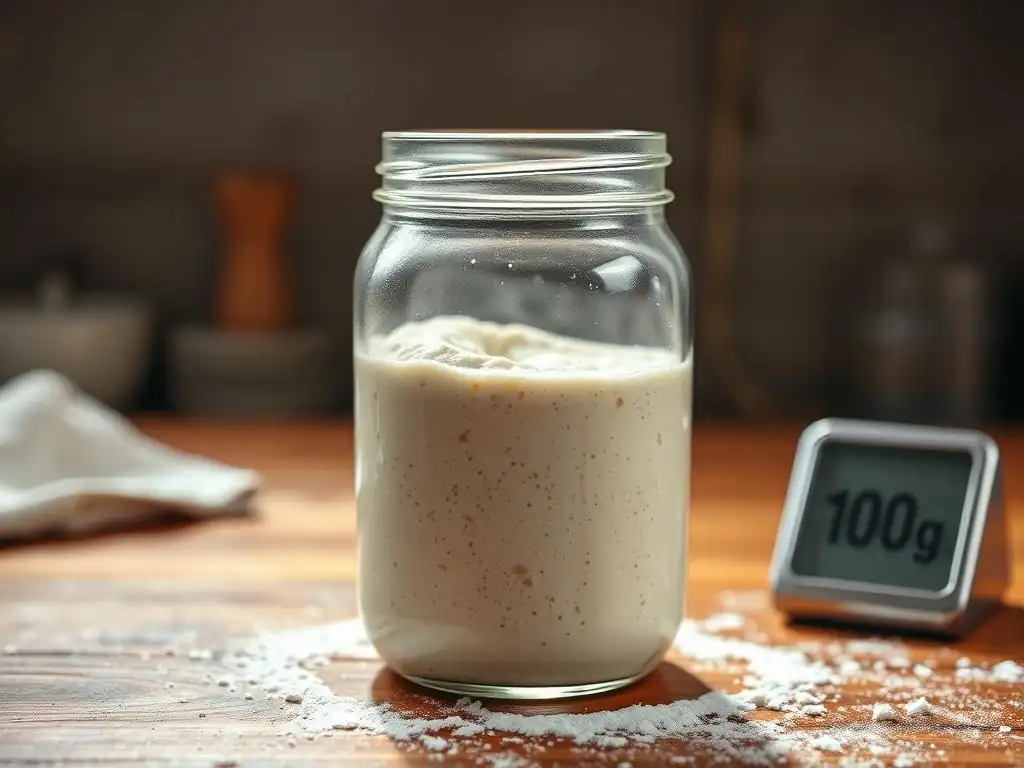
Ingredients for Your Easy Sourdough Starter
Creating your starter requires just two basic ingredients: flour and water. The type of flour you use can influence the speed of activation and the microbial community, but most common flours work well. We recommend starting with unbleached all-purpose flour or whole wheat flour, or a combination of both. Unchlorinated water is best, as chlorine can inhibit microbial growth.
Here's what you'll need for this simple sourdough starter recipe:
- Unbleached All-Purpose Flour or Whole Wheat Flour
- Unchlorinated Water (filtered or tap water left out for 24 hours)
- A clean glass jar or plastic container (around 1-quart capacity)
- A lid or plastic wrap to cover
- A rubber spatula or spoon for mixing
- A kitchen scale is highly recommended for accuracy, but volume measurements are possible.
Using equal parts flour and water by weight (a 1:1 ratio) is standard and easy to remember. For example, 50 grams of flour and 50 grams of water.
Day 1: Mixing the Initial Starter
Let's begin your simple sourdough starter recipe journey! Find a clean jar or container. Using a kitchen scale is ideal for precision.
- Add 50 grams of unbleached all-purpose flour (or whole wheat) to the jar.
- Add 50 grams of unchlorinated water to the flour.
- Mix thoroughly with a spoon or spatula until there are no dry spots of flour and the mixture is smooth and paste-like. Scrape down the sides of the jar.
- Cover the jar loosely with a lid or plastic wrap. You want to allow gases to escape but prevent the starter from drying out.
- Leave the starter at room temperature, ideally between 70-78°F (21-26°C).
Label the jar with the date you started. Don't expect much activity on day one; the microbes are just waking up! This initial mix is the foundation of your easy sourdough starter.
Day 2-7: Feeding Your Sourdough Starter for Optimal Growth
From day two onwards, you will begin the feeding process, which is crucial for cultivating a strong, active starter. Each day, you will discard a portion of the starter and feed the remainder with fresh flour and water. This removes metabolic waste and provides fresh food for the growing microbial population.
Here's the daily feeding routine for your simple sourdough starter recipe:
- Discard: Gently stir the starter. Discard about half of the starter from the jar. This might seem wasteful, but it's necessary to maintain a manageable amount and concentrate the microbial activity. You can discard into the trash or compost. (Reserve discard for recipes later if you wish, but not until the starter is consistently active).
- Feed: To the remaining starter, add 50 grams of fresh unbleached all-purpose flour and 50 grams of unchlorinated water (following the 1:1 ratio by weight).
- Mix: Stir vigorously until well combined and smooth. Scrape down the sides.
- Cover & Rest: Cover loosely and return to room temperature.
Repeat this discard and feeding process daily. You might see tiny bubbles or a slight sour smell after a few days. Around Day 4-7, activity should increase significantly, with noticeable bubbles and rise.
Recognizing a Healthy and Active Sourdough Starter
After about 7-14 days of consistent daily feeding at room temperature, your simple sourdough starter recipe should be showing clear signs of health and activity. The most obvious sign is consistent doubling (or even tripling) in volume within 4-8 hours after feeding, especially when kept in a warm spot around 75°F (24°C).
Other indicators of a healthy starter include:
- Bubbles: Large and small bubbles visible throughout the starter, not just on the surface.
- Texture: It should be light and airy, not dense or gluey.
- Smell: A pleasant, slightly tangy, or yeasty aroma, sometimes described as smelling like yogurt or ripe fruit. Avoid strong, unpleasant smells like acetone (nail polish remover), which can indicate it's hungry and needs feeding more often or at a warmer temperature.
- The Float Test (Optional): Once your starter is consistently doubling, you can test its readiness by dropping a small spoonful into a glass of water. If it floats, it's typically active enough to leaven bread.
Once your starter consistently doubles within several hours of feeding, it's ready to be used in your first loaf! Achieving this stage confirms you've successfully cultivated your simple sourdough starter recipe.
Making Your First Loaf: A Simple Sourdough Bread Recipe
Ingredients for BakeWithEase Basic Sourdough Bread
This simple sourdough bread recipe uses minimal ingredients to let the flavor of your starter shine. Accuracy in weighing ingredients is important for consistent results.
Here's what you'll need:
- 100 grams active and mature sourdough starter (at its peak, 4-8 hours after feeding)
- 375 grams unchlorinated water (around 80-85°F or 27-29°C)
- 500 grams strong bread flour (or unbleached all-purpose flour)
- 9-10 grams fine sea salt
Using warm water helps the dough come together easily and encourages yeast activity. Strong bread flour has a higher protein content (typically 12-14%), which helps develop a strong gluten structure needed for sourdough's open crumb.
Step 1: Autolyse - Hydrating the Flour
Autolyse is a simple technique that significantly improves dough handling and gluten development with minimal effort. It involves mixing just the flour and water and letting it rest.
- In a large mixing bowl, combine the 500 grams of flour and 375 grams of warm water.
- Mix with your hands or a spatula until no dry flour remains. The mixture will be shaggy and sticky.
- Cover the bowl with plastic wrap or a damp towel.
- Let it rest for 30 minutes to 1 hour at room temperature.
During this rest period, the flour absorbs the water, and enzymes naturally present in the flour begin to break down proteins, kickstarting gluten development without kneading.
Step 2: Mixing the Dough - Combining Starter and Flour
After the autolyse, it's time to incorporate your active simple sourdough starter and the salt.
- Add the 100 grams of active sourdough starter and the 9-10 grams of salt to the autolysed dough in the bowl.
- Mix everything together thoroughly. This can be messy initially. Use your hands to squish and fold the dough until the starter and salt are evenly distributed. It might take a few minutes of mixing and squeezing.
- Once combined, the dough will still be sticky but should start to show a little more structure.
This step fully integrates all components, allowing the starter's leavening power and the salt's flavor and structure-enhancing properties to work throughout the dough.
Step 3: Bulk Fermentation - Building Flavor and Strength
Bulk fermentation (or the first rise) is a critical phase where the starter leavens the dough, and flavors develop. This stage involves a series of "stretch and folds" to build gluten strength.
- After mixing, let the dough rest for 30 minutes.
- Perform the first set of stretch and folds: With damp hands, gently grab one side of the dough, stretch it up, and fold it over the center. Rotate the bowl and repeat this motion 3-4 times until all sides have been stretched and folded. The dough will become smoother and more elastic with each set.
- Cover the bowl and let it rest for another 30-45 minutes.
- Repeat the stretch and fold process 3-4 more times, with 30-45 minute rest periods in between. You should see the dough gaining strength and becoming less sticky.
The total bulk fermentation time can range from 4 to 8 hours (or potentially longer) depending on your room temperature and the activity of your simple sourdough starter. Aim for the dough to increase in volume by about 50-75% and feel airy and slightly jiggly.
Understanding Bulk Fermentation Time and Temperature
Temperature is the single biggest factor affecting bulk fermentation time. At warmer room temperatures (around 78-80°F or 26-27°C), bulk fermentation might only take 4-5 hours. In a cooler kitchen (68-70°F or 20-21°C), it could take 8 hours or even longer. There's no strict clock; you must learn to read the dough.
Look for visual cues: the dough should look puffy, have some bubbles on the surface and sides, and feel lighter. When performing the last stretch and fold, it should hold its shape reasonably well. Over-fermenting can lead to a slack, difficult-to-shape dough, while under-fermenting results in a dense loaf. Observe your dough and track how long it takes in your specific kitchen environment for future bakes.
Step 4: Shaping Your Sourdough Loaf
Once bulk fermentation is complete, it's time to shape the dough into its final form. This builds tension, which helps the loaf hold its shape and rise properly in the oven.
- Gently turn the dough out onto a lightly floured surface. Be careful not to deflate it too much.
- Perform a pre-shape: Gently tuck the edges under to form a rough ball or rectangle, depending on your desired final shape (round boule or oval batard). Let the dough rest, uncovered, for 15-20 minutes. This allows the gluten to relax before the final shape.
- Perform the final shape: Flour the top of the dough lightly. Flip the dough over so the seam is up. Gently stretch the dough into a rough rectangle. Fold the bottom third up, then fold the top third down over that. For a boule, fold the sides in and then gently cup the dough with your hands, rotating it on the surface to create surface tension. For a batard, roll the folded dough seam-side down into an oval shape, tucking the ends.
- Place the shaped dough seam-side up into a floured proofing basket (banneton) or a bowl lined with a floured towel.
Proper shaping is key to achieving a good oven spring and a well-structured crumb in your simple sourdough bread.
Step 5: Proofing - Preparing for the Oven
Proofing (the second rise) allows the shaped dough to lighten up before baking. This typically happens in a cooler environment to slow down fermentation and develop more complex flavors.
- Cover the proofing basket with plastic wrap or place it inside a plastic bag to prevent the dough from drying out.
- Place the covered basket in the refrigerator for 8 to 12 hours, or even up to 18 hours. Cold proofing develops flavor and makes the dough easier to handle and score.
Alternatively, you can proof at room temperature for 1-3 hours, but this requires careful monitoring as it happens much faster. The dough should look puffy but not significantly larger than its shaped size. An over-proofed dough will feel very airy and might collapse when handled.
Tips for Successful Proofing
Proofing is another stage where temperature plays a significant role. Cold proofing in the refrigerator (around 38-40°F or 3-4°C) is highly recommended for beginners as it's more forgiving and allows for better flavor development and a stronger crust. Ensure your refrigerator is cold enough.
To check if a cold-proofed loaf is ready, gently poke it with a floured finger. If the indentation slowly springs back about halfway, it's ready. If it springs back completely, it needs more time. If it stays fully indented, it might be slightly over-proofed, but you can still bake it! Learning these cues comes with practice using your simple sourdough starter recipe.
Step 6: Baking Your Sourdough Bread to Perfection
Baking sourdough at high heat with steam is essential for achieving a beautiful, crackling crust and maximum oven spring. The easiest way to create steam at home is by baking in a Dutch oven or a lidded heavy pot.
- Preheat your oven to a high temperature, typically 450-500°F (230-260°C), with your Dutch oven inside, for at least 30-45 minutes. The pot needs to be screaming hot.
- Carefully remove the hot Dutch oven from the oven.
- Gently invert the proofed dough from its basket into the hot pot. If using parchment paper, you can place the paper and dough directly into the pot.
- Score the top of the dough with a sharp razor blade or knife. This allows the bread to expand predictably as it bakes. A single slash or multiple cuts work.
- Immediately place the lid back on the Dutch oven.
- Carefully place the lidded pot back into the preheated oven.
Baking with the lid on creates steam, which keeps the crust soft initially, allowing the loaf to expand rapidly (oven spring) before the crust sets.
Baking Temperatures and Times for a Perfect Crust
Bake the bread with the lid on for the first 20 minutes at 450-475°F (230-245°C). This initial phase is crucial for oven spring.
After 20 minutes, carefully remove the lid. The bread should have expanded nicely and the crust will be starting to color. Reduce the oven temperature slightly, usually to 425-450°F (220-230°C).
Continue baking uncovered for another 20-30 minutes, or until the crust is a deep golden brown and the internal temperature of the loaf reaches 200-210°F (93-99°C). Baking uncovered allows the crust to dry out and become crisp. Use a probe thermometer for accuracy. Once baked, carefully remove the loaf from the Dutch oven and let it cool completely on a wire rack before slicing. This cooling time is vital for the internal structure and flavor to set.
Troubleshooting Your Sourdough: Common Problems and Solutions
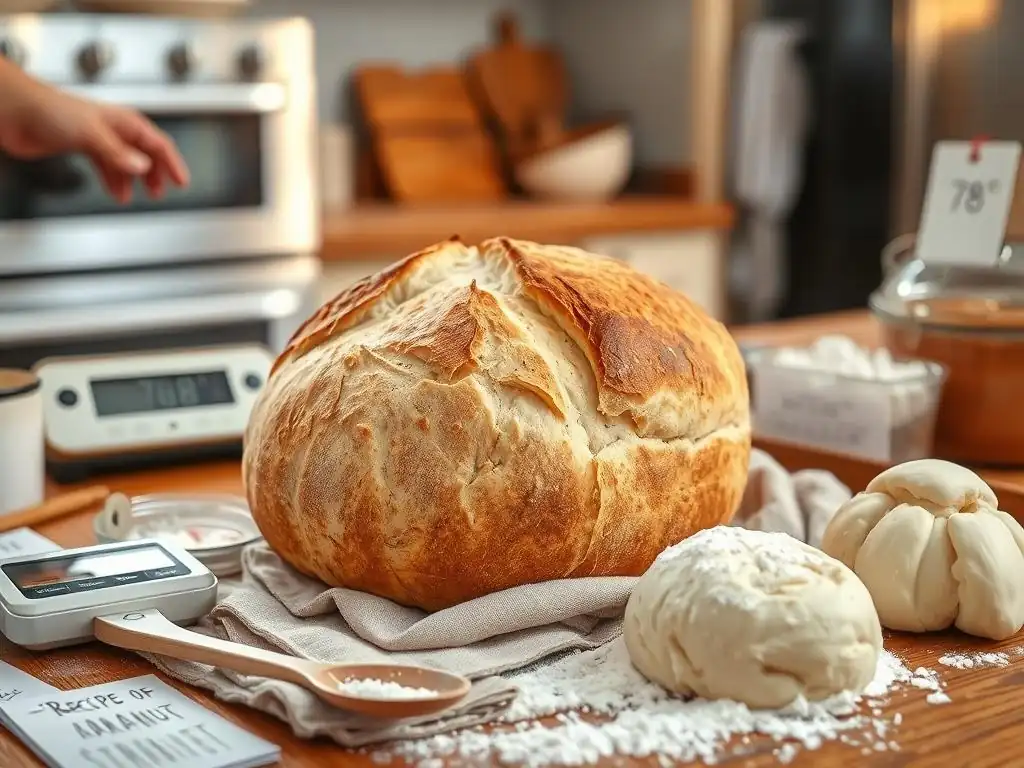
My Sourdough Isn't Rising: Troubleshooting Tips
If your sourdough starter isn't rising or your dough isn't expanding during bulk fermentation or proofing, several factors could be at play. First, check your simple sourdough starter recipe: is it active? Is it consistently doubling within 4-8 hours after feeding? If not, it needs more time, warmer temperatures, or more consistent feeding. Ensure you are using unchlorinated water and unbleached flour.
Another common issue is temperature. Sourdough fermentation is highly dependent on warmth. Ensure your starter is kept in a warm spot (70-78°F is ideal) and that your bulk fermentation is happening at a suitable room temperature. Under-kneading or insufficient stretch and folds can also result in poor gluten development, which prevents the dough from holding onto the gas produced by the starter. Make sure you are performing enough sets of stretch and folds until the dough shows visible strength.
Dense Sourdough Bread: Causes and Corrections
A dense crumb in your simple sourdough bread is often a sign of insufficient fermentation or poor gluten development. If the dough didn't rise much during bulk fermentation or proofing, it likely didn't produce enough carbon dioxide to create an open structure. This could be due to an inactive starter, too cool temperatures, or not allowing enough time for the fermentation stages.
Alternatively, if the dough felt slack and didn't hold its shape well during shaping, it might indicate insufficient gluten development from lack of proper mixing or stretch and folds. Over-proofing can also sometimes lead to a dense crumb if the structure collapses. Ensure your starter is vigorous, your bulk fermentation time is adequate for your kitchen temperature, and you are building sufficient strength in the dough through stretch and folds.
Sour Sourdough vs. Mild Sourdough: Controlling the Flavor
The tanginess of sourdough comes from the lactic and acetic acids produced by the bacteria in your simple sourdough starter. You can influence the level of sourness through a few factors. Warmer fermentation temperatures (above 75°F or 24°C) tend to favor lactic acid production, resulting in a milder, yogurt-like tang. Cooler temperatures (below 70°F or 21°C), especially during a long cold proof in the refrigerator, favor acetic acid production, leading to a more pronounced, vinegary sourness.
Feeding ratios also play a role. Feeding your starter a higher ratio of fresh flour and water compared to the amount of starter (e.g., 1:5:5 ratio of starter:flour:water) will result in a milder starter because the microbes have more food and produce less acid before the next feeding. A lower ratio (e.g., 1:1:1) will produce a tangier starter faster. Experiment with temperature and feeding ratios to find the tang level you prefer in your simple sourdough starter recipe.
Sourdough Starter Maintenance and Long-Term Care
Feeding Your Sourdough Starter After Baking
Once your simple sourdough starter recipe is mature and you've used a portion for baking, it's important to replenish it so it stays healthy and ready for your next loaf. The process is similar to the daily feedings you did when establishing it.
- Take the small amount of starter remaining in your jar after removing what you needed for the recipe.
- Feed it with fresh flour and water. A standard maintenance feeding ratio is 1:1:1 (starter:flour:water by weight). For example, if you have 20 grams of starter left, feed it 20 grams of flour and 20 grams of water.
- Mix well, cover loosely, and let it sit at room temperature for a few hours (3-4) until you see signs of activity (small bubbles). Then, you can either feed it again before using it for another bake soon or place it in the refrigerator for storage.
Consistent feeding keeps the microbial community balanced and strong, ensuring your simple sourdough starter recipe remains reliable.
Storing Your Sourdough Starter in the Refrigerator
If you don't bake every day or every few days, storing your simple sourdough starter recipe in the refrigerator is the most convenient option. Cold temperatures significantly slow down microbial activity, reducing the need for frequent feeding.
- Feed your starter as usual, let it show signs of activity at room temperature for 2-4 hours, then place it in the refrigerator.
- When stored in the fridge (around 38-40°F or 3-4°C), your starter only needs to be fed about once a week.
Before baking, you'll need to "wake up" your refrigerated starter. Take it out of the fridge, discard most of it, and feed it at room temperature. You might need 1-3 feedings over 12-24 hours until it consistently doubles within 4-8 hours again. This process ensures it's active enough to leaven your bread effectively.
Reviving a Dormant Sourdough Starter
Sometimes life happens, and your simple sourdough starter recipe might get neglected in the fridge for longer than a week or two. It might look sluggish, have a layer of dark liquid on top (called "hooch"), and smell strongly of alcohol or acetone. Don't despair – it's usually salvageable!
- Pour off the hooch (or stir it in if you prefer a tangier starter, though pouring off is generally recommended for revival).
- Discard most of the starter, leaving only a small amount (e.g., 20-30 grams).
- Feed the remaining starter with fresh flour and water, using a ratio like 1:2:2 or even 1:3:3 (starter:flour:water) to give the microbes plenty of fresh food.
- Mix well and leave at room temperature.
- Repeat this feeding process every 12-24 hours, discarding most before each feed.
Within a few days (sometimes up to a week), you should see increasing activity, and the starter will return to its vigorous, doubling state. Patience and consistent feeding are key to reviving a dormant simple sourdough starter recipe.
Delicious Variations: Expanding Your Simple Sourdough Repertoire

Adding Flavors: Herbs, Seeds, and More
Once you've mastered the basic simple sourdough bread recipe, the possibilities for variations are endless! Adding flavors can transform a simple loaf into something truly special. Common additions include herbs like rosemary or thyme, roasted garlic, cheese (cheddar, Gruyère), or spices like black pepper or caraway seeds.
Seeds are also popular additions, providing texture and nutrition. Try incorporating toasted sesame seeds, poppy seeds, sunflower seeds, or a mix like "everything bagel" seasoning. Generally, you can add these inclusions during the final mixing step after the autolyse or during the last set of stretch and folds. A good starting point is adding 10-20% of the total flour weight in additions. For example, for a 500g flour recipe, add 50-100g of seeds or other inclusions. Be mindful that some additions, like cheese or a large amount of seeds, can affect dough hydration and handling.
Sourdough Discard Recipes: Minimizing Waste
A natural byproduct of maintaining a simple sourdough starter recipe is the "discard" – the portion you remove before feeding. Instead of throwing it away, you can use this discard (especially from a healthy, mature starter) in a wide variety of delicious recipes. Discard typically doesn't have enough leavening power on its own to make a loaf of bread rise significantly, but it adds moisture, flavor, and a slight tang to other baked goods.
Popular sourdough discard recipes include pancakes, waffles, muffins, quick breads, crackers, pizza dough, and even pasta. These recipes often call for discard along with baking soda or baking powder for leavening. Using discard is a fantastic way to minimize waste and enjoy the unique flavor profile of your simple sourdough starter recipe in different formats.
Enjoying Your Homemade Sourdough Bread
Serving Suggestions and Pairing Ideas
There's nothing quite like the moment you slice into a warm loaf of your homemade simple sourdough bread. The aroma is intoxicating, and the crust crackles invitingly. Serve it simply with good quality butter – it's a classic for a reason.
Sourdough is incredibly versatile. Use it for sandwiches, toast, or as an accompaniment to soups, stews, or salads. Its sturdy structure holds up well, and the tangy flavor complements a wide range of dishes. Consider pairing it with cheese boards, charcuterie, or dipping it in olive oil and balsamic vinegar. Freshly baked sourdough elevates even the simplest meal.
Sourdough Bread Storage for Maximum Freshness
Homemade sourdough bread, especially with its natural acidity, tends to stay fresh longer than commercial yeast bread. However, proper storage is key to maintaining its crust and texture.
- Once completely cooled (this is essential! ), store the loaf at room temperature. Avoid refrigerating it, as this can actually make it stale faster.
- For the first day, you can simply leave it cut-side down on a cutting board to preserve the crust.
- For longer storage, wrap the loaf in a linen bread bag, a cotton towel, or place it in a paper bag inside a bread bin. Plastic bags will soften the crust.
- To store for several days, wrap the loaf tightly in plastic wrap or beeswax wrap after the first day to prevent drying out, or store it in a dedicated bread box.
For longer-term storage, slice the cooled loaf and freeze the slices in a freezer-safe bag. You can then toast slices directly from frozen for a quick taste of fresh sourdough.
Conclusion: Mastering the Art of Simple Sourdough Baking with BakeWithEase
Congratulations! By following this guide, you've learned how to create and maintain a simple sourdough starter recipe and bake your very first loaf of delicious, homemade sourdough bread. This journey requires patience and practice, but the rewards are immense.
From the initial mixing of flour and water for your starter to pulling a perfectly baked loaf from the oven, you've participated in a timeless craft. Don't be discouraged by imperfect loaves along the way; each bake is a learning experience. With consistent practice using your simple sourdough starter recipe, you'll build confidence and intuition, leading to consistently amazing results. Keep baking, keep experimenting, and most importantly, keep enjoying the process and the incredible bread you create with BakeWithEase.
Frequently Asked Questions
What exactly is a sourdough starter, and why is it important for making sourdough bread?
A sourdough starter is a live culture of wild yeast and bacteria used to leaven bread. It's important because it provides the characteristic tangy flavor and chewy texture of sourdough.
Your recipe mentions "simple ingredients." What are the only ingredients needed to create and maintain a sourdough starter?
You only need two ingredients: flour and water. That's all! The process cultivates the natural yeasts and bacteria present in the flour.
How long does it realistically take to create a sourdough starter from scratch using your "Simple Sourdough Starter Recipe Easy"?
It typically takes 7-14 days to create a usable sourdough starter. Factors like temperature and flour type can affect the timeline.
What are some common signs that my sourdough starter is ready to be used for baking?
A ready starter will show signs of active bubbling, it will double in size after feeding, and have a slightly sour, tangy aroma.
I've tried other sourdough starter recipes before with no success. What makes the "BakeWithEase Basic Sourdough: Simple Ingredients, Great Results" recipe different and more likely to work?
The BakeWithEase recipe focuses on clear, concise instructions and easy-to-understand explanations. We provide troubleshooting tips to help overcome common problems.
Final Reflection: The Enduring Allure of Simple Sourdough
The humble sourdough starter, with its simple ingredients and transformative power, remains a potent symbol of connection to our food heritage and a testament to the enduring satisfaction of homemade bread. In a world increasingly dominated by convenience and processed foods, the act of nurturing a sourdough starter and baking with it offers a powerful counterpoint – a return to slower, more mindful practices that yield extraordinary results. This simple process, accessible to everyone, offers a tangible link to generations past and a deeply satisfying connection to the food we consume.
The journey of creating a sourdough starter, from its initial bubbling to its eventual use in a crusty loaf, is a deeply rewarding experience. It's a process that teaches patience, observation, and the importance of understanding the subtle nuances of fermentation. This journey mirrors our own personal growth, requiring nurturing and attention to detail, but ultimately yielding something beautiful and unique. Bread is the staff of life,
they say, and in the case of sourdough, it's a staff crafted with love, time, and a healthy dose of patience. This simple act of baking connects us not only to our food but also to a richer, more meaningful way of life.
Now, consider your own kitchen. Imagine the aroma of freshly baked sourdough filling your home, the satisfying crust yielding to a soft, tangy crumb. This isn't just about a recipe; it's about reclaiming a connection to the process of food creation. Take the leap. Start your own starter. Embrace the simplicity, the patience, and the profound satisfaction of baking your own sourdough bread. The journey may be slow, but the rewards are immeasurable.
Unleash Your Inner Baker: Start Your Sourdough Journey Today!
Thanks for taking the time to explore the world of sourdough with us! We hope you gained valuable insights and confidence in tackling this rewarding baking journey. Now it's time to put your newfound knowledge into practice.
- Begin your sourdough starter today! Follow the simple steps outlined in the article and watch your starter come alive. This is your first step toward delicious, homemade bread.
- Share your sourdough adventure! Post a picture of your starter or your first loaf on social media and tag us – we'd love to see your progress!
- Explore other beginner-friendly recipes on BakeWithEase.com to expand your baking skills beyond sourdough.
Ready to transform your kitchen into a bakery? What's your biggest question about getting started with sourdough today?