
Working with Wafer Paper: Delicate Flowers and Textures

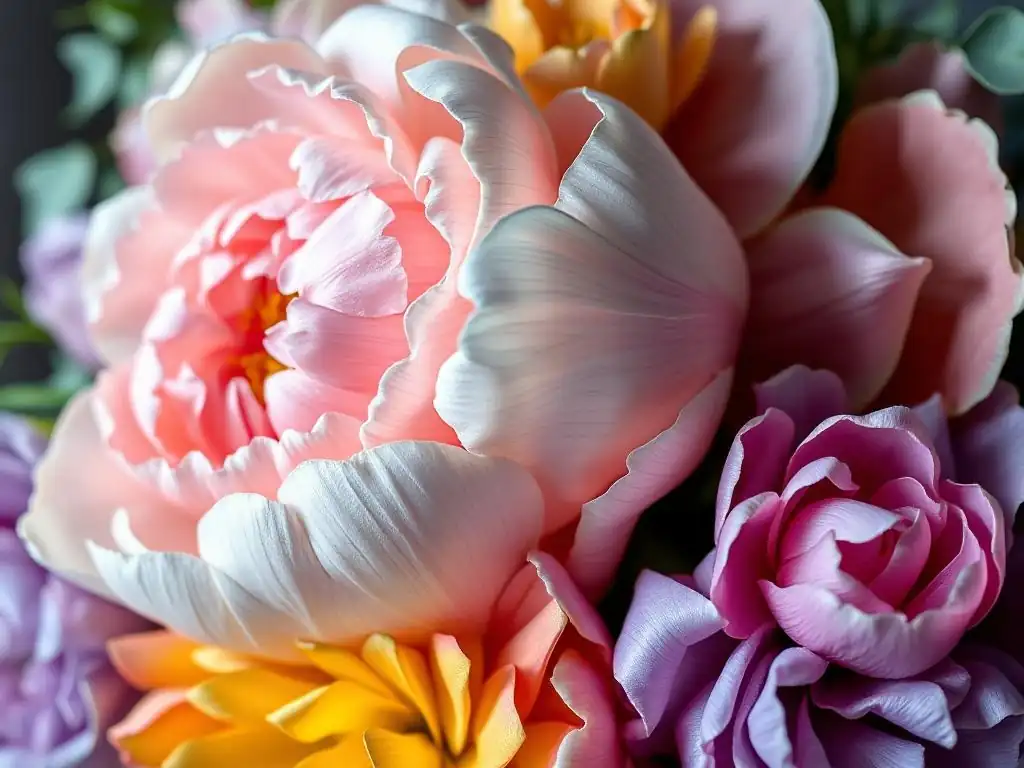
Welcome to BakeWithEase, where the joy of baking meets effortless execution! Ever dreamt of creating delicate, edible art? This week, we're diving deep into the world of advanced baking techniques with a focus on transforming humble wafer paper into stunning masterpieces. Prepare to be amazed as we unveil our detailed wafer paper flower tutorial, guiding you through each step to craft breathtaking floral decorations. Intrigued by the possibilities? Let's unlock the secrets to working with this versatile medium and elevate your baking to a whole new level of artistry...
- Working with Wafer Paper: Delicate Flowers and Textures - SweetCreations
- Introduction to Wafer Paper for Cake Decorating
- Essential Tools and Materials for Wafer Paper Art
- Wafer Paper Flower Tutorial: A Step-by-Step Guide
- Creating Textures and Effects with Wafer Paper
- Troubleshooting Common Wafer Paper Problems
- Wafer Paper Flower Tutorial: Advanced Techniques
- Tips and Tricks for Long-Lasting Wafer Paper Decorations
- Wafer Paper Inspiration: Design Ideas and Projects
- Conclusion: Mastering Wafer Paper for Stunning Cake Art
-
Frequently Asked Questions
- What is wafer paper, and what makes it suitable for making delicate flowers?
- Where can I purchase wafer paper for my flower tutorial project?
- What tools are essential for following a wafer paper flower tutorial?
- Are there any specific tips for preventing wafer paper from tearing or becoming too brittle during the flower-making process?
- Can I color wafer paper to create different colored flowers, and if so, what type of coloring should I use?
- Final Reflection: The Enduring Allure of Wafer Paper Blooms
- Unleash Your Inner Floral Artist: Craft Stunning Wafer Paper Wonders!
Working with Wafer Paper: Delicate Flowers and Textures - SweetCreations
Introduction to Wafer Paper for Cake Decorating
What is Wafer Paper and Why Use it in Baking?
Wafer paper, also known as rice paper or potato paper, is an edible paper made primarily from potato starch, water, and vegetable oil. It is virtually tasteless and has a slightly translucent quality, similar to a very thin communion wafer. It's widely used in baking for edible printing, wrapping confections, and creating decorations because it is entirely edible and dissolves in moisture, making it a unique medium compared to traditional sugar paste or fondant.
Its composition makes it ideal for delicate work. Unlike gum paste or fondant, which require significant drying time and can be heavy, wafer paper is lightweight even when dry. This allows decorators to create large, intricate pieces like wafer paper flowers or delicate sails without adding substantial weight to a cake, which is crucial for structural integrity, especially on tiered cakes.
The Advantages of Wafer Paper Flowers and Decorations
One of the primary advantages of using wafer paper is the speed with which decorations can be created once you master the techniques. While complex gum paste flowers can take hours or days to dry before assembly, wafer paper elements dry relatively quickly and become rigid, holding their shape. This allows for faster turnaround on custom cake orders.
Furthermore, wafer paper allows for an unparalleled level of delicacy and realism in edible flowers. Its thinness means petals can be layered to mimic the natural transparency and fragility of real blooms. The ability to easily color and shape the paper enables decorators to create stunningly realistic wafer paper flowers, ruffles, and other textural elements that are both beautiful and entirely edible, enhancing the overall guest experience.
Essential Tools and Materials for Wafer Paper Art
Must-Have Tools for Cutting and Shaping Wafer Paper
Working with wafer paper requires a few specific tools to achieve clean cuts and delicate shapes. A sharp craft knife, like an X-acto knife, is indispensable for precise cutting, especially when working with templates or intricate designs. A self-healing cutting mat is also essential to protect your workspace and keep your blade sharp. For freehand cutting or less intricate shapes, a pair of small, sharp detail scissors designed for crafting can also be very useful.
To shape wafer paper petals and leaves, you'll need a foam pad and a ball tool set. The foam pad provides a soft surface that allows you to gently press and manipulate the wafer paper without tearing it. Ball tools, ranging in size from very small (around 1.5mm) to larger (up to 25mm), are used to soften the edges of petals, create ruffles, and cup shapes, giving your wafer paper flowers a natural, lifelike appearance. Veining tools or impression mats designed for sugar flowers can also add realistic texture.
Choosing the Right Wafer Paper for Your Project: Thickness and Quality
Wafer paper typically comes in a couple of standard thicknesses. The most common is often referred to as "O" grade, which is relatively thin (approximately 0.27mm). This thickness is perfect for delicate, translucent petals, ruffles, and elements where flexibility and a soft drape are desired. It's the go-to choice for creating realistic wafer paper flowers and layered textures.
A thicker version, sometimes called "DD" (double density) or "extra thick," is available (around 0.6mm). This sturdier paper is better suited for structural elements like standing sails, geometric shapes, or for edible printing, as it holds ink well and is less prone to curling. The quality of the paper matters; look for smooth sheets without visible air bubbles or inconsistencies, as these can lead to tearing during manipulation. Sourcing from reputable suppliers ensures you get paper that is fresh and pliable.
Edible Glue and Other Adhesives for Wafer Paper
The primary adhesive for wafer paper is edible glue, typically made from CMC powder (Tylose powder) mixed with water. A common ratio is 1/4 teaspoon of CMC powder dissolved in 2 tablespoons of water, left to sit for several hours or overnight to thicken. This creates a clear, slightly viscous gel. When applied sparingly to wafer paper, the moisture reacts with the starch, creating a bond as it dries. It's crucial to use very little glue, as too much moisture will cause the paper to dissolve.
Other adhesives can be used with caution. A small amount of clear alcohol (like vodka or grain alcohol) can provide a very light, fast-drying tack, useful for adhering dusts or making minor adjustments. While water can be used, it's highly risky due to the potential for immediate dissolution. Adhesives like melted chocolate or royal icing are generally too thick and visible for delicate wafer paper joins, though they might be used for attaching finished pieces to a cake covered in frosting.
Food Coloring and Dusts for Wafer Paper Flowers: Achieving Realistic Hues
Wafer paper can be colored in several ways. For solid colors or gradients, airbrushing with alcohol-based edible colors is highly effective, as the alcohol evaporates quickly, minimizing moisture exposure. You can also paint on wafer paper using edible food coloring diluted with clear alcohol. Edible markers can be used for fine details, though they can sometimes cause the paper to soften slightly.
Edible petal dusts and lustre dusts are essential for adding depth, shading, and realism to wafer paper flowers. Applied dry with soft brushes (dedicated makeup brushes work wonderfully), these dusts allow you to mimic the subtle color variations found in natural petals. For instance, applying a darker pink dust to the center of a petal and lighter pink or white dust to the tips can create a beautiful gradient. Dusts can also be mixed with a drop of clear alcohol to create edible paint for adding veins or accent colors.
Wafer Paper Flower Tutorial: A Step-by-Step Guide
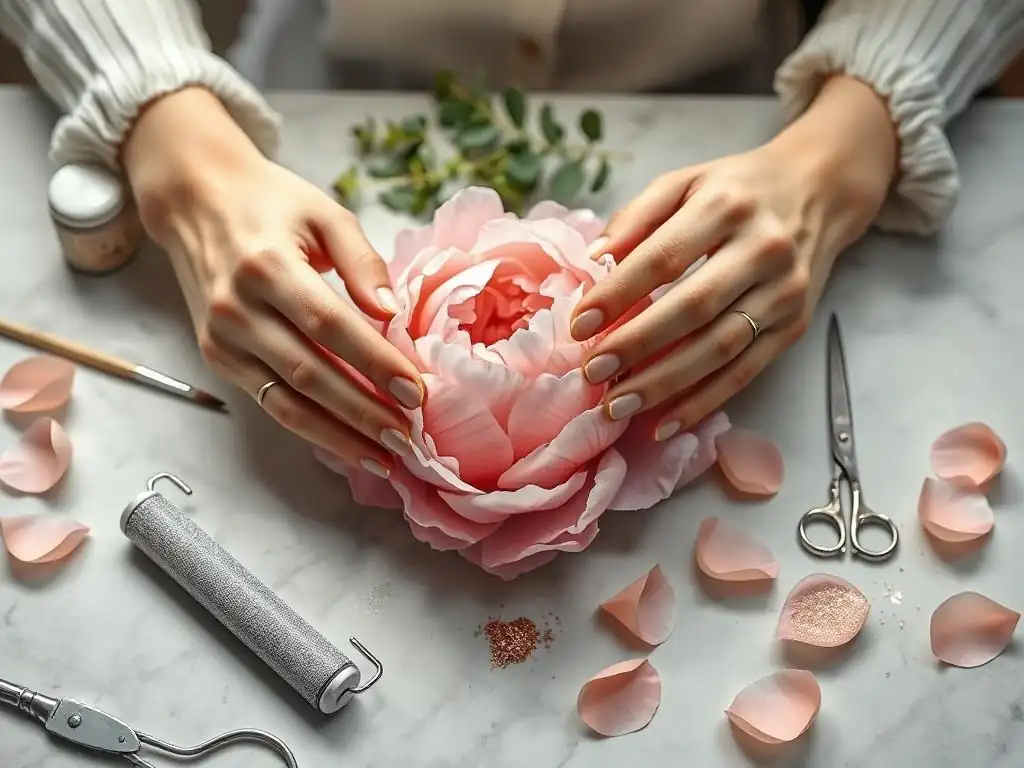
Preparing Your Wafer Paper for Flower Making
Working with wafer paper requires a dry environment, as humidity is its nemesis. Ensure your workspace is free from steam or excessive moisture. Keep unused wafer paper sealed in its original packaging or an airtight container.
Handle the paper with dry hands. If your wafer paper feels brittle, it may need a tiny amount of conditioning. This can be done by briefly exposing it to steam from a distance (a few feet away from a steamer for just a second or two) or working in a room with a cool mist humidifier running, but exercise extreme caution as too much moisture will ruin the paper.
Once conditioned (if necessary) or if it's already pliable, lay the wafer paper flat on your cutting mat. If using templates, place the template on top of the paper. You can secure the template gently with a piece of masking tape or a small weight if needed to prevent slipping while cutting. Plan your cuts to maximize the use of each sheet of wafer paper, similar to cutting fabric from a pattern.
Cutting Petals and Leaves: Basic Shapes and Techniques
The shape of your petals is fundamental to the type of wafer paper flower you are creating. Basic shapes include simple teardrops, rounded shapes for roses or peonies, or elongated shapes for lilies. You can cut these freehand with sharp scissors or a craft knife, or use pre-made templates. Practice cutting on scrap pieces to get a feel for how the paper cuts and to ensure your tools are sharp enough to prevent tearing.
Metal sugar flower cutters can also be used. Place the cutter on the wafer paper and press down firmly, wiggling slightly if necessary to ensure a clean cut. For intricate or custom shapes, using a craft knife with a template offers the most flexibility. Electronic cutting machines are also an option for very precise or repetitive cuts, but require specific settings and mat preparation for wafer paper. Aim for smooth, clean edges as ragged edges can be prone to tearing during shaping.
Shaping and Veining Wafer Paper Petals for a Realistic Look
Once cut, wafer paper petals are flat and somewhat stiff. To give them a natural, curved shape, you'll need to soften and manipulate them. Place a petal on your foam pad. Using a ball tool, gently roll the edge of the petal, applying light pressure. This will cause the edge to thin slightly and curl, creating a ruffled or wavy effect. For a cupped shape, gently press the center of the petal onto the foam pad with the ball tool. The key is to use light, even pressure to avoid tearing the delicate paper.
Veining adds another layer of realism. Place the petal between a veining tool set or an impression mat. Apply gentle, even pressure to imprint the vein pattern onto the paper. Wafer paper doesn't hold vein impressions as deeply as gum paste, but even a subtle pattern adds significant detail. For leaves, use a leaf veiner to create the central and side veins. Allow shaped and veined petals to dry completely on a drying rack or former before assembling your wafer paper flower.
Assembling Your Wafer Paper Flower: Layering and Adhesion
Assembling a wafer paper flower involves layering petals around a central point, using edible glue sparingly. Start with the innermost petals. For a rose or peony, you might create a small cone or bud shape from a piece of wafer paper or fondant attached to a floral wire (if using). Apply a tiny dot or thin line of edible glue to the base of the first few petals and attach them around the bud, overlapping slightly.
Continue adding layers of petals, working outwards. Apply glue only where the base of the petal will attach to the flower's structure or the previous layer. Overlap petals and vary their angle and position to create a natural, full look. For larger flowers, it's helpful to let layers dry for a few minutes before adding the next to maintain structure. Use a small brush to apply the glue precisely, avoiding getting excess moisture on the visible parts of the petals.
Adding Color and Detail to Your Wafer Paper Flowers with Edible Dusts
Adding color with edible dusts is where your wafer paper flowers truly come to life. Use soft, dry brushes dedicated to sugar art to apply edible petal dusts. Start with the deepest color at the base or center of the flower where petals are darkest, gradually blending lighter shades towards the tips. For example, on a pink rose, you might use a deep rose pink dust at the base and a lighter blush pink or white dust on the outer edges.
To add fine details like veins or to create an antique effect, mix a small amount of petal dust with a drop or two of clear alcohol, such as vodka or food-grade grain alcohol. This creates an edible paint. Use a fine-tipped brush to paint veins onto leaves or petals, or to add highlights or lowlights. The alcohol evaporates quickly, leaving the pigment behind without saturating the paper. This step is crucial for achieving the realistic depth and variation seen in natural blooms and is a key part of any good wafer paper flower tutorial.
Creating Textures and Effects with Wafer Paper
Embossing Wafer Paper for Unique Designs
Embossing is a fantastic way to add intricate patterns and textures to wafer paper for cake decoration. While standard paper embossing folders can be used, ensure they are new and designated only for food use, or use food-safe texture mats. Place a sheet of wafer paper between the embossing tool or mat and apply even pressure, often by rolling over it with a rolling pin.
This technique creates raised or recessed patterns on the paper, such as floral motifs, geometric designs, or lace-like textures. Embossed wafer paper can be used to create decorative panels for the sides of cakes, elegant borders, or individual elements like textured leaves. The process can also make the paper slightly more pliable for shaping immediately after embossing, before it dries and becomes rigid again.
Working with Wafer Paper to Create 3D Effects on Cakes
Wafer paper's ability to hold shape when dry makes it excellent for creating striking 3D effects directly on the cake surface. By cutting multiple identical or varying shapes and layering them with a small amount of edible glue, you can build up textures like scales (fish or dragon), feathers, or overlapping geometric patterns. Each layer adds dimension, transforming a flat surface into a dynamic design.
Controlled hydration is key for some 3D effects. By brushing one side of a wafer paper strip or shape very lightly with alcohol or holding it briefly near a cool mist steamer, you can make it pliable enough to mold around a form, create soft drapes, or form ruffles before it dries rigid. For instance, applying moisture to one side of a strip and letting it dry over a cylindrical object creates a curved piece perfect for modern designs. However, this technique requires practice and a very light touch to avoid dissolving the paper.
Adding Wafer Paper Sails and Other Modern Cake Decorations
Wafer paper sails are a popular modern cake decoration, adding height and architectural interest. To create a sail, cut a large, freeform shape from a sheet of wafer paper (thicker paper, like DD grade, often works best). While the paper is still dry, or after very slight conditioning with alcohol spray or steam, gently drape or curve it over a form, such as an empty bottle, a cake dummy, or a specially designed drying rack.
Allow the sail to dry completely in the desired shape; this takes several hours, depending on humidity. Once dry, the sail will be rigid and hold its form. Wafer paper's versatility also extends to creating other modern elements like sharp geometric shards, fans, abstract folded shapes, or even structured edible prints that stand upright on the cake. These elements are lightweight and add a contemporary flair that is difficult to achieve with heavier sugar mediums.
Troubleshooting Common Wafer Paper Problems
Preventing Wafer Paper from Tearing or Cracking
Tearing and cracking are common frustrations when working with wafer paper, primarily caused by dryness, excessive handling, bending too sharply, or using dull tools. To prevent this, always store unused wafer paper sealed in an airtight container away from direct light and heat. Handle the paper gently, supporting larger pieces. When cutting, ensure your craft knife or scissors are very sharp to make clean cuts without dragging or snagging the paper fibers.
Avoid bending wafer paper past its natural curve once it's dry and rigid. If a piece feels excessively brittle, it might benefit from minimal conditioning in a humidified environment or a quick spritz of alcohol from a distance, but this is a delicate process. Working efficiently once the paper is exposed to air also helps minimize drying out and brittleness.
Dealing with Humidity and Wafer Paper
Humidity is the arch-nemesis of wafer paper. High moisture in the air causes the paper to become sticky, wavy, and eventually dissolve or lose its shape entirely. Working in a humid environment is extremely challenging. The starch in the paper readily absorbs moisture, leading to these undesirable effects.
To combat humidity, work in an air-conditioned room if possible. A dehumidifier can be a valuable tool. Keep unused wafer paper sealed. Store finished wafer paper decorations in airtight containers immediately after they are dry, ideally with food-safe silica gel packets inside (ensuring they do not touch the decorations) to absorb excess moisture. Place decorations on the cake as late as possible before the event to minimize exposure to potential humidity changes.
Fixing Mistakes and Re-Shaping Wafer Paper Elements
Fixing mistakes like tears or cracks in wafer paper is difficult, and achieving an invisible repair is often impossible. Small tears can sometimes be patched from the back with a tiny piece of wafer paper and a minimal amount of edible glue, but the repair will likely be visible on the front. If a piece is significantly damaged, it is usually best to cut and shape a new one.
Once wafer paper has dried into a specific shape, it becomes brittle and attempting to reshape it will likely cause it to crack or break. Unlike fondant or gum paste which can often be re-softened, wafer paper does not easily regain pliability without the risk of dissolving. If you need a different shape, it is almost always more effective and less frustrating to start fresh with a new piece of paper rather than trying to force a dried piece into a new form.
Wafer Paper Flower Tutorial: Advanced Techniques
Creating Realistic Wafer Paper Roses
Creating realistic wafer paper roses is a cornerstone skill for many decorators following a wafer paper flower tutorial. A single, open rose can require anywhere from 20 to 30 petals, depending on its desired size and fullness. The technique involves cutting multiple sizes of petals, from small inner ones to large outer guard petals.
Assembly begins with a tight bud formed from a small piece of wafer paper or fondant. The smallest petals are attached around this bud, followed by progressively larger layers. Key techniques include softening and ruffling the outer edges of larger petals more dramatically than the inner ones using a ball tool on a foam pad. Dusting is critical; subtle shading from deep color at the base to lighter tones at the tips, combined with careful layering, creates the illusion of a real rose bloom.
Making Wafer Paper Peonies and Other Complex Flowers
Wafer paper peonies are another popular choice, known for their lush, ruffled appearance. Making a large peony can involve cutting 40 to over 60 petals of various sizes. The petals are often wider and more ruffled than rose petals. Shaping involves extensive softening and ruffling of the edges using a ball tool.
Assembly typically starts with building a central mass of tightly packed, ruffled petals, then adding layers outwards. Other complex flowers like dahlias, hydrangeas, or orchids require different cutting and assembly strategies. Hydrangeas, for example, are made from many small, individual four-petal florets assembled into a larger head. Mastering these flowers expands your repertoire significantly and showcases the versatility of wafer paper.
Combining Wafer Paper with Other Sugar Art Techniques [Example: Using Isomalt]
Wafer paper can be beautifully combined with other sugar art mediums to create more complex and dynamic decorations. Isomalt, a sugar substitute that melts clear and hardens quickly, can be used to create structural elements like delicate, transparent stems or branches for wafer paper flowers. Melted isomalt can also be drizzled or shaped into elements like 'water drops' or 'ice' to add unique details to your wafer paper creations. Always use caution when working with hot isomalt.
Other combinations include using fondant or gum paste. A sturdy fondant or gum paste center can provide a solid base to attach delicate wafer paper petals, especially for larger flowers or those on wires. Gum paste leaves can offer a different texture and sturdiness compared to wafer paper leaves, providing contrast. Attaching wafer paper elements to chocolate structures or using them alongside royal icing details further broadens the possibilities for stunning, mixed-medium cake art.
Tips and Tricks for Long-Lasting Wafer Paper Decorations
Storing Wafer Paper Flowers Properly
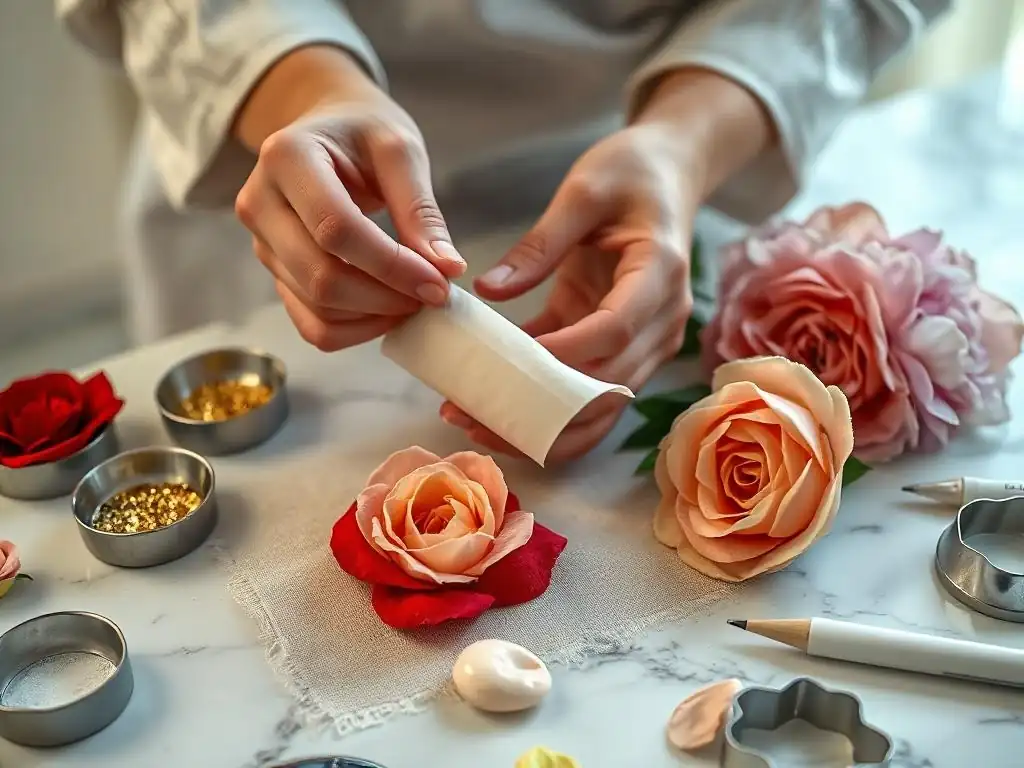
Proper storage is crucial for preserving the delicate beauty of your wafer paper flowers and decorations. They must be stored in an airtight container away from light, heat, and any source of moisture. Plastic cake containers or food storage boxes with tight-fitting lids are ideal.
To protect fragile pieces from crushing, store them in a single layer if possible, or separate layers with parchment paper or food-safe tissue paper. Placing food-safe silica gel packets inside the container helps absorb ambient moisture; ensure the packets do not come into direct contact with the decorations. Store the container at room temperature. Avoid storing wafer paper creations in the refrigerator or freezer, as the condensation that forms when they return to room temperature will damage them.
Sealing Wafer Paper for Added Protection
While wafer paper is sensitive to moisture, a light application of an edible sealing spray can offer a minimal layer of protection and enhance appearance. Edible glazing or sealing sprays, often alcohol-based, can add a subtle sheen or gloss to finished wafer paper decorations, making colors pop and giving a slightly more finished look.
When using a sealing spray, apply it in very light, even coats from a distance, allowing each coat to dry before applying another if needed. The alcohol helps it dry quickly, but too much spray will still cause the paper to soften and potentially dissolve. The protection offered is against very light humidity or brief handling, not against direct contact with moisture or high humidity environments. It can also help 'fix' edible dust colors, preventing them from rubbing off easily.
Transporting Cakes Decorated with Wafer Paper
Transporting cakes adorned with fragile wafer paper decorations requires careful planning. If possible, the safest method is to transport the cake plain and attach the wafer paper elements, especially tall sails or large, delicate flowers, at the final destination. Carry the decorations separately in their protective storage container.
If decorations must be transported on the cake, ensure the cake is securely placed in a sturdy box that is tall enough to accommodate the highest decoration without touching the lid. Avoid sudden stops or turns. Keep the car cool and dry during transport. For very tall or precarious elements like sails, you might consider adding temporary supports within the box that can be removed just before display. Always handle the cake box with care, avoiding tilting or shaking.
Wafer Paper Inspiration: Design Ideas and Projects
Wafer Paper Flowers for Wedding Cakes
Wafer paper flowers are an exquisite choice for wedding cakes, offering unparalleled elegance and lightness. Their delicate appearance perfectly complements the romantic aesthetic of weddings. Unlike heavy sugar flowers that can sometimes compromise the structure of multi-tiered cakes, lightweight wafer paper blooms allow for elaborate floral cascades or large statement flowers without adding significant stress. Popular choices include classic white or blush pink wafer paper roses, delicate sweet peas, or ethereal filler flowers like baby's breath or hydrangeas, all easily tinted to match specific wedding palettes.
For example, a six-tier wedding cake might feature a breathtaking cascade of over a hundred handcrafted wafer paper roses and peonies, interspersed with wafer paper leaves and delicate filler flowers, flowing from the top tier down several sides. The ability to achieve such scale and detail while keeping the decorations edible and relatively light is a major advantage. Wafer paper also allows for very intricate lace-like designs or delicate ruffled borders that enhance the sophisticated look of a wedding cake.
Wafer Paper Decorations for Birthday Cakes
Wafer paper isn't limited to formal occasions; it's incredibly versatile for birthday cakes of all themes and ages. Vibrant, colorful wafer paper flowers can top a fun, contemporary cake, while delicate butterflies or feathers can create a whimsical design for a child's birthday. Edible printed wafer paper is also a fantastic option for birthday cakes, allowing for photos, characters, or custom patterns to be applied directly to the cake surface or cut out as stand-up toppers.
Consider a modern birthday cake featuring bold, abstract wafer paper sails in bright blues, pinks, and golds rising dramatically from the top. For a themed party, a cake could be decorated with wafer paper elements cut and shaped to resemble specific objects, like edible playing cards or musical notes. A popular trend involves using edible printed wafer paper images of characters, cut out and applied to the side of the cake or used as toppers, offering a unique alternative to plastic figurines.
Creative Cake Designs Using Wafer Paper
Beyond traditional flowers and sails, wafer paper opens the door to highly creative and innovative cake designs. Its unique properties allow decorators to mimic textures like fabric, paper, or even architectural elements. Wafer paper ruffles can cover an entire tier, creating a soft, billowy effect resembling cloth. Embossed paper can be used for detailed panels or borders that look like intricate wallpaper or lace.
Experimentation with controlled moisture can lead to stunning effects, such as creating wafer paper that drapes like fabric, or pieces that curl into abstract, sculptural forms. Wafer paper can be layered and manipulated to create textures resembling wood grain, scales, or even crumpled paper effects. Combining it with techniques like airbrushing, stenciling, or even using it with chocolate molds allows for truly unique cake art pieces that push the boundaries of edible decoration.
Conclusion: Mastering Wafer Paper for Stunning Cake Art
Working with wafer paper is a rewarding skill that allows bakers and decorators to create stunning, delicate, and entirely edible cake art. From crafting incredibly realistic wafer paper flowers following a detailed wafer paper flower tutorial to creating modern geometric sails or intricate textures, its versatility is unmatched. While it presents unique challenges, particularly regarding moisture sensitivity, understanding its properties and using the right tools and techniques can lead to breathtaking results.
Like any sugar art technique, mastering wafer paper takes practice. Start with basic shapes and simple flowers, gradually moving to more complex designs and structural elements. The ability to create lightweight, detailed, and quickly drying decorations makes wafer paper an invaluable medium in the cake decorator's toolkit. Embrace the challenge, experiment with colors and forms, and watch your cakes transform into edible masterpieces with the delicate beauty of wafer paper.
Frequently Asked Questions
What is wafer paper, and what makes it suitable for making delicate flowers?
Wafer paper, also known as rice paper, is an edible paper made from potato starch, water, and oil. It's ideal for delicate flowers due to its thinness and ability to be molded when moistened.
Where can I purchase wafer paper for my flower tutorial project?
Wafer paper can be found at most cake decorating supply stores or online retailers specializing in baking ingredients. Look for various thicknesses depending on the desired effect.
What tools are essential for following a wafer paper flower tutorial?
Key tools include scissors or a craft knife for cutting, edible glue or water for adhering petals, and shaping tools like ball tools or tweezers for creating realistic curves.
Are there any specific tips for preventing wafer paper from tearing or becoming too brittle during the flower-making process?
To prevent tearing, lightly mist the wafer paper with water to make it more pliable. Avoid over-saturating it, as this can cause it to dissolve.
Can I color wafer paper to create different colored flowers, and if so, what type of coloring should I use?
Yes, you can color wafer paper using edible food coloring. Gel colors are recommended, as they are concentrated and won't add too much liquid, which could damage the paper.
Final Reflection: The Enduring Allure of Wafer Paper Blooms
The delicate art of crafting wafer paper flowers is more than just a hobby; it's a testament to the enduring human desire to create beauty from the simplest of materials. This intricate process, explored throughout this tutorial, allows for the creation of stunning, lifelike blooms that add an exquisite touch to cakes, cards, and other artistic endeavors. The accessibility of wafer paper and the surprisingly simple techniques involved make this craft a rewarding pursuit for both beginners and experienced artisans alike.
The impact of wafer paper artistry extends beyond the individual creation; it fosters a sense of community and shared passion. The online world is brimming with tutorials, inspiration, and a supportive network of fellow crafters, constantly pushing the boundaries of what's possible with this medium. This collaborative spirit is a beautiful reflection of the human need to connect through creativity. The best things in life are not things. They are people, places, memories and feelings.
This quote resonates deeply with the experience of crafting, where the process itself becomes as valuable as the finished product.
Now, it's your turn. Consider the possibilities that lie before you. Perhaps you'll embark on your own wafer paper journey, creating delicate blossoms that capture the essence of a cherished memory or a fleeting moment of beauty. Or maybe you'll simply appreciate the artistry involved in a new light, recognizing the dedication and skill that goes into each petal, each carefully formed bloom. Let the beauty of wafer paper inspire you to create, to connect, and to celebrate the artistry within yourself.
Unleash Your Inner Floral Artist: Craft Stunning Wafer Paper Wonders!
Thanks for joining us on this journey into the delicate world of wafer paper crafting! We hope you've discovered the incredible versatility and beauty this medium offers. Ready to bring your newfound skills to life?
- Create your first wafer paper masterpiece: Choose your favorite design from the article and give it a try. Don't be afraid to experiment with colors and textures! Even a small project will boost your confidence.
- Share your creations: Show off your stunning wafer paper flowers and designs on social media using #BakeWithEaseWaferPaper – we'd love to see your artistry!
- Explore new techniques: Dive deeper into the world of wafer paper by searching for advanced tutorials on YouTube or other baking blogs. What new skills are you eager to learn?
What unique wafer paper design will you bring to life next?