
Mastering Eastern European Nut Rolls (Orekhovyi Rulet) Easily

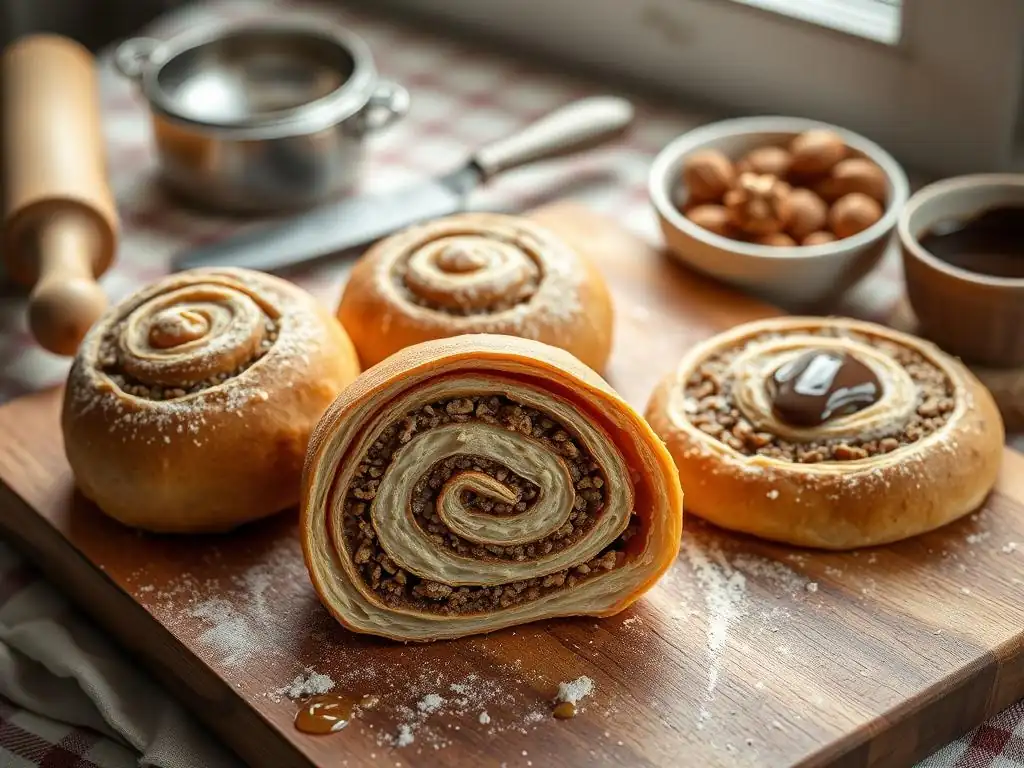
Welcome to BakeWithEase, your trusted guide to baking bliss! Are you ready to unlock the secrets to creating authentic and delicious treats from around the globe? This week, we're diving into the heart of Eastern European baking with a recipe that's both comforting and impressive. Discover how surprisingly easy it is to master the art of Easy Eastern European nut rolls (Orekhovyi Rulet). Intrigued? Let's get baking!
- Mastering Easy Eastern European Nut Rolls (Orekhovyi Rulet)
- BakeWithEase' Guide to Simple Orekhovyi Rulet
- What are Eastern European Nut Rolls (Orekhovyi Rulet)?
- Why This Easy Orekhovyi Rulet Recipe Works
- Easy Orekhovyi Rulet Recipe: Step-by-Step Guide
- Tips and Tricks for Perfect Eastern European Nut Rolls
- Variations and Adaptations for Your Nut Rolls
- Storing and Serving Your Homemade Nut Rolls
- Troubleshooting Common Nut Roll Baking Problems
- Enjoy Your Easy Homemade Eastern European Nut Rolls!
-
Frequently Asked Questions
- What makes BakeWithEase's nut roll recipe easy?
- What type of nuts are traditionally used in Eastern European nut rolls?
- What's the secret to preventing the nut roll from cracking during baking?
- Can I freeze nut rolls, and if so, how?
- Are there any substitutions I can make for ingredients in the nut roll recipe?
- Final Reflection: The Enduring Sweetness of Tradition, Simplified
- Unlock Your Inner Baker: Master the Art of Nut Rolls!
Mastering Easy Eastern European Nut Rolls (Orekhovyi Rulet)
BakeWithEase' Guide to Simple Orekhovyi Rulet
Welcome to BakeWithEase, where we believe that delicious baking should be accessible to everyone, regardless of experience level. Eastern European nut rolls, often known as Orekhovyi Rulet in Ukrainian or Makowiec (poppy seed roll) and Orzechowiec (nut roll) in Polish, are beloved pastries enjoyed across many cultures in the region.
Their rich, sweet nut fillings encased in a tender, often slightly sweet dough make them a festive and comforting treat. While traditional recipes can sometimes seem daunting, our goal with this guide is to show you just how simple it can be to create beautiful and delicious easy Eastern European nut rolls right in your own kitchen.
This article will walk you through a simplified approach to making these delightful rolls. We'll cover everything from understanding what makes them special to a step-by-step recipe designed for ease, plus tips for success and variations. Get ready to fill your home with the wonderful aroma of freshly baked easy Eastern European nut rolls.
What are Eastern European Nut Rolls (Orekhovyi Rulet)?
A Delicious Dive into Eastern European Baking
Eastern European nut rolls are a staple in the rich tapestry of the region's baking traditions. At their heart, they are a sweet yeast dough rolled thin, generously spread with a filling—most commonly ground nuts (like walnuts) or poppy seeds—then rolled up jelly-roll style and baked until golden brown. The result is a beautiful swirl of dough and filling when sliced, offering a delightful contrast in texture and flavor.
These rolls are not just desserts; they are often symbols of celebration, hospitality, and family gatherings. Making easy Eastern European nut rolls allows you to connect with these traditions in a manageable way.
The fillings are usually made from finely ground nuts (walnuts being a favorite for orekhovyi rulet), often mixed with sugar, milk, butter, and sometimes flavorings like vanilla, rum, or citrus zest. The consistency of the filling is key – it needs to be spreadable but not too wet, ensuring it stays in place during rolling and baking. The dough itself is typically enriched with eggs and butter, giving it a soft, tender crumb that complements the dense, sweet filling perfectly. Mastering easy Eastern European nut rolls means understanding this balance between a tender dough and a flavorful filling.
The History and Tradition of Nut Rolls
Nut rolls and poppy seed rolls have a long and storied history throughout Eastern Europe, with variations found in countries like Poland, Ukraine, Hungary, Slovakia, and beyond. Their origins are intertwined with agricultural cycles and religious holidays. For example, poppy seeds were traditionally associated with abundance and good fortune, making poppy seed rolls (like Polish Makowiec) popular for Christmas and Easter. Nut rolls ( Orekhovyi Rulet, Hungarian Beigli) also feature prominently during these festive seasons and for other special occasions like weddings and family celebrations.
Historically, preparing these rolls was a labor-intensive process, often involving multiple family members. The dough required careful kneading and long rising times, while the fillings were prepared from scratch, sometimes involving grinding nuts or poppy seeds by hand. The tradition of making these rolls has been passed down through generations, with each family often having its own cherished recipe and techniques.
Our approach to easy Eastern European nut rolls respects this heritage while simplifying the steps, making it possible for modern bakers to enjoy this classic without dedicating an entire day to the process. The act of making and sharing these rolls remains a powerful link to cultural identity and family history.
Why This Easy Orekhovyi Rulet Recipe Works
Simplifying Traditional Nut Roll Baking
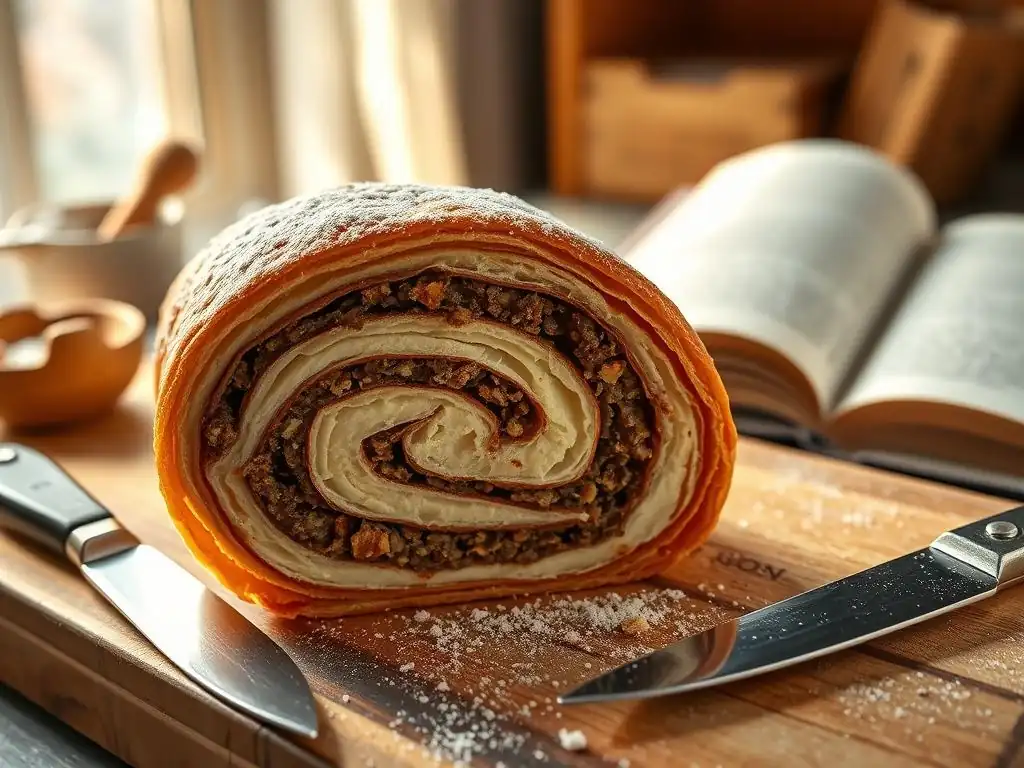
Traditional Eastern European nut roll recipes often call for multiple rises, intensive kneading, and sometimes complex filling preparations. Our easy Eastern European nut rolls recipe streamlines these steps without compromising on authentic flavor or texture. We achieve this simplification through a few key adjustments. Firstly, the dough method minimizes hands-on kneading, relying more on mixing and a shorter, more manageable rising period. This cuts down significantly on preparation time.
Secondly, the filling preparation is designed for speed and ease. Instead of lengthy simmering or complex steps, our filling comes together quickly while still delivering that rich, nutty flavor. By focusing on essential techniques and ingredients, we've created a process for easy Eastern European nut rolls that is approachable for beginners yet yields results that rival more complex traditional methods. This recipe proves that you don't need years of baking experience to enjoy homemade orekhovyi rulet.
Key Ingredients for Easy Nut Roll Success
Using the right ingredients is crucial for achieving tender dough and flavorful filling in your easy Eastern European nut rolls. Here are some key players:
- Active Dry Yeast: This is the leavening agent that makes the dough light and airy. Ensure your yeast is fresh for proper rising. Using warm (not hot) milk or water is essential to activate it effectively.
- All-Purpose Flour: Standard unbleached all-purpose flour works wonderfully for this dough, providing enough structure while remaining tender.
- Butter: Provides richness and tenderness to the dough and is a crucial binder and flavor enhancer in the filling. Using softened butter in the dough helps it incorporate smoothly.
- Sugar: Sweetens both the dough and the filling. Granulated sugar is standard, but brown sugar can add a deeper flavor to the filling.
- Eggs: Add richness, color, and structure to the dough. An egg wash is also used to give the baked rolls a beautiful golden sheen.
- Milk: Provides liquid for the dough and helps activate the yeast. Whole milk adds extra richness.
- Ground Walnuts: The star of the orekhovyi rulet filling! Freshly ground nuts provide the best flavor. Ensure they are finely ground but not turned into a paste. Approximately 250-300 grams (about 2.5-3 cups) of ground walnuts is a typical amount for a generous filling in two rolls.
- Flavorings: Vanilla extract, lemon zest, or a splash of rum are common additions to the nut filling, enhancing its complexity.
These ingredients, when combined correctly, contribute to the success of your easy Eastern European nut rolls, ensuring they are both delicious and relatively simple to make.
Easy Orekhovyi Rulet Recipe: Step-by-Step Guide
Preparing the Dough for Your Nut Roll
Creating a tender dough is the first step towards perfect easy Eastern European nut rolls. This recipe uses a straightforward method that minimizes fuss.
Ingredient List for the Dough
- 1 packet (about 7 grams or 2.25 teaspoons) active dry yeast
- 1/4 cup warm milk (around 105-115°F or 40-46°C)
- 1 teaspoon sugar (for yeast)
- 2 1/2 cups all-purpose flour, plus more for dusting
- 1/4 cup granulated sugar
- 1/2 teaspoon salt
- 1/2 cup (1 stick or 113 grams) unsalted butter, softened
- 2 large eggs, lightly beaten
- 1/4 cup milk, room temperature
Mixing and Kneading the Dough
- In a small bowl, combine the warm milk, yeast, and 1 teaspoon sugar. Stir gently and let stand for 5-10 minutes until foamy. This confirms your yeast is active – a crucial step for easy Eastern European nut rolls.
- In a large mixing bowl, whisk together the flour, remaining 1/4 cup sugar, and salt.
- Cut the softened butter into small pieces and add it to the dry ingredients. Use your fingers or a pastry blender to cut the butter into the flour mixture until it resembles coarse crumbs.
- Add the beaten eggs, room temperature milk, and the activated yeast mixture to the bowl.
- Mix with a wooden spoon or a stand mixer with a dough hook until a shaggy dough forms.
- Turn the dough out onto a lightly floured surface and knead for about 5-7 minutes, or use a stand mixer for about 4-5 minutes, until the dough is smooth and elastic. It should be slightly sticky but manageable. Avoid adding too much extra flour, which can make your easy Eastern European nut rolls dry.
Letting the Dough Rise
- Lightly grease a clean bowl with butter or oil.
- Place the kneaded dough in the bowl, turning to coat all sides.
- Cover the bowl tightly with plastic wrap or a clean kitchen towel.
- Let the dough rise in a warm place until doubled in size. This typically takes about 1 to 1.5 hours, depending on the warmth of your kitchen. A slightly warmer spot (like a turned-off oven with the light on) can speed up the process for your easy Eastern European nut rolls.
Making the Nut Filling
The rich, sweet nut filling is what defines Orekhovyi Rulet. This simple version comes together quickly.
Ingredients for the Nut Filling
- 2 1/2 cups (about 250-300 grams) finely ground walnuts
- 1/2 cup granulated sugar
- 1/4 cup milk or heavy cream
- 2 tablespoons unsalted butter, melted
- 1 teaspoon vanilla extract
- Optional: 1 tablespoon rum, 1 teaspoon lemon zest, or 1/4 teaspoon cinnamon
Preparing the Nut Mixture
- In a medium bowl, combine the finely ground walnuts and sugar. Mix well to distribute the sugar evenly among the nuts.
- In a separate small bowl, whisk together the milk (or cream), melted butter, and vanilla extract. Add any optional flavorings like rum, lemon zest, or cinnamon at this stage.
- Pour the liquid mixture over the nut and sugar mixture.
- Stir everything together thoroughly until you have a thick, spreadable paste. The consistency should be moist but not runny. If it seems too dry, add another tablespoon of milk. If too wet, you can add a tablespoon of finely ground cookie crumbs or breadcrumbs. This ensures the filling stays put in your easy Eastern European nut rolls.
Assembling and Baking the Nut Rolls
This is where your easy Eastern European nut rolls take their iconic shape!
Rolling Out the Dough
- Once the dough has doubled in size, gently punch it down.
- Turn the dough out onto a lightly floured surface.
- Divide the dough in half. Working with one half at a time, roll it out into a large rectangle, approximately 12x16 inches (about 30x40 cm) and about 1/8 inch (3-4 mm) thick. Try to keep the edges relatively straight. Rolling evenly is key to uniform easy Eastern European nut rolls.
Spreading the Nut Filling
- Take half of the prepared nut filling.
- Spread the filling evenly over the rolled-out dough rectangle, leaving a small border (about 1/2 inch or 1 cm) clear around the edges. This clear border helps seal the roll. Ensure the filling is spread all the way to the edges you'll be rolling from.
Rolling and Shaping the Nut Rolls
- Starting from one long side of the rectangle, tightly roll up the dough with the filling inside, like a jelly roll. Try to keep the roll tight as you go to prevent large air pockets.
- Once rolled, gently pinch the seam closed to seal the roll.
- Carefully transfer the rolled nut roll to a baking sheet lined with parchment paper. Place the roll seam-side down.
- Repeat the process with the second half of the dough and the remaining filling. You should have two easy Eastern European nut rolls.
Baking to Golden Perfection
- Preheat your oven to 350°F (175°C).
- Beat the remaining egg (you can use one of the two originally listed for the dough, reserving a tiny bit) with a tablespoon of milk or water to make an egg wash.
- Brush the tops and sides of the rolled nut rolls generously with the egg wash. This gives them a beautiful golden-brown crust.
- Using a skewer or toothpick, gently pierce the tops of the rolls in several places (about 6-8 times per roll). This allows steam to escape during baking and helps prevent cracking.
- Bake the easy Eastern European nut rolls for 30-40 minutes, or until they are golden brown and sound hollow when gently tapped on the bottom. Baking time can vary based on your oven.
- Remove from the oven and let the rolls cool completely on the baking sheet or a wire rack before slicing. Cooling is essential for the filling to set properly.
Tips and Tricks for Perfect Eastern European Nut Rolls
Achieving a Tender and Flaky Dough
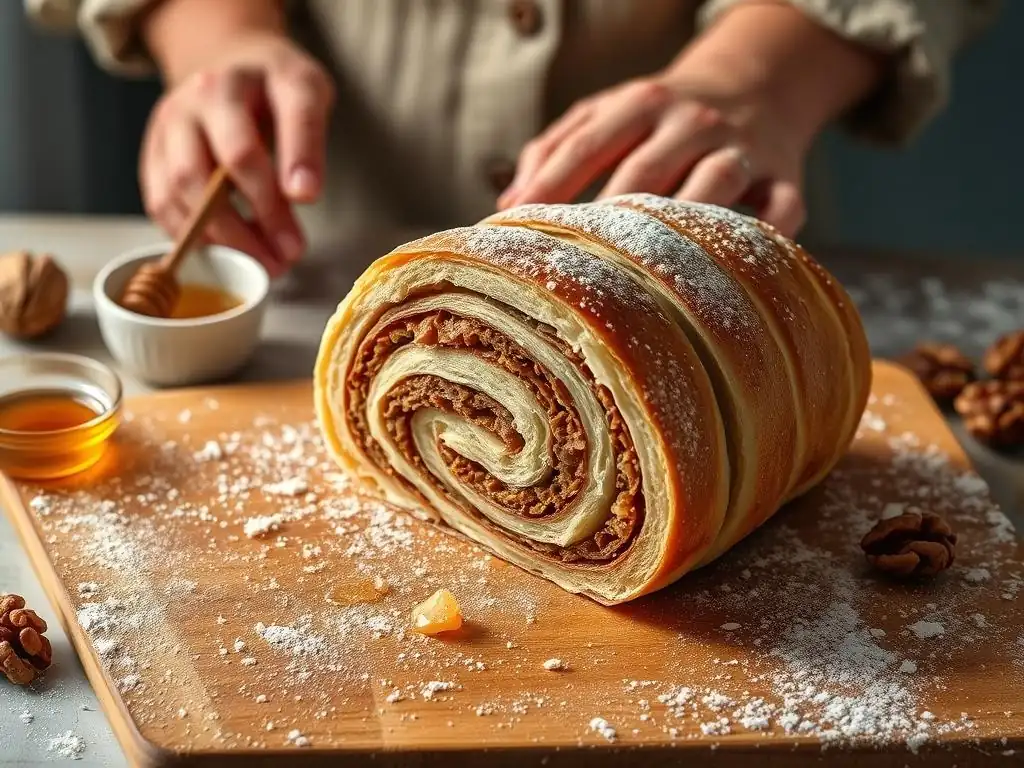
The secret to a tender dough in your easy Eastern European nut rolls lies in proper ingredient ratios and gentle handling. Using softened butter and eggs at room temperature helps them incorporate smoothly into the dough, resulting in a softer texture. Avoid adding too much extra flour during kneading or rolling; a slightly sticky dough is better than a dry, tough one.
Kneading just until the dough is smooth and elastic, rather than over-kneading, also prevents gluten from developing too much, which can lead to toughness. Allowing the dough to have its full rise time gives it a light, airy structure crucial for a tender final product.
Another tip is to handle the dough gently when punching it down and rolling it out. Aggressive handling can deflate the air pockets created during the rise and compact the dough. Roll it out smoothly and evenly, applying consistent pressure. This careful approach to dough preparation ensures your easy Eastern European nut rolls have that desirable soft, slightly flaky texture that melts in your mouth alongside the rich filling.
Preventing Cracks in Your Nut Roll
Cracking is a common issue when baking nut rolls, but it can often be prevented with a few simple techniques. The most important step is piercing the rolls before baking. As the roll bakes, steam builds up inside, particularly from the moist filling. If this steam cannot escape, it will force cracks in the dough. Piercing with a skewer or toothpick allows the steam to release gradually. Aim for about 6-8 evenly spaced holes along the top of each roll.
Another factor is the tightness of the roll. While you want it rolled snugly, rolling it too tightly can also contribute to cracking, as the dough has less room to expand. Ensure the dough is rolled to the recommended thickness (about 1/8 inch) so it's not too thin and fragile. Finally, baking at the correct temperature (350°F/175°C) is important; an oven that is too hot can cause the outside to set before the inside is fully baked and expanded, leading to cracks. Following these steps will help you bake beautiful, crack-free easy Eastern European nut rolls.
Enhancing the Nut Flavor
To truly make the nut filling shine in your easy Eastern European nut rolls, start with high-quality, fresh walnuts. Walnuts can sometimes have a slightly bitter edge if they are old or not stored properly. Grinding the nuts yourself just before making the filling will yield the freshest, most intense flavor compared to using pre-ground nuts that may have lost some of their aromatic oils.
Toasted nuts offer an even deeper, richer flavor profile. You can lightly toast the walnuts in a dry skillet over medium heat for a few minutes, stirring constantly until fragrant, before grinding them for the filling. Be careful not to burn them! Incorporating flavor enhancers like vanilla extract, a splash of rum, or citrus zest (lemon or orange) also brightens and complements the nutty taste. Don't be afraid to add a small pinch of cinnamon or a tiny bit of almond extract for added complexity, ensuring your easy Eastern European nut rolls are bursting with delicious flavor.
Variations and Adaptations for Your Nut Rolls
One of the joys of making easy Eastern European nut rolls is the ability to customize the filling and toppings to your liking.
Different Nut Fillings: Walnut, Poppy Seed, and More
While walnut is classic for Orekhovyi Rulet, you can easily adapt this recipe for other popular Eastern European fillings.
- Poppy Seed (Makowiec): Replace the ground walnuts with about 1.5-2 cups (about 150-200 grams) of finely ground poppy seeds. Poppy seed filling typically involves simmering the seeds with milk, sugar, butter, and flavorings like honey, raisins, or citrus zest until thickened. This requires a slightly different preparation method than the walnut filling, but the dough recipe works perfectly.
- Almond: Use finely ground almonds instead of walnuts. Almond filling often pairs well with cherry or apricot flavors.
- Hazelnut: Ground hazelnuts can also be used for a distinct, rich flavor. Toasting hazelnuts before grinding is highly recommended to bring out their best taste.
Experimenting with different nuts allows you to explore the diverse world of easy Eastern European nut rolls.
Adding Citrus Zest for Extra Flavor
Adding citrus zest is a simple yet effective way to elevate the flavor of your easy Eastern European nut rolls. Lemon zest is traditional and pairs wonderfully with both walnut and poppy seed fillings, adding a bright, fresh counterpoint to the richness. Orange zest can also be used for a slightly different aromatic note.
When adding zest, use a microplane or fine grater to get just the colored part of the peel, avoiding the bitter white pith. A teaspoon or two of finely grated zest added to the nut filling mixture is usually sufficient to impart a noticeable lift in flavor. This small addition can make a big difference in the overall taste profile of your easy Eastern European nut rolls.
Glazing and Topping Options
While a simple egg wash provides a lovely finish, you can add extra flair to your easy Eastern European nut rolls with glazes and toppings.
- Simple Sugar Glaze: A common finish is a thin glaze made by mixing powdered sugar with a little milk, lemon juice, or rum. Drizzle this over the cooled rolls.
- Chocolate Drizzle: Melted semi-sweet or dark chocolate can be drizzled over the cooled rolls for a decadent touch.
- Nut Topping: Before baking, you can sprinkle chopped nuts over the egg-washed rolls for added texture and visual appeal.
- Powdered Sugar: A simple dusting of powdered sugar after cooling is a classic and elegant finish.
These options allow you to customize the look and taste of your easy Eastern European nut rolls even further.
Storing and Serving Your Homemade Nut Rolls
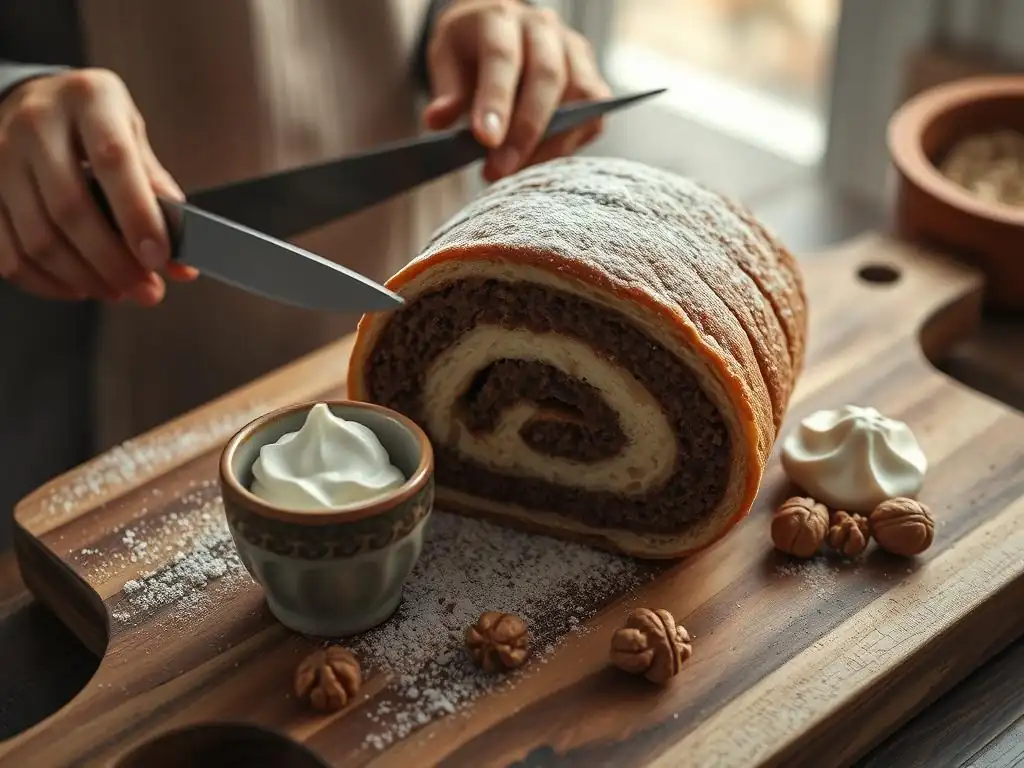
Proper storage ensures your easy Eastern European nut rolls stay fresh and delicious, and knowing how to serve them enhances the experience.
Keeping Nut Rolls Fresh
Once completely cooled, your easy Eastern European nut rolls should be stored properly to maintain their texture and flavor.
- Room Temperature: Store whole or sliced rolls wrapped tightly in plastic wrap or placed in an airtight container at room temperature for up to 3-4 days. The high sugar and fat content in the filling helps preserve them.
- Refrigeration: For longer storage, refrigerate the rolls for up to a week. Wrap them well to prevent drying out.
- Freezing: Nut rolls freeze exceptionally well. Wrap individual slices or whole rolls tightly in plastic wrap, then wrap again in aluminum foil or place in a freezer-safe bag. Frozen nut rolls can last for 2-3 months. Thaw at room temperature.
Proper wrapping is key to preventing the rolls from becoming dry or absorbing off-flavors, keeping your easy Eastern European nut rolls tasting their best.
Serving Suggestions for Any Occasion
Easy Eastern European nut rolls are versatile and can be enjoyed in many ways. They are traditionally served sliced, alongside coffee or tea, as a dessert or a special snack. The slices reveal the beautiful swirl pattern, making them visually appealing on a serving plate.
They are perfect for holiday gatherings like Christmas or Easter, family brunches, or simply as a comforting treat any time of year. Consider serving them with a dollop of whipped cream or a scoop of vanilla ice cream for an extra indulgent dessert. Their rich flavor also pairs well with a glass of sweet wine or liqueur. No matter how you choose to serve them, your homemade easy Eastern European nut rolls are sure to be a hit!
Troubleshooting Common Nut Roll Baking Problems
Even with an easy Eastern European nut rolls recipe, baking can sometimes present challenges. Here are solutions to common issues.
Dry Dough Solutions
If your dough feels too dry and isn't coming together, it's likely due to too much flour or not enough liquid. This can happen if you measure flour by volume inaccurately or if humidity is low.
- Fix: Add liquid (milk or water) one teaspoon at a time while kneading until the dough reaches the correct consistency – smooth, elastic, and slightly tacky. Avoid adding large amounts of liquid at once.
- Prevention: Measure flour accurately, preferably by weight (2 1/2 cups is roughly 300-320 grams). Ensure your liquid ingredients are measured correctly. Pay attention to the dough's feel as you mix and knead.
A properly hydrated dough is essential for tender easy Eastern European nut rolls.
Runny Filling Fixes
If your nut filling seems too wet and is difficult to spread or threatens to leak out, it might have too much liquid or the nuts weren't ground finely enough.
- Fix: Stir in a tablespoon at a time of finely ground cookie crumbs (like vanilla wafers), dry breadcrumbs, or even a bit more finely ground nuts until the filling is a thick, spreadable paste. The crumbs will absorb excess moisture.
- Prevention: Measure liquids accurately. Ensure nuts are ground finely but not to a butter consistency. The filling should be moist enough to spread but hold its shape.
Adjusting the filling consistency is key to successful easy Eastern European nut rolls assembly.
Uneven Baking Prevention
Uneven browning or baking occurs if your oven has hot spots or if the rolls are placed too close together.
- Prevention: Preheat your oven fully before baking. Consider using an oven thermometer to verify the temperature. If your oven has known hot spots, rotate the baking sheet halfway through the baking time (e.g., after 15-20 minutes).
- Fix: If one roll is browning faster, you can loosely tent it with aluminum foil to shield it while the other continues to bake. Ensure rolls are spaced adequately on the baking sheet to allow for even heat circulation.
Checking for doneness by tapping the bottom of the roll (it should sound hollow) or using an internal thermometer (around 190-200°F or 88-93°C in the center) can help ensure your easy Eastern European nut rolls are perfectly baked throughout.
Enjoy Your Easy Homemade Eastern European Nut Rolls!
Frequently Asked Questions
What makes BakeWithEase's nut roll recipe easy?
The recipe focuses on simplified steps and easy-to-find ingredients, ensuring even beginner bakers can succeed. We provide detailed instructions with pictures to guide you through each stage.
What type of nuts are traditionally used in Eastern European nut rolls?
While walnuts are the most traditional nut, many variations exist. Some recipes include hazelnuts, pecans, or even a mixture of nuts for a more complex flavor.
What's the secret to preventing the nut roll from cracking during baking?
The key is to ensure the dough is properly proofed and the filling isn't too dry. Also, score the top of the roll before baking to release steam.
Can I freeze nut rolls, and if so, how?
Yes, nut rolls freeze well! Wrap them tightly in plastic wrap and then foil for up to 3 months. Thaw completely at room temperature before serving.
Are there any substitutions I can make for ingredients in the nut roll recipe?
You can often substitute butter with margarine, although the taste may differ. For a dairy-free option, try using a plant-based butter alternative. Always check your substitutions for appropriate moisture levels
Final Reflection: The Enduring Sweetness of Tradition, Simplified
Mastering the art of the Orekhovyi Rulet isn't just about baking; it's about connecting with a rich culinary heritage in a modern, accessible way. This recipe, designed for ease and clarity, aims to demystify a beloved Eastern European treat, making it achievable for home bakers of all skill levels. The simplicity of the process shouldn't overshadow the deep satisfaction of creating something so delicious and steeped in history.
The enduring appeal of the Orekhovyi Rulet lies not just in its delightful taste, but in its ability to bridge generations and cultures. It's a testament to the power of food to connect us to our roots and to share cherished traditions with loved ones. As I developed this recipe, I was reminded of the countless family gatherings centered around baking and sharing these sweet rolls – a tradition I hope to continue for years to come. Food is symbolic of love when words are inadequate.
- Alan D. Wolfelt
Now, it's your turn. Don't let the perceived complexity of traditional recipes intimidate you. Embrace the challenge, gather your ingredients, and experience the joy of creating your own Orekhovyi Rulet. Share this recipe with friends and family, and let the sweet aroma and delicious taste become a new tradition in your own home. The journey of mastering this recipe is as rewarding as the final product itself – a testament to the enduring power of simple pleasures and shared experiences.
Unlock Your Inner Baker: Master the Art of Nut Rolls!
Thank you for exploring the world of Eastern European nut rolls with us! We hope you gained valuable insights and inspiration to create this delicious treat. Now it's time to put your newfound knowledge into practice.
Here’s how you can take the next step:
- Bake your own nut roll today! Use the recipe and tips from the article as your guide. Feel free to experiment with variations and make it your own.
- Share your baking journey! Post pictures of your creation on social media and tag us—we’d love to see your delicious results!
- Join our baking community on social media to connect with fellow baking enthusiasts and share your successes and challenges.
What unique twist will you add to your nut roll to make it truly special? We'd love to hear your ideas in the comments!