
The Rewarding Challenge of Making Enriched Dough By Hand

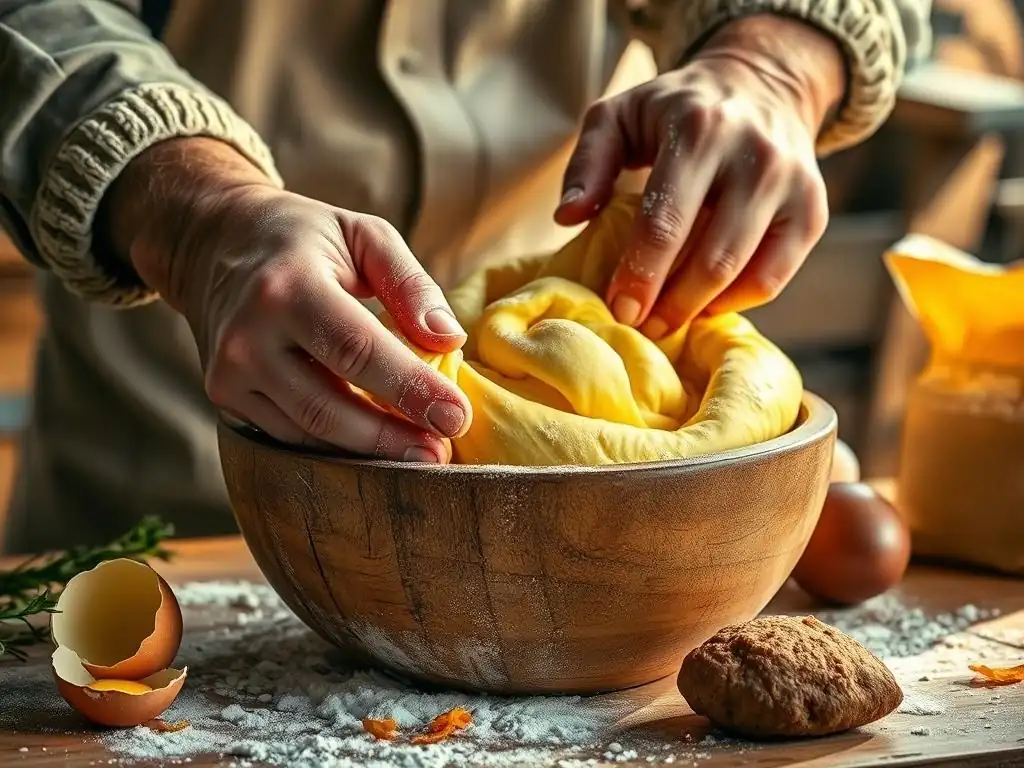
Welcome to BakeWithEase, your partner in crafting delicious creations! Ready to elevate your baking game? Discover the rewarding challenge and unparalleled flavor that comes from mastering handmade enriched dough techniques. Uncover the secrets behind achieving that perfect texture and taste, and prepare to impress with breads and pastries that are truly extraordinary. Let's get baking!
- Introduction: Embracing the Art of Handmade Enriched Dough
- Understanding Enriched Dough Ingredients for Hand Mixing
- Essential Handmade Enriched Dough Techniques
-
Step-by-Step Guide: Hand Mixing a Classic Brioche Dough
- Step 1: Combining Dry Ingredients for Hand Mixing
- Step 2: Incorporating Wet Ingredients by Hand: A Gentle Approach
- Step 3: Kneading the Dough: The Hand Kneading Process Explained
- Step 4: First Rise: Bulk Fermentation for Flavor Development
- Step 5: Shaping and Proofing: Preparing for Baking
- Step 6: Baking Your Handmade Brioche: Achieving Golden Perfection
- Troubleshooting Common Issues with Handmade Enriched Dough
- Tips and Tricks for Perfecting Your Handmade Enriched Dough
- Exploring Variations: Expanding Your Handmade Enriched Dough Repertoire
- Conclusion: The Joy of Baking Enriched Dough by Hand
-
Frequently Asked Questions
- What exactly is enriched dough, and why is it called that?
- Why would I choose to make enriched dough by hand instead of using a machine?
- What are some common examples of baked goods made with handmade enriched dough?
- What are the biggest challenges when working with enriched dough by hand?
- What tips can help me achieve a perfect handmade enriched dough?
- Final Reflection: The Timeless Art of Handmade Enriched Dough
- Unleash Your Inner Baker: Knead to Know More?
Introduction: Embracing the Art of Handmade Enriched Dough
Venturing into the world of enriched doughs, like brioche or challah, brings a unique satisfaction, especially when you tackle the process by hand. These doughs, rich with ingredients like butter, eggs, and sugar, demand patience and specific handmade enriched dough techniques. Unlike lean doughs (think rustic bread), enriched doughs require gentle handling initially but vigorous kneading to develop their structure and achieve that signature soft, tender crumb. Mastering the manual process connects you intimately with the dough, allowing you to feel its transformation from a shaggy mass into a smooth, elastic ball ready for baking.
Choosing to mix enriched dough by hand is more than just a traditional approach; it's a sensory experience that teaches you the nuances of dough development firsthand. It allows you to understand hydration levels, gluten formation, and temperature changes in a way that machines can't replicate. While mixers offer convenience, the satisfaction derived from transforming simple ingredients into a beautiful, rich dough using only your hands is immense, offering a deep connection to the craft of baking.
Why Choose Hand Mixing for Enriched Doughs?
Opting for hand mixing enriched doughs offers a tactile learning experience that is invaluable for any baker. When you knead by hand, you directly feel the dough changing texture – from sticky and resistant to smooth and pliable. This hands-on approach helps you understand concepts like gluten development and dough hydration in a very tangible way. You learn to recognize the subtle signs that indicate whether your dough needs more kneading or a slight adjustment in moisture, skills that build intuition and confidence in your baking journey.
Beyond the educational aspect, hand mixing can be a meditative and rewarding process. It forces you to slow down, focus on the task at hand, and connect with the ingredients. For enriched doughs, which are often quite sticky and soft due to the high fat and sugar content, hand mixing allows for a gentler initial incorporation of ingredients before the more vigorous kneading begins.
This can sometimes be less stressful on the gluten structure early on compared to aggressive machine mixing, contributing to a potentially finer crumb structure in the final baked good. The satisfaction of achieving a perfectly smooth, elastic dough through your own effort is a significant part of the joy.
What Makes Enriched Dough Special?
Enriched doughs are distinguished by the addition of fats (like butter or oil), eggs, and sugars, which set them apart from lean doughs made primarily of flour, water, yeast, and salt. These extra ingredients contribute significantly to the dough's characteristics. Butter and eggs add richness, tenderness, and flavor, while sugar contributes sweetness, aids in crust browning, and provides food for the yeast. These additions, however, also make the dough softer, heavier, and often stickier, presenting a unique challenge when employing handmade enriched dough techniques.
The presence of fat and sugar initially inhibits gluten development because they coat the flour particles, preventing them from absorbing water and forming gluten networks easily. This is why enriched doughs typically require longer or more intensive kneading compared to lean doughs to build sufficient structure. The developed gluten network must be strong enough to support the weight of the added ingredients and trap the gases produced by the yeast, resulting in a light, airy, yet tender crumb. The richness also means these doughs brown beautifully and stay fresh longer than their lean counterparts.
Understanding Enriched Dough Ingredients for Hand Mixing
Working with enriched doughs by hand requires a good understanding of how each ingredient behaves and interacts, especially under manual manipulation. The ratios of flour, liquid, fat, sugar, and eggs are carefully balanced to achieve the desired texture and richness. When using handmade enriched dough techniques, the quality and type of each ingredient become even more apparent as you feel their impact on the dough's consistency and handling properties.
The Role of High-Protein Flour in Handmade Dough
High-protein flour, typically bread flour with a protein content ranging from 12% to 14%, is crucial for enriched doughs, particularly when using handmade enriched dough techniques. The higher protein content means there is more potential for gluten development.
Gluten, formed when the proteins glutenin and gliadin in flour combine with water and are worked (kneaded), provides the structure and elasticity needed to trap the gases produced by yeast. In enriched doughs, the fats, sugars, and eggs tend to soften the gluten structure, so a strong foundation from high-protein flour is essential to achieve a dough that can rise well and hold its shape.
When kneading by hand, the process of developing this gluten network takes time and effort. A strong flour helps you reach the desired elasticity without the dough breaking down too quickly. For a classic brioche, for instance, where butter can make up 50% to 70% of the flour's weight, the flour's ability to form a robust gluten network is paramount to supporting all that richness and achieving a light, airy texture despite the heavy load. Using a weaker flour would result in a dough that is difficult to handle by hand and yields a dense, heavy final product.
Butter's Importance in Flavor and Texture of Enriched Dough
Butter is arguably the star ingredient in many enriched doughs, contributing significantly to flavor, tenderness, and richness. High-quality butter, typically unsalted to control the salt level in the dough, is essential. It needs to be incorporated correctly, usually softened or even melted and cooled, depending on the specific handmade enriched dough techniques being used. Butter coats the strands of gluten, preventing them from forming a tight, tough network. This results in a soft, melt-in-your-mouth texture characteristic of items like brioche or challah.
The amount of butter used varies greatly between recipes, from a moderate 10-20% of the flour weight in some sweet rolls to an indulgent 70% or more in rich brioche. When mixing by hand, incorporating large amounts of butter requires patience. The dough will become very soft and sticky initially, making kneading challenging.
However, as the butter is fully incorporated and kneading continues, the dough transforms, becoming smooth, elastic, and less sticky. This transformation is a key indicator that the butter is emulsified within the dough and the gluten structure is developing around it, a tactile sign you feel directly with handmade enriched dough techniques.
Yeast Activation for Hand-Mixed Enriched Dough: A Crucial First Step
Yeast is the leavening agent that makes enriched doughs rise, creating their airy texture. For hand mixing, ensuring your yeast is active and happy is a crucial first step. While instant yeast can often be mixed directly with the dry ingredients, many bakers prefer to activate active dry yeast in a warm liquid (like milk or water, around 105-115°F or 40-46°C) with a pinch of sugar. This process, called proofing the yeast, confirms its viability before you commit to mixing the entire dough.
Seeing the yeast bloom into a foamy layer within 5-10 minutes indicates it's alive and ready to work. This is particularly important when you're investing the time and effort into handmade enriched dough techniques. A non-active yeast would result in a dense, flat dough, wasting your valuable hand-kneading time. Enriched doughs, with their higher fat and sugar content, can sometimes slow down yeast activity slightly, so starting with vigorous, active yeast is the best way to ensure a successful rise.
Eggs and Sugar: Adding Richness and Structure by Hand
Eggs and sugar play vital roles in the structure, flavor, and appearance of enriched doughs. Eggs, particularly egg yolks, add significant richness, tenderness, and a beautiful yellow hue to the crumb. Whole eggs also contribute liquid and protein, aiding in structure. Sugar, besides providing sweetness, helps tenderize the dough by interfering with gluten development (which is why sufficient kneading is necessary) and assists in retaining moisture, keeping the baked goods fresh longer. Sugar also caramelizes during baking, contributing to a golden-brown crust.
When incorporating eggs and sugar using handmade enriched dough techniques, they are typically added after the initial mixing of flour and liquid, often along with the butter. The dough will become slack and potentially very sticky as these ingredients are worked in. It requires persistent kneading to fully integrate them and rebuild the gluten structure that becomes disrupted. For example, a brioche recipe might call for 4-6 whole eggs per 500g of flour, plus a significant amount of sugar (say, 50-100g), making the dough initially quite challenging to handle by hand until the gluten is sufficiently developed.
Essential Handmade Enriched Dough Techniques
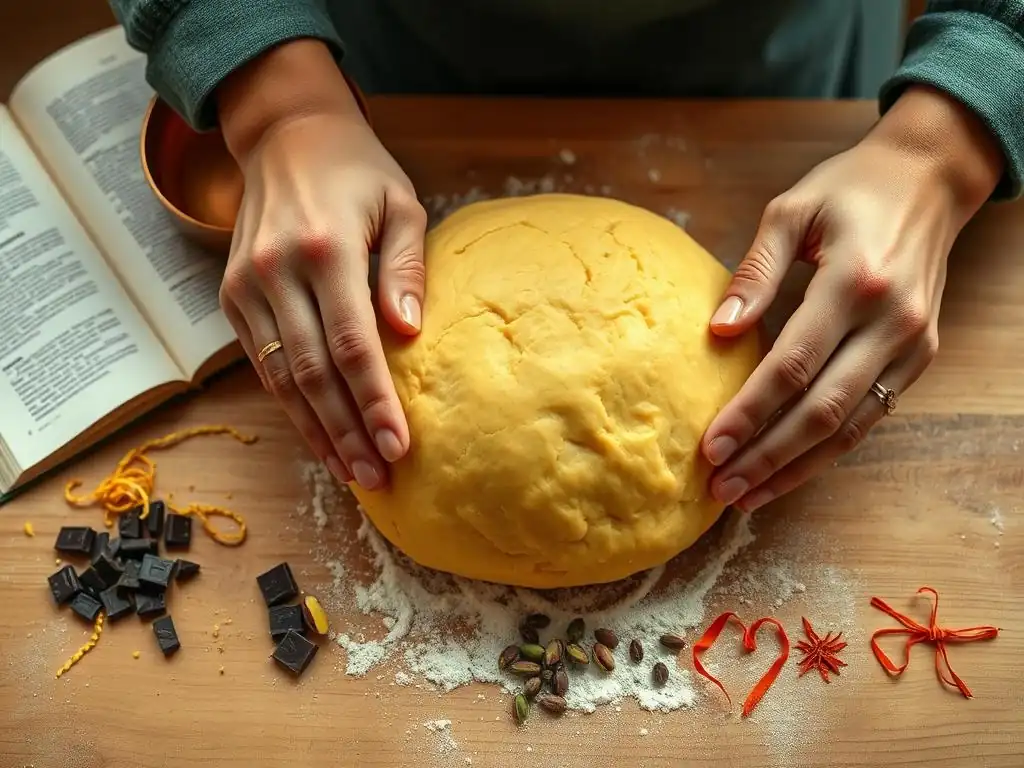
Mastering enriched doughs by hand requires developing specific skills and understanding the dough's feel at different stages. The journey from a sticky, shaggy mass to a smooth, elastic ball is a process that relies entirely on your tactile connection with the dough. Effective handmade enriched dough techniques focus on developing a strong gluten network capable of supporting the rich ingredients.
Mastering the Art of Hand Kneading Enriched Dough
Hand kneading enriched dough is a vigorous process that builds gluten structure. Unlike lean doughs which might use folding techniques, enriched doughs benefit from more traditional kneading methods due to their richness and the need to fully incorporate fats and sugars. A common technique involves pushing the dough away from you with the heels of your hands, stretching it, then folding it back towards you and rotating. This action aligns the gluten strands and develops elasticity.
Because enriched doughs are often soft and sticky, especially at the beginning and when incorporating butter, using a bench scraper can be incredibly helpful. It allows you to scrape the dough from the work surface and your hands, keeping the process manageable.
You'll need to knead for a significant amount of time – often 15 to 25 minutes or even longer, depending on the dough's richness and hydration. The dough will initially be very sticky, but as you knead, it will become progressively smoother, less sticky, and more elastic, indicating that the handmade enriched dough techniques are effectively developing the gluten.
Developing Gluten by Hand: Patience is Key
Developing gluten is the core purpose of kneading, and when working with enriched doughs by hand, patience is truly a virtue. The presence of fat and sugar initially hinders gluten formation. As you knead, you are essentially aligning the gluten proteins into a network that provides structure. This network is what gives the dough its strength and allows it to rise and hold its shape during fermentation and baking.
You can feel the gluten developing as you knead. The dough will gradually become less sticky and easier to handle. It will start to resist stretching and spring back when pulled. This elasticity is a direct result of the strengthening gluten network. While a machine mixer can develop gluten relatively quickly, hand development takes more time and effort. However, the sensory feedback you get allows you to feel the dough's progress directly, teaching you to recognize the stages of gluten development through touch, which is a fundamental aspect of successful handmade enriched dough techniques.
The Windowpane Test: Knowing When Your Dough is Ready
The windowpane test is a classic method for determining if your enriched dough has been sufficiently kneaded and its gluten is well-developed. It involves taking a small piece of dough (about the size of a golf ball), gently stretching and pulling it outwards with your fingers. The goal is to stretch it thin enough that light can pass through the center, creating a translucent "window," without the dough tearing.
If the dough tears easily before you can stretch it thin, it needs more kneading; the gluten network is not yet strong enough. If you can stretch it into a thin, almost transparent membrane, the gluten is well-developed and the dough is ready for its first rise. This test is particularly satisfying when working with handmade enriched dough techniques, as it provides clear visual proof of the hard work you've put into kneading and developing the dough's structure.
Adjusting Dough Consistency: Hydration Levels for Hand Kneading
Hydration refers to the ratio of liquid to flour in a dough, typically expressed as a percentage (liquid weight / flour weight * 100). Enriched doughs often have moderate hydration levels from water or milk, supplemented by the liquid from eggs. When mixing by hand, managing hydration is key because a very wet dough can be extremely difficult to handle and knead manually. Typical hydration for a classic brioche might be around 55-65% (excluding the liquid from butter), plus the liquid from eggs.
If your dough feels too stiff and is hard to knead initially, you can add a small amount of liquid (a teaspoon at a time) while kneading until the desired consistency is reached. Conversely, if the dough is excessively sticky and unmanageable even after several minutes of kneading, you might need to add a tablespoon or two of flour. However, be cautious with adding extra flour, as it can make the dough tough.
The goal with handmade enriched dough techniques is to achieve a dough that is soft and slightly tacky, but not so sticky that it constantly adheres to your hands and the work surface. Learning to feel and adjust hydration is a critical skill.
Step-by-Step Guide: Hand Mixing a Classic Brioche Dough
Let's walk through the process of making a classic brioche dough, a prime example of where handmade enriched dough techniques truly shine. This recipe provides a rich, tender bread perfect for sweet or savory uses. We'll assume a recipe using approximately 500g of high-protein bread flour, 10g salt, 50-100g sugar, 10-15g active dry yeast, 4-6 large eggs, and 250-350g softened unsalted butter.
Step 1: Combining Dry Ingredients for Hand Mixing
Begin by combining your dry ingredients in a large mixing bowl. Measure out your 500g of bread flour, the salt (10g), and the sugar (50-100g). If using instant yeast, you can add it directly to the flour mixture. If using active dry yeast (10-15g), first proof it in a small amount of warm milk or water (say, 60ml at 105-115°F or 40-46°C) with a pinch of sugar for 5-10 minutes until foamy. Whisk the dry ingredients together to ensure they are evenly distributed. This initial step is simple but sets the stage for successful handmade enriched dough techniques.
Using a large bowl provides ample space for the subsequent mixing and kneading by hand. Ensure your salt and yeast are not placed in direct contact initially, as salt can inhibit yeast activity. A good practice is to put flour in the bowl, place salt on one side and yeast on the other before giving it a gentle whisk. This basic combination prepares the foundation before the enriching ingredients are introduced.
Step 2: Incorporating Wet Ingredients by Hand: A Gentle Approach
Next, create a well in the center of your dry ingredients. Crack the 4-6 large eggs into the well. If you proofed active dry yeast, add the foamy yeast mixture to the well as well. Begin incorporating the wet ingredients into the dry using one hand or a wooden spoon. Stir gently at first, drawing the flour from the sides into the center. The mixture will be quite wet and sticky.
Continue mixing until most of the flour is incorporated and you have a rough, shaggy dough. This stage is messy, but it's a necessary part of the handmade enriched dough techniques. At this point, the dough will be very loose and sticky, clinging to your hands and the bowl. Resist the urge to add too much extra flour; the consistency will change dramatically once the butter is added and kneading begins.
Step 3: Kneading the Dough: The Hand Kneading Process Explained
Turn the shaggy dough out onto a clean, lightly floured surface. This is where the real hand kneading begins. Enriched doughs, especially brioche, require significant kneading to develop gluten and incorporate the butter. Start with a basic push-and-fold kneading motion. Push the dough away from you with the heels of your hands, stretch it, then fold it back over itself and rotate. Repeat this rhythmically.
Initially, the dough will be quite sticky and difficult to handle. This is normal. As you knead, the gluten will start to develop, and the dough will become smoother and more elastic. Once the dough is somewhat cohesive (after about 5-10 minutes of kneading), begin adding the softened butter (250-350g) in small pieces, a tablespoon or two at a time. Knead each addition of butter fully into the dough before adding the next.
The dough will become very soft and slippery as you add butter, but continue kneading. It might feel like it's breaking apart, but persist. After all the butter is incorporated, continue kneading vigorously for another 10-20 minutes, or until the dough is smooth, elastic, and passes the windowpane test. This extended kneading with the butter is a hallmark of handmade enriched dough techniques for brioche.
Step 4: First Rise: Bulk Fermentation for Flavor Development
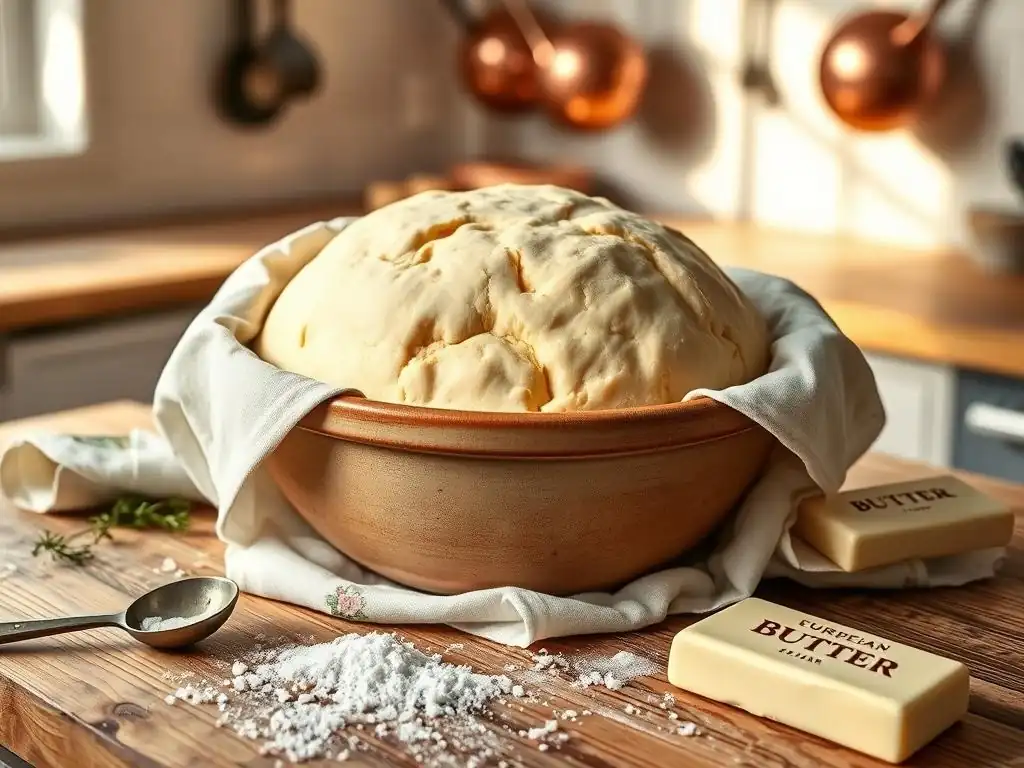
Once the dough is smooth and elastic, gather it into a ball. Lightly grease a large bowl with butter or oil. Place the dough in the bowl, turning to coat. Cover the bowl tightly with plastic wrap or a damp tea towel. The first rise, or bulk fermentation, is crucial for flavor development and allowing the yeast to work. Place the bowl in a warm, draft-free place. Ideal temperature is around 75-80°F (24-27°C).
Enriched doughs often rise slower than lean doughs due to the fat and sugar content. Expect the dough to double in size in about 1 to 2 hours, though it could take longer depending on the temperature and yeast activity. Some recipes even call for a slow, cold fermentation in the refrigerator overnight (8-12 hours), which develops more complex flavors. This slow rise is a key step in the process, allowing the handmade enriched dough techniques to yield a flavorful result.
Step 5: Shaping and Proofing: Preparing for Baking
After the first rise, gently punch down the dough to deflate it. Turn it out onto a lightly floured surface. Now it's time to shape your brioche. This could be into a loaf, rolls, or other desired forms. For a classic loaf, divide the dough into equal pieces (e.g., 3-4 pieces for a braided loaf, or 8-12 for rolls). Shape each piece smoothly and tightly. Place the shaped dough in prepared pans (greased or lined with parchment paper) or onto a baking sheet.
Cover the shaped dough loosely with plastic wrap or a light cloth to prevent drying. This second rise, or proofing, allows the dough to increase in volume again before baking. Let it proof in a warm place until it is visibly puffy and has increased by about 50-75% in size. Don't let it double completely, as it will continue to rise in the oven (oven spring). This proofing stage typically takes 45-90 minutes. Proper proofing is essential after employing your handmade enriched dough techniques during kneading.
Step 6: Baking Your Handmade Brioche: Achieving Golden Perfection
Preheat your oven to the temperature specified in your recipe, typically around 350-375°F (175-190°C). For a beautiful golden crust, you can brush the surface of the proofed dough with an egg wash (one egg beaten with a tablespoon of water or milk) before baking. This also helps achieve a lovely sheen.
Carefully transfer the pan or baking sheet to the preheated oven. Baking time will vary depending on the size and shape of your brioche, but a standard loaf might take 30-40 minutes, while rolls might take 15-25 minutes. The brioche is done when it is deep golden brown on top and sounds hollow when tapped on the bottom. An internal temperature of around 190-200°F (88-93°C) confirms it's fully baked. Allow the brioche to cool on a wire rack before slicing. This final step rewards your efforts with a delicious, tender, handmade enriched dough creation.
Troubleshooting Common Issues with Handmade Enriched Dough
Working with enriched dough by hand can present challenges. Their high fat and sugar content make them unique and sometimes tricky. Understanding common issues and how to address them is part of mastering handmade enriched dough techniques.
Sticky Dough Problems and Solutions for Hand Mixing
One of the most frequent issues encountered when using handmade enriched dough techniques is excessively sticky dough. This is especially common at the start, before gluten is developed, and when incorporating butter or eggs. If the dough is sticking aggressively to your hands and the work surface, making kneading almost impossible, resist the urge to dump large amounts of flour onto it. Adding too much flour will change the hydration ratio and can result in a tough, dry bread.
- Solutions:
- Use a bench scraper to continuously scrape the dough from the surface and your hands, folding it back onto itself.
- Lightly flour your hands and the work surface, but use just enough to make the dough manageable, not dry.
- If the dough seems genuinely too wet based on the recipe, add flour a tablespoon at a time, kneading it in completely before adding more.
- Ensure your butter was softened, not melted and hot, which can make the dough greasy and hard to handle. Chilling your hands briefly can also help!
Dense or Under-risen Dough: Addressing Yeast Issues
If your enriched dough doesn't rise sufficiently during the first or second fermentation, resulting in a dense final product, it's often related to yeast activity. This could be due to inactive yeast, incorrect dough temperature, or insufficient proofing time. Yeast is a living organism and needs specific conditions to thrive.
- Solutions:
- Ensure your yeast was fresh and active (proof it first if using active dry).
- Check the temperature of your liquid – too hot will kill the yeast, too cold will slow it down significantly. Ideal is 105-115°F (40-46°C) for active dry, room temp for instant.
- Ensure the dough temperature during fermentation is warm enough, ideally 75-80°F (24-27°C). A colder room will require a much longer rise time.
- Allow adequate time for both the bulk fermentation and the final proofing. Enriched doughs often take longer to rise than lean doughs due to the heavy ingredients. Check the dough's volume increase rather than strictly following time estimates.
Over-Proofed Dough: Recovery Techniques
Over-proofing occurs when the dough rises too much and for too long, exhausting the yeast and potentially collapsing the gluten structure. You'll recognize over-proofed dough if it looks excessively large, puffy, and might even start to deflate or smell strongly alcoholic. While it's hard to fully recover, you can sometimes salvage the dough.
- Recovery:
- Gently punch down the dough to deflate it.
- Reshape it carefully, trying not to introduce too much air.
- Allow it a very short second proof (maybe 15-30 minutes) just to puff up slightly, then bake immediately. The resulting bake might still be slightly denser or have a less ideal structure than perfectly proofed dough, but it will be edible. Preventing over-proofing by monitoring the dough's volume (aiming for doubled in the first rise, 50-75% increase in the second) is the best strategy when using handmade enriched dough techniques.
Achieving the Perfect Crust Color and Texture
Getting that beautiful, golden-brown crust on an enriched dough like brioche requires specific attention during baking. A pale crust indicates under-baking or insufficient sugar/fat. A tough or dry crust might be due to over-baking or lack of moisture during proofing.
- Tips for Success:
- Ensure the oven is fully preheated to the correct temperature.
- Use an egg wash (whole egg + water/milk) brushed gently over the dough surface just before baking. This adds richness, color, and shine.
- Ensure there is enough sugar in your recipe, as sugar aids in caramelization and browning.
- Bake until the internal temperature reaches 190-200°F (88-93°C) for doneness, which usually coincides with good crust color.
- Avoid over-baking, which can lead to a thick, tough crust. If the crust is browning too quickly before the inside is cooked, you can loosely tent the loaf with foil.
Tips and Tricks for Perfecting Your Handmade Enriched Dough
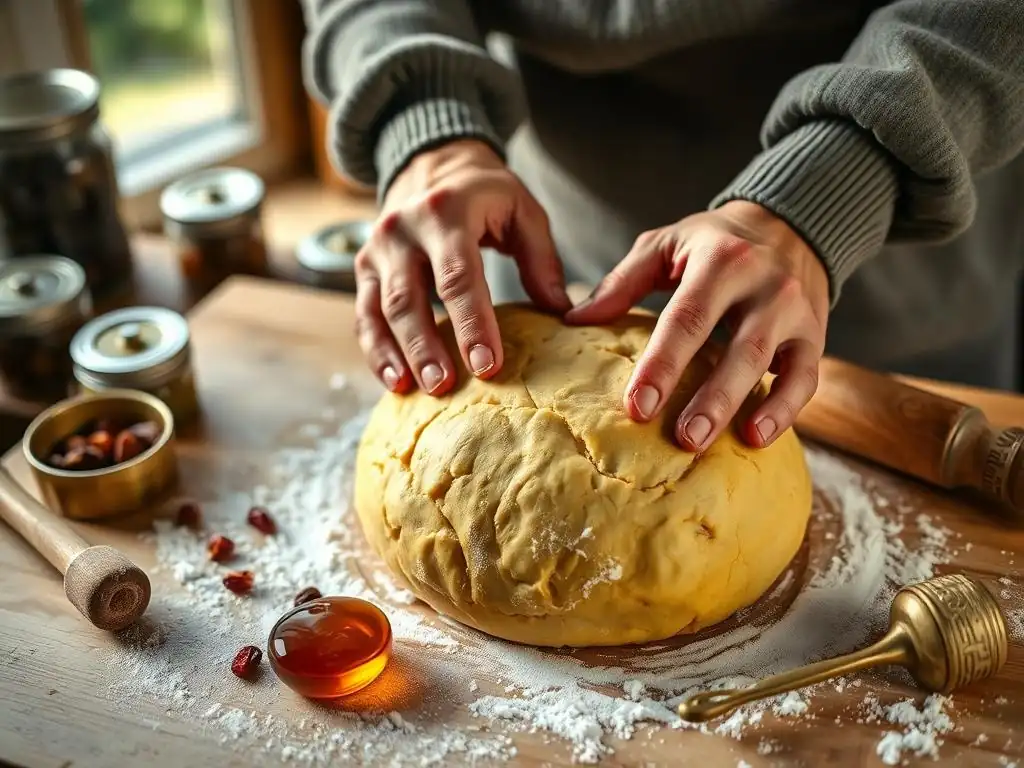
Elevating your handmade enriched dough techniques involves more than just following a recipe; it's about understanding the nuances of dough handling and incorporating helpful practices. These tips can make the process smoother and lead to even better results.
Using a Dough Scraper for Easier Hand Kneading
A simple bench or dough scraper is an indispensable tool when working with sticky enriched doughs by hand. It's not just for portioning; it's essential for managing the dough during kneading. As the dough sticks to your hands and the work surface, the scraper allows you to cleanly lift and fold it back onto itself.
Instead of constantly adding flour to combat stickiness (which can dry out the dough), use the scraper to gather, turn, and manipulate the dough. You can use it to clean your work surface quickly and to help perform the fold-and-stretch motions if the dough is very soft. Think of it as an extension of your hand that doesn't get sticky. Mastering the use of a dough scraper significantly improves the efficiency and cleanliness of handmade enriched dough techniques.
The Importance of Dough Temperature Control
Temperature plays a significant role throughout the enriched dough process, from ingredient temperature to ambient room temperature and the final dough temperature after kneading. Yeast activity is highly dependent on temperature; too cold and it's sluggish, too hot and it can die. The ideal dough temperature after kneading is often cited as 75-80°F (24-27°C).
- Tips for Control:
- Use room temperature ingredients (eggs, milk) unless the recipe specifies otherwise. Softened butter should be cool to the touch, not warm or greasy.
- Warm your liquids (milk or water) to the correct temperature for yeast activation (105-115°F or 40-46°C for active dry yeast).
- Kneading generates heat. If your kitchen is warm or you are kneading vigorously for a long time, the dough temperature might rise. If it gets too warm (above 80°F/27°C), the yeast can become overactive initially and then exhaust itself, or the butter might melt out. A cooler room or even briefly chilling the dough can help.
- During fermentation, place the dough in a warm, consistent environment. A slightly warm oven (turned off, with the light on) or a proofer setting can be ideal. Consistent temperature helps ensure a steady rise when using handmade enriched dough techniques.
Alternative Mixing Methods: Autolyse Technique for Enriched Dough
While not always traditional for very rich doughs, a modified autolyse can sometimes be beneficial when using handmade enriched dough techniques, particularly for doughs that are moderately enriched rather than extremely rich like brioche. Autolyse involves mixing just the flour and liquid (and sometimes yeast, but no salt, fat, or sugar) and letting it rest for 20-60 minutes.
This resting period allows the flour to fully hydrate and enzyme activity to begin breaking down proteins, which kickstarts gluten development without any manual effort. After the rest, you add the salt, yeast (if not added initially), eggs, sugar, and butter and proceed with kneading. This can potentially shorten the required kneading time and make the dough easier to handle initially, as some gluten structure has already begun to form during the rest. It's an interesting variation on classic handmade enriched dough techniques worth experimenting with.
Scaling Recipes for Hand Mixing: Adjusting Quantities
Scaling a recipe, whether increasing or decreasing the yield, requires careful consideration, especially when using handmade enriched dough techniques. Doubling or halving a recipe isn't always a straightforward multiplication or division, particularly regarding ingredients like yeast and liquids.
- Considerations:
- Yeast quantity: You might not need to perfectly double the yeast for a doubled recipe; sometimes slightly less is sufficient as the larger mass retains heat better, encouraging fermentation.
- Liquid absorption: Different batches of flour, even from the same bag, can absorb liquid slightly differently. Be prepared to make minor adjustments to liquid or flour as you knead by hand, based on the dough's feel.
- Kneading time: A larger batch of dough will require more physical effort and potentially longer kneading time to develop gluten evenly by hand. Conversely, a very small batch might develop gluten more quickly.
- Fermentation time: Larger batches of dough tend to ferment faster than smaller ones because they generate and retain more heat. Monitor the dough's volume increase, not just the clock. Adjusting quantities requires intuition built from experience with handmade enriched dough techniques.
Exploring Variations: Expanding Your Handmade Enriched Dough Repertoire
Once you've mastered the basics of handmade enriched dough techniques with a classic recipe like brioche, a world of delicious variations opens up. Many beloved baked goods are based on enriched doughs, offering opportunities to apply your skills to different flavors and shapes.
Hand Mixing Challah Dough: A Braided Delight
Challah is a beautiful, often braided, enriched bread traditionally baked for the Jewish Sabbath. While similar to brioche in being enriched, challah typically uses oil (often vegetable oil) instead of butter and often contains more sugar and eggs. This results in a slightly different texture – often less delicate and more bread-like than brioche, but still rich and tender.
Hand mixing challah dough involves similar handmade enriched dough techniques: combining dry ingredients, incorporating wet (eggs, oil, water/milk, yeast), and then kneading to develop gluten. Challah dough is often less sticky than brioche due to the use of oil instead of butter and potentially lower fat percentage. Kneading by hand is very effective for challah, allowing you to achieve a smooth, elastic dough perfect for shaping into intricate braids. The process of hand mixing, kneading, and braiding challah is deeply satisfying.
Making Cinnamon Rolls by Hand: A Sweet Treat
Cinnamon rolls are another popular application of handmade enriched dough techniques. The dough base is typically a moderately enriched dough, similar to a sweet roll dough, containing butter, sugar, eggs, and milk. This dough is mixed and kneaded by hand until smooth and elastic, then allowed to rise.
After the first rise, the dough is rolled out, spread with a cinnamon-sugar-butter filling, rolled up, sliced into rounds, and proofed again before baking. Hand kneading this type of dough is very manageable and allows you to feel when it has the right balance of structure and softness. The hands-on process of mixing, kneading, rolling, filling, and shaping cinnamon rolls is a rewarding experience that culminates in a warm, fragrant treat.
Other Enriched Dough Recipes to Try: Panettone, Babka
Your skills in handmade enriched dough techniques can be applied to many other delightful recipes:
- Panettone: A famous Italian sweet bread, traditionally made with a natural sourdough starter (lievito madre) and enriched with copious amounts of butter, eggs, sugar, candied fruit, and raisins. Hand mixing a true panettone is a multi-day project involving multiple feeding and mixing stages and requires significant strength and patience due to the sheer volume of enrichments. It's perhaps one of the ultimate tests of handmade enriched dough techniques.
- Babka: Originating from Eastern Europe, babka is a sweet, enriched dough often swirled with fillings like chocolate or cinnamon and sugar, then baked in a loaf pan. The dough is similar to brioche but often slightly less rich, making it quite manageable for hand mixing and kneading. Rolling out the dough, spreading the filling, and twisting or braiding it before baking showcases your dough handling skills.
- Stollen: A German Christmas bread, also highly enriched with butter, dried fruit, nuts, and often marzipan. The dough is mixed and kneaded by hand, then shaped and baked, often finished with melted butter and powdered sugar.
Each of these offers a unique application of the fundamental handmade enriched dough techniques you've learned, allowing you to expand your baking repertoire.
Conclusion: The Joy of Baking Enriched Dough by Hand
Embarking on the journey of making enriched dough by hand is an incredibly rewarding endeavor. It's a process that requires patience, persistence, and a willingness to get your hands sticky, but the results are truly worth the effort. From the initial mixing of ingredients to the final golden bake, every step performed by hand creates a unique connection between the baker and the bread.
Celebrating the Process: From Hand to Oven
There's an unparalleled sense of accomplishment that comes from transforming simple flour, eggs, butter, and sugar into a beautifully risen, tender, and flavorful loaf using only your hands and basic tools. You feel the texture change as gluten develops, you see the dough double in size, and you shape it with your own touch. This intimate connection with the dough, facilitated by handmade enriched dough techniques, makes the final product taste even sweeter. It's a celebration of traditional skills and the magic of fermentation and baking.
Encouragement for Continuing Your Enriched Dough Journey.
Don't be discouraged if your first attempt isn't perfect. Making enriched dough by hand is a skill that improves with practice. Each batch teaches you more about how the dough feels, how it responds to temperature, and how different factors influence the outcome. Embrace the challenges, learn from any mistakes, and enjoy the process. Continue exploring different recipes, experimenting with variations, and refining your handmade enriched dough techniques. The world of enriched baking is vast and delicious, and your hands are your most valuable tools. Keep baking, keep learning, and savor every moment – and every slice!
Frequently Asked Questions
What exactly is enriched dough, and why is it called that?
Enriched dough is a type of dough that contains added fats, sugars, and sometimes eggs or dairy. It's called "enriched" because these additions make the dough richer in flavor and texture than basic lean doughs.
Why would I choose to make enriched dough by hand instead of using a machine?
While a machine can be convenient, making enriched dough by hand allows for greater control over the dough's hydration and development. You can also feel the dough's texture change as you knead, helping you understand the baking process better.
What are some common examples of baked goods made with handmade enriched dough?
Many delicious treats are made with enriched dough! Some popular examples include brioche, challah, cinnamon rolls, and even some types of sweet rolls. These all benefit from the rich, tender crumb achieved with enriched dough.
What are the biggest challenges when working with enriched dough by hand?
Enriched dough can be sticky and require longer kneading times. The high fat content can also make it more challenging to develop gluten properly. Patience and practice are key!
What tips can help me achieve a perfect handmade enriched dough?
Start with high-quality ingredients, ensure your ingredients are at the correct temperature, and knead the dough adequately until it passes the windowpane test. Don't be afraid to experiment with different fats and sugars to find your perfect flavor profile.
Final Reflection: The Timeless Art of Handmade Enriched Dough
The meticulous process of crafting enriched dough by hand remains a powerfully relevant skill in our increasingly automated world. It's more than just baking; it's a connection to culinary history, a testament to patience, and a pathway to unparalleled flavor and texture that mass production simply can't replicate. The satisfaction derived from this process transcends the final product, offering a profound sense of accomplishment.
The influence of handmade techniques on the culinary landscape is undeniable, shaping not only the taste of our food but also our relationship with it. We live in a time of instant gratification, yet the deliberate act of kneading, folding, and shaping dough by hand fosters a mindful connection to the ingredients and the process itself. This slow, intentional approach allows for a deeper appreciation of the craft, reminding us of the simple pleasures found in traditional methods. The best things in life are not things, but experiences.
This rings especially true when considering the journey of creating enriched dough from scratch.
Now, consider your own kitchen. Will you embrace the rewarding challenge of making enriched dough by hand? I invite you to try it.
Don't be intimidated by the time commitment; instead, see it as an opportunity for mindful creation, a chance to slow down, connect with your food, and experience the profound satisfaction of transforming simple ingredients into something truly extraordinary. The journey itself, with its subtle nuances and rewarding moments, is as important as the delicious outcome. Let the aroma of freshly baked bread fill your home, a testament to your dedication and a delicious reward for your efforts.
Unleash Your Inner Baker: Knead to Know More?
Thanks for taking the time to explore the rewarding world of handmade enriched dough! You’ve now unlocked a key to crafting truly exceptional baked goods. Ready to put your new knowledge into practice?
- Dive into your next baking project: Choose a recipe (maybe that croissant you've been eyeing!) and give it a go. Feel the satisfying texture of the dough between your fingers.
- Share your baking journey: Post a picture of your creation on social media and tag us – we'd love to see your results!
- Explore variations: Try experimenting with different flours or additions to personalize your enriched dough recipe. What unique twist will you discover?
So, what delicious adventure will your enriched dough take you on next?