
Why Your Bread is Dense (And How to Fix It Instantly)


Welcome to BakeWithEase, your trusted companion in the baking world! Ever wondered why your homemade bread sometimes falls flat, literally? Dive into our latest article and unlock the secrets to perfect your loaf! We're breaking down the common culprits behind dense bread and providing instant troubleshooting tips to ensure your next bake is a triumph. Let's banish dense bread forever – your baking adventure starts now!
- Why Your Sourdough Bread is Dense (And How to Fix It) - BakeWithEase.com
- Understanding Dense Sourdough: Common Causes and Solutions
-
Dense Sourdough Causes: Diagnosing the Baking Issue
- Inactive or Weak Starter: A Leading Cause of Dense Sourdough
- Insufficient Gluten Development: The Gluten Factor in Sourdough Density
- Improper Fermentation: Is Your Dough Fermenting Properly?
- Insufficient Baking Time: Underbaked Sourdough and Dense Texture
- Improper Oven Temperature: Calibrating Your Oven for Perfect Sourdough
-
Dense Sourdough Fixes: How to Improve Your Bread's Texture
- Revitalizing Your Sourdough Starter: Strengthening the Culture
- Enhancing Gluten Development: Kneading Techniques for Better Sourdough
- Optimizing Fermentation Time: Achieving the Right Balance
- Achieving Perfect Baking Time: Ensuring Thorough Baking
- Oven Temperature Calibration: Ensuring Consistent Results
- Preventing Dense Sourdough: Proactive Baking Strategies
- Baking Sourdough Like a Pro: Mastering the Fundamentals for a Perfect Loaf
- Frequently Asked Questions
- Final Reflection: The Unexpected Joys of a Perfectly Light Loaf
- Unlock Lighter, Fluffier Bread Today!
Why Your Sourdough Bread is Dense (And How to Fix It) - BakeWithEase.com
Understanding Dense Sourdough: Common Causes and Solutions
What Does Dense Sourdough Mean? Identifying the Problem
Dense sourdough bread is characterized by a heavy, tight crumb structure with small, irregular holes, or sometimes no discernible holes at all. Instead of a light, airy texture that springs back when gently pressed, a dense loaf feels weighty for its size and may seem gummy or undercooked inside, even if the crust looks golden brown.
This lack of openness in the crumb is a clear sign that something went awry during the baking process, preventing the dough from properly expanding and developing the characteristic airy texture sourdough is known for. Recognizing this specific texture is the first step in implementing effective dense bread troubleshooting tips.
Identifying dense sourdough isn't just about the visual appearance; it's also about the texture and mouthfeel. A perfectly baked sourdough should have a resilient crust and a relatively open, airy interior that is moist but not gummy. If your loaf feels heavy, the crumb is uniform and tight like a cake or even putty-like, and it chews like gum, you are likely dealing with a dense crumb. This issue can be incredibly frustrating after hours of work, but understanding the underlying causes is key to preventing it in the future and applying the right dense sourdough troubleshooting techniques.
Dense Sourdough Troubleshooting: A Quick Overview
Troubleshooting dense sourdough involves a systematic review of your baking process, from nurturing your starter to the final bake. The most common culprits typically fall into a few key areas: the health and activity of your sourdough starter, the development of the gluten network in your dough, the fermentation process (both bulk fermentation and proofing), and the actual baking time and oven temperature.
Addressing any one of these areas can significantly improve your bread's texture, but often, a combination of factors contributes to a dense loaf. Effective dense bread troubleshooting tips will guide you through assessing each stage to pinpoint where the process deviated.
Resolving dense sourdough issues requires patience and attention to detail. Quick fixes might involve adjusting your next bake's timing or temperature, but long-term improvement comes from understanding the science behind sourdough baking. This overview provides a roadmap for diagnosing the problem, exploring the specific causes in detail, and then offering actionable fixes and preventative strategies. By systematically checking your starter's health, ensuring proper dough development, monitoring fermentation carefully, and calibrating your oven, you can move from consistently dense loaves to beautifully airy sourdough bread.
Dense Sourdough Causes: Diagnosing the Baking Issue
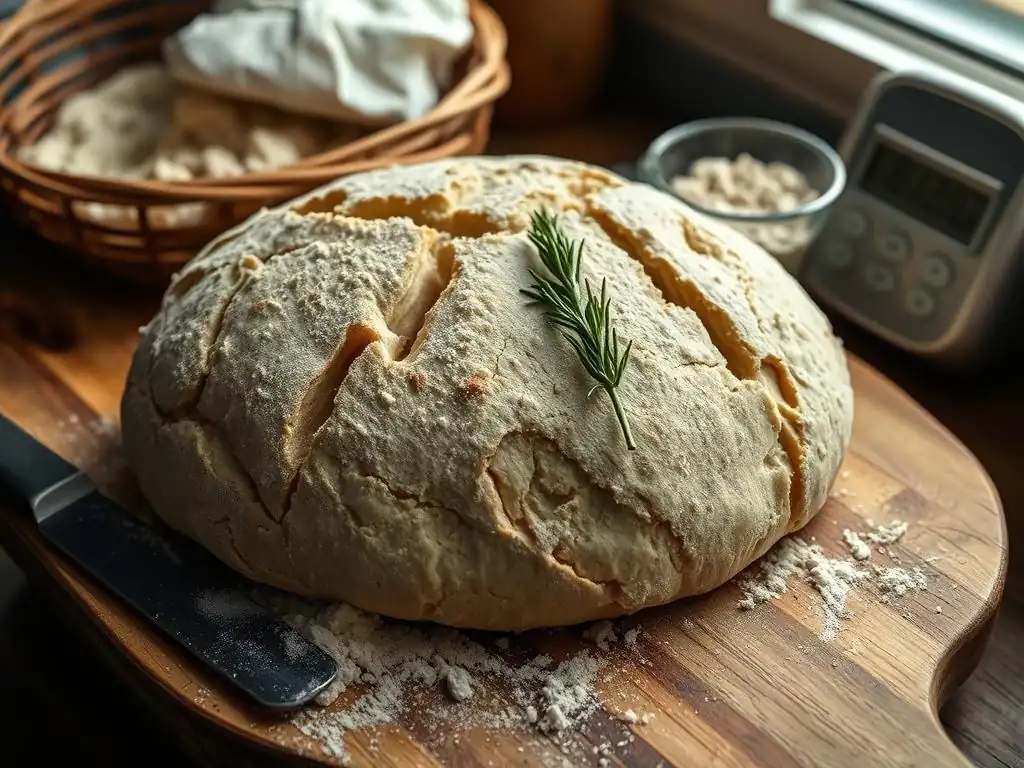
Inactive or Weak Starter: A Leading Cause of Dense Sourdough
An inactive or weak sourdough starter is arguably the most common reason for dense bread. A healthy starter is a thriving colony of wild yeast and bacteria that produce carbon dioxide (CO2) gas and organic acids when fed. This CO2 gas is what creates the bubbles and lift in your dough during fermentation and baking.
If your starter isn't vigorous – meaning it doesn't reliably double or triple in size within 4-8 hours after feeding at room temperature (around 70-78°F or 21-26°C) and lacks a bubbly, airy texture – it won't produce enough gas to leaven your bread properly. This leads to dough that doesn't rise sufficiently, resulting in a dense, heavy crumb. Many dense bread troubleshooting tips start with assessing the starter's health.
Consider a starter that only barely increases in volume after feeding, or one that reaches its peak and collapses very quickly. This indicates insufficient yeast activity. Using this starter for a loaf will inevitably lead to poor oven spring and a tight, dense crumb.
For example, if you use a starter that only doubles over 12 hours when it should ideally peak around 6 hours, it's simply not producing gas at the necessary rate to lift the dough effectively. Ensuring your starter is consistently active and bubbly before mixing your dough is a fundamental step in preventing dense sourdough. A strong starter is the engine that drives the entire leavening process.
Insufficient Gluten Development: The Gluten Factor in Sourdough Density
Gluten development is crucial for creating an open, airy crumb structure in sourdough bread. Gluten is a protein network formed when water interacts with proteins in flour (glutenin and gliadin) and is developed through mixing, kneading, and stretching the dough. This elastic network acts like a balloon, trapping the CO2 gas produced by the starter. If the gluten isn't sufficiently developed, the network is weak and cannot hold the gas effectively. The bubbles escape, the dough doesn't expand properly, and the result is a dense, tight crumb. This is a key area to examine when troubleshooting dense sourdough issues.
Think of the gluten network as the scaffolding for your bread's structure. Without strong scaffolding, the building (your loaf) will collapse or remain stunted. Techniques like the windowpane test, where you can stretch a small piece of dough thinly without tearing, are indicators of good gluten development. If your dough tears easily when stretched, it likely needs more development. Factors like using low-protein flour (like cake flour instead of bread flour), insufficient kneading or stretching, or adding too much salt too early in the process can all inhibit proper gluten formation, contributing significantly to a dense loaf.
Improper Fermentation: Is Your Dough Fermenting Properly?
Fermentation is the magical process where the starter's yeast and bacteria work on the dough, producing gas and flavor. This stage is critical for texture, and issues here are major contributors to dense sourdough. Fermentation isn't just one step; it typically involves bulk fermentation (the first rise of the whole dough mass) and proofing (the final rise of the shaped loaf). Getting the timing and conditions right for both is essential. Incorrect fermentation is a common cause of dense bread that requires careful troubleshooting.
Incorrect Bulk Fermentation: Managing the First Rise
Bulk fermentation, also known as the first rise, is where the majority of the dough's volume increase occurs. During this phase, the starter is actively producing gas, and the gluten network is strengthening through enzymatic activity and manual folds (like stretch and folds). Under-fermenting means the dough hasn't had enough time for the starter to produce sufficient gas to create a light structure.
The dough might look dense and heavy, with little sign of bubbly activity. Conversely, over-fermenting during bulk can also lead to issues, though it's more commonly associated with proofing problems. A properly bulk-fermented dough should typically increase in volume by around 50-100% depending on temperature and hydration, show signs of bubbles on the surface, and feel airy and slightly jiggly.
For example, a dough bulk fermenting at 75°F (24°C) might take 4-6 hours, while the same dough at 65°F (18°C) could take 8-12 hours. Not accounting for temperature significantly impacts the outcome.
Over-Proofing Sourdough Dough: Too Much of a Good Thing?
Over-proofing, particularly during the final rise (proofing), is a frequent cause of dense sourdough, often resulting in a loaf that spreads rather than springs in the oven. If dough proofs for too long or at too warm a temperature, the yeast can consume all the available sugars before baking. This means there's no fuel left for the rapid burst of activity (oven spring) when the dough hits the hot oven.
Furthermore, the gluten structure, which has been stretched to its maximum by the gas, can start to break down, losing its ability to hold shape and trap gas. An over-proofed dough might look puffy but lose its tension and feel overly fragile.
When you gently poke it, the indentation might remain completely or collapse entirely, whereas a perfectly proofed dough will slowly spring back most of the way. For instance, a loaf proofed at room temperature (70-75°F) for 3-4 hours might be perfectly proofed, but leaving it for 6 hours could lead to over-proofing and a subsequent dense, gummy texture.
Insufficient Baking Time: Underbaked Sourdough and Dense Texture
Underbaking is a straightforward but significant contributor to dense sourdough. Even if your starter is active, gluten is developed, and fermentation is spot on, cutting the baking time short will result in a doughy, gummy, and dense interior. During baking, the yeast activity initially increases (oven spring), then the yeast dies off, and the internal structure of the bread sets as starches gelatinize and proteins coagulate.
Water evaporates, contributing to the final texture. If the loaf doesn't bake long enough, the interior remains too moist and undeveloped, leading to a heavy, sticky, dense crumb. This is a simple yet common issue in dense bread troubleshooting.
The internal temperature of a fully baked sourdough loaf should reach between 200°F and 210°F (93-99°C). Using an instant-read thermometer is the most reliable way to check for doneness. Visually, an underbaked loaf might have a pale crust, especially on the bottom, but the true indicator is the internal temperature and the texture of the crumb once cooled.
Pulling a loaf out at 180°F (82°C) will almost certainly result in a dense, wet interior, regardless of how good the crust looks. Ensuring adequate baking time allows the internal structure to fully set and moisture levels to balance, producing a light, airy crumb.
Improper Oven Temperature: Calibrating Your Oven for Perfect Sourdough
The temperature of your oven plays a critical role in how your sourdough bakes and whether it develops a light, airy crumb or a dense one. If your oven temperature is too low, the dough won't experience adequate oven spring – the rapid expansion that occurs in the first 10-15 minutes of baking as the gas expands and the yeast has a final burst of activity. Insufficient oven spring leads to a loaf that doesn't reach its full volume potential, often resulting in a tighter, denser crumb.
Furthermore, a low temperature can prolong the baking time needed to reach the correct internal temperature, potentially drying out the crust before the interior is fully cooked. When performing dense bread troubleshooting, checking your oven's accuracy is vital.
Many home ovens are not calibrated precisely, and the actual temperature can vary significantly from the setting on the dial, sometimes by as much as 25-50°F (15-30°C). For sourdough, which typically bakes at high temperatures (often starting around 450-500°F or 230-260°C), this discrepancy can be detrimental. Baking sourdough in an oven that is consistently cooler than the recipe calls for will directly impact oven spring and lead to a denser loaf.
Using an oven thermometer placed inside the oven is the best way to verify the actual temperature and adjust your oven dial accordingly. For instance, if your recipe calls for 475°F but your oven thermometer reads 425°F, you'll need to set your oven higher to achieve the desired temperature for optimal baking and prevent dense bread.
Dense Sourdough Fixes: How to Improve Your Bread's Texture

Revitalizing Your Sourdough Starter: Strengthening the Culture
A weak starter is a common culprit for dense sourdough. The first step in fixing this and improving your bread's texture is to ensure your starter is healthy and active. This requires consistent care and attention to its feeding schedule and ratios. A strong starter should reliably double or triple in volume within a few hours after feeding, show lots of bubbles, and have a pleasant, tangy aroma. If your starter is sluggish, it's time to give it some focused care. This is a fundamental dense bread troubleshooting tip.
Feeding Your Starter Regularly and Consistently
To revitalize a weak starter, establish a consistent feeding routine. For a starter kept at room temperature, daily feeding (or even twice daily if it's very sluggish) with a ratio of 1 part starter, 1 part water, and 1 part flour (1:1:1 ratio by weight) is often recommended initially. Use filtered water and good quality flour (like bread flour or a mix of bread and whole wheat).
Discarding a portion of the starter before feeding ensures you're maintaining a manageable amount and providing enough fresh "food" for the microorganisms. For example, if you keep 50g of starter, feed it with 50g water and 50g flour.
Observe its activity – how quickly it rises and falls – to gauge its strength. Once it's reliably active and peaking predictably, you can adjust feeding ratios (like 1:2:2 or 1:3:3) or frequency if you plan to store it in the refrigerator, but consistent, generous feeding is key to building strength.
Using a Kitchen Scale for Precise Starter Feeding Ratios
Precision is paramount when feeding your sourdough starter, and using a kitchen scale is the most accurate way to measure ingredients. Feeding ratios (like 1:1:1 or 1:2:2 starter:water:flour) are always expressed by weight, not volume. Using cups can be highly inaccurate because flour density varies.
For instance, 1 cup of flour can weigh anywhere from 120g to 150g depending on how it's scooped and the type of flour. Feeding by weight ensures you are providing the correct proportion of fresh flour and water to the existing starter, which is essential for maintaining a healthy balance of yeast and bacteria and promoting vigorous activity. Consistent feeding by weight is a simple yet highly effective dense bread troubleshooting practice for starter health.
Enhancing Gluten Development: Kneading Techniques for Better Sourdough
Proper gluten development is essential for an open crumb structure. If your dense sourdough results from insufficient gluten, incorporating specific kneading or folding techniques will significantly improve your dough's elasticity and strength. These techniques help align the protein strands and build that crucial network capable of trapping gas.
Autolyse: Allowing Flour and Water to Hydrate Before Kneading
The autolyse technique is a simple way to kickstart gluten development with minimal effort. It involves mixing just the flour and water from your recipe and letting the mixture rest for 20 minutes up to a few hours before adding the starter and salt. During this rest period, the flour fully hydrates, and enzymatic activity begins to break down proteins, making gluten development easier and more efficient once kneading or folding begins.
For example, if your recipe uses 500g flour and 350g water, mix only these two ingredients until no dry flour remains, then cover and let it sit. This step allows the gluten network to start forming passively, leading to a more extensible and less sticky dough that requires less intensive kneading to reach the desired strength, helping combat dense bread issues caused by poor gluten.
Stretch and Folds: Building Strength During Bulk Fermentation
Stretch and folds are a series of gentle manipulations performed during the bulk fermentation phase that build dough strength without aggressive kneading. Every 30-60 minutes for the first 2-3 hours of bulk fermentation, you wet your hands, grab one side of the dough, stretch it upwards, and fold it over the rest of the dough. You rotate the bowl and repeat this 3-4 times.
This process helps align the gluten strands, build tension, and redistribute the yeast and food throughout the dough. Performing adequate sets of stretch and folds is crucial, especially for higher hydration doughs, as it develops the structure needed to support the gas produced by the starter. A dough that has had sufficient stretch and folds will feel more cohesive, elastic, and hold its shape better, directly contributing to a lighter, less dense crumb.
Optimizing Fermentation Time: Achieving the Right Balance
Incorrect fermentation timing is a major factor in dense sourdough. To fix this, you need to learn how to read your dough and understand the impact of temperature. This is a key aspect of dense bread troubleshooting.
Understanding Fermentation Time Based on Starter Activity and Temperature
Fermentation time is not a fixed number; it's highly dependent on the activity of your starter and the ambient temperature. A warmer kitchen (e.g., 78°F/26°C) will result in much faster fermentation than a cooler one (e.g., 65°F/18°C). Instead of strictly following recipe times, learn to observe your dough. During bulk fermentation, look for signs like a significant increase in volume (often 50-100%), a domed surface, and visible bubbles, especially around the edges and on top.
For example, if a recipe suggests a 4-hour bulk ferment, but your kitchen is cool and your dough shows minimal activity after 4 hours, it needs more time. Conversely, in a warm environment, 4 hours might be too long. Learning to recognize these visual and tactile cues is more important than watching the clock for preventing dense bread.
The Float Test: Determining Starter Readiness
While not a foolproof method for predicting dough rise, the float test is a useful indicator of whether your starter is active enough right now to leaven bread. To perform the float test, gently take a small dollop of your ripe starter (at its peak activity, usually 4-8 hours after feeding) and drop it into a glass of water. If the starter floats, it indicates it's full of CO2 gas and ready to be used in your dough.
If it sinks, it may not be at its peak activity or is not strong enough yet. While a sinking starter doesn't guarantee dense bread, a floating starter is a good sign that the engine (your starter) is ready to perform its job of leavening your dough, reducing the risk of a dense outcome.
Achieving Perfect Baking Time: Ensuring Thorough Baking
Underbaking is a common cause of dense, gummy sourdough. The fix is simple: bake it longer! Ensuring your loaf reaches the correct internal temperature is the most reliable way to guarantee it's fully baked and not dense.
Internal Temperature Check: The Key to Doneness
The most accurate way to know if your sourdough is fully baked is to measure its internal temperature using an instant-read thermometer. Insert the thermometer into the center of the loaf from the bottom or side, avoiding any large air pockets. A fully baked sourdough loaf should have an internal temperature between 200°F and 210°F (93-99°C).
Baking until this temperature is reached ensures the starches have gelatinized and the structure is set, preventing a gummy, dense interior. For example, if your recipe suggests baking for 30 minutes covered and 20 minutes uncovered, but your thermometer reads only 190°F, continue baking for another 5-10 minutes, checking the temperature periodically, until it reaches the target range.
Using a Dutch Oven: Creating Oven Spring
Using a Dutch oven or other lidded baking vessel creates a steamy environment around the dough during the initial phase of baking. This steam keeps the surface of the dough moist and elastic, allowing it to expand maximally during oven spring before the crust hardens. The intense heat trapped within the Dutch oven also promotes rapid heat transfer to the dough.
This combination of steam and high heat is ideal for achieving excellent oven spring and a light, open crumb, significantly reducing the likelihood of dense sourdough. Baking for the first 20-30 minutes with the lid on, then removing it to finish baking and develop the crust, is a standard technique that greatly improves texture.
Oven Temperature Calibration: Ensuring Consistent Results
Inaccurate oven temperature is a hidden cause of dense sourdough. Fixing this involves verifying your oven's actual temperature and adjusting your baking strategy accordingly.
Using an Oven Thermometer for Accurate Readings
The most effective way to combat inaccurate oven temperature is to use a simple, inexpensive oven thermometer placed inside your oven. Place it in the center rack and preheat your oven to the desired temperature (e.g., 450°F or 230°C). Once the oven indicates it's preheated, check the thermometer. If it reads significantly lower or higher (e.g., 420°F or 245°C), you know your oven is off.
Knowing the discrepancy allows you to adjust your oven setting. For instance, if your oven consistently reads 25°F low, set it 25°F higher than the recipe calls for to achieve the target temperature. This simple calibration step is essential for consistent baking results and effective dense bread troubleshooting related to oven performance.
Adjusting Baking Time Based on Oven Performance
Once you know your oven's true temperature, you may need to adjust your baking time. If your oven runs cool, you might need to bake longer to reach the correct internal temperature. If it runs hot, you might need to slightly reduce the overall baking time or lower the temperature after the initial oven spring phase to prevent burning the crust before the interior is done.
Always rely on the internal temperature check (200-210°F) as the definitive indicator of doneness, adjusting time as needed based on your calibrated oven's performance. Consistent oven temperature and vigilant monitoring are crucial dense bread troubleshooting tips.
Preventing Dense Sourdough: Proactive Baking Strategies

Preventing dense sourdough is much easier than fixing it after the fact. By focusing on key aspects of the process from the beginning, you can drastically increase your chances of baking consistently airy and delicious loaves. Implementing these proactive strategies is the best form of dense bread troubleshooting.
Maintaining a Healthy and Active Sourdough Starter
The foundation of airy sourdough is a strong, active starter. Regularly feeding your starter, keeping it at a consistent temperature (or managing its activity via refrigeration), and using it when it is at its peak vigor are non-negotiable steps. Observe your starter's behavior – its rise, fall, and bubble activity – to understand its cycles. A starter that reliably doubles or triples within a predictable timeframe after feeding is ready to leaven your bread effectively. This consistent care prevents the primary cause of dense bread.
Mastering the Art of Kneading: Developing Strong Gluten
Developing a strong, elastic gluten network is vital. Whether you use traditional kneading, the autolyse method, or stretch and folds, ensure your dough has the necessary structure to trap gas. Learn to recognize the signs of proper gluten development, such as the dough becoming smooth, less sticky, and passing the windowpane test. Sufficient gluten development provides the necessary scaffolding for the dough to expand upwards rather than outwards during baking, preventing a tight, dense structure.
Controlling Fermentation Conditions: Creating the Ideal Environment
Controlling the temperature during bulk fermentation and proofing is key to managing the rate at which your dough rises. Understand that warmer temperatures speed up fermentation, while cooler temperatures slow it down. Use a proofing box, your oven with the light on, or simply find a warm or cool spot in your kitchen to control the environment. Learn to judge the dough's readiness by its appearance and feel (volume increase, bubbles, feel) rather than just the clock, as this is critical for preventing both under- and over-fermentation, major causes of dense bread.
Monitoring Baking Time and Temperature: Achieving Baking Perfection
Accurate oven temperature and sufficient baking time are the final safeguards against dense sourdough. Use an oven thermometer to ensure your oven is at the correct temperature. Always bake your loaf until it reaches an internal temperature of 200-210°F (93-99°C). Don't rely solely on crust color. Using a Dutch oven can help ensure excellent oven spring and efficient heat transfer, contributing to a lighter crumb. Consistent monitoring at this final stage seals the deal for a perfectly textured loaf.
Baking Sourdough Like a Pro: Mastering the Fundamentals for a Perfect Loaf
Achieving a consistently light and airy sourdough loaf is a journey that involves understanding and mastering several fundamental techniques. It starts with a healthy, active starter, moves through proper gluten development, careful fermentation management sensitive to temperature, and concludes with accurate baking time and temperature. By focusing on these core principles and applying the dense bread troubleshooting tips discussed, you build the skills needed for successful sourdough baking.
Rustic Sourdough Boule Recipe: Applying These Techniques
Let's consider a basic rustic sourdough boule. To prevent it from being dense:
- You'd start with a starter that's doubled in size 4-8 hours after its last feeding (healthy starter).
- You'd mix flour and water for an autolyse rest (enhancing gluten).
- After adding starter and salt, you'd perform several sets of stretch and folds during bulk fermentation until the dough feels strong and elastic (enhancing gluten development).
- You'd let the dough bulk ferment until it's visibly increased in volume by 50-75% and is bubbly, adjusting time based on your kitchen temperature (optimizing fermentation).
- After shaping and proofing (monitoring for readiness with a poke test), you'd bake it in a preheated Dutch oven at 450-475°F (calibrating oven temp and using steam).
- Finally, you'd bake until the internal temperature hits 205°F (achieving perfect baking time).
Applying these techniques systematically to a recipe like this directly addresses the common causes of dense bread.
Further Resources: Sourdough Starter Maintenance and Scoring Techniques
To continue your sourdough journey and further refine your skills beyond dense bread troubleshooting, explore resources on maintaining your sourdough starter. Understanding how to keep your starter vigorous is paramount. Additionally, learning about dough handling techniques, including shaping and scoring, can impact your loaf's final appearance and structure. Scoring, for instance, helps control the direction of oven spring, allowing the loaf to expand properly rather than bursting unpredictably, which can sometimes affect crumb structure near the surface.
By understanding the 'why' behind dense sourdough and applying these specific 'how-to' fixes and preventative measures, you are well on your way to baking beautiful, airy loaves consistently. Happy baking!
Frequently Asked Questions
Why is my bread so dense even after proofing?
Dense bread can result from several issues. Common causes include insufficient gluten development, incorrect flour to liquid ratio, or not allowing enough time for the dough to properly rise.
What are some common mistakes that lead to dense bread?
Baking mistakes leading to dense bread often involve using old or inactive yeast, skipping the kneading process, or not proofing in a warm enough environment. These factors hinder proper dough expansion.
How can I tell if my yeast is still active?
To check yeast activity, mix it with warm water and a pinch of sugar. If it doesn't foam or bubble within 5-10 minutes, it's likely dead and needs to be replaced for proper bread rise.
What type of flour is best for avoiding dense bread?
While all-purpose flour can work, bread flour contains more protein, which develops more gluten. This extra gluten provides structure and elasticity, leading to a lighter, less dense loaf.
Besides ingredients, what are some technique-based tips to avoid dense bread?
Proper kneading is crucial for gluten development. Also, ensure your oven is at the correct temperature and consider using a proofing box or a warm, humid environment for optimal rising.
Final Reflection: The Unexpected Joys of a Perfectly Light Loaf
The quest for the perfect loaf—light, airy, and utterly delicious—is a journey many home bakers undertake, often encountering the frustrating reality of dense bread. This seemingly simple culinary challenge speaks to a deeper desire for mastery, for understanding the subtle interplay of ingredients and technique that transforms humble flour into something truly special. The seemingly small issue of dense bread reveals a larger truth about the rewarding nature of perseverance in the kitchen.
The frustration of a dense loaf, however, is often quickly overcome with a little knowledge. Understanding the science behind bread-making—the role of yeast, hydration, and kneading—empowers us to troubleshoot effectively. This journey of discovery extends beyond the kitchen, mirroring the challenges we face in other areas of life. As the saying goes, The only way to do great work is to love what you do.
And the satisfaction of finally achieving that perfectly light crumb? That's a reward that transcends the simple act of baking. It's a testament to patience, experimentation, and the joy of creating something beautiful from simple ingredients.
Now, consider your own baking journey. Have you experienced the disappointment of a dense loaf? What did you learn from that experience? I encourage you to embrace the process, to experiment with different techniques and recipes, and to never give up on the pursuit of that perfect, airy crumb. The next time you encounter a dense loaf, remember the lessons learned here, and approach the challenge with renewed confidence and a spirit of culinary adventure. The reward—a truly magnificent loaf of bread—is well worth the effort.
Unlock Lighter, Fluffier Bread Today!
Thanks for taking the time to learn about achieving perfect bread texture! We hope you now feel empowered to tackle even the most challenging doughs. Ready to put your new knowledge to the test?
- Bake a test loaf: Experiment with one of the techniques outlined above and see the difference! Use the same recipe you've always used, but focus on one specific adjustment. Note the outcome.
- Share your baking journey: Tell us about your experience – what worked, what didn't, and what you learned! We love hearing your baking stories.
- Explore our other articles: Discover more baking secrets and tips for achieving consistently delicious results – from crusty loaves to fluffy buns!
What’s your biggest bread-baking challenge, and how will you tackle it next time?