
Why Does My Bread Have a Big Air Pocket on Top?

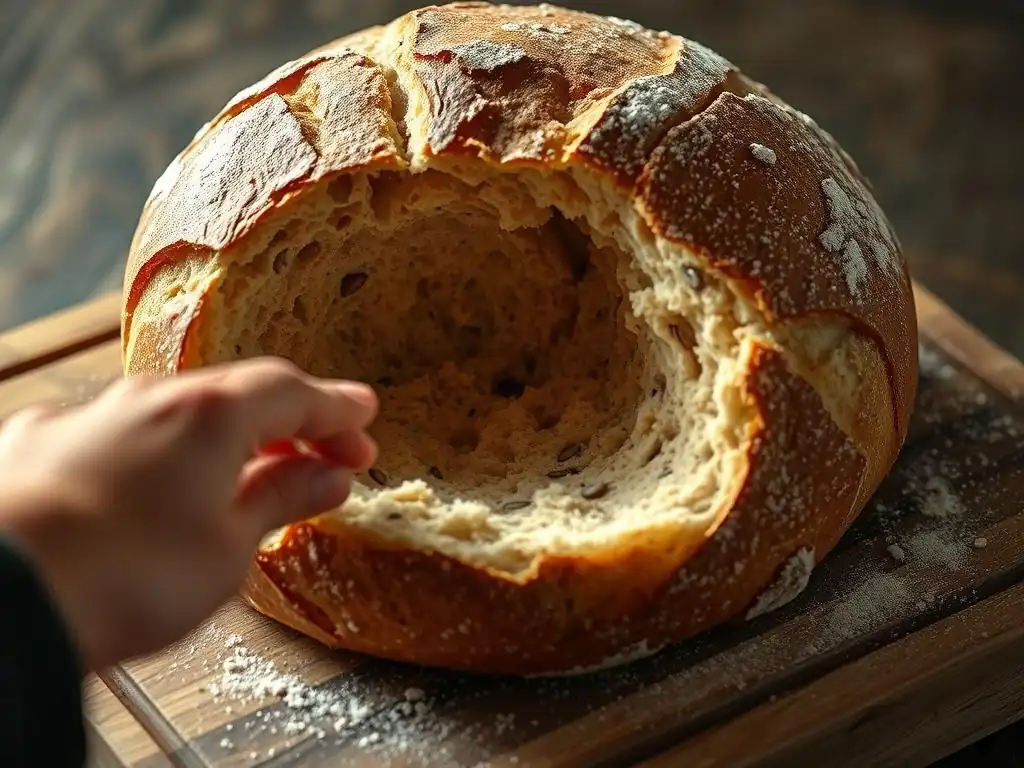
Welcome to BakeWithEase, where baking becomes a delightful journey! Ever wondered why your homemade bread sometimes sports that frustratingly large air pocket on top? This article dives deep into unraveling the mystery behind the big air pocket bread phenomenon. Discover the secrets to achieving perfectly even loaves and avoiding this common baking pitfall. Intrigued? Keep reading to unlock the techniques that will transform your bread baking forever!
- Troubleshooting Bread Structure Issues
- Understanding Bread Structure: An Introduction
- Common Causes of Uneven Bread Texture
- Troubleshooting Bread Texture: Practical Solutions
- Preventing Bread Imperfections: Proactive Baking
- Related Bread Baking Issues and Solutions
- Resources for Successful Bread Baking
- Frequently Asked Questions
- Final Reflection: The Humble Air Pocket – A Baker's Tale and a Slice of Life
- Unleash Your Inner Baker: Perfect Loaves Every Time!
Troubleshooting Bread Structure Issues
Understanding Bread Structure: An Introduction
Addressing Common Bread Imperfections
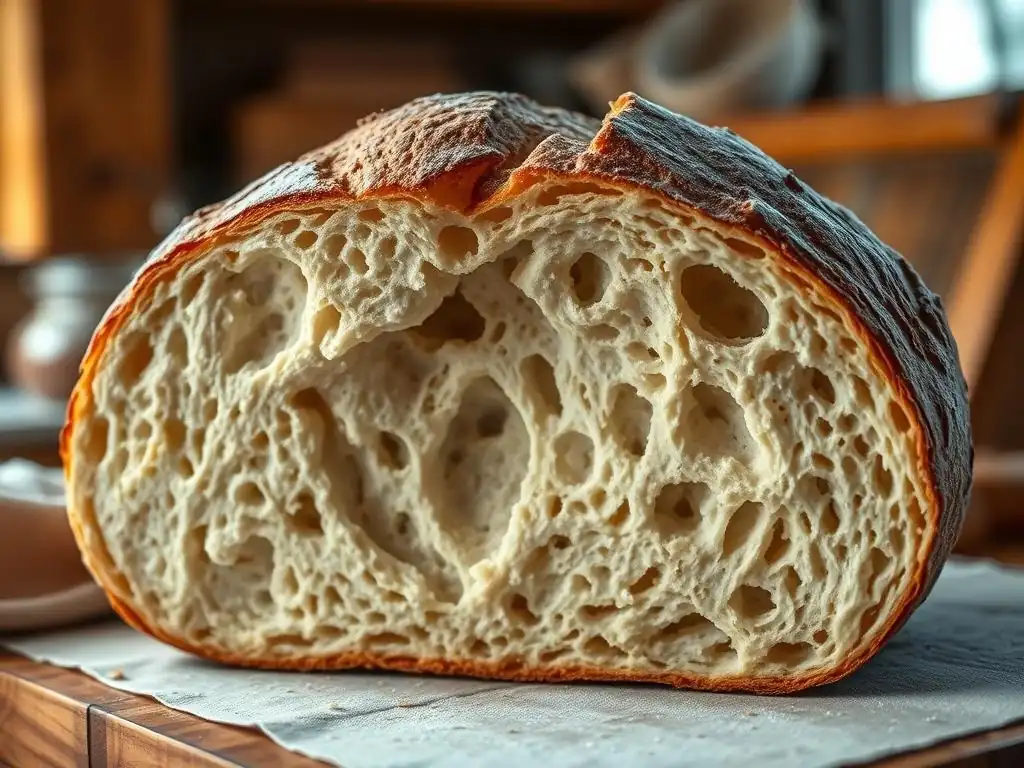
Bread structure refers to the internal crumb and external crust that develop during fermentation and baking. When you slice into a loaf and see irregular holes or dense patches, it indicates uneven gas distribution or gluten development. A big air pocket at the top is one such imperfection, often resulting from uneven expansion or shaping issues.
Aside from the large cavity, other imperfections include dense centers, gummy textures, and collapsed tops. These problems can stem from imbalances in proofing time, flour protein content, hydration levels, or oven conditions. Recognizing these signs early helps bakers adjust variables like kneading duration, proofing environment, and shaping techniques for a consistently even crumb.
Identifying and Resolving Baking Challenges
Successful troubleshooting starts with observation. Note dough behavior during bulk fermentation—does it double in volume in 60 to 90 minutes at 24°C? Measure ambient humidity (ideally 65–75%) and track oven heat-up time to reach 230°C before placing the loaf inside. Detailed records of each bake help pinpoint recurring issues.
Once you’ve identified the root cause—be it over-proofing, under-kneading, or temperature spikes—you can apply targeted solutions. For instance, reducing proofing time by 10% or increasing kneading by five minutes often corrects uneven crumb. Tracking these tweaks over ten to twenty bakes will highlight patterns, gradually eliminating the notorious “big air pocket bread” problem.
Common Causes of Uneven Bread Texture
Over-Proofing: Impact on Bread Structure
The Science of Over-Proofing
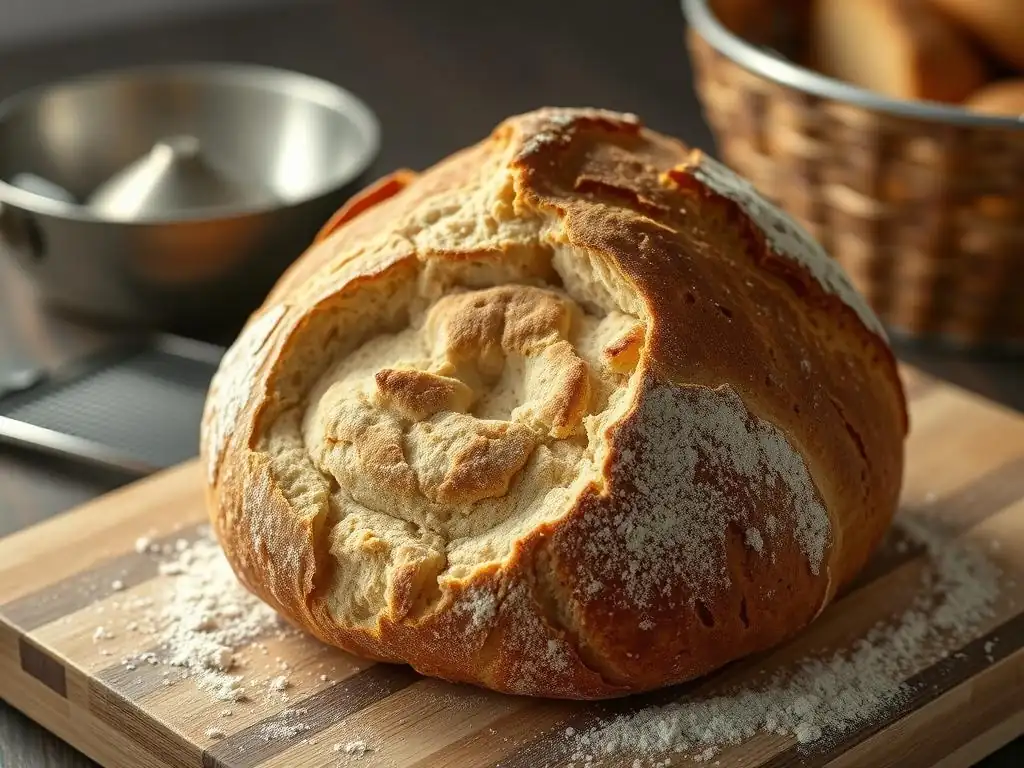
Over-proofing occurs when yeast ferments dough beyond its optimal gas-retaining capacity. During fermentation, yeast metabolizes sugars, producing carbon dioxide (CO₂) and alcohol. In a well-timed proof, gluten network traps CO₂, creating small, uniform bubbles. However, if proofing continues past peak volume, the gluten stretches and weakens, allowing gases to coalesce into larger pockets.
At 26°C, dough can over-proof in as little as 75 minutes. Research from the American Institute of Baking shows that dough beyond peak rise loses up to 30% of its elasticity, causing gas to migrate and gather at the weakest spot—often the top of the loaf. Consequently, a big air pocket forms under the crust, compromising structure and sliceability.
Recognizing Over-Proofed Dough
Visual and tactile cues signal over-proofing. When you press the dough and the indentation remains without springing back within five seconds, the dough has likely passed optimal proof. A rapid flattening of the dome shape or a shiny, loose surface layer also indicates excessive gas accumulation.
A practical guideline: perform the poke test at the 60-minute mark for standard white bread dough (500 g flour, 350 ml water). If the dough fails to regain shape, shorten the final proof by 10–15 minutes next time. Keeping a kitchen thermometer and timer handy ensures more precise control over your “big air pocket bread” dilemma.
Insufficient Dough Shaping: Achieving Uniform Texture
The Role of Dough Shaping in Gas Distribution
Proper shaping aligns gluten strands and redistributes gas bubbles evenly throughout the loaf. When you fold and roll the dough into a tight oval or cylinder, you trap residual gases in smaller pockets. This prevents large voids from forming during the final rise and oven spring.
Inadequate shaping, conversely, leaves large bubbles near the surface. These bubbles expand rapidly in the hot oven, lifting the top crust unevenly and creating that unwanted air pocket. A tightly shaped loaf yields a more consistent crumb structure and minimizes the risk of big air pocket bread.
Effective Dough Shaping Techniques
- Pre-shape: After bulk fermentation, gently deflate the dough on a lightly floured surface.
- Tension-building: Using both hands, drag the dough edges toward the center, rotating as you go to form a smooth ball.
- Final shape: Roll or tuck the pre-shaped ball into its final loaf configuration, ensuring uniform tension on the surface.
Task list:
- [ ] Allow dough to rest for 10 minutes after pre-shaping.
- [ ] Use a bench scraper to tighten edges.
- [ ] Maintain flour ratio at 0.5% of flour weight when dusting to avoid dryness.
Inadequate Dough Strength: Gluten Development and Texture
Gluten's Importance in Bread Structure
Gluten proteins (gliadin and glutenin) form an elastic network that captures CO₂ during fermentation. Strong gluten development results in fine, uniform crumb, while weak gluten yields a coarse, collapsed structure. Inadequate kneading or low-protein flour (below 9% protein) often fails to establish enough strength for even gas retention.
A study of artisan bakeries in France showed that using 11–12% protein flour and kneading for at least 10 minutes by hand or 5 minutes with a stand mixer produces optimal dough elasticity. Insufficient dough strength is a primary culprit behind the dreaded big air pocket bread on top of a loaf.
Enhancing Dough Strength Through Kneading and Flour Choice
To boost gluten formation:
- Choose bread flour (11–14% protein) over all-purpose flour (8–11%).
- Knead dough until it passes the windowpane test: a thin film of dough should stretch without tearing, allowing light to pass through.
Use a mixer on speed 2 for 4–5 minutes if manual kneading isn’t feasible. A slight hydration adjustment—reducing water by 5%—can also help beginner bakers manage dough consistency and improve kneading efficiency.
Oven Temperature Fluctuations: Effects on Bread Baking
Oven Temperature and Dough Expansion
During the first ten minutes of baking, known as oven spring, trapped gases expand rapidly as yeast remains active until the internal temperature reaches about 60°C. If the oven is too cool (below 200°C), expansion slows, causing irregular crumb and dense spots. Too hot (above 250°C) can form a crust too quickly, trapping gases that then migrate upward, creating large voids.
Commercial ovens often vary by ±15°C from the set temperature. Even home ovens can fluctuate by 20°C between preheat and mid-bake, worsening uneven rise and big air pocket formation.
Ensuring Accurate Oven Temperature
Place an oven thermometer in the center rack and preheat for at least 20 minutes. Calibrate your oven by testing at various settings:
Oven Setting: 200°C → Actual: 185°C
Oven Setting: 220°C → Actual: 230°C
Adjust your dial accordingly. Consider rotating the loaf halfway through baking to compensate for hot spots. If your oven spikes above 240°C, slightly reduce the dial to 230°C to maintain consistent heat.
Troubleshooting Bread Texture: Practical Solutions
Adjusting Proofing Time: Optimizing Fermentation
Controlling Proofing Conditions: Temperature and Humidity
To prevent over-proofing, proof dough at 24°C with 65% relative humidity. Use a proofing box or place dough in the oven with a pan of hot water. Monitor dough every 15 minutes once it nears the expected rise time of 60–75 minutes.
If your kitchen is warmer (above 28°C), shorten proofing by 10–20 minutes or lower fermentation temperature by refrigerating dough for 30 minutes before shaping. This “retarded proof” technique enhances flavor while reducing the risk of big air pocket bread.
Mastering Dough Shaping: Step-by-Step Instructions
Visual Guide to Effective Dough Shaping
- Lightly flour work surface and hands.
- Flatten dough into a rectangle, pressing out large gas bubbles.
- Fold the bottom third up, then the top third down like an envelope.
- Tuck and roll the dough towards you, pinching seams to seal.
Two important pointers: keep a consistent seam on the bottom to avoid seam splits; and apply moderate tension without tearing. A well-shaped loaf will spring upward more uniformly and avoid large top pockets.
Strengthening Gluten Development: Kneading and Resting Strategies
Advanced Kneading Techniques
Incorporate stretch-and-folds during bulk fermentation: every 30 minutes, stretch the dough gently from one side and fold it onto itself. Repeat four times to build strength without overworking. This technique simulates kneading and is particularly effective for high-hydration doughs (75–80% hydration).
Allow autolyse: mix flour and water, rest for 30 minutes before adding yeast and salt. This rest period improves water absorption and gluten alignment, resulting in a more resilient dough that resists large void formation.
Optimizing Oven Temperature: Achieving Even Baking
Utilizing Baking Stones or Dutch Ovens
A baking stone retains heat, providing steady bottom heat that encourages even oven spring. Preheat the stone for at least 30 minutes at 250°C. Sliding the loaf onto the stone boosts initial heat exposure, reducing temperature drop that can cause uneven rise.
Alternatively, bake in a Dutch oven: preheat it at 230°C, then transfer dough into the preheated vessel. Cover for the first 20 minutes to trap steam, then uncover for browning. This method yields a crisp crust, controlled expansion, and minimizes the risk of big air pocket bread.
Preventing Bread Imperfections: Proactive Baking
Selecting Appropriate Flour: Recipe Compatibility
Flour Types and Their Characteristics
- Bread Flour (11–14% protein): Ideal for strong gluten networks and even crumb.
- All-Purpose Flour (8–11% protein): Suitable for softer textures but may need added vital wheat gluten (1–2%).
- Whole Wheat Flour (13–15% protein, high fiber): Requires more water and extended kneading to develop gluten.
Choose flour based on hydration and kneading capacity. For a standard loaf, start with 12% protein bread flour to minimize large pockets under the crust.
Accurate Ingredient Measurement: Consistency in Baking
The Significance of Precise Measurements
Baking is a science; a 2% deviation in flour weight (10 g in 500 g) can alter hydration and gluten formation. Use a digital kitchen scale to measure ingredients by weight rather than volume. This accuracy reduces variable outcomes, preventing big air pocket bread due to overly wet or dry dough.
Proper Kneading: Developing Dough Strength
Indicators of Sufficiently Kneaded Dough
- Windowpane Test: Dough stretches into a thin translucent membrane.
- Elasticity: When you form a ball, the dough rebounds quickly upon gentle poke.
If the dough tears at 8 cm stretch, continue kneading in 2-minute increments. Well-kneaded dough should pass the windowpane test within 8–12 minutes of mixing.
Gentle Dough Handling: Minimizing Deflation
Tips for Preserving Dough Volume
- Avoid aggressive degassing; gently press to redistribute gas, remove only the largest bubbles.
- Use a bench scraper to lift and turn dough rather than pressing with your fingers.
- Maintain final proof close to shaping surface to prevent overhandling before baking.
These practices keep the internal structure intact, reducing the chance of a large air pocket forming under the crust.
[Link to article about dense bread]
Resources for Successful Bread Baking
Explore Baking Tips and Techniques
Frequently Asked Questions
Why does my bread have a big air pocket on top?
This is often due to uneven gluten development or excessive gas production during the proofing stage. This can lead to a concentrated pocket of air near the surface.
How can I prevent a large air pocket from forming in my bread?
Properly kneading the dough is crucial to develop strong gluten. Also, ensuring the dough is not over-proofed will help prevent excessive gas build-up.
What role does kneading play in preventing air pockets?
Kneading develops the gluten structure, which creates an even network to hold gas bubbles. Insufficient kneading results in weak gluten that can't evenly distribute the gas, leading to larger pockets.
Does the type of flour I use affect the formation of air pockets?
Yes, using a flour with a high protein content, like bread flour, is recommended. This helps form a stronger gluten structure, better able to hold gas evenly.
Could my oven temperature be contributing to the air pocket issue?
A too-hot oven might cause the crust to set too quickly, trapping expanding gases within the dough. Try lowering the oven temperature slightly and ensuring even heat distribution.
Final Reflection: The Humble Air Pocket – A Baker's Tale and a Slice of Life
The seemingly insignificant air pocket atop our bread reveals a surprisingly complex interplay of science, technique, and even a touch of artistry. Its presence, often met with disappointment, actually speaks volumes about the delicate balance required in baking, a balance easily disrupted by seemingly minor variations in ingredients, temperature, or technique. Understanding this balance allows us to appreciate the craft behind even the simplest loaf.
The quest to understand the "big air pocket" has led me down a fascinating path, exploring the physics of yeast fermentation, the chemistry of gluten development, and the subtle nuances of baking technique. It's a journey that highlights how even the most mundane aspects of our daily lives – like a slice of bread – can hold hidden depths of knowledge and artistry. The best bread is made with love and patience; the rest is just chemistry.
– Unknown. This quote perfectly encapsulates the blend of scientific precision and passionate dedication required to achieve baking perfection, or at least, a loaf without a gaping hole!
So, the next time you encounter that frustrating air pocket, remember it's not just a flaw, but a testament to the intricate process of bread making. Consider the journey your loaf took from simple ingredients to its final form. Take a moment to appreciate the science behind the crumb, and perhaps, even experiment with your own baking to see if you can master the art of the perfectly even loaf. The journey of understanding, like the journey of baking, is filled with both successes and failures, but the rewards are always worth the effort.
Unleash Your Inner Baker: Perfect Loaves Every Time!
Thanks for taking the time to explore the mysteries of bread baking with us! We hope you now have a better understanding of those pesky air pockets. Ready to put your new knowledge to the test?
- Bake a perfect loaf today! Try adjusting your technique based on what you've learned – you might be surprised by the results. Remember those tips on kneading and proofing? Put them to work!
- Share your baking triumphs (and challenges!) with our community on social media. Use #BakeWithEase and tag us – we love seeing your creations!
- Explore our other articles on bread making for even more expert advice.
What will your next baking adventure be?