
Troubleshooting OverProofed or UnderProofed Pizza Dough

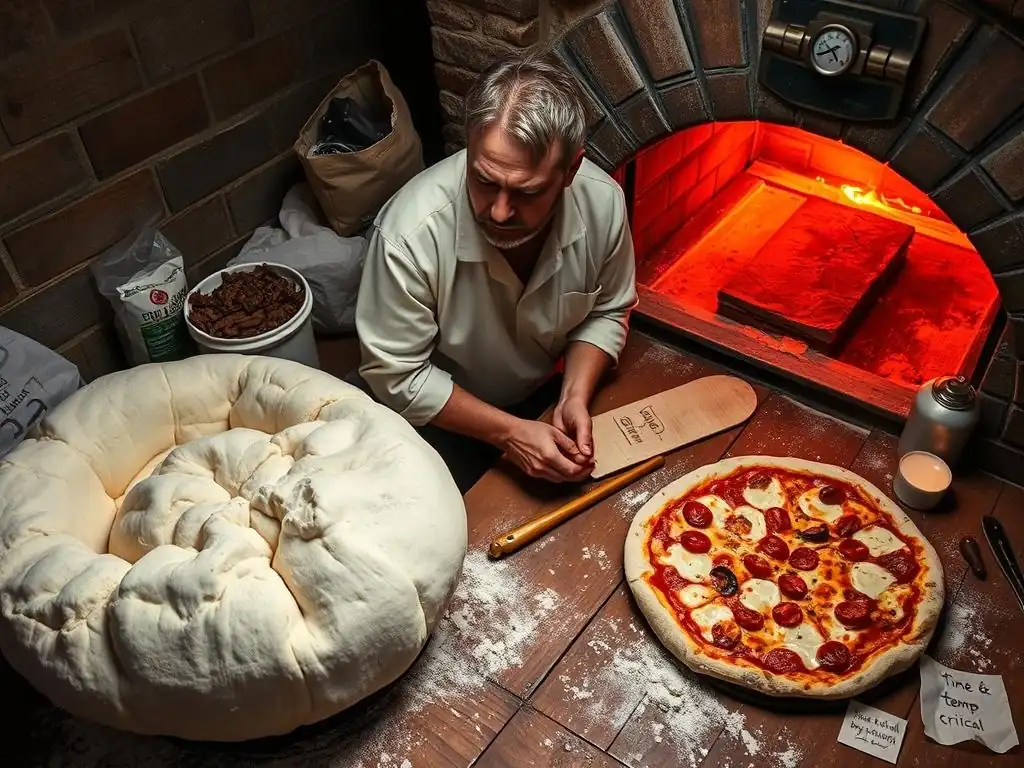
Welcome to BakeWithEase, your companion in the delightful world of baking! Ever wondered if your pizza dough is just right or teetering on the edge of disaster? This week, we dive into a common baking challenge: overproofed pizza dough. But don't worry, we're not just pointing out the problem; we're offering solutions. Read on to discover how to fix overproofed pizza dough and rescue your pizza night! What secrets are we about to reveal?
- BakeWithEase' Guide to Perfect Pizza Dough Proofing
- Understanding Pizza Dough Proofing: The Foundation for Great Pizza
- Identifying Under-Proofed Pizza Dough: Signs and Solutions
- How to Fix Over-Proofed Pizza Dough: Salvaging Your Dough
- Preventing Proofing Problems: Best Practices for Pizza Dough
- Common Mistakes in Pizza Dough Proofing (and How to Avoid Them)
- Mastering Pizza Dough Proofing: Tips and Tricks from BakeWithEase
- Conclusion: BakeWithEase' Final Thoughts on Perfect Pizza Dough Proofing
- Frequently Asked Questions
- Final Reflection: The Alchemy of Pizza Dough: Mastering Proofing
- Unlock Your Perfect Pizza Crust: Take Control of Your Dough!
BakeWithEase' Guide to Perfect Pizza Dough Proofing
Making delicious homemade pizza starts with perfect dough, and achieving that often comes down to mastering the art of proofing. Proofing is a critical step where yeast works its magic, transforming a simple mixture of flour, water, yeast, and salt into a light, airy foundation for your toppings. When dough is proofed just right, it bakes up with a beautiful crust, tender crumb, and that satisfying chew we all love.
However, sometimes things go awry, leading to under-proofed or over-proofed dough. This guide from BakeWithEase will walk you through identifying these issues and, more importantly, how fix overproofed pizza dough and rescue under-proofed dough.
Understanding the signs of improperly proofed dough is the first step to correcting the problem. Whether your dough hasn't risen enough or has gone too far, recognizing the visual and tactile cues is key. We'll delve into specific techniques and strategies that can help you salvage dough that isn't quite right, ensuring your pizza night isn't ruined. Learning to troubleshoot these common proofing problems will significantly improve your homemade pizza results, making you a more confident and successful baker.
Understanding Pizza Dough Proofing: The Foundation for Great Pizza
What is Proofing and Why is it Crucial for Pizza Dough?
Proofing, also known as fermentation, is the stage where yeast consumes sugars in the dough and produces carbon dioxide gas and alcohol. This gas gets trapped within the gluten network, causing the dough to rise and expand. This expansion is vital for creating the light, open structure that makes a pizza crust airy and tender. Without proper proofing, the dough will remain dense and heavy, resulting in a tough, unappealing crust that lacks flavor complexity.
Beyond just providing lift, proofing also develops flavor. The metabolic activity of yeast and other microorganisms present (especially in sourdough or long-fermented doughs) produces organic acids and other compounds that contribute to the characteristic aroma and taste of a well-made pizza crust. This flavor development is a slow process, which is why many recipes call for extended cold fermentation in the refrigerator, sometimes for 24 to 72 hours, allowing deeper flavors to emerge alongside a slower, more controlled rise.
The Visual Cues of Properly Proofed Pizza Dough
Properly proofed pizza dough should have roughly doubled in size, depending on the recipe and ambient temperature. It should look visibly puffy and feel light and airy when gently handled. The surface will appear smooth, perhaps with a few small bubbles visible just beneath the surface. A classic test is the "poke test": gently press a floured finger into the dough about half an inch deep. If the indentation slowly springs back halfway, your dough is likely perfectly proofed and ready to shape.
Another indicator is the texture. Properly proofed dough should be easy to handle, pliable, and not overly sticky or tight. It should stretch relatively easily without tearing, indicating a well-developed gluten structure that is relaxed by the fermentation process. If your dough exhibits these characteristics – significant increase in volume, a smooth puffy surface, and the correct response to the poke test – you are on your way to a fantastic pizza crust.
Identifying Under-Proofed Pizza Dough: Signs and Solutions
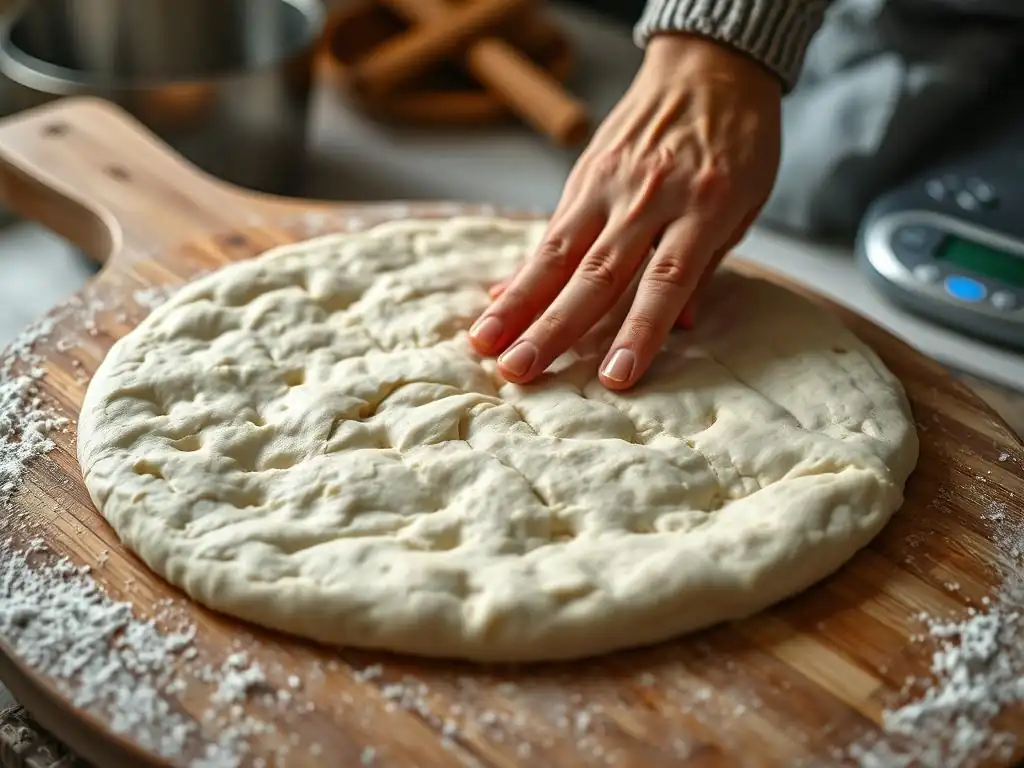
Recognizing Under-Proofed Dough: Dense texture, slow rise, dough springs back quickly when poked.
Under-proofed pizza dough is dough that hasn't fermented long enough or hasn't risen sufficiently. Visually, it will appear smaller than expected, perhaps only increasing by 25-50% of its original volume instead of doubling. The texture will feel dense and heavy, lacking that characteristic puffiness. When you try the poke test, the indentation will likely spring back almost immediately and completely, indicating that the gluten structure is still too tight and hasn't relaxed enough through fermentation.
When baked, under-proofed dough results in a dense, heavy, and often tough crust. It may not brown evenly and will lack the desirable open crumb structure. The flavor profile will also be less developed, tasting more simply of flour rather than the complex, slightly tangy notes found in properly fermented dough. Recognizing these signs early is crucial for implementing rescue strategies before baking.
Common Causes of Under-Proofed Pizza Dough
Insufficient Yeast Activity
One of the primary reasons for under-proofing is yeast that isn't active enough. This can happen if the yeast is old or expired, if the water used to activate it was too cold (below 75°F or 24°C), or if it was killed by water that was too hot (above 135°F or 57°C). Yeast is a living organism, and its vitality is key to successful fermentation. If your yeast doesn't foam or bubble when proofed in warm water with a pinch of sugar, it's likely inactive.
Another factor affecting yeast activity is the presence of salt. While necessary for flavor and controlling fermentation speed, adding salt directly on top of yeast during mixing can inhibit or even kill it. Ensuring salt is added after the yeast has been dispersed in water or mixed into the flour can prevent this issue. Using the correct type and amount of yeast specified in the recipe is also fundamental for predictable results.
Low Dough Temperature
Yeast activity is significantly influenced by temperature. Dough that is too cold will ferment very slowly, leading to under-proofing even if given sufficient time. The ideal temperature range for bulk fermentation (the first rise) for many pizza doughs is between 70°F and 80°F (21°C and 27°C). Temperatures below this range will drastically slow down the yeast. For instance, dough left to proof at 60°F (15°C) might take twice as long to rise compared to dough at 75°F (24°C).
Ambient room temperature, the temperature of the ingredients (especially the water), and even the temperature of your mixing bowl can impact the dough's temperature. Using slightly warmer water during mixing can help bring the dough into the ideal temperature range. Conversely, cold ingredients or a cold environment will require a significantly longer proofing time to achieve the desired rise.
Inadequate Proofing Time
Simply not giving the dough enough time to rise is a straightforward cause of under-proofing. Proofing times provided in recipes are often estimates and can vary greatly depending on the factors mentioned above: yeast activity, dough temperature, type of flour used, and even altitude. A recipe might say "proof for 1-2 hours," but if your kitchen is cold or your yeast is slightly sluggish, it might need 3 hours or more to properly double in size.
It's always better to rely on the visual cues (doubling in size, poke test) rather than strictly adhering to a time given in a recipe. Setting a timer is helpful, but be prepared to let the dough proof longer if it hasn't reached the desired volume and texture. Patience is a virtue in baking, especially when waiting for dough to rise.
How to Fix Under-Proofed Pizza Dough: Rescue Strategies
Extending Proofing Time: A Patient Approach
The most common and often most effective way to fix under-proofed dough is simply to give it more time. If your dough hasn't doubled or doesn't pass the poke test, cover it back up and let it continue proofing in a warm spot. This might mean letting it sit for another 30 minutes, an hour, or even longer, depending on how under-proofed it was and the ambient conditions. Monitor it every 30 minutes or so to avoid it becoming over-proofed.
To speed up the process slightly, you can place the covered dough in a slightly warmer environment. This could be an oven with the light on (creating a temperature around 80-85°F or 27-30°C), a microwave with a cup of hot water placed alongside, or near a warm appliance. Avoid overly hot places, as this can kill the yeast or cause uneven heating. The goal is to gently encourage the yeast to finish its work.
Warmth and Humidity: Creating the Ideal Environment
Yeast thrives in warm, humid conditions. If your dough is proofing slowly in a dry, cool environment, try creating a more favorable microclimate. As mentioned, a warm oven with the light on is effective. You can also place the dough in a bowl, cover it tightly with plastic wrap or a damp cloth, and put it in a warm spot. The plastic wrap helps trap the moisture released by the dough as it ferments, increasing humidity around the dough.
For an extra boost of humidity, you can place a pan of hot water on the bottom rack of your oven before putting the dough inside (with just the light on, not heated). The steam from the hot water will humidify the air, creating a sauna-like environment that encourages yeast activity and helps prevent the dough surface from drying out and forming a skin.
Kneading and Re-Proofing: A Last Resort
If your dough is significantly under-proofed and feels very dense and tight, or if you suspect the gluten hasn't been developed enough, you could gently knead it again for a few minutes (say, 3-5 minutes) to further develop the gluten structure. However, be cautious with this approach, as it can sometimes make the dough tougher if overdone. After kneading, you must let it proof again from scratch.
This method is typically a last resort for very stubborn dough. Ensure your hands and surface are lightly floured, knead just until the dough feels smoother and more elastic, then reshape it into a ball, place it back in a clean, oiled bowl, cover, and let it proof fully until doubled. This essentially restarts the proofing process, offering a chance to correct initial issues like poor gluten development.
How to Fix Over-Proofed Pizza Dough: Salvaging Your Dough
Recognizing Over-Proofed Dough: Collapsed structure, sour smell, excessive bubbles, dough doesn't hold its shape.
Over-proofed dough is dough that has fermented for too long, allowing the yeast to produce excessive amounts of gas and acids. Visually, it might look puffy initially but then start to deflate or even collapse in the center. Instead of a smooth surface, you might see very large bubbles or a web-like structure on top. The smell can be a strong indicator; over-proofed dough often has a distinct, pungent, sometimes overly alcoholic or sour aroma due to the build-up of fermentation byproducts.
When you perform the poke test on over-proofed dough, the indentation will remain completely, and the dough may feel fragile or even slightly sticky and wet. It loses its structure and elasticity, making it difficult to handle and shape. Knowing how fix overproofed pizza dough when you see these signs is essential for salvaging your efforts.
Common Causes of Over-Proofed Pizza Dough
Excessive Yeast Activity
Using too much yeast for the amount of flour and water can lead to dough proofing much faster than anticipated, potentially resulting in over-proofing if not monitored closely. Yeast quantities in recipes are usually quite specific for this reason. A small increase in yeast can significantly accelerate the rise time, especially in warm conditions.
Different types of yeast also have varying activity levels. Instant yeast is typically more vigorous and faster-acting than active dry yeast, requiring less proofing time. Using instant yeast in a recipe designed for active dry yeast without adjusting the quantity or proofing time can easily lead to over-proofing.
High Dough Temperature
Just as low temperatures slow yeast, high temperatures speed it up considerably. Proofing dough in a very warm environment (e.g., over 85°F or 30°C) can cause it to rise too quickly, exhausting the yeast and leading to over-proofing in a shorter amount of time than expected. This is a common issue during hot summer months or when proofing dough too close to a heat source.
Rapid fermentation at high temperatures can also negatively impact flavor development, as the yeast rushes through its metabolic processes without allowing complex flavors to build. Controlling the dough temperature is therefore crucial for both proper rise and good flavor.
Excessive Proofing Time
Leaving the dough to proof for too long, even at a moderate temperature, will eventually lead to over-proofing. Yeast continues to produce gas until it runs out of available sugars or the gluten structure can no longer contain the gas. If left unchecked, the dough will rise, peak, and then begin to collapse as the gluten strands weaken and the gas escapes.
Recipe times are guidelines, but relying solely on the clock without observing the dough's volume and texture is a recipe for over-proofing. Checking the dough periodically, especially during the final stages of proofing, is vital to catch it at its peak before it starts to decline. This is where understanding how fix overproofed pizza dough becomes relevant – when you missed the perfect window.
The Science Behind Over-Proofing: Gluten Breakdown
Over-proofing isn't just about too much gas; it's also significantly about the degradation of the gluten network. Gluten, the protein structure formed by kneading, is what provides the dough with its elasticity and strength, allowing it to trap the gases produced by the yeast. During fermentation, enzymatic activity within the dough, particularly from proteases, starts to break down proteins, including gluten.
In a properly proofed dough, this breakdown is minimal and helps relax the gluten, making the dough pliable and easy to shape. However, in over-proofed dough, this enzymatic breakdown goes too far. The gluten strands weaken and break, losing their ability to hold the gas. This is why over-proofed dough often collapses, feels fragile, and doesn't spring back when poked. The weakened gluten structure also means it won't hold its shape well during baking, resulting in a flat, dense, or gummy crust, even if you know how fix overproofed pizza dough before baking.
Techniques to Fix Over-Proofed Pizza Dough: Salvage Operations
Deflating and Re-Shaping: The Gentle Approach
One common strategy for how fix overproofed pizza dough is to gently deflate it, reshape it, and give it a brief, shorter second proof. Punching down the dough expels the excess gas and redistributes the yeast and nutrients. Handle the dough gently to avoid further stressing the already weakened gluten. Simply fold the edges into the center to create a taut surface, flip it seam-side down, and let it rest for 10-20 minutes.
After this short rest, the dough might regain a little structure, but it won't double in size again like a fresh dough. Shape it carefully into your pizza base. Be aware that the crust texture may still be compromised, potentially resulting in a less airy or slightly denser bake than intended. This method works best if the dough is only slightly over-proofed, helping you still bake a passable pizza.
Baking as is: Accepting Imperfection
Sometimes, the easiest answer for how fix overproofed pizza dough is to simply proceed with baking, accepting that the result won't be perfect. If the dough hasn't completely collapsed and you can still manage to shape it (even if it's floppy), you can try baking it as you normally would. Use plenty of flour to handle the potentially sticky dough and be extra gentle during shaping and transferring to your pizza peel or baking surface.
The resulting crust may be thinner in spots, have a tighter crumb (due to the collapsed structure), and potentially be a bit chewier or denser than ideal. However, it will still be edible, and with delicious toppings, you might barely notice the difference. This is a practical approach when time is of the essence and you just want to get dinner on the table.
Turning Over-Proofed Dough into Focaccia or Flatbread
If your dough is severely over-proofed – very fragile, sticky, and completely lacking structure – trying to shape it into a thin pizza crust might be impossible. In this case, a great way to salvage it is to turn it into focaccia or a thicker flatbread. These types of bread are more forgiving of a weakened gluten structure.
To do this, gently pour or scrape the dough into a well-oiled baking pan (like a 9x13 inch pan). Drizzle the top with olive oil and gently dimple the surface with your fingertips. You can add toppings like flaky salt, herbs (rosemary is classic), or cherry tomatoes.
Let it rest for another 15-30 minutes (it might rise slightly, or just relax) and then bake it in a hot oven (around 400-450°F or 200-230°C) until golden brown. This method embraces the dough's lack of structure and still yields a delicious result, providing a creative answer for how fix overproofed pizza dough beyond just pizza.
Preventing Proofing Problems: Best Practices for Pizza Dough
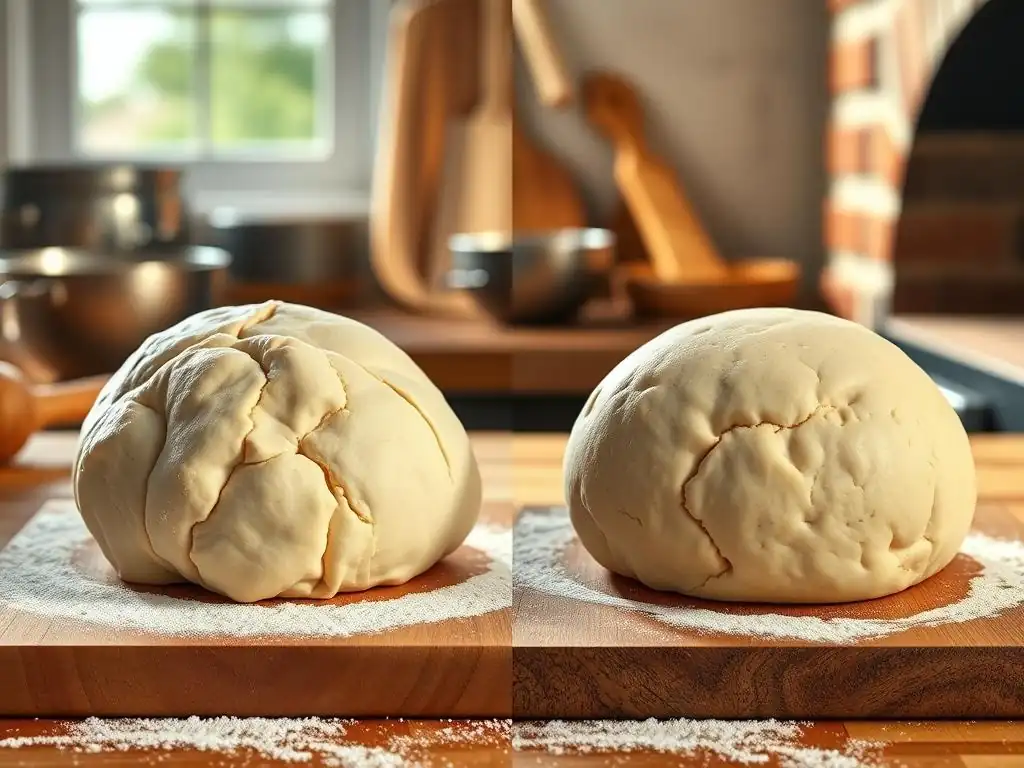
Yeast Selection and Activation: Ensuring Proper Rise
Start with fresh, viable yeast. Check the expiration date on the package. If using active dry yeast, "proof" it first by dissolving it in a small amount of warm water (around 105-115°F or 40-46°C) with a pinch of sugar. Wait 5-10 minutes; if it doesn't become foamy and bubbly, your yeast is dead, and you need to start over with a new packet. Instant yeast typically doesn't require proofing and can be mixed directly with the dry ingredients, but ensuring it's fresh is still important.
Store yeast properly. Unopened packets or jars should be kept in a cool, dry place. Once opened, yeast is best stored in an airtight container in the refrigerator or freezer, which significantly extends its shelf life. Freezing yeast can keep it viable for many months, though you might need to let it warm up slightly before using.
Temperature Control: Maintaining the Ideal Dough Temperature
Pay attention to the temperature of your ingredients and your environment. Use water within the recommended temperature range for your type of yeast (usually warm, not hot or cold). Aim for a final dough temperature after mixing that is within the ideal proofing range (around 75-80°F or 24-27°C). You can use a kitchen thermometer to check the water and the dough temperature.
During proofing, find a consistent, warm spot away from drafts. An oven with just the light on is a reliable proofing box. Avoid placing dough directly in sunlight (which can overheat spots) or on cold countertops. In colder kitchens, consider using a proofing box or placing the bowl on a warming mat set to a low temperature. Consistency in temperature helps ensure a predictable rise rate, making it easier to judge proofing time and avoid needing to figure out how fix overproofed pizza dough or under-proofed dough later.
Accurate Proofing Time: Avoiding Over or Under Proofing
Don't rely solely on the clock. While recipe times provide a starting point, always observe your dough. Look for visual cues: has it doubled (or increased by the amount specified in the recipe)? Does it look puffy? Perform the poke test to check its elasticity and structure. These indicators are far more reliable than a timer set for a specific number of hours.
Keep in mind that many factors influence proofing speed, including the amount of yeast, dough hydration, type of flour, presence of sugar or fat, and salt content. Learn to recognize the signs of properly proofed dough for your specific recipe and environment. This observational skill is key to consistently successful proofing.
The Float Test: A Simple Way to Check Proofing
A classic, though sometimes debated, method to check if a small piece of dough is ready for its final shaping (or if it's over-proofed) is the float test. Gently pinch off a small piece of dough (about the size of a grape). Fill a bowl with lukewarm water. Carefully drop the dough piece into the water.
If the dough floats immediately to the surface, it is generally considered well-proofed and ready to go. This indicates it has trapped enough gas to be buoyant. If it sinks, it may need more time. However, this test isn't foolproof and works best for certain dough types. Combine it with the poke test and visual cues for a more reliable assessment of your dough's readiness.
Common Mistakes in Pizza Dough Proofing (and How to Avoid Them)
Mistake #1: Using Expired Yeast
Using old or dead yeast is a fundamental error that guarantees your dough won't rise properly, if at all. Yeast is a living organism with a limited shelf life. Always check the expiration date before you begin. If you don't bake frequently, consider buying smaller packets of yeast to ensure freshness or storing larger quantities properly in the refrigerator or freezer.
To confirm viability, especially if you suspect the yeast is old, perform the activation test described earlier: dissolve in warm water with sugar. If it doesn't foam within 10 minutes, discard it and get new yeast. This simple step can save you a lot of frustration and prevent under-proofed dough.
Mistake #2: Ignoring Temperature Fluctuations
Dough temperature is perhaps the single biggest variable affecting proofing speed. Ignoring ambient temperature or using water that is too hot or cold leads to unpredictable results. A drafty kitchen in winter will slow proofing significantly, while a warm spot in summer can lead to over-proofing surprisingly quickly, forcing you to learn how fix overproofed pizza dough on the fly.
Be mindful of the temperature of your ingredients and your proofing environment. Use a thermometer if necessary. Find a consistent, warm spot for proofing, and avoid exposing the dough to drafts or direct sunlight. Adjusting proofing times based on the temperature of your kitchen is a skill that comes with practice.
Mistake #3: Over-Kneading the Dough
While proper kneading develops the gluten structure essential for trapping gas, over-kneading can create a dough that is too tight and difficult to proof. Over-kneaded dough feels very stiff and resistant, and may tear easily when stretched thin. It won't relax properly during proofing, leading to a dense texture even if it does rise somewhat.
Knead your dough until it passes the windowpane test (you can stretch a small piece thin enough to see light through it without tearing) and feels smooth and elastic, but not overly tight. Stop kneading once these signs are met, typically after 8-10 minutes in a stand mixer or 15-20 minutes by hand for many pizza dough recipes.
Mistake #4: Using the Wrong Type of Flour
Different flours have varying protein contents, which affects gluten development and thus proofing. Using a low-protein all-purpose flour might not develop enough gluten to support a robust rise, leading to a flatter crust. High-protein bread flour or Italian "00" flour is often preferred for pizza dough because their higher gluten content provides the necessary structure for an airy crust.
Ensure you are using the type of flour recommended in your recipe, or understand how substituting flours will affect the dough. For example, using a whole wheat flour will require more water and potentially longer proofing due to the bran interfering with gluten development. Matching the flour to the recipe's requirements is key for predictable proofing.
Mastering Pizza Dough Proofing: Tips and Tricks from BakeWithEase
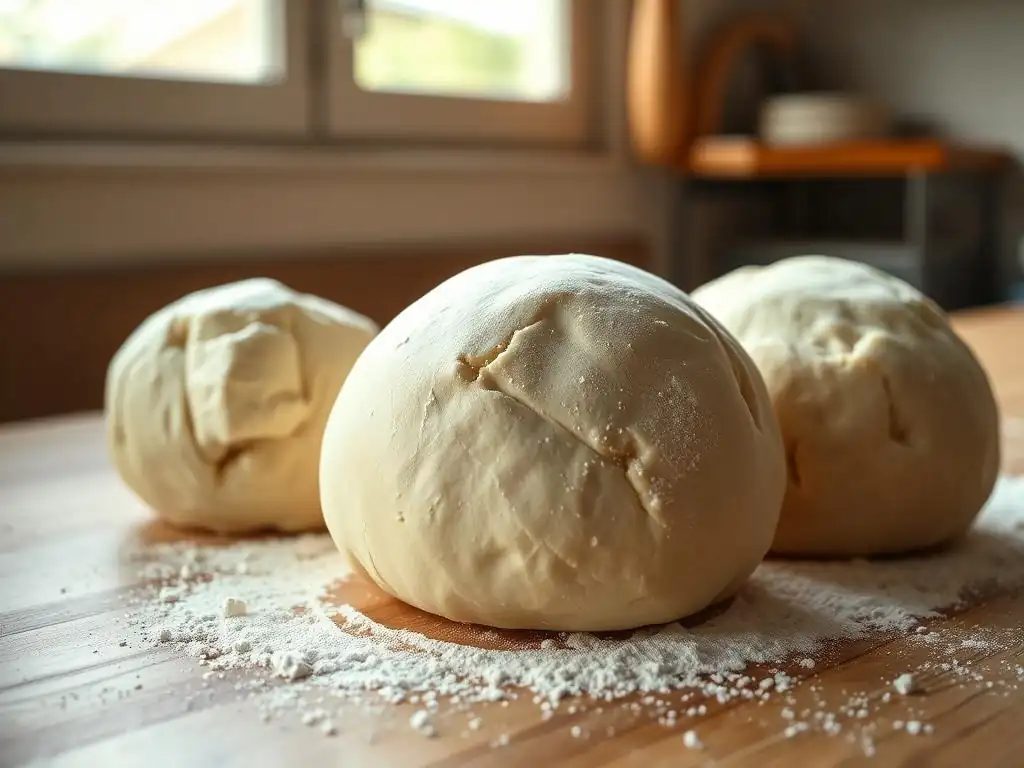
Tip #1: Use a Clear Container for Easy Observation
Proofing dough in a clear container, such as a large glass bowl or a clear plastic food storage container, allows you to easily monitor its progress without disturbing it. You can see how much it has risen against the side of the container and observe the development of bubbles. This visual check is invaluable for judging when the dough is properly proofed.
Marking the starting level of the dough on the container with a piece of tape or an elastic band gives you a clear reference point for measuring the rise, for example, aiming for it to double in volume. This makes it much easier to avoid under-proofing or needing to figure out how fix overproofed pizza dough.
Tip #2: Take Notes on Proofing Times and Temperatures
Become a baking scientist in your own kitchen! Keep a simple log of your pizza dough batches. Note the recipe used, the type and amount of yeast, the water temperature, the ambient room temperature, the time you started proofing, and the time the dough looked perfectly proofed (based on visual cues and the poke test).
Over time, this data will help you understand how your specific kitchen environment and chosen recipe behave. You'll develop an intuition for how long your dough typically takes to proof under different conditions, making it much easier to predict proofing times accurately and consistently achieve perfect results without encountering problems that require you to how fix overproofed pizza dough.
Tip #3: Adjust Proofing Based on Ambient Conditions
Be flexible with proofing times. If your kitchen is warmer than usual, start checking the dough earlier than the recipe suggests, as it will likely proof faster. Conversely, if it's colder, be prepared to extend the proofing time or find a warmer spot. There is no single magic number for proofing time; it's dependent on environmental factors.
Learning to read the dough itself, rather than just the clock, is the hallmark of a skilled baker. By observing the dough's volume, feel, and response to the poke test, you can confidently determine when it's perfectly proofed, regardless of minor variations in temperature or time, significantly reducing instances where you need to how fix overproofed pizza dough.
Conclusion: BakeWithEase' Final Thoughts on Perfect Pizza Dough Proofing
Mastering pizza dough proofing is a journey, not a destination. It involves understanding the science behind yeast activity and gluten development, recognizing the visual and tactile cues of dough at different stages, and learning to adapt to your specific baking environment. While encountering under-proofed or over-proofed dough can be frustrating, remember that these issues are common, and as we've shown, there are often ways to salvage your dough.
By paying attention to yeast freshness, controlling dough temperature, observing the dough's progress rather than sticking rigidly to times, and practicing techniques for how fix overproofed pizza dough and under-proofed dough, you'll significantly improve your pizza-making skills. Don't be discouraged by imperfections; each batch is a learning opportunity. With patience and practice, you'll consistently achieve perfectly proofed pizza dough that results in delicious, airy crusts every time you bake with ease.
Frequently Asked Questions
How can I tell if my pizza dough is overproofed?
Overproofed dough will often appear deflated or collapsed and may have a sour or alcoholic smell. It might also be very sticky and difficult to handle.
What causes pizza dough to overproof?
Overproofing happens when the yeast ferments for too long, consuming all the available sugars. This can be due to excessive warmth or too long of a rising time.
Can I salvage overproofed pizza dough?
Sometimes, yes! You can try gently kneading the dough to redistribute the yeast and then re-proofing it for a shorter time. However, the quality might be affected.
What's the best way to prevent pizza dough from overproofing?
Control the temperature and timing. Use cooler water when mixing the dough and monitor the dough's rise closely. Don't rely solely on the recipe's suggested time.
What if my pizza dough is underproofed instead of overproofed?
Underproofed dough will be dense and won't stretch easily. It needs more time to rise in a warm place to develop proper gluten structure and flavor.
Final Reflection: The Alchemy of Pizza Dough: Mastering Proofing
The perfect pizza starts with the perfect dough, and mastering the art of proofing is the cornerstone of that success. A seemingly simple process, proofing—allowing the yeast to do its work—can easily go awry, resulting in either a gummy, overproofed mess or a dense, underproofed disappointment. This article has explored the subtle nuances of this crucial step, providing practical solutions for both common proofing pitfalls.
The journey from a simple flour and water mixture to a beautifully risen pizza dough is a testament to the power of patience and precision. It's a process that mirrors life itself; sometimes we rush things, resulting in less-than-ideal outcomes, while other times, we allow for the necessary time and attention, leading to something truly remarkable. This delicate balance between control and letting go is something I've personally learned to appreciate through my own pizza-making adventures. The best things in life are worth waiting for,
a sentiment that rings especially true when crafting the perfect pizza dough.
Now, it's your turn. Take what you've learned here, not just as a guide to fixing overproofed or underproofed dough, but as a metaphor for approaching any challenge. Observe your dough, learn its rhythm, and don't be afraid to experiment. The next time you find yourself facing a less-than-perfect rise, remember the lessons within these pages, and embrace the opportunity to learn and improve. The reward? A pizza so delicious, it will be worth every minute of the process.
Unlock Your Perfect Pizza Crust: Take Control of Your Dough!
Thanks for taking the time to learn more about mastering your pizza dough! You've now got the knowledge to avoid those frustrating proofing mishaps. Ready to put your new skills to the test?
- Bake your perfect pizza tonight! Use what you've learned to create a crust that's exactly right – perfectly risen and incredibly delicious.
- Share your pizza-making journey! Let us know your results and any tips you discover in the comments below. We love hearing from our baking community!
- Explore other BakeWithEase articles on achieving the perfect pizza sauce and toppings for a truly unforgettable pie!
What unique twist will you add to your next pizza masterpiece?