
Bake Beautiful Challah: A StepbyStep Braiding Guide

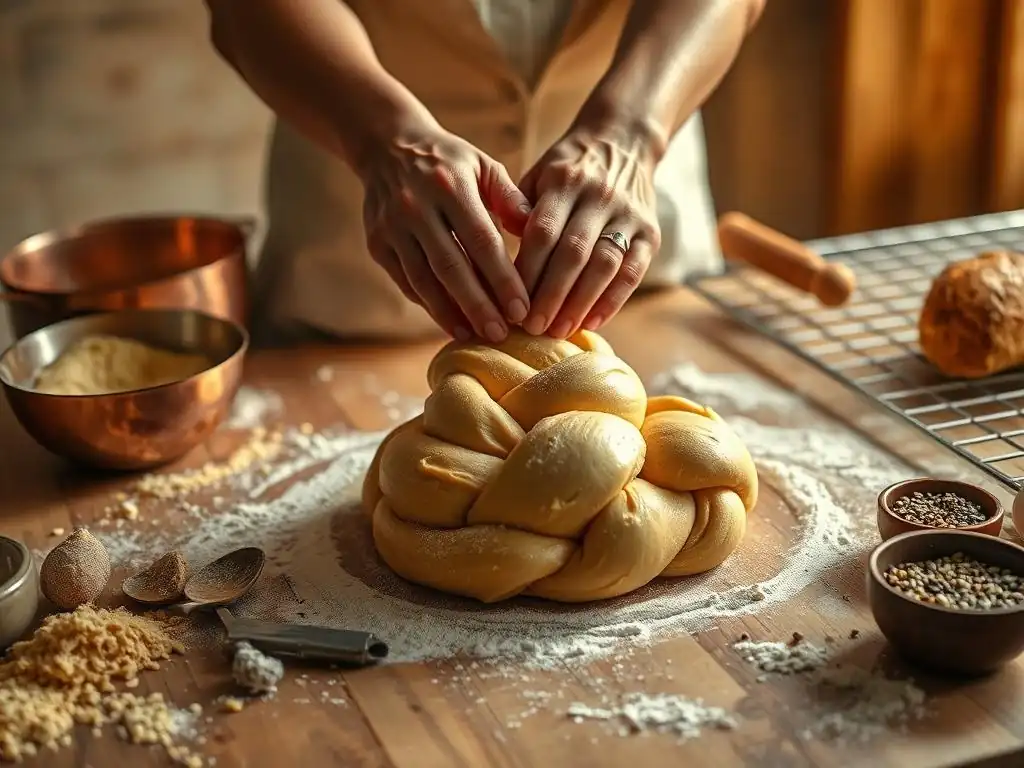
Welcome to BakeWithEase, your kitchen companion for all things baking!
Ready to elevate your baking game? Unlock the secrets to crafting a stunning and delicious challah with our Easy Challah Braiding Tutorial. Ever wondered how to achieve that intricate, picture-perfect braid? We'll guide you through each step, transforming simple dough into a masterpiece. Get ready to impress – your baking adventure starts now!
- Mastering Challah: A Comprehensive Braiding Guide
- Understanding Challah and Its Significance
- Essential Ingredients for Authentic Challah
- Preparing the Challah Dough: A Step-by-Step Approach
- Braiding Techniques: A Visual Guide to Success
- Detailed Braiding Instructions: Step-by-Step
- Baking Your Braided Challah: Achieving Perfection
- Troubleshooting Common Challah Baking Issues
- Tips for Consistently Beautiful Challah
- Serving and Storing Your Freshly Baked Challah
- Exploring Challah Variations: Beyond the Traditional
- Conclusion: Enjoying Your Homemade Challah
- Frequently Asked Questions
- Final Reflection: The Enduring Power of Simple Pleasures
- Unleash Your Inner Baker: Braid Your Own Beautiful Challah!
Mastering Challah: A Comprehensive Braiding Guide
Understanding Challah and Its Significance
What is Challah and Its Cultural Context?
Challah is a traditional Jewish braided bread, rich with eggs and often slightly sweet. It holds deep cultural and religious significance, typically baked to celebrate the Shabbat (Sabbath) and other Jewish holidays. On Shabbat, two loaves are traditionally placed on the table, representing the double portion of manna provided to the Israelites in the desert before the Sabbath. The braiding itself symbolizes unity and connection. While traditionally associated with religious observances, challah's delicious flavor and beautiful form have made it popular far beyond the Jewish community, enjoyed by many for its unique texture and taste.
This enriched bread stands apart from standard lean bread doughs due to its high content of eggs, oil, and often sugar or honey. This composition results in a soft, tender crumb and a rich, golden crust when baked. The process of making challah, from mixing the dough to the intricate braiding, is often seen as a meaningful ritual, connecting bakers to generations of tradition. Mastering an easy challah braiding tutorial allows home bakers to participate in this tradition and enjoy this wonderful bread.
This Guide: Achieving Beautiful Braided Challah at Home
Welcome to your guide to creating stunning, braided challah right in your own kitchen. This article is designed for intermediate bakers looking to elevate their bread-making skills, specifically focusing on the art of braiding this enriched dough. We'll walk you through selecting the right ingredients, preparing your dough, and mastering several braiding techniques, from a simple three-strand braid perfect for beginners to more complex six-strand patterns that create impressive loaves.
Our aim is to make the process clear and achievable, providing you with the knowledge and confidence to bake challah that is not only delicious but also visually captivating. By following these steps, you'll learn how to handle challah dough effectively, ensuring your braids hold their shape and result in a perfectly baked loaf every time. Get ready to impress yourself and your loved ones with your beautiful homemade challah, guided by this comprehensive easy challah braiding tutorial.
Essential Ingredients for Authentic Challah
Bread Flour: Choosing the Right Flour for Structure
Bread flour is the cornerstone of a well-structured challah. It contains a higher protein content compared to all-purpose flour, typically ranging from 12% to 14%. This higher protein level is crucial because it develops more gluten during the kneading process. Gluten is the protein network that provides elasticity and strength to the dough, allowing it to trap the carbon dioxide produced by the yeast. This results in a loaf with good volume and a chewy yet tender texture, characteristic of traditional challah.
Using bread flour ensures that your challah dough is strong enough to support the weight of the enriched ingredients like eggs and oil, and robust enough to hold the shape of the intricate braids during proofing and baking. While you can technically use all-purpose flour (around 10-12% protein), the resulting loaf may be less voluminous and have a softer structure, potentially making detailed braiding slightly more challenging. For the best results and a reliable dough for your easy challah braiding tutorial, opt for bread flour.
Active Dry Yeast: Ensuring Proper Activation
Active dry yeast is a common leavening agent used in challah. It comes in granular form and requires activation in warm liquid before being added to the dry ingredients. Proper activation is key to ensuring your dough rises correctly. The ideal temperature for activating active dry yeast is typically between 105°F and 115°F (40°C to 46°C). Water or milk at this temperature range awakens the dormant yeast cells and allows them to begin feeding on sugars.
To activate active dry yeast, dissolve it in the specified amount of warm liquid (usually water or milk) along with a pinch of sugar. Let the mixture stand for 5-10 minutes. You should see a foamy layer develop on the surface, indicating that the yeast is alive and active. If the mixture doesn't foam, your yeast may be old or the liquid wasn't at the correct temperature, and you should start again with fresh yeast. Using properly activated yeast is fundamental to a successful rise and a beautiful, airy challah.
Honey: Enhancing Flavor and Moisture
Honey serves multiple purposes in challah dough. Primarily, it acts as a sweetener, adding a subtle richness and depth of flavor that granulated sugar alone might not provide. The type of honey can subtly influence the final taste; for example, clover honey offers a classic mild sweetness, while a darker honey like buckwheat could add a more robust note. Beyond flavor, honey is a humectant, meaning it attracts and retains moisture.
The presence of honey contributes to a moist, tender crumb that stays fresh longer. It also aids in browning the crust during baking, giving the challah its characteristic golden hue. While some recipes use granulated sugar, honey is often preferred in traditional challah for its unique flavor profile and moisture-retaining properties. Typically, a challah recipe might call for anywhere from 2 to 6 tablespoons of honey, depending on the desired sweetness and richness.
Eggs: Adding Richness and Color
Eggs are a defining ingredient in enriched doughs like challah, contributing significantly to its richness, color, and texture. They add fat and protein, which tenderize the crumb and provide structure. The yolks contribute a beautiful golden color to both the dough and the final baked loaf, while the whites help create a slightly chewy texture. Using whole eggs makes the dough more pliable and easier to handle, which is particularly beneficial when practicing your easy challah braiding tutorial.
Most challah recipes call for several large eggs. For instance, a recipe yielding one standard loaf might use 2-3 large eggs, while a recipe for two larger loaves could use 4-6 eggs, sometimes including an extra yolk for added richness. The high egg content is why challah is often described as having a "cake-like" or "brioche-like" quality compared to lean bread. They also play a role in the dough's ability to rise beautifully and maintain its form.
Olive Oil: Contributing to a Soft Texture
Olive oil is a traditional fat used in challah, contributing to the dough's tenderness and softness. Unlike butter, which is solid at room temperature and can coat flour particles differently, oil remains liquid, distributing more evenly throughout the dough. This even distribution helps to shorten gluten strands slightly, resulting in a more tender crumb. The type of olive oil used can also subtly influence the flavor; a mild extra virgin olive oil is commonly preferred to avoid overpowering the other ingredients.
The amount of oil typically ranges from 1/4 cup to 1/2 cup for a standard loaf recipe. This fat content not only improves texture but also helps to keep the bread moist and extends its shelf life compared to lean breads. The use of oil rather than butter also makes challah inherently pareve (neither dairy nor meat), which aligns with traditional dietary laws for serving with various meals. Incorporating oil correctly is part of achieving the perfect dough consistency needed for an easy challah braiding tutorial.
Salt: Balancing Sweetness and Enhancing Flavor
Salt is a critical ingredient in bread making, and challah is no exception. While it might seem counterintuitive in a slightly sweet bread, salt plays several vital roles. Firstly, it balances the sweetness provided by the honey or sugar, preventing the bread from tasting cloyingly sweet and instead highlighting the rich flavors of the other ingredients. Without salt, sweet breads often taste flat or one-dimensional.
Beyond flavor, salt helps to control yeast activity. It slows down fermentation slightly, allowing the dough to develop more complex flavors over a longer period and preventing it from rising too quickly. Salt also strengthens the gluten structure, contributing to a better crumb and overall loaf shape. Too little salt can result in a bland, rapidly risen dough with a poor structure, while too much can inhibit yeast activity significantly and make the bread taste overly salty. A typical ratio is about 1.5% to 2% of the total flour weight.
Preparing the Challah Dough: A Step-by-Step Approach
Mixing and Kneading: Developing Gluten for Strength
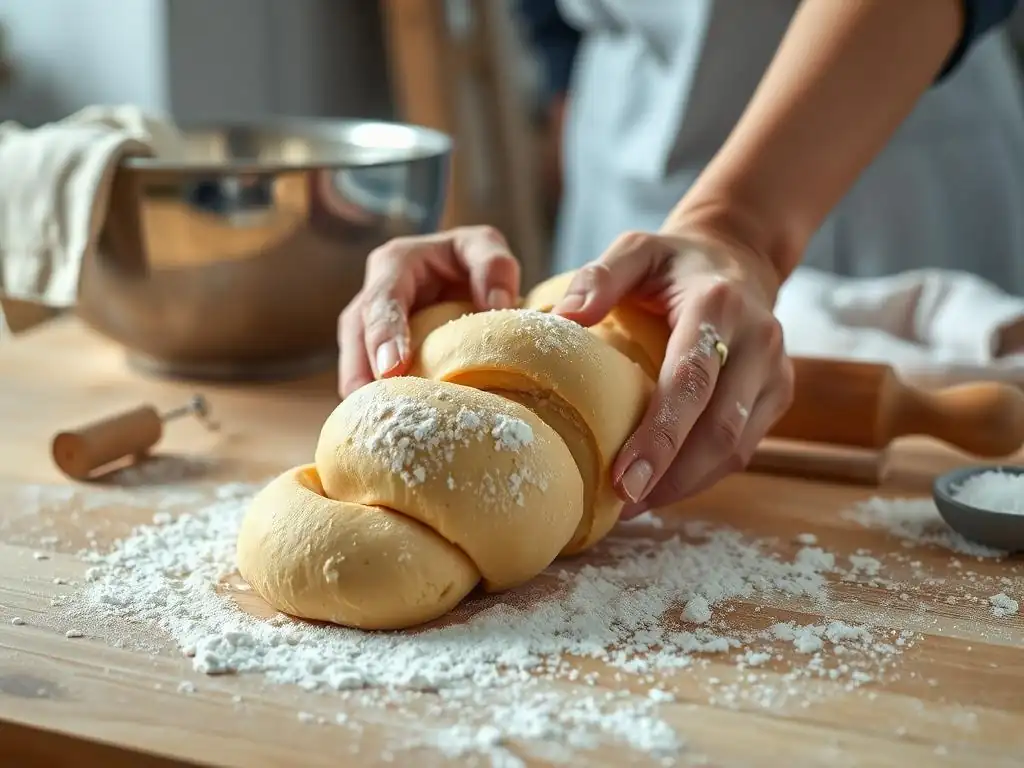
The process begins with combining the activated yeast mixture with the other wet ingredients (eggs, oil, honey) and then gradually incorporating the dry ingredients (bread flour, salt). Mixing can be done by hand or with a stand mixer fitted with a dough hook. Once the ingredients are roughly combined into a shaggy dough, the kneading process starts. Kneading develops the gluten network, which is essential for the dough's structure and elasticity, crucial for successful braiding.
Kneading should continue until the dough is smooth, elastic, and pulls away cleanly from the sides of the bowl (if using a mixer). This typically takes about 8-12 minutes in a stand mixer on medium speed, or 15-20 minutes by hand. You can perform the windowpane test to check for adequate gluten development: pinch off a small piece of dough and gently stretch it.
If you can stretch it thin enough to see light through it without tearing, the gluten is well-developed. Properly kneaded dough is easier to handle and braid, making your easy challah braiding tutorial experience much smoother.
First Proof: Allowing the Dough to Rise
After kneading, the dough needs time to undergo its first rise, also known as bulk fermentation. Place the dough in a lightly oiled bowl, turning it to coat all sides. Cover the bowl tightly with plastic wrap or a damp towel to prevent a skin from forming. The dough should be left to rise in a warm, draft-free place. An ideal temperature range is typically between 70°F and 75°F (21°C to 24°C).
During this first proof, the yeast ferments the sugars in the dough, producing carbon dioxide gas, which causes the dough to expand. The dough should approximately double in size. This usually takes about 1 to 1.5 hours, but the exact time can vary significantly depending on the ambient temperature and the activity of your yeast. A slower, cooler rise (e.g., in the refrigerator for 8-12 hours) can develop more complex flavors, though a standard room temperature rise is perfectly fine for this easy challah braiding tutorial.
Punching Down: Preparing for Braiding
Once the dough has doubled in size during the first proof, it needs to be "punched down." This process involves gently deflating the dough to release the carbon dioxide gas that has built up. Punching down redistributes the yeast, sugar, and moisture, equalizes the temperature throughout the dough, and prepares the gluten for the next stage. It also makes the dough easier to handle and shape into strands for braiding.
To punch down, simply press your fist gently into the center of the risen dough. Then, fold the edges into the center and briefly knead it a few times within the bowl. The dough will deflate significantly. After punching down, the dough is ready to be divided and shaped into strands for braiding. This step is quick but essential before moving on to the exciting part of your easy challah braiding tutorial.
Braiding Techniques: A Visual Guide to Success
Dividing the Dough: Achieving Even Portions
Before you can begin braiding, the dough needs to be divided into equal portions, which will become your strands. The number of portions depends on the type of braid you plan to create (3, 4, or 6 strands are common). For consistency in size and even baking, it's highly recommended to use a kitchen scale to weigh the entire dough ball after punching down, then divide that total weight by the number of strands you need.
For example, if your dough weighs 800 grams and you want a 6-strand braid, you would divide the dough into six pieces, each weighing approximately 133-134 grams. Weighing ensures that each strand is the same thickness and length when rolled out, leading to a more uniform and aesthetically pleasing braided loaf. This simple step is key to a successful easy challah braiding tutorial outcome.
Choosing Your Braid: 3-Strand, 4-Strand, or 6-Strand Options
The beauty of challah lies in its versatile braiding. You can choose from several patterns, ranging in complexity and visual appeal. The most common options are the 3-strand, 4-strand, and 6-strand braids. The 3-strand braid is the simplest and an excellent starting point for beginners attempting an easy challah braiding tutorial. It resembles a standard hair braid and is quick to execute.
The 4-strand braid offers a slightly more intricate look and is often described as weaving rather than braiding. It results in a flatter, wider loaf. The 6-strand braid is perhaps the most traditional and visually stunning, creating a tall, rounded loaf with an intricate, woven pattern. While it looks complex, the technique is actually quite systematic and achievable with practice. Choosing your braid depends on your skill level and the desired final appearance of your challah.
Simple 3-Strand Braid: A Beginner-Friendly Technique
The 3-strand braid is the perfect entry point for anyone learning how to braid challah easily. It follows the familiar over-and-under pattern used for braiding hair or rope. Once you have divided your dough into three equal portions and rolled them into strands (as described in the next section), align them side-by-side and pinch them firmly together at one end to secure the top.
To braid, take the rightmost strand and cross it over the middle strand. The original middle strand is now on the right. Then, take the leftmost strand and cross it over the new middle strand. Continue this alternating pattern, taking the outside strand (right or left) and crossing it over the middle strand, working your way down the length of the strands.
Keep the tension relatively even to maintain a consistent braid width. Pinch the ends together firmly at the bottom and tuck them under the loaf for a neat finish. This simple technique makes for a very easy challah braiding tutorial.
Elegant 4-Strand Braid: Adding Complexity
The 4-strand braid, while adding complexity, creates a beautiful woven pattern. After dividing your dough into four equal portions and shaping them into strands, arrange them side-by-side and pinch the tops together securely. Imagine the strands are numbered 1, 2, 3, and 4 from left to right. The key is a specific weaving sequence.
Start by taking strand 4 (the rightmost) and crossing it over strand 2. Then, take strand 1 (the leftmost) and cross it over strand 3. Now, take the strand that is now second from the right (it was originally 2) and cross it over the two strands to its left. It's a rhythm of right-over-two, left-over-two, then the new second-from-right over the two to its left. Alternatively, a common method is: 4 over 3, 2 over 1, 3 over 2. Repeat this sequence down the loaf. Pinch and secure the ends. This technique results in a flatter, basket-weave appearance.
Intricate 6-Strand Braid: Creating a Stunning Centerpiece
The 6-strand braid looks incredibly impressive but follows a systematic pattern that becomes intuitive with practice. Divide your dough into six equal portions and roll them into strands. Pinch the tops together firmly and fan the strands out.
Imagine the strands are numbered 1 through 6 from left to right. The pattern is a simple sequence of movements: take the outermost right strand (6), bring it over two strands (5 and 4), and lay it down between strands 3 and 4. Then, take the outermost left strand (1), bring it over two strands (2 and 3), and lay it down between strands 3 and 4.
You are always taking the outside strand, moving it over two strands, and placing it in the middle. Repeat this pattern: Right over two, into the middle. Left over two, into the middle. Continue until you reach the end of the strands. Keep the strands relatively close together as you work. Pinch the ends together and tuck them under the loaf. This method creates a tall, rounded loaf with a beautiful, intricate weave, making your easy challah braiding tutorial result look professionally made.
Detailed Braiding Instructions: Step-by-Step
Setting Up Your Braiding Station
Preparation is key to a smooth braiding process. Clear a large, clean surface – your countertop or a large cutting board works well. Lightly flour the surface. Ensure your divided dough portions are ready. Have a baking sheet lined with parchment paper nearby; braiding directly on parchment paper makes transferring the delicate braided loaf much easier after the second proof. Arrange your dough portions according to the number of strands you plan to use (3, 4, or 6). For a 6-strand braid, fan them out evenly from the pinched top.
Having everything within easy reach and your surface lightly floured prevents the dough from sticking while you roll and braid the strands. A little bit of flour goes a long way; too much can dry out the surface of the dough. Prepare your space before you start shaping the strands to ensure a seamless transition from dough division to braiding, making your easy challah braiding tutorial experience less stressful.
Step 1: Shaping the Dough into Even Strands
Once your dough is divided into equal portions, the next step is to shape each portion into a long, even strand. On your lightly floured surface, take one dough portion and gently roll it back and forth under your palms, starting from the center and working outwards towards the ends. Apply even pressure to create a rope-like shape. The goal is for each strand to be roughly the same length and thickness along its entire length.
Aim for strands that are slightly longer than the desired length of your final loaf, as the braid will shorten them. For a standard loaf, strands might be around 14-18 inches long and about 1 to 1.5 inches thick. If the dough resists rolling, let it rest for a few minutes (this allows the gluten to relax) before trying again. Consistent strand thickness is important for an even braid and baking, so take your time on this step of the easy challah braiding tutorial.
Step 2: Joining the Strands at the Top
After you have shaped all your dough portions into even strands, arrange them side-by-side (for 3 or 4 strands) or fanned out (for 6 strands) on your prepared surface or parchment-lined baking sheet. Gather the strands together at one end and pinch them very firmly. This pinched end will form the top of your loaf and acts as the anchor point for your braid.
Ensuring this connection is secure prevents the top of the braid from unraveling during proofing and baking. You can even tuck the pinched end slightly under itself for extra stability. This step creates the foundation for your braid, whether you're doing a simple 3-strand or a complex 6-strand pattern, setting you up for success in your easy challah braiding tutorial.
Step 3: Executing the Braid: A Visual Demonstration
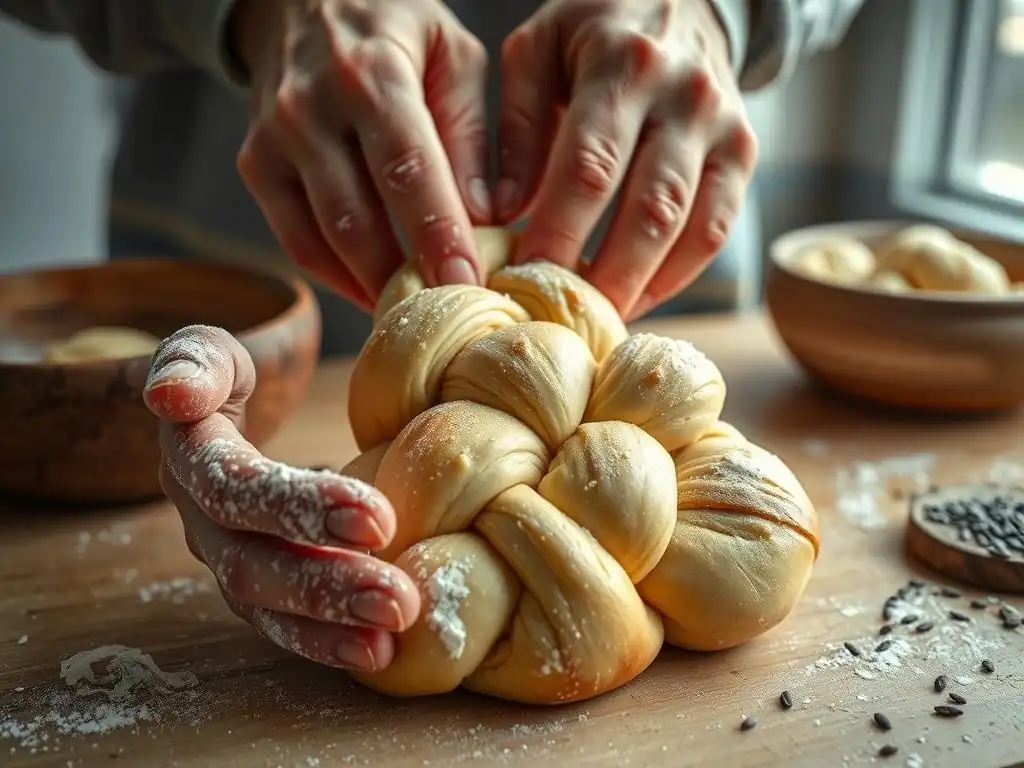
This is where the magic happens! With your strands laid out and the top securely pinched, begin executing your chosen braid pattern (3-strand, 4-strand, or 6-strand) following the steps described earlier. Work your way down the length of the strands, keeping the tension consistent. Try not to pull the strands too tightly, as this can result in a dense loaf; a gentle, even hand is best.
As you braid, keep the strands relatively close together. If they start spreading out, gently push them back towards the center. For longer loaves, you may need to stand or move around the loaf as you work your way down. The process of braiding is often best learned visually, watching someone perform the steps. Focus on repeating the pattern accurately until you reach the end of the strands.
Step 4: Securing the Ends for a Finished Look
Once you have braided down to the end of your strands, you need to secure the bottom to prevent the braid from unraveling. Gather the ends of the strands together and pinch them firmly, just as you did at the top. For a neat finish, you can either tuck the pinched end underneath the loaf or gently fold and press it against the underside.
This ensures that the braid holds its shape during the final proof and baking. Take a moment to gently shape the loaf if needed, ensuring it looks even and symmetrical. This final touch completes the braiding process and prepares your beautiful challah for its second rise, moving you closer to enjoying the results of your easy challah braiding tutorial.
Baking Your Braided Challah: Achieving Perfection
Second Proof: Ensuring Optimal Rise
After braiding and shaping your challah loaf, it requires a second proof (also called the final proof or bench proof). Carefully transfer the loaf (if not already on it) to a baking sheet lined with parchment paper. Cover the loaf loosely with plastic wrap or a clean kitchen towel to prevent it from drying out. Allow the challah to rise in a warm, draft-free place for approximately 45-75 minutes, or until it looks visibly puffy and has increased in size by about 50-75%.
The dough should feel soft and slightly springy when gently poked; if it springs back immediately, it needs more time. Be careful not to overproof, as this can cause the loaf to collapse in the oven. This second rise is crucial for achieving a light, airy texture in the final baked bread.
Egg Wash: Creating a Golden-Brown Crust
An egg wash is essential for giving challah its signature glossy, golden-brown crust. Typically, an egg wash consists of one beaten egg mixed with a tablespoon or two of water or milk. For an extra rich color and shine, you can use an egg yolk mixed with a little liquid. Gently brush the entire surface of the loaf with the egg wash just before baking. Be sure to get into all the crevices of the braid.
For added texture and flavor, you can sprinkle toppings like sesame seeds, poppy seeds, or everything bagel seasoning over the egg wash. The egg wash not only contributes to color and shine but also helps any seeds or toppings adhere to the crust during baking. Apply the wash gently to avoid deflating the beautifully proofed loaf.
Baking Temperature and Time: Achieving a Perfect Bake
Preheat your oven to the correct temperature, typically between 350°F and 375°F (175°C to 190°C). The exact temperature can vary slightly depending on your oven and recipe, but this range is standard for enriched doughs. Baking time will depend on the size and thickness of your loaf, but a standard challah loaf usually takes between 25 and 40 minutes to bake.
Bake the challah until the crust is a deep golden brown and the internal temperature reaches the target range. Midway through baking, you might need to loosely tent the loaf with foil if the top is browning too quickly. Rotating the baking sheet halfway through can also help ensure even browning.
Checking for Doneness: Using a Thermometer
The most reliable way to determine if your challah is fully baked is by checking its internal temperature using an instant-read thermometer. Carefully insert the thermometer into the thickest part of the loaf, usually the center. The challah is done when the internal temperature reaches between 190°F and 200°F (88°C to 93°C).
Baking by time alone can be misleading due to variations in oven calibration and loaf size. A loaf that looks golden brown on the outside might still be underbaked in the center. Using a thermometer ensures your challah is cooked through, resulting in a perfectly baked loaf with a tender crumb and a beautiful crust, the perfect culmination of your easy challah braiding tutorial efforts.
Troubleshooting Common Challah Baking Issues
Sticky Dough: Adjusting Hydration
If your challah dough feels excessively sticky and difficult to handle even after sufficient kneading, it likely has too much hydration (too much liquid relative to the flour). This can happen due to variations in flour absorption or inaccurate measuring. While challah dough is enriched and softer than lean bread doughs, it shouldn't be unmanageably sticky.
To fix sticky dough, you can gradually add a small amount of bread flour, about a tablespoon at a time, kneading it in thoroughly before adding more. Continue adding flour until the dough is still soft and pliable but no longer sticks excessively to your hands or the work surface. Avoid adding too much flour, as this will result in a dry, tough loaf. Proper hydration balance is key for dough that's easy to work with during an easy challah braiding tutorial.
Braid Falling Apart: Improving Dough Strength
If your beautifully crafted braid loses its definition or seems to spread excessively and flatten out during proofing or baking, it could be due to insufficient gluten development or overproofing. Dough that hasn't been kneaded enough won't have a strong enough structure to hold its shape against the force of the rising gas. Overproofing weakens the gluten structure, making it unable to support the loaf.
Ensure you are kneading the dough until it passes the windowpane test, indicating sufficient gluten development. Also, monitor the second proof carefully; the loaf should be puffy but not look like it's about to collapse. If the issue persists, try slightly reducing the hydration or ensuring you are using bread flour with adequate protein content (12-14%) to provide the necessary structure for your easy challah braiding tutorial.
Uneven Strands: Techniques for Consistent Shaping
Uneven strands are a common issue when learning to braid challah, leading to a lopsided or unevenly baked loaf. If your strands are thicker in some places and thinner in others, they will rise and bake at different rates. The thinner parts may overcook and become dry, while the thicker parts might be underbaked.
To achieve consistent strand thickness, practice your rolling technique. Start rolling from the center of the dough portion, working your way outwards, applying even pressure with your palms. If a strand becomes too long or thin in one section, you can gently push the dough back towards the center of that section to even it out. Using a kitchen scale to divide the dough initially is the most crucial step for starting with even portions, making the subsequent shaping much easier for your easy challah braiding tutorial.
Insufficient Rise: Addressing Yeast and Proofing
If your challah dough isn't rising adequately during either the first or second proof, several factors could be at play. The most common culprits are inactive yeast, incorrect liquid temperature during yeast activation, or a proofing environment that is too cold. Yeast is a living organism and requires specific conditions to thrive.
Ensure your active dry yeast is fresh and properly activated in water between 105°F and 115°F (40°C to 46°C) until it foams. If it doesn't foam, the yeast is likely dead, and you need to start over with a fresh packet. For proofing, find a warm, draft-free spot.
Temperatures below 70°F (21°C) will significantly slow down the rise. You can create a warm environment in your oven by turning on the light (it generates a small amount of heat) or placing the dough in a warm room. Patience is key; sometimes, a slow rise is simply due to a cooler temperature, so allow extra time if needed.
Tips for Consistently Beautiful Challah
Using a Kitchen Scale for Accuracy
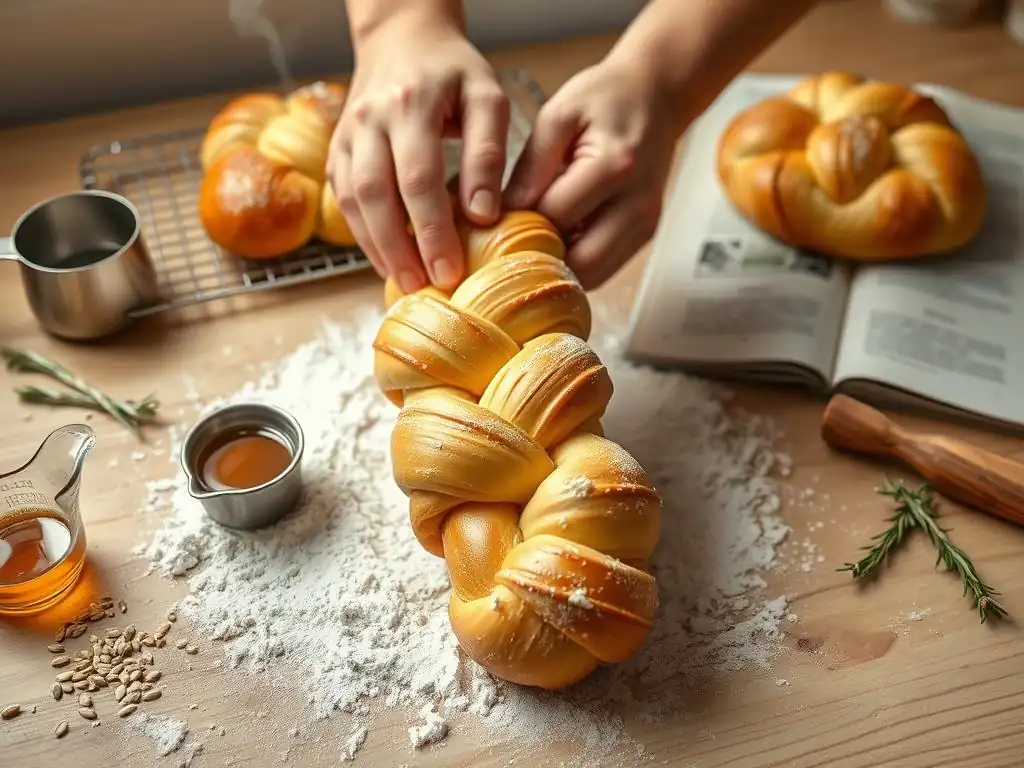
One of the most impactful ways to ensure consistent baking results, especially with enriched doughs like challah, is to use a kitchen scale. Measuring ingredients by weight rather than volume (cups) is significantly more accurate. A cup of flour, for instance, can vary in weight by as much as 20% depending on how it's scooped and packed.
Using a scale ensures you have the precise ratio of flour to liquid and other ingredients specified in the recipe. This consistency leads to dough with the correct hydration and texture, which is much easier to handle and braid effectively. For dividing the dough into strands, weighing each portion guarantees they are identical in size, leading to a symmetrical braid and even baking. Investing in a scale is a simple step that dramatically improves the reliability of your easy challah braiding tutorial results.
Handling Dough Temperature Effectively
Dough temperature plays a significant role in the rate of fermentation and the dough's handling properties. Warm dough ferments faster and can feel softer and stickier, while cold dough ferments slower and is firmer and easier to handle, especially for intricate braiding. The ideal dough temperature after kneading is often between 75°F and 80°F (24°C to 27°C).
If your kitchen is warm, your dough may rise faster than expected. If it's cold, it will rise slower. You can control dough temperature somewhat by adjusting the temperature of the liquid used to activate the yeast (within the safe range) or by proofing in a warmer or cooler spot. For braiding, slightly cooler dough (perhaps after a brief chill in the fridge) can be less sticky and hold its shape better, making complex braids easier to manage.
Practice and Patience: Honing Your Skills
Mastering the art of challah braiding, especially the more complex patterns, takes practice. Don't be discouraged if your first few attempts aren't perfect or if your braids look a little uneven. Each loaf you bake is an opportunity to learn and improve. Pay attention to how the dough feels and how it responds to your handling.
Patience is also crucial throughout the entire process, from kneading to proofing to braiding. Allow the dough sufficient time to rise; rushing the process will result in a less flavorful and less airy loaf. Approach the braiding as a relaxed, almost meditative task. With each attempt, your hands will become more familiar with the movements, and your braids will become more consistent and beautiful. Think of each braid as a step in your journey with this easy challah braiding tutorial.
Braiding on Parchment Paper: Facilitating Transfer
A simple yet effective tip for preserving the shape of your braided challah before baking is to braid it directly on the parchment paper that you will use to line your baking sheet. Once a challah loaf is braided and has undergone its second proof, it becomes very delicate and can be easily misshapen when transferred from a countertop to a baking sheet.
By braiding on the parchment paper, you eliminate the need for this potentially problematic transfer. Simply slide the parchment paper with the proofed loaf onto your baking sheet, and it's ready for the egg wash and the oven. This technique minimizes handling of the fragile proofed dough, helping your beautiful braid maintain its form and ensuring a perfect loaf emerges from the oven.
Serving and Storing Your Freshly Baked Challah
Serving Suggestions: Enhancing the Flavor
Freshly baked challah, warm from the oven, is a delight on its own, but it also pairs wonderfully with various accompaniments. Traditionally, it's served simply, perhaps with a sprinkle of coarse salt or a drizzle of honey. Its slightly sweet, rich flavor makes it perfect for both sweet and savory pairings.
Consider serving slices with butter, jam, or cream cheese for breakfast or brunch. For a more substantial treat, use it to make incredible French toast – its rich, eggy crumb absorbs the custard beautifully. Leftover challah is also ideal for bread pudding or savory applications like stuffing. Its versatility makes it a favorite bread for many uses beyond the traditional Shabbat meal.
Proper Storage Techniques: Maintaining Freshness
Challah is best enjoyed within 1-2 days of baking, as its rich nature means it can dry out slightly faster than lean breads. To store it at room temperature, allow the loaf to cool completely on a wire rack before placing it in a bread box, a paper bag, or loosely wrapping it in plastic wrap. Avoid storing warm bread in airtight containers, as this can trap moisture and make the crust soggy.
For longer storage within the first couple of days, an airtight container or plastic bag can help maintain softness, though it might slightly compromise the crust's crispness. If you won't be eating the challah quickly, freezing is the best option for preserving its quality.
Freezing for Long-Term Preservation
Challah freezes exceptionally well, allowing you to enjoy your homemade bread weeks or even months after baking. Ensure the loaf is completely cooled to room temperature first. You can freeze it whole or slice it before freezing, depending on how you plan to use it.
Wrap the cooled challah tightly in plastic wrap, then wrap it again in aluminum foil or place it in a freezer-safe bag. This double layer of protection helps prevent freezer burn. Frozen challah can be stored for up to 3-4 months. To thaw, remove from the freezer and let it sit at room temperature (still wrapped) for several hours. For best results with a whole loaf, you can reheat it in a 300°F (150°C) oven for about 10-15 minutes after thawing to refresh the crust.
Exploring Challah Variations: Beyond the Traditional
Seed and Topping Combinations: Adding Flavor and Texture
While classic challah is often left plain or simply brushed with egg wash, adding seeds and other toppings before baking is a popular way to enhance flavor and texture. The most common toppings are sesame seeds and poppy seeds, often sprinkled generously over the egg-washed crust. These add a pleasant crunch and a subtle nutty flavor.
Beyond the basics, you can experiment with nigella seeds, caraway seeds, or a combination of several types. For a savory twist, consider adding Everything Bagel seasoning (a mix of sesame seeds, poppy seeds, dried garlic, dried onion, and salt) to the top. These toppings not only add flavor but also make your beautiful braided challah even more visually appealing, complementing the intricate patterns achieved through your easy challah braiding tutorial.
Sweet and Savory Challah Recipes: Expanding Your Repertoire
Traditional challah is slightly sweet, but the base dough recipe is versatile enough to be adapted for both distinctly sweet and savory variations. Sweet challah can incorporate ingredients like raisins, dried cranberries, or chocolate chips into the dough before braiding. Additional sugar or honey can also be added to the dough mixture for a sweeter loaf.
Savory challah variations might include incorporating herbs like rosemary or dill, adding minced garlic, chopped olives, or even cheese (though cheese would make it dairy, not pareve). These additions are typically mixed into the dough during the kneading phase. Exploring these variations allows you to tailor your challah to different meals and preferences.
Chocolate Chip Challah: A Sweet Indulgence
Chocolate chip challah is a beloved sweet variation that turns the traditional loaf into a decadent treat. Miniature chocolate chips work particularly well, distributing more evenly throughout the dough. They can be folded into the dough during the last minute or two of kneading. A typical amount might be around 1/2 to 3/4 cup of mini chocolate chips for a standard loaf.
The key is to ensure the chocolate chips are evenly distributed but not overworked into the dough, which could streak the dough with melted chocolate. The rich, slightly sweet bread studded with pockets of melted chocolate is delicious on its own or served for breakfast or dessert.
Everything Bagel Challah: A Savory Twist
For those who prefer a savory profile, Everything Bagel challah is a fantastic option. This variation involves adding the components of everything bagel seasoning directly into the dough during kneading, as well as sprinkling the mixture generously over the egg-washed crust before baking.
Ingredients typically include toasted sesame seeds, black sesame seeds, poppy seeds, dried minced garlic, dried minced onion, and flaky sea salt. Adding about 1-2 tablespoons of the mix into the dough and another 2-3 tablespoons on top creates a flavorful, aromatic loaf that is perfect for sandwiches or served alongside savory meals. It's a creative way to use your easy challah braiding tutorial skills for a completely different flavor experience.
Conclusion: Enjoying Your Homemade Challah
Frequently Asked Questions
What makes this challah braiding tutorial "easy"?
This tutorial focuses on simplified braiding techniques suitable for beginners, using clear step-by-step instructions and visual aids. It avoids complex braiding patterns to ensure success.
What kind of dough is best for challah braiding?
The best dough is one that's elastic and easy to handle. The tutorial likely recommends a specific recipe with high gluten content for optimal braiding.
How many strands are typically used for challah braiding?
While challah can be braided with various numbers of strands, the tutorial likely focuses on simpler 3 or 4 strand braids. These are the easiest to master when starting out.
What if my challah dough is too sticky to braid easily?
If the dough is sticky, try adding a tiny bit more flour, a teaspoon at a time. Also, make sure the dough has properly rested and developed gluten.
Where can I find the full recipe for the challah dough?
The recipe is likely available on the BakeWithEase.com website, specifically accompanying the braiding tutorial. Look for a link or a separate section with ingredient measurements and instructions.
Final Reflection: The Enduring Power of Simple Pleasures
The art of challah braiding, once a sacred ritual, has become a surprisingly accessible and deeply rewarding creative outlet in our fast-paced world. This simple act of kneading, shaping, and braiding dough offers a tangible connection to tradition and a surprisingly effective antidote to the stresses of modern life. The beauty of a perfectly braided loaf isn't just visual; it's a testament to patience, precision, and the satisfaction of creating something beautiful with your own hands.
The enduring appeal of challah transcends its delicious taste; it's a symbol of community, celebration, and the quiet joy found in mindful creation. The process itself, from measuring ingredients to the satisfying thwack of the dough, is meditative. It's a reminder to slow down, appreciate the process, and find beauty in the simple things. As the poet Mary Oliver wisely wrote: Instructions for living a life: Pay attention. Be astonished. Tell about it.
Baking challah, in its own way, embodies these very instructions.
Now, I invite you to take what you've learned here and apply it to your own life. Don't be afraid to experiment with different braiding techniques, to share your creations with loved ones, and to find joy in the simple act of baking. Let the fragrant aroma of freshly baked challah fill your home, a testament to your own creativity and a reminder that even the most intricate designs can begin with a simple, beautiful braid. Embrace the process, and discover the enduring magic within.
Unleash Your Inner Baker: Braid Your Own Beautiful Challah!
Thanks for taking the time to explore the art of challah braiding with us! We hope you now feel confident and inspired to create your own stunning loaves. Ready to get baking?
- Master the Braid: Try braiding your own challah today! Use the techniques you learned here to create a masterpiece. Experiment with different braiding patterns – you might surprise yourself!
- Share Your Success: Post a picture of your beautiful challah on social media and tag us @BakeWithEase – we'd love to see your creations!
- Elevate Your Baking: Explore other delicious bread recipes on our site – we have many more baking adventures waiting for you!
What unique twist will you add to your next challah braid? Share your ideas in the comments below!